BBC-QS55 - (Quick Set-Up Batting Tunnel) Installation Instructions - (Quick Set-Up Batting Tunnel) Installation ...
←
→
Page content transcription
If your browser does not render page correctly, please read the page content below
--- BBC-QS55 ---
                  (Quick Set-Up Batting Tunnel)
                        Installation Instructions

   OPTIONAL WALL MOUNTING KIT   OPTIONAL WALL HOISTING KIT   OPTIONAL NET STORAGE CART
        MODEL #: BBC-WLKT          MODEL #: BBC-QSKIT1         MODEL #: TENINJA-CART

    Call Jaypro Sports Equipment at 1-800-243-0533 during
          regular business hours for technical support.
                                      www.jaypro.com

Rev - B                                                                        Page 1 of 9
JAYPRO SPORTS
BBC-QS55, INDOOR QUICK SET-UP BATTING TUNNEL KIT
IMPORTANT NOTICE:
1) DO NOT SET CAGE OR NET TOO CLOSE TO WALLS, COLUMNS, LOW CEILINGS
OR ANY SOLID OBJECT WHERE BALLS CAN STRIKE AND BOUND BACK. CAGE
OR NET SHOULD BE AT LEAST 4 FEET FROM ALL BYSTANDERS, CEILINGS,
WALLS OR SOLID OBJECTS.
2) SPECTATORS MUST NOT STAND IN BACK OR NEAR SIDES OF CAGE OR NET
WHILE BEING USED FOR BATTING PRACTICE.
3) ALTERATION OR MODIFICATION OF THIS EQUIPMENT MAY BE HAZARDOUS
AND RESULT IN INJURY. FOR REPAIR OR REPLACEMENT, CONTACT YOUR
DEALER OR JAYPRO SPORTS.
4) CAUTION: DO NOT OVER TIGHT THE CABLES, AS EXTREME LOADING WILL BE
PLACED ON THE WALL OR END STRUCTURE.
PRODUCT DESCRIPTION:
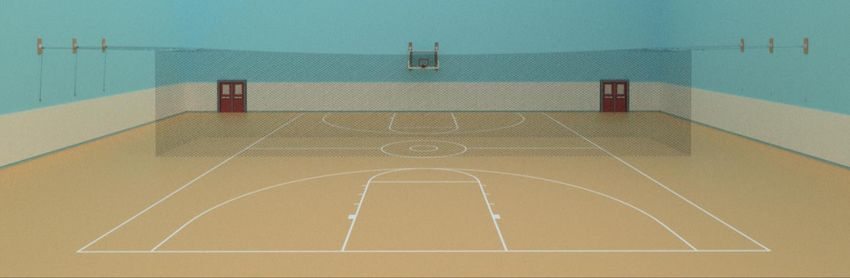
The BBC-QS55, quick set-up batting tunnel kit is designed to attach to the walls of a gym. The
distance between walls should not exceed 120 ft. During set-up the net easily attaches to three (3)
pre-installed polyester lines coming off of each wall. One wall will have three fixed length lines,
while the other wall will contain the hoisting lines.
There are six wall attachments that need to be made, three on each wall. Because there are many
different types of wall construction, additional wall anchors may be required depending on your type
of building. Six (6) 3/8” eyebolts are provided for basic wall anchoring. These eyebolts can be
directly installed in the metal building structure, existing wall blocking, or used in conjunction with
double expansion anchors, in solid concrete walls.
If attaching to standard CMU block or stud constructed walls, it is recommended that a wood
stringer wall mounting kit be used (model number BBC-WLKT), purchased separately. This kit
includes six (6) attractive polyurethane finished 24” long, 2” x 8” stringers and mounting plates that
are easy to install and help spread the load across multiple CMU blocks or other wall types. Studded
walls will required that internal blocking be installed to help provide anchor points and spread the
load across multiple studs.
An optional Supplemental Wall Hoisting Kit (BBC-QSKIT1) is available, that can provide added
flexibility on the end of the tunnel opposite the main hoisting lines. The kit can be used if the anchor
lines are too short to access from the floor, or to provide added tension if the hoist end is bottomed out.
Rev - B Page 2 of 9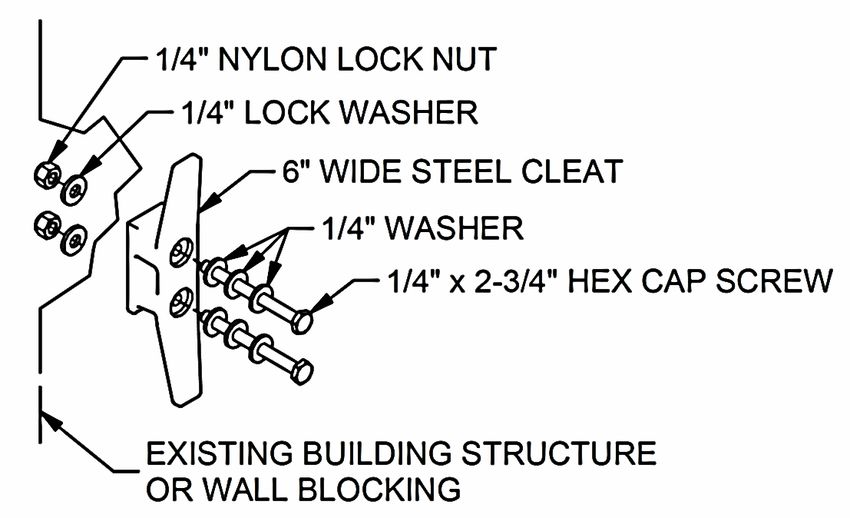
ASSEMBLY INSTRUCTIONS

TOOLS REQUIRED:
     (1) Box Wrench Set
     (1) Electric Drill or Hammer Drill
     (1) Appropriate drill set (depends on wall construction)
     (1) Ladder or Scissor Lift
     (1) Tape measure

          •   Unpack all parts and check against parts list to ensure that all have been included.
          •   Inspect all parts for damage. Report any damages to the trucking company.

          ITEM                       DESCRIPTION                                      BBC-QS55
             1   55’ x 14’ x 14’ BBC NET (P/N: BBC-551414)                                1
             2   5/16” x 300 FT LONG BLACK BRAIDED ROPE                                   1
             3   PULLEY BLOCK w/ CAM CLEAT (P/N: HM6568A)                                 3
             4   SNAP HOOK (P/N: HM5013)                                                 12
             5   D-RING (P/N: HM240)                                                      6
             6   SWIVEL PULLEY (P/N: HM6226)                                              3
             7   6” WIDE STEEL CLEAT (P/N: HM6331)                                        6
             8   1/4”-20 x 2 3/4” HEX CAP SCREW                                          12
             9   1/4” LOCK WASHER                                                        36
            10   1/4” WASHER                                                             12
            11   1/4”-20 NYLON LOCK NUT                                                  12
            12   3/8”-16 x 3” EYEBOLT                                                     6
            13   3/8”-16 HEX NUT                                                          6
            14   3/8” LOCK WASHER                                                         6
            15   3/8” FLAT WASHER                                                        12
                                                                                        QTY

Rev - B                                                                                    Page 3 of 9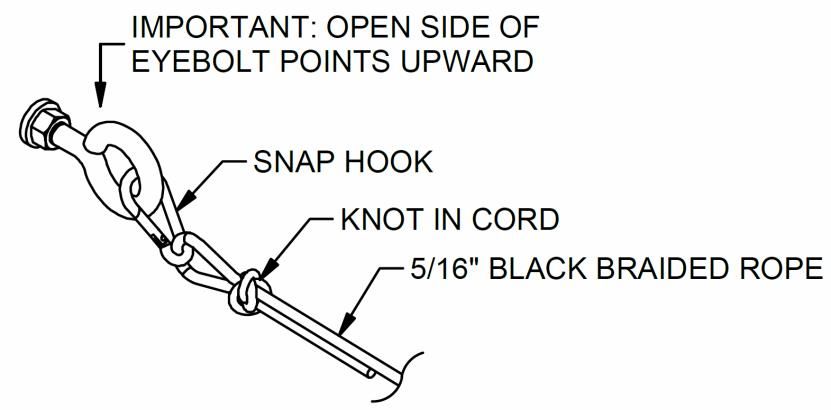
1) Mark the location of the cable anchor as shown in the diagram below.

                      Anchor Point Locations on Building Wall (Both Ends)

Note: The height of the cables should be set at about 9” below the overall height of the net. This
will place about 12” of net on the floor to capture the balls.

Rev - B                                                                               Page 4 of 9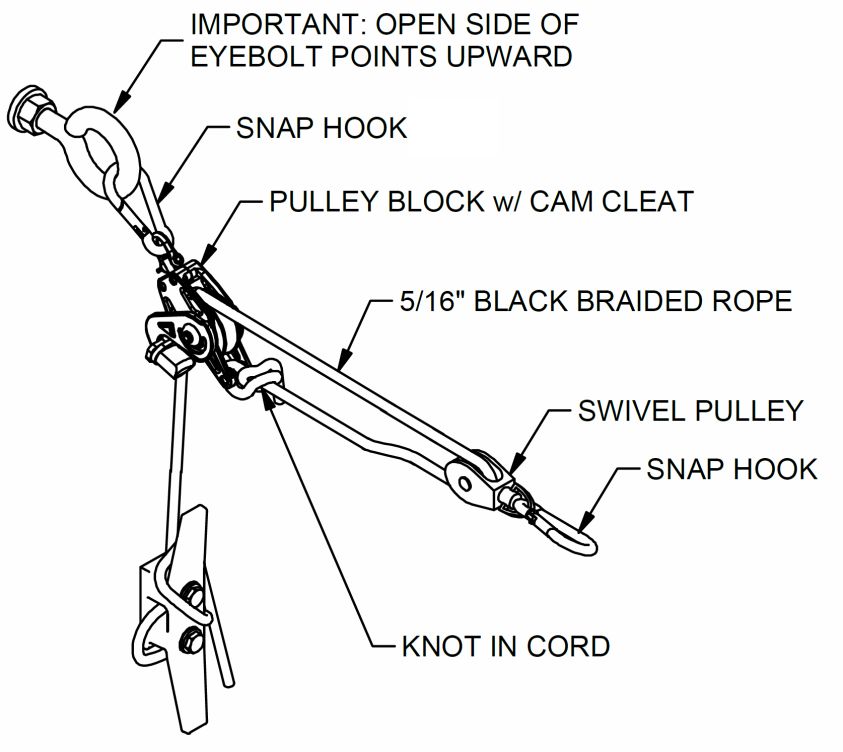
2) Install the wall anchors on both sides of the gym, as shown below. Follow the appropriate
      figure for your building type. Note: if optional wall mounting kit (BBC-WLKT) is
      purchased; please see installation instructions that come with it.

     Figure 1: Standard Building Attachment - For Metal Structure and Wood Blocking

             Figure 2: Standard Building Attachment - For Solid Concrete Walls
                        (Double Expansion Shield Anchors Not Provided)

            Figure 3: Optional Wall Mounting Kit – For CMU and Studded Walls
                              (Alternate Wall Anchors Required)

Rev - B                                                                                Page 5 of 9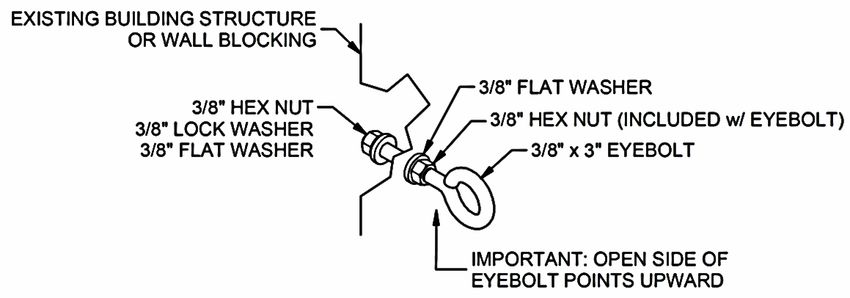
3) Make up and install the three fixed end lines. Based on the desired distance off the wall, cut
      three equal lengths of 5/16” black braided rope and tie two snap hooks to each end. Attach
      the three lines to the wall anchors.

                              Figure 4: Fixed End Support Lines
                       (Line Length Base on Desired Distance off the Wall)

   4) Make up and install the three hoisting lines. The approximate length of each line will equal
      twice the distance off the wall, plus 25 ft. Tie one end of the rope to the bottom of the pulley
      block and then pass it through the swivel pulley. Next pass the rope through the pulley black
      and cam cleat, as shown in Figure 5. Attach the three hoisting lines to the wall anchors.

                                  Figure 5: Hoisting Lines
      (The Approximate Line Length Will Equal Twice The Distance Off The Wall, Plus 25 ft)

Rev - B                                                                                    Page 6 of 9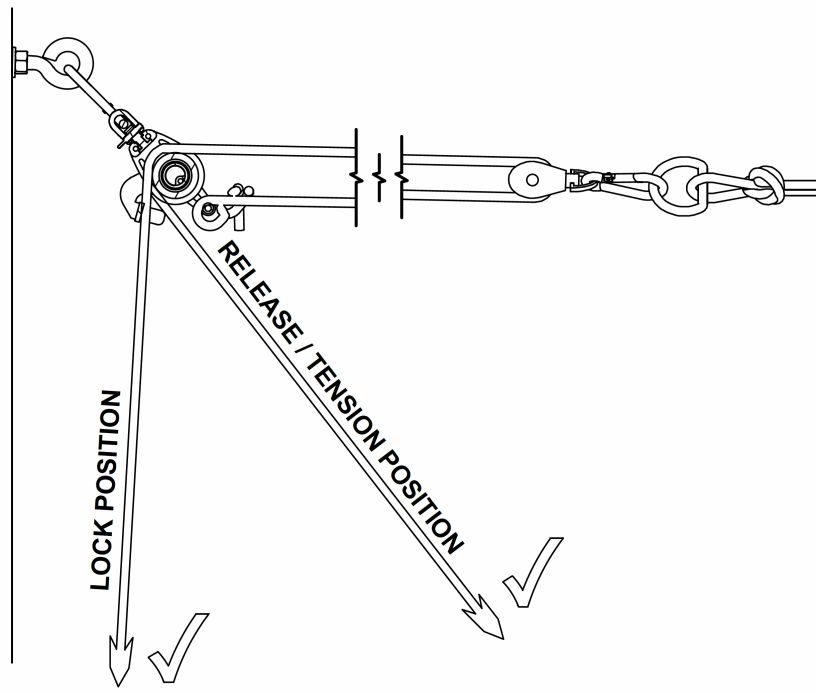
5) Make up the six leads on the end of the net as shown in Figure 6.

                                                                       Note: Top cords should be
                                                                       anchored to the net in all six
                                                                       locations. Do not undo knots
                                                                       securing the cords to the net body.
                                  Figure 6: Assemble Net Leads
                                      (6 Places on Netting)

   6) Attach one end of the net to the fixed end lines. Feed out the three hoisting lines and attach
      each to the other end of the net. Evenly hoist the net up into position, making sure to apply
      equal tension to all three lines.

                            Figure 7: Assemble Suspended Net Leads

Rev - B                                                                                   Page 7 of 9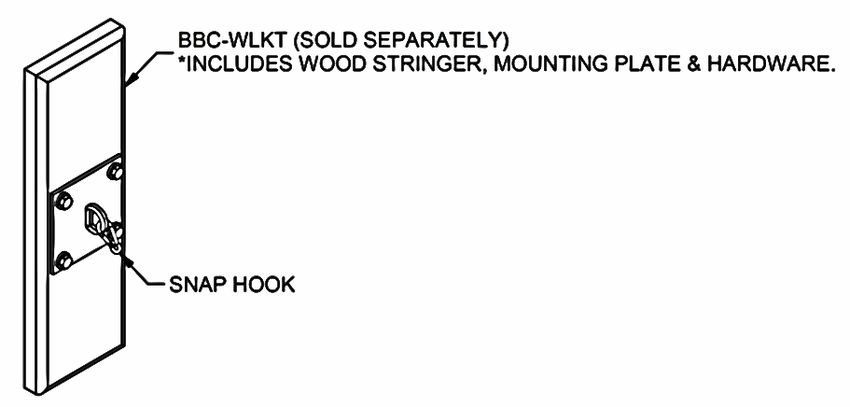
7) Make any necessary adjustments.
   8) Install the Six, 6” wide steel cleats beneath each of the six lines, see Figure 8 & 9. It is
      recommended that the cleats be installed at a height of at least 7 ft above the floor.

          Figure 8: Standard Building Attachment - For Metal Structure and Wood Blocking

      Figure 9: Standard Building Attachment on Fixed End - For Solid Concrete Walls
                          (Double Expansion Shield Not Provided)

   9) Lower the net by releasing each hoisting line from the cam cleat. Before removing the net go
       back and cut off any excess rope from the hoisting line. Tie a knot in the very end of each
       line to prevent the line from accidentally passing through the pulley block.
   10) Remove the net and store in a suitable container. See optional net storage cart (TENINJA-CART).
   11) Gather all lines and hang them from their respective wall cleat.

Rev - B                                                                                      Page 8 of 9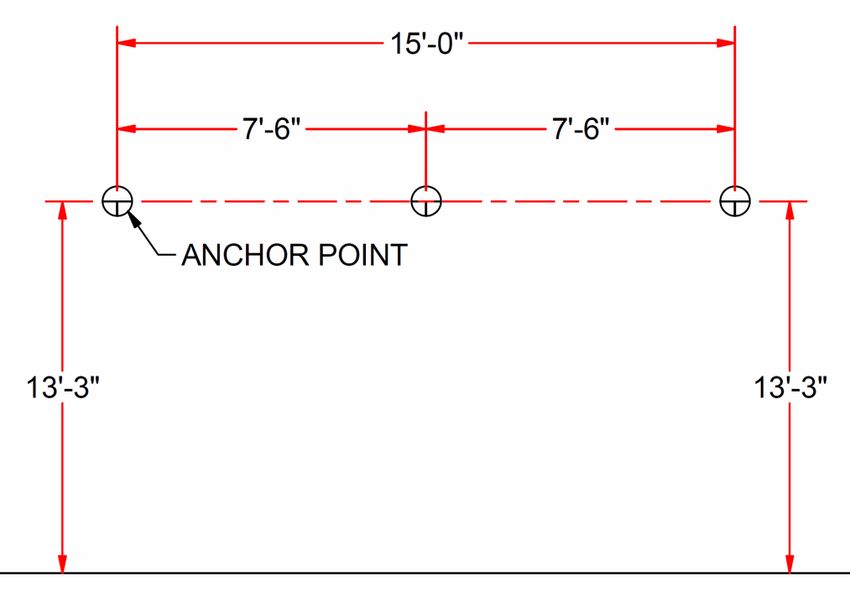
OPTIONAL KITS AND HARDWARE:

                              MODEL #: BBC-WLKT
                              WALL MOUNTING KIT: (QTY: 6) Wood
                              stringers and mounting plates for attaching to
                              CMU block and concrete walls.

                              MODEL #: TENINJA-CART: Net storage cart.

                              MODEL #: BBC-QSKIT1
                              Supplemental Wall Hoisting Kit

                              To be used if the anchor lines are too short to
                              access from the floor, or to provide added tension if
                              the hoist end is bottomed out.

Rev - B                                                                               Page 9 of 9
You can also read