PROJECT DESCRIPTION - Museum of Craft and Design
←
→
Page content transcription
If your browser does not render page correctly, please read the page content below
Museum of Craft and Design
CHALK INTENTIONS
PROJECT DESCRIPTION
This project is a preview of MCD’s MakeArt Kits that will be available for free to
registered visitors to the museum from June 5th through August 15th.
If a picture is worth a thousand words, a sculpture is worth a million. Encoded Holidays
features holiday cards sent by Gary Hutton and Tom Bonauro over a 30-year period.
Each of these ‘sculptures-in-a-box’ marks a new year, offers a snapshot into the lives
of the designers, and sheds light on current events. By incorporating short powerful
messages, unexpected featured materials, and using found imagery from printed sources,
Hutton and Bonauro asked letter recipients to reflect on the past and set intentions for
the future. Using shiny foil for maximum reflection potential, this project follows in the
footsteps of these two Bay Area designers with a customizable ‘sculpture-in-a-box’ to
share with a loved one near or far!
RECOMMENDED AGE/SKILL LEVEL
Recommended for ages 7 and up with adult supervision.
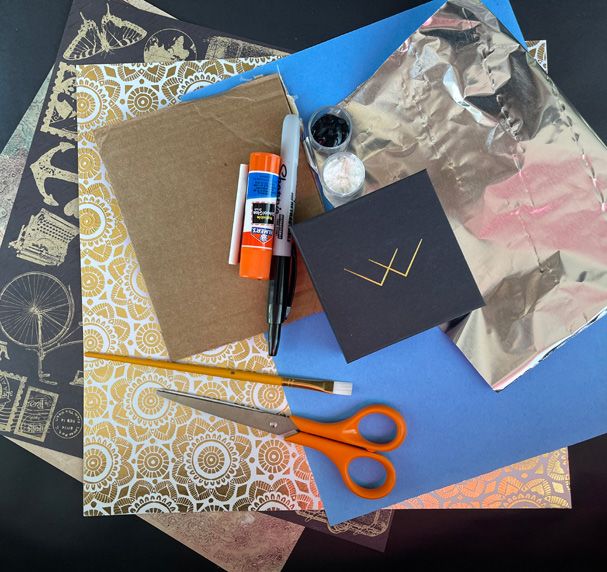
SUGGESTED MATERIALS
• Cardboard jewelry box with lid • Decorative paper ephemera (ie: newspaper, maps,
• Corrugated cardboard wrapping paper, scrapbook paper, magazines,
• Colored construction paper etc…)
• Permanent marker • Chalk
• Paintbrush
• Scissors Optional
• Glue stick • Postage
• Aluminum foil • Butcher paper
• Black acrylic paint
• Cornstarch
• Mixing cup or palette
sfmcd.org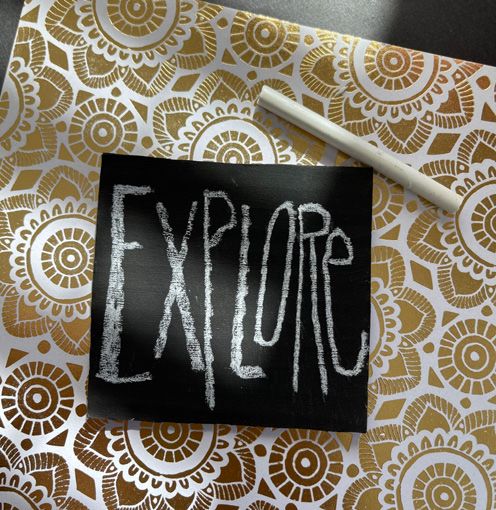
Museum of Craft and Design
CHALK INTENTIONS
INSTRUCTIONS
 •   Trace the dimensions of the bottom half of the jewelry box onto corrugated cardboard.
 •   Cut the cardboard out, trimming the sides down until it can easily fit into and slip out
     of the bottom of the box.
 •   To create the chalkboard paint, mix cornstarch and acrylic paint at a 1:4 ratio.
 •   Evenly coat one side of the cardboard with chalkboard paint. Set aside to dry.

 •   Trace the dimensions of the bottom half of the box onto a piece of aluminum foil.
 •   Cut foil out.
 •   Use a glue stick to adhere cutout foil to the inside bottom of the box.
 •   Repeat with foil or decorative paper on the inner box lid.

 •   Line the interior sides of the box with additional foil and/or paper, as desired.
 •   Using the paper ephemera, piece together a theme or story you would like to tell.
 •   Cut individual images out to decorate the exterior of the box, as well as to use as
     “sculpture” pieces inside the box.
 •   Layout and glue exterior pieces onto the box.
 •   Glue “sculpture” pieces onto decorative paper backing and cut out. Set aside.
     NOTE: The examples here are using double sided scrapbook paper.

                                                                                    sfmcd.org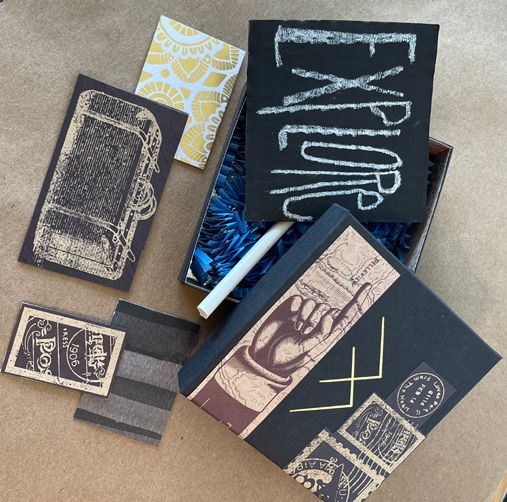
Museum of Craft and Design
CHALK INTENTIONS

 •    Grab the dry chalkboard painted cardboard:
     ° Evenly coat the non-painted cardboard side with glue.
     ° Adhere aluminum foil and smooth out.
     ° Trim aluminum edges to be flush with the cardboard.
 •    With chalk, write a single word intention on the chalkboard.
     °     How might this word relate to:
           * The box theme
           * Your relationship with the recipient
           * Current events

 •       Cut colored construction paper into approx 4” x 4” pieces.
 •       Accordion fold the pieces approx six times.
         NOTE: The width of our folds is approx ½” but yours can be bigger or smaller as
         desired.
 •       Pinch folds together and snip along the length of the paper, creating confetti-like
         crinkle shapes.
 •       Repeat until you have the desired volume of crinkle filler for the bottom of the box.

                                                                                          sfmcd.org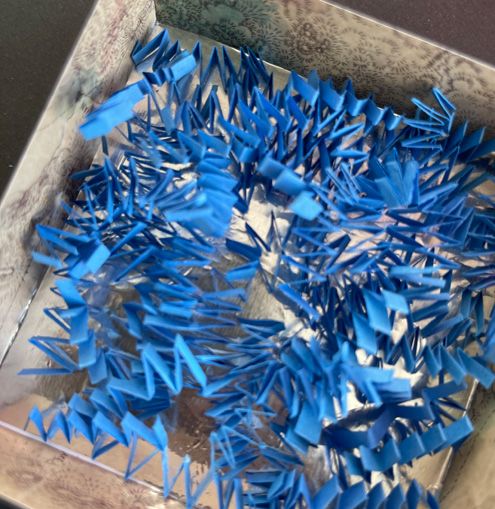
Museum of Craft and Design
CHALK INTENTIONS

 •    Place contents in box:
     ° Crinkle filler
     ° Found image “sculpture” pieces
     ° Chalkboard
     ° Chalk
 •   OPTIONAL: Wrap the box in plain butcher paper and add a personal note before
     mailing or gifting to its recipient.

 Creative prompts for more…
 • Create a DIY box! All you’ll need is cardstock, paper clips, and glue!
 • Aluminum was just one of the many materials Tom Bonauro and Gary Hutton
    incorporated in their ‘sculptures-in-a-box’. Other unexpected materials used in this
    exhibition include wax, felt, glass, and even chocolate! Do you have access to any of
    these? How could you incorporate them?
 • What else could you turn into a chalkboard? Try using chalkboard paint on surfaces
    like wood, metal, drywall, glass, or concrete.
 • Use different typefaces and languages when writing messages!
    Create your own typeface on Fonstruct or dafont.com.

                                                                                   sfmcd.org
Museum of Craft and Design
CHALK INTENTIONS
 •    DIY Chalk
     ° Mix equal parts of water and cornstarch together. Add a splash of color by mixing in
        food coloring or a dab of watercolor paint.
     ° Pour the mixture into containers from which the hardened cornstarch can be easily
        removed (e.g. an ice cube tray or 3-4 inch paper straw).
     ° Let stand for 36 hours at room temperature.

ADDITIONAL RESOURCES
CONNECT SOCIALLY AND LEARN MORE

 Facebook & Instagram: @MuseumofCraftandDesign
 Twitter @SF_MCD
 Share your project! Post and tag #MCDatHome

 *This template is proprietary property of the Museum of Craft and Design and shall not be reproduced for any reason
                                              outside of this organization.
                                                                                                        sfmcd.org


You can also read