(Reasonably) Quick PIC Guide
←
→
Page content transcription
If your browser does not render page correctly, please read the page content below
(Reasonably) Quick PIC Guide

•   To apply for any EU grant programme, you first need to register your
    organisation online on the new ”Participant Portal” and receive a
    Participant Identification Code (PIC). These are assigned centrally,
    not by the NA.

•   Any Sending or Receiving Organisation which will be named in the
    application form requires a PIC. It is not possible to be a partner in
    an application wihout having a PIC, as it must be quoted on all grant
    applications.

•   The initital process takes 10 minutes to complete. After receiving
    your PIC, you will be asked to upload documents to ‘validate’ your
    registration.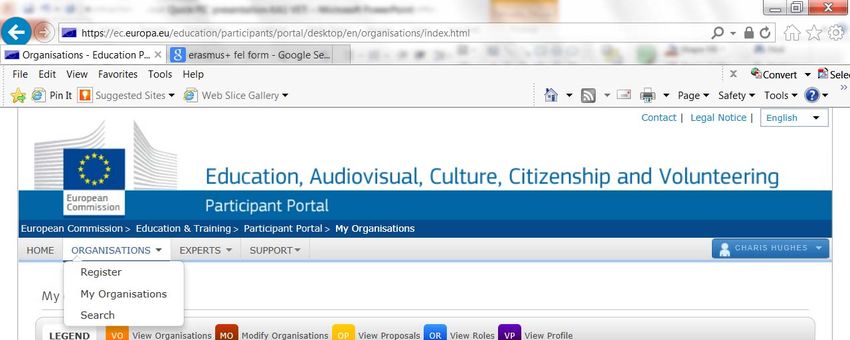
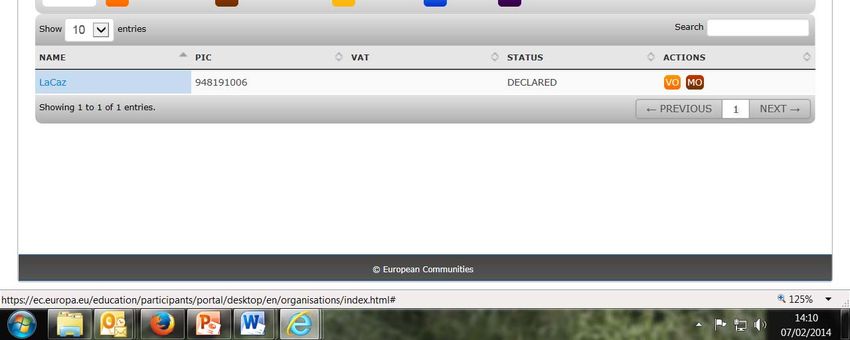
Participant Portal:
http://ec.europa.eu/education/participants/portal

NB: First, use the search facility to see if your organisation is already
registered and has a PIC. If so, you can use that PIC for your application
and do not need to re‐register. If registered, you will need to check
internally to see who is managing your organisation’s details.
Step One:
Obtaining a PIC
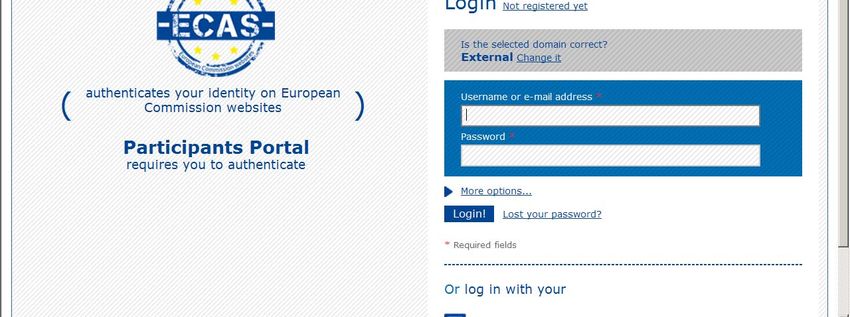
ECAS: https://webgate.ec.europa.eu/cas/

To use the Participant Portal, you must first
have an ECAS account. ECAS is the central
access system for the European Commission’s
various online tools.

You will already have an ECAS account if you
filed an online report in LPP or YIA e.g
through the Mobility Tool.

                                Always choose
                                ‘external’ when
                                logging in.       If you don’t have an
                                                  ECAS account, click
                                                  ”not registered yet”
                                                  or ”sign up” and
                                                  follow the steps.

                                                  Our UK colleagues
                                                  have uploaded an
                                                  instruction video:

                                                  http://www.erasmus
                                                  plus.org.uk/news/vid
                                                  eo‐resource/ecas‐
                                                  registration
Click ”Login” and
use your ECAS
login details. You
can now register
your organisation
and obtain your
PIC.
Click ”Organisations” and then
”Register” from the drop‐
down menu.

                                 Your log in
                                 name will be
                                 displayed here
If you are registering your
organisation for the first time, click
”Register organisation”.

If you have already started the
process and saved your details, click
”Resume registration”.
Enter your VAT and/or
Business Registration
numbers here.
‐ Schools should enter their
roll number as Business
Registration Number.
‐ If your organisation does
not have these, click ”no”.
If you do not have a
Business Registration
Number, enter ”N/A”
and today’s date.
                        All formal organisations (e.g. ETBs,
                        businesses) should click ”Yes”. Only
                        informal groups in the Youth sector
                        should click ”No, I’m a natural
                        person”.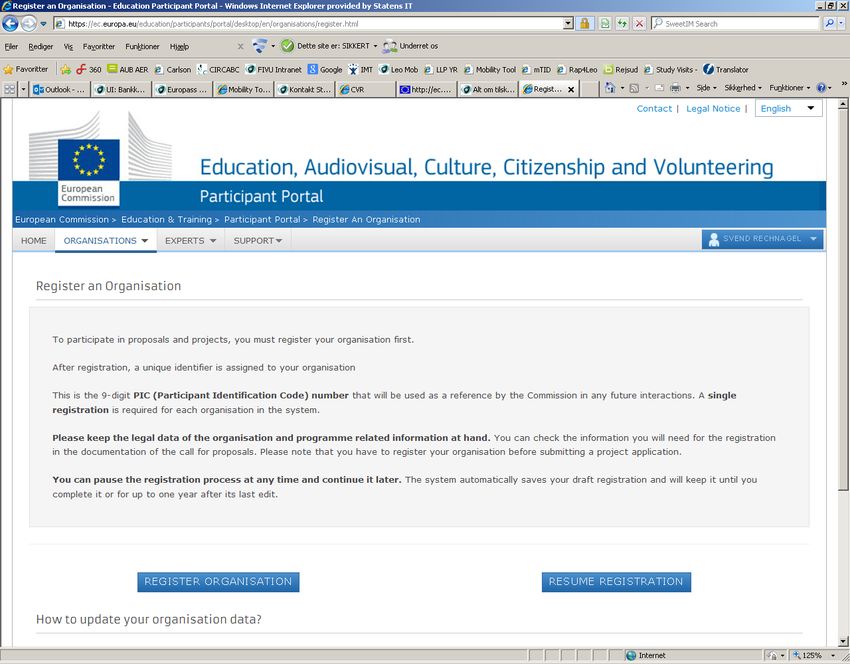
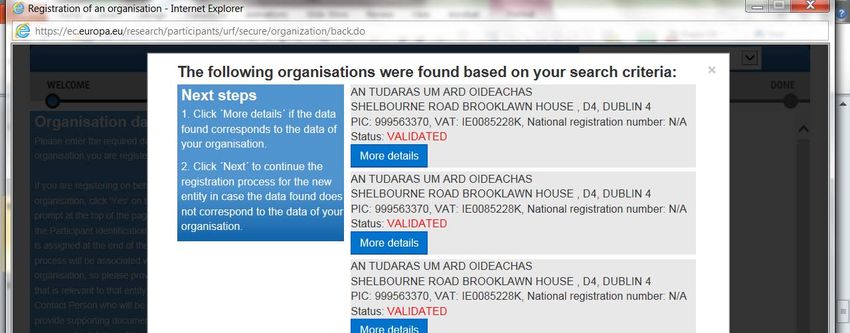
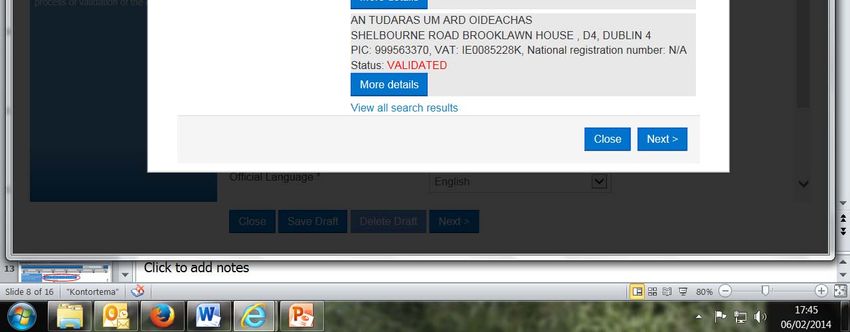
At this stage, the Participant Portal may pick up a similarity to an organisation which has already
registered. If this data corresponds to your organisation, click ”more data” to view and record your PIC.
You will not need to continue the registration process.

If it does not correspond to your organisation, click ”next” to continue registration.
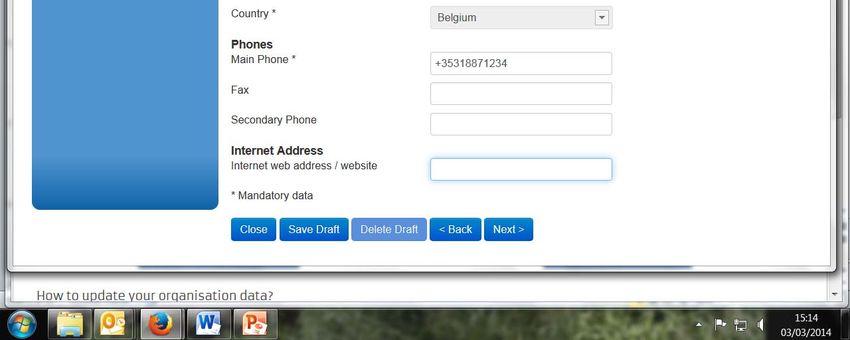
Phone numbers
must be entered in
the format +353
(area code without
0) (number) e.g.
+35315551234
Enter the name and e‐
   mail address of the
   contact person in the
   organisation

                            NB: Scroll down to
                            complete the contact
                            information section
Select yes if the contact
person’s address is the
same as the
organisation’s
Before finishing your registration, you must use the button below to link to Erasmus+. Click ”Erasmus+” on the drop down menu.
NB: Read the list carefully
and choose the
organisation type most
closely matching your
own.

Click ”Save and return”.
Review and verify the
information you have
entered. You can edit
your details if
necessary.

Once it’s correct, click
confirm to submit it.
That’s it! This is your
organisation’s PIC. Print and
keep for your records.

If you misplace the PIC, you
can search for it again
through the Participant
Portal.

                                Your information is
                                saved and you can now
                                click ”close”.
Click ”yes” to finish.
Step Two:
Uploading Supporting Documents
 to Validate your Organisation’s
             Identity
Documents Required
For Individuals:
• Completed FEL & financial identification
forms with required stamps/signatures
and
• A legible photocopy of your passport
identification page (you must be over 18)Documents Required
For Public Entities:
• Completed FEL & Financial Identification
forms with required stamps/signatures
and
• A copy of the resolution, law, decree, decision
or any other official document establishing
the organisation.Documents Required For Private Companies: • Completed FEL & Financial Identification forms with required stamps/signatures and • A copy of the VAT registration, including the VAT number • An extract of registration (or equivalent e.g. Company Register, Official Journal) indicating the name, address and registration number of the organisation. Private Companies requesting grants over €60,000 need additional documents for the financial capacity check: • Annual balance sheet for the last approved accounting period and • Profit and Loss account for the last approved accounting period.
Your PIC number

After registration , you may receive this email at
the address of the registered contact person.
Please ask that person to forward the email if you
are registering on behalf of somone else!

The e‐mail contains the link to the EU forms
required to validate your organisation’s identity.
However, you can proceed to the links without
receiving the e‐mail.
Legal Entity (FEL) & Financial
         Identification Forms

• Download Legal Entity (FEL) Form:
• http://ec.europa.eu/budget/contracts_grants/inf
  o_contracts/legal_entities/legal_entities_en.cfm

• Download Financial Identification Form:
• http://ec.europa.eu/budget/contracts_grants/inf
  o_contracts/financial_id/financial_id_en.cfm
Follow the link and scroll down to the ”en” (English) section. For the FEL, click on the correct document for your organisation type (Individual, Private Companies or Public Entities). Forms will open in pdf format. You will need Adobe reader on your computer to work with these forms.
Click ”Sign” to fill
in the required
information on
the form.
For Individuals, the FEL form must be signed.
For Private Companies, the FEL form must be signed by the authorised
representative (legal signatory).
For Public Entities, the FEL form must be signed and stamped by the
authorised representative (legal signatory).
In all cases, the form must be scanned and uploaded to your computer.
The Financial
Identification
form must be
signed and dated
by the account
holder. A recent
bank statement
OR bank
signature are
also required.
Scan and upload
the completed
form.
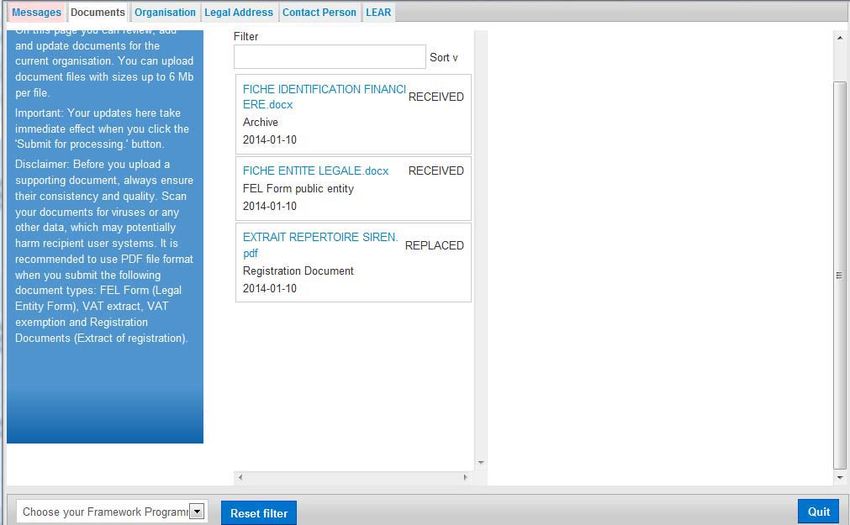
1. To upload your
documents, click ”My
Organisations” on the
drop down menu

               2. Click the
               ”MO”(Modify
               Organisation) icon
1. Click ”Documents” on
the top tabs
2. Click ”Add a new
document”
3. Click ”Browse” to
locate the documents on
5. Click ”Submit for
your computer
processing” to upload to
4. Choose the validation service
document type
from the drop
down e.g. ”FEL
Form Public Entity”Check that your
documents have been
succesfully uploaded.
You can also check the
progress of validation
here.
Click ”quit” to exitValidation • Validation is done by the Validation Services Team • Please ensure all organisation data is correct before requesting validation • You will be kept informed during the validation process and of its outcome
Resources
• Erasmus+ Programme Guide pp 191‐194
• FAQ:
https://ec.europa.eu/education/participants/po
rtal/desktop/en/support/faq.html
• User Manual:
http://www.leargas.ie/media/Erasmus+%20URF
%20manual_V2.0.pdf
Remember that once you have
registered, you can log in to the
Participant Portal at any time to check
information about your organisation
and applications.
You can also read