Science Project Guidelines for Elementary & Middle School Teachers & Science Fair Coordinators
←
→
Page content transcription
If your browser does not render page correctly, please read the page content below

Science Project Guidelines for Elementary & Middle School Teachers &
                         Science Fair Coordinators

The following information should help you help your students have a successful science fair project
experience. If you are unsure why it is important for students to complete a science fair project, you
might be interested in reading about some good reasons at the International Science and Engineering
Fair website (http://www.societyforscience.org/impact). High school sweepstakes winners can
compete at the International fair.

Above all — a Science Fair Project should be fun for students. So, they should keep that in mind when
they start thinking about what they want to do.

The Nature of Science
The history of science reveals both evolutionary and revolutionary changes. With new evidence and
interpretation, old ideas are replaced or supplemented by newer ones. While science and technology
do impact each other, basic scientific research is not directly concerned with practical outcomes, but
rather with gaining an understanding of the natural world for its own sake.

Science, by definition, is limited to naturalistic methods and explanations and, as such, is precluded
from using supernatural elements in the production of scientific knowledge. Therefore, science
methods, explanations and generalizations should be the sole focus in the classroom to the exclusion
of all non-scientific or pseudoscientific methods, explanations, generalizations and products. (National
Science Teachers Association (NSTA) (http://www.nsta.org/about/positions/inquiry.aspx)

The Scientific Method
Through use of the “Scientific Method,” scientists attempt to develop an accurate, reliable, consistent
and non-arbitrary view of the world.

Although procedures vary from one field of science to another, recognizable characteristics distinguish
scientific inquiry from other approaches for obtaining answers to questions. Scientific inquiry is a
powerful way of understanding science content. Students learn how to ask questions and use evidence
to answer them. In the process of learning the strategies of scientific inquiry, students learn to conduct
an investigation and collect evidence from a variety of sources, develop an explanation from the data,
and communicate and defend their conclusions. Although no single step-by-step scientific method
captures the complexity of doing science, a number of shared values and perspectives characterize a
scientific approach to understanding nature. These shared values may include:
    • explanations supported by evidence that is testable
    • evidence must be observable
    • arguments must be rational
    • conclusions must be drawn from observations
    • conclusions should include some element of skepticism
    • conclusions must be subject to peer review (scientists review each other’s data before it is
        published )
    • methods must be repeatable (other scientists must be able to repeat the experiment and obtain
        very similar evidence)
Regarding students’ abilities to do scientific inquiry, NSTA recommends that teachers help students
(red by SNRSEF):

   •   “learn how to identify and ask appropriate questions that can be answered through scientific
       investigations;” [Scientific Method: Question]
   •    “design and conduct investigations to collect the evidence needed to answer a variety of
        questions;” [Scientific Method: Hypothesis, Methods]
   •    “use appropriate equipment and tools to interpret and analyze data;” [Scientific Method:
        Results]
   •    “learn how to draw conclusions and think critically and logically to create explanations based on
        their evidence;” [Scientific Method: Conclusions]
   •    “communicate and defend their results to their peers and others” (publish in a journal).

    (National Science Teachers Association (NSTA) (http://www.nsta.org/about/positions/inquiry.aspx)

Design and Plan a Science Project
STOP! Are any of your students using animals or human subjects?

                  Review possible risks in your students’ proposed projects and discuss them with your
                  students. If any student is working with animals or humans, they must have their
                  methods reviewed and preapproved by your school’s Institutional Review Board
                  (IRB) BEFORE they begin work on their project. In fact, it’s FEDERAL LAW that they
                  do this. See the requirements for an Institutional Review Board on this website.

Create the Science Project Logbook
Before students begin their projects, they should start their Science Project
Logbook, which will be a very important part of the project. You are
encouraged to ask your students to use a “Composition Book” for the logbook
(right). These can be found at any store carrying office or school supplies.

Students should leave the first page of the logbook blank so that they will have
room to write a Table of Contents on this page after they finish their project.
Students should keep the logbook nearby to record all ideas, thoughts,
experiments and activities. The notebook serves many purposes:
   • the place to keep notes while they plan their project;
   • the place to keep notes while they perform their experiments;
   • illustrates the quality of work they perform and shows the amount of time and effort that went
       into their project.

Students should handwrite everything into this book that pertains to the project, no matter how
insignificant it might seem. You never know when that piece of information will come in handy. They
should write in ink and not erase or tear out pages just because they made a mistake.

When students enter notes in their logbook, they should try to:
  •   be as complete and clear as possible;
  •   write neatly enough that other people can read it;
  •   use correct grammar and spelling;
  •   enter the date and time of day every time they have ideas, at the time they think of them, or
      when they are working on their project;
   • have their entries witnessed at least once a week, either by the you or a parent, depending on
      where they are performing the experiment.

This logbook must be included with the Science Project Display Board and if the project is sent forward
to the regional fair, the quality of the logbook will be part of the judging criteria.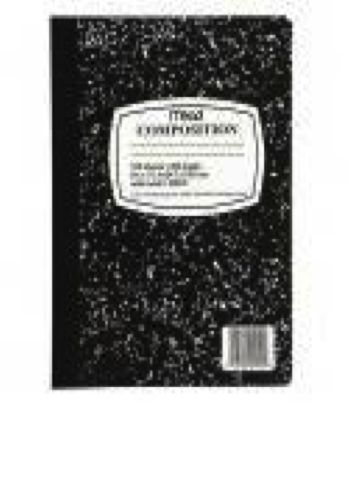
Project Design
Students should begin to design their project using the Scientific Method as a guide, and record
everything in their Science Project Logbook as they proceed. The following is very important:
   • This is the student’s project. That means that the ideas and the work must be THEIRS—not
       their parents. Age-appropriateness will be part of the judging criteria.
   •   Originality counts. Students should use their imagination to think of a science project
       themselves. Originality will be part of the judging criteria.

Ask Questions
Students should think about their areas of interest and questions within that area that might be worth
exploring. They should narrow their ideas down to define one question that they want ask concerning
their interests.

Students should formulate a question. As an example, let’s say a student is thinking about the
environment, and then perhaps about the effects of acid rain on buildings. Since many buildings are
made of brick, they decide their question will be: “How does acid rain affect brick buildings?”

Do Some Research
Getting information from existing sources helps students develop their ideas. Here are some
suggestions:
   • Students should talk to lots of people, including teachers, parents and friends, or experts in
       their area of interest. They should read scientific magazines and books, and other written
       material.
   • Students should research the Library and the Internet to see what is currently being done in the
       area of their question.
   • Refer students to the Librarian for help in their research.
   • Students should write down your sources (“citations”) in their logbook.

In our example above, the student should do some research in the library to find information on
acidity, acid rain, and the effects of acid rain on the environment, including buildings.

Students should record their thoughts, investigations and citations in their Science Project Logbook.
Then they are ready to form a Hypothesis.

Develop a Hypothesis
Scientists create hypotheses as early attempts to explain patterns observed in nature or to predict the
outcomes of experiments. (Wikipedia http://en.wikipedia.org/) Students form their hypothesis based on the
information that they found in their research. Student’s Hypothesis should be age appropriate.

A hypothesis consists of a reasonable suggestion of a possible
   •  explanation for something students observe, or
   •  a correlation between many things they observe.

Remember from our previous discussions above, the scientific method requires that students test their
hypothesis, and confirm or disprove their hypothesis; if they can’t test their hypothesis, then they
can’t use the Scientific Method.

Typical hypotheses are statements, and often they are presented in the form of an “IF-THEN”
statement. Using our previous example:

   •   “IF rain water is more acidic, THEN bricks in buildings will fall apart faster;” OR in the
       alternative,
   •   “IF rain water is less acidic, THEN bricks in buildings will take longer to fall apart;”

Don’t forget — if the student’s results show their hypothesis to be false that is perfectly acceptable.
False hypotheses still give us information. Scientists frequently find their hypothesis is false.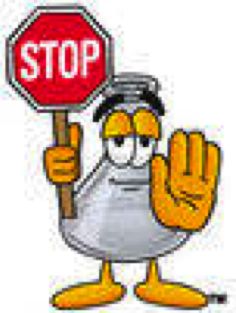
The “Hypothesis” should be recorded in the students’ Science Logbook and included on the final Project
Display Board. Now they are ready to think about their methods.

Plan the Methods
Students should develop Methods to test their hypothesis. They should think about their Methods in an
organized way, and write them so that someone who reads the logbook could repeat the methods.
Student’s Methods should be age appropriate. Here are some considerations:
   • Students should think about the actions that they will take in their experiment, and how they
       will measure the results of these actions.
           o In our example, students could decide that their actions will be to use water with
              different acidities, and see if there are any differences in the effects on brick.
           o They might want to measure the difference in brick break-up by measuring the weight of
              the bricks after the treatments.
   • Students should determine what their actions will be under “normal” conditions.”
           o In our example, students would make water samples with a neutral pH (about 7.0).
           o This is called the “control group”.
   • Students should determine what their actions with be under “changed” conditions.”
           o In our example, they would make up water samples with differing pH.
           o This group is called the “experimental group.” Their actions are the same as under
              normal conditions: apply water to the brick. The acidity of the water is different in the
              “experimental group.”
           o The student decides what acidities to use, and how to measure the results of applying
              this water to the brick.
           o Students must also decide how often to expose the bricks to acidic water and measure
              brick break-up over time.
   • What tools and materials do they need to use to complete the experiment? In our example,
       they might need water, vinegar, pH paper, bricks and containers to hold them, and a scale to
       weigh them.
   • The student must decide how to record these measurements in their Science Logbook. They
       might want to use a table and maybe draw pictures to illustrate their methods.
   • Remember, students should record the methods that they PLAN to use in their experiment.
       When they actually perform the experiment, they will write down the methods they actually
       perform as they perform the experiment.
   • Students must decide how they will compare the measurements for the experimental group to
       the control group.
           o They should draw a plan for a template to record their data in their Science Logbook.
           o Charts and graphs should be hand-written or drawn directly in the Science Logbook.

Test the Hypothesis (the Experiment)
Students should begin the experiment by carefully following their Methods. Student’s Testing
(experiment) should be age appropriate. They should:
   • record the dates and time of day of each step, and the acidity used;
   • record any mistakes or unusual observations; use more detail rather than less detail; illustrate
      results — take photographs or make drawings of the methods and materials if desired and tape,
      glue or otherwise fix into the Science Logbook; they might want to also use these pictures on
      their Project Display Board; if so, they need two prints each; record the data or results.

Analyze the Results
Students should think about the data and what it means. Student’s Analysis should be age
appropriate.
   • Do they see differences between the experimental group and the control group for the
      phenomena measured?
   • If they didn’t get the results they were expecting, is the hypothesis false, or do they need to re-
      examine the experimental method, the hypothesis or redefine the original question? For
      example, what if the bricks don’t fall apart when treated with acidity? How can they change
      their methods?
• They might want to use visual aids to illustrate the data in the table, such as quick hand-drawn
graphs of the data.
• These analyses should be recorded in the Science Logbook.
Form Conclusions
After analyzing the data, does the student think that their hypothesis is true or false? Why? Student’s
Conclusions should be age appropriate. They should record this in their Science Logbook and on
the Project Display Board.
Create a Table of Contents
Write a Table of Contents on the first page of your Science Project Logbook (you left this page blank
when you began your project).
Write an Abstract
Students should write a one-paragraph summary of the steps in the project and record this in their
Science Logbook and on the Project Display Board. Student’s Abstract should be age appropriate.
Gather Citations
Students should gather their Citations from the Logbook so that they can include them on the Project
Display Board.
Create the Project Display Board
Students should create their Project Display Board according
to the guidelines that appear on this website. Remember,
they must include the on the board the steps that they
followed using the Scientific Method: Questions, Research,
Hypothesis, Methods, Results, Conclusions, Abstract, and
Citations. Students do not need a computer at home in order
to do a Science Fair project. The display of the completed
project does NOT need to be typed. Student’s Display
should be age appropriate.
Citations for this “Science Project Guidelines”
Intel/ISEF http://www.societyforscience.org/isef/
Wikipedia: http://en.wikipedia.org/wiki/Scientific_method#Introduction_to_scientific_method
National Science Teachers Association (NSTA) (http://www.nsta.org/about/positions/inquiry.aspx
Clark County School District Curriculum Overviews K-8
A special thanks to George Ochs, Director, Western Nevada Regional Science & Engineering Fair in Reno, for his generous help
with re-inventing the Southern Nevada Regional Science & Engineering Fair; http://www.nevadasciencefair.net/You can also read