2020 Project Athena Adventure Training Guide - WWW.PROJECTATHENA.ORG
←
→
Page content transcription
If your browser does not render page correctly, please read the page content below
2020 Project Athena Adventure Training Guide

          WWW.PROJECTATHENA.ORG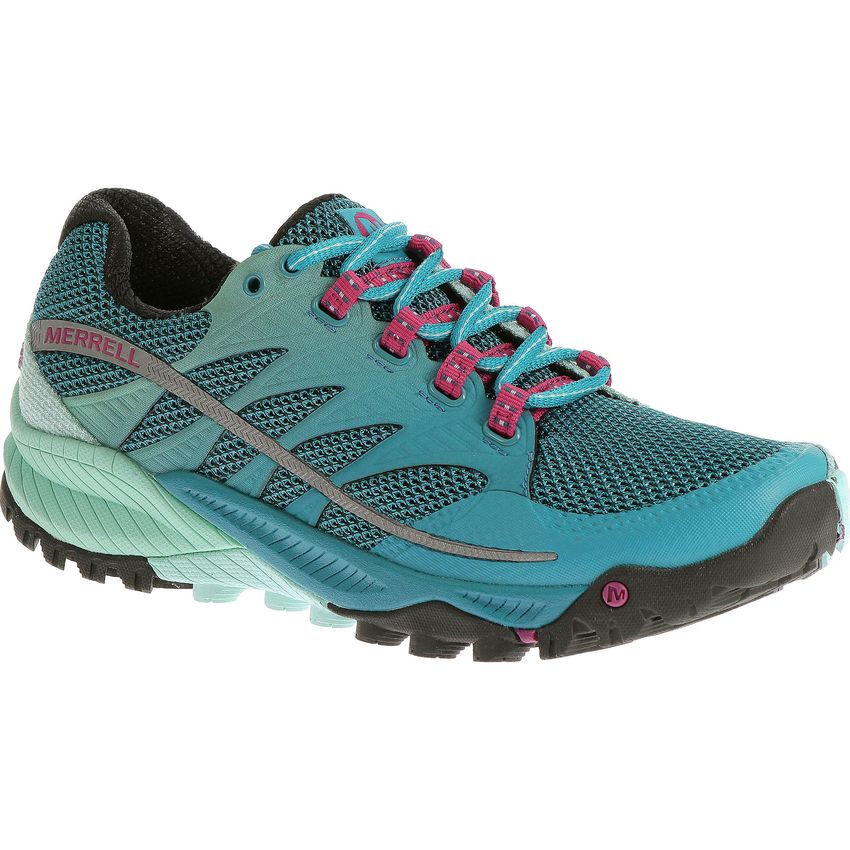
2020 Project Athena                            Adventure Training Guide

                                Table of Contents

      Introduction                                               4

      Taper                                                      7

      Strength Training                                          8

      Balance Training                                           11

      Functional Training                                        13

      Stretching Exercises                                       15

      Sample Workouts                                            18

      Gear List                                                  23

      The Right Pack                                             25

      How To Pack Your Pack                                      26

      Hydration How To                                           28

      The Right Shoe                                             29

      The Right Water Shoe                                       31

      Foot Care                                                  32

      Team Adventures…There’s No “I” in Team                     34

      Training for Endurance Events                              35

      Food Strategies                                            37

                       WWW.PROJECTATHENA.ORG
2020 Project Athena                                 Adventure Training Guide

                                Table of Contents
                                   (continued)

      Macronutrients 1010                                             39

      Fueling on a Bike                                               41

      Water 101                                                       42

      Adventure Grocery Trip                                          44

      Weight Management                                               46

      Getting Ready for the “Cold” Season                             47

      Recovery Essentials                                             49

      Training while Managing a Medical Condition                     51

      Staying Connected                                               52

      PAF Directory                                                   53

                      WWW.PROJECTATHENA.ORG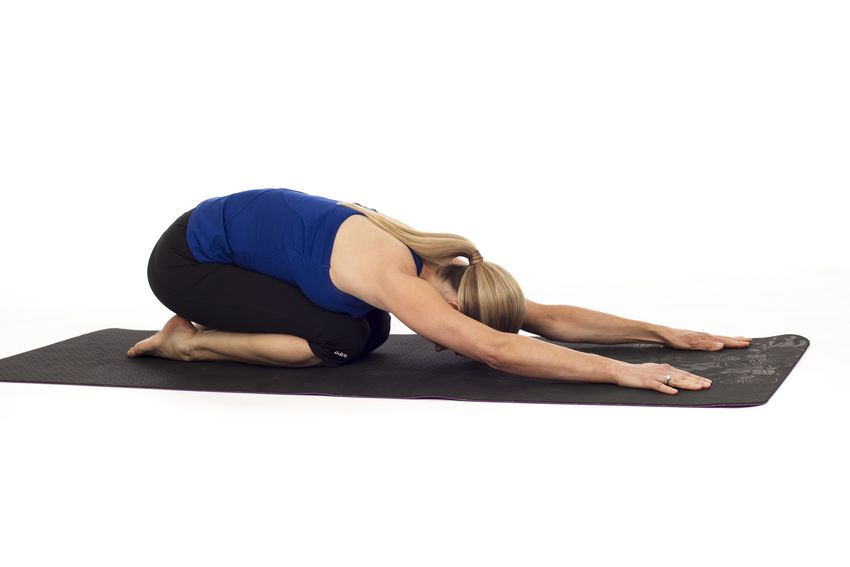
2020 Project Athena Adventure Training Guide
INTRODUCTION
Welcome to the Project Athena Foundation 2020 Adventure Training Guide! Proper training
is critical to ensure both comfort and success at any endurance event. So let’s get started.
Our training plans are twenty (20) weeks long and will concentrate on building a base of
physical activity. The training plan is designed to build each week in both distance and
intensity over the course of five phases. Our goal is for you to feel adequately prepared for
your adventure at the completion of your Training Plan.
To help avoid injury, we will only increase your total milage by ten (10%) percent per week.
Your training should also include some cross-training, strength, flexibility, and functional
workouts which can all be found under Sample Workouts in this Adventure Guide.
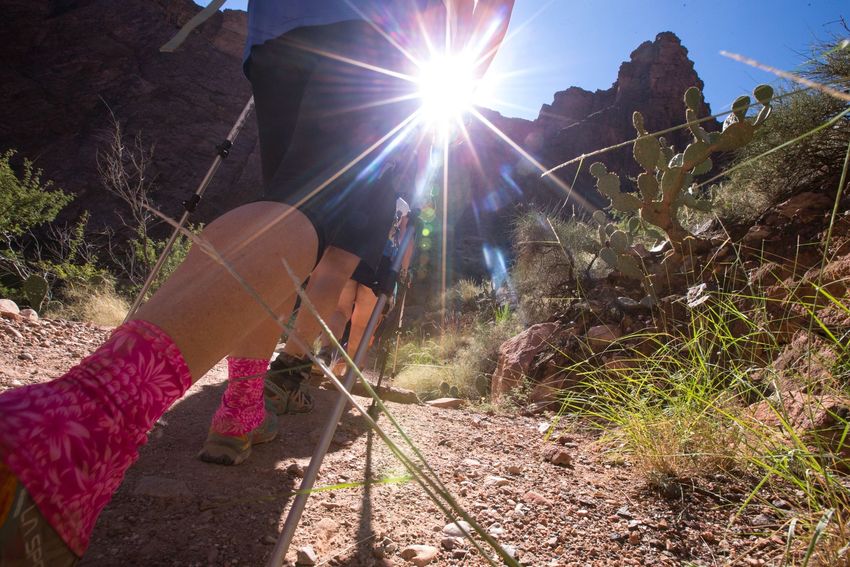
Training for elevation changes in the Grand Canyon is more important that actual high
altitude training. Our goal is to train for both the elevation gain AND loss we will
experience when trekking on all adventures. Each week your long hike should increase by
roughly 500-750 feet (ft.) in elevation. This is not 250 ft. up and 250 ft. down, but a change
of both 500 ft. up and 500 ft. down. If you do not have access to hills, you must find an
alternative such as stairs or stadium bleaches to acquire the necessary elevation
requirements. Your PAF Adventure Coach can assist you with developing specific workouts
to simulate ascending and descending if elevation is not easily accessible. Just ask!
You should begin training in the gear you plan to wear during your adventure. This will help
you develop a sense of comfort and confidence in your gear. Please be sure to read
through our gear recommendations outlined in this Adventure Guide.
For an endurance event, your Training Plan will include physical activity and cross-training
five to six (5 - 6) days a week, with one or two (1 or 2) days being longer, which will build or
increase in elevation and the total time as the weeks progress. It will also be important to
train the body to adapt to being active on back-to-back days. The training plan will ask you
to train on two consecutive days through phases 2-5. This allows you to assess any
problems that crop up from doing a certain set of activities or distance on successive days,
often knee pain!
4 WWW.PROJECTATHENA.ORG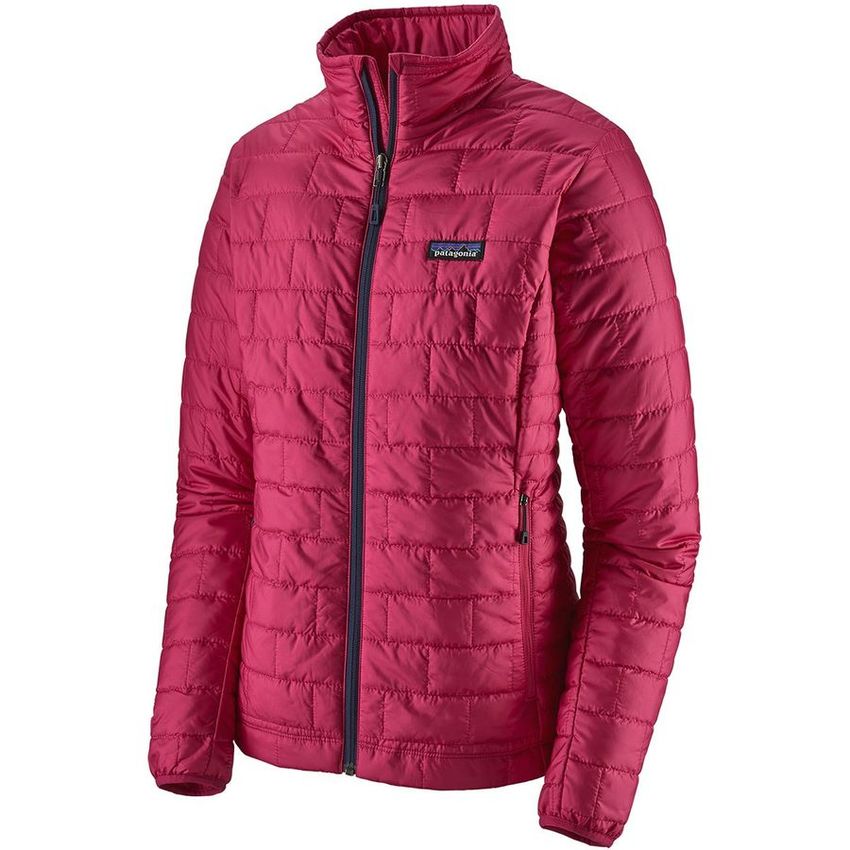
2020 Project Athena                                              Adventure Training Guide

  It’s imperative that you plan ahead with your training schedule. It takes time to build up to the
  hours, distance, and the ability to be active for long periods of time. This training will help make
  your Project Athena Foundation adventure experience both fun and successful! We are striving to
  be the best adventure team possible!

  Everyone may face different challenges or obstacles when it coms to training, including but not
  limited to inclement weather, work obligations, or personal/family commitments. It is important to
  focus on the quality of training versus the quantity. For example, if you’re faced with weather issues
  and the Training Plan calls for a ten (10) mile walk, it is more appropriate to be safe and train inside
  for a shorter duration at a faster pace to decrease the risk of injury. You can also find an alternative
  training location like a mall or local recreation center. That being said, it is important to simulate the
  terrain of the actual adventure as much as possible. Be sure to follow the terrain advice provided
  for each suggested activity. If you’re unclear on the adventure terrain specifics, please ask or search
  the web for the location of each event. The internet is a powerful tool! The more technical a surface
  the more physical and mental demand, so it is important for the body to acclimate to this challenge
  over time regardless of whether you are on foot or a bike.

  Endurance vs. Speed
  PAF adventures require both physical endurance and the mental toughness to be moving for hours
  on back-to-back days at a steady pace. The majority of the training focuses on building endurance
  but there will be weekly workouts focused on speed intervals, stair climbs, hills or cross- training to
  ensure you are able to meet the expected adventure pace minute per mile.

  Cross-Training
  Cross-training is an important adjunct to other activities to help minimize injury and fatigue. It helps
  to keep the body and mind healthy and decreases the likelihood you will get bored or find excuses
  not to train. Examples of cross-training and its benefits include; swimming or aqua jogging which
  eases joint pain, jogging/running which builds cardiovascular capacity and endurance, and stair
  climbers or elliptical machines which increase cardiovascular efficiency with less impact. Another
  great workout for our adventures is actual stair climbing – real stairs. The Grand Canyon and Zion
  adventures require hours of climbing and training must simulate this impact on the body. Just head
  over to your local high school, nearest tall building or parking garage, strap on your weighted pack
  and walk, jog, or run the stairs. Other cross-training exercises to consider: jumping rope, rowing
  machine, HIIT workouts and spin classes. (See Sample Workouts).

 5                       WWW.PROJECTATHENA.ORG

2020 Project Athena                                            Adventure Training Guide

  Stretching
  Stretching is another important aspect of training. When we work out, our muscles expand and
  contract which creates small tears in the muscle fibers. Muscles rebuild while we rest and sleep
  between workouts. It is suggested to stretch after each workout, when muscles are warm. The
  benefits of stretching include: preventing muscles from shortening over time, improving range of
  motion; increasing functional strength which lends to decreased opportunity for injury. The key to
  effective stretching is to hold a pose comfortably, without over stressing the muscles. Do not
  bounce or cause severe pain. Hold each stretch for 15 - 30 seconds.

  Gear
  All clothing, shoes, sunscreen, hydration packs, gaiters, trekking poles need to be used and tested
  on your longer training days well in advance of the event (See Gear List). You want nothing that is
  new or untested on the adventure itself. From head to toe, train in the gear you will plan to wear on
  adventure. This includes: shoes, socks, underwear, bra, shirt, pants, shorts, hat, jacket, hydration
  pack, water bottles, trekking poles, and rain gear. You want to know how each item will perform
  during long training sessions and still have time to replace it if it doesn't meet your needs. Be sure
  to visit the PAF website for our 2020 partners and ask your Adventure Coach about possible
  discounts.

  Nutrition & Hydration
  Proper nutrition and hydration will prepare you for a successful endurance event. You will need to
  train with the food and fluids that work best for you and help sustain your energy for many hours.
  As a reference, you’ll want to consume at least 150-200 calories per hour while moving which can
  be a combination of both food and fluid calories. You will also want to ensure you are drinking a
  combination of water and electrolytes, 24 - 32 oz. per hour to maintain proper hydration.

  Always carry water with you during training walks/hikes/rides/paddles – even starting at week one
  (1). Starting at week three (3) begin adding extra weight to your pack. You’ll want to ease into the
  amount of weight in your pack. For weeks one - three (1 - 3) simply carry your water bottles and/or
  hydration bladder and a few snacks. After week three (3), we suggest you begin adding 2 - 5 extra
  pounds of weight. Do not exceed 15 pounds total.

  You will receive the adventure training program electronically thru Training Peaks, details on how to
  access and login will come from your adventure coach. You can adjust the days and workouts to
  what works for your schedule. For example if you are off work on Fridays and want to do your long
  training on Fridays that is totally fine! We strongly recommend you follow both the suggested
  weekly mileage and any back-to-back training days.

 6                      WWW.PROJECTATHENA.ORG
2020 Project Athena                                              Adventure Training Guide

                                             TAPERING

  Taper: [tey-per] verb
  As an endurance athlete or someone who has trained for an event of this intensity, we sometimes
  throw the word ‘taper’ around like we all know exactly what it means. In the context of sports,
  tapering refers to the practice of reducing exercise in the days before an important event or
  competition to ensure optimal physical and mental performance. Learning to taper and actually
  implementing a strategy to taper after more than four months of intense training is vital to the
  success of your overall training plan. Essentially, tapering significantly reduces an athlete’s training
  load before a major race or event. It’s been proven that a period of intentional rest before a major
  event significantly increases the athlete’s level of fitness and boosts performance by an average of
  three (3%) percent. As an example, a boost in performance for a marathon runner of 3% equals to a
  decrease in total time by 5 -10 minutes! That's a huge benefit!

  An appropriate taper should consist of one to two (1 - 2) weeks. You’ll want to significantly decrease
  mileage for these weeks, but still focus on quality training. Taper is not the time to try new activities
  such as kick-boxing or mountain climbing and risk injury. It is very common to experience new
  “aches and pains” during the taper period, but these are often just the mind playing tricks on you.
  Use the taper period as a time to catch up on all things that may have been neglected during
  training such as laundry and cleaning. Your specific taper training plan is included in Training Peaks.

  Heart Rate: How to calculate your heart rate
  Use the tips of your first two fingers (not thumb) to press lightly over the blood vessels in your wrist.
  Count your pulse (beats) for 10 seconds and multiply by 6 to find your heart rate. Subtract your age
  from 220 to get your maximum heart rate. Your target heart rate is defined as 75 - 85% of your max
  heart rate.

  For example, a 40 year old female would have a max heart rate of 180 beats per minute (bpm) 220
  - 40 = 180 | 180 x 0.75 = 135 | 180 x 0.85 = 153

  Target heart rate zone for 40 y.o. female training is 135 - 153 bpm.

 7                       WWW.PROJECTATHENA.ORG
2020 Project Athena                                            Adventure Training Guide

  Strength, Balance & Functional Training

  Strength Training
  You’ve got the mental fortitude, now it’s time to work on aerobic conditioning, muscle strength and
  flexibility for any adventure. Let’s break it down and address quality training.

  Aerobic Conditioning: Aerobic conditioning is primarily about maintaining a steady pace, not an
  all- out sprint. Because you need to maintain this effort over a sustained period of time, you’ll want
  to keep your workouts to a moderate intensity. Ideally, you’ll want your training to be at 65 to 70
  percent of your maximum heart rate. Your basic aerobic condition regimen should focus on walking,
  since that’s what you’ll be doing on your adventure. You can also utilize the Perceived Level of
  Effort Scale to determine your intensity and level of effort. This can be found in Training Peaks.

  Muscle Strength: It will take more than strong legs for our adventures. One important pack -
  carrying muscle is the “core”. This includes the hips, glutes, hamstrings, and abdominal muscles. It
  will also be important to work on your shoulder and chest muscles to support proper posture. It’s
  suggested to strength train a minimum of twice (2) per week. You can be successful with basic
  exercises like sit-ups, planks, lunges, and push-ups. These moves can be done at home if you don’t
  have access to a gym. Body weight exercises will target those muscles, add them to your regimen
  at least twice a week, beginning at least 8 weeks before your trip.

                        STRENGTH TRAINING EXERCISES

      Lunges with bicep curls:
 Stand with your feet apart and in line with
 your hips while holding a weight in each
 hand with your arms hanging at your sides.

 Step forward with one foot, letting your knee
 bend when the foot lands. Make sure that
 when you land, your bent knee does not go
 past your toes. At the same time, flex your
 arms so that your palms lift toward your
 shoulders. Push back to a standing position
 by straightening your knee and stepping
 back as you lower your hands.

 8                      WWW.PROJECTATHENA.ORG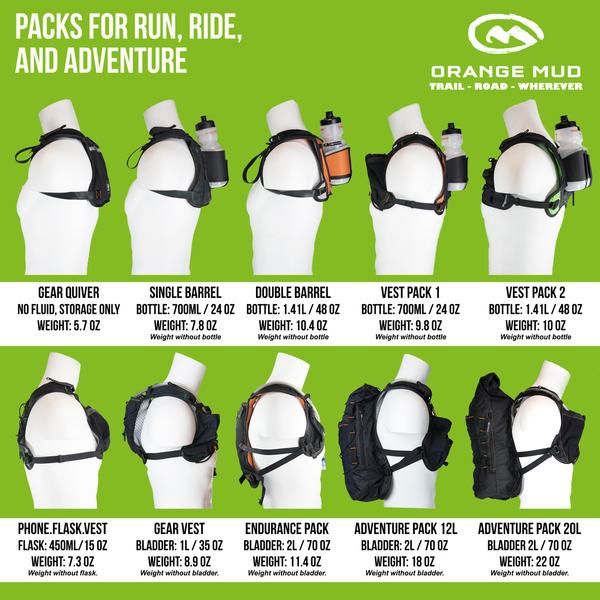
2020 Project Athena                                  Adventure Training Guide

                    Squats:
  Stand with your feet apart and in line with
  your hips. Bend your knees and lower you
  buttocks, as if you are going to sit on a chair.
  Keep your back straight, your abs tight, and
  your knees behind your toes. Squat as low as
  you can while keeping your torso upright
  and your heels on the floor. Return to a
  standing position. Holding a ball behind
  your head with both hands will help you
  maintain good posture.

                   Sit-Ups:
  Lay with your back on the floor. Place your
  arms across your chest or place your hands
  behind your head. Keep your knees bent to
  reduce stress on your lower back muscles.

  Slowly lift your upper body from the floor
  bringing your chest toward your knees. If you
  have placed your hands behind your head,
  be careful not to pull on your neck as you lift.

                  Step-Ups:
  Stand facing a curb or low platform. Step up
  onto it with your right foot, lifting your left
  foot off the ground as you straighten your
  right knee. Place your left foot on the step to
  finish. Return to the starting position by
  placing your left foot on the ground, then
  bringing the right foot down. You can
  complete the set's repetitions with the right
  foot and then switch to the left, or you can
  alternate sides.

 9                       WWW.PROJECTATHENA.ORG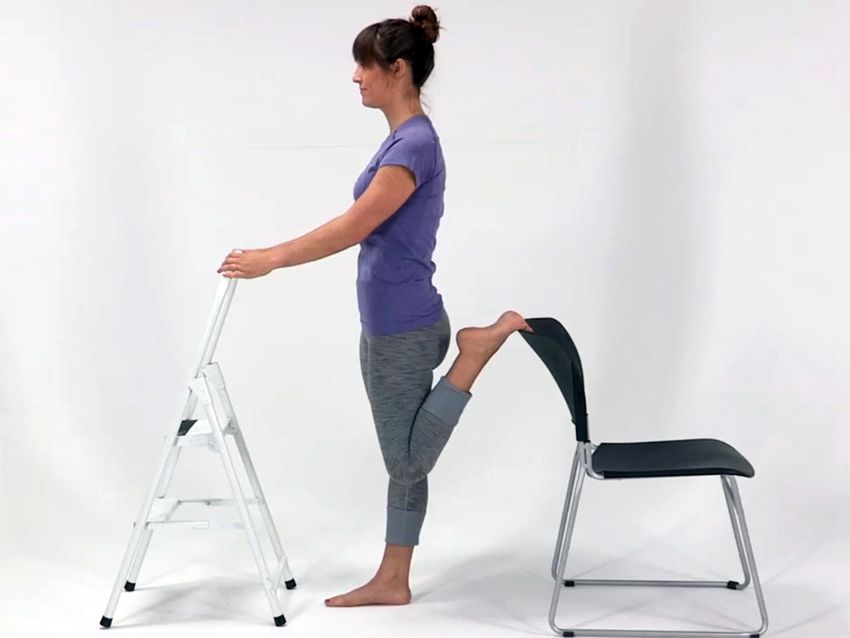
2020 Project Athena                                 Adventure Training Guide

                 Push-Ups:
  Lay face down on the floor, placing your
  hands slightly more than shoulder width
  apart and keeping your feet together. Curl
  your toes upward (towards your head) so that
  the balls of your feet touch the ground.
  Keeping your abdominal muscles tight and
  your back straight, exhale as you push
  yourself away from the floor. Don't lock your
  elbows. Now inhale and slowly lower
  yourself toward the floor, stopping as your
  elbows reach a 90 degree bend. Do not
  allow your body to touch the floor. Repeat
  several sets.

                   Planks:
  Lie face down on the floor, resting on your
  forearms with your palms flat on the floor.
  Raise your body off of the floor supporting
  your body with your toes and forearms. Keep
  your back flat and in a straight line from your
  head to your heels. Contract your
  abdominals to prevent your rear end from
  sticking up in the air or sagging in the
  middle. If your lower back feels
  uncomfortable, raise your hips a couple
  inches further off the floor. Hold for 20 to 60
  seconds, lower and repeat for 3-5 reps.

  *If this position is too difficult, you can
  modify this move until you are stronger.
  Simply support your body from your knees
  and forearms, again keeping your back
  straight.

10                       WWW.PROJECTATHENA.ORG
2020 Project Athena Adventure Training Guide
Assisted dips:
Find a flat, heavy surface. A coffee table,
sturdy chair, or bleacher will all work. Sit
down on the edge of the surface. Place both
hands behind you and slowly inch your butt
off the surface until you are supporting
yourself with your arms. Keep your feet flat
on the ground, knees bent and abs pulled in
tight. Lower your body toward the floor;
bending your arms until your elbows are at a
90 degree angle.
You should feel this in the triceps! Straighten
your arms, returning your body to the
starting position. Do not lock your elbows!
This move can be modified by lowering only
as far as your flexibility and strength allow!
BALANCE TRAINING EXERCISES
Balance Training:
Balance training improves coordination, improves posture, and prevents injury. It is imperative on an
adventure where you will encounter uneven surfaces. Here’s the secret: keep your abdominal muscles
tight. Complete a selection of these exercises two to three times a week in as little as five minutes
total.
11 WWW.PROJECTATHENA.ORG2020 Project Athena Adventure Training Guide
Single-leg stance with chop:
Stand on your left leg with your knee slightly
bent. Clasp your hands and hold them above
your right shoulder. Move your clasped
hands quickly from right shoulder to left hip.
Then change sides, standing on your right
leg and moving your clasped hands from
your left shoulder to your right hip. You can
rotate your torso to the right and left as your
balance improves.
Clock leg reach:
Pretend there's a clock face drawn on the
ground and stand at the center of it. Lift one
foot off the ground and, without changing
the direction you're facing, point with your
toes to all of the hours on the clock.
Alternate directions as you get better,
pointing first, for example, at the 10, then
the 5, then the 2, and finally the 12. Having a
partner call numbers randomly to catch you
off-guard will increase the difficulty.
Multidirectional lunges:
Perform lunges as described for muscle
strengthening, but instead of using handheld
weights keep your hands on your hips. This
time, you'll step not only forward to lunge,
but also to each side (pointing your toes in
the direction of the lunge) and backward
(lowering your buttocks as if to squat). Try
this on a soft surface like a mat, sand, or
thick grass; the unstable footing will make
your abs work harder.
12 WWW.PROJECTATHENA.ORG2020 Project Athena Adventure Training Guide
FUNCTIONAL TRAINING EXERCISES
Functional Training:
What is functional training? Functional training focuses on strengthening your feet, ankles, knees, hips
and shoulders with exercises that mimic real life movement. It is slightly different than strength training
in that its focus is on key joints and doesn’t require multiple repetitions. Here are some great exercises:
Feet: Ankles:
Simply stand with your feet together and Lie on your back with knees bent. Pick up the
hands by your side. Rise up on your tippy right foot in the air and begin “writing” the
toes – hold for count of three and release alphabet with your right big toe. Write the
back down to the floor – perform 10 times letters A-Z and then repeat with your left
foot. Do each foot just one time.
Shoulders:
Lie on your back, knees bent. Straighten
arms by your side with palms facing up and
arms slightly off the ground. Slowly raise
your arms over your head to the count of 10.
Return arms to your side with the same 10
count process.
13 WWW.PROJECTATHENA.ORG2020 Project Athena Adventure Training Guide
Knees:
Stand on one leg (get your balance). Jump
forward (pause) jump back to start position
(pause) jump side (pause) jump other side
(pause) jump backward (pause) jump forward
to start position. Repeat on the other leg.
Hips:
Stand on one leg and lift the other leg waist
high in front of you. Circle the leg slowly 10
times. Repeat on the other side.
**Keep hips facing forward the entire time.
14 WWW.PROJECTATHENA.ORG2020 Project Athena Adventure Training Guide
STRETCHING EXERCISES
Stretching:
Stretching is a form of physical exercise in which a specific muscle or tendon is deliberately flexed or
stretched to improve the muscles elasticity and maintain muscle tone. Stretching is usually natural and
instinctive. Here are some great stretches:
Achilles tendons/calves:
A: Stand facing a wall, and press your hands
against the wall so that your arms are
straight and at shoulder height. Extend one
foot behind you, with your heel on the
ground and your toes facing forward.
B: Bend your front leg while keeping your
back leg straight. Hold. Then, with your front
leg still bent, bend your back leg, keeping
your heel on the ground (Tip: Move your
back foot a little forward).
Hold. Relax and repeat on the other side.
15 WWW.PROJECTATHENA.ORG2020 Project Athena Adventure Training Guide
Back:
Get down on all fours with your hands
directly under your shoulders and your knees
directly under your hips. Inhale slowly, then
tuck in your chin, arch your back, and tuck
your hips under slightly. Hold. If you’re
stretching correctly, your back will be in an
asymmetrical arch, like a Halloween cat.
Then exhale and relax your back without
relaxing your abs; at the same time, lift your
chin to look ahead of you (not up) and lift
your buttocks slightly. Repeat, moving slowly
and carefully.
Hamstrings:
Stand in front of a knee-high, sturdy object.
Place the heel of one foot on the object,
standing tall and keeping both knees
straight. If you feel any discomfort, look for a
lower object. Lean your torso forward (not
down!) and hold. Switch legs and repeat.
Hamstrings:
Stand a foot or two away from and with your
back to a chair back or desk. Using your right
leg, bend your knee and lift your leg behind
you so that you can place the top of your
foot on the chair back or desk. Tighten your
buttocks and extend your pelvis slightly
forward. Hold, and then do the same with
your left leg.
16 WWW.PROJECTATHENA.ORG2020 Project Athena Adventure Training Guide
Stretches
Hold each one 20-30 seconds. You can pick a couple to do every other day. Be sure to breathe through
stretches and try to relax, do not bounce!
1. Childs pose: stretches back, shoulders and hips
2. Forward bend: reach hands toward floor, stretches hamstrings, hips and knees
3. Cobra: arms straight and push up into back stretch, works back, hips and glutes
4. Butterfly: works hips, knees and back. Bend forward, can put hands on knees to help stretch them
out further
5. Bird dog: on all fours, lift opposite arm and leg, works full body, think tight core, then switch sides
6. Staff pose: one leg bent in at knee and lay forward over opposite leg, works hamstrings, glutes and
knees
7. Straddle: legs out wide in a V, stretch to middle and each side
8. Standing knee grab: balance on one leg and pull opposite knee to chest and stretch hip flexor and
knee
9. Quad stretch: stand on one leg, pull opposite leg behind and grab foot, keep knees together but
pull on foot to work quad
10. Seated twist: Seated on butt, knees to right and turn torso to left, switch knees to left and twist
torso to right
Cobra Pose
Child’s Pose Butterfly
Staff pose
Bird Dog
Seated Twist
17 WWW.PROJECTATHENA.ORG2020 Project Athena Adventure Training Guide
SAMPLE WORKOUTS
Hills…Hills…Hills
All you need is a hill or steep incline of about 100-300 feet!
Warm up by walking at easy pace for 3-5 minutes
Slowly jog up and down the hill x 2. Do 10 squats at the bottom of the hill
Side shuffle up the hill leading with the right leg - keep your head forward, butt out.
Run back down the hill
20 wide-legged squats with punches - A wide legged squat is an ideal exercise for building and
strengthening the leg muscles, especially the inner thighs.
wide-legged squat with punches
Side shuffle up the hill leading with the left leg - keep your head forward, butt out
Run back down the hill
10 mountain climbers - The mountain climber is an excellent total body exercise. It will build strength in
your shoulders, arms, core and legs!
Jog up and down (carefully) the hill BACKWARDS x 2. Do 20 wide-legged squats at bottom of hill
Alternating lunges up the hill, run back down the hill
Finish strong with high knees half way up the hill, then sprint to the top
REPEAT entire sequence for 3 rounds total
mountain climbers
18 WWW.PROJECTATHENA.ORG2020 Project Athena Adventure Training Guide
Stadium Stair Workout
After phase 1 of training (weeks 5-18), wear your
pack with weight in it! 10-15 lbs.)
Walk or jog around the track for at least 3-5
minutes
Run a set of selected stairs at an easy pace, walk
down (repeat 2 times)
Run as fast as possible, walk down (repeat 2 times)
Side Step*, walk down (repeat 2 times - first time
lead with left leg, second time lead with right)
Run as fast as possible, walk down (repeat 2 times)
Run at an easy pace, walk down (repeat 2 times) *Side Stepping is exactly what it
sounds like. Face to your right, do a
Walk or jog at an easy pace for at least 3-5 lateral step up with your left leg;
minutes. bring your right up to meet it.
Continue this all the way up the stairs.
High Intensity Interval Training (HIIT) is a training idea in which low to moderate intensity intervals are
alternated with high intensity intervals. HIIT can be applied to running or to strength exercises. HIIT is
considered to be much more effective than normal cardio because the intensity is higher and you are
able to increase both your aerobic and anaerobic endurance while burning more fat than ever before.
HIIT #1
(40 sec rest between each exercise)
20 squats
20 lunges, each leg
10 burpees
20 mountain climbers
10 push-ups (on knees if needed)
40 high-knees running Burpees
3x 50 meter sprint-walk back
19 WWW.PROJECTATHENA.ORG2020 Project Athena Adventure Training Guide
HIIT #2
Warm up 5 min cardio of choice
(30 seconds rest between each exercise)
20 squat jumps
20 lunge jumps, each leg
15 burpees
Jump Lunge
10 push-ups
30 mountain climbers
15 tuck jumps
4x 50 m sprint-walk back
5 min jog to cool down
Speed Intervals
Can be done walking, jogging, stair climbing, elliptical, and/or on spin bike
15 minute easy warm up
THEN - 90 second (sec) intervals
30 sec moderate
30 sec hard
30 sec all-out effort
90 sec easy
Repeat x 10!
10 min cool down of choice
“Life Begins at the End of Your Comfort Zone.”
20 WWW.PROJECTATHENA.ORG2020 Project Athena Adventure Training Guide Aqua/Water Jogging: If you have access to a pool, this is a great way to keep fit with less impact! They even make waterproof iPods or headphones which helps make the time go faster. Be sure to wear a swim belt for the best form! Steady Interval Workout - 64 minutes total, 18 minutes hard running Warm up 20 minutes 3 minutes hard, 1 minute recovery. Repeat this 4-minute interval 6 times. Cool down 20 minutes 1’s and 2’s Interval Workout - 76 minutes total, 18 minutes hard running Warm up 20 minutes 2 minutes hard, 1 minute recovery. Repeat this 3-minute interval 6 times. 1 minute hard, 1 minute recovery. Repeat this 2-minute interval 6 times. 20 minutes cool-down Downhill Ladder - 60 minutes total, 28 minutes hard Warm up 10 minutes Ladder down from 7 minutes with half-time recovery (i.e. run hard for 7 minutes, then easy for 3:30, then hard for 6, then easy for 3, etc.). Cool down 10 minutes Backward Walking (strengthens knees and hamstrings) Suggest walking on a treadmill at >15% incline backwards to develop quadricep and knee strength and experience impact on the feet and toes. Speed isn’t necessarily important, but the goal is to walk at the highest incline possible to simulate downhill walking. You can use arms of machine to steady yourself but do not hold on to arms as it transfers weight from the legs to the upper body. Our goal is to work the legs!e Aim for 10 - 15 minutes at the end of a workout and work up to 30 - 60 minutes total. 21 WWW.PROJECTATHENA.ORG
2020 Project Athena                                             Adventure Training Guide

 Knee Builder
 You can do this a couple times a week to help build muscles around knees to reduce soreness and
 stiffness. Do 3 sets, 10-15 reps, each side.

 Lateral Walks: tie a band around ankles about shoulder width apart, and walk side to side
 Monster walks: tie band around ankles and walk forward, stepping forward and outward
 Bridges: hips ups, tight glutes, knees over ankles
 Lateral leg raises: lying on side, point toe down, heel up and lift leg to shoulder height
 Clamshells: band above knees, lying on side, knees bent and open and close like a clam

 Arms/Core
 Workout #1
 10 push-ups
 30 crunches
 10 burpees
 30 second plank hold
 30 bicycles
 Repeat x3!

 Workout #2
 25 forward arm circles
 30 bicep curls
 15 tricep dips (on a chair or bench)
 15 push-ups (on knees if be)
 40 mountain climbers
 30 raised knee crunch
 Repeat x3!

22                        WWW.PROJECTATHENA.ORG
2020 Project Athena                                             Adventure Training Guide

                                            GEAR LIST

 Clothing:
   •   Project Athena shirts (orange for Athena/Zeuses and white for Gods/Goddesses)
   •   Non-cotton / moisture-wicking shorts, capris, or pants
   •   Non-cotton / moisture-wicking socks
   •   Project Athena hat and buff
   •   Sports Bras (for the ladies)
   •   Sleepwear (remember you will be sharing a room and/or tent with others)
   •   Windproof / waterproof vortex jacket (something that can pack up small)
   •   Post-Adventure celebration dinner attire (casual)

 Shoes:
   •   Good trail running shoes either a half (1/2) or one (1) full size bigger than you normally wear
   •   Water shoes with a closed toe and heel
   •   Flip flops or comfy shoes to wear at the completion of your adventure (your feet will thank you!)

 Gear:
   •   Day pack < 18 L
   •   Two (2) large water bottles and 70-100 oz. (2-3 L.) hydration bladder
   •   One (1) duffle bag (all items need to fit in this one bag due to limited space in vehicles)
   •   Trekking poles (collapsible)
   •   Headlamp with LED bulbs, multiple settings - don’t forget batteries!
   •   Dry Bag (FOR KEYS)
   •   Gloves for hiking, cycling, or paddling
   •   Gaiters (specific to Grand Canyon or Zion)
   •   Sleeping bag and inflatable mattress pad (FOR KEYS)

 Personal Items:
   •   Clothes for travel and group dinners (first & last night)
   •   Sunglasses
   •   Sunscreen (waterproof and > 30 SPF recommended)
   •   Personal First-Aid kit with bandaids, Ibuprofen, Aspirin, Benadryl

23                      WWW.PROJECTATHENA.ORG
2020 Project Athena Adventure Training Guide
• Small blisters/foot care kit with moleskin, or second skin, and duct tape
• Lip-balm/chapstick (we recommend one with SPF)
• Wet wipes / Sani wipes
• Snacks (bring what you have trained with)
• Electrolyte drink mix (powder or tablets…TRAIN WITH THESE!)
Optional Items:
• Small camera or GoPro
• Bandana or cooling towel to cover the neck and face from sun and/or dust
• Swimsuit for the hotel pools
• Sun sleeves to help keep cool during the adventure
• Warm gloves and hats for the early mornings
• Gaiters - these are mini shoe covers to prevent rocks and dirt from getting in your shoes
• Extra plastic bags for food and/or dirty clothes
PLEASE REMEMBER that all adventures are different. This is a standard gear list for any of our
adventures, but not everything is mandatory for each adventure. If you have any questions about
gear, please contact your Adventure Coach or consult the PAF Adventure Group on Facebook to
receive feedback from past adventurers! Our PAF family has many alumni who have a variety of tips
and suggestions to share! See our Ambassador page on our website. Adventure specific gear is
covered on each adventure kick-off webinar/call and weekly coach emails!
PARTNER DISCOUNTS: Be sure to visit the PAF website and talk to your Adventure Coach about
any current gear discounts! We know that gear can be expensive, so we've teamed up with some
great suppliers to help get you discounts as members of the PAF team!
Coach Amanda - amanda@projectathena.org
24 WWW.PROJECTATHENA.ORG2020 Project Athena Adventure Training Guide
THE RIGHT PACK
It’s important to find a pack that works FOR YOU. It’s the first piece of gear, besides shoes, that you’ll
need to purchase. So what’s important when looking for a pack? Here are a few general guidelines to
help you find the right pack for your adventure:
Fit: You want a backpack that fits you well. It may be best to go to a store and try a few. You want it to
be comfortable around the waist and shoulders.
Size: A daypack will work well for our adventures. A day pack will NOT have any frame to it, plus it’s
compact. The pack should have at least 15 to 20 liters of internal space. NO MORE!
Hydration Capacity: Your pack MUST be able to hold a 70 - 100 ounce water reservoir (a.k.a.
hydration bladder). Be sure to purchase a pack that is designed to hold a bladder!
Straps: It’s a good idea to buy a pack that has padded straps. For long day trips it keeps you more
comfortable and equalizes the weight on your body.
Exterior Pockets: Ideally, you want multiple front pockets that allow for easy access to snacks, plus a
mesh pocket on each side for the pack to hold your additional water bottles.
Here are a few of our favorites:
Orange Mud Adventure
Pack 12L or Pack 20L
www.orangemud.com
Outthere USA
MS-3 Pack
www.outthereusa.com
25 WWW.PROJECTATHENA.ORG2020 Project Athena Adventure Training Guide
HOW TO PROPERLY PACK YOUR PACK
Let’s start at the bottom of the pack and work our way up!
The Bottom of the pack is where you should stash items you won't need very often. Think of it as
more of your “storage” place for the day. You may stash a long-sleeved lightweight shirt, or lightweight
rain jacket at the very bottom or other “required” gear you aren’t using, but should have with you.
The Core, or middle, of your pack is where heavier items should be centered in your pack - not too
high, not too low. The goal is to create a stable, comfortable center of gravity. Heavy items too low
cause a pack to feel saggy...too high and the load might feel tippy. **You aren’t required to carry heavy
items, but keep this tip in mind. **
The core of your pack will house your full water bladder also known as the “hydration reservoir”. Most
packs include a hydration reservoir sleeve. This is a slot that holds the reservoir close to your back and
parallel to your spine. It's easier to insert the reservoir while the pack is still mostly empty, so load your
water bladder first then the items you won’t be using as often (lightweight rain jacket). Then start
putting in the small bag of necessities (bug spray, Advil, foot care needs), extra pair of socks, etc. This
is also an ideal spot to place food that you won’t be reaching for as often, but may need for lunch,
longer breaks or the food you will use to replenish your side and strap pockets during the later hours of
the trek.
Top and External (or extra pockets) of the pack…Some packs are designed with a zippered top lid.
This is ideal for items you will want to easily reach such as sunscreen, sunglasses, headlamp, and first
aid kit. If your pack has strap pockets or hip pockets, you will want to use these spaces for frequently
used items such as chapstick, small sunscreen, fuel (portioned in snack sized Ziplock bags), gum, mints,
and pain medications. These pockets are ideal for items you’ll reach for often.
Your pack should offer side mesh pockets that are excellent for carrying additional water bottles, plus
its good storage for stowing your trekking poles when not in use. You’ll want to put the grips in the
pocket and the tips pointing upward. Practice stowing your poles, it's harder than you think!
If necessary you can use a carabiner to affix an additional water bottle to your pack or use it to keep
your sunhat handy, etc. A bandana can be tied to a strap as well to wipe away sweat or tears. You want
to minimize the gear you attach to your pack’s exterior. External items can potentially get snagged on
trees, bushes or other people and jeopardize your stability.
26 WWW.PROJECTATHENA.ORG2020 Project Athena Adventure Training Guide
It’s important to practice, practice, practice with your pack and know how YOU have it organized.
Ultimately, if you have practiced you’ll know exactly where things are and where things go. This makes
you most efficient on the adventure! It’s best to set up a system that you follow throughout training. Do
what works for you! It’s also important not to over pack. By the time your adventure arrives, you will
know how much food you might need (include 1 - 2 extra hours worth) and what items you use
frequently and the exact location in your pack! Take only what you need.
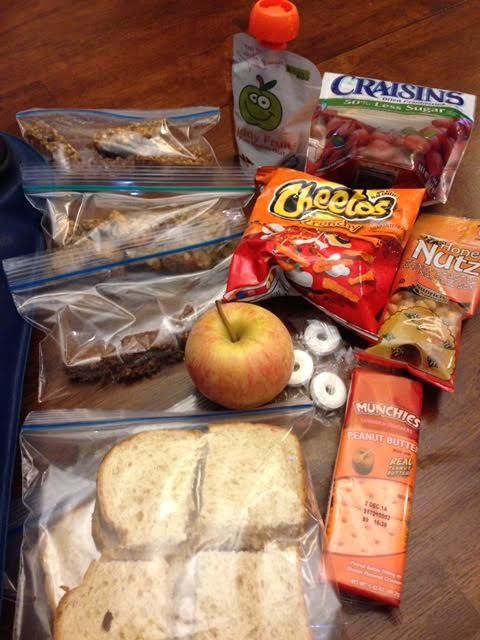
To the left: A picture showing an example of how
you might consider packing your food for the day.
Snack-sized bags with a variety of food items
including energy bars, crackers, two peanut butter
and jelly sandwiches cut into quarters. This allows
you to eat a bit at a time!
Photo courtesy of a past adventurer.
27 WWW.PROJECTATHENA.ORG2020 Project Athena Adventure Training Guide
HYRDATION HOW TO
Each PAF adventure requires a a day pack and hydration bladder. There are a couple of different
brands available when selecting a hydration system including: Camelbak, Nathan, Ultimate Direction
and Osprey. Their function is similar but can vary in size, design, bite valve, color, etc. Regardless of the
design, it is important to know how best to care for your hydration system to prolong product life as
well as ensure you stay HEALTHY!
Key points for keeping your hydration system happy:
• Best practice is to clean and dry reservoir after every use, especially if filling it with anything but
water (sugar grows mold)
• Ensure hydration system dries completely between uses to prevent mold from growing
• Clean around the cap and seal area to prevent dirt and grit from damaging the seal
Cleaning Solution Options: Cleaning Steps:
• 2 cups hot water + 2 tablespoons baking soda • Add water and solution to
• 2 cups hot water + 2 tablespoons of bleach reservoir
• 2 cups of hot water + 1/4 cup vinegar • Hold reservoir above head
• Camelback cleaning tablets • Pinch bite valve
• Denture cleaning tablets • Allow water to run through tube
• Mild dish soap • Allow solution to soak for 30
minutes
Supplies: • Scrub any mold spots and seal
area
• Hot water • Wash reservoir with warm water
• Cleaning solution and mild soap
• Warm water • Hang dry
• Mild soap
• Toothbrush or scrub brush
Quick Tips:
• When cleaning your hydration system, use this as an opportunity to look for any damage to the
seal or bite valve that can lead to moisture and mold!
• If you do develop mold in your hydration system, follow the above process to remove it. The
mold permanently stains the bladder, but it is still safe to use!
28 WWW.PROJECTATHENA.ORG2020 Project Athena Adventure Training Guide
THE RIGHT SHOES
Choosing the best shoe for you is important. It is definitely a personal choice, however there are KEY
factors to consider when choosing the best shoe for you. Finding the best shoe may require some trial
and error, but you’ll be so glad you put in the time to find just the right shoe. There are a lot of good
choices out there, so where do you start?
Key points to consider:
• Fit: It is important that the shoe fits. We recommend considering a shoe that is at least half to a full
size larger, than what you normally wear. Your feet will swell due to the amount of time on them, plus
heat and travel increase the risk of swelling. Start with at least a half size larger to also help minimize
blisters and hot-spots.
• Shoe Specifics: If you need or prefer a wider toe box, be sure to seek a shoe that offers this. Also
consider the amount of support or cushioning the shoe offers.
• Weight: It’s important to consider the total weight of the shoe. Some trail running shoes weigh as
little as 8 ounces while others weigh 12 ounces. Keep in mind you are trekking for long periods of
time and the less your shoes weigh the less weight you’re “carrying”. Look for a shoe that weighs 12
ounces or less!
Trail Running Shoes: Trail running shoes are a great option for long distance hikers. Trail running shoes
are different than running shoes in their tread and soles. There’s a bit more stability in trail shoes, plus
the sole may wrap over the front of the shoe, protecting the toes from getting stubbed. An obvious
benefit of a trail runner is the weight of the shoe, which is about half of a hiking boot. Lifting less
weight with each step lessons your overall load. The only downside to trail runners is they often
provide less ankle support which may be something you need. Discuss with your PAF coach!
Hiking Boots: It's only fair to offer up some suggestions in regard to hiking boots too. The appeal to
hiking boots is usually durability and the fact that they are water-proof/resistant. And, sometimes,
boots are simply a personal preference. Another reason people gravitate to boots is the hight and
ankle protection they offer. Just remember, hiking boots are going to weigh more and we discourage
them in most cases! Discuss with your PAF coach as many trail runners are now available as boots!
If you're worried about ankle protection, but would prefer a trail runner, we highly suggest
investing in some gaiters. Gaiters attach to the shoe and cover your ankles to help prevent dust,
dirt, and gravel from entering your shoe.
29 WWW.PROJECTATHENA.ORG2020 Project Athena Adventure Training Guide
Suggestions to Consider:
Brooks PureGrit Merrell All Out Charge
www.brooksrunning.com www.merrell.com
Hoka Challenger ATR Altra Lone Peak MRB
www.hokaoneonone.com www.altrarunning.com
TIP shop local running or outdoor outfitter
stores for guidance with shoe sizing. Often
these stores will let you return any shoes worn
inside in case they do not work!
Hoka Speedboat
www.hokaoneonone.com
30 WWW.PROJECTATHENA.ORG2020 Project Athena Adventure Training Guide
THE RIGHT WATER SHOE
Choosing the best shoe for your water adventure is important. It is definitely a personal choice,
however there are factors to consider when choosing the best water shoe for you. There are a lot of
good choices out there, so where do you start?
Key points to consider:
• Fit: It is important that the water shoe fit snuggly so it does not come off in the water
• Shoe Specifics: the water shoe must be closed-toe and cover your entire foot
• Weight: It’s important to select a water shoe that is both light weight & quick drying
What Water Shoes Are NOT: Water shoes are not flips-flops or open sandals such as Teva's! Water
shoes are not old heavy boots or athletic shoes that become water-logged and heavy when wet!
What Water Shoes Are: You can use an old pair of running shoes that are light weight and have laces.
You would want something similar to "minimalist" running shoes that fit snuggly and are made of both
breathable and quick-dry material.
A few of our favorites:
Speedo Merrell
Vibram
Swim Shoe Water Shoe
Five Fingers
www.speedo.com www.merrell.com
www.vibram.com
31 WWW.PROJECTATHENA.ORG2020 Project Athena Adventure Training Guide
FOOT CARE
Easy Foot Care for Hiking/Trekking: A major problem for trekkers/hikers is sore feet and blisters. This
is true for both beginners and experienced hikers alike. Fortunately, there are a few steps to take
BEFORE you hike that promote good foot health.
Understanding the Cause of the Problems: Too much moisture and friction are the two main causes
of blisters. Small pebbles and sand can get into shoes between toes and cause abrasions. Heat can
also make your feet feel like they are literally baking.
Hot feet + sweaty socks + rubbing = BLISTERS!
• Proper hiking form: Pay attention to your gait and train as prescribed.
• Do exercises to strengthen ankles and feet which promote proper balance and foot placement.
• Essentials: Be sure to pack only the required necessities and make your pack as light as possible
– less weight on your feet over multiple days.
• Buy shoe gaiters. They will help prevent sand, grit, and pebbles getting into your shoes – less
friction = less blisters.
• Socks: Be sure to practice hiking in a variety of socks. Wool blends, moisture-wicking and toe
socks are good options.
• Bandage and protect: Learn to bandage and care for your feet in case of problems. Medical
tape, duct tape, and moleskin are key!
• Foot care kit: It’s important to create your very own foot care kit. This kit should be separate
from your first aid kit. You want it to be easily accessible and easy to find in your pack. A few
items to consider: small scissors, baby wipes or alcohol pads, moisturizer or some sort of sports
stick, antibiotic ointment, duct tape (yes, you read that correctly), small travel baby powder, and
moleskin.
32 WWW.PROJECTATHENA.ORG2020 Project Athena Adventure Training Guide
Dressing the Feet Step-by-Step
Once you’ve reached the later phases of training, you’ll begin to know where your feet are rubbing or
blistering. The good news is you can “dress” your feet before you begin a hike.
Here’s a step-by-step guide to dressing the feet prior to a long day on the trail or road:
• Always, always start with both clean & dry feet
• Apply any moleskin, duct tape or bandages when feet are dry
• Once the dressing is applied, apply any lubricant you plan to use. Apply liberally everywhere,
be sure to avoid any bandaged areas. (You want the bandaged areas to stay as dry as
possible).
• Once lubricant is applied, generously powder feet with baby or foot powder. Powder helps
keep feet dry by absorbing any moisture!
• Put socks and shoes on, tie shoes tightly and secure shoe gaiters
Feet are known to be fickle and this is challenging while training conditions and trails may be
constantly changing. This is exactly why it’s important to do your long training sessions with your gear
in place and learn how your feet will respond. Do not ignore hot spots!!! If you know you develop a
hot spot in a particular area during your long training trek, be sure to treat that spot prior to any
additional training. Treat hot spots right away – when feet get ignored they will ultimately demand
extra time in the form of blisters and could keep you from completing subsequent training days!
For fun,
fashionable
gaiters, check
out Dirty Girl
Gaiters or other
outdoor gear
companies like
REI.
33 WWW.PROJECTATHENA.ORG2020 Project Athena Adventure Training Guide
TEAM ADVENTURES … HAVING AWARENESS
There is no “I” in TEAM! - A note from Robyn
For the past 20 years, my Adventure Racing teammates and I have learned the "hard way" about what
it takes to get through any difficult endeavor. So part of my goal as the Captain of Team Merrell Elite
was to help athletes avoid those mistakes and help prepare them to stay in the game longer, feel
better, and kick more butt than ever before! Over the next few months, your PAF Adventure Coach is
going to share with you what we have learned about nutrition, care and maintenance of your body and
equipment, getting yourself and your teammates across that finish line together, what to wear, how to
get the most from your training, and how to access the most helpful resources to help you BE BRAVE
and A BADASS :)
An expanded definition of self awareness is our ability to notice ourselves in the present moment. Self-
awareness is often a good measure of 'presence'. Being present with our body can bring us awareness
of many things. A gut feeling may alert us to something that's not quite right; the flow of blood in our
veins can awaken us to the simple joy of being alive; a shiver down our spine may let us know that we
have connected with a truth. Noticing this internal activity as it happens is the manifestation of self -
awareness. This living knowledge of what is happening with us now is self - awareness, to be
differentiated from self - knowledge which is based on what we know of ourselves from the past - even
if that past is as recent as only a moment ago. Awareness helps us keep up with life as it happens. It
helps connect us with the present moment and the constant changes and challenges that present
moment brings. It connects us to the warrior within. It allows us to to determine when we have the
strength to offer help and when we need to accept help from other members of the team. Asking for
help isn’t a weakness but a strength and a knowledge of when you need assistance to better help the
team as a whole! The goal is that we all suffer equally out there together!
PLANNING + SUPPORT + PATIENCE = SUCCESSFUL ADVENTURE
XO,
Robyn
34 WWW.PROJECTATHENA.ORG2020 Project Athena Adventure Training Guide
TRAINING FOR ENDURANCE EVENTS
Preparing for a Project Athena adventure, or any endurance event includes more than just making sure
that you have the right clothing, equipment and gear. It requires a huge time commitment to both train
and ensure you optimally recover, so the best way to ensure you are able to accomplish everything
accordingly is to MAKE A PLAN!
When considering how to best to find a training and life balance, there are several strategies or items
to include in your TRAINING PLAN:
1. Communication: Let your PAF Adventure Coach know of any travel, events or conflicts with
required training dates. Coaches are more than happy to make adjustments and
accommodations to training requirements AHEAD OF TIME! Also, communicate with family and
friends letting them know what your training demands include, not for sympathy but for
assistance. Family can offer to help with life demands such as errands and you may identify
friends willing to come join you for parts of your training. Coworkers might even be willing to
walk or stair-climb before, during lunch or after work. Having the support of family and friends
helps to make the demands of training seem manageable!
2. Research: Each adventure has required elements that often include a specific time and terrain.
Plan ahead on possible places that meet the requirements. Search the Internet for elevation
profiles for local parks and trails, etc. Realize, you may have to travel a bit to find a place that
simulates the desired course. It's important to use published route statistics as a formal frame of
reference when planning a route, as relying on just your GPS device can leave you short of a
requirement as GPS signals varying when out in the wild! PAF coaches can help you navigate
specifics if you have questions, but meeting the requirements is ultimately the responsibility of
you, the athlete!
3. Explore and Extend: Create a network of people to train alongside including family, friends or
other PAF adventure peeps. Use social media avenues to connect! Explore local running, bike or
outdoor recreational retailers as they often provide group activities and suggestions on trails
that you can include in your training. Social connections made thru training are shown to
increase accountability!
4. Onward: When following an extensive training plan, it is likely that life may get in the way for a
day or two that can snowball into a couple more days of missed workouts and before you realize
it, you have lost an entire week of solid training. This is when you need to outreach to your PAF
coach to set up a call to get back on track. Acknowledge that LIFE HAPPENS and training needs
to keep progressing forward. Do not get down on yourself for what you have failed to complete,
but instead focus on making a solid plan for completing the remaining training successfully!
35 WWW.PROJECTATHENA.ORG2020 Project Athena Adventure Training Guide
Project Athena will provide you with a specific training plan based on your adventure through the
electronic platform Training Peaks. We suggest you carefully review this training plan and place key
dates on your calendar. Identify any conflicts including work, travel, vacations, celebrations, etc.
Knowing your schedule ahead of time will give you an idea when to schedule workouts that meet our
mandatory deadlines. This will also help hold you accountable for completing each aspect of the
training plan!
PLANNING + SUPPORT + DILIGENCE = SUCCESSFUL ADVENTURE
Example from TrainingPeaks Desktop Calendar
Example from TrainingPeaks Mobile
36 WWW.PROJECTATHENA.ORG2020 Project Athena Adventure Training Guide
FOOD STRATEGIES FOR ENDURANCE EVENTS
Let’s Simplify Things:
Everywhere you look today there is information and data to support the benefits of eating one way
over another. Honestly, it’s great that there are so many wonderful, healthy options. The downside is,
that it gets downright confusing. Paleo, intermittent fasting, gluten-free, non-dairy, clean eating, high -
fat, no carb, any of these sound familiar?
FOOD IS ENERGY! And you can get this energy from food regardless of which strategy you prefer.
You may have to get creative, but it’s possible. You’re going to need energy to train with rigor and
enjoy the adventure that lies ahead.
The key is consuming the calories you need to exert energy and prepare for the length of the
adventure. Food is energy and food is recovery. We recommend different levels of calories for each
adventure. If you know you need to consume 150 - 200 calories an hour, you can do this regardless of
your eating strategy. The key is that it takes a bit of planning and you can have what you need to reach
the suggested calorie intake.
Here are some quick tips to help you fuel, eat well, and recover on your next adventure:
Plan Ahead
• Train with the food you KNOW you can have available on the adventure.
- It’s best to train with foods that are portable vs. foods that require a lot prep!
• If you make a lot of your own food/snacks, plan to bring them with you.
• Portability - You’ll be packing in a suitcase/duffel bag and storing food in a backpack.
- Bring foods that can withstand the demands of travel.
• Starting a rigorous training plan is NOT the time to start a diet to lose weight!
- You will be exerting a lot of calories, and replenishing calories.
- This is the time to make healthy choices so you’re fueling your body well.
• Too few calories will leave you feeling tired and unable to face back-to-back training days.
- Remember food is energy!
• Too few calories does not allow for adequate recovery of your muscles.
- Muscles need fuel too!
37 WWW.PROJECTATHENA.ORG2020 Project Athena Adventure Training Guide
Don’t Over Complicate the Process: Use Five Alive!
PAF coaches use the Five Alive strategy to simplify fueling training needs. Create five items, or foods,
that work for you and use them routinely. Here’s an example:
1. Nut butter sandwich (portable, easy, make & take, travels well, or buy Smuckers Uncrustables)
2. Bars: There are all kinds of bars available. Chances are you can find one that suits what you need
ingredient wise, taste, texture, etc..
3. Small fresh fruit: This can be purchased at the store. Apples, clementines or bananas - one a day
is fabulous on an adventure!
4. Nuts, seeds, trail mixes. You can make your own and include what you like - we suggest no
chocolate because it can melt easily!
5. Dried fruits, candies, gummies, etc. Dried fruit is a great option and so are a lot of candies. You
may want to consider gums, lifesavers, lollipops, swedish fish & gummy bears!
Coaches Tip: Enjoy your food, make smart and easy choices! Practice with what you
know you can have available on your adventure! Include different textures and tastes to
satisfy the athletic palate. Have fun and fuel on!
38 WWW.PROJECTATHENA.ORG2020 Project Athena Adventure Training Guide
MACRONUTRIENTS 101
As complicated as nutrition can be at times, nutrients can essentially be divided into 2 categories:
macronutrients and micronutrients.
Macronutrients are those nutrients that the body needs in large amounts. They provide the body with
energy or calories. Micronutrients are those nutrients that the body needs in smaller amounts.
There are three macronutrients: carbohydrates, protein and fat!
CARBOHYDRATES: PROTEINS:
ROLE IN THE BODY: ROLE IN THE BODY:
Fuel during high intensity exercise; spares protein Tissue structure (part of organ tissues, muscle,
(to preserve muscle mass during exercise); fuel for hair, skin, nails, bones, tendons, ligaments and
the central nervous system (your brain!) blood plasma); involved in metabolic, transport,
and hormone systems; make up enzymes that
RECOMMENDED INTAKE: regulate metabolism; helps regulate acid/base
• Sedentary Individuals: 40 - 50% of your balance to maintain a neutral environment in our
total daily calories should be bodies.
carbohydrates
RECOMMENDED INTAKE:
• Exercises Regularly: 60% of your total daily
calories should be carbohydrates • Sedentary Individuals: 0.36 grams of
protein per pound of body weight
• Athletes or persons involved in heavy
training: 70% of your total daily calories • Exercises Regularly: 0.45 - 0.68 grams of
should be carbs protein per pound of body weight
• Maximum amount of protein the body can
FOOD SOURCES: utilize: 0.91 grams of protein per pound of
• Grains (choose mostly whole grains) body weight
• Dairy (choose low-fat or non-fat) FOOD SOURCES:
• Fruit (choose whole fruits over fruit juice)
• Meat & fish
• Dairy
• Legumes
• Eggs
39 WWW.PROJECTATHENA.ORGYou can also read