Application booklet Thermoforming - Arla Plast
←
→
Page content transcription
If your browser does not render page correctly, please read the page content below
Application booklet Thermoforming
Thermoforming                                                                                                      2

Thermoforming is one of the oldest and most common methods of processing plastic materials.
Thermoformed plastic products are all around us and play a major part in our daily lives. It is a very versatile
process used to manufacture a wide range of products from simple packaging trays to high impact aircraft
cockpit covers. It is also used extensively to make design prototypes of products to be produced by other
processes. The process, however, is basically the same in each case. In its simplest form thermoforming is
the heating of a plastic sheet which is then draped over a mould whilst a vacuum is applied. The moulding is
then allowed to cool before it is ejected from the mould using a reverse pressure facility.

Generally speaking amorphous materials, e.g. Polycarbonate and ABS are easier to thermoform than
semicrystallines (like PE, PP) as they do not have such a critical forming temperature. When heat is applied
amorphous materials becomes soft and pliable – when it reaches this state it is known as its Glass
Transition Temperature (Tg). If heated to a higher temperature it reaches a Viscous state. The changes
occur over a range of temperatures and enable the operator to have a fairly wide forming range.

Thermoforming is possible on our whole solid sheet range, except for SAPHIR™ hard coated range. Its hard
and scratch resistant surface does not allow for any forming techniques. It is however possible to apply the
hard coating after thermoforming. Contact us for more information.
Thermoforming is not strictly limited to solid sheet: also our MULTICLEAR™ Multiwall range can be – albeit
limited – thermoformed, but forming procedures for MULTICLEAR™ are not described in this booklet.

All techniques mentioned in this booklet are applicable to all ARLA PLAST AB polycarbonate sheet (with
exception of SAPHIR™ hard coated range), GRIPHEN™ sheet and ABS sheet grades.
Where GRIPHEN™ is indicated, it is also valid for the GRIPHEN™ Frost range, unless otherwise specified.

Protective maskings are not meant for thermoforming, unless otherwise stated.
Therefore it is recommended to remove the masking prior to the application of heat for the forming process.
GRIPHEN™ clear masking is thermoformable.

Surface textures normally decrease due to a thermoforming process.
Only in case of GRIPHEN™ FROST, the surface properties are maintained.

In order to determine the right product for the right application, it is important to understand the technical
basics of the process.

CONTENTS
1. PRE-DRYING

2. HOT LINE BENDING

3. DRAPE FORMING

4. VACUUM FORMING

5. TROUBLE SHOOTING

6. ADDITIONAL INFORMATION

Our solid sheet can be cold curved with a minimum radius of 175 times the gauge thickness for outdoor
applications, and 125 times the thickness for indoor applications. When smaller radii are needed
thermoforming or drape forming is the way to go.
Thermoforming                                                                                                   3

1. PRE-DRYING
In spite of the very low moisture absorption which contributes to the good dimensional stability of our
polycarbonate sheet range, thorough pre-drying of sheet stock is essential for all thermoforming techniques
in which the sheet temperature will rise above 160°C. Failure to do so will probably result in moisture
blisters. GRIPHEN™ sheet do NOT require predrying, as its forming temperatures remain low enough.

The recommended procedure for polycarbonate is to use an air circulating oven set at 120-125°C for PC
and 70-80°C for ABS. After removal of the protective masking the sheet should be suspended (on drilled
holes), put upright or laid flat on racks in the oven. Make sure that the sheets are arranged 20-30 mm apart
so that the air can circulate freely between them.

Note that it is also possible to pre-dry with the masking on. In that case it is recommended that temperature
should not exceed 90°C in order to avoid masking related problems. In that case drying temperature is much
longer.

When it is required that forming should be done with the masking on the sheet, please contact us for latest
information regarding thermoformable masking.

The minimum drying time depends not only on the sheet thickness, but mainly on the moist content. A
simple test can be done to obtain optimum drying time: place a part of the dried sheet into an oven at 180°C
for 10 minutes. If bubbles appear, the sheet is not fully dried, and process needs to be maintained. As soon
as no bubbles appear no more, optimum drying time is set.

Pre-dried sheet should, if possible, be left in the oven until immediately before forming to save heating
power and heating time on the thermoforming machine. Fully dried sheets taken out of the oven and cooled
down to room-temperature may be used within a period of 1 hour up to a maximum of 10 hours (depending
on the relative humidity and temperature of the work-shop) without the necessity of pre-drying them again.
When preparing a blank for a thermoformed polycarbonate part, remember that the sheet shrinks the first
time it is heated above its glass transition temperature. Shrinkage up to a maximum of 10% (for thin sheet)
can be expected, unless the sheet is clamped in a frame.

Before starting the heating and thermoforming operation, the sheet should be cleaned by means of an antistatic
cleaning agent or an ionized air gun. This is necessary to avoid marks on, or even imbedding of dirt or
dust particles in the final article.

Take care while heating the sheet. Heating too fast will result in heat accumulating at the sheet surface and
degrading it. The most appropriate heaters are infra red heaters. Contact heating and high-frequency
heating are not suitable. Halogen heaters are mainly suitable for coloured sheet.
Thermoforming                                                                                                     4

2. HOT LINE BENDING
The Hot Line Bending equipment is a simple IR- or electrical resistance heater, bending-calliper coated with
fabric and a clamping device.
It is preferred to remove the masking, as forming occurs at 10-15 °C over glass transition temperatures, but
in order to keep the finished part protected, remove the masking locally but avoid cutting the sheet surface.
In some cases the masking can stay on the sheet during the entire process. Perform a preliminary test to
find out the correct heating time.
For polycarbonate sheet up to 2 mm pre-drying normally is not needed. If bubbles occur on the edges, place
some insulating material against the edges in order to avoid overheating them. If bubbles still occur, it might
be needed to pre-dry.

If inner angles are smaller than 45° the masking should be removed on the inner side.
The heating time depends on the power of the IR heaters. With one side heating, it takes about 2 min to
make a 3 mm sheet weak enough to bend. Thicker sheet need to be heated from both sides. If not available,
turn periodically during the heating cycle. Always bend the sheet with the last heated side forming the
outside radius.

When the sheet softens, remove from heating source, bend, place into calliper and clamp.
Cool slowly to prevent distortion. Keep the part close to the heating device to make it cool down evenly and
reduce tensions. Once the part is below its Tg, it can be placed in a fixing device and cool down in the air.

Glass transition temperatures (Tg):
GRIPHEN                81°C
ABS                    min. 88°C, depending on the grade.
Polycarbonate          148°C

3. DRAPE FORMING
Uni-axial or slightly curved 3D bent parts can be achieved by drape forming. The mould, preferably preheated
to 55-70% of the Tg to avoid cooling problems - can be made out of wood, aluminium or resin
covered with felt. Slight pressure (with soft gloves or cloth, e.g. linen) is sufficient to drape the sheet over a
positive mould. An alternative method is to place the flat sheet on the mould, foreseen with a load to push
the sheet in place when getting soft. Then place mould and sheet in an oven.

Where applicable, remove standard masking before putting into an IR oven to be heated. Preferably the
sheet should be clamped in a frame or hung, as placing it on a bed might mark the sheet. The sheet
temperature should be about 20°C over its Tg to achieve easy forming. Place sheet on the mould
immediately after heating; therefore minimise distance between mould and oven. Cool in surrounding air, but
take care for drafts which could cause distortion of, and stress in the finished parts.
In most cases it is not needed to pre-dry the sheet for the drape forming process. Note that, as the sheet is
not framed during the process, it will shrink during the heating process (sheet up to 5 mm can shrink up to
10% in extrusion direction; above 5 mm shrinkage is less)
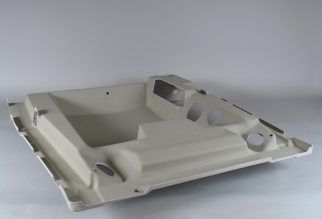
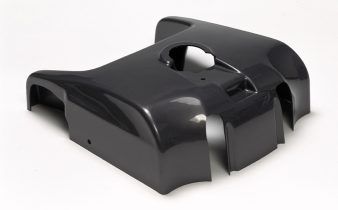
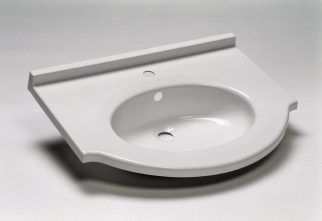
Thermoforming                                                                                                                                                 5

4. VACUUM FORMING
Because of their good flow properties, all our sheet, allow you to make complex finished parts. Higher draw
ratios can be achieved:
Polycarbonate:         up to 3:1
ABS:                   up to 4:1
GRIPHEN:               up to 5:1

Standard available vacuum forming machines, preferably with a sandwich heating system can be used to
form our sheet.
All plastic sheet from Arla Plast require a minimum vacuum of 500 mm Hg (=0,66 atm = 0,066 MPa), but
higher vacuum is preferred.

4.1 Temperatures
________________________________________________________________________________________________________________________________________________________________

Ideal forming temperatures should be high enough to limit internal stress build up, but low enough to ensure
a fast cycle time. In any case maximum temperatures should not be exceeded, in order not to ‘burn’ the
material. Temperatures listed are sheet temperatures.

GRIPHEN:                         max 160 °C
ABS:                             max 185 °C
Polycarbonate:                   max 210 °C

4.2 Moulds
________________________________________________________________________________________________________________________________________________________________

For long production runs and/or when optical quality is required, use temperature controlled aluminium or
steel tools. For prototypes or limited production work, tools made of plaster, hardwood, reinforced epoxy or
polyester resins may be used. Be aware that the mould material affects both cooling time and finish of the
formed parts. It is also preferred that the mould roughness (Ra value) is situated between 1.0 to 1.4.
Allow for moulding shrinkage of 0.8 to 1% for polycarbonate and 0.5 to 0.6% for GRIPHEN™
For good evacuation of air, it is important to make an optimum number of holes in the right locations. If that
is not the case, optical defects like little pores or craters could be formed. This may occur especially on parts
with large flat surfaces. To avoid venting marks on the final moulding, these vent holes should not have
diameters larger than 0.5 - 0.8 mm. Back drilling with larger drills is suggested to speed up air evacuation.
Design moulds with such roundings (minimum equal to sheet thickness) that the plastic sheet can slip over
without risk for thinning and webbing. A good release of the moulding can be obtained by providing a draft
angle of minimum 4 to 6°.

4.3 Negative and positive mouldings
________________________________________________________________________________________________________________________________________________________________

Negative moulds result in finished parts with a thin bottom and thick walls, whilst positive moulds result in
parts with a thick bottom and thin walls. Depending on the application, either a positive or a negative mould
should be built. For better external finish use negative moulds which show more detail.

Understand that hot thermoformable sheet reproduces every detail, badly finished moulds included. This can
be reduced by either refinishing the mould or by reducing the mould temperature and/or the sheet surface
temperature.
Thermoforming                                                                                                                                                 6

4.4 Heating
________________________________________________________________________________________________________________________________________________________________

Remove standard protection masking prior to thermoforming, and blow off the sheet with ionised pressurised
air.
When clamped on 2 sides only (in automatic feeders) be informed that the free side might shrink (see drape
forming). Therefore four side clamping is preferred. If a heating profile is available, it is recommended to
adjust it as such that when pre-blown, the sheet forms the same shape as the mould. That way the best
thickness spread is obtained. It is also recommended that the systems used to support and clamp the edges
of the sheet should also be heated, to avoid significant heat losses during heating as well as uneven cooling
which could result in internal stresses or edge warping.
To improve the thickness gradient the sheet can be blown or mechanically pre-formed by means of a plug.

Heating range:
GRIPHEN™                         100-160°C
ABS                              150-180°C
Polycarbonate                    175-210°C

It is recommended to supply minimum 30 kW/m2 as heating power, but if present power is not sufficient, it
might help to insulate the process with heat-reflecting material. One side heating is not recommended for
sheets of 3 mm and above. To prevent surface degradation, avoid fast heating. The sheet can only absorb
part of the IR radiation and accumulation of heat will damage the sheet and embrittle the formed part.
The necessary heating time, proportional to the sheet thickness, has to be determined during preliminary
tests on the thermoforming machine.

As soon as the sheet becomes plastic enough it will start the tension relaxation process while also
expanding thermally, making it move up and down. Air pressure should be applied to keep the sheet as flat
as possible, failing to do so will cause local uneven heating patterns.
Once the heating process is finished, the forming can commence.

Note that different colours and different surface textures require different heating procedures.

Coefficient of dilatation (x 10-6 m/m °C)
_____________________________________________________________
Polycarbonate        Glass        Steel   Aluminium
67                    7-9         12-15   21-23

4.5 Forming
________________________________________________________________________________________________________________________________________________________________

As soon as the heaters are withdrawn, the sheet will be pre-blown to the required height, the mould moves
up, and vacuum is applied to firmly form the sheet over the mould.
Thermoforming                                                                                                                                                 7

4.6 Cooling the formed part
________________________________________________________________________________________________________________________________________________________________

Cool with compressed air; possibly with water mist (avoid droplets as they might cause marking). Let the
part stiffen sufficiently and take it from the mould. Sheet which are formed at higher temperatures cool more
rapidly, and because of this it requires more rapid forming. At the same time, however, its high heat
deflection temperature under load enables short cooling cycles to be achieved. The mouldings can be
removed from the mould with little risk of deformation as soon as they have cooled down to about 10-15°C
below the Tg.
Using positive moulds, mould shrinkage might cause removal problems. Take care to remove before the
part shrinks on the mould. Do not cool too fast, because the generated stresses may result in cracking.
If necessary, annealing can be done.

Mould shrinkage:
GRIPHEN™                         0.4-0.5%
ABS                              0.3-0.7%
Polycarbonate                    0.8-1.0%

(Mould shrinkage is mainly caused by the thermal contraction when cooling from demoulding temperature
to room temperature)

4.7 Free forming
________________________________________________________________________________________________________________________________________________________________

These techniques are utilized in forming dome shapes. Free blown billow forming uses air pressure while
free drawing uses a vacuum.

The sheet is heated until a sag is formed. An optical switch and/or a micro-switch are coupled with the
pressure (vacuum).The initial pressure (vacuum) is high (2,8 MPa or more) and is lowered towards the end
of the forming cycle. The pressure (vacuum) is held until the sheet temperature cools down to 15-20°C
below the Tg and the forming is able to be removed. Here will be no mark-off as no moulds are used, but dirt
or oil in compressed air may cause marks on the sheet.

4.8 Plug-assist vacuum forming
________________________________________________________________________________________________________________________________________________________________

Corner or periphery thinning of box-shaped articles can be prevented by use of a plug-assist to mechanically
stretch and pull additional plastic material into the female cavity. Plug-assist vacuum forming and plug-assist
pressure allow deep drawing and permit shorter cooling cycles and good wall thickness control. Both
processes require close temperature control and are more complex than straight vacuum forming. The plug
should be 10 to 20 % smaller than the mould and should be heated to ca 20-30°C over the Tg. Once the
plug has forced the hot sheet into the mould cavity, air is drawn from the mould to form the part onto the
mould.
Plug assist is an essential feature when forming multiple impression male moulds as they can be placed
very close together without the fear of the material webbing between the formed parts.

4.9 Other methods
________________________________________________________________________________________________________________________________________________________________

Other thermoforming methods are combinations of above mentioned ones.
High pressure forming (HPF) and Twin sheet forming (TSF) are two advanced methods which for small to
average series can compete with injection moulding and blow moulding.

4.9.1 High Pressure Forming
Using a negative mould, the atmospheric air pressure that spreads the softened sheet over the mould, is
increased by pressurised air up to 1 MPa.
This makes it possible to create sharp corners and very fine details like part textures.
Thermoforming                                                                                                                                                 8

4.9.2 Twin Sheet Forming
Two heated sheets are brought between two negative moulds. Air pressure in between these sheets is
applied while the circumference of the sheet is clamped. An alternative technique forms the upper and lower
part separately, and both parts are brought together, the circumference is reheated to obtain fusion of both
parts. This technique creates hollow shapes, to obtain light parts with high structural stiffness.

4.10 Annealing
________________________________________________________________________________________________________________________________________________________________

Whenever possible, use the optimum processing conditions to minimise the creation of internal stresses.
Parts with too high internal stress levels should be annealed to avoid failure in service. This can be done by
heating the parts evenly in an air circulating oven up to 10-20°C below their Tg, at which temperature they
should be kept for 1 hour for every 3 mm of the part thickness. Then the part should be cooled slowly to
room temperature, preferably in the oven with its doors closed.

5 TROUBLE SHOOTING
This comprehensive table is a summary of the most common causes and remedies thereto.
Thermoforming                                                                                                 9

6 ADDITIONAL INFORMATION
Delivery programme for thermoforming applications:
! We offer sheet from 0.75 to 15 mm, up to 2,1 m wide
! In a vast range of standard colours and any custom colour, including metallics and specialties
! In Polycarbonate, ABS, and Copolyester (PETG)
! With or without UV layer
! Also recycled products available
! Contact us for more information

COLOURS
Matching and sampling:
Arla Plast offers a comprehensive range of transparent colours, opal white diffusive tints and opaque
colours. Most colours can also be colour-matched.
For a colour match in an opaque colour, a sample or RAL code or NCS code is required.
Transparent colours either only can be matched to a sample, or to light transmission requirements.
Due to the specificality of the sheet extrusion process is it not possible to extrude one sheet in normal
circumstances.
In order to see the thermoforming possibility of a coloured sheet for sampling reasons, it can be useful to
paint a transparent sheet with formable paint prior to forming. Alternatively, any coloured sheet can be
thermoformed and spray painted into the desired colour.

TEXTURES
Arla plast offers its extensive range of textures:

    00 (smooth)                  30                    35                      38                      40

        45                       50                    57                      60

Additionally, the frosty matt surface of GRIPHEN™ Frost also retains its properties when thermoformed.

Thermoforming simulation programmes
Relative new are the thermoforming simulation programmes.
However, due to the complexity of both the sheet extrusion process and the thermoforming process, will it
probably never be possible to fully simulate the whole process for obtaining all processing parameters.
These simulations therefore are more suitable to get a general idea but not the details.
Thermoforming 10
Extrusion related common issues
The sheet extrusion process has a typical build up with a die and calandering roll stack.
Extrusion related issues can be:
Orange arrow indicates extrusion direction
1) Due to the specificality of the sheet extrusion process,
extrusion defects most commonly are either:
1) perpendicular to extrusion direction
2) parallel to extrusion direction
2) 3) following the material flow
On small scale, separate defects are present at random.
Extrusion defects often are more visible when the sheet
has been exposed over its glass transition temperature
Tg.
This is typically the case in thermoforming techniques.
3) But of course thermoforming itself creates its own defects
as well.
In order to distinguish between defects caused by thermoforming and extrusion related defects:
Test if the defect still occurs/ is on the same spot:
A) when the sheet is turned 90° (if possible)
B) when the sheet is turned 180°
C) when the sheet is turned upside down
If the defect does not follow the rotational movement, it is probably not extrusion related.
Original position A) turn 90o B) turn 180o C) turn upside down
(arrow is on top surface)
For more information contact your local agent or contact Arla Plast directlyYou can also read