BOB'S BURGERS TABLE GUIDE BY SHORYUKENTOTHECHIN - ZEN STUDIOS
←
→
Page content transcription
If your browser does not render page correctly, please read the page content below
Bob’s Burgers Table Guide
     By ShoryukenToTheChin

    10

         3   4   5   6

                         7
    2                        8
                                 9
1
Key to Table Overhead Image –

   1. Food Truck Orbit
   2. Bob Targets
   3. Mr. Frond Lane
   4. Sinkhole
   5. Wonder Wharf Ramp
   6. Hugo Lane
   7. Mort Lane
   8. Tina Targets
   9. Jimmy Pesto Lane
   10. Cross Ramp

In this guide when I mention a Ramp, Lane, Hole etc. I will put a number in brackets which will correspond
to the above Key, so that you know where on the Table that particular feature is located.
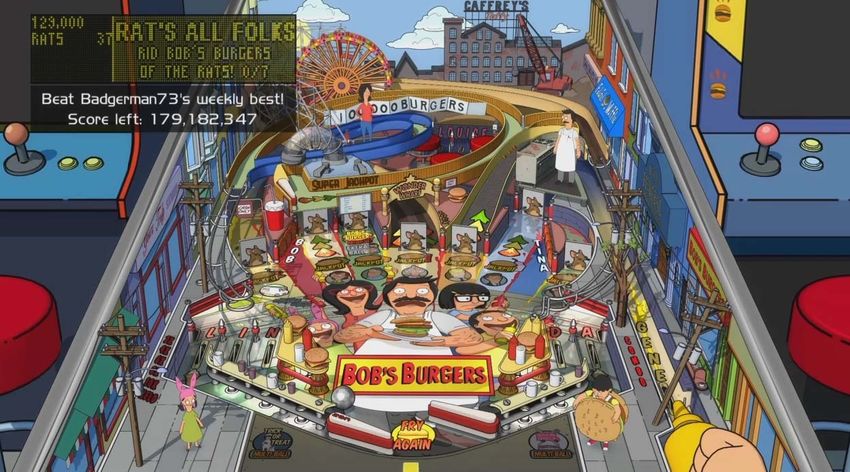
TABLE SPECIFICS
  Notice: This Guide is based off of the Zen Pinball 2 (PS4/PS3/Vita) version of the Table on default
controls. Some of the controls will be different on the other versions (Pinball FX 2, etc...), but everything
                                    else in the Guide remains the same.

INTRODUCTION
Zen Studios has teamed up with Fox to give us a Bob’s Burgers Pinball Table. The Table was released
within a pack titled “Balls of Glory” which featured 4 Pinball Tables based on hit animated TV shows, one
of those was of course Bobs Burgers.

Bob’s Burgers Pinball sees you play through various Modes which draw inspiration from many of the shows
episodes. The Table incorporates the art style of the cartoon, and various audio works from the series itself.
The voice work is also ripped straight from the show to add that extra bit of authenticity.

I hope my Guide will help you understand the Table better.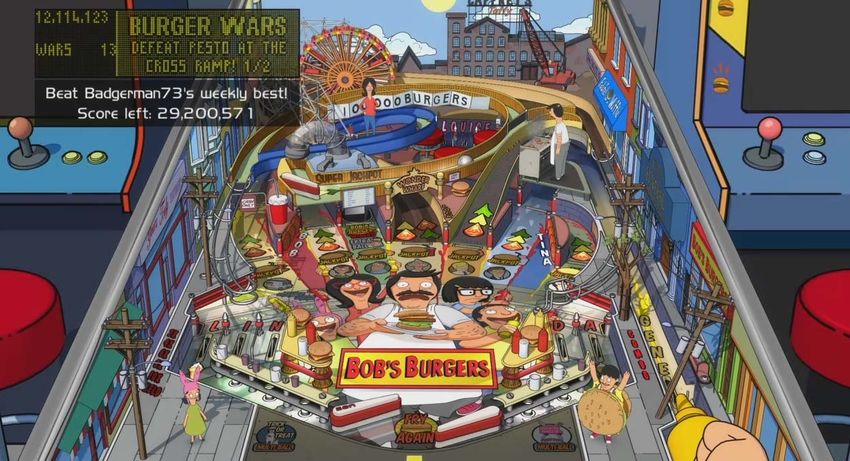
Skill Shot - *1 Million Points, can be raised*
To Produce a Skill Shot you will need to have the Ball roll down the flashing “LOUISE” Rollover (above
the Bumpers). There are 3 Rollovers – “LO”, “UI” & “SE”

Manually set the Plunger (Hand) as shown in the Images below. Example: Using a PS4 controller you can
pull back the Right Analogue Stick to adjust the Plunger.

Each time you do a Skill Shot. A letter of “GENE” will become lit solid. If you perform 4 Skill Shots in the
same game. You will light EXTRA BALL for collection at the Sink Hole (4).

“SE” (Right) Rollover:
“UI” (Middle) Rollover:

“LO” (Left) Rollover:

Time of Day
This Table has a “Time of Day” mechanic in action. Over the course of your play through of the Table the
“Time of Day” will shift between “Day” & “Night”. Depending on the “Time of Day” different Game
Modes will be available for activation/completion.

To manually change the “Time of Day” simply press and hold the “Launch” Button on your controller for 3
Seconds.

Day Time:

Night Time:
Kick Back & Ball Save
Kickbacks –

To activate the Kickbacks on this Table you will need to complete the Linda Hurry Up. This is activated by
having all of the “LINDA” Letter Rollovers lit solid. Simply roll the Ball down the Rollovers, changing the
lit Rollovers with the Flipper Buttons as to make the Ball roll down an unlit Rollover.

Once that is done you will have about 15 Seconds to hit the Ball up the Cross Ramp (10) using the Top Left
Flipper. To gain access to that Flipper you first need to send the Ball up the Jimmy Pesto Lane (9), then send
the Ball up the Cross Ramp (10) using that Top Left Flipper. This will then activate the Left Kickback.
Repeat the process again to activate the Right Kickback, and to gain an EXTRA BALL you will repeat this
process while both Kickbacks are activated.

Ball Save -

This is activated at the start of various Modes, or rewarded via Tina Random Awards mechanic.
Extra Balls
There are 5 Ways to achieve an Extra Ball;
Collect the Extra Balls by hitting the Ball into the Sink Hole (4) -
Method 1: Spell Gene; Perform 4 Skill Shots. Look earlier in the Guide at the section titled “Skill
Shot” for information on how to get this Extra Ball.
Method 2: Reach 10x times Multiplier and light “LOUISE” Rollovers one more time; Look later in
the Guide at the section titled “Raising the Multiplier” for information on how to get this Extra Ball.
Method 3: Random Tina Award; Look later in the Guide at the section titled “Tina Random
Rewards” for information on how to get this Extra Ball.
Method 4: Completed the Kuchi Kopi Mode (Night Time); Look later in the Guide at the section
titled ‘Main Modes – Night – Kuchi Kopi” for information on how to get this Extra Ball.
Method 5: Hit the Cross Ramp (10) while in the Kickback Hurry Up, while having both Kickbacks
previously activated; Look earlier in the Guide at the section titled “Kickbacks & Ball Save -
Kickback” for information on how to get this Extra Ball.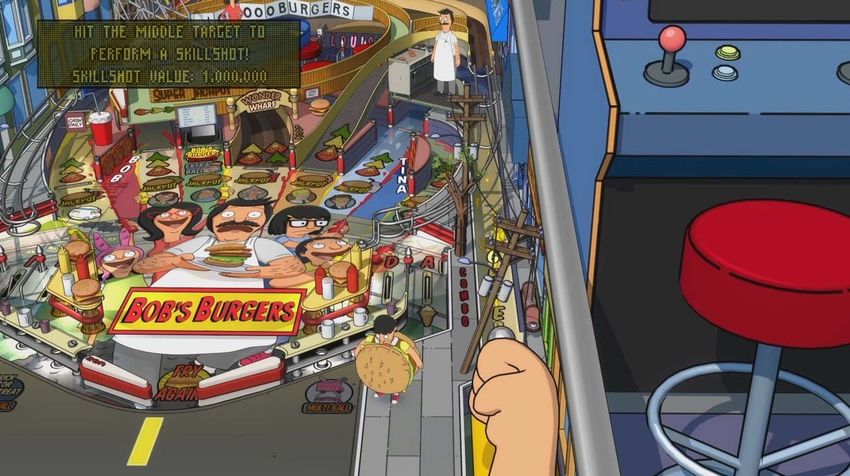
Raising the Multiplier
The Multipliers on this Table will increase by 2x times, every time you light up all of the Letters of
“LOUISE” by going down the 3 Rollovers above the Bumpers.

Once you completely max out the Multiplier at 10x times, repeat the process once more and you will light
up EXTRA BALL at the Sink Hole (4).

                          *Note – Multiplier Level resets upon draining the Ball.*

Bob Targets
Hitting all 3 Bob Targets (2) in the Day Time will award you with 1 Million Points. In the Night Time it
will start up the Kuchi Kopi Mode (outside a Mode).

Also hitting these Targets within the Main Mode will reset the Modes timer.

Tina Random Awards
Hitting all 4 Tina Targets (8) will give out a random reward. Rewards such as light EXTRA BALL or Ball
Save etc.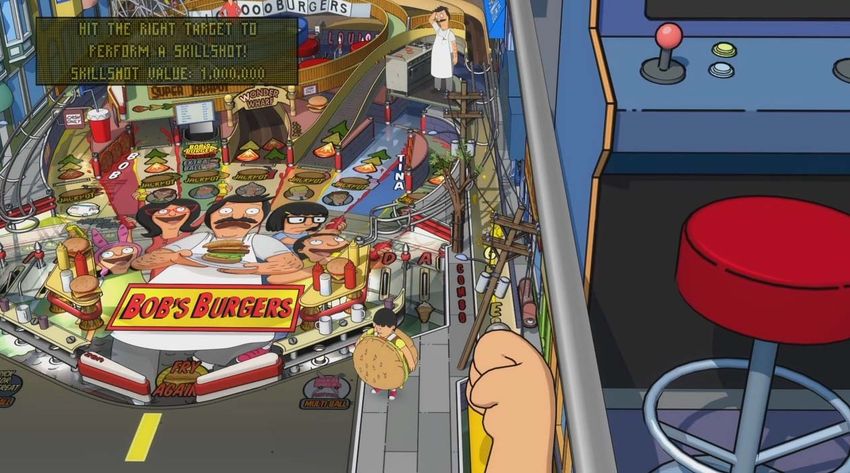
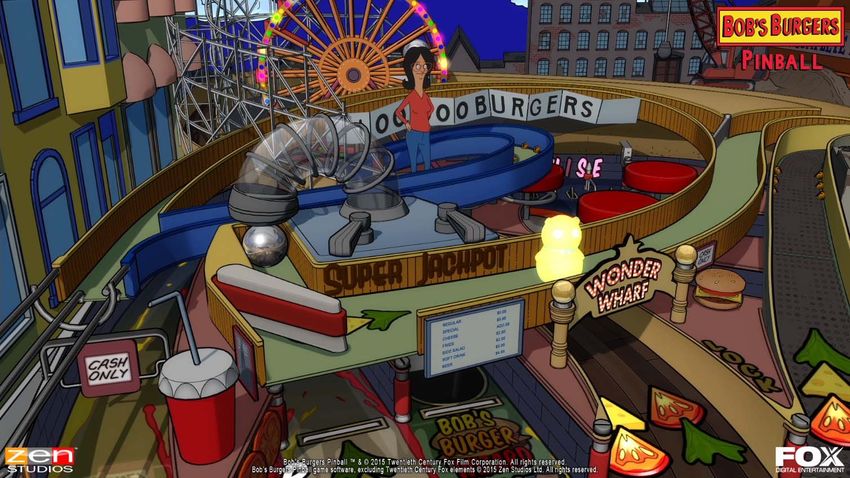
Multiball Modes
There are 2 Multiball Modes on this Table. They are available at different times of day on the Table as
shown –

*Day Time* Food Truck Multiball Mode *3 Balls *

Activation –

During Day Time you will need to hit the Spinner located at the entrance of Food Truck Orbit (1). You will
see miles to travel on the Dot – Matrix.

Once that is done you will be able to lock a Ball by hitting it up the Wonder Wharf Ramp (5).

Repeat the above a further 2 times. Locking 3 Balls altogether, once done the Multiball Mode will begin.
Mode itself -

All flashing Lanes will result in a Jackpot reward (1 Million Points). Shooting 1 will then make that Lane
become lit solid.

Once all the flashing Lanes have been hit, the Super Jackpot reward (5 Million Points) will be available at
the Cross Ramp (10).

The Multiball Mode will continue as long as you have more than a single Ball alive on the Playfield.
Otherwise the Mode will end, and you will need to repeat the above activation process to re-enter this Mode.
*Night Time* Trick-or-Treat Multiball Mode *3 Balls *
Activation –

During Night Time you will need to hit the Spinner located at the entrance of Food Truck Orbit (1). You
will see miles to travel on the Ferry towards King Island (on the Dot – Matrix).

Once the Ferry reaches its destination, the Multiball Mode will begin.

Mode itself -

All the Lanes will be flashing permanently for Jackpots (250, 000 Points), and the Cross Ramp (10) for
Super Jackpots (1 Million Points).

The Multiball Mode will continue as long as you have more than a single Ball alive on the Playfield.
Otherwise the Mode will end, and you will need to repeat the above activation process to re-enter this Mode.
Main Modes
Completion of the various Main Modes listed below will impact on the values of the Jackpots & Super
Jackpots available in the Party Time Wizard Mode. So the more Modes you complete before starting the
Wizard Mode will make for higher scoring possibilities.

Also hitting the Bob Targets (2) within the Main Mode will reset the Modes timer.

                                     Day Time Modes

Kids in Crisis *Timed*
Activation –

Start this Mode by hitting the Mr. Frond Lane (3) a total of 3 times.

Mode itself -

Now once the Mode starts you will have a short amount of time to once again hit the Mr. Frond Lane (3) a
total of 3 times. Once done, the Mode is completed.
Orders There are a few things which will need to be explained for you to fully grasp the concept of the Taking Orders Mode. Self-Promotion (This is not a Mode) Hitting the Wonder Wharf Ramp (5) a total of 4 times will cause Gene to hand out flyers and award you with 2 Million Points each time this is done. This will also add another Customer to be served within the next Order Up section of the Taking Orders Mode. You can repeat the above again for another Customer to be added (3 Customers max!). This will make serving the 5 Customers needed for the availability of the Party Time Wizard Mode much faster. Taking Orders *Timed – 45 Seconds* Before starting this Mode, I would strongly advise you to complete the Self-Promotion explained above. To start this Mode you will need to hit the Sink Hole (4) a total of 3 times.
Once the Mode starts you will have a time limit to hit as many of the flashing Lanes as possible, these add
Side Orders. Hitting the Cross Ramp (10) adds the Burger of The Day.

Doing this will increase the starting value of the Order, it will also give a greater value to the Order Up
sequence of this Hurry Up Mode.

Burnt Burgers (can be activated while within the Taking Orders or Fry Time Sub-Modes) *Timed*

If you manage to hit the Bumpers several times within the Taking Orders or Fry Time sequence of this
Hurry Up Mode.

This will then start a fire on the Grill. You will then have a short time limit to hit the Ball up the Hugo Lane
(6) twice. Doing so will extinguish the Fire and perfect the barbeque flavour of the Burgers.
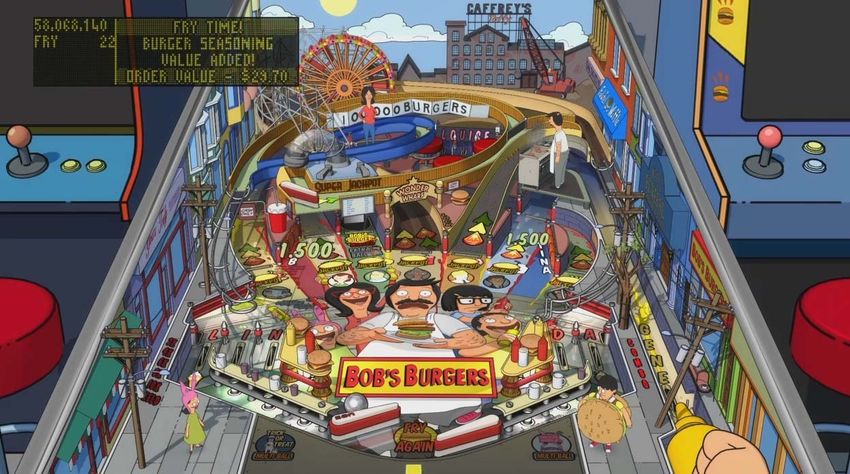
Fry Time *Timed – 30 Seconds*

Once this section begins you will have a short amount of time to hit the Ball up either of the flashing Lanes
to add seasoning to the Burgers, thus making the overall Order value increase the more this is done.

Order Up *Timed*

Once the Fry Time part of the Mode is completed, the last part “Order Up” will begin. Depending on the
number of Customers added (1, 2 or 3 depending on how many times you did Self Promotion which was
explained at the start of the “Orders” section). The Starting Value for the Orders is linking to the value of the
Order taken (how well you did on the previous sections of “Taking Orders” etc.

Shoot the flashing Customer Lanes to have them become lit solid and collect the score displayed on the Dot
– Matrix. Remember the faster you do this, the more Points awarded since the score is counting down.

The Lanes that can be flashing are shown in the below image.

Repeat these sections of the Guide below the “Orders” title to serve all 5 Customers and allow access to the
Party Time Wizard Mode (detailed much later in the Guide).
Rats All Folks *Timed – 40 Seconds*
Activation -

Start this Mode by hitting the Ball up the Hugo Lane (6) a total of 3 times.

Mode itself -

Once the Mode starts 7 Rat Drop Down Targets will appear at the entrances of the Lanes. You will have
about 40 Seconds to hit all of them.

Once done, the Mode is completed.
Green Mold *Timed – 45 Seconds* Activation - Start this Mode by hitting the Mort Lane (7) a total of 3 times. Mode itself - Once the Mode begins 6 Mold patches will appear on the Table Playfield. Hit them all within the 45 Second time limit. Located at – Bob Targets (2) Mr. Frond Lane (3) Sink Hole (4) Hugo Lane (6) Mort Lane (7) Cross Ramp (10) Once they are all hit, the Mode will be completed.
Burger Wars *Timed – 15 Seconds*
Activation -

To start this Mode hit the Jimmy Pesto Lane (9) a total of 3 times.

Mode itself -

Once the Mode begins you will need to send the Ball up the Cross Ramp (10) twice within the very short
time limit.

Simply hit the Ball up the Jimmy Pesto Lane (9) then with the Top Left Flipper up the Cross Ramp (10), do
this twice and the Mode will be completed.
Night Time Modes
Torpedo Grease *Timed*
Activation -

This Hurry Up Mode will begin when you enter the Night Time of the Table if either the “Taking Orders”,
“Burger Wars” or “Food Festival Multiball” were started during the Day Time.

Mode itself -

You will see a Score countdown on the Dot – Matrix, and Hugo Lane (6) will be flashing. Hit the Ball up
that to collect the Score displayed and the grease.

Now again but this time you need to hit the Ball up the Wonder Wharf Ramp (5) to deliver the grease and
collect the displayed Score.
Kuchi Kopi *Timed*
Activation -

This Mode is started by hitting all 3 of the Bob Targets (2).

Mode itself -

Now once it starts you will see a Kuchi Kopi Doll moving around the Table. Simply hit it with the Ball 4
times to complete the Mode.

Completing this Mode will also light up EXTRA BALL at the Sink Hole (4).
The Frond Files *Timed – 30 Seconds*
Activation -

Start this Mode by hitting the Mr. Frond Lane (3) a total of 3 times.

Mode itself -

Once that is done, the Mode will begin. Shoot the Ball into the Sink Hole (4) a total of 4 times to destroy the
Cyborgs sent back from the future.

Once done, the Mode is completed.
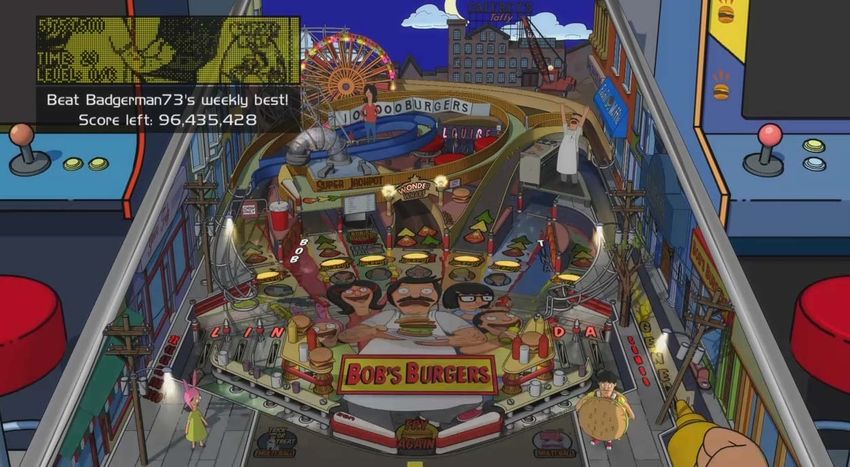
Taffey Factory *Timed – 32 Seconds*
Activation -

Shoot the Sink Hole (4) a total of 3 times to start up the Taffey Factory Video Mode.

Mode itself -

Move Left & Right using the corresponding Flipper Buttons, to try and find the Treasure.

The above is what you see when you find the Taffey Doll, minimum you will gain for completion is 5
Million Points. Also sometimes Bob & Linda will find you before that, and this will cause the Mode to stop.
Although you gain a 1 Million Point Bonus if that occurs.
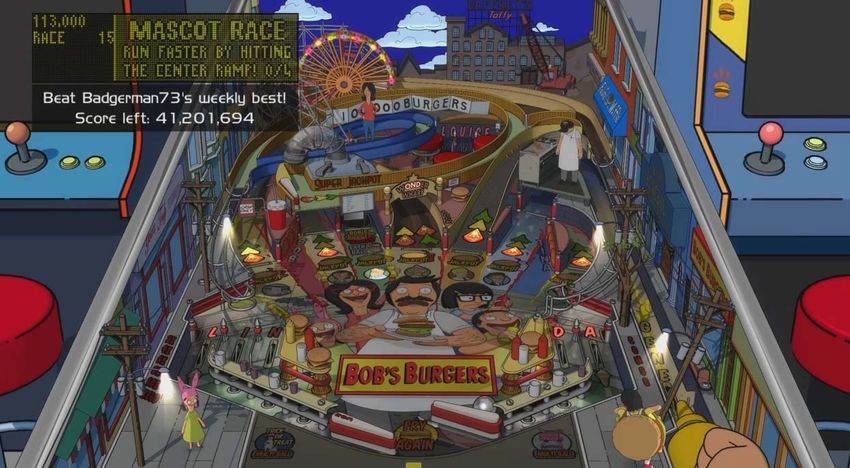
Mascot Race *Timed – 20 Seconds*
Activation -

Hit the Wonder Wharf Ramp (5) a total of 3 times to start this Mode.

Mode itself -

Once the Mode begins you will have a very short time frame to hit the Ball up the Wonder Wharf Ramp (5)
a total of 4 times.

Once done, the Mode will be completed.
El Diablo *Timed – 45 Seconds*
Activation -

Hit the Hugo Lane (6) a total of 3 times to start this Mode.

Mode itself -

Once the Mode begins a Racoon Target will randomly appear at various Lane entrances. Hit that Target to
stun him, then hit the Ball into the Sink Hole (4) to complete the Mode within the time limit. If you fail to
hit the Sink Hole in time, you will need to re-hit the Racoon and retry.
Crematorium *Timed – 30 Seconds* Activation - Hit the Mort Lane (7) a total of 3 times to start this Mode. Mode itself - Once the Mode starts 6 Fires will appear at these points. Food Truck Orbit (1) Mr. Frond Lane (3) Wonder Wharf Ramp (5) Hugo Lane (6) Jimmy Pesto Lane (9) Cross Ramp (10) You have about 30 Seconds to find and save Bob by hitting the Fires, once he is saved, the Mode is completed.
Slumber Party *Timed – 30 Seconds*
Activation -

Hit the Bumpers several times to activate the Slumber Party Mode.

Mode itself -

Now once the Mode begins you will need to quickly hit the 4 flashing Lanes to send the unwanted Guests
home.
Burger Boss *Timed – 30 Seconds*
Activation -

Hitting the Jimmy Pesto Lane (9) a total of 3 times will start this Mode.

Mode itself -

Shoot any of the flashing Lanes a total of 6 times.

Once done, the Mode will be completed.
Wizard Mode – “Party Time” *4 Ball
                 Multiball*
Once all 5 Customers have been served (detailed in the “Main Modes – Day Time – Orders” section). The
Wizard Mode will be available at the Sink Hole (4).

Wizard Mode itself –

This is a 4 Ball Multiball Wizard Mode. Meaning the Wizard Mode will continue as long as you have more
than a single Ball alive on the Playfield. Otherwise the Wizard Mode will end, and you will need to repeat
the above activation process to re-enter the Wizard Mode.

As you can see everything will be flashing on the Playfield. Party Time Jackpots on all flashing Lanes &
Super Jackpots via the Cross Ramp (10) will be available.

These values can be increased by completing the Main Modes. The Jackpot value maxes out at 2.5 Million
Points for each Lane, and Super Jackpot maxes out at 10 Million Points via the Cross Ramp (10).

Once you lose the Multiball, the Table will then reset.
Special Thanks to all the Zen Studios Forum Community! Members such as shogun00, Cloda, Ty-43, Deep, wims, skyway73, tenorhero, DiscoKing & surf1der. I couldn’t have completed the Guide without your help either directly or indirectly - you are all awesome!!! In closing I hope you enjoyed this Table, I certainly have and I hope by using this Guide it increases that Fun factor for you and everyone else who plays with you. Check out the other Tables available, they are all available to download on the Xbox Live Marketplace in Add-Ons section or download it straight from the PFX2 Platform itself. Zen Pinball 2 on PlayStation Network, Zen Pinball on the Apple AppStore, Zen Pinball 3D on Nintendo 3DS and Zen Pinball THD on Android Marketplace. Thanks for viewing my Guide; any feedback would be greatly appreciated - “Here’s a bunch of Letters they may look random, but they are the Guide for this Table.” Yours ShoryukenToTheChin
You can also read