DCS 500B QUICK GUIDE DCS Thyristor Power Converters DCS Thyristor-Stromrichter Convertitore di potenza a tiristori DCS Convertidor de potencia por ...
←
→
Page content transcription
If your browser does not render page correctly, please read the page content below
DCS Thyristor Power Converters
               DCS Thyristor-Stromrichter

                                                                 english
    Convertitore di potenza a tiristori DCS
Convertidor de potencia por tiristores DCS
                Variateurs standards DCS

                                                    DCS 500B
                                                   QUICK GUIDE

                                              I1

 3ADW000177R0200_DCS500B_QuickGuide_edisf_b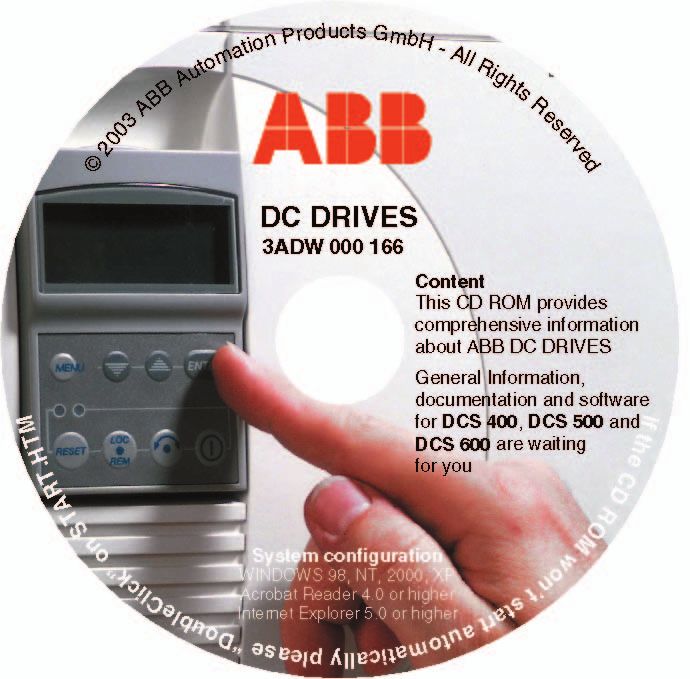
DCS 500B QUICK Guide

english                                                                                   español
CONTENTS                                                                                  CONTENIDO
1 Product description .................................... 3                              1 Descripción del producto .......................... 51
2 Notes, brief instructions CD and                                                        2 Instrucciones resumidas en CD, notas y
   documents overview .................................. 5                                   publicaciones adicionales ........................ 53
3 Notes on EMC ............................................ 8                             3 Notas acerca de EMC .............................. 56
4 Standard function assignments for the                                                   4 Asignaciones de funciones estándar para
   terminals ................................................... 10                          los terminales ........................................... 58
5 Connection example ................................ 11                                  5 Diagrama de conexiones ......................... 59
6 Safety and operating instructions ............. 13                                      6 Instrucciones de seguridad ...................... 61
7 Short start-up ........................................... 14                           7 Arranque rápido ....................................... 62
8 Status messages ...................................... 17                               8 Mensajes de estado ................................. 65
9 Dimensions, drilling patterns and weights 83                                            9 Dimensiones, patrones de taladrado y pesos 83
10 Errors and alarms ..................................... 85                             10 Errores y alarmas ..................................... 85
11 List of parameters .................................... 94                             11 Lista de parámetros ................................. 94
12 Declaration of conformity ......................... 96                                 12 Declaración de conformidad .................... 96
   Declaration of Incorporation ..................... 97                                     Declaración de homologación .................. 97

deutsch                                                                                   français
INHALT                                                                                    SOMMAIRE
1 Produktbeschreibung ............................... 19                                  1 Description des produits ........................... 67
2 Hinweise, Kurzanweisung CD und                                                          2 CD des procédures abrégées,
   Dokumentationsübersicht ......................... 21                                      informations et autres documents ............ 69
3 EMV-Hinweise .......................................... 24                              3 Règles de CEM ........................................ 72
4 Standard-Funktionsbelegung der                                                          4 Fonctions standards sur les bornes ......... 74
   Klemmen .................................................. 26                          5 Schéma de câblage ................................. 75
5 Anschlussschaltbild .................................. 27                               6 Consignes de sécurité .............................. 77
6 Sicherheits- und Anwendungshinweise ... 29                                              7 Mémento de mise en route ...................... 78
7 Kurzinbetriebnahme ................................. 30                                 8 Messages d'état ....................................... 81
8 Statusmeldungen ..................................... 33                                9 Dimensions, calibres de perçage et
9 Abmessungen, Bohrbild und Gewichte .... 83                                                 masses ..................................................... 83
10 Fehler und Alarme .................................... 85                              10 Défauts et alarmes ................................... 85
11 Parameterliste .......................................... 94                           11 Liste de paramétres ................................. 94
12 Konformitätserklärungen .......................... 96                                  12 Déclaration de conformité ........................ 96
   Herstellererklärung ................................... 97                                Déclaration d'incorporation ....................... 97

italiano
INDICE
1 Descrizione prodotto ................................ 35
2 Note, brevi istruzioni CD e documen-
   tazione - Informazioni generali ................. 37
3 Note sulla compatibilità elettromagnetica . 40
4 Assegnazioni funzioni standard per i
   morsetti .................................................... 42
5 Schema di collegamento .......................... 43
6 Istruzioni per la sicurezza ......................... 45
7 Istruzioni per la messa in servizio ............ 46
8 Messaggi di stato ..................................... 49
9 Dimensioni, schemi di foratura e pesi ...... 83
10 Errori e allarmi .......................................... 85
11 Lista dei parametri .................................... 94
12 Dichiarazione di conformità ...................... 96

                                 I2

                                                         3ADW000177R0200_DCS500B_QuickGuide_edisf_b
1    Product description                                                                         DCS 500
                                                                              DC Drive for regenerative

                                                                                                            english
                                                                          or non-regenerative operation
                                                                                       25 to 5200 A DC
                                                                             230 to 1000 V AC 3-phase

MODERN DESIGN                        DEMANDING APPLICATIONS              PROCESS FOCUSED

                                                                                                        R

                                                                                                  NRTL /C

                                  Standard Features
                                  • Design and commissioning tools
                                  • Monitoring functions
                                  • Communication via databus
                                  • Human-machine interface
                                  • More than 300 additional functions
                                    blocks programmable under Windows
                                  • Graphical Application Designer
                                  • Plain text display
                                  • FOR HIGH POWER

    taken from/for further information:                                                     I3
             DCS500B Flyer
              3ADW000151
                                               3ADW000177R0200_DCS500B_QuickGuide_edisf_b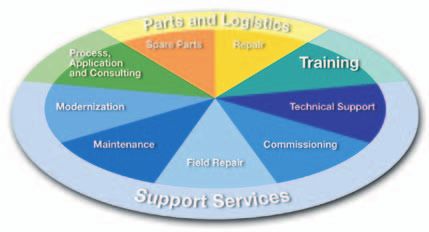
Power spectrum of DCS 500 Converters Technical Data of DCS 500 Converters
DCS 501 non-regenerative Converters (2-Q) Converter Ratings
Continuous at supply Voltage [V AC]
Rated supply voltage: 230 to 1000 V AC ±10%, 3-ph
Frame
Rated frequency: 50 Hz or 60 Hz
Size
Armature
Current 400 500 600 690 790 1000 Dyn. frequency range: 50 Hz: ±5 Hz; 60 Hz: ± 5 Hz
IDC [A]
25 z z DC current range: 25...5200 A DC
50 z z z
75 z z C1 Operating Conditions:
100 z z z Ambient temperature: 0 to +40°C (32...104°F)
125 z z
Storage temperature: -40 to +55°C (-40...130°F)
180 z z
225 z z Relative humidity: 5 to 95%, no condensation
245 z C2 Degree of protection: IP 00
315 z z
405 z z z Dimensions Module
470 z z
mm inches kg frame
610 z z
740 z z C2b h w d h w d size
900 z z
420 273 195 16.54 10.75 7.67 8 C1 (25...75 A)
900 z z
1200 z z 469 273 228 18.46 10.75 8.97 12 C1 (100...140A)
A5
1500 z z z z 505 273 361 19.88 10.75 14.21 29 C2
2000 z z z z 652 273 384 25.66 10.75 15.11 42 C2b
1900 z 1050 510 410 41.34 20.07 16.14 110 A5
2050 z z z A6
A6 1750 460 410 68.90 18.11 16.14 180
2500 z z z z z
3000 z z z z z 1750 760 570 68.90 29.92 22.44 315 A7
2050 z Field supply Protection
2600 z
3300 z z z z z z
• up to 16 A incorporated in the • Speed feedback error
4000 z z z z z z A7 drive module (not for A6 and • Overtemperature
4800 z z z A7-converters) • Overload
5200 z z
• 25...520 A external • Overspeed
• Zero speed
I/O- connections • Armature overcurrent
DCS 502 regenerative Converters (4-Q) • 8 Digital Inputs • Armature ripple
Continuous at supply Voltage [V AC] • 8 Digital Outputs • Armature overvoltage
Frame
• 4 Analogue Inputs • Minimum field current
Size
Armature
Current 400 500 600 690 790 1000
IDC [A]
• 3 Analogue Outputs • Field overcurrent
25 z z • 1 Tachogenerator input • Motor stalled
50 z z z • 1 Encoder input • Mains over- and undervoltage
75 z z C1
z z
• ±10 V Ref. voltage • Auxiliary undervoltage
100
110 z • Multiple fieldbus adapters • Incorrect mains phase sequence
140 z z avail.
200 z z Tools
250 z z CDP 312 Panel GAD
270 z C2
350 z z Removable control and display PC-based application tool
450 z z z panel with plain text display for: for:
520 z z • Reference and feedback display • Drawing
680 z z
820 z z C2b • Drive control • Creating Software func-
1000 z z • Parameter programming tions
900 z z • Fault detection • Documentation
1200 z z A5
1500 z z z z • Parameter upload and download
Serial Communication
2000 z z • Lockable operation
1900 z • Profibus
2050 z z z A6
CMT • CS 31
2500 z z z z z PC-based commissioning tool for: • ModBus
3000 z z z z z
2050 z
• Online Start-up • ModBus+
2600 z • Diagnosis • CANopen
3300 z z z z z z • Maintenance • ControlNet
4000 z z z z z z A7
4800 z z z
• Troubleshooting • DeviceNet
5200 z z • Programming
DCS 500 converters are available
as modules or in cabinets as DCA
500 Enclosed converters.
I4 taken from/for further information:
DCS500B Flyer
3ADW000151
3ADW000177R0200_DCS500B_QuickGuide_edisf_b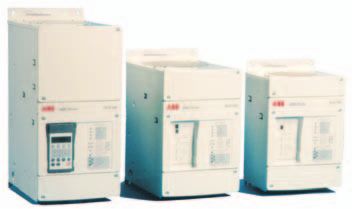
2      Notes, brief instructions CD and documents overview

                                                                                                            english
We are gratified that you have purchased an            System requirements for using the
ABB DC drive power converter, and thank you                        CD-ROM
for the confidence you have displayed in our
products.                                             • Operating system WINDOWS 98, NT, 2000,
                                                          XP
To make sure that you continue to be satisfied        • ACROBAT READER 4.0 sufficient (we rec-
with our product, we have put together this               ommend 5.0 - included on the CD-ROM)
brochure for you. It is intended primarily to         • INTERNET Explorer 5.0 or a later version
provide you with a brief overview of the product's    If the CD ROM won’t start automatically please
key data, EMC notes, typical applications, start-     double-click on START.HTM
up and trouble-shooting.

If you require further information on the product                   Further support
concerned, then in addition to this brief docu-
mentation you are provided with a CD-ROM              In addition, we offer further support, since it's
(this CD-ROM is an integral part of this docu-        only when you as the customer are satisfied with
mentation package) in the five main languages         us and your decision that we can be satisfied
English, German, Italian, Spanish and French,         too.
featuring the following contents:                     Internet
                                                      On the ABB homepage under
              Documentation                                           www.abb.com/dc

Documentation on our product series:                  you'll find abundant information provided on
• DCS400                                              • DC products
• DCS500                                              • service support
• DCS600                                              • the latest updates
                                                      • tools
Our documentation is basically structured on          • downloads, etc.
the following system:                                 Please don't hesitate to visit us there.

System description                                    Contacting us
as comprehensive information on the planning          If you require any further information, please talk
of the overall power converter system.                to your nearest ABB Drives office or send an
                                                      email to:
Technical data
as detailed information, with all important partic-               DC-Drives@de.abb.com
ulars on the individual components, like module       Please give us your name, your company, ad-
dimensions, electronics boards, fans and ancil-       dress and phone number, and we will immedi-
lary components.                                      ately inform you of the contact person responsi-
                                                      ble for you.
Operating instructions
with all the requisite information on starting up
and maintaining the entire drive, in detailed
form.

Software description plus application blocks
required only for programming the drive, availa-
ble only in English and not in printed form.

Service Manual
for maintenance and repair of the units.

Plus sundry information on applications (e.g.
12-pulse) and technical accessories, etc.

                                                                                                      I5

                                             3ADW000177R0200_DCS500B_QuickGuide_edisf_b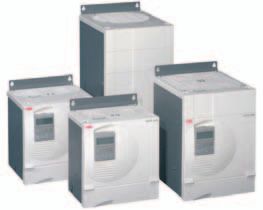
ABB DRIVE SERVICE
In order to offer the same after sales service to
our customer all around the world, ABB has
created DRIVE SERVICE CONCEPT.

ABB productize after sales service and make
our operations globally consistent by creating
common targets, rules, and the way to operate.
To our customer's this means:

•     same service products globally available
•     consistent way of delivery
•     consistency in global agreement
•     consistent and high quality service around
      the world

please visit ABB drive service homepage
www.abb.com/drivesservices

DC Drives Worldwide Service Network
    Country            Local ABB Service           Town              Service Phone No.
    Argentina          Asea Brown Boveri S.A.      BUENOS AIRES      +54 (0) 12 29 55 00
    Australia          ABB                         NOTTING HILL      +61 (0) 3 85 44 00 00
    Austria            ABB AG                      WIEN              +43 1 60 10 90
                                                                     +32 27 18 64 86
    Belgium            ABB N.V.                    ZAVENTEM
                                                                     +32 27 18 65 00 - 24h service
    Brazil             ABB Ltda.                   OSASCO            +55 (0) 11 70 84 91 11
    Canada             ABB Inc.                    SAINT-LAURENT     +1 51 48 32 65 00
    China              ABB China Ltd               BEIJING           +86 10 84 56 66 88
    Czech Republic     ABB S.R.O.                  PRAHA             +42 2 22 83 23 60
    Finland            ABB Oy Service              KUUSANKOSKI       +35 8 10 22 51 00
    Finland            ABB Oy Product Service      HELSINKI          +35 8 10 22 20 00
    Finland            ABB Oy Service              NOKIA             +35 8 10 22 51 40
                       ABB Automation              MASSY             +33 1 64 47 64 26
    France
                       ABB Process Industry        DECINES           +33 4 72 05 40 76
    Germany            ABB Process Industries      MANNHEIM          +49 18 05 12 35 80
    Greece             ABB SA                      METAMORPHOSSIS    +30 1 02 89 16 51
    Ireland            ABB Ireland Ltd.            TALLAGHT          +35 3 14 05 73 00
    Italy              ABB                         MILAN             +39 02 90 34 73 91
    Korea, Republic    ABB Ltd., Korea             CHONAN            +82 (0) 4 15 29 22
    Malaysia           ABB Malaysia Sdn. Bhd.      KUALA LUMPUR      +60 3 56 28 42 65
    Mexico             ABB Sistemas S.A. DE C.V.   TLALNEPANTLA      +52 53 28 14 00
    Netherlands        ABB B.V.                    ROTTERDAM         +31 1 04 07 88 66
    New Zealand        ABB Service ltd             AUCKLAND          +64 92 76 60 16
    Poland             ABB Centrum IT Sp.zo.o      WROCLAW           +48 4 26 13 49 62
    Russia             ABB Automation LLC          MOSCOW            +7 09 59 56 05 44
    Switzerland        ABB AG                      DÄTTWIL           +41 5 85 86 87 86
    Singapore          ABB Industry Pte Ltd        SINGAPORE         +65 67 76 57 11
                                                                     +42 12 49 26 63 69
    Slovakia           ABB Elektro s.r.o.          BANSKA BYSTRICA
                                                                     +42 12 49 26 61 11
    South Africa       ABB South Africa (Pty) Lt   JOHANNESBURG      +27 1 16 17 20 00
                                                                     +34 9 37 28 87 00
    Spain              ABB Automation Products     BARCELONA
                                                                     +34 9 37 28 73 00
    Taiwan             ABB Ltd.                    TAIPEI 105        +88 62 25 77 60 90
    Thailand           ABB Limited                 SAMUTPRAKARN      +66 27 09 33 46
    Turkey             ABB Elektirk Sanayi A.S     ISTANBUL          +90 2 16 36 52 90
    USA                ABB Industrial Products     NEW BERLIN        +1 26 27 85 32 00
    Venezuela          ABB S.A.                    CARACAS           +58 (0) 22 38 24 11 / 12

I6

                      3ADW000177R0200_DCS500B_QuickGuide_edisf_b
DCS 500B documents
english
Language
Public. number E D I ES F SW CN
DCS 500B Quick Guide + CD 3 ADT 645 063
DCS 500B
Flyer DCS 500B 3 ADW 000 151 x x x x x
Winding with the DCS 500 3 ADW 000 058 x x
Flyer Easy Drive 3 ADW 000 071 x x
System description DCS 500B 3 ADW 000 066 x x x x x
Technical data (old) 3 ADW 000 054 x
Technical data (new) 3 ADW 000 165 x x x x x
Operating instructions DCS 500B 3 ADW 000 055 x x x x x x x
Software description DCS 500B 3 ADW 000 078 x x
Application Blocks 3 ADW 000 048 x
Technical Guide 3 ADW 000 163 x
Service Manual 3 ADW 000 093 x x
Planning and Start-up for12-Pulse 3 ADW 000 040 x
converters
CMA-2 Board 3 ADW 000 136 x
Flyer Hard – Parallel 3 ADW 000 153 x
CMT Tool 3 ADW 000 141 x
DDC Tool 3 ADW 000 142 x
GAD Tool, version 2.44-1 DCINF00051 x
Drive-specific serial link interconnect. 3 ADW 000 086 x
Installation according to EMC 3 ADW 000 032 x
DCA 500B / 600
Flyer DCA 500B / 600 3 ADW 000 183 x x
System description DCA 500B / 600 3 ADW 000 121 x x
Installation of DCA 500B / 600 3 ADW 000 091 x x
DCR 500
Flyer DCR 3 ADW 000 007 x x
DCR Manual 3 ADW 000 092 x
Serial interfaces
Installation and Start-up Guide 3 AFY 58920029 x
NCSA-01 (AC31)
Fieldbus Adapter with DC Drives 3 ADW 000 043 x
NCSA-01 (AC31)
Installation and Start-up Guide 3 BFE 64254154 x
NCAN-02 (CANopen) 3 BFE 64484133 x
Fieldbus Adapter with DC Drives 3 ADW 000 149 x
NCAN-02 (CANopen)
Installation and Start-up Guide 3 AFY 64498908 x
NCNA-01 (ControlNet)
Fieldbus Adapter with DC Drives 3 ADW 000 176 x
NCNA-01 (ControlNet)
Installation and Start-up Guide 3 AFY 58919829 x
NDNA-02 (DeviceNet) 3 AFY 64484141 x
Fieldbus Adapter with DC Drives 3 ADW 000 150 x
NDNA-02 (DeviceNet)
Installation and Start-up Guide 3 AFY 58919772 x
NMBA-01 (MODBUS)
Fieldbus Adapter with DC Drives 3 ADW 000 051 x
NMBA-01 (MODBUS)
Installation and Start-up Guide 3 AFY 58919802 x
NMBP-01 (MODBUS PLUS)
Fieldbus Adapter with DC Drives 3 ADW 000 168 x
NMBP-01 (MODBUS PLUS)
Installation and Start-up Guide 3 BFE 64341588 x
NPBA-12 (PROFIBUS) 3 BFE 64459708 x
Fieldbus Adapter with DC Drives 3 ADW 000 156 x
NPBA-12 (PROFIBUS)
DCS 500 B and AC 70 or FCI (CI810)/AV DCINF00059 x
400
I7
3ADW000177R0200_DCS500B_QuickGuide_edisf_b3 Notes on EMC
The paragraphs below describe selection of the • the product's interference immunity
electrical components in conformity with the • the product's actual emissions
EMC Guideline. The EMC Guideline expects EMC to be taken
into account when a product is being developed;
The aim of the EMC Guideline is, as the name however, EMC cannot be designed in, it can
implies, to achieve electromagnetic compatibil- only be quantitatively measured.
ity with other products and systems. The guide- Note on EMC conformity
line ensures that the emissions from the product The conformity procedure is the responsibility of
concerned are so low that they do not impair both the power converter's supplier and the
another product's interference immunity. manufacturer of the machine or system con-
In the context of the EMC Guideline, two aspects cerned, in proportion to their share in expanding
must be borne in mind: the electrical equipment involved.
First environment (residential area with light industry) with restricted distribution
Not applied, since general distribution sales channel excluded
Not applicable satisfied
satisfied
Medium-voltage network Medium-voltage network
Residential area Supply transformer for a residential Light industry Supply transformer for a residential
area (rating normally ≤ 1,2 MVA) area (rating normally ≤ 1.2 MVA)
Residential area
Earthed
neutral
Earthed
neutral Earthed public 400-V Earthed public 400-V Earthed public 400-V
network with neutral network with neutral network with neutral
conductor conductor conductor
To other loads which have to be protected from the system disturbances caused by
To other loads which have to be protected from the system disturbances caused by
power converters (HF interference and commutation notches)
power converters (HF interference and commutation notches)
To other loads, e.g. drive systems
To other loads, e.g. drive systems
To other loads, e.g. drive systems
Mains filter Mains filter Mains filter
Line reactor +
Line reactor Y-capacitor Line reactor Line reactor
Converter Converter Converter Converter Converter Converter
alternative
alternative
M M M M M M M M
Operation at public An isolating transformer Operation at public Operation at public An isolating transformer
low-voltage network with an earthed screen low-voltage network low-voltage network with an earthed screen
together with other and earthed iron core together with other together with other and earthed iron core
loads of all kinds. renders mains filter and loads of all kinds. loads of all kinds. renders mains filter and
line reactor superfluous. line reactor superfluous.
Classification
I8 for further information:
Technical Guide
3ADW000163 - chapter 2.1
3ADW000177R0200_DCS500B_QuickGuide_edisf_bFor emitted interference, the following apply:
For compliance with the protection objectives of EN 61000-6-3 Specialised basic standard for emissions in light industry can
the German EMC Act (EMVG) in systems and be satisfied with special features (mains filters, screened power
cables) in the lower rating range *(EN 50081-1).
english
machines, the following EMC standards must
EN 61000-6-4 Specialised basic standard for emissions in industry
be satisfied:
*(EN 50081-2)
Product Standard EN 61800-3
For interference immunity, the following apply:
EMC standard for drive systems (PowerDriveSys-
EN 61000-6-1 Specialised basic standard for interference immunity in residen-
tem), interference immunity and emissions in resi-
tial areas *(EN 50082-1)
dential areas, enterprise zones with light industry
EN 61000-6-2 Specialised basic standard for interference immunity in indus-
and in industrial facilities.
try. If this standard is satisfied, then the EN 61000-6-1 standard
This standard must be complied with in the EU for is automatically satisfied as well *(EN 50082-2).
satisfying the EMC requirements for systems and
machines! * The generic standards are given in brackets
Standards Classification
Second environment (industry) with restricted distribution EN 61800-3 The following overview
utilises the terminolo-
Not applicable EN 61000-6-3 gy and indicates the
action required in ac-
satisfied on customer's request satisfied EN 61000-6-4
cordance with Product
EN 61000-6-2 Standard
satisfied EN 61800-3
EN 61000-6-1
For the DCS 500B se-
ries, the limit values for emitted
Medium-voltage network Medium-voltage network interference are complied with,
Industrial zone
Supply transformer for a
residential area (rating Industrial zone Converter provided the action indicated is
transformer
normally ≤ 1.2 MVA) with earthed carried out. This action is based
Converter
transformer on the term Restricted Distri-
Earthed iron core bution used in the standard
neutral Earthed 400-V network
(and earthed I > 400 A
with neutral conductor;
screen where and/or (meaning a sales channel in
appropriate)
3~ ≤ 400 A U > 500 V
which the products concerned
can be placed in the stream of
commerce only by suppliers,
customers or users which indi-
vidually or jointly possess tech-
nical EMC expertise).
To other loads, e.g. drive systems
To other loads, e.g. drive systems
Case-referenced EMC analysis
For power converters without
Mains filter additional components, the fol-
lowing warning applies:
This is a product with restrict-
ed obtainability under IEC
61800-3. This product may
cause radio interference in
Line reactor +
Y-capacitor Line reactor Line reactor residential areas; in this case,
it may be necessary for the
operator to take appropriate
action (see adjacent dia-
grams).
Converter Converter Converter Converter
alternative
alternative
alternative
alternative
The field supply is not depicted in
this overview diagram. For the
field current cables, the same
M M M M M M M M rules apply as for the armature-
Operation at low-voltage network together with Operation with separate power converter transformer. If there
circuit cables.
other loads of all kinds, apart from some kinds are other loads at the same secondary winding, these must be
of sensitive communication equipment. able to cope with the commutation gaps caused by the power Legend
converter. In some cases, commutating reactors will be Screened cable
required.
Unscreened cable with restriction
for further information: I9
Technical Guide
3ADW000163 - chapter 2.1
3ADW000177R0200_DCS500B_QuickGuide_edisf_b4 Standard function assignments for the terminals
(Digital and analogue I/O connection of the SDCS-CON-2)
SDCS-CON-2 Software Reso- Input/output Scaling Power Common Remarks
- lution values by mode
90-270 V
X3:1 [bit] Hardware range
X2:
-
30-90 V
2 S4
R2716
-
8-30 V 1 2 100k 100k
±90...270 V Tachometer
3 1n AITAC
4
+ 5 3 4 100k 1n 100k 12 + sign ±30...90 V R 2716/ ±20 V ➀➁➂➃
6 GND
- ±8...30 V Software
5 speed reference
+ AI1
6 22 K 12 + sign -10...0...+10 V Software ±20 V ➀➁➂
- +10V
7 S1:23-24
torque reference
+ AI2 11 + sign -10...0...+10 V Software ±40 V ➀➁➂
8
-
9 not used
+
AI3 11 + sign -10...0...+10 V Software ±40 V ➀➁➂
10
not used
X4:1
AI4 11 + sign -10...0...+10 V Software ±40 V ➀➁➂
2
3 0V
4 +10V
≤5 * mA for external use
5 -10V
≤5 * mA e.g. reference pot.
6 0V (AOx)
100µ 47.5
7 AO1
100n 11 + sign -10...0...+10 V Software ≤5 * mA speed feedback
8 AO2
11 + sign -10...0...+10 V Software ≤5 * mA armature voltage
9 analogue ±3 V fixed ≤5 * mA 3V=^ nom. conv. curr.
10 0V
+/- I-act Encoder supply Remarks
S1: S1:
X5:1 4 5 6 +24V 1 2 3
ChA +
2 ChA - Inputs not isolated
Impedance = 120 Ω, if selected
3 ChB +
10 11 12 +24V 7 8 9 max. frequence ≤300 kHz
4 ChB -
5 +24V 1314 15 ChZ +
16 17 18
6 ChZ -
7 GND
Sense lines for GND and supply to correct volt-
8 Sense GND age drops on cable (only if 5V/12V encoder is in
9 Sense Power + use)
10 Power-Source 5V/ ≤0.25 mA * Selectable on POW-1 board
12V/24V ≤0.2 mA *
4.75k 47.5k
X6:1 220n
DI1
10k
2 DI2 Input value Signal definition Remarks
by Software
3 DI3
DI1 - Converter fan
4 DI4 0...8 V DI2 - Motor fan ^ "0" status
=
5 DI5 16...60 V DI3 - Main contactor ^ "1" status
=
DI4 - FREE
6 DI6 DI5 - Emergency stop see also System description
7 DI7 DI6 - Reset chapter 2
DI7 - On/Off
8 DI8 DI8 - Start/Stop
9 +48 V/ ≤50 mA
10 Output value Signal definition Remarks
+24V
X1:
100µ DO1 by Software
X7: 1
100n DO1 - Conv. fan contactor
2 DO2 DO2 - Field supply contact. see also System description
3 DO3 DO3 - Main contactor chapter 2
DO4 - Ready for operation
4 DO4 50 * mA DO5 - Operation
Current limit for all 7 outputs =
5 DO5 DO6 - Free 160 mA
DO7 - Free Do not apply any reverse
6 DO6
voltages!
7 DO7
8 0V
➀ total smoothing time ≤2 ms
The terminal connectors X3: ... X7: and X16: are removable. When ➁ -20...0...+20 mA by external 500 Ω resistor
connecting the terminal blocks to the CON-2 board, please start with ➂ 4...20 mA by ➁ + Software function
the left connector at first and make sure, that they will be placed on
➃ Remove jumper S4:1-2 and 3-4 if SDCS-IOB-3 is used
the board in the correct sequence and without spaces in between.
* short circuit proof (but a short-circuit can cause a malfunction of the drive)
Terminal connection of SDCS-CON-2 board
I 10 taken from/for further information:
Technical data
3ADW000165 - chapter 3
3ADW000177R0200_DCS500B_QuickGuide_edisf_b5 Connection example
Standard drive configuration using an internal field
english
Wiring the drive according to this diagram gives the most flexibility and offers the highest degree of standard monitoring functions done
by the drive. There are no software modifications to adapt the drive to the external wiring.
A C Voltage levels D E
L1 N L1 L2 L3 see description L1 N L1 L2 L3
T2
230V F1
690V
660V
600V
1 1 1 575V 1 3
F2 T3
F7 F5 F8 525V
115V
2 2 2 500V 2 4 500V
450V F6 1 3 5 13
460V
415V F3 415V
K15 400V 400V
380V 14
365V
350V
X96:1 265V I> I> I>
OFF STOP
K10 K11 250V 2 4 6
90V
X96:2 60V
START 30V
ON 13 X2:4
K1 K21 F6
14
X2:5
1 1 3 1 3 5 1 3 1 3 5
EMER. K1 K3 K6
K8
STOP S1 2 4 2 4 6 2 4
K20 2 4 6
2
K20 K21 K6 K8 K3 K1 K15 L1 L3
X96: 1 2 X99: 1 2 X2: 4 5 X2: 1 2 3 U1 V1 W1 PE X1: 1 7
Communication
IN3 V5 board (COM-x) Control board (CON-2)
OUT3 V6 M
DO8 ~
IN1 V1
Power supply depending on the unit type
OUT1 V2 (POW-1) an other configuration is possible
S4 Converter Field exciter unit
5 6 module (SDCS-FEX-1/2)
X33 AITAC AI1 AI2 AI3 AI4
_ + _ + _ + _ + _ + +10V -10V AO1 AO2 IACT DI1 DI2 DI3 DI4 DI5 DI6 DI7 DI8 +48V DO1 DO2 DO3 DO4 DO5 DO6 DO7
0V 0V 0V 0V 0V
X3: 1 2 3 4 5 6 7 8 9 10 X4: 1 2 3 4 5 6 7 8 9 10 X6: 1 2 3 4 5 6 7 8 9 10 X7: 1 2 3 4 5 6 7 8 X5: 1...10 C1 D1 X1: 5 3
_ _
+ +
e.g. Pressure K6 1 K20
switch at C4
module S1
K10
2
K1 K11
K8 K21
if there are intermediate terminals the polarities are shown for motor operation V
U W
T M M
3~
+
T
_
Standard drive configuration using an internal field
• Selection of components
For this wiring diagram a DCS 500B converter construction type C1 / C2 / A5 was selected together with a SDCS-FEX-1 or 2 field supply. This field supply
can be used at line voltages up to 500V and will give field current up to 6 / 16A. For higher field currents, use the next bigger field supply unit DCF 503A/
504A (for wiring see System description chapter 3.3/1) or a 3-phase supply DCF 500B (wiring is shown at System description chapter 3.5/2).
• Power supply
There are several components, which need a power supply:
- Converter´s power part: 200 V to 1000 V, depending on converter type; see System description chapter 2
- Converter´s electronics power supply: 115V or 230V, selectable by jumper
- Converter cooling fan: 230V 1-ph; see Technical Data
- Power part field supply: 115 V to 500 V; together with an isolating / auto transformer up to 600 V; see System description
chapter 2 and / or Technical Data
- Motor cooling fan: depending on motor manufacturer / local demands
- Relay logic: depending on local demands
The fuses F1 are used because the converter construction type C1 and C2 don´t have them build in. All components, which can be fed by either 115/230 V
have been combined and will be supplied by one isolating transformer T2. All components are set to 230 V supply or selected for this voltage level. The different
consumers are fused separate. As long as T2 has the right tappings it can be connected to the power supply, used to feed the converter´s power part.
The same can be applied to the field supply circuit. There are two different types of matching transformers available. One can be used for supply voltages
up to 500 V, the other for voltages up to 690 V. Do not use the 690 V primary tapping together with the SDCS-FEX-1/2 field supply!
Depending on the motor fan voltage the power can be taken from the same source which is used for the converter´s power part.
In case the power for A, D and E should be taken from the source, used for C, a decision must be made, whether the fuses F1 can be used for two reasons
(protection of the power part + auxiliary power supply) or not.In addition it has to be checked, if the consumers can be supplied with this voltage wave form
(see System description chapter 2 Line Chokes) before connecting to C. If the converter is supplied directly by a high-voltage converter transformer at point
C, additional conditions are to be considered during engineering of the drive (more details on request).
taken from/for further information: I 11
System description
3ADW000066 - chapter 3
3ADW000177R0200_DCS500B_QuickGuide_edisf_b• Control
The relay logic can be split into three parts:
a: Generation of the ON/OFF and START/STOP command:
The commands represented by K20 and K21 (latching interface relay) can be generated by a PLC and transferred to the
terminals of the converter either by relays, giving galvanic isolation or directly by using 24V signals. There is no absolute
need to use hardwired signals. These commands can be transferred via a serial link system too. Even a mixed solution
can be realized by selecting the one or the other possibility for the one or the other signal.
b: Generation of control and monitoring signals:
The main power contactor K1 for the armature circuit is controlled by a dry contact located on the electronic power supply
board. The status of this contactor is checked by the converter via binary input 3. The field supply contactor K3 is controlled
by the auxiliary contact K11 connected to a binary output of the converter. The binary outputs consist of relay drivers,
capable to give appr. 50 mA each and a current limitation of around 160 mA for all of the outputs. The contactors K6 and
K8 control the fans of the drive system. They are controlled by the auxiliary contact K10 (similar to K11). In series with
K6 is an auxiliary contact of the circuit breaker F6, which monitors the motor fan supply. For the converter fan supply
monitoring the contact of the temperature detector is used in series with K8. Auxiliary contacts K6 and K8 are used and
connected to the binary inputs 1 and 2 to monitor the status of the fan supplies by the converter. The function of K15 is
described at the next point.
c: Stop mode beside ON/OFF and START/STOP:
This chapter tries to explain the reaction of the drive when the input named EMERGENCY_STOP (906) or COAST_STOP
(905) is operated. Please take the external wiring used for this explanation as an example only!
For EMERGENCY STOP different preconditions have to be taken into account. This description focus on the functionality
and does not take special safety conditions depending on the type of machine into account.
In this case, if emergency stop is hit, the information is transferred to the converter via binary input 5. The converter will
act according to the function programmed (stop by ramp, current limit or coasting). If the converter will not manage to get
the drive to standstill within the time set at K15, the auxiliary contact will switch off the control
power. Because of this the main power contactors K1 and all the others will be switched K16
off. This may result in failure of components (see Operating Instructions). This danger can
be minimized by adding another time delay (grey-shaded parts below). By doing so another ELEC.
DISCONN.
stop mode is available.
- Emergency stop signal initializes the ramp down function inside the converter in that way 1
described before. If the drive comes to standstill within the time specified by K15, the EMER.
STOP S1 K15
converter will switch off the main power contactor K1. If the converter doesn´t manage to
get the drive to standstill within this time, K15 will start the function ELECTRICAL 2
DISCONNECT with the time delay specified by K16. This information will be transferred to K15 K16
the converter to a free binary input. This input has to be connected to the COAST_STOP
input of the drive logic. The COAST_STOP input forces the current down to zero as fast as
possible. The delay time of K16 has to be slightly higher than the time needed by the current
controller to get the current to zero. When the time K16 has elapsed the control voltage will
CON-2
be switched off and all power contactors will drop off. DIx X6:9
K15
- If no care should be taken to the speed of the drive the function of K16 can be initialized
by the command ELECTRICAL DISCONNECT.
d: Main contactor handling by the PLC only because of safety reasons:
This mode is not recommended to be used as a standard switch on or switch off sequence. Nevertheless it is sometimes
used to fulfill safety regulations or other needs. In such cases it´s recommended to follow the next guidelines:
- It´s assumed that the PLC´s contact is in serial with the K1 (underneath the terminals named X96: 1 and 2) or in serial
with the auxillary contact of K16 or replaces this one
- Switching off the main power contactor in regenerative mode may result in failure of components (see Operating
Instruction)
- The PLC generates the command “main contactor off”. Two types of contacts are needed:
- A pretriggered contact should then be connected to an unused binary input of the converter; this input has to be connected
to the signal START_INHIBIT (908). This will block the controllers, trying to get the current to zero and switch off the main
contactor from the converter point of view (independent, if the converter´s command is used or not).
- A normal contact can then handle the main contactor.
- Caused by the final timing alarms or error may be detected; they should be reset or bypassed (e.g. by the auto reclosing
function
• Sequencing
When the ON command is given to the converter and there is no error signal active, the converter closes the fan, field and
main contactor, checks the supply voltage and the status of the contactors and without error messages, releases the
regulators and starts waiting for the RUN command. When the RUN command is given, the speed reference is released and
speed control mode is active (for more details, see Software Description).
I 12 taken from/for further information:
System description
3ADW000066 - chapter 3
3ADW000177R0200_DCS500B_QuickGuide_edisf_b6 Safety and operating instructions
english
for drive converters DCS / DCF / DCR
(in conformity with the low-voltage directive 73/23/EEC)
1. General 4. Installation
In operation, drive converters, depending on their degree of The installation and cooling of the appliances shall be in accord-
protection, may have live, uninsulated, and possibly also moving ance with the specifications in the pertinent documentation.
or rotating parts, as well as hot surfaces.
The drive converters shall be protected against excessive
In case of inadmissible removal of the required covers, of strains. In particular, no components must be bent or isolating
improper use, wrong installation or maloperation, there is the distances altered in the course of transportation or handling. No
danger of serious personal injury and damage to property. contact shall be made with electronic components and contacts.
For further information, see documentation. Drive converters contain electrostatic sensitive components
which are liable to damage through improper use. Electric
All operations serving transport, installation and commissioninng components must not be mechanically damaged or destroyed
as well as maintenance are to be carried out by skilled technical (potential health risks).
personnel (Observe IEC 364 or CENELEC HD 384 or DIN VDE
0100 and IEC 664 or DIN/VDE 0110 and national accident 5. Electrical connection
prevention rules!). When working on live drive converters, the applicable national
accident prevention rules (e.g. VBG 4) must be complied with.
For the purposes of these basic safety instructions, “skilled The electrical installation shall be carried out in accordance with
technical personnel” means persons who are familiar with the the relevant requirements (e.g. cross-sectional areas of conduc-
installation, mounting, commissioning and operation of the tors, fusing, PE connection). For further information, see docu-
product and have the qualifications needed for the performance mentation.
of their functions.
Instructions for the installation in accordance with EMC require-
2. Intended use ments, like screening, earthing, location of filters and wiring, are
Drive converters are components designed for inclusion in contained in the drive converter documentation. They must
electrical installations or machinery. always be complied with, also for drive converters bearing a CE
marking. Observance of the limit values required by EMC law is
In case of installation in machinery, commissioning of the drive the responsibility of the manufacturer of the installation or
converter (i.e. the starting of normal operation) is prohibited until machine.
the machinery has been proved to conform to the provisions of
the directive 89/392/EEC (Machinery Safety Directive - MSD). 6. Operation
Account is to be taken of EN 60204. Installations which include drive converters shall be equipped
with additional control and protective devices in accordance with
Commissioning (i.e. the starting of normal opertion) is admissible the relevant applicable safety requirements, e.g. Act respecting
only where conformity with the EMC directive (89/336/EEC) has technical equipment, accident prevention rules etc. Changes to
been established. the drive converters by means of the operating software are
admissible.
The drive converters meet the requirements of the low-voltage
directive 73/23/EEC. They are subject to the harmonized stand- After disconnection of the drive converter from the voltage supply,
ards of the series prEN 50178/DIN VDE 0160 in conjunction with live appliance parts and power terminals must not be touched
EN 60439-1/ VDE 0660, part 500, and EN 60146/ VDE 0558. immediately because of possibly energized capacitors. In this
respect, the corresponding signs and markings on the drive
The technical data as well as information concerning the supply converter must be respected.
conditions shall be taken from the rating plate and from the
documentation and shall be strictly observed. During operation, all covers and doors shall be kept closed.
3. Transport, storage 7. Maintenance and servicing
The instructions for transport, storage and proper use shall be The manufacturer’s documentation shall be followed.
complied with.
The climatic conditions shall be in conformity with prEN 50178. Keep safety instructions in a safe place!
taken from/for further information: I 13
Safety instructions
3ADW000033
3ADW000177R0200_DCS500B_QuickGuide_edisf_b7 Short start-up
Operating the panel
Panel (control and display panel) Equipment
The CDP 312 control and display panel commu- • 16 membrane pushbuttons in three function
nicates with the power converter via a serial groups
connection in accordance with the RS 485 stand- • LCD display comprising four lines with 20
ard at a transmission rate of 9.6 kBaud. It is an characters each
option for the converter unit. After completion of • Language: German, English, French, Italian,
the commissioning procedure, the panel is not Spanish
necessarily required for diagnostic routines, • Options for the CDP 312:
because the basic unit incorporates a 7-seg- – cable, separated from the power converter
ment display for indicating errors, for example. for utilization
– kit for mounting the panel in the switchgear
cubicle door
Parameters Function
For selecting and adjusting Selects the “functions” operating mode; can be used
all parameters and signals. to perform special functions such as uploading and
0 L 0,0 rpm 00 downloading or application programming.
Group
and name 17 RAMP GENERATOR
Subgroup 08 ACCEL 1
and name Status row 0 L 0,0 rpm 00
20.0 s
Value Functions to be UPLOAD
Display contrast CONTRAST
setting
Actual
Selects the display of feedback values plus the
signal group and the error memory group. Drive
for subsequent extensions
ID number Control Speed Main contactor Run status
of the location reference status 1 = Run
drive L = local rpm 0 = open 0 = Stop
selected = remote 1 = closed
Enter
is used in the following modes:
Status row 0 L 0,0 rpm 00 Parameter setting: enter new parameter value
Actual signal SPEEED ACT 0,0 rpm Feedback value
name and value CONV CUR 0 A signal display: enter the current signal selec-
Cursor shows
U ARM ACT 0 V tion mode
the row selected Signal selection: accept selection and return to
the feedback value signal dis-
play mode
Twin arrow keys
are used to change the group. In the parameter and Arrow keys
reference presetting modes, you can alter the param- are used to select parameters within a group. You al-
eter value or the reference setting ten times faster by ter the parameter value or the reference setting in the
means of the twin arrow keys than by means of the parameter and reference presetting modes. In the
single arrow key. feedback signal display mode, you select the line you
want.
Local/Remote
is used to select local (control
panel) or remote control. Start
starts the drive in local mode.
Reset
Error acknowledgement key. Stop
1 = last fault shuts the drive down if you are in local mode.
2 = last-but-one fault 0 L 0,0 rpm 00
99 = last-but-98 fault 1 LAST FAULT
Name of Fault
or alarm Emergency stop Reference
Total time after 3212:59:35:56
switch-on is used to activate the reference presetting mode.
HHHH:MM:SS.ss
On Off
in local mode switches the main contactor on. in local mode switches the main contactor off.
Function keys and various displays on the removable control and
display panel. The panel can also be used to load the same pro-
gram on different power converters.
I 14 taken from/for further information:
System description
3ADW000066 - chapter 2
3ADW000177R0200_DCS500B_QuickGuide_edisf_bStart-up
english
Danger! High voltage: this sym- 1 Preparations
bol warns of high voltages which • Check unit for any damage!
may result in injuries to persons • Install unit, and wire it up
and/or damage to equipment. The • Supply voltage level / Rated value correct for electronics and fan?
text beside this symbol describes, • Supply voltage level / Rated value correct for armature-circuit con-
where appropriate, options for verter?
avoiding this hazard. • Supply voltage level / Rated value correct for field supply?
• Wiring / cross-sections, etc. correct?
General warning: this symbol • EMERGENCY STOP functioning properly?
warns of non-electrical dangers,
which may result in serious or
even fatal injuries to persons and/ 2 Standardising signals inside the unit
or damage to equipment. The • If a serial interface is to be used for exchanging data with the unit, then
text beside this symbol describes, first the optical link between the power converter and the field bus
where appropriate, options for adapter must be disconnected by withdrawing the cables at V260.
avoiding this hazard. • Connect the electronics power supply
• 522 = English
Warning of electrostatic dis- • 501 = Rated motor voltage
charge: this symbol warns of • 502 = Rated motor current
electrostatic discharges which • 507 = Rated line voltage
may result in damage to equip- • In the case of units above 2050 A: see Operating Instructions Manual
ment. The text beside this symbol
describes, where appropriate, op-
tions for avoiding this hazard. 3 Presetting the field supply unit
• Switch on power via ON/OFF input
• Is the phase sequence correct (no F38 indication)?
• Alter 506 if necessary
Uncontrolled field Controlled field with: Controlled field with:
General instructions
with: SDCS-FEX-1 SDCS-FEX-2 DCF 501B /
• This short start-up routine is referenced to
• 505 = DIODE FIELD DCF 503A / 504A DCF 502B
Chapter 5 Connection diagram of this pub- EXCIT • 505 = FEX2 OR FEX3 see Operating Instruc-
lication.
• 503 = Rated motor tions Manual
• Safety instructions - see at the beginning
field current
of the chapter. • 1305 = Underexcita-
• Recommendations for motor and field volt-
tion signal
ages (see System description / Operating
instructions). • Switch off power via ON/OFF input
• In accordance with DIN 57 100 Part 727 / • 11202 = SAVE MOT1 SET (save setting)
VDE 0100 Part 727, precautions must be
taken to enable the drive to be shut down,
e.g. in the event of danger. The unit's binary 4 Autotuning current controller
inputs or the control panel are not sufficient • 1201 = ARM. AUTOTUNING
as the sole measure for this purpose! • Switch on power via ON/OFF input
• Start drive via RUN input within the next 20 s.
If NOT ACTIVATED appears in the If a different text appears in the
panel, this means the action has display, this means the action has
Parameter entry been completed correctly; stop the not been completed correctly.
Examples for entering parameters: drive; if armature current is flowing see Operating Instructions Manual
501 = Enter rated motor voltage (sys- nevertheless, increase value of the
tem-dependent value) nmin signal (2201).
11202 = SAVE MOT1 SET (select setting) • Switch off power /drive via inputs
1201 = ARM. AUTOTUNING (select set- • 11202 = SAVE MOT1 SET (save
ting) setting)
taken from/for further information: I 15
Operating instructions
3ADW000055 - chapter 2
3ADW000177R0200_DCS500B_QuickGuide_edisf_b5 Speed feedback balancing 7 Balancing the speed controller, and fine-
• 2102 = EMF SPEED ACT balancing the EMF controller and current
• 1001 = CONSTANT FIELD controller
• 2103 = desired speed / or motor rating plate • 1701 = 11206 (change between POT1 and POT2
• 1701 = 12516 (internal reference source activated) activated)
• 12516 = 2000 (internal reference = 10 % of 501) • 1708 = 0.1 s (ramp-up time)
• Switch on power via ON/OFF input. • 1709 = 0.1 s (run-down time)
• Start drive via RUN input; drive should now turn at 10 % of rated • 1204 = 10 % … 20 % nmax(POT1; 20000 = ^ 100
voltage. % nmax)
• 1205 = 0 (POT2)
Analogue tacho: Encoder (pulse encoder): EMF con- • 1206 = as per necessary test condition (PERI-
• Connect measuring instrum. to: • Check wiring; signal trol: OD)
- to X3: (PS5311 → X1:) 1…3 12104 must become • Drive • Switch on power via ON/OFF input
+ to X3: (PS5311 → X1:) 4 steadily greater should • Start drive via RUN input; drive should turn at
Measured value must have posi- • Switch off power; drive turn at speeds corresponding to POT1/POT2
tive sign! will coast 10 % • 2014 / 2018 set the controller´s behaviour you
• Right input for tacho? • 2101 = number of en- want
• Potentiometers R9, R48, R2716 at coder pulses
left stop? • 2102 = ENCODER A+- Only when you want to perform fine-balancing of
• Switch off power; drive will coast. , B+- EMF controller or fine-balancing of current control-
• 101 = TACHO VOLT. +/-10 • Switch on power via ON/ ler: see Operating Instructions Manual
• 2102 = ANALOG TACHO OFF input; drive should
• Switch on power via ON/OFF in- turn at 10 % of 2103 • 1204 = 0
put; drive should turn. • 1205 = 0
• Set speed to 10 % nmax with R9, • Stop drive via RUN input, switch off power via
R48, R2716. ON/OFF input
• 1701 = 11903
• 11202 = SAVE MOT1 SET (save setting)
• Stop drive via RUN input, switch off power via ON/OFF input.
• 11202 = SAVE MOT1 SET (save setting)
8 Adapting control unit to system condi-
tions
Convention- Control via serial interface:
6 Balancing the field supply unit and EMF controller al control at • 1214 = MACRO 4 (linking the in-
Fine-adjustment of the speed feedback the power puts/outputs as per field bus ap-
Constant field current con- Field weakening control with setting Field wea- converter, plication).
trol: range 1:1.5:
ly to 20000 = ^ 100 % start drive via RUN input trol panel. • 4002 to 4015 = settings as per
see
while measuring the • 12516 = increase slowly to 20000 =^ field bus adapter being used.
Operating • 11202 = SAVE MOT1 SET
motor voltage; it must 100% while measuring the motor Instruc-
not exceed the recom- voltage /speed; it must not exceed • Switch the electronics supply of
tions Ma- the DCS 500B and of the field bus
mended motor voltage! the recommended motor voltage/ nual
• Measure speed with a speed! See also Operating Instruc- adapter off and on again.
hand held tacho; cor- tions Manual • Establish communication between
rect if necessary with • Measure speed with hand held ta- the control system and the DCS
R9, R48, R2716; keep cho; correct if necessary with R9, 500B; EMERGENCY STOP via
motor voltage under R48, R2716; keep motor voltage Terminal X4:5 is active; for further
observation (see above) under observation (see above) instructions, see manual entitled
• 12516 = 0 • 12516 = 0 Description of drive-specific serial
• Switch off power and • Switch off power and thus stop the link interconnections
thus stop the drive drive
• 11202 = SAVE MOT1 SET (save
setting)
- ramp function generator
- binary inputs and outputs
- limit value signals
- additional functions
- etc.
End of short start-up routine
I 16 taken from/for further information:
Operating instructions
3ADW000055 - chapter 2
3ADW000177R0200_DCS500B_QuickGuide_edisf_b8 Status messages
english
Categories of mes- The thyristor power converters from the DCS 500B/DCF 500B se-
sages and display ries output general messages / power-up errors / error and alarm
options messages with the aid of a seven-segment display on the SDCS-
CON-x processor board. The messages appear as codes. In the
case of multi-character codes, the individual letters/digits are
displayed in succession for 0.7 s at a time.
Additionally, in conjunction with the LC display of the CDP 31x dis-
play and control unit, the error and alarm messages and the status
messages are available in plaintext.
General messages They appear only on the seven-segment display of the SDCS-CON-
x processor board.
Description Remark
8 Program not running (1)
. Normal state, no error/alarm messages
L Display if a different firmware package is loaded into the
drive
(1) Switch units off and on again electrically; if the error recurs, check the SDCS-
POW-1 and SDCS-CON-x boards, and replace if necessary.
Power-up error (E) Power-up errors appear only on the seven-segment display of the
SDCS-CON-x processor board. The drive cannot be started up.
Description Remark
E1 Error in ROM test (1)
E2 Error in RAM test (1)
E3 TC connection board missing
(not with software version S21.1xx)
E4 Communication board SDCS-CON-x faulty (2)
E5 No program for closed- and open-loop control in memory (3)
E6 ASIC not OK (1)
E7 Parameter FLASH identification failed (1)
(1) Switch units off and on again electrically; if the error recurs, check the SDCS-
POW-1 and SDCS-CON-x boards, and replace if necessary.
(2) Check communication board, plug on correctly, and replace if necessary.
(3) Reload firmware.
Error messages (F) Error messages appear on the seven-segment display of the
SDCS-CON-x computer board as Code F .. and on the LC display
of the CDP 31x display and control unit as text. All error messages
(with the exception of F 17, F 18 and F 44) are (following elimination
of the error concerned) resettable; F 20 is self-resetting, if the
communication function has been restored beforehand. To reset er-
ror messages, the following steps are required:
- Cancel the ON/OFF and RUN commands
- Eliminate the cause of the error
- Acknowledge error with the RESET command at the CDP 31x
panel or by briefly setting the RESET command via binary in-
put/serial interface
- Depending on the system conditions involved, generate the
ON/OFF and RUN commands anew.
Error messages lead to cancellation of the signal [10910] and to the
drive being completely or partially switched off.
taken from/for further information: I 17
Operating instructions
3ADW000055 - chapter 4
3ADW000177R0200_DCS500B_QuickGuide_edisf_bAlarm messages (A) Alarm messages appear on the seven-segment display of the
SDCS-CON-x computer board as Code A … and on the LC display
of the CDP 31x display and control unit as plaintext. They are
displayed only if no error message is active. Alarm messages (with
the exceptions of A 101 and A 102) do not cause the signal 10910
to be cancelled or the drive to be switched off.
Note The error and alarm messages are listed in several languages in
Chapter 10.
Status signals The status of the drive functions (autotuning controllers, saving va-
lues) is indicated by the status signals 11201 and 11202. The sta-
tus of the first and/or second field supply unit, the torque control
and the current controller is indicated by the signals 11203 to
11205, and is regularly updated by the power converter software,
enabling users to check it when one of the three signals is selec-
ted.
Depending on the unit being used (CDP 31x or CMT Tool), plain-
text or a number will be shown on the display/screen. This number
constitutes a code, which is equivalent to the plaintext for signal
11201; for all others, it is a binary-coded decimal number (the 16-
bit word with the binary value for each signal is converted into de-
cimal).
Parameter Code/Bit Description / Explanation of signals
11201 0...49 COMMIS_STAT: result of a drive function. Provides as feedback the sta-
tus information when the parameter DRIVEMODE (1201) was used to
start a drive function.
50...61 Provides as feedback the status information when the parameter
DRIVEMODE (1201) was used to start the drive functions 3, 5 or 6 (auto-
tuning).
11202 0...6 BACKUPSTOREMODE: status of this operating mode. This operating
mode is used to pass commands to the drive’s parameter handling routi-
ne.
7...17 During command execution, the value of BACKUPSTOREMODE shows
what is happening, or the cause of the error if the command fails.
11203 -- FEXC_STATUS: status of field exciters 1 and 2
11204 -- TC_STATUS: status of the torque control
11205 -- BC: current controller status. If the value of BC = 0, everything is in order.
Otherwise, the different bits of BC will indicate the cause of the current
controller disable.
I 18 taken from/for further information:
Operating instructions
3ADW000055 - chapter 4
3ADW000177R0200_DCS500B_QuickGuide_edisf_b1 Produktbeschreibung DCS 500
Gleichstromantrieb für 2-Quadrant oder
4-Quadrant-Anwendungen
25 bis 5200 A DC
230 bis 1000 V AC 3~
deutsch
MODERNES DESIGN ANSPRUCHSVOLLE ANWENDUNGEN PROZESS ORIENTIERT
R
NRTL /C
Standard Merkmale
• Programmier- und Inbetriebnahme Tools
• Überwachungsfunktionen
• Kommunikation über Datenbus / MMK
(Mensch-Maschine-Kommunikation)
• Mehr als 300 zusätzliche unter Windows
programmierbare Funktions-
blöcke
• Graphical Application Designer
• Klartextanzeige am Display
• Auch für sehr große
Leistungen einsetzbar
entnommen aus/weitergehende Informationen: I 19
DCS500B Flyer
3ADW000151
3ADW000177R0200_DCS500B_QuickGuide_edisf_bLeistungsübersicht der DCS 500 Stromrichter Technische Daten DCS 500 Stromrichter
DCS 501 Geradeausstromrichter (2-Q) Stromrichter Kenndaten
Ankerdauer- Bei einer Speisespannung von [V AC]
Nennanschlußspannung: 230 bis 1000 V AC ±10%, 3~
größe
Nennfrequenz: 50 Hz oder 60 Hz
Bau-
strom
IDC [A] 400 500 600 690 790 1000 Dyn. Frequenzbereich: 50 Hz: ±5 Hz; 60 Hz: ± 5 Hz
25 z z Gleichstrombereich: 25...5200 A DC
50 z z z
75 z z C1 Umgebungsgrenzwerte:
100 z z z Umgebungstemperatur: 0 bis +40°C (32...104°F)
125 z z
180 z z
Lagertemperatur: -40 to +55°C (-40...130°F)
225 z z Relative Feuchtigkeit: 5 bis 95%, keine Kondensation
245 z C2 Schutzart: IP 00
315 z z
405 z z z Abmessungen Bau-
470 z z
mm inches kg größe
610 z z
740 z z C2b H B T H B T
900 z z
420 273 195 16,54 10,75 7,67 8 C1 (25...75 A)
900 z z
1200 z z 469 273 228 18,46 10,75 8,97 12 C1 (100...140A)
A5
1500 z z z z 505 273 361 19,88 10,75 14,21 29 C2
2000 z z z z 652 273 384 25,66 10,75 15,11 42 C2b
1900 z 1050 510 410 41,34 20,07 16,14 110 A5
2050 z z z A6
A6 1750 460 410 68,90 18,11 16,14 180
2500 z z z z z
3000 z z z z z 1750 760 570 68,90 29,92 22,44 315 A7
2050 z Feldstromversorgung Schutzfunktionen
2600 z
3300 z z z z z z
• bis 16A im Stromrichtermodul ein- • Tachosignal Fehler
4000 z z z z z z A7 gebaut (nicht möglich bei Baugr. A6 • Übertemperatur
4800 z z z und A7) • Überlast
5200 z z
• 25...520 A extern • Überdrehzahl
• Drehzahl Null
Ein-/ Ausgaben • Ankerüberstrom
DCS 502 Umkehrstromrichter (4-Q) • 8 digitale Eingänge • Ankerstromwelligkeit
Ankerdauer- Bei einer Speisespannung von [V AC]
• 8 digitale Ausgänge • Ankerüberspannung
größe
• 4 analoge Eingänge • Minimalfeldstrom
Bau-
strom
IDC [A] 400 500 600 690 790 1000 • 3 analoge Ausgänge • Feldüberstrom
25 z z • 1 Tachogenerator-Eingang • Motor blockiert
50 z z z • 1 Inkrementalgeber-Eingang • Netzüber- und unterspan-
75 z z C1
100 z z
• ±10 V Referenzspannungsquelle nung
110 z • diverse Feldbusadapter • Unterspannung Elektro-
140 z z nik
200 z z
• Falsche Phasenfolge
250 z z
270 z C2 Tools
350 z z CDP 312 Panel GAD
450 z z z Abnehmbare Bedien- und Anzeigeein- PC-Applikationstool für:
520 z z
680 z z heit mit Klartextanzeige für: • Funktionsblock-Pro-
820 z z C2b • Soll- und Istwertanzeige grammierung
1000 z z
• Antriebssteuerung • Zeichnungserstellung
900 z z
1200 z z • Parametrierung • Dokumentation
A5
1500 z z z z • Fehlersuche Serielle Schnittstellen
2000 z z • Parameter Up- und Download
1900 z • PROFIBUS
2050 z z z • verriegelbaren Betrieb • CS 31
A6
2500 z z z z z • Modbus
3000 z z z z z
CMT
2050 z PC-Tool für die Inbetriebnahme mit den • Modbus+
2600 z Eigenschaften: • CANopen
3300 z z z z z z • ControlNet
4000 z z z z z z A7 • Online Antriebssteuerung
4800 z z z • Diagnose • DeviceNet
5200 z z • Fehlersuche
• Wartung
• Programmierung
DCS 500 Stromrichter sind als
Modul oder im Schaltschrank
als DCA 500 verfügbar.
I 20 entnommen aus/weitergehende Informationen:
DCS500B Flyer
3ADW000151
3ADW000177R0200_DCS500B_QuickGuide_edisf_bYou can also read


