Field Day Instructor Manual - Minnesota Hunter Education Firearms Safety For use with Online and Classroom Students - MN DNR
←
→
Page content transcription
If your browser does not render page correctly, please read the page content below
Minnesota
  Hunter Education Firearms Safety

       Field Day
  Instructor Manual
For use with Online and Classroom Students

        PARTNERS IN EDUCATING
 SAFE RESPONSIBLE AND ETHICAL HUNTERS

                 Sept 2012
                 Version 6                   1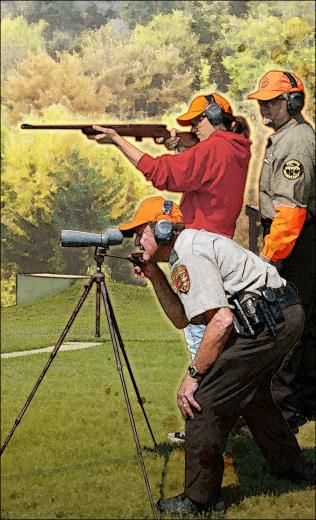
Welcome
Welcome to the Minnesota Firearms Safety Hunter Education (HEFAS) Field Day
Instructor Manual. Please accept a sincere and well-deserved thank you. It is
because of you and your fellow dedicated and determined instructor efforts that
hunting is safer today than ever before. You make the difference.

You are part of a new Field Day session and exciting optional certification process
that is quickly becoming the new high standard in Hunter Education Firearms Safety
Training. Your challenge is to become proficient in scenario-based learning that
complement and enhance what your students have already learned through
HunterCourse.com study or in your classroom.

The scenarios in this manual are designed to present students with realistic hunting
situations where they must make decisions based on safety and ethics. The
situations and scenarios presented to the students are designed to challenge their
thought process while being evaluated and mentored by certified instructors.

This manual, used in conjunction with the Volunteer Instructor Procedures Manual
(VIP), will provide you with the information needed to complete the Field Day HEFAS
Certification session successfully.

Note: the manual is written for use with the HunterCourse.com and classroom course
Field Day. The manual includes information and instructions for the indoor
(classroom) portion of the HunterCourse.com certification and the Hunter Trail portion
for both the classroom and HunterCourse.com certification. Classroom course
students need to complete only the outdoor Hunter’s Trail segment, provided the
“class plan” is completed as written, prior to the Field Day.

This manual includes information on the HunterCourse.com certification process and
is a reference manual for both the HunterCourse.com and classroom Field Day. A
Pocket Guide is available for instructors’ use as a brief reminder of the
steps/scenarios for the Field Day.

                                                                                         2
Table of Contents
What is the “Field Day”? .............................................................................................. 4
Minnesota Options for Earning a HEFAS Certificate ................................................. 4
Hunter Education Firearms Safety Certification Flow Chart ..................................... 6
Combining Classroom and HunterCourse.com Students in the same Field Day .... 7
The Hunter’s Trail Field Experience ............................................................................ 7
Pocket Guide ............................................................................................................... 10
The Hunter’s Trail - Required Field Scenarios .......................................................... 23
Conclusion of the Hunter’s Trail ................................................................................ 35
Student Fees and Optional Additional Fees for Certification ................................ 43
Student Self-Certification ........................................................................................... 44
Summary of Administrative Responsibilities of the Principal Instructor ............... 45
Appendix A: Student Certification Process Information Sheet ............................... 46
Appendix B: Materials Provided from Camp Ripley ................................................ 47
Appendix C: Live Fire Range Guidelines .................................................................. 48
Appendix D: Field Day Evaluation Form .................................................................. 52
Appendix E: HunterCourse.com Quiz (Correct Answers Underlined) ................... 53

                                                                                                                             3
What is the “Field Day”?
       The Field Day is a one-day, hands-on, scenario-based session where the team
       leader evaluates what students learned from:
   1. The classroom Hunter Education Firearms Safety (HEFAS) certification; session
       six of seven sessions. (3 ½ hours)
   2. Part two of two for the HunterCourse.com option* for Minnesota students to
       receive HEFAS certification. (6 ½ hours)
   The Field Day is designed for a low student (3-5) to instructor (1) ratio. Adding
   additional instructors to your team may be necessary. The ideal team size is 7-10
   instructors for a group of 20-30 students.
       *additional classroom instruction included

 IMPORTANT: The HunterCourse.com option is not intended to replace the current
 classroom version. This has been developed to offer an option for students who
 find it difficult to attend a multi-day course. The intent of the option is to provide
 opportunity for everyone who wants, to become certified.

Minnesota Options for Earning a                                Instructor Team
HEFAS Certificate                                    Lead Instructor = person that
        A person who is at least 11 years old has    organizes the session, i.e., calls
two options to use to earn a HEFAS certificate in    meetings, assigns/assures team
Minnesota. (1) A seven-session, volunteer            members know/carry out their
instructor-facilitated classroom course can be       responsibilities.
successfully completed to learn the basic            Principal instructor = certified
requirements to become certified. The sixth          instructor specifically
session of the classroom course is the Hunter’s      responsible for completing and
Trail part of the Field Day (3 ½ hours). (2) A       sending required forms.
student may choose to complete online learning       Team Leaders = certified
and participate in a Field Day (6 ½ hours) to        instructors responsible for
earn a certificate.                                  facilitating 3 – 5 students (team)
        Each of the two methods to earn a            during the Field Day scenarios.
certificate has the exact same objectives*; the
difference is the means with which the student learns the objectives: (a) an instructor
team facilitates the learning of the objectives in the classroom, or (b) online learning is
provided by HunterCourse.com. HunterCourse.com provides a narrated, illustrated,
                                   and interactive online method for a student to learn
                                   what is taught in the classroom course. It contains
                                   short visual quizzes to help the student learn. When
                                   the student has completed the course, they take a 50-
                                   question examination. They do not pay the
                                   HunterCourse.com fee of $24.95 until they have
                                   successfully completed the examination. At that time
                                   they print a voucher which allows the student to attend
                                   a Field Day to complete the HEFAS certification.
Sample Field Day Voucher                  Although the fee structure for HunterCourse.com
                                   student certification is greater than the classroom

                                                                                          4
course fee, the benefit to students and parents is cost (driving expense) and time
savings related to travel and scheduling; these are perceived as a positive.
         Ideally each instructor team should provide both formats to students. The ability
to provide the HunterCourse.com option will not work in all situations. It may not be
necessary in all communities, especially those who traditionally have a small number of
students.
         Instructors choosing to offer the HunterCourse.com option must be familiar with
the content and delivery method used by HunterCourse.com, that is, should complete
the study guide version. See http://www2.huntercourse.com/minnesota/study .
         The following page contains an illustrated flow chart showing how knowledge and
skills are learned and demonstrated in each of the two options. Volunteer instructors
facilitate the learning of objectives in the classroom vs. online students learn by
completing HunterCourse.com.
         As part of the Field Day, HunterCourse.com students complete a “classroom”
segment (2 hours). The flow chart indicates that both classroom and online students
complete the same activities*; the chart illustrates where they are completed in each
method of certification.
*Assumes the volunteer instructor team is following and using the classroom Instructor
Manual and Reference Guide as printed.

Reminder: Youth must be 11 years of age by the Start Date of your class. On-line
students must be 11 years of age by the first day they are scheduled to attend the
                   2-hour classroom segment and field day.

                                                                                        5
Minnesota Department of Natural Resources
                       Education and Safety Training

   Hunter Education Firearms Safety Certification Options Flow Chart

       Classroom Learning                                       On-line Learning

Session 1 – Student Registration                       Complete HunterCourse.com learning
Each session includes instructor
facilitated learning                                   Complete Exam

                                                       Pay HunterCourse.com Fee

Session 2 – Firearm Actions,                           Print Field Day Voucher
Accepting/Passing Firearm,
Load/Unload

Session 3 – Field Carries,                            Field Day – 2-Hour Classroom
Dominant Eye, Sight Picture,                          Session
Shooting Positions                                    Student Registration, Quiz, Firearm
                                                      Actions, Accepting/Passing Firearm,
                                                      Load/Unload, Field Carries, Dominant
                                                      Eye, Sight Picture, Shooting
Session 4 – Ethics, Hunter
                                                      Positions, Survival Kit, Trip Plan, Ask
Responsibility, Regulations
                                                      Permission Hunt, Basic Map
                                                      Compass

Session 5 – Survival Kit, Trip
Plan, Ask Permission Hunt
        (Session 6)              Field Day – Hunter’s Trail

Session 7 - Examination

                                  Firearms Safety Certificate
                           -Self-Certification on DNR
                           Website
                           -Pay DNR Fee
                           -Print Firearms Safety Certificate

                                                                                           6
Combining classroom and HunterCourse.com students in the same
Field Day
        As both classroom and HunterCourse.com students must successfully complete
a Field Day as part of their certification requirements, students from both may be
included in the same Field Day. To do so, the instructor team must have an adequate
number of certified instructors (1 per 3 students) and provide the additional 2-hour
classroom segment for the HunterCourse.com students prior to classroom students’
arrival. (For example, the instructor team may allow students, who have conflicts with
the dates of the classroom sessions, to complete HunterCourse.com and participate in
the Field Day with the classroom students.)

The Hunter’s Trail Field Experience                   What is a “Team Leader”?
                                                      Team member responsible for a
Introduction                                          group of 3 to 5 students; from the
        The field scenarios segment of the            time they arrive until they leave the
certification process is the most important part      Field Day with their parent /legal
for the instructor team. It is to be successfully     guardian.
completed by all students who have a                      • Must be a certified instructor.
HunterCourse.com Voucher and those learning               • Will evaluate their team
in the classroom sessions. On the Hunter’s                   members and determine if
Trail, all students will shoot a .22 rifle and               they will be certified.
experience “real” simulated hunting scenarios.
During these scenarios Team Leaders will assist each of his/her team members with
hands-on learning of proper firearms handling techniques, how to act/react to hunting
situations and determine if individual students are eligible to be certified based on their
demonstration of knowledge, skills, respect and responsibility.

Objectives
         The objective is to motivate students to make safe, legal, and ethical decisions in
actual simulated hunting situations. The “hands-on” field activities session may be the
first time a student will handle and shoot a real firearm. It may be the first “hunting
experience” they will participate in. It will give the beginner a chance to practice and
demonstrate knowledge and skills such as control the muzzle of their firearm, as well as
loading and unloading of guns, field carries, and other basic knowledge and skills
related to firearms and hunting. The session will allow students of all abilities to
experience a variety of hunting situations, not just those with which they may be familiar
with. Team Leaders will evaluate, encourage and correct student behavior instantly
through effective field exercises. These scenarios will allow students to practice what
they have learned in their HunterCourse.com and classroom studies. The scenarios will
allow students to think about their own actions and the actions of others.

                                                                                              7
Parents are encouraged to attend the Field Day session with their young hunter
 (11 – 15 year olds). The certificate earned from this session allows young hunters to
 purchase hunting licenses. By attending the Field Day, parents will discover the
 points they need to reinforce with their young hunter. They may learn something
 new, and they will have a better understanding of the rules. Parents may attend the
 session free of charge unless they to want to be certified. To become certified, they
 must complete the HunterCourse.com portion of the program, pay the optional fee (if
 required), and complete certification requirements.

Evaluation
        A Team Leader is responsible for a team of three to five students. Each Team
Leader will evaluate each of his/her team members by using the Field Activities
Evaluation Form (Appendix D). As noted
on the form a HunterCourse.com student             Instructors (Team Leaders) need to
                                                 display  a positive attitude and provide
must demonstrate, by a quiz, that they have
actually completed the online study.             an  opportunity  for each student to
                                                 succeed. Some students will arrive
                                                 with some firearms handling skills
Methods                                          while others may have never handled
        The field experience is the “Hunter’s    a firearm.
Trail”; a sequence of scenarios set up to
simulate a real hunting experience including shooting a .22 rifle (live fire) at a range.
The team, guided by their Team Leader, will proceed through a “trail” where they will
react to scenarios. The Team Leader will facilitate a discussion of each scenario to help
students learn from and improve their knowledge and skills. The Team Leader will
evaluate students’ actions/reactions to the
scenarios.
        Many scenarios will put students in
“shoot or don’t shoot” situations. They must
rely on the knowledge learned in their
HunterCourse.com or classroom studies to
answer three questions: 1) Is the
situation/shot safe? 2) Is the situation/shot
legal? 3) Is the situation/shot responsible or
ethical? Students must respond to the
scenario by “shooting” or not taking a shot.
Other scenarios will involve safe and/or
responsible actions while in the field. See
interactive map at: http://www.huntercourse.com/usa/minnesota/fielddayinfo.aspx
        The Team Leader will facilitate discussions of wildlife management and
conservation topics, hunter behavior and hunting laws and regulations as the
opportunity presents. Caution: Set students up to succeed, allow students to think but
avoid unrealistic “trick” scenarios.

                                                                                         8
Site Procedures
Planning is essential if the live fire
station is to be safe and each Hunter’s Trail
scenario effectively simulates a hunting
situation. Remember, each student is to
decide if a scenario is safe, legal and
ethical. The Hunter’s Trail scenarios should
be planned to include several possible
choices related to firearm safety, laws, and
ethical decisions. Ideas for scenarios and
the set-up required for each are discussed
in this manual.
The instructor group must properly
set up and rehearse each scenario. Walk
through the site and identify possible
situations for scenarios before setting up. This will ensure that the best use is made of
the landscape (roads and fences, topography, natural draws, vegetation, etc.) Note:
some scenarios will require helpers.
Safe firearms handling practices and understanding the three basic rules of safe
firearms handling are a part of the classroom session that is completed prior to the field
experience. Students are to demonstrate that they know and can follow the rules at all
times when around and handling firearms.
Safety Precautions – Live ammunition is allowed only on the designated range. A
trained Range Master is responsible for distribution of live ammo at the
appropriate time. See Appendix C: Live Fire Range Guidelines. Provide approved
dummy ammunition for use during the scenarios. Team Leaders must be alert to
determine that students are using the correct live or dummy ammunition.
Safety is Everyone’s Responsibility!
Risk Management Plan (Instructors/Students)
As Instructors, the whole focus is to educate students
on how to prevent accidents. Instructors are specialized in
the messages depending on what Safety Program they
facilitate. Many times instructors get focused on their specific
messages and forget the other risks that are involved with any
outdoor recreational activity and field activities. Trailering and
operating boats, ATVs, snowmobiles or props and equipment
for a Field Day always pose a risk. Is your range as safe as it
possibly can be? Where will a round go if it goes over the
back stop? What hazards exist on your “Hunter’s Trail”?
Proper safety planning is a 24/7 job. Instructors need to be conscious of risks all
of the time in whatever they are doing. Assess your risk when involved in all activities.
Part of any risk assessment process is equipment matching and maintenance. Is
your equipment maintained properly and being used properly? Are the loading ramps
big or strong enough for the equipment? How steep is the angle of the ramp? How far
are you stepping down? Are there any holes, rocks, snow, ice, or ratchets that could
9cause a slipping, tripping or falling hazard? What is present at your training site that
could pose a hazard to you or your students? Work with your fellow instructors to
reduce your risk of injury before during and after your course.
Keep a first aid kit, insect repellent, sunscreen, and other helpful items on hand.
Make sure water is available. If the possibility of hot weather exists, provide adequate
shade for all present. Develop a plan for contacting emergency services. Determine if
members of the instructor group have advanced first aid credentials and are able to
assist until professional help arrives.
Take time to assess everyone’s risks and develop a plan to minimize or eliminate
potential problems before they happen.
Field Day Pocket Guide
A one-sheet, color-coded Pocket Guide is to be used by each Team
Leader during the Field Day. The Pocket Guide is printed with brief
reminders to the Team Leader of the what, when, where of the session.
The information on the Pocket Guide is based on the detailed information
presented in the following pages. The information expands the brief points
required to be facilitated by each Team Leader during the Field Day
session.
The color coding on the Pocket Guide is used to easily identify
sections which apply to students depending on the method of study they
completed prior to the Field Day -- HunterCourse.com or classroom.
The green background is applicable for all HunterCourse.com
students and may apply to classroom students. The activities included with
the green background are included in the curriculum for the classroom
students. If the classroom instructor team did not complete some or all of
those activities in the classroom prior to the Field Day, those activities must
be completed by the team members as part of the Field Day. Scenarios
with the blue background must be completed by all, HunterCourse.com and
classroom students, during the Field Day. Note: the registration process
will have been completed when students registered for the classroom
course.
10Pocket Guide Front
Pocket Guide Back
11Online (HunterCourse.com) Student Check-In and Registration
Note: One certified instructor (Team Leader) is
required for each 3 participants.
-00:45 to 00:00 Student Check-in
Pre-assign three students to a team with
a certified instructor, e.g., their Team Leader
for the session. The Team Leader is
responsible for his/her team until they leave
the site with their parent or approved guardian.
When assigning students to teams, strive to
create a team of students who are not related,
i.e., no siblings or relatives, nor allow “friends”
to be on the same team. Team Leaders will
find that by doing so they will have greater
attention and participation of team members.
Each Team Leader will have a Field Day
Field Day Pocket Evaluation Form (Appendix D) that they will
Guide use to evaluate their students.
Note: This Guide is to be used for If students have not been pre-assigned
online and classroom student field to teams, as students arrive, a Team Leader
Day. Yellow background apply to can take the first student that arrives and begin
online students only. Green
background online, as well as, the registration process, another Team Leader
classroom students who have not takes the next and begins the registration
completed them in the classroom process, another Team Leader the next and so
sessions. Blue background
scenarios for all. Those instructor on. Continue this method until all have been
teams with both online and placed on a team.
classroom students at their field day
schedule classroom students to
arrive 2 ½ hrs after online students. As students arrive each Team Leader:
Welcomes each Student and their Parent.
Check-in and Registration Check-in and secure all firearms; make safe
and insert chamber checker into students’
-30/45 minutes before the firearms.
start of Class Inquire about ammunition or other
prohibited items and secure if needed.
Welcome
Determine that the students have the
Students/Parents
proper clothing to complete field activities;
Check-in and secure all
long pants, proper foot wear, i.e., no
firearms make safe and
sandals, protection from the sun, wind, rain,
insert chamber checker
ticks, etc.
into students’ firearms.
Parent/guardian completes Parental
Inquire about and secure Release/Self-Certification Form. Instructors
ammunition or other
can learn the details for completing the form
prohibited items.
online at
http://files.dnr.state.mn.us/education_safety
/safety/instructors/self-cert-instructions.pdf
12 Determine that each student has his or her
HunterCourse.com Field Day Voucher. After
· Parent/guardian viewing, return to student.
completes Parental
Verify the student’s name written on the form
Release/Self-
Certification Form
with that of their birth certificate. When
*Explain the parent/guardian has completed the Parental
certification Release/Self-Certification Form, check the
process* spelling of the student’s full legal name from
· Collect their birth certificate with the name on the form.
HunterCourse.com It is important that they are the same for the
"Field Day Voucher”. purpose of purchasing MN DNR licenses.
Collect the optional Instructor fee, if applicable.
(An additional fee of up to $7.50 can be
collected for use by the instructor team for
expenses at the Field Day.) The additional fee
may be used for: training aids, safety
equipment, Hunter Trail props, additional
· Verify students name ammunition for demonstrations, mailing,
with birth certificate. copying, incidental class expenses, classroom
· Collect the Instructor rental, transportation costs to the site, and
course fee if refreshments for students during the session.
applicable. Explain (See VIP 1 – 7)
to each On the Checklist – What to bring to MN Range
parent/guardian that and Field Day (Appendix A) indicates the
students will “self- student is to bring Safety and Responsibility
certify” upon Note to Parent letter signed by parent/student.
successful
Most students will bring as directed. For those
completion of field
day. that do not suggest that they review the points
made on the page. The Safety Note is found at
https://www.huntercourse.com/usa/minnesota/p
df/note-to-parents.pdf. This is optional for
students 18 and older.
Explain to each parent/guardian that their student will “self-certify” upon successful
completion of field day. The instructions for self-certification will be found on the
back of the yellow copy of the Parental Release/Self-Certification Form which the
student will receive upon successful completion of the session. Instructors can also
find additional information on the MN DNR web page
http://files.dnr.state.mn.us/education_safety/safety/instructors/self-cert-
instructions.pdf
13 Record student’s names on a
Record students name on Field Day Field Day Evaluation Form.
Evaluation Form. (Assign (Appendix D)
Leaders) Request that the parent stay
until their student has
· Request that the parent stay
successfully completed the quiz
until their student has activity. The quiz is to be used
completed the quiz activity. as a verifier that the student in
· Provide nametags. attendance actually completed
· Inquire about lunch storage the HunterCourse.com.
needs.
Provide each team member
with a DNR nametag. The
Field Day Evaluation Form nametags will help the Team
The Team Leader will use Leader learn the names of the
this form to record the level of students. Note: Parents are
ability each student encouraged to accompany their
demonstrates while under child throughout the session; if
his/her guidance. At the they do, provide them with a
completion of the session the nametag.
Team Leader will discuss the Ask if student brought a bag
results of the students’ lunch (if requested) and if it
evaluation with the student needs to be refrigerated?
and their parent/guardian in
private. Only areas that have
an X will be used to not
certify a student. The Team
Leader will explain in detail to
the student and
parent/guardian why the
student is not being certified.
Any of the areas where the
student received an N rating
should be discussed with the
student and parent/guardian;
the student and
parent/guardian will need to
work on improving the area
but it/they will not prevent the
student from being certified.
1400:00 – 00:14 (Green Section Pocket Guide)
Start 00:00 - 00:19 Quick
The lead instructor facilitating the beginning of
Welcome and Introductions the formal session should do so at the
then play advertised time. Often students will “be late”.
Late students should be registered as soon as
“THE LAST SHOT” they arrive, while the Last Shot DVD is being
shown.
At the exact start time show the DVD - The Last
Shot (14 minute length). The objective for
using the DVD is to set the ‘tone’ for the
session; to help the students get in the right
frame of mind. No formal activity is associated
with the video. Team Leaders should refer to it
at appropriate times, as “learning moments”
during the session.
00:14 – 00:19
Introductions by lead instructor (VIP 3-4)
Introduce self.
Introduce volunteer instructors (Team Leaders).
00:19 - 00:45 Welcome Introduce the host organization, e.g.,
Students/Quiz conservation, gun club.
· Introductions by lead instructor Welcome your students to the class.
(Host, other instructors)
Expectations and class rules adult- Explain expectations and class rules. (VIP 3-4)
like behavior at all times. Explain that students are expected to
· Muzzle Control, Participation SAFE demonstrate adult-like manners in the
FUN! classroom and field activities.
When handling any firearm, student
must demonstrate - at all times - muzzle
control.
Each student is expected to participate
in all activities if they are physically able.
Explain the consequences of violating
class rules. If the Team Leader
determines that a student has violated
rules or does not demonstrate adult-like
“Display a positive behavior or is careless handling a
firearm, then the student will not be
attitude—provide an certified. If this student wants to be
opportunity for each certified in the future they may attend a
course and meet its requirements.
student to succeed” Explain the requirements for earning a
certificate.
15· Complete quiz: instructor read aloud
to all students. When all have Prove completion of online study
completed, have students check their by quiz.
neighbors’ quiz. Actively participate with their group
and Team Leader.
Demonstrate adult-like behavior.
Demonstrate they can safely and
responsibly handle their firearm.
00:19 – 00:45
HunterCourse.com students complete
quiz. (Appendix E)
Review All Quiz Questions. Review VIP 3 – 8 for information on
administering exams.
*Parents of students who have
Note: quiz is to determine that the
successfully completed the quiz may student actually completed
leave at this time. Be sure they know HunterCourse.com and learned the
when to pick their student up. material (i.e., they did not have
someone do the HunterCourse.com
00:45-00:50 Assign students to for them.)
leaders. Team Leader is now in When all students have had
charge of their team of students. adequate time to complete their quiz
Student evaluation begins. the lead instructor reads the correct
answers to the quiz. Have students
FULL GROUP/TEAM ACTIVITY: correct their neighbors’ quiz.
Instructor A explains and
demonstrates proper steps to hand a
Parent/approved guardian of students who
firearm to Instructor B: had three or less incorrect on the quiz may
a. Safety on leave at this time if they are not staying for
b. Action open the session. If parent is not staying for the
c. Visually & physically determine no session, assure they know what time they
bullet/shell in chamber must return to pick up their child. Team
d. Say “empty” Leader is responsible for their students
e. Hand firearm to partner making until they leave the site with parent or
sure they safely grip with 2 hands approved guardian.
FULL GROUP/TEAM ACTIVITY: Instructor
A explains and demonstrates proper steps
to hand a firearm to Instructor B:
a. Safety on.
b. Action open.
c. Visual & physically determine no
bullet/shell in chamber
d. Say “empty”.
e. Hand firearm to partner making
sure they safely grip with 2 hands.
16f. Release firearm when partner f. Release firearm when partner says
says “I have it, Thank You.” Partner “I have it, Thank You.” Partner
visually & physically inspects firearm visually & physically inspects firearm
to determine unloaded -- Say to determine unloaded—Say
“empty”. “empty”.
From this point on each Team Leader facilitates the remainder of the activities with
their 3 students, i.e., team. Team Leader will assist his/her team with understanding
and practicing the objectives as presented in the HunterCourse.com course. Team
Leaders are responsible for their team until each of their students leave with their
parent or approved guardian.
00:45 – 00:50
Each Team Leader assists his/her team with understanding the correct answers
from the quiz. If a student gets 3 or more wrong on the quiz, the Team Leader should
determine from the student the reason for the errors. If the Team Leader determines
the student did not complete the HunterCourse.com they should notify the parent, and
the student will not be permitted to participate in the remainder of the session.
At this point the instructor Team Leader will begin to record and evaluate each of
his/her team on the Field Day Evaluation Form. The team leader will circle “N” after
“test score” for the student that has more than three incorrect but determined the
student completed HunterCourse.com.
Use of Field Day Evaluation Form - Note: Evaluate each student in each category
and circle one of the following: M = meets objective or N = needs improvement or
X = fail. Only selected categories have an X. If a student receives one or more X’s
they will not be certified during this session.
Those categories that have an X as a choice should be scored by the instructor as
follows: the first time a student “miss steps”, the instructor should cross out the M.
If the student does not repeat the “miss step” or improves the category during the
session, the instructor should circle the N for the final evaluation and make a note at
the bottom of the column.
If the student repeats or continues to fail the category the instructor will circle the X
and the student will not be certified during this session. Record in the notes space
the reason for the X.
1700:50 to 02:00 (Classroom or Outdoors)
Hands-on activities
These activities will require Laser-Ed guns and samples of each firearms action
type. With three students on a team only three Laser-Ed guns are needed. One team
can complete the activities that require Laser-Ed guns while other teams are completing
activities that do not require them. The activities can be completed in no specific order,
with some exceptions. The activities are:
Handling firearms, Safeties and Action types:
00:50 - 02:00 Firearms Break/hinge, slide/pump, semi-auto, lever, bolt.
Familiarization
Students identify (name) each action type.
Bolt, pump/slide, semi-auto,
Show students where safety is on each
break, lever; others maybe
firearm that they will be handling and how it is
added...
operated.
Team Activity – MUZZLE
CONTROL!!! Team Leader demonstrates how to PROVE
a. Students Identify action, each action type is unloaded.
Identify Safety, Determine Each student demonstrates that each action
gauge/caliber of type of firearm is unloaded.
demonstration firearm Procedure for giving/accepting a firearm from
b. Instructor demonstrates another person.
how to operate action and i. Team Leader demonstrates correct
safety procedure.
ii. Students practice procedure.
iii. Correct procedure must be used each time
a firearm is handed/accepted from to/from
another person.
Students demonstrate the operation of each
safety on each firearm they will be handling.
Students demonstrate they can operate each
action type.
Selecting the correct ammunition.
Students identify the gauge/caliber of each
firearm.
Students select the correct “dummy” round for
c. Instructor each firearm.
explains/demonstrates how Team Leader demonstrates to students how to
to load /unload – DUMMY load each type of firearm with the correct dummy
AMMO ONLY round. Students load and unload each type of
d. Each student accepts firearm with the correct dummy round then prove
each action type, locates & that it is unloaded.
operates safety, operates Team Leader discusses proper technique for
action, Loads/Unloads and cleaning a shotgun and a rifle. Have students
hands firearm to the next wipe down their firearm each time it is handled
student. and at the completion of the Hunter’s Trail with
gun oil and a rag.
Muzzle control/practice field carries. Students will demonstrate and practice the
carries; two handed, cradle, elbow, sling, trail, and shoulder. While they are doing
so they must demonstrate muzzle control at all times. Use Daisy Laser-Ed guns. If
18· Demonstrate field carries inside where a laser beam can be seen, tape
(LazerEd guns) - two handed, trigger so the laser light is on continuously.
cradle, elbow, sling, trail, The laser beam will show where each
shoulder · Muzzle control/use muzzle is pointing.
- single file, three abreast Muzzle control in a group. The team of
students will demonstrate appropriate, safe
· Determine dominant eye firearms carries to use when:
a. Team single file.
b. Team side-by-side.
Determine dominant eye of each student.
Students will have determined their
dominant eye when completing their
HunterCourse.com study or it is a part of the
classroom Class Plan. Team Leader will
check each student’s dominate eye by
directing them to extend their hands and
forming an opening between their thumbs
and forefinger. With both eyes open, direct
· Sight picture—notch each student to focus on the Team Leaders’
sight/use LazerEd nose while sighting through the opening in
their hands. The Team Leader will see the
dominant eye of the student. Direct the
students to pull their hands back to their
face. With both eyes open they will pull back
to their dominant eye. Ask each student
which is their dominant hand. If their
dominant eye and hand are not the same,
have these students shoot their firearms with
their dominant eye. Explain to the
parent/guardian the importance of practicing
shooting with their dominant eye; the
dominant eye will always take over in a stress situation. For example, while hunting
when a shot presents itself, if not shooting with the dominant eye, safety becomes
an issue. If the parent/guardian is not present, make a note to discuss this with
them when they return to pick up their student.
Sight picture with open notch sight. Have each student demonstrate that they
understand what sight picture means by using a Laser-Ed gun. Raccoon targets are
provided in the materials from Camp Ripley. Fasten a target on a wall where the
student can aim at it from about 15 feet. When the student believes they have a
proper site picture they squeeze the trigger of the Laser-Ed gun. Based on where
the laser beam hits the target, the Team Leader can determine if the student
understands the concept of sight picture. (Small Allen wrench needed to ‘sight in’
LaserEd gun).
19 Team members each complete a Hunting
· Prove unloaded using
Trip Plan for the hunting scenario they will
sample dummy rounds-
be completing in the Hunter’s Trail field
determine their
activities. Each student will experience
gauge/caliber (NO LIVE
climbing into an elevated tree stand as part
AMMO)
of the Hunter’s Trail. Suggest to the team
As a team – complete a
that they complete the trip plan based on a
Hunting Trip Plan for a deer hunt which includes the use of a tree
hunt that is a part of the stand.
“Hunter’s Trail” Team Leader checks to determine that
· Students show their each student has the required Survival kit.
survival kit. Provide Question to determine that each student
each student with understands the use of each item in the kit.
survival bandana. Students will be using the survival kit in the
field scenarios.
Discuss its messages.
Provide each student with a Survival
bandana. Quickly study the messages on
the bandana. Suggest that students
include it in their survival kit or carry it on
their person each time they are in the out-
of-doors.
Using a map and compass. Provide each
team with a compass and a map of the
· Review map of site. field activities site. Prepare students for
Discuss basics of using any activities that will require the use of the
compass and map — map and compass including safety
How to take a bearing— bearings.
How to use a compass
Safety Bearing: a compass bearing which, if
to travel in a straight line followed, will bring a lost hunter to a road or
· Help students develop other major, recognizable feature.
their “Asking
Permission to Hunt” One of the scenarios will include the team
“asking permission to hunt private land”.
dialog; prompt students
The team is to plan the, what, when, where
to decide the time of for the Hunter Trail scenario. The Team
year they will ask, how Leader will explain the hunt that the team
they will approach and will ask permission. For example, the
what they need to Hunter’s Trail may include a deer hunt.
ask/tell the landowner The team is to plan the when, where, and
and what they need to questions and information they will ask the
landowner when they participate in the
know if they get
scenario. The scenario will have a
permission. What will landowner (actor, volunteer).
they do if denied? Students within groups of THREE
approach “Landowner”
• Introductions…Names and where
from?
• Why there?
20• What they will be hunting?
• Where are property lines? Fence lines?
Areas we should stay away from?
Tell who in hunting party…Friends/relatives with names
What type of firearms or equipment using?
What vehicles are they using?
When they arrive…Day and time.
When they leave…Day and time
Get permission well in Advance*…
*Teaching moment (express scouting & advantage of early prospects)
02:30 to 03:00 Lunch
Team Leader is responsible for his/her group of students. During lunch,
show a video such as Tree Stand Safety or an appropriate title from Alan
Madison. An option: Local Conservation Officer gives a short
presentation; if they are not available to be a part of the Hunter’s Trail
scenarios.
03:00 to 06:00 (3 hours)
Hunter’s Trail Required Field Scenarios
The descriptions, directions, and information that
follow correspond to the brief notes on the pocket guide.
The layout of the site will dictate the order in which
the scenarios are facilitated; that is, it is unlikely that
most sites will have the scenarios in the order printed in
this manual or the Pocket Guide. Each instructor group
will need to determine the best order for completion of
the required activities according to their site.
The scenarios are set up so each team of students, lead by the Team Leader,
will participate in the scenarios by following a sequence, or Hunter’s Trail. As the team
proceeds on the trail, during and between scenarios, the team members will
demonstrate knowledge of and demonstrate safe hunting skills.
The Team Leader will facilitate team member understanding of the basics of
hunting in each of the scenarios. Facilitation includes asking questions of the team
members. (VIP 2 - 2, 2 – 3) Include all team members in the sharing of answers. The
Team Leader will limit the “telling” how to; rather, they will use “probing” questions to
allow team members to realize the answers and how they should conduct the hunt.
Teams will begin with a “shotgun start” -- each team starting with a different
scenario and continuing on the Hunter’s Trail until they come to the scenario they
started at. This will prevent groups standing, waiting to start the scenarios and all will
finish at approximately the same time.
Ideally the local conservation officer will be available during the field portion of the
certification process. Ideally the officer will move on the Hunter’s Trail in the opposite
direction as the teams are moving on the trail. The teams will meet with the officer as
they move through the scenarios. The officer will interact with the team members as an
officer would while working in the field during a hunting season.
21Facsimile hunting licenses should be
provided for each team member in the event the
conservation officer asks to see a license as they
might while checking hunters in the field. Sample is
provided in supplies from Camp Ripley. Copy the
number needed for each team member at the field
day.
Incorporate game identification into scenarios when possible.
22Hunter’s Trail Scenarios
(Blue Section Pocket Guide)
Muzzle Control
Each team member will carry a firearm or facsimile
while participating on the Hunter’s Trail. Operational
firearms must have a method to determine that they are
Hunter’s Trail
unloaded; a chamber checker can be a weed whip line
Scenario Based inserted down the barrel so excess extends from the
Activities chamber and the muzzle.
02:30 - 5:30 Students (hunters) need to demonstrate safe firearms
Team/students carry their handling procedures at all times; the 3 basic rules of
unloaded firearm, with a
visible empty chamber firearms safety. They should be challenged to
indicator. They must demonstrate their knowledge and skill in determining
demonstrate safe firearms safe “zones of fire”. Challenge their knowledge and
handling skills, decision ethics by incorporating into the scenarios unsafe
making and fully backgrounds such as buildings, vehicles on roads and
participate in activities and
questions from Team water. Include no trespassing signs and fences that may
Leader. or may not indicate a property line.
(Allow time for a restroom NO LIVE AMUNITION (except at the live fire .22
break before heading out) range). Students will simulate loading and unloading at
Safety Bearing appropriate times during the scenarios.
Determining a Safety Bearing
Using compass the team
establishes their safety
Before the team starts on the Hunter’s Trail, the
bearing. Team Leader will facilitate the team in determining a
safety bearing to use while on the Hunter’s Trail. Each
Asking permission to hunt
(need a “landowner” to role team will need a map of the site and an orienteering
play) compass. The map can be made by printing an aerial
photo from a computer-based map site. The team
Students will ask for
should use the safety bearing when they complete the
permission to hunt as per
the dialog they developed
survival scenario.
in their classroom To determine a safety bearing the students first study
assignment. the map and find, on the map, a boundary; such as a
road, trail, fence, waterway, power line, etc. that they will
be able to identify when they come to it.
Asking Permission to Hunt
In this scenario the team will ask a landowner (need
an adult to role play) for permission to hunt, doing so
according to the planning they completed in the
classroom segment of the session. Set up a scenario
where the landowner is at home (use a door to the
classroom, shed, etc.) or the role player may be working in a yard, etc. where the team
approaches and asks permission to hunt.
This activity is to allow the students to realize they need permission to hunt private
land and that they must ask permission. The Team Leader needs to be ready to
facilitate the what, when, where and why of asking permission to hunt.
Tree stand scenario
23To complete this scenario, a properly erected TMA ladder tree stand should be
used; use only the first section of the stand.
Tree Stand Scenario - Demo
(Note: experience has shown that this activity
Vest
1. Instructor demonstrates how to
tends to be a bottle neck on the Hunter’s Trail. If
put vest on and explains what is possible set in place more than one appropriate
expected during this scenario tree stand and associated equipment so more
2. What to do with firearm? than one team of students could be completing
this scenario concurrently, especially if there are 4
3. Haul line – where/how? or more teams on the Hunter’s Trail.)
4. Climb into stand A TMA treestand full body harness should be
5. THREE-POINT RULE” available for team members’ use. This will
require the availability of various-sized harnesses.
6. Stepping Down onto the Stand
It is best that the vest harness be obtained as
7. Attach/adjust safety strap students will find it easier to put on. (Caution: If a
(almost tight when sitting) full body harness of the appropriate size/weight
8. Safely hauling firearms/bows, rating is not available for some students, i.e.
Retrieving firearm. Load only when petite or extra-large for example, these students
ready to hunt should not be required to climb into the stand.)
(OPTIONAL) Before descending allow An appropriate “haul” line will be used in this
student to see what it is like to hang in scenario. It is suggested that a firearm be
safety harness. (student slides over
dedicated for this activity; one that all students will
side of stand and self-recovers)
use. It is best if it is inoperable. A facsimile such
1. Discuss suspension trauma as a wooden cut can also be used.
2. How to relieve suspension The objective of the scenario is to allow each
trauma; exercise legs/carry student to experience the proper/safe use of a
suspension relief device. tree stand; student proficiency will come with later
tree stand use. Each student will put on a full
body harness and demonstrate the steps to safely
enter a tree stand. The Team Leader will assist
the students by questioning the order of the steps:
unload (simulate), attach firearm to a haul line
opposite the side of the tree they will climb, climb
into the treestand using the three-point rule,
correctly attach the full body harness tether strap
to the tree, snug when sitting down, haul firearm
into stand, when ready simulate loading. When
the student understands and demonstrates these
steps the student will then demonstrate the steps
to descend from the stand. It is suggested that
after the student has safely lowered their firearm
and before detaching the tether strap, they
carefully lower themself to experience the feel of
the harness.
While students are completing the scenario
the Team Leader should facilitate questions
related to: what if you fall, how you recover from a
fall, what is suspension trauma, how one relieves
suspension trauma, did you tell someone where
you were going, when you would return, etc.
24Also, discuss how to safely enter a non-ladder stand, i.e.,
using a lineman’s belt for climbing the tree, stepping down
Deer Drive-Shoot/Don’t onto the platform verses up or over onto it. Testing the stand
Shoot WMA before putting your full body weight on it should be included
When to load/unload in the discussion.
Safe zones of fire Deer Drive - Shoot/Don’t Shoot
Shoot/don’t shoot Many new hunters have the opportunity to participate in
Be aware of other deer hunting early on in their hunting career and the Deer
hunters/non-hunters Drive is often a method used during the hunt.
Be aware of where they This scenario is set up where the team members will be
are; are they on public a part of a deer drive. The deer drive scenario should be set
(open to hunting) land; up to include “posters” in the area. “Posters” may be
where are property dummies attired in hunter orange (a heavy duty garbage
lines?
bag stuffed with material such as straw, leaves, crumpled
newspapers, etc. with a hunter orange t-shirt and cap; see
photo). Also, deer targets should be placed so that as the
party of hunters drive or still hunt through the scenario, they
will be required to make shoot/don’t shoot decisions. If a
team member comes upon a
“shoot” situation, that is, a safe shot
Safety of deer drives. can be taken, the hunter will shout
How to complete a drive - “bang”. If a “don’t shoot” target is
Drivers “still hunt”; stop found, the hunter should warn team
and go, should have the members of the danger.
possibility of getting a As all deer drives should have,
shot. the Team Leader is the “general”
Team member finds a safe and will direct the team members
shot and takes it.
what their responsibility is and what
Discussion on Ground they are to do and where they are
Blind Safety
to go on the drive. “Dummy Poster”
The Team Leader will assist the A large garbage
team in understanding important bag stuffed with
safety considerations and methods material and
in a drive. The best scenario for a dressed in a
drive is that in which both the Hunter Orange
“posters” and “drivers” have equal Tee Shirt and
chances for a safe shot. Cap
Posters should be positioned so,
when drivers move deer, they will have safe zones of fire.
The posters need to determine where they will be able to
safely take a shot should a deer appear in the zone. Posters need to determine what is
behind areas where they may be presented with a shot; buildings, domestic animals,
roads, etc. Posters also need to know the routes the drivers will be taking; keep in mind
a driver may not always follow their planned route. Also hunters from other parties may
be present -- even trespassers.
Tradition has been that posters line up at the end of a woods, etc. and wait for deer
to be driven out. This is less than ideal for a number of reasons. If a deer should run
between two posters that are in line, it is likely that shots taken at the deer will have the
other poster in the background. Unless the posters have permission to enter the land
25behind them, it is likely that a deer will continue to run away from the drivers and, even if
mortally hit, expire on ground where trespass becomes an issue in its recovery.
A well planned deer drive will locate posters within the woods in a staggered
formation where each has a safe zone of fire -- where they have safe shots at deer that
are attempting to sneak away from the drivers.
The best method for drivers to complete their task is to “still hunt”, that is, start and
stop. Drivers that are hunting appropriately should have opportunity to harvest a deer
equal to that of a poster. Moving slowly for a short distance then stopping and
observing will often cause a deer to get nervous and stand up. Many times noisy
hunters moving quickly will walk past a hidden deer because the deer knows where the
hunter is and stays put. When a hunter stops and is quiet, a deer often gets nervous
and tries to determine what is going on thus sometimes providing the driver with a safe
shot.
The driver needs to be safety conscious at all times -- thinking about and planning a
safe shot. If a deer appears in an area, can a shot be made? Drivers need to know
where other drivers and posters are, what’s in the background, non-party hunters who
may appear and may be trespassing, as well as non-hunters may be afield.
Team members will simulate loading and unloading the firearm that they are carrying
at the appropriate times. Firearms safety rules and muzzle control will be demonstrated
at all times.
The final deer target the team finds should be a shoot situation. One of the team
members will shoot, i.e., shouts “bang”. When the team arrives at the target, a blood
trail will be present.
26Transportation, Storage, and Transportation, storage, and removal of
Removal of Firearms and firearms and ammunition from a motorized
Ammunition from a Vehicle vehicle
Students start at a vehicle from When students arrive at the Field Day site and
which they retrieve the firearm are asked to bring a firearm, qualified instructors
(shotgun or rifle with unloaded will inspect each firearm to determine that it is
indicator string they will use unloaded and can be operated safely; a chamber
during the hunt). checker should be installed. The cased firearm
Vehicle should contain firearms that can then be placed in a dedicated vehicle until the
are legally cased and transported time the student needs it for the Hunter’s Trail
as well as those that are not. scenarios.
Include a bow and case even When the team members retrieve their firearm
though it may not be included in a the Team Leader should facilitate a discussion of
scenario. transportation of firearms in a motor vehicle in
Minnesota. Assist team members with
As students retrieve the firearms
and dummy ammunition from the understanding when a firearm needs to be cased.
vehicle, the instructor facilitates a Determine that the students understand that all
discussion to help the students firearms must be unloaded while being
learn what the safe and legal transported in a motorized vehicle. Also help
methods are to transport and team members to understand that firearms, in
remove guns and ammunition
from a vehicle and when to load certain situations, can be transported uncased but
and unload firearms. that is safer (and protects the firearm) to transport
all firearms cased. If available, samples of
Fence Crossing archery equipment could be placed in the vehicle
Lone hunter so discussion of case requirements for their
1. Unload transport can be facilitated.
2. Place firearm on ground Fence Crossing
muzzle away Each team member will be required to
Protect muzzle with cap, etc. demonstrate the proper/safe steps to cross a
-Cross safely
-Check for obstructions
fence when they are alone and with a partner. Do
not cross barbed wire or another type of fence
that may pose a risk of injury. If an appropriate
fence is on site it may be used if convenient. A
fence can be made by tying two ropes between
convenient trees or temporary posts. Team
members can cross alone, for example, at one
location on the Hunter’s Trail and with a partner at
another if the site allows. Or team members can
cross alone in one direction and with a partner in
the other.
The steps that a student should demonstrate when crossing alone include:
unloading their firearm, laying the firearm under the fence with the muzzle pointing
away (with a cap, glove, etc. protecting the muzzle) from where the hunter will cross;
the hunter crossing the fence being sure not to step on the firearm, picking up the
firearm, checking the muzzle for obstructions and reloading if the hunt is to continue.
27If a student misses a step politely ask
With another hunter
1. Unload – (back-to-back) them “what they should do different”. If they
2. One hunter accepts unloaded are unsure or need help, ask other team
firearm member if they have a suggestion.
3. Partner crosses safely Each student will complete the activity.
4. Hands firearms to partner As always, all students need to demonstrate
5. Crosses fence muzzle control and safe firearms handling
6. Second hunter accepts their
firearm from partner (“I have it,
procedures at all times.
thank you”) The steps to cross a fence with a
7. Reload when safe & appropriate to partner are as follows: partners stand back-to-
do so (back-to-back) back and unload their firearms, one partner
hands his/her firearm to the other (following the
proper procedure; “got it, thank you”), partner
crosses the fence, first partner hands the two
firearms to partner (following the proper
procedure; “got it, thank you”), he/she crosses
the fence and receives his/her firearm from
partner (following the proper procedure; “got it,
thank you”). If the hunt is to continue, partners
reload while standing back-to-back.
If there are an odd number of members
on the team one member may have to be a
partner twice.
Live Fire .22
Live Fire - Range Master and Instructor team will provide .22 rifles for the
Team Leader live fire scenarios. As student teams will
include some who are right eye dominant and
15 rounds of .22 - use instructor some left eye dominant, both right and left
guns hand rifles will be needed. Also, rifles with
various lengths of pull should be ready for use.
Standing 3rds Least Stable
Rifles should be single shot; if not, allow
Kneeling 3rds More Stable
students to load one round at a time.
Sitting 4rds More Stable
A safe gun rack or location to place the
Prone 5rds Most Stable rifles when students are not using them should
be provided. As students will be carrying their
own firearms but not using them at the live fire,
accommodations to safely set them aside need
to be made.
Hearing and eye protection must be used
by all while the live fire scenarios are being
conducted. Soft foam ear protectors are
provided with supplies. Eye protection
sanitation equipment must be used as directed
in Appendix C.
A Range Master will run the live fire range
for all teams. The Team Leader becomes a
range assistant for the live fire scenarios.
Appendix C provides information and
instructions for the Range Master. Team
28You can also read