HOW TO USE The Water Calculator - Water Calculator Guide v2 120711
←
→
Page content transcription
If your browser does not render page correctly, please read the page content below
HOW TO USE
The Water Calculator
               Water Calculator Guide v2 120711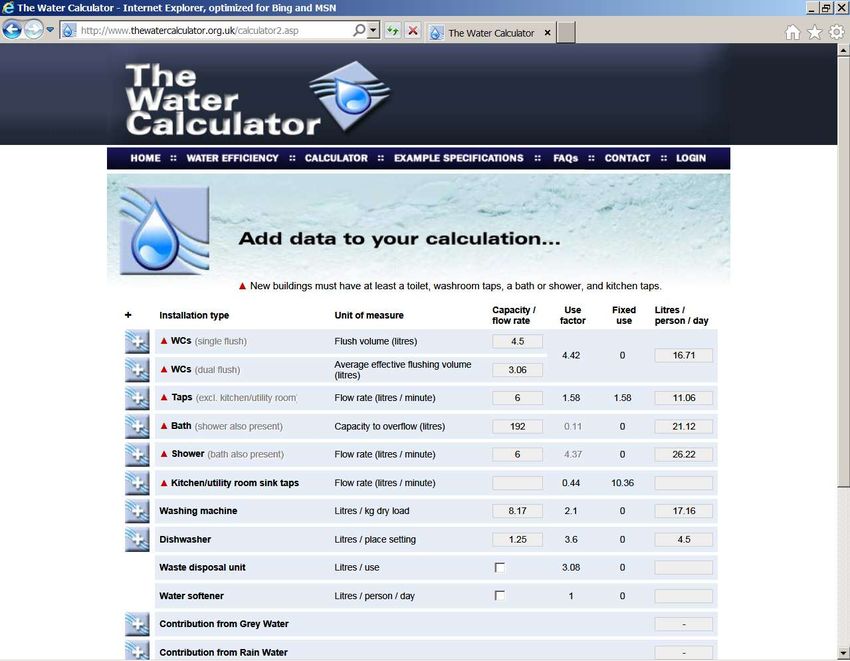
The Water Calculator is designed for industry professionals. The calculator is not a
catalogue of products. It is assumed that the user already knows the product ranges
                        available in the UK bathroom market.
The Water Calculator is designed to help compliance with
The Code for Sustainable Homes and Building Regulations Approved Document G.
                         It is designed for the ‘whole house’.
    All parts of the calculator need to be completed to obtain a correct result.
     Missing information will be highlighted if a whole house is not completed

  The Water Calculator uses the methodology and formulae laid down by the UK
       Government Department for Communities and Local Government

       The Water Calculator uses products registered in the WEPLS database
                    (Water Efficient Product Labelling Scheme)
   It also allows manual additions for products that are not yet listed in WEPLS

                    Products registered in the WEPLS database
       fully conform with the requirements of the Water Regulations 1999

             To start - go to the dedicated Water Calculator website.
                   www.thewatercalculator.org.uk
       There are also links on the BMA website and on the WEPLS website.
HINT | Know your products before you start.

To start a calculation, click on the droplet.
A ‘whole house’ calculation with no manual additions should take about 20
minutes to complete. Manual additions will increase the time it takes.
Click on a ‘radio button’ to select your performance target.
(Note: the maximum allowed under current regs is 120 litres per person
per day plus 5 litres for an outside tap) You can give your project a name
now, if you want to. Then click NEXT.
Start adding product data to your project.
Click on a     button against a product installation type to reveal another
window. Here we have chosen ‘WCs (single flush)’.
You can reduce the number of products displayed using the filter.
Use the drop down menu. Select your options.
In this example we have chosen 4.5 litres.
The system now refreshes and limits the choices available to you.
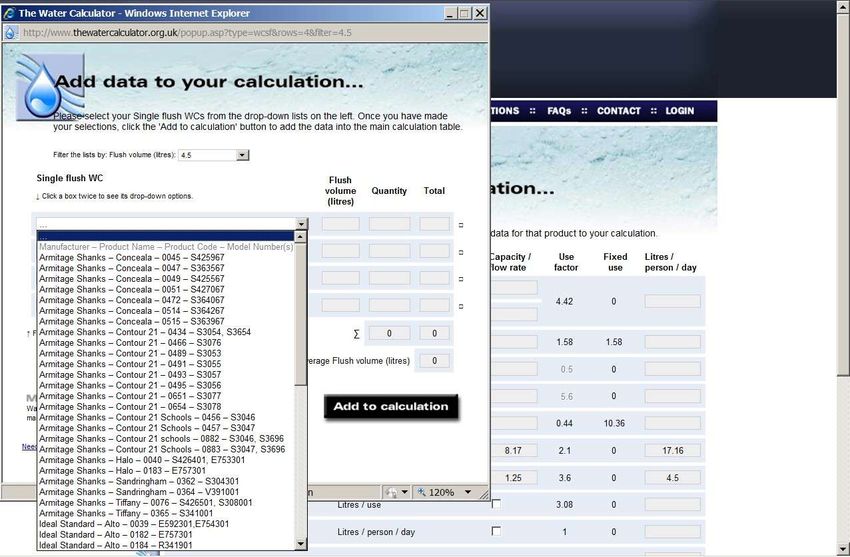
Click the first box TWICE to reveal the products available, listed alphabetically, by
manufacturer. You therefore need to know the product manufacturer and product
name since the products are not listed by volume consumed.
The drop down menu of available products appears.
(They are all listed in the WEPLS database and fully conform with the regs.)
Click on your chosen product – in this case the first one.
The product will be automatically added to your project.
After about 5 seconds a thumbnail of your product will appear.
Hover your mouse over the thumbnail to make it grow, a little.
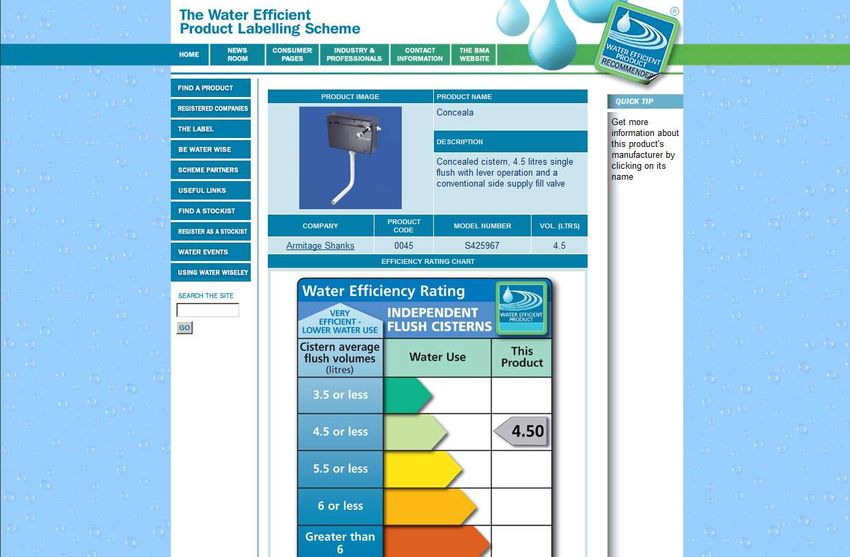
Click on the image for more live information direct from the WEPLS website.
Another window will open and you will be directed to the WEPLS site
where you can find more information about the product chosen.
The WEPLS site is packed with more information.
Close this window to return to your calculation.
So – back to the calculation and one product has been automatically added.
And a total usage has been automatically calculated using the formulae
developed for the UK Government’s department for Communities and
Local Government.
Now, click “Add to calculation”.
Observe: your single flush WC information has been added in the first row
using the known ‘use factor’.
Add a second product – click on WCs Dual Flush.
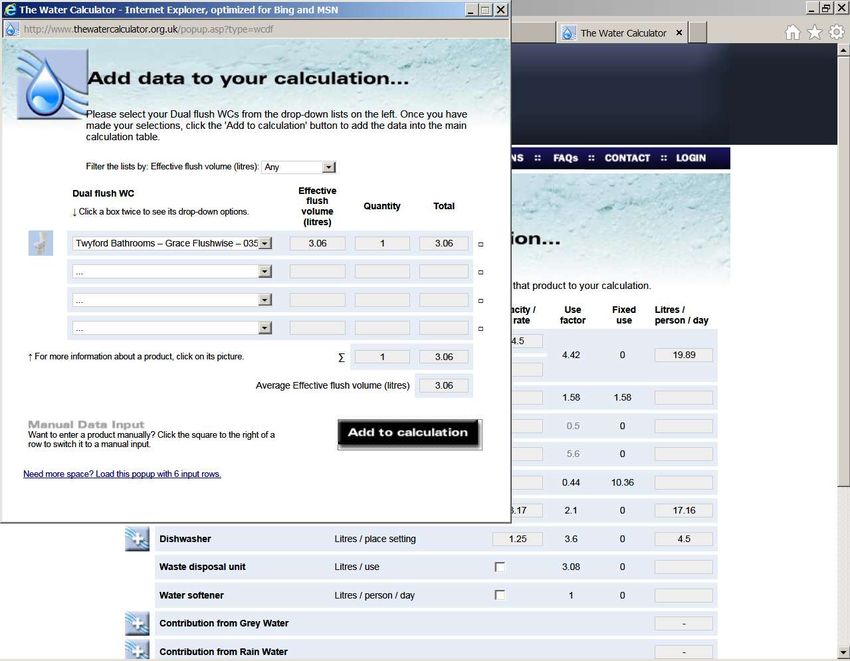
In this case we will add a Dual flush WC.
Choose your favoured product from those presented in the new window.
Click twice to get a drop down menu.
Choose your favoured product from those presented in the new window.
In this example the Twyford Grace Flushwise WC has been chosen.
Click “Add to calculation”.
Note: scroll the window to find the button if it is not showing first time
Observe: the two choices made so far have been added to the total.
Now add some taps. Click on ‘Taps’
Again, observe that a new window has opened.
Click twice on the box for the drop down options.
Choose your product as before. In this example a Methven (Deva) Cross Tap
has been selected.
Click on ‘Add to calculation’
Observe: you are now building up your project details and specification
with ‘use factor’ built in.
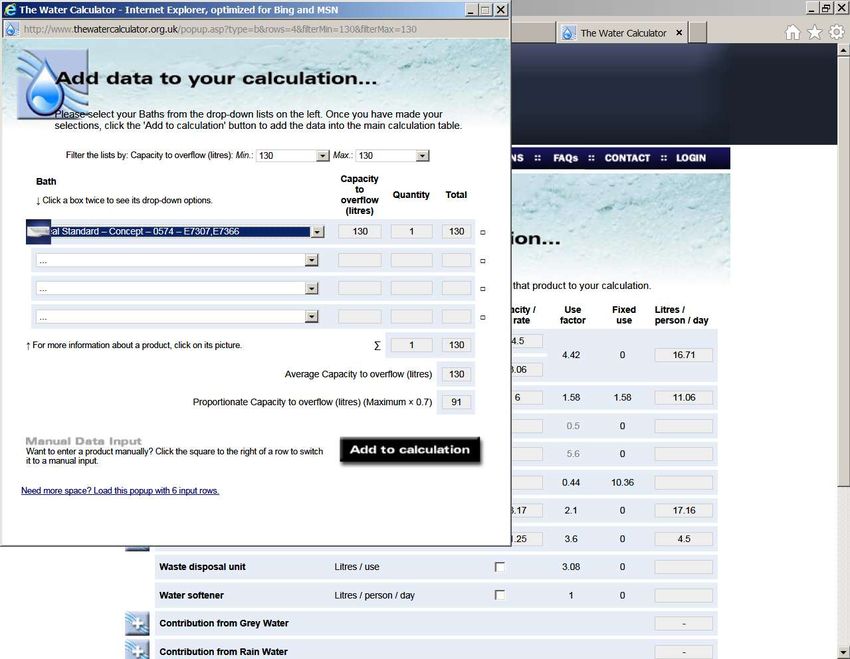
Add a bath.
Click on the box twice.
Add the bath.
Don’t forget: use the filter if you need to limit the choice available to you.
In this example the Ideal Standard Concept Bath has been chosen.
Click ‘Add to calculation’
Observe: your calculation is steadily being built up using the CLG
methodology as previously described.
Continue adding your products, using the same method as before.
Observe: Fixed usage figures (issued by Government) for a
washing machine and dishwasher have already been added for you.
Note: It may be that you want to add a product which is not listed in the
database. You can do this manually. Any product can be added manually.
In this case and only as an example, we have chosen a Shower (Showers, of
course, can be added from the WEPLS database as all other products)
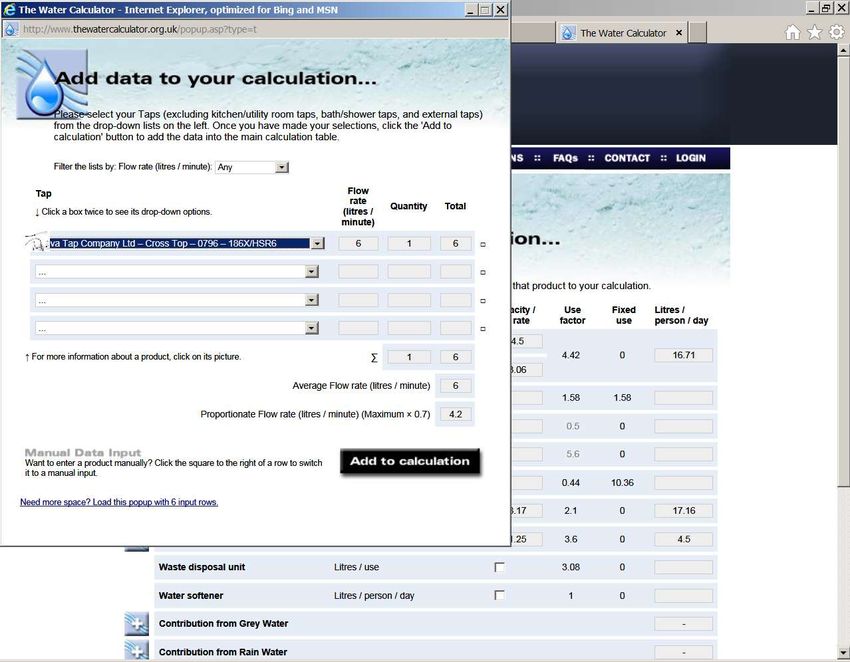
Observe: A new window opens. Manual input instructions are at the
bottom of the window. Click on the small square to the right of a row to
switch to manual input.
Observe: the window has changed. Ignore the instructions to ‘Click on a box
to see its drop down options.’ Also ignore ‘For more information about a
product …’ Type in the flow rate for the shower you are adding, manually.
Observe: In this case we have chosen a shower with a flow rate of 6 litres per
minute. Now click ‘Add to calculation’
Observe: The manually-added details have been calculated
and added
NOTE: The calculator is designed for a ‘whole house’ specification. If you
are tempted to click the calculate button too early, graphic red triangles
will show your progress and possible errors.
Observe: The error is highlighted. The kitchen /utility room sink taps
detail is missing. Click to add the missing items.
Observe: Kitchen / utility room taps are not included in the WEPLS database.
They therefore need to be added manually.
Use the same manual method as shown previously.
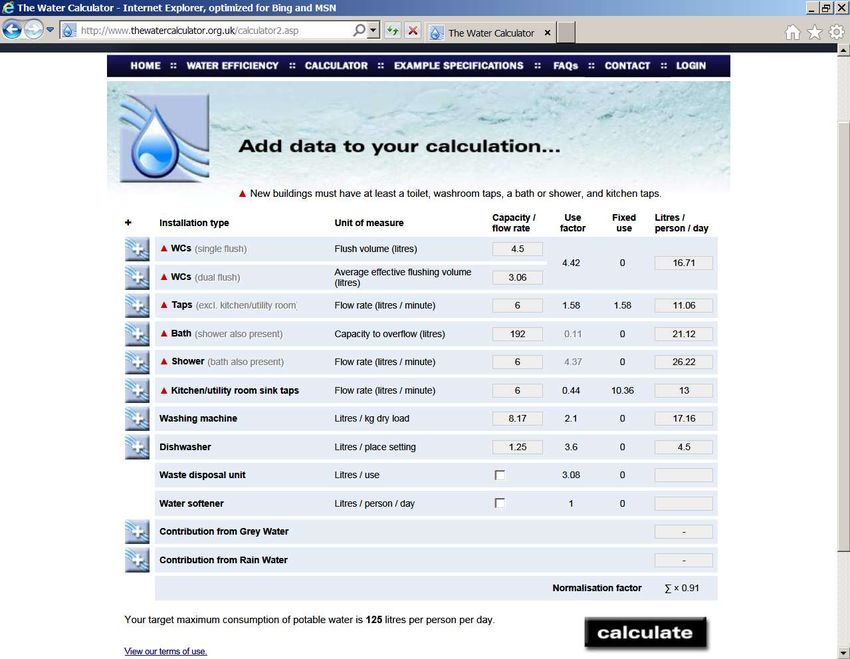
Type in the flow rate for the kitchen or utility taps.
Click ‘Add to calculation.’
If you have no waste disposal or water softener to add, and no contribution
from grey water or rainwater click calculate
Note: 5 litres have been added
automatically for the outside tap
for external water use.
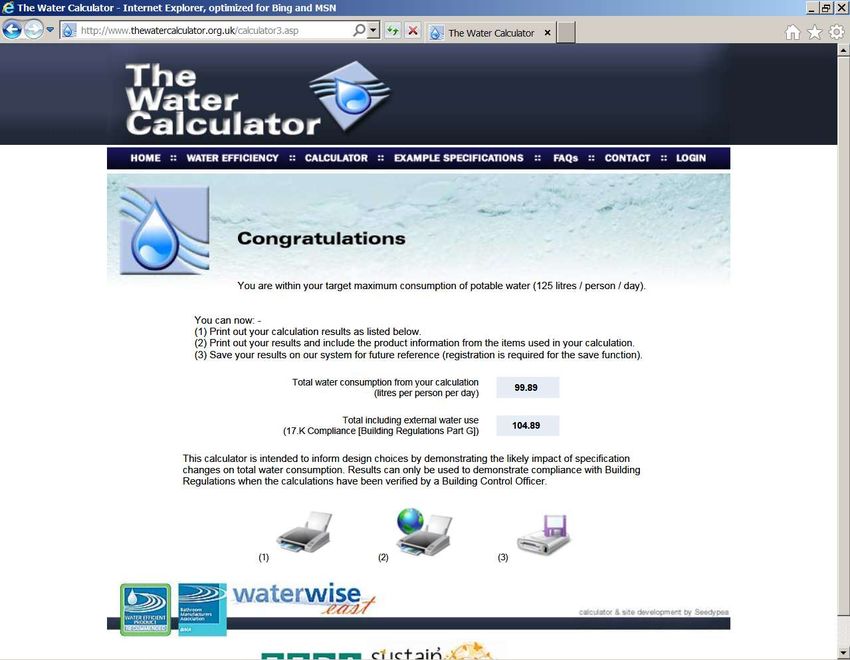
Observe: If you meet the requirements you set at the start, you get the
congratulations screen and the options to print or save the results for later.Observe: Here is the ‘Print result only’
Observe: Here is ‘Print result plus all details’
Observe: Save. The result can be saved for later.
If you haven’t already done so you will need to register and log in.
Your results are private and will never be revealed to a third party.
Enter the name of your project and your login details.
Click next.
That’s it …
  as with all software the more you use
          The Water Calculator
  the more proficient you will become.
   Thank you for choosing to use
The Water Calculator for your project.
You can also read