INFRARED PHOTOGRAPHY FRAN DERESPINIS - CAPITAL CITY CAMERA CLUB
←
→
Page content transcription
If your browser does not render page correctly, please read the page content below
Infrared Photography     Fran DeRespinis
A Personal Journey

                     1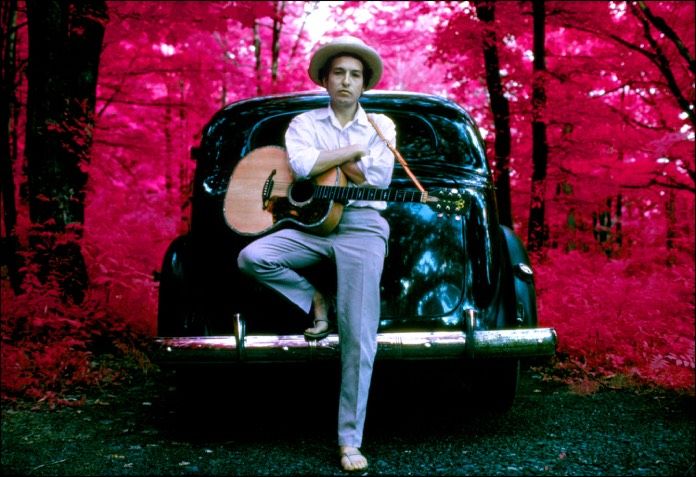
A Disclaimer and My Intended Purpose

❖   My Disclaimer

    I am not an IR expert. I’m an enthusiastic practitioner who has just
    enough knowledge to make me slightly dangerous on this subject.

❖   My In-Yo-Face Intention

    To convert at least one of you to shoot IR. Maybe two.
    Yes, I’m proselytizing!

                                       2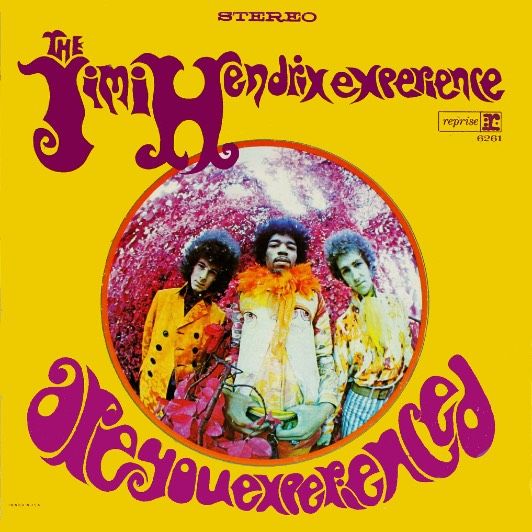
You’ve Seen B&W Infrared Photographs
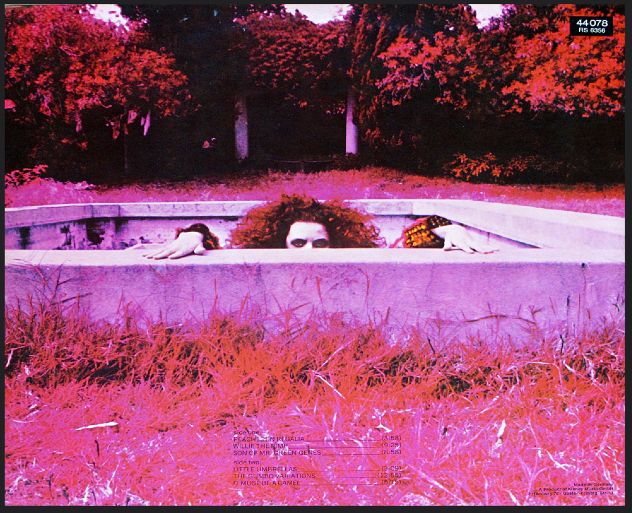
You’ve Seen Faux Color Infrared Images

                  4
So, What Is Infrared Light?
                                     (as scientific as I dare to get)

                                                             •   Human visible light is 400 - 700nm
                                                                 (violet - deep red).

                                                             •   Invisible near infrared is about
                                                                 700 - 1200nm.

•   Faux (false) color IR photography
    (e.g. 590nm) includes some of the
    visible reflected light that we see.

•   Deep B&W IR photography (e.g.
    850nm) removes virtually all visible
    wavelengths of light.

                                                    5
A Barely Bare-Bones Overview
❖ The Briefest of histories:
❖ Infrared radiation discovered in 1800 William Herschel
❖ First publication of IR images was in 1910 by physicist Robert W. Wood in the Photographic Journal of
the Royal Photographic Society
❖ Today, infrared light is used for many things, e.g. lasers in CDs and DVDs and the remote control
behind the couch cushion
❖ Some common uses of infrared photography:
❖ Scientific Imagery (e.g. botany, ecology, meteorology)
❖ Forensics
❖ Astronomical Studies
❖ Medical Applications
❖ Military and Law Enforcement
❖ and… Art!
6Why Bother? What’s In It for Me?
(le raison d’être)
❖ A way to see and render the familiar in unfamiliar ways
❖ You can enjoy shooting in broad daylight.
❖ It’s easy to do, especially with a digital camera.
❖ Not just for making landscapes look weird:
It’s also for:
architecture closeups portraits abstracts,
macro flash interiors and more…
7Nine Key Points About Capturing IR Images
(1 - 5)
1. Focus shift: Infrared light focuses at a different point than visible
light - red wavelengths bend the least, violet the most. (no problem)
2. Avoid autoexposure. Ideally, shoot manually.
I also shoot aperture priority and use exposure compensation.
3. IR images can be grainier and not as sharp as visible-light
captures.
4. If you use filters on a conventional camera you’re “shooting blind”,
losing 5-7 stops, requiring pre-focusing and composition and the
use of a tripod.
5. Some lenses on converted cameras can create hot spots. Do your
research at LifePixel or Kolari Vision.
8Nine Key Points About Capturing IR Images
(6 - 9)
6. An IR image that is captured in B&W has shades of grey with magenta tones.
7. Faux Color imaging often described as a “brick and cyan” color scheme (*not my Dƒ!).
“Typical” Faux Color Capture WB Problem Faux Color Capture
8. Ideally, set your WB in-camera - create a preset using grass or leafy greens as your subject
(*I cannot set a custom WB in my Dƒ, so in LR I might set Temp 2000 and Tint -75 !).
9. Good to check your histogram: Red channel blowout (not a problem).
9Some of IR Conversion Options
(information from Kolari Vision website)
The Standard IR Filter (720nm) This is the tried and true classic IR filter. It allows for good color for false color, and good contrast for black and white. This is equivalent to
the Hoya R72 and Wratten 89b.
When to use this filter: This filter is good if you are interested in shooting some mild color and black and white. This filter produces the traditional dark blue skies and can also
be processed for color. While not as high contrast as the 850nm, people prefer this filter over the 850nm for B+W work, as it allows a little more color for B+W processing.
***The Ultra Color filter (590nm) The Ultra Color filter (590nm) lets more visible light in, producing the most vibrant colors. Leaves are golden yellow, and skies are bright
blue. B+W contrast is lower than the deeper IR filters.
When to use this filter: This filter is good for vibrant color IR landscapes, allowing the most flexibility in post processing. Also a good choice for portraits. The shallow IR shows
less veins than the deeper IR filters while still creating a dreamy look. May not be as sharp as the deeper filters due to increased chromatic aberration.
The Enhanced Color filter (665nm) The Enhanced color filter (720nm) has an effect between the 720nm and 590nm, producing more vibrant colors than the 720nm for pale
yellow leaves and brighter blue skies.
When to use this filter: My most used filter, this filter is best suited for processing to a traditional blue sky and white leaves, by desaturating the yellow in the leaves. This
produces a look like the 720nm filter, but providing a richer blue that comes out more reliably between different cameras and different shooting conditions. Also a good choice
for portraits. The shallow IR shows less veins than the deeper IR filters while still creating a dreamy look. May not be as sharp as the deeper filters do to increased chromatic
aberration.
***The Deep Black and White filter (850nm) This filter is good for a dedicated black and white IR. The camera will produce bright whites and pronounced darks. With a
custom white balance in camera, the picture is close to pure B+W without any processing. Equivalent to the Wratten 87c.
When to use this filter: This filter is the best for the highest contrast B+W, closest resembling traditional B+W IR film. Also good for forensics and other applications where the
deep IR wavelengths are helpful.
The NDVI Blue IR filter (Blue +IR) Our newest filter transmits both blue and IR, making it ideal for NDVI crop analysis applications, allowing an NDVI to be generated from a
single image using the blue and red channels of the image. This filter is also handy for landscape photography, as it produces a similar effect to the 590nm after a channel
swap, right out of the camera.
When to use this filter: Good for crop analysis purposes and a false color IR without post processing. Due to the multiple bands the lens has to focus with this filter, the
images are less sharp than they can be with the dedicated IR filters.
The Full Spectrum filter (clear glass) makes the camera sensitive to UV, visible, and IR light, allowing switching between various external filters to achieve the desired
effect, this allows going between infrared and regular shooting with one camera, however on DSLRs opaque infrared filters will block composition.
The Two Spectrum filter (IR + Visible) makes the camera sensitive to visible and IR light. It works the same way as the full spectrum, while filtering out UV for better color
rendition in visible light shooting.
10Example: 850nm Deep B&W
Capture Final Rendition
Photos © 2017 Francis DeRespinis. All Right Reserved
11Example: 590nm Super Color
Capture Final Rendition
Photos © 2017 Francis DeRespinis. All Right Reserved
12Processing Your IR Image
❖ There are as many workflows and creative styles for IR
post processing as there are IR photographers!
❖ Mine is a variation on the workflow of Mark Hilliard. I
learned this workflow in a workshop run by Mark and
Jamie Konarski Davidson.
❖ Let’s look at my workflow for a Super Color IR image
(Nikon Dƒ - 590nm)
13Processing Steps: 1 - 2
1. Load your image into Lightroom or Photoshop.
2. Make small adjustments to Contrast, Saturation & Clarity.
(*Sometimes Temp, Tint, Exposure)
Alternately, you can do this in
Photoshop with Nik Viveza.
14Processing Steps: 3 - 7
3. Send the image to Photoshop if it’s not already in PS.
4. In PS, Click Image > Adjustments > Channel Mixer.
5. Select Red as the output channel and drag the Red channel slider until 0% is displayed. Then drag the
Blue channel slider until 100% is displayed.
6. Now select Blue as the output channel and drag the blue channel slider until 0% is displayed. Then
drag the Red channel slider until 100% is displayed.
7. Click OK to accept your changes
and to close the Channel Mixer.
Okay, so here’s some magic!
Mark Hilliard has a PS “Action”
that you can download and use
that automates the swapping.
See the links page.
15Processing Steps: Channel Swapping
Here’s an image in PS before and after the channel swap.
Photos © 2017 Francis DeRespinis. All Right Reserved
16Processing Steps: 8 - …
8. You can now do a gazillion different things to your image,
depending on your own style.
• You can stay in PS and use Viveza, Nik software, or other
tools to alter your image.
• You can do what I do and go back to LR and use any and
all of your know how, including treatments, presets, other
Nik software, and so on…
This is the FUN part!!!!!
17Process Simulation: B&W 1 (so freakin’ easy!)
OOC Capture with my Fuji X100T converted to 850nm
Photo © 2017 Francis DeRespinis. All Right ReservedProcess Simulation: B&W 2 (so freakin’ easy!)
Silver Efex Pro: Full Dynamic Harsh and Agfa APX 400 simulation
Photos © 2017 Francis DeRespinis. All Right ReservedProcess Simulation: B&W 3 (so freakin’ easy!)
In Lightroom, I raised the exposure on the three faces of the monoliths
Photo © 2017 Francis DeRespinis. All Right ReservedProcess Simulation: B&W 4 (so freakin’ easy!)
In Lightroom, I selectively darkened the ground and tops of some shrubs
Photo © 2017 Francis DeRespinis. All Right ReservedProcess Simulation: B&W 5 (so freakin’ easy!)
In Lightroom, I finish by selecting the DPS preset: Cabo Wabo
Photos © 2017 Francis DeRespinis. All Right ReservedProcess Simulation: B&W 6 (so freakin’ easy!) Photo © 2017 Francis DeRespinis. All Right Reserved
In Summary
                   Processing Example (Super Color 590nm)

         Capture                  Swapped Channels          Faux Color   B&W

Photos © 2017 Francis DeRespinis. All Right Reserved

                                                       24
Example: 850nm Deep B&W
Capture Final Rendition
Photos © 2017 Francis DeRespinis. All Right Reserved
25Processing Example (Visible, IR Color, IR B&W)
(Thanks Alan Clark!)
Visible Light IR Super Color (590nm) IR B&W (from 590nm image)
Photos © 2017 Francis DeRespinis. All Right Reserved
26Explore These Links: Infrared Photography
❖ lifepixel.com (All you want to know about camera conversion - They converted my Nikon Dƒ)
❖ https://kolarivision.com (More “All you want to know…” - They converted my Fuji X100T)
❖ http://www.spencerscamera.com/index.cfm (Another conversion company but never used them)
❖ https://markhilliardatelier-blog.com (You can download his PS action for color channel swapping)
❖ http://newlifephotos.photoshelter.com/gallery/Infrared-Imagery/G0000pnOSC0bPSNY/ (Jamie Konarskie got me
started!)
❖ https://www.theculturium.com/ron-rosenstock-the-invisible-light/
❖ http://khromagery.com/khromagery/processing-infrared-raw-files/
❖ www.atsf.co.uk/ilight/index.html
❖ https://elliottlandy.com
❖ martinreeves.com
❖ https://www.flickr.com/groups/top20ir/
❖ http://www.pxleyes.com/blog/2011/05/the-50-best-infrared-photos-created-by-high-skilled-photographers/
❖ https://www.facebook.com/groups/Infraredphotography/
27FINIS 28
You can also read


