IV Catheter Placement - Year Group: BVSc3 +
←
→
Page content transcription
If your browser does not render page correctly, please read the page content below
IV Catheter Placement

          Year Group: BVSc3 +
                   Document number: CSL_A06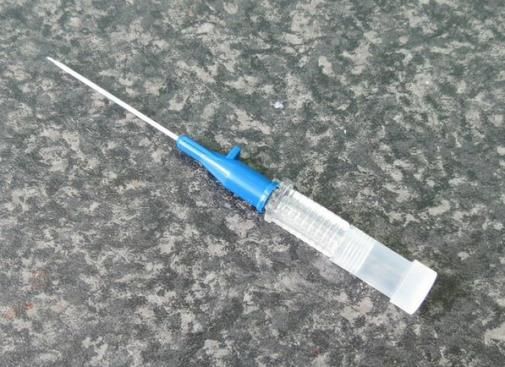
Equipment list:
                            IV Catheter Placement
 Equipment for this station:
    •    IV catheter model, with giving set and red fluid bag
    •    IV catheter
    •    Bung or T-port
    •    Tape – two strips cut to size before starting

    Additional equipment you would need with a live animal:
         – Swab/cotton wool
         – Skin preparation solution
         – Needle
         – Syringe
         – Sterile saline

 Considerations for this station:
   • Stylets and needles must be disposed of in a sharps
      container.
   • In the Clinical Skills Lab (CSL) stylets and needles
      should be used more than once wherever possible
   • Wear gloves if allergic to latex

 Anyone working in the Clinical Skills Lab must read the ‘CSL_I01 Induction’ and
    agree to abide by the ‘CSL_I00 House Rules’ & ‘CSL_I02 Lab Area Rules’
Please inform a member of staff if equipment is damaged or about to run out.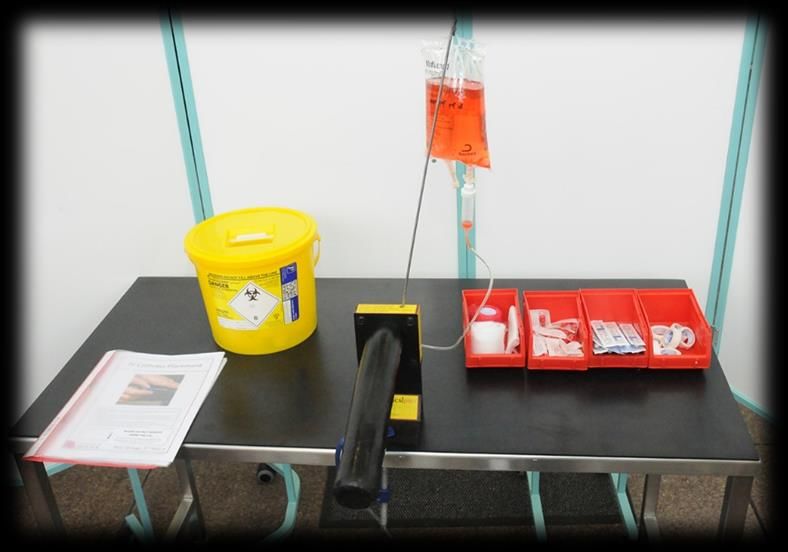
Clinical Skills:
IV Catheter Placement
1 2 3
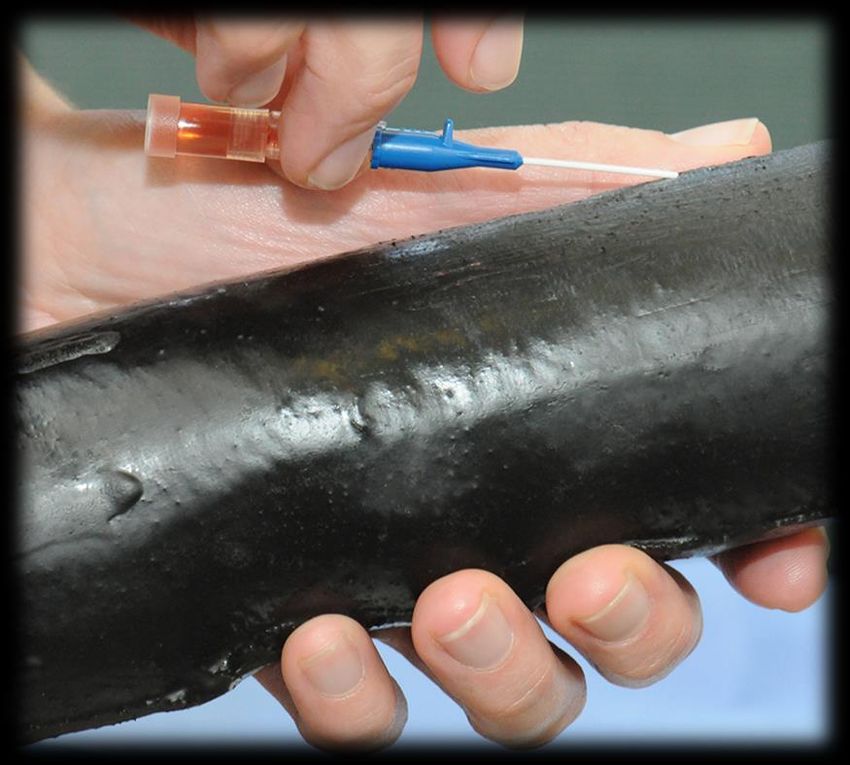
Before attempting to place an With live animals: In a live animal clip the hair at
IV catheter it is important to Pre-flush a T-port with the insertion site and then
prepare all equipment. It may clean according to the clinics
sterile saline (see ‘CSL_A09
become difficult to restrain an standard operating procedure
anxious or wriggly animal if the
IV Fluid Therapy Set Up’
booklet). This avoids (both chlorhexidine and
procedure is prolonged while
delivering an air embolus alcohol are commonly used).
waiting for missing equipment.
Prepare 2 lengths of tape for with the fluids or drug/s.
securing the catheter. These
should be long enough to pass The above picture
around the animal’s leg demonstrates flushing a
approximately 1½ times.
needle free system.
4 5 6
Do not touch
Do not touch
Open the catheter packaging Remove the catheter from Top tip: Partially separate
by peeling off the paper its protective plastic cap the catheter and stylet and
back. (container). then replace them in the
original position. They can
N.B. Sterility must be be difficult to separate the
maintained whilst placing first time.
catheters.
If you break sterility, stop Take care not to touch the catheter tubing or rest it on the
and correct the mistake table as the catheter tube lies within the vein and must be
appropriately. See page 10 kept sterile.
of this booklet for examples. See the “I Wish I’d Known” section towards the end of this
booklet for more information on maintaining sterility.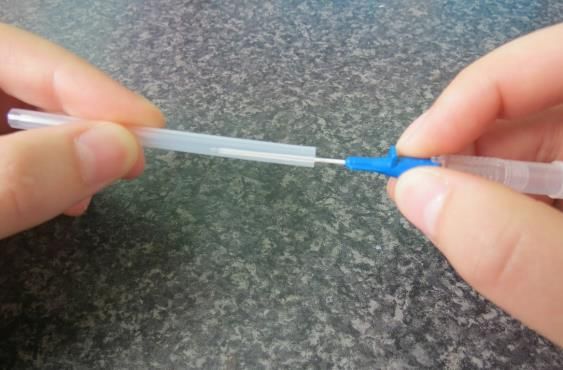
Clinical Skills:
                                    IV Catheter Placement
7
                Flashback chamber                 Catheter

                                                                              Stylet tip

      Bung

                  Stylet grip                            Hub

 8                              9                                10

In a live animal, ask an        If you are right handed,          With your right hand
assistant to restrain the       place your left thumb             position the catheter with
animal, stabilise the limb      alongside the vein to             the bevel facing upwards at
and raise the vein.             stabilise it (but not over the    an angle of approximately
                                sterile area).                    30° to the leg.

                                     Bevel down                  Bevel up

                                                     Leg                    Leg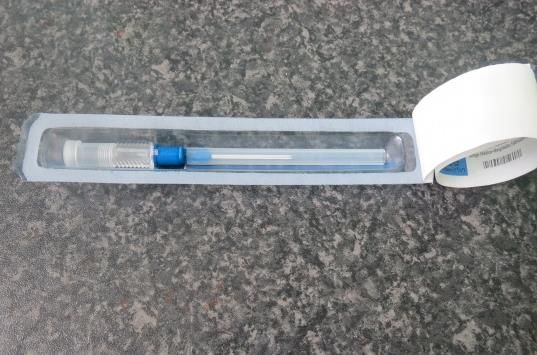
Clinical Skills:
                                  IV Catheter Placement
11                               12                              13

Insert the tip of the catheter   Once the red flash is seen,     Gently press the end of the
in one confident movement        flatten the angle of the        catheter down onto the limb
to pierce the skin and vein.     catheter and continue to        so that if the animal moves
                                 insert for approximately        you will move with it and not
                                 another 5mm to ensure that      accidentally remove the
If placed correctly the                                          catheter.
catheter will enter the          the catheter is lying well
                                 within the vein.                With your index finger on the
lumen of the vein a red flash                                    catheter (as shown above)
of blood is seen in the                                          advance the catheter into the
flashback chamber. Be                                            vein and off the stylet. The
careful not to exit through                                      stylet should be held still and
the other side of the vein.                                      not be advanced into the vein,
                                                                 only the catheter is advanced.

14                               15                              16

Advance the catheter until       At this stage, in the live       Fully remove the stylet and
the hub meets the entry          animal instruct the assistant    continue to hold the limb.
point of the skin. The stylet    to stop raising the vein.        There may be some leakage
should remain still and                                           of blood from the catheter
should not be advanced into                                       although this can be
the vein.                                                         minimised by being ready to
                                                                  attach a bung or T-port.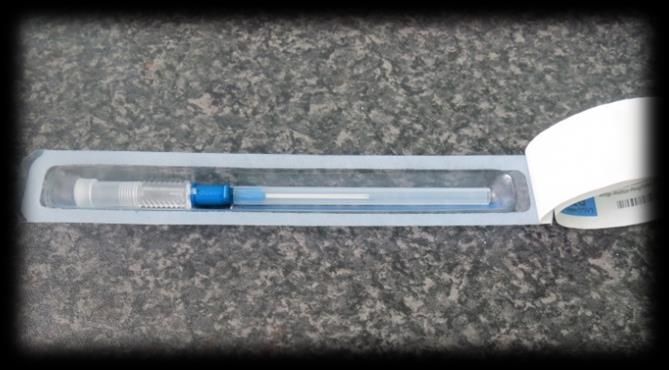
Clinical Skills:
                                IV Catheter Placement
17                            18                                 19

While ensuring that you do    Gently wipe the area               Pass a piece of tape around
not let go of the limb        surrounding the catheter           the leg, this should lay
securely attach a bung onto   using a swab to ensure the         underneath the catheter.
the catheter.                 skin is clean and dry; this will   Then tape over the top of
                              ensure the tape adheres to         the catheter without
                              the skin.                          covering the connection to
                                                                 the bung.
                                                                 This will ensure the catheter
                                                                 remains securely taped in
                                                                 place should you need to
                                                                 remove a T-port or bung.

20                            21                                 22

Pinch the tape around the     To secure the bung in place,       In a live animal, a T-port may
catheter to ensure that it    pass a second piece of tape        be used rather than a bung.
adheres securely to the       around the leg (as directed        Connect the T-port to the
catheter.                     in step 24) then tape over         catheter and ensure it is
                              the top of the bung,               secure.
                              ensuring that the tape does        Pass a piece of tape around
                              not cover the join between         the leg, this should lay under
                              the catheter and the bung.         the tubing just below where
                                                                 the T-port is connected to
                                                                 catheter. Then tape over the
                                                                 top of the T-port tubing.
Clinical Skills:
                                   IV Catheter Placement
23

When using a T-port, before
applying a protective bandage
it is important to check the
catheter placement. Flush the
catheter with sterile saline, if
it flushes easily, with no
subcutaneous swelling, create
a loop in the T-port and tape
it onto the leg.
See ‘CSL_B04 Catheter Bandage
- Catheter not in use’ and
‘CSL_B03 Catheter Bandage -
Catheter in use’ for catheter
bandaging techniques.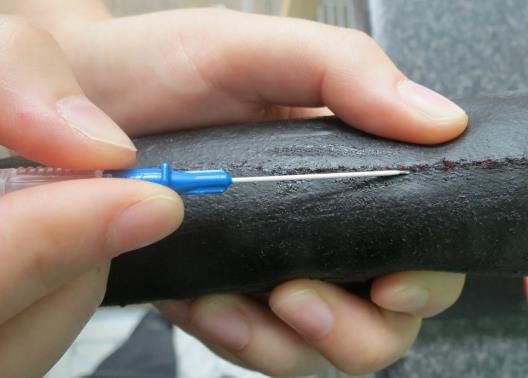
Resetting the station:
                       IV Catheter Placement

1.   Remove tape, T-port and/or bung (in the CSL the T-port
     and bung will be reused).
2.   Remove the catheter – these are re-used so re-insert the
     stylet – see ‘CSL_U02 Safe use of needles’ for re-sheathing
     of needles and place them back in their packaging in a
     tray. Take care not to injure yourself. If the catheter is
     blunt, dispose of in a sharps bin.
3.   If no-one else is about to use the model, turn the ‘blood’
     drip off, but do not disconnect anything:

                                     The gate should be closed, so the roller
                                     is at the bottom.

                                     The 3 way tap behind the model should
                                     NOT allow the ‘blood’ to flow into the
                                     model – the arrows show where fluid
                                     can move. Match it to the picture.

              Station ready for the next person: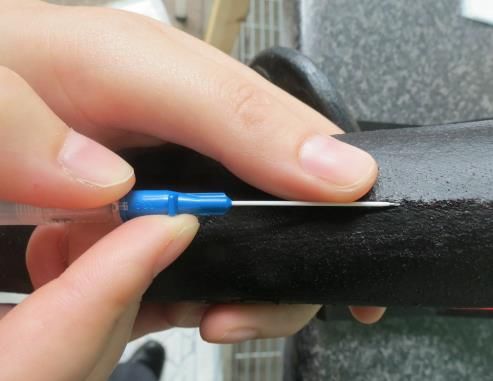
I wish I’d known:
                                                       IV Catheter Placement
 • Everyone has ‘bad vein days’: don’t be disheartened, even the best people miss veins.
 • Some people find it easier catheterising the left or right leg – if you are struggling on
   live animals, try a different leg next time.
 • Sometimes it is less stressful if you can take your patient to a procedures room or ask
   the owner to wait in reception while a blood sample is taken.
 • Open the packaging and remove the catheter without touching the inside of the
   packaging. This means if you need to place the catheter down for any reason, you
   have a readily available sterile sleeve to place it in. N.B. You should always re-sheath
   the catheter in its hard protective cap before placing in the packaging, to help
   maintain sterility, and for sharps safety.

 • Removing the bung at the end of the catheter and flushing with saline makes it much
   easier to see the ‘flashback’ of blood during catheter insertion and advancement
 • Making a small skin nick with a no. 11 scalpel blade facilitates catheter insertion in
   animals with thick or tough skin (e.g. bulldogs).
 • It is essential to maintain sterility whilst placing a catheter. If the tubing of the
   catheter (the white tube that lies inside the vein) touches any non-sterile surface e.g.
   your hand, the table, or the animal’s hair before placement, it will be contaminated
   and a new sterile catheter must then be used.
 • Consequences of poor sterility include phlebitis (inflammation of the vein) which can
   be caused by mechanical, chemical or infectious irritation at the catheter site. If left
   untreated, this can lead to infection or thrombus formation.
 • Studies have shown the rate of bacterial colonisation of catheters to vary between
   7-20% 1-3
 • Careful placement whilst adhering to sterility measures can help to prevent phlebitis
   and associated complications.
1)   Mathews, K. A., Brooks, M. J. and Valliant, A. E. (1996), A Prospective Study Of Intravenous Catheter Contamination. Journal of Veterinary
     Emergency and Critical Care, 6: 33–43.
2)   Lobetti, Remo G; Joubert, Kenneth E; Picard, Jackie; et al. (2002) Bacterial colonization of intravenous catheters in young dogs suspected to
     have parvoviralenteritis. Journal of the American Veterinary Medical Association Volume: 220 Issue: 9 Pages: 1321-1324
3)   Seguela, J. and Pages, J.-P. (2011), Bacterial and fungal colonisation of peripheral intravenous catheters in dogs and cats. Journal of Small
     Animal Practice, 52: 531–535.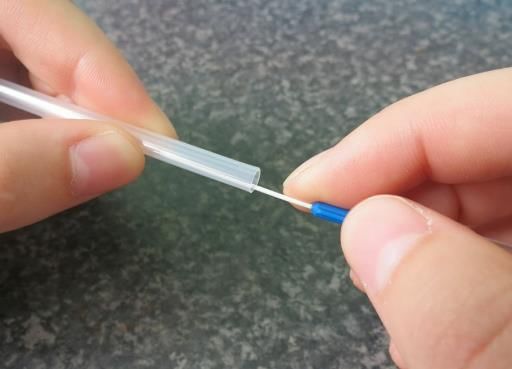
Incorrect Technique
                                    IV Catheter Placement
This page highlights INCORRECT technique. If you make any of these errors whilst inserting a
catheter, it is important to recognise the error, and ensure that sterility is re-established before
continuing.

                                                                               If you touch the
                                                                               tubing, discard that
                                                                               catheter and use a
                                                                               new, sterile one.

Do not touch the tubing of the       Do: Hold the blue port end of the catheter in your dominant
catheter when removing the           hand, and the protective cap in your non-dominant hand.
protective cap.                      Remove the catheter carefully from the cap.

                                                                             If you place the
                                                                             catheter on the table,
                                                                             or compromise its
                                                                             sterility, discard that
                                                                             catheter and use a
                                                                             new, sterile one.

Do not place the catheter            Do: If you need to put the catheter down, re-sheath the
directly on the table.               catheter within its protective cap and place both catheter
                                     and cap within the original packaging (ensure packaging
                                     was opened in a sterile manner).

                                                                             If you touch the tubing
                                                                             during catheter
                                                                             insertion, discard the
                                                                             catheter (even if it has
                                                                             been inserted) and use
                                                                             a new, sterile one. You
                                                                             may also need to re-
                                                                             prepare the skin at the
                                                                             insertion site.

Do not touch the tubing of the       Do: Be aware of where the catheter will enter the vein
catheter with your thumb             and where your thumb is stabilising the vein. Rotate
(stabilising the vein) when          your non-dominant hand away from the insertion site a
inserting the catheter.              little to allow more room and easier visualisation.
You can also read