To Quilting Beginner's Guide - Elizabeth Betts - David and Charles
←
→
Page content transcription
If your browser does not render page correctly, please read the page content below
Beginner’s Guide
      to Quilting
      Learn to quilt with this easy project

     Elizabeth Betts

REPRObeg_guide_quilting.indd 33               2/8/13 7:55 AM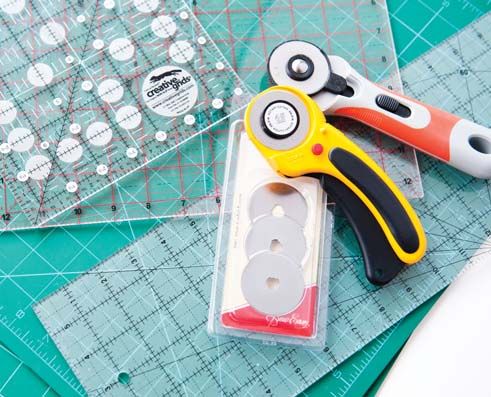
Tools and Equipment
               It can be appealing to buy lots of haberdashery when
               you start making patchwork. I suggest you begin with
               a hand sewing kit, then buy other sewing tools as and
               when you need them. A good basic hand sewing kit
               should contain needles, thread, scissors, thimble, pins,
               tape measure and seam ripper. Keep your sewing kit
               in a box. There are some pretty ones available to buy,
               although a toolbox from a DIY store does the job just as
               well! It is also worth having a notebook and pencil handy
               when sewing to jot down notes and ideas as you stitch.

               Basic kit
               Needles: Use Sharps for hand piecing, and                    Scissors: It is handy to have at least two pairs: a large
               embroidery or chenille needles for hand quilting with        pair for cutting fabric, and a small pair for snipping
               perle thread. Buy a pack of needles with different sizes     threads. It is also good to keep a pair of paper scissors
               so you can try them to see which one you feel most           in your sewing box so you aren’t tempted to use your
               comfortable using.                                           fabric scissors on template plastic or paper as this will
                                                                            blunt them.
               Thread: Make sure you buy a good brand from a
               sewing shop as it will be colour-fast and you will be less   Thimble: These are available in metal, plastic and
               likely to have tension issues with your sewing machine.      even leather. Try out different styles and sizes to see
               For piecing cotton fabric it is best to use 50-weight        what suits you.
               100 per cent cotton thread. Natural colours, such as
               light grey or beige, tend to tone with most fabrics, so      Pins: Different types of pins are available, but for
               buy them on large reels to save money and trips to the       patchwork look for long, fine pins. Flower- or glass-
               shop to buy more thread when you run out. For big            headed pins are handy if you work in a space also used
               stitch hand quilting, I use perle thread in a size 8. For    by children or pets, as you can spot them easily if you
               machine quilting, look for threads specially made for        drop them.
               this purpose as they will be stronger.
                                                                            Tape measure: A standard tape measure is fine;
                                                                            however, if you plan to make large quilts, look for an
                                                                            extra long (120in/300cm) one.

                                                                            Seam ripper: This is an essential tool for unpicking
                                                                            seams quickly.

                                                                            Notebook and pencil: These are handy to keep
                                                                            nearby when sewing to make notes on, for example,
                                                                            colour of thread used, size of stitch, or ideas that come
                                                                            to mind while sewing.

REPRObeg_guide_quilting.indd 8                                                                                                          2/8/13 7:53 AM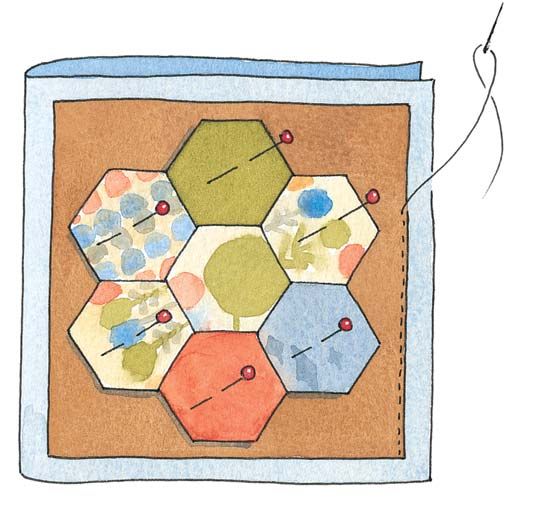
Other quilting tools                                         Acrylic ruler: Rulers come in many different shapes
                                                                            and sizes, from small 4in (10.2cm) squares to hexagons
               Marking tools: These are used to mark sewing or              and circles (see page 21 for more information).
               quilting lines on the fabric. The types most widely used
               are:
               Chalk based – pencils, tailor’s chalk, propelling pencils.
               Pens – water-soluble or vanishing pens.
               Adhesive tape – low-tack masking tape, ¼in (0.6cm)
               wide.
               Pressure based – the Hera marker uses a pressure to
               mark quilting lines.

                                                                            Sewing machine: There are some lovely sewing
                                                                            machines marketed at quilters; however, all you need
                                                                            to start is a basic sewing machine that sews a straight
                                                                            stitch. If you are trying patchwork for the first time, it
                                                                            may be that you can borrow a sewing machine, which
                                                                            will give you a better idea of what you are looking for
                                                                            when it comes to buying one. For quilt making using
                                                                            a sewing machine, it is handy to buy a ¼in (0.6cm)
               Template plastic: This is a sheet of a strong plastic        foot, a darning foot and a walking foot to go with the
               that is used to make patchwork or quilting templates.        standard feet that come with your machine. More
                                                                            details of these are given in the machine piecing and
                                                                            machine quilting sections (see pages 19 and 27). You
               Quilter’s safety pins: These are normally curved             can get useful advice from specialist sewing machine
               to make using them easier. They hold the layers of the       shops, which will usually let you try one out. Some
               quilt together ready for quilting.                           features, such as needle up/down, speed control and
                                                                            the ability to machine sew a blanket stitch, are handy
               Rotary cutter: If you are machine piecing, one               to have, but these are not essential.
               of these is essential. Rotary cutters come in several
               sizes, but the 45mm is the one most widely used for
               patchwork (see p21 for more information).

               Self-healing mat: An A2 size mat is the most useful,
               as it comfortably fits a piece of 44in (110cm) wide
               fabric folded in half. I also find an A3 size handy if
               sewing at home on a small table (see page 21 for more
               information).

REPRObeg_guide_quilting.indd 9                                                                                                          2/8/13 7:53 AM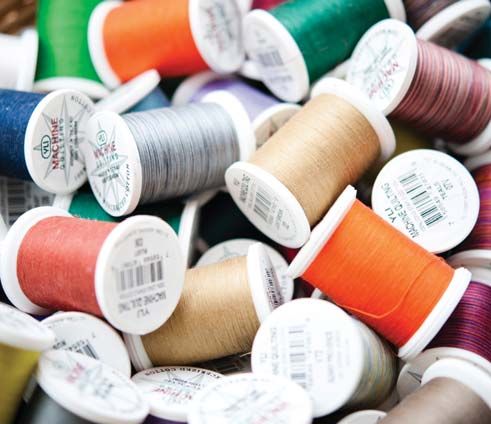
Piecing
               In patchwork, piecing is the term used for sewing fabric together. It can be done by hand, or on the
               machine. Try piecing using both methods to see what suits you.
               When piecing together fabrics that are different colours, use thread in a beige or grey colour as your
               eye will not be drawn to it like it would be for a white thread. When I find a neutral colour that works, I
               buy large reels as it is economical and convenient. If making a quilt with fabrics in predominantly one
               colour, say blue, I would then use a mid-blue colour thread.

               For piecing, use100 per cent cotton, 50-weight thread
               as it is suitable for both hand and machine piecing, and
               easy to find.

               Hand piecing
               Sewing patchwork by hand is really enjoyable. It is
               often portable so you can work for an hour in the
               evening in front of the television, then take it into work
               and do another 30 minutes on it in your lunch break. It
               has a reputation for being slow to do, but hand sewing
               while doing another activity means it uses 'down time'.
               Is's faster to piece on the sewing machine, but if you
               don't have a dedicated sewing room where you can
               keep your machine set up, it is much more convenient
               to have sewing you can pick up and put down.

                                                                            Keep everything you need in a small box, such as a
                                                                            pretty vintage tin, then all you have to do is open the
                                                                            tin and start sewing where you left off. I use Sharps
                                                                            needles for hand piecing. Buy a pack of needles that
                                                                            contains different sizes and try different ones to see
                                                                            which one suits you.

                                                                            The most important thing about hand piecing is to
                                                                            make sure that the beginning and end of your seam
                                                                            are really secure. If you are making something to
                                                                            be quilted after it is hand pieced, this will add to the
                                                                            strength of the item.

                                                                            The main method of hand piecing that I use is
                                                                            English paper piecing.

REPRObeg_guide_quilting.indd 16                                                                                                        2/8/13 7:53 AM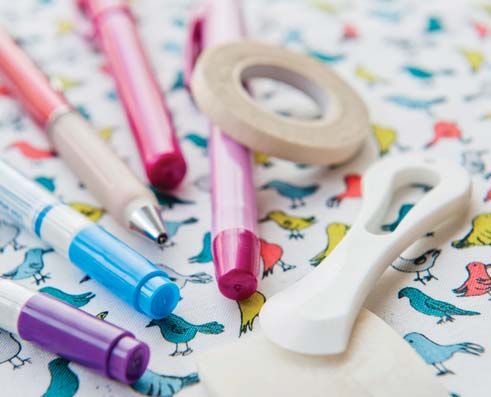
Place two patches on top of each other, right sides
              English paper piecing                                    4     together. To oversew the patches together, thread
              This technique tacks (bastes) fabric to paper shapes,    a needle and start ¼in (0.6cm) in from the edge of
              which are then oversewn. It is good for making           the piece where you want to start, and take a few tiny
              patchwork with different regular shapes, such as         stitches back to the edge, which serves as a backstitch to
              hexagons and diamonds, hence it is also sometimes        secure the thread. Then work your way along the seam
              known as mosaic patchwork.                               and sew a few reverse stitches at the end of the fabric
                                                                       to secure. Keep sewing the patches together in this
                                                                       manner. If you are making a large quilt, work in small
                  Make a template out of card or template plastic.     units then join them together later.
              1   Draw round the template on to paper – scrap paper
               is fine – and cut out the shape from the paper.
                                                                            4
                   Pin the paper piece to the back of the fabric.
              2    Using scissors, cut around the shape, leaving a
               generous ¼in (0.6cm) seam allowance all around.

                     2

                     Thread a needle and tie a knot in the end. Fold
               3     the seam allowance over the piece of paper and
               tack (baste) in place using a large running stitch.

                     3

                                                                           When you have finished making the patchwork,
                                                                       5   take out the tacking (basting) stitches and the
                                                                       paper backing. Keep the paper backings as they can be
                                                                       used for another project.

REPRObeg_guide_quilting.indd 17                                                                                                     2/8/13 7:53 AM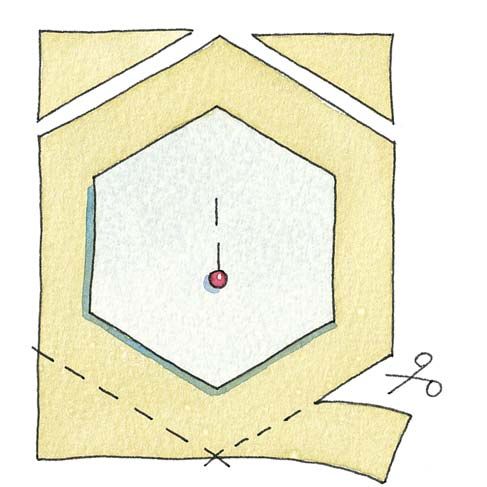
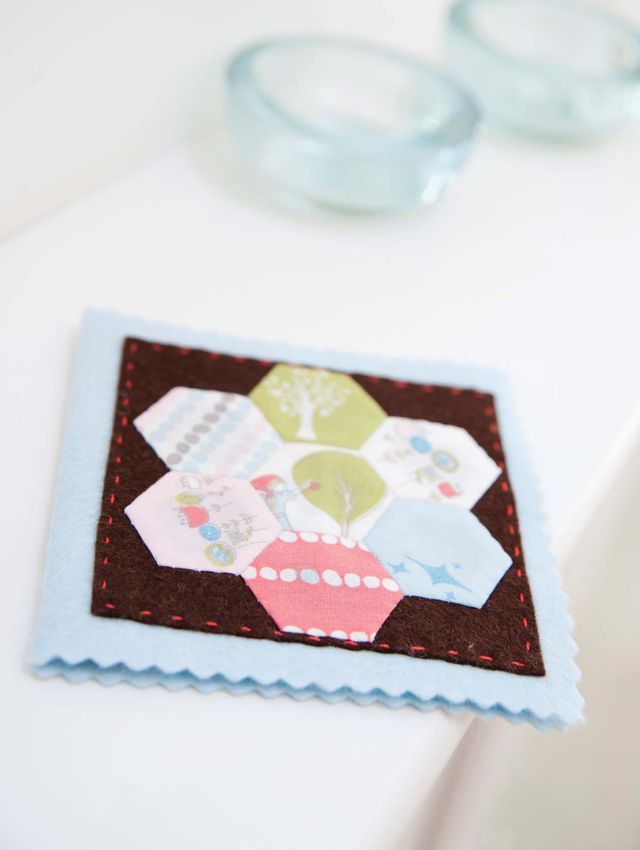
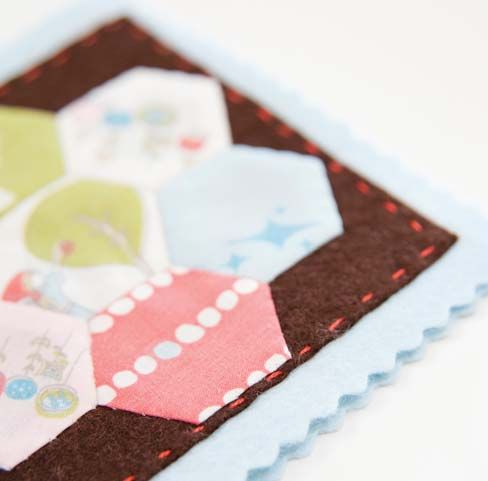
Patchwork Rosette Needle Book
              Every respectable sewing box should have a handmade needle book! This project is
              straightforward to make and uses only small pieces of fabric and felt. The hexagon
              rosette on the front is made using the English paper piecing technique, where the
              fabric is tacked (basted) over paper templates before the shapes are sewn together. I
              am a huge fan of this technique as it is portable; I take a small tin of work along with
              me when waiting to collect my children from their after-school activities. You can
              make larger pieces of patchwork using this technique but it can be time-consuming,
              so this small project is a good way to try it out before committing to making a quilt.
              English paper piecing should come with a warning though, as it is addictive!

              FINISHED SIZE: 5in x 4½in (12.7cm x 11.4cm)

             . Get
              ❉ 4¼in x 4¼in (10.8cm x 10.8cm) felt for the rosette
                                                                           .. Ready
                                                                           ❉ If you have bought large pieces of felt, cut them
                backing                                                      down to size now. I cut the two rectangular shapes
              ❉ 5in x 9½in (12.7cm x 24.1cm) felt for the needle book        with pinking shears. If you don’t have any, cut them
                cover                                                        straight-edged with normal scissors.
              ❉ 4½in x 9in (11.4cm x 24.1cm) felt for the inside page of   ❉ To make the hexagon template, trace the template
                the needle book                                              provided on to paper. Trim, leaving a border
              ❉ 7 pieces of fabric, a minimum of 2¼in (5.7cm) square         approximately ½in (1.3cm) from the line, then stick
              ❉ 100% cotton thread for tacking (basting) and piecing         the shape on to card. Cut out the shape along the line.
              ❉ Perle thread, no 8                                           Place the template on your paper, and cut out seven
              ❉ Pinking shears (optional)                                    shapes using scissors.
              ❉ Scissors, for paper and fabric
              ❉ Ruler and pencil
              ❉ A4 paper, photocopy weight
              ❉ Glue stick
              ❉ 4in (10.2cm) square of card
              ❉ Pins
              ❉ Sharps sewing needle
              ❉ Iron
              ❉ Chenille needle

REPRObeg_guide_quilting.indd 32                                                                                                        2/8/13 7:55 AM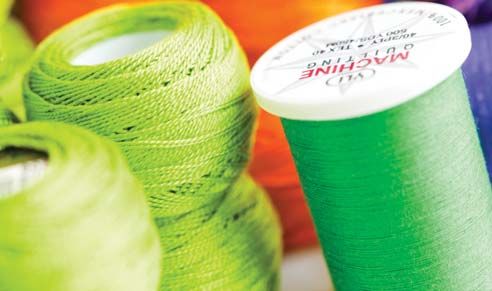
REPRObeg_guide_quilting.indd 33 2/8/13 7:55 AM
... Sew
                 Pin one of the paper hexagons to the wrong side of
                                                                         3     Lay out your hexagons and, once they are in an
                                                                               order you are happy with, pick up the central
                                                                         one and one of the border ones. Place their right sides
                                                                         together. Using a colour thread that tones with the
              1  a piece of fabric and cut the fabric round the paper
               shape, leaving a ¼in (0.6cm) seam allowance. Repeat
                                                                         project, thread a needle. Start stitching ¼in (0.6cm)
                                                                         in from the right end, holding the end of the thread;
               with each hexagon, using whatever fabric you wish.        oversew a few stitches to the beginning, then stitch
                                                                         along the seam, sewing back by ¼in (0.6cm) at the
                                                                         end. This acts like a backstitch to secure the stitching.
                  1                                                      Sew the other five hexagons on to the central hexagon
                                                                         in the same way.

                                                                           3

                    Pick up one of the shapes and fold the excess              Sew up between the rows using the same method.
              2     fabric to the back. Thread a needle and tie a knot
               in the end. Fold the excess fabric over the paper, then
                                                                         4
               sew through the paper and fabric, folding the corners         Press the rosette with a medium hot iron (so you
               as you go. When you come to the end of the stitching,
               sew a single backstitch. Repeat this with each hexagon.
                                                                         5   don’t scorch the paper). Then carefully unpick the
                                                                         tacking (basting) stitches and take the paper out. Don’t
                                                                         throw the paper away as it can be re-used.

                      2

                                                                         Patchwork Rosette Hexagon Template
                                                                         Actual size

REPRObeg_guide_quilting.indd 34                                                                                                      2/8/13 7:55 AM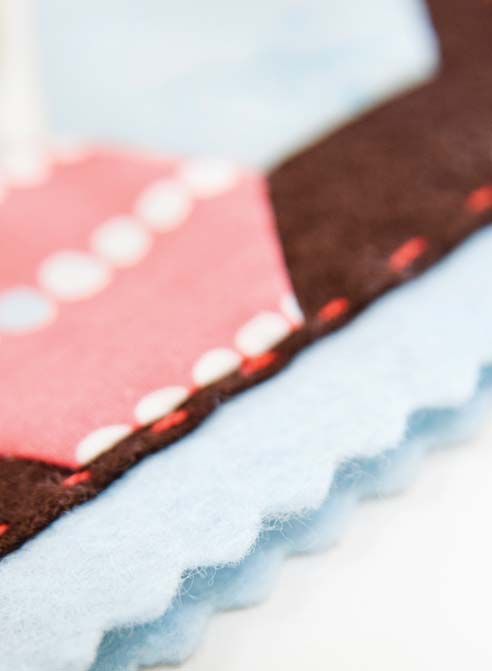
Place the hexagons in the centre of the felt square        Draw a line in pencil down the centre of the felt
              6    and pin into place. Slipstitch around the rosette
               using a toning thread. Don’t worry too much about
                                                                         8    to be used for the inside of the needle book. Lay
                                                                         the outside of the book right side down and place the
               your stitching on the back – it will not be seen.         inner page in the centre. When you are happy it is in
                                                                         place, pin to secure then, using perle thread, sew up
                   Fold the felt for the needle book cover in half and   the line with running stitch. Fold the book in half and
              7    press the fold with your finger to help hold it in
              place. Place the felt-backed rosette on the front in the
                                                                         finger press down the fold. It is now ready to use.

              centre. Using the perle thread and a chenille needle,         8
              sew a running stitch around the edge of the felt square.
              I started using a knot, which I hid in the layers, then
              finished with a backstitch, also hidden between the
              layers of fabric.

                    7

                                  Take it further…
                          Draw up a bigger hexagon
                        template and use the rosette to
                         go in the centre of a cushion

REPRObeg_guide_quilting.indd 35                                                                                                    2/8/13 7:55 AM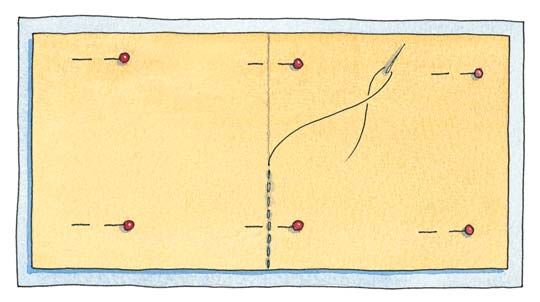
You can also read