SEWING TUTORIAL - Swafing Blog
←
→
Page content transcription
If your browser does not render page correctly, please read the page content below
SEWING TUTORIAL

CONTENTS

INTRODUCTION ..................................................................................................................... Page 3

IMPORTANT INFORMATION ................................................................................................ Page 4

LADDER STITCH .................................................................................................................... Page 5

FLOOR BLANKET INSTRUCTIONS VARIATION WITH BINDING ............................................. Page 6-10

FLOOR BLANKET INSTRUCTIONS VARIATION WITHOUT BINDING .......................................Page 11-14

BUNTING INSTRUCTIONS ............................................................................................. Page 15-16

PILLOW CRACKLE CLOTH .............................................................................................. Page 17-19

PILLOW INSTRUCTIONS ............................................................................................... Page 20-21

SOFT BLOCK INSTRUCTIONS ....................................................................................... Page 22-24

PACIFIER HOLDER INSTRUCTIONS...............................................................................Page 25-27

© Lycklig Design (Berit Winter)                                                                                               Page   2

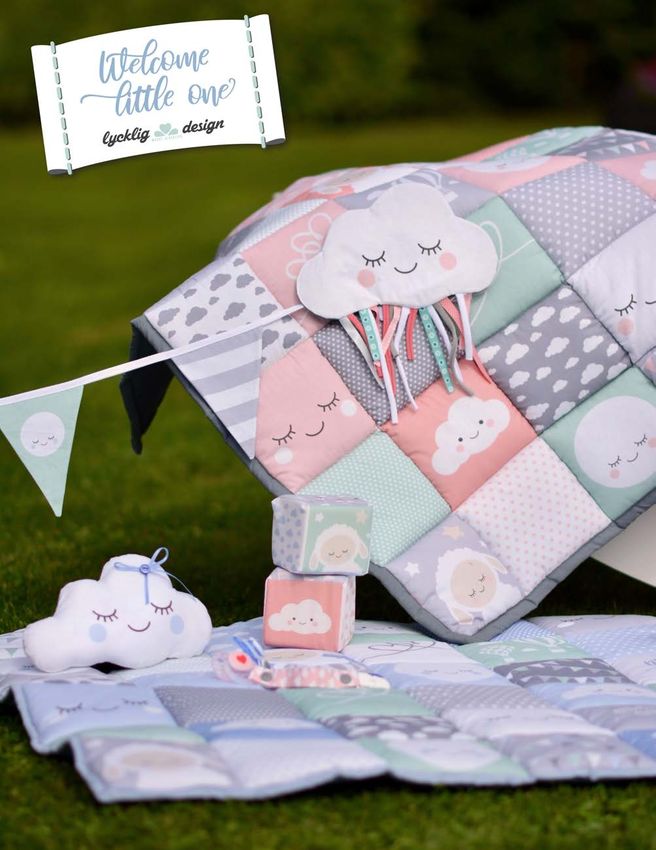
INTRODUCTION

Hello dear friends!

First of all, I would like to say a HUGE THANK-YOU to you for purchasing the DIY baby set
“Welcome Little One”. I hope you have a lot of fun with the set and enjoy it as much as I do.
Be sure to read all the instructions before you begin sewing.

I would love to see your finished work! Tag me in your Facebook and Instagram posts, and I’ll be
sure to check them out.

www.facebook.com/lyckligdesign
Instagram: @lyckligdesign

Have fun sewing!
Berit

© Lycklig Design. All Rights Reserved. This DIY set was designed with great attention to detail.

The DIY set is intended for private, home sewing use only. Mass production is prohibited.
User discretion is advised. It is expressly understood that the author, designer and affiliates make no warrants as to accuracy in the
instructions and shall assume no liability whatsoever for possible errors and/or omissions in the instructions.

© Lycklig Design (Berit Winter)                                                                                                      Page   3
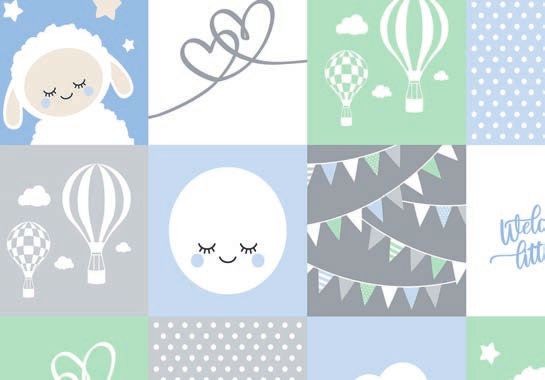
IMPORTANT INFORMATION
MATERIALS LIST
The following fabric and notions are required in addition to the “Welcome Little One” panel for
sewing the complete baby set:

Floor blanket
. 1.10 x 1.10 meters of fabric for the back
. 1.10 x 1.10 meters of high loft poly batting (or batting of choice)

Bunting
. 20 cm x 1 meter of fabric for the back     . 3 meters of double fold bias tape

Crackle Cloth or Pillow
. Woven ribbons, knit jersey noodles, cords or similar
. Fiber fill (pillows) . Crackling foil

Soft block
. Polyurethane foam cubes or fiber fill (polyester, cotton, wool, etc.)

Pacifier holder
. Suspender clip . Snap fasteners (optional)       . Silicone Ring (optional)

IS A SEAM ALLOWANCE INCLUDED?
YES - a 7 mm seam allowance is already included! All pattern pieces fit together perfectly.

BATTING LOFT
The amount of loft you chose for your batting is up to you. However, we recommend batting that is
not too thin. I, myself, used Mander 300 in my sewn example. This batting is a full 3 cm thick and
suitable for quilting. The generous loft creates a nice 3D effect and the finished playmat will be
super comfy for lots of happy tummy time.

IMPORTANT! On the fabric panel, Cutting a piece of batting 1x1 meter is indicated. However, I
recommend cutting your batting a few centimeters larger, because the layers tend to shift and move
when quilting. After quilting, you can then trim the excess batting from the edges.

© Lycklig Design (Berit Winter)                                                                   Page   4
LADDER STITCH

                                                     HOW TO SEW A LADDER STITCH

                                                     Some parts of the set have to be stitched closed by
                                                     hand. I recommend using the so-called ladder stitch.

                                                     Legend: Unbroken lines show the thread on the item
                                                     right side. Dashed lines indicate the path of thread
                                                     on the fabric wrong side.

                                                     Turn your project right side out. Press the seam
                                                     allowance edges toward the inside. Align the edges
                                                     of the opening and secure with a pin or clip. Start
                                                     by sewing a stitch from the fabric wrong side at one
                                                     end of the opening and pull taut. The subsequent
                                                     stitches will be sewing loosely and pulled taut in a
                                                     final step.
                                  10 7
                                         6           Begin stitching 7 mm from the edge (at the inside edge
                                             3       of seam allowance) and stitch across the seam (1).
                                                 2
                                                     Now insert your needle just under the pressed seam
                                                 1   allowance edge and stitch parallel to the opening (2).
                                             4       Your thread will lay across the fabric wrong side.
                                         5
                                  9 8
                                                     Pull your needle up toward you and stitch the next
                                                     stitch across the opening. Be sure to leave this stitch
                                                     somewhat loose. (3)

                                                     The next stitch will be sewn parallel to the seam
                                                     along the opposite seam allowance. Your thread will
                                                     lay on the fabric wrong side. (4)

                                                     Repeat these loose stitches along the opening.

                                                     Gradually, you will stitch “rungs” across a “ladder”
                                                     all the way across the opening.

                                                     In a final step, pull the thread taut to close. Anchor
                                                     and knot the thread to secure the seam.

© Lycklig Design (Berit Winter)                                                                     Page   5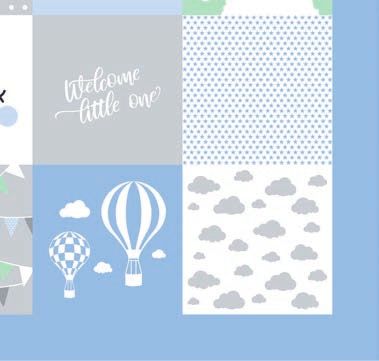
FLOOR BLANKET INSTRUCTIONS - VARIATION WITH BINDING

                                                  1
                                                Cut the front of the floor blanket from the
                                                “Welcome Little One” panel. Cut one 1.10 x 1.10 m
                                                square from a non-stretch woven cotton of
                                                your choice.

                                                Cut a generous piece of loft batting (see recommendation
                                                on batting on page 4).

                                                  2
                                                Press the front and back pieces to remove any
                                                unsightly wrinkles.

                                                  3
                                                Now lay the three pieces one on top of the other
                                                as follows:
                                                - Back piece fabric right side facing down
                                                - Batting
                                                - Front piece fabric right side facing up

                                  Querschnitt

© Lycklig Design (Berit Winter)                                                             Page    6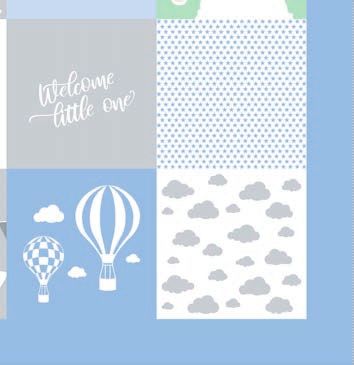
FLOOR BLANKET INSTRUCTIONS - VARIATION WITH BINDING

                                     4
                                  Smooth the layers working from the center out
                                  toward the edges. Make sure the layers are aligned
                                  and neatly stacked.

                                  Starting from the middle, secure the three layers
                                  together using quilt pins or curved safety pins.
                                  You may also baste the layers together using long
                                  basting stitches. Please refer to the illustration on
                                  the left.

                                                                     QUILTING IS DE
                                                                                    FINED AS
                                                                    THE PROCESS OF
                                                                                      STITCH-
                                                                      ING AT LEAST TH
                                                                                       REE
                                                                     LAYERS OF MAT
                                                                                     ERIAL
                                                                          TOGETHER.

                                     5
                                  Now start quilting the squares with a straight stitch.
                                  I use a somewhat longer stitch length, such as 3.5.
                                  The three layers including batting can be difficult to
                                  fit under the sewing machine. Roll your quilt to fit
                                  under the needle.

© Lycklig Design (Berit Winter)                                                     Page   7
FLOOR BLANKET INSTRUCTIONS - VARIATION WITH BINDING
 Option A
                                                        There are different sequences in which you may best
                    15     7      1   5       13        stitch the quilted layers together.

        18                                         17   Option A
                                                        For best results, always start by stitching a line
        10                                         9
                                                        down the center of the floor blanket. Turn your work
         4                                         3    90º and stitch a line perpendicular to the first down
        12                                         11   the center. Turn your work 90º again and stitch the
                                                        next line parallel to the first. Continue by following
        20                                         19   the stitching order indicated in the illustration on the
                                                        left. Secure your stitching lines with a few back-
                    16     8      2   6       14        stitches or by tying off your threads.
                                                                                                            PRACTICE TAUT
                                                                                                                           SEWING
                                                                                                            BY FIRMLY HOLD
                                                                                                                           ING THE
                                                                                                          FABRIC BEHIND
                                                                                                                        THE NEEDLE
                                                                                                           AND AIDING YO
                                                                                                                         UR WORK
                                                                                                           OVER THE FEED
 Option B                                                                                                    WITHOUT PULL
                                                                                                                         ER DOGS

                                                        Option B                                                           ING.

                      5      4    1       2    3        For best results, always start by stitching a line
                                                        down the center of the floor blanket. Stitch a line
                                                        parallel to and to the right of your first stitching line.
             8
                                                        Stitch a line parallel to and to the left of your first
             7                                          stitching line. Repeat stitching parallel lines in the
                                                        sequence illustrated on the right. Turn your work 90º
             6
                                                        and repeat for the remaining stitching lines, begin-
             9                                          ning again with the center stitching line. Secure your
             10
                                                        stitching lines with a few backstitches or by tying
                                                        off your threads.

                                                           6
                                                        Trim any excess batting from around the edges of
                                                        your work.

                                                        WATCH OUT! Take care not to cut the backing
                                                        material.

© Lycklig Design (Berit Winter)                                                                          Page   8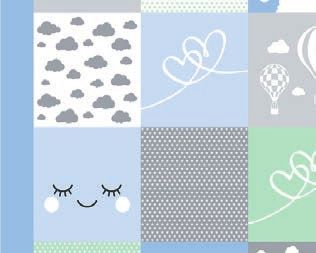
FLOOR BLANKET INSTRUCTIONS - VARIATION WITH BINDING

                                          7
                                        Trim the backing down to 3 cm all the way around.

                                          8
                                        Bind the edges by pressing the edge of the back-
                                        ing 1,5 cm toward the floor blanket body. Fold the
                                        pressed edge over the batting and top layer and
                                        secure with pins or clips.

                 Cross-sectional view

                                          9
                                        Topstitch very close to the binding edge with a straight
                                        stitch. Secure the stitching line with a few backstitches
                                        at seam beginning and end.

© Lycklig Design (Berit Winter)                                                      Page    9
FLOOR BLANKET INSTRUCTIONS - VARIATION WITH BINDING

                                      10
                                     Stitch one quilt binding side as described above. Fold
                                     and press the next perpendicular edge of the backing
                                     1,5 cm toward the quilt body. Press the corner at a
                                     45º angle toward the quilt body.

                                     Fold the long pressed edge over the quilt body and
                                     secure with pins. Be sure the corner material is
                                     tucked in neatly at the miter. Topstitch along the
                                     edge to secure the binding. Tack the fold in the miter
                                     in place with a few hand stitches as desired.

                                     Continue in this manner until all four edges are
                                     bound and corners mitered.

                      KET CAN
     THE FLOOR BLAN
                N W  IT HOUT THE
   ALSO BE SEW
                  BETWEEN THE
    SOLID BORDER
               UA RE S AND THE
      MOTIF SQ                   Y
                 AP OXIMATEL
                    PR
   BINDING. TRIM         EDGE OF
                    CH

                                     ALL DONE!
      2 CM FR OM EA
                           E.
          THE FRONT PIEC

© Lycklig Design (Berit Winter)                                                 Page    10
FLOOR BLANKET INSTRUCTIONS - VARIATION WITHOUT BINDING
1
Cut the play blanket front piece and cut a square
piece of backing fabric of equal size.
Cut a square of poly batting of the same dimensions
less your seam allowance.
2
Press the front and back pieces to remove any
wrinkles.
3
Stitch the front and back pieces right sides together.
Stitch seam allowance of at least 7 mm.
Leave a generous opening in your stitching line for
turning.
Be sure to secure your stitching lines with a few
backstitches.
© Lycklig Design (Berit Winter) Page 11FLOOR BLANKET INSTRUCTIONS - VARIATION WITHOUT BINDING
4
Trim the corners. Turn the play blanket right side
out. Work the corners with a point turner. Press your
work if necessary.
Stuff the poly batting between the front and back
pieces through the opening.
Close the opening by hand using a ladder stitch.
Instructions for the ladder stitch are found on page 5.
5
Smooth out the layers starting from the center and
moving toward the edges of the blanket. In doing so,
make sure that the batting is centered and the layers
align evenly.
Secure the layers with long quilting pins (see illustra-
tion left). Alternatively, you may stitch long basting
stitches through the layers.
© Lycklig Design (Berit Winter) Page 12FLOOR BLANKET INSTRUCTIONS QUILTING IS DE
FINED AS
THE PROCESS OF
STITCH-
ING AT LEAST TH
REE
LAYERS OF MAT
6
ERIAL
TOGETHER.
Now start quilting the squares with a straight stitch.
I use a somewhat longer stitch length, such as 3.5.
Your project may be difficult to fit under the throat
of your sewing machine. Simply roll the right side of
your work to fit while you stitch. Reduce the presser
foot pressure to help ease the thickness under the
foot.
You may stitch the quilting layers together best using
Option A
one of the following squences.
23 15 7 1 5 13 21
26 25
Option A
18 17 For best results, always start by stitching a line down
the center of the floor blanket. Turn your work 90º
10 9
and stitch a line perpendicular to the first down the
4 3 center. Turn your work 90º again and stitch the next
12 11 line parallel to the first. Continue by following the
stitching order indicated in the illustration on the left.
20 19
28 27 Secure your stitching lines with a few back-
24 16 8 2 6 14 22 stitches or by tying off your threads.
PRACTICE TAUT
SEWING
BY FIRMLY HOLD
ING THE
FABRIC BEHIND
THE NEEDLE
AND AIDING YO
UR WORK
OVER THE FEEDE
R DOGS
WITHOUT PULLI
NG.
Option B
Option B
7 6 5 1 2 3 4 For best results, always start by stitching a line down
11 the center of the floor blanket. Stitch a line parallel
10 to and to the right of your first stitching line. Stitch
a line parallel to and to the left of your first stitching
9 line. Repeat stitching parallel lines in the sequence
8 illustrated on the right. Turn your work 90º and repeat
for the remaining stitching lines, beginning again with
12
the center stitching line.
13
Secure your stitching lines with a few backstitches
14
or by tying off your threads.
© Lycklig Design (Berit Winter) Page 13FLOOR BLANKET INSTRUCTIONS - VARIATION WITHOUT BINDING
ALL DONE!
© Lycklig Design (Berit Winter) Page 14BUNTING INSTRUCTIONS
1
For best results, lay the bunting piece directly over
your backing material (right sides together) and cut
both layers simultaneously.
Keep the cut front and back flag pieces in pairs
together.
2
Press the flag pieces.
3
Stitch two flag pieces along the long edges right sides
together with 7 mm seam allowance.
Trim the seam allowance (with pinking shears if at hand)
and notch the corner.
© Lycklig Design (Berit Winter) Page 15BUNTING INSTRUCTIONS
4
Turn the flag piece and use a point turner or knitting
needle to work the point. Press the encased seams.
Repeat for the remaining flag pairs.
5
ca. 8 cm
Unfold your double-fold bias tape once and lay the
short edge of the flag pieces along the center of the
bias tape. Space the flag pieces approximately 8 cm
from one another. Fold the bias tape over the flag
piece and secure with pins or clips. Remember to
leave a generous length of bias tape at either end of
your bunting for tying. (See image below).
Begin stitching the two edges of the bias tape to-
gether with a straight stitch. Stitch the entire length
of the bias tape and catch the flags in your stitching
line as you go.
ALL DONE!
© Lycklig Design (Berit Winter) Page 16CRACKLE CLOTH INSTRUCTIONS
1
Cut the crackle cloth front and back pieces.
YOU MAY CUT TH
E BACK OF
THE CRACKLE CL
DIFFERENT FABR OT H FROM A
IC AND USE THE
CLOUD PIECE FO OTHER
R ANOTHER PROJ
SUCH AS A THRO ECT,
W PILLOW. YOU
EMBROIDER A FA MAY
CE ON THE BLAN
CLOUD PIECE US K
ING A NARROW
LENGTH ZIG ZA STITCH
G OR BY MAKIN
IRON-ON TRANSF G AN
ER FACE USING
YOUR PERSONAL
DIE
2
CUTTING MACHI
NE.
Cut a cloud from crinkle fabric/crinkle paper.
IMPORTANT
Be certain to use safe crinkle fabric/crinkle paper
that is, for example, USA Safety EN71 and CPSIA cer-
tified. Using a hole punch, make several holes in the
crinkle fabric layer to reduce the risk of suffocation.
3
Cut several pieces of ribbon, rick rack, and/or knit jersey
noodles in varying short lengths for the cloud’s “rain”.
IMPORTANT
To prevent possible strangulation, do not cut these
pieces very long.
© Lycklig Design (Berit Winter) Page 17CRACKLE CLOTH INSTRUCTIONS
4
Press the crackle cloth front and back. (Press the
Woven Cotton pieces, not the crinkle fabric/paper).
5
Secure the bits of ribbon, rick rack and knit jersey
noodles to the crackle cloth right side with adhesive
tape or pins. Baste the “rain” pieces in place along
the lower seam allowance.
6
Lay the cloud piece front on the back piece fabric right
sides together. Make sure the ribbons are tucked in
away from the edges, so that they do not accidental-
ly become caught in the edge seam. Lay these two
pieces on top of the crinkle fabric and secure all three
layers with a few pins. Begin stitching the layers
together along the top or side of the cloud with a
straight stitch using a 7 mm seam allowance. Leave a
small opening for turning.Secure the stitching line with
a few backstitches at seam beginning and end.
© Lycklig Design (Berit Winter) Page 18CRACKLE CLOTH INSTRUCTIONS
7
Trim the seam allowance within pinking shears if
at hand. Otherwise notch the curves and trim the
corners for a smooth turn.
IMPORTANT
Do NOT trim the seam allowance at the opening.
8
Turn your work right side out. Finger press the
encased seams, as an iron may melt the crinkle foil.
Close the opening with a few ladder stitches.
Ladder stitch instructions may be found on page 5.
ALL DONE! ADULT
SUPERVISION
REQUIRED!
© Lycklig Design (Berit Winter) Page 19PILLOW INSTRUCTIONS
1
The crackle cloth pieces may also be used to make a
throw pillow. Cut the cloud front and back pieces.
YOU MAY CUT TH
E BACK OF
THE PILLOW FR
OM A DIFFEREN
FABRIC AND US T
E THE OTHER CL
PIECE FOR ANOT OUD
HER PROJECT, SU
AS A THROW PI CH
LLOW. YOU MAY
EMBROIDER A FA
CE ON THE BLAN
CLOUD PIECE US K
ING A NARROW
LENGTH ZIG ZA STITCH
G OR BY MAKIN
IRON-ON TRANSF G AN
ER FACE USING
YOUR PERSONAL
DIE
2
CUTTING MACHI
NE.
Press the accent pillow pieces.
3
Pin and stitch the pillow front to the pillow back right
sides together using a 7 mm seam allowance. Begin
stitching along the lower edge and work your way
around the pillow.
Leave a small opening for turning along the bottom edge
of your pillow. Secure the stitching line with a few
backstitches at seam beginning and end.
© Lycklig Design (Berit Winter) Page 20PILLOW INSTRUCTIONS
4
Trim the seam allowance within pinking shears if
at hand. Otherwise notch the curves and trim the
corners for a smooth turn.
IMPORTANT
Do NOT trim the seam allowance at the opening.
5
Turn your work right side out and press the encased
seam. Press the fabric edges of the opening toward
the inside. Stuff your pillow with poly fiber fill.
Close with opening using a ladder stitch.
Ladder stitch instructions may be found on page 5.
ALL DONE!
© Lycklig Design (Berit Winter) Page 21SOFT BLOCK INSTRUCTIONS
1
Cut all the squares of the soft block individually.
You may stitch the squares in any arrangement you
choose.
MIX AND MATCH
THESE SQUARE
S WITH
OTHER FABRICS
TO
MAKE MORE TH
AN ONE
SOFT BLOCK!
2
Press the squares nice and smooth.
TO CREATE A
SOMEWHAT LARGER
SOFT BLOCK, REDUCE
YOUR SEAM ALLOWANCE
TO 4 MM.
3
Take the first four squares and sew them to end to end
right sides together with a 7 mm seam allowance. Stitch
the edge of the first square to the fourth square to make
a ring.
Be sure to secure your stitching lines with a few
backstitches..
© Lycklig Design (Berit Winter) Page 22SOFT BLOCK INSTRUCTIONS
4
7 mm
7 mm
Please follow the instructions carefully!
Pin a square to one end of the stitched ring right
sides together. When stitching, this square will be on
the bottom, while the ring will be on top as you feed
it under the presser foot.
Flap the tunnel to sew it together each to the left so
7 mm
that you have one side of the cube can close. At the
Sew using a 7 mm seam allowance. Begin stitching beginning secure the seam.
exactly 7 mm in from the first edge and stop stitch-
ing exactly 7 mm from the opposite fabric edge. ATTENTION
Do not sew from fabric edge to fabric edge, but as
follows:
Begin your stitching line exactly 7 mm from the first
edge and end your stitching line exactly 7 mm before
the opposite edge. With the needle down, lift the
presser foot and pivot your work 90º to stitch the
next cube edge.
Continue stitching along all four edges, pivoting at
each corner. Secure your seam with a few back-
stitches.
With needle down and presser foot lifted,
pivot your work 90º. Repeat the above with the last remaining square of
material. Remember to leave an opening for turning
and stuffing. If using a foam cube, remember to
7 mm
leave a larger opening.
7 mm
Turn the ring fabric wrong side out
and stitch around the corner.
© Lycklig Design (Berit Winter) Page 23SOFT BLOCK INSTRUCTIONS
5
Turn the soft block right side out. Work the corners
using a knitting needle or point turner. Press your
work as required.
6
Now stuff the soft black with poly fiberfill or insert
a foam cube.
Close the turning opening by hand using a ladder
stitch. Instructions for a ladder stitch may be found
on page 5.
ALL DONE!
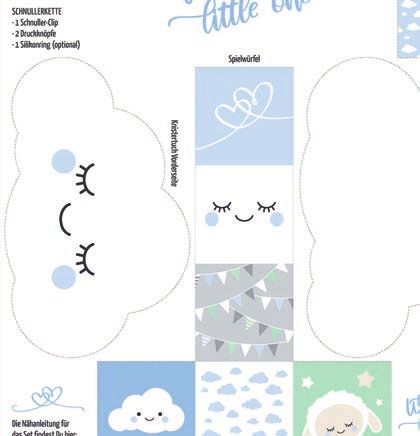
© Lycklig Design (Berit Winter) Page 24PACIFIER HOLDER INSTRUCTIONS
1
Cut the rectangular holder piece.
IMPORTANT
For safety reasons, the rectangular piece may not
be cut any longer. Any length longer than 20 cm
presents a strangulation hazard.
2
Fold in the piece in half lengthwise and press.
3
Unfold the pressed piece and fold in the two lengthwise
edges toward the center fold and press.
© Lycklig Design (Berit Winter) Page 25PACIFIER HOLDER INSTRUCTIONS
4
Fold along the center fold again and press.
Cross-sectional view
5
Unfold the pressed piece and lay flat. Fold the short
edges toward the wrong side 5 - 10 mm and press
only the end folds (not the entire piece).
6
Refold the piece following the pressing lines. Start with
the short ends and fold the long edges afterwards.
Secure with pins and edgestitch around the piece.
Secure your stitching line with a few backstitches at the
beginning and the end of each seam.
© Lycklig Design (Berit Winter) Page 26PACIFIER HOLDER INSTRUCTIONS
7
Thread the clip, loop the material and securely tack
the end in place. Repeat for the pacifier. Alternately,
mark the location for snaps and attach snaps.
IMPORTANT
If using snaps, be sure the snaps are securely
attached, as loose snaps present a choking hazard.
ALL DONE!
ADULT
SUPERVISION
REQUIRED!
© Lycklig Design (Berit Winter) Page 27You can also read