Lesson: DIY Edible Play Dough
←
→
Page content transcription
If your browser does not render page correctly, please read the page content below
Lesson: DIY Edible Play Dough
Suggested Group Size: Small Group
Objective(s): Students will be able to:
Students will practice their measurements skills combining ingredients to make
Edible Play Dough.
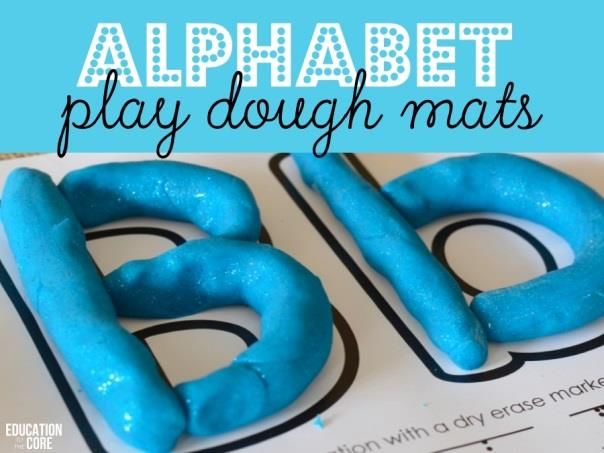
Students will shape Play dough in order to create letters of the alphabet,
numbers, and shapes.
Students will experiment using the play dough to learn the colors on a color
wheel.
Students will use their sense of smell to distinguish a scent in the play dough.
Activity:
Students will apply their measurement skills to combine ingredients together and make
Edible Play Dough. Then manipulate the play dough into various letters of the alphabet,
numbers, and shapes. Students will end the program by identifying the various scents of
the play dough.
Targeted Florida Early Learning and Developmental Standards for Four-Year-Olds:
VI. Mathematical Thinking
o A. Number Sense
Student will identify and create numbers
VII. Scientific Thinking
o B. Scientific Inquiry
a. Investigation and Inquiry
B.a.1. Demonstrates the use of simple tools and equipment for
observing and investigating
Florida Department of Education DIY Edible Play Dough 1
Materials:
Book: Green Eggs and Ham by Dr. Seuss
Recipe*
1.5 cups flour
1/2 cup salt
2 teaspoons cream of tartar
2 tablespoons oil
1 cup of boiling water
Mix together with spoon, and then knead with hands. Beware that dough may
be hot at first but should gradually cool. If it is too sticky, add more flour. If it is
too clumpy, add more boiled water. If the recipe doesn’t go right the first time,
that’s great! Use this as part of the lesson to talk about what amounts of the
ingredients might be better and how each ingredient changes the recipe.
*Recipe found at: https://www.howweelearn.com/the-best-easy-no-cook-play-doh-recipe/
Procedure:
1. Students will apply their measurement skills to combine ingredients together and make the
Edible Play Dough.
2. Manipulate the play dough into various letters of the alphabet, numbers, and shapes using
printed templates.
3. End the lesson by having the children identify the various scents of the play dough.
Adaptations:
Create the play dough prior to lesson and just have students manipulate it
Model procedure first so the children understand how to complete activity
Modify activity when children begin to lose interest.
Use verbal, visual, and physical cues to help children know what to do.
Florida Department of Education DIY Edible Play Dough 2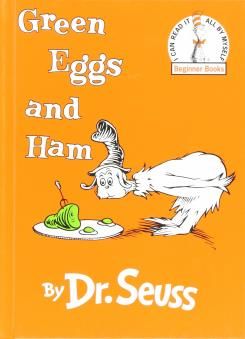
Extensions:
If you already have alphabet/number cookie cutters, students can cut out each letter or
number and then practice putting them in order.
Add color! Use food coloring and plastic gloves to change the color of the dough. Begin
with one primary color before choosing another to see what secondary color results from
the combination.
What about scents? You can add extracts, flavors, or spices. Go for kid-friendly smells, and
remind students that even though the dough smells yummy, adding a scent will not make
it taste yummy. If you make a variety of scents, students can try their best to correctly
identify the smells.
Scent Options Include:
Bubblegum flavor
Cinnamon
Pumpkin Pie Spice
Ginger
Vanilla extract
Pine needle oil
Lemon/orange/almond/mint extract
You can reuse your play dough for multiple days by saving it in Tupperware or in Ziploc
bags.
When you’re ready to get rid of your play dough, don’t throw it
out! You can have students create handprints, shapes, or
ornaments and either watch them dry over a few days or use an
oven to bake them at 200-250 degrees to create keepsakes that
they can then paint and take home. Beware; some creations do
not bake well. We found that rolling the dough flat, baking for one
hour at 200 degrees was a good method to keep creations intact.
Florida Department of Education DIY Edible Play Dough 3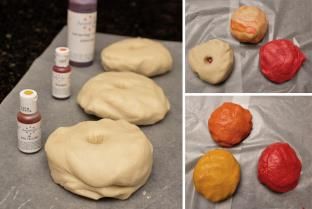
Notes on Safety:
This play dough is edible, so you won’t have to panic if your students take a nibble. Still,
the recipe is for fun, not for eating, so try to encourage students to play without
engaging their curious tongues.
When making the dough, use microwave safe bowls. Students can add most of the
ingredients to the bowl themselves. However, the boiling water must be added by a
teacher. When adding boiling water, the teacher may choose to use an electric kettle or
perhaps microwave cups of water to be added. Once water is added, stir the mixture a
few times with a spoon. The temperature of the mixture should reduce quickly once
incorporated, but have students continue stirring with spoons for a few minutes to
allow dough to cool a little more. Then they can start kneading by hand.
Checking for Understanding:
Children will demonstrate their understanding of the lesson by:
Measurements by using measuring cups to measure the ingredients.
Number and letter recognition by forming letters and numbers with the play dough.
Color recognition by mixing primary colors to make secondary colors, and secondary
colors to form tertiary colors.
Related Standards for Four Year Olds:
I. Physical Development
o D. Fine Motor Development
1. Demonstrates increasing control of small motor muscles to preform
simple tasks.
II. Approach to Learning
o A. Eagerness to Curiosity
Shows curiosity and is eager to learn new things and new experiences.
Florida Department of Education DIY Edible Play Dough 4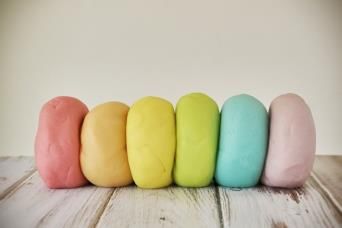
You can also read


