OPERATOR'S MANUAL - Cat. No. 2268-40 Infrared Temp-Gun - Milwaukee
←
→
Page content transcription
If your browser does not render page correctly, please read the page content below
OPERATOR'S MANUAL
Cat. No.
2268-40
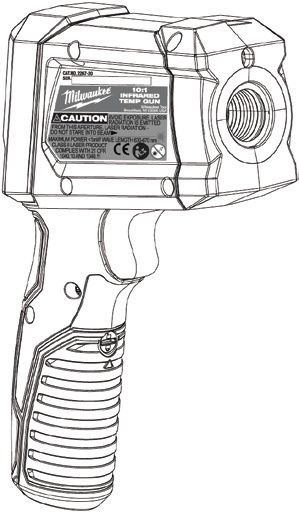
Infrared Temp-Gun™
TO REDUCE THE RISK OF INJURY, USER MUST READ AND UNDERSTAND OPERATOR'S
MANUAL.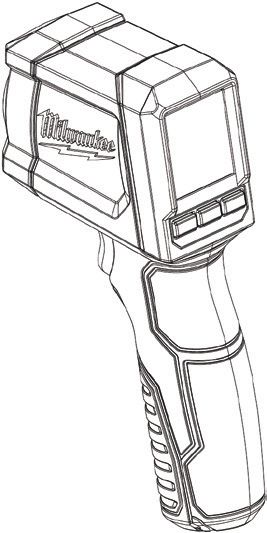
IMPORTANT SAFETY INSTRUCTIONS
      WARNING READ ALL SAFETY WARNINGS AND INSTRUCTIONS. Failure to follow
       the warnings and instructions may result in electric shock, fire and/or serious injury. Save
 these instructions - This operator’s manual contains important safety and operating instructions
 for the MILWAUKEE® Infrared Temp-Gun™ Thermometer. Before using the Temp-Gun™, read
 this operator’s manual and all labels on the Temp-Gun™.
              LASER SAFETY                                                   SERVICE
•Laser light - Do not stare into beam or view            •Have your Temp-Gun™ serviced by a qualified
 directly with optical instruments. Do not point          repair person using only identical replacement
 laser light at others. Laser light can cause eye         parts. This will ensure that the safety of the tool is
 damage.                                                  maintained.
•Avoid exposure to laser radiation. Laser may            •Do not disassemble. Incorrect reassembly may
 emit hazardous radiation.                               result in the risk of electric shock or fire. If it is
•Do not point laser at reflective surfaces. Un-          damaged, take it to the store where the product was
 predictable results may occur.                          originally purchased or one of our authorised
          WORK AREA SAFETY                               MILWAUKEE® service centres.
•Keep children and bystanders away while op-             •Store in a cool, dry place. Do not store where
 erating Temp-Gun™. Store idle Temp-Gun™                  temperatures may exceed 60°C (140°F) such as
 out of the reach of children and do not allow            in direct sunlight, a vehicle or metal building during
 persons unfamiliar with the tool or these in-            the summer.
 structions to operate them.                             • Do not remove or deface labels. Maintain labels
•Avoid dangerous environments. Do not use in              and    nameplates. These         carry    important
 rain, snow, damp or wet locations. Do not use in
 the presence of explosive atmospheres (gaseous           information. If unreadable or missing, contact the
 fumes, dust or flammable materials) because              store where the product was originally purchased or
 sparks may be generated when inserting or remov-         one of our authorised MILWAUKEE® service
 ing batteries, possibly causing fire.                    centres.
           PERSONAL SAFETY
•Stay alert, watch what you are doing and use
 common sense when operating Temp-Gun™.
 Do not use while you are tired or under the
 influence of drugs, alcohol or medication. A
 moment of inattention may result in serious per-
 sonal injury.
•Do not overreach. Keep proper footing and
 balance at all times. This enables better control
 in unexpected situations.
         BATTERY USE AND CARE
•This tool is designed to be powered by one
 (1) 9V battery     properly inserted into the
 MILWAUKEE® Temp-Gun™. Do not attempt to
 use with any other voltage or power supply.
•Do not leave battery within the reach of chil-
 dren.
•Install battery according to polarity (+ / –)
 diagrams.
•Properly dispose of used batteries immedi-
 ately.
•Do not incinerate or dismantle batteries.
•Under abusive conditions, liquid may be eject-
 ed from the battery, avoid contact. If contact
 accidentally occurs, flush with water. If liquid
 contacts eyes, additionally seek medical help.
 Liquid ejected from the battery may cause irritation
 or burns.
FUNCTIONAL DESCRIPTION                                                                                   Specifications
                                                                                                                 IR Temperature range:
                                                                                                                   For 2268-40: -30°C to 550°C (-22°F to 1022°F)
    9        11
                                                                                      1                          IR Accuracy:
        10        12                                                                                              		 For 2268-40:
8
                                                                                                                     -30°C to -18°C (-22°F to 0°F): ±2.0°C (4°F) + 0.1°C / 1°C
                                                                                                                     -18°C to 10°C (0°F to 50°F): ±2.5°C (5°F)
                   13                                                                                                10°C to 550°C (50°F to 1022°F): ±1.8°C (4°F) or 1.8%
                                                                                                                               of reading, whichever is greater
                                                                                                                  		*Assume ambient operating temperature of 23°C ±2°C
                   14
                                                                                                                               (70°F to 77°F)

                                                      3                                                          Repeatability: ±0.8% OR ±1°C (±2°F)
                                                                                        2                                          (whichever is greater)
16                                        6                                                                      Temperature display resolution:
              15                                                                                                        0.1°C/°F in Primary and Secondary
                                                                                                                 Distance to spot (90% energy):
                                                             9V
                                                                    G87A9 SSSSSS MJJJJ

                                                                                         2268-40                      For 2268-40: 12 to 1
                                                                                                                 Emissivity: 0.95
                          7                                                                                      Response time:
Distance to Spot: —— Center of Spot
– – – Laser pointer (approx. 19 mm above center of spot)
12:1 (2268-40)
Spot size at distance indicated
NOTE: A quick change
in temperature (>10°F)
affects the meter’s read-
ings. Allow the meter to
reach ambient tempera-
ture before use (5 to 30
minutes, depending on
temperature change). 2268-40: At 30 cm away,
spot is 38 mm in diameter
2268-40: At 90 cm away, spot is 76 mm in diameter
2268-40: At 150 cm away, spot is 127 mm in diameter
OPERATION
Scanning Object Temperature Temperature Alarm
1. Pull and hold the trigger for at least 2 seconds Press the ALARM button to turn on
and scan the surface temperature of an object. the alarm function. The bell icon is
A laser pointer is used for aiming on the area displayed. If the temperature read-
being scanned. ing is outside the preset range, the
NOTE: The object should be temperature reading will flash.
larger than the spot being
scanned. If not, readings will be
affected. See Distance To Spot Setting Preset Range for the
for necessary object size. Alarm
2. As you continue to hold the 1. To set the alarm range, pull the
trigger, the icon is displayed trigger and then press the SET
along with the primary measure- button. Repeat to toggle between
ment (surface temperature) and HI and LO settings.
secondary measurement (maxi- 2. Press the up or down arrow soft
mum, minimum, average, or dif- keys to toggle between tem-
ferential temperature) readings. peratures. Wait 5 seconds for the
3. Release the trigger. HOLD is ranges to save and exit.
displayed until the screen shuts off in about ten
seconds.
Setting the Trigger Lock Low Battery
To turn the trigger lock on and off, pull the trigger When the Low Battery icon is dis-
and then press the SET button five times. Press the played, change the battery.
buttons above the up and down arrows to toggle
between ON and OFF. Wait 5 seconds for the set-
ting to save and exit.
Mode Description
MAX Displays maximum temperature measured during a continuous reading
MIN Displays minimum temperature measured during a continuous reading
AVG Displays average temperature of last 20 measurements during a continuous reading
DIF Displays the difference between MAX and MIN during a continuous reading
MAINTENANCE                                               ACCESSORIES
      WARNING To reduce the risk of injury,                       WARNING Always remove batteries
 always remove the batteries from the tool                   before changing or removing accessories.
 before performing any maintenance. Never                    Only use accessories specifically recommend-
                                           ®
 disassemble the tool. Contact a MILWAUKEE                   ed for this tool. Others may be hazardous.
 service facility for ALL repairs.
                                                             For a complete listing of accessories refer to your
Maintaining Tool                                             MILWAUKEE® accessories catalogue or go online
Keep your tool in good repair by adopting a regular          to www.milwaukeetools.com.au or www.milwau-
maintenance program. After six months to one year,           keetools.co.nz. To obtain a catalogue, contact the-
depending on use, return the tool to the store where         store where the product was originally purchased
the product was originally purchased or one of our           or one of our authorised MILWAUKEE® service
authorised MILWAUKEE® service centres.                       centres.
If the tool does not start or operate at full power with
new batteries, clean the contacts on the battery
door. If the tool still does not work properly, return the
tool to the store where the product was originally
purchased or one of our authorised MILWAUKEE®
service centres.
Cleaning the Lens
Blow off loose particles with clean compressed
air. Carefully wipe the suface with a cotton swab
moistened with water. Using a second cotton swab,
dry completely.

      WARNING To reduce the risk of per-
 sonal injury and damage, never immerse
 your tool in liquid or allow a liquid to flow
 inside it.
Cleaning
Clean dust and debris from tool. Keep tool handles
clean, dry and free of oil or grease. Use only mild
soap and a damp cloth to clean the tool since certain
cleaning agents and solvents are harmful to plastics
and other insulated parts. Some of these include
gasoline, turpentine, lacquer thinner, paint thinner,
chlorinated cleaning solvents, ammonia and house-
hold detergents containing ammonia. Never use
flammable or combustible solvents around tools.
Repairs
For repairs, return the tool to the nearest service
center listed on the back cover of this operator's
manual.
WARRANTY - AUSTRALIA and NEW ZEALAND
Please refer to Australian and New Zealand warranty supplied with the tool. This warranty applies only to product
sold in Australia and New Zealand.

                      AUSTRALIA AND NEW ZEALAND MILWAUKEE® SERVICE
MILWAUKEE® prides itself in producing a premium quality product that is Nothing But Heavy Duty®.
Your satisfaction with our products is very important to us! If you encounter any problems with the operation of this
tool, please contact your authorised MILWAUKEE® dealer. For a list of MILWAUKEE® dealers, guarantee or service
agents please contact MILWAUKEE® Customer Service or visit our website.

Australia: 1300 MILWAUKEE (1300 645 928)
           www.milwaukeetools.com.au
New Zealand: 0800 279 624
           www.milwaukeetools.co.nz

                               Milwaukee Electric Tool Corporation
                     13135 West Lisbon Road, Brookfield, Wisconsin U.S.A. 53005

                       Milwaukee Electric Tool Corporation (Australia)
                                 Techtronic Industries (Australia) Pty. Ltd.
                                    Rowville, Victoria, Australia, 3178

                     Milwaukee Electric Tool Corporation (New Zealand)
                              Techtronic Industries (New Zealand) Pty. Ltd.
                                Mangere, Auckland, New Zealand, 2022

                     Professionally made in China for Milwaukee Electric Tool Corporation
You can also read