OutlOOk web applicatiOn webmail
←
→
Page content transcription
If your browser does not render page correctly, please read the page content below
outlook web application   webmail

Outlook web application
       webmail
outlook web application   webmail

                                                            contents

Access your webmail                                                  1

Send emails                                                          2

Schedule a meeting                                                   3

Add a function-related mailbox                                       4

Show week numbers in calendar                                        5

Sign out of your webmail                                             7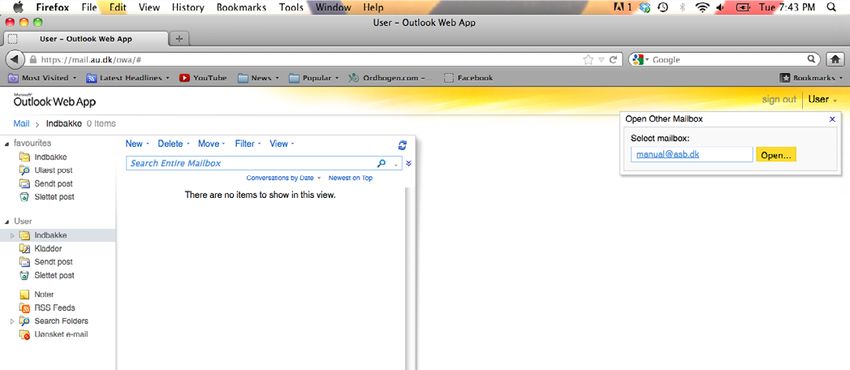
outlook web application    webmail
                                                                                       1

Access your webmail

                      This guide will show you how to access and use your webmail
                      which is your connection to the mail server at Aarhus University.

                      The guide will explain some of the most basic features in the
                      webmail such as writing emails, scheduling a meeting and
                      adjusting your calendar.

                      In order to access your webmail, go to the web page mail.au.dk

                      Here you will see the login window depicted to the left. You must
                      enter domain, user name and password as shown in the picture.

                      Information on your username and the domain can be found at
                      http://au.dk/nymail. Choose ‘English’ and go to ‘New system -
                      this is what you do’, then ‘Find your domain and username’. You
                      can also follow this link: http://goo.gl/9SXYJ.
                      You can also specify whether you are using a public computer
                      (upper selection) or a private computer (lower selection). If you
                      choose ‘private computer’, your email address will be saved for
                      your next logon. From your private computer, you must be certain
                      that the safety settings comply with the security policy at Aarhus
                      University.

                      You will then see your webmail where many of the items and
                      their locations are known from Outlook.

                      In the left column, you will see your mailbox(es) and your
                      mailfolder(s) and below, you can choose between Mail,
                      Calendar, Contacts etc.

                      To the right is a column that shows your emails in the mail folder
                      in question. Above it are the tools often used in your mailbox.
outlook web application      webmail
                                                                                  2

Send emails

              To write a new email, choose ‘New’.

              You can either press ‘New’ or select the arrow next to it and
              choose ‘Message’.

              You can now choose ‘To’, ‘Cc’ and ‘Subject’ for your email as in
              Outlook. It is possible to search for recipients by pressing ‘To’.

              Here you can search for recipients by their user name, mail
              address, name etc. Please note that searches for recipients are
              conducted from left to right which means that a search for a part
              of the name, where the beginning is left out, will not yield the
              right results. This is especially relevant if a search is attempted by
              for instance a middle or a last name.

              Select the persons you wish to add as recipients and press ‘To ->’
              in the bottom of the window.
outlook web application   webmail
                                                                                     3

Schedule a meeting

                     Press the arrow next to ‘New’ and select ‘Meeting Request’ in
                     order to schedule a meeting.

                     In the window that appears, you can choose different settings for
                     the meeting including participants by pressing ‘To’ and you can
                     choose ‘Subject’ and ‘Location’ for the meeting.

                     You can search for participants by pressing ‘To’ and making a
                     search as described in the section ‘Send emails’.

                     You can also define the start and end time of the meeting and
                     you can write a description that will be attached to the meeting
                     request.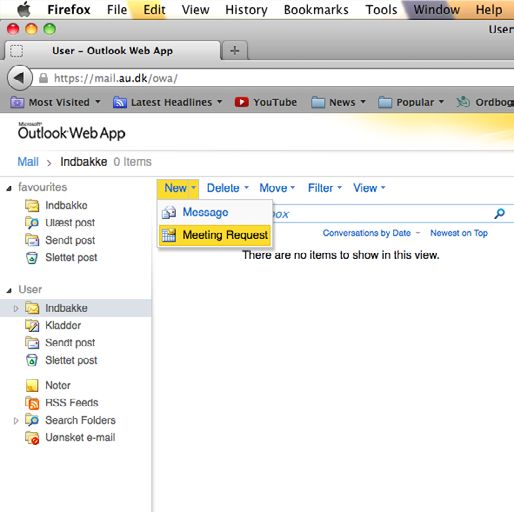
outlook web application     webmail
                                                                                                                                    4

                                                                  You can coordinate the participants’ time schedules before
                                                                  sending out the invitation by pressing the tab ‘Scheduling
                                                                  Assistant’.

                                                                  Under ‘Select Attendees’ to the left, you can add participants to
                                                                  the meeting. These participants will then be added automatically
                                                                  under the tab ‘Appointment’. It is also possible to book a room
                                                                  from within the meeting request by choosing ‘Add a room’ in the
                                                                  lower left corner.

                                                                  The participants’ schedules will then be shown in the middle of
                                                                  the window. This will let you know if they are busy at the time of
                                                                  the meeting. You can also compare their time tables in order to
                                                                  find the most convenient time for the meeting.

                                                                  The start and end time of the meeting can then be adjusted in
                                                                  the upper part of the window.

                                                                  You can send out the meeting request by selecting ‘Send’ in the
                                                                  upper left corner. If you wish to save the request in order to edit
                                                                  and send it later, you can do so by pressing      next to ‘Send’.

Add a function-related mailbox

You can add a function-related mailbox through your webmail       The mailbox will now be accessible from the Navigation Pane
in order to access a shared mailbox associated with one of your   to the left under your personal mailbox. If you have a shared
job functions.                                                    mailbox in Outlook, the location will be roughly the same.

To add a function-related mailbox, click your name in the upper   Please note that the function-related mailbox can only be added
right corner, then type the address of the mailbox you wish to    if it has already been migrated to the new mailserver.
add, e.g. ‘manual@asb.dk’, and choose ‘Open’.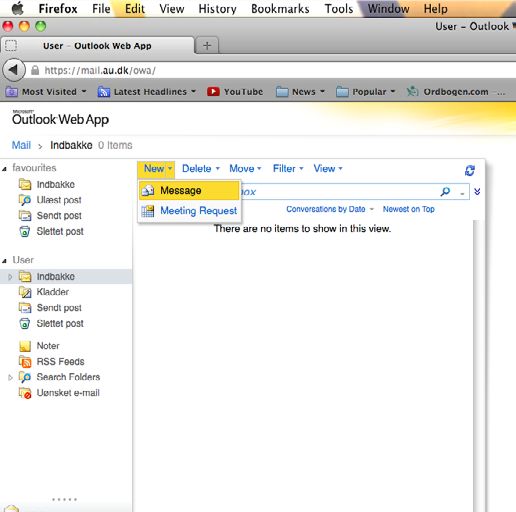
outlook web application webmail
5
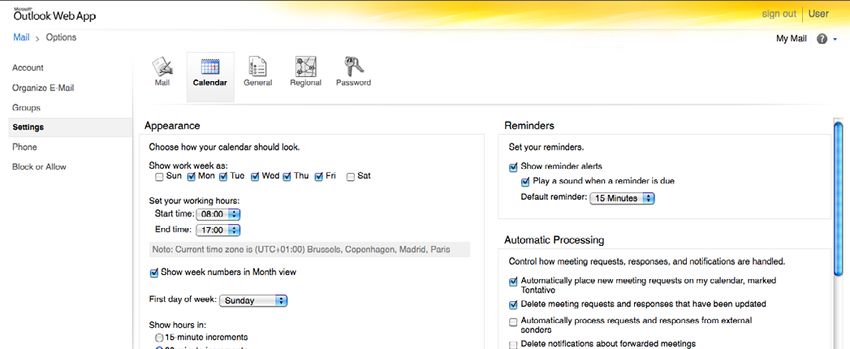
Show week numbers in calendar
It is possible to adjust the settings for the Outlook Web Application
calendar in order to have the calendar show the week numbers.
This function can be added under the webmail settings.
Click ‘Options’ in the upper right corner and choose ‘See All
Options’.
This brings you to the global settings menu for your webmail. To the right are shortcuts to often used settings in your webmail.
To the left is a menu which lets you adjust general settings, apply In order to adjust the calendar settings, choose ‘Settings’ in the left
inbox rules, block unwanted emails etc. hand side of the screen.
outlook web application   webmail
                                                                                                                                6

Choose ‘Calendar’ in the upper menu. You will now see the         settings are based on a variation of the Gregorian calendar,
general settings for the calendar.                                the calendar year does not correspond to the one used in the
                                                                  danish regional settings. The week numbers will therefore be
Make sure that the option ‘Show week numbers in Month view’ is    one week ahead. Although the problem cannot be solved, it can
checked. This will make the week numbers show in your calendar.   be avoided by setting the week to start on Sundays under ‘First
                                                                  day of week’ just beneath ‘Show week numbers in Month view’.
Please note that the week numbers will not be shown correctly     The week numbers will then be shown correctly but you must be
when English is the chosen language. Because the regional         aware that Sunday will be listed as the first day of the week.

Once you have chosen the wanted settings for your calendar,       To return to your mailbox, you can either choose ‘Mail’ in the
you must press ‘Save’ before returning to your mailbox.           upper left corner or ‘My Mail’ in the upper right corner.

Press ‘Save’ in the lower right corner.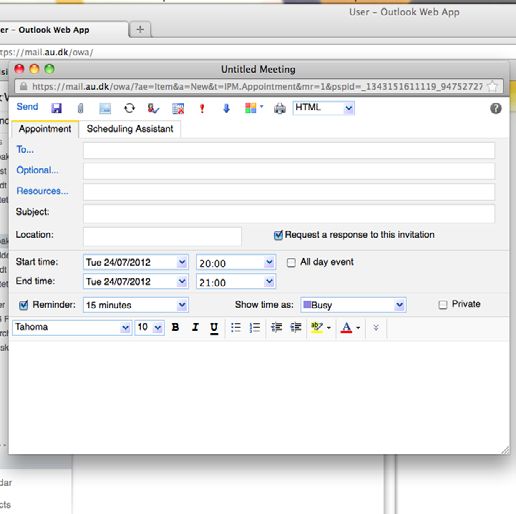
outlook web application     webmail
                                                                                                                                    7

From your mailbox, you can choose ‘Calendar’ in the lower left    These settings will not affect the settings you have chosen in
corner.                                                           Outlook.

You will now see the week numbers next to the corresponding
weeks if you have set the week to begin on Sundays as described
above.

Sign out of your webmail

                                                                  It is important that you remember to log off before leaving the
                                                                  computer so that your webmail is not available to other users of
                                                                  the computer.

                                                                  In order to log off webmail, choose ‘sign out’ next to your name in
                                                                  the upper right corner.

                                                                  When you see this picture, you have successfully signed out of
                                                                  your webmail. It is now safe to leave the computer.

                                                                  If you need help using your webmail or the different options
                                                                  described in this guide, you are welcome to contact the IT support
                                                                  of your main academic area using this link:
                                                                  http://medarbejdere.au.dk/en/administration/it/it-at-the-main-
                                                                  academic-areas/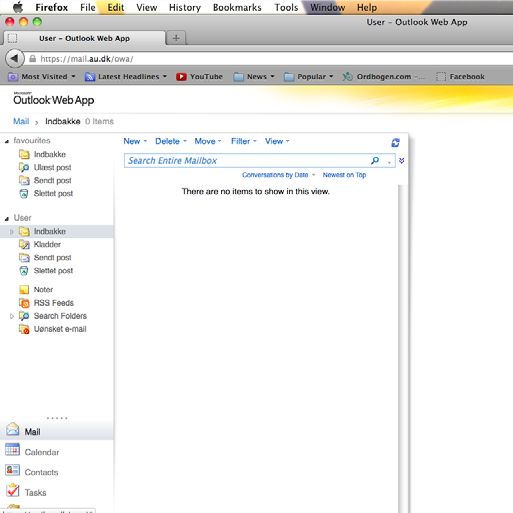
outlook web application    webmail
                                                                                                                    8

 this guide has been produced by

    advanced multimedia group                                       analytics group

Advanced Multimedia Group is a division under            Analytics Group, a division comprised of student
AU IT supported by student assistants. Our primary       assistants under AU IT, primarily offers support to
objective is to convey knowledge to relevant user        researchers and employees.
groups through manuals, courses and workshops.
                                                         Our field of competence is varied and covers
Our course activities are mainly focused on MS           questionnaire surveys, analyses and processing of
Office, Adobe CS and CMS. Furthermore we                 collected data etc. AG also offers teaching assistance
engage in e-learning activities and auditive and         in a number of analytical resources such as SAS, SPSS
visual communication of lectures and classes. AMG        and Excel by hosting courses organised by our student
handles video assignments based on the recording,        assistants. These courses are often an integrated
editing and distribution of lectures and we carry out    part of the students’ learning process regarding their
a varied range of ad hoc assignments requested by        specific academic area which ensures the coherence
employees.                                               between these courses and the students’ actual
                                                         educational requirements.
In addition, AMG offers solutions regarding web
development and we support students’ and                 In this respect, AG represents the main support division
employees’ daily use of typo3.                           in matters of analytical software.

please address questions or comments regarding the contents of this guide to
Bertel Kirkeby
advanced@asb.dk
You can also read