Audio and Web Conferencing - quick start guide
←
→
Page content transcription
If your browser does not render page correctly, please read the page content below
Audio and Web Conferencing quick start guide Orange Business Services would like to thank you for using its Audio and Web Conferencing services the way to set up and schedule your conferences depends on the type of service you subscribed - look at your account information (welcome e-mail or welcome letter) and refer to one of the following options: 1. if your portal address to access the service is : http://www.orangebusinessconferencing.com you will find out more information to use the service in this guide 2. if your portal address to access the service is personalized with the name and logo of your company (example : http://yourcompanyname.webex.com) you will find out more information in the “assistance/support” section of your web conferencing portal
summary

A- how to organize an audio conference call ?        page 3

B- connect to the portal and access your interface   page 4

C- with Cisco Webex®                                 page 6
      1. scheduling a web conference                 page 6
      2. launch your web conference                  page 9
      3. run your web conference                     page 11
      4. Webex One-Click                             page 12

D- with Microsoft® Live Meeting                      page 13
      1. scheduling a web conference                 page 13
      2. launch your web conference                  page 19
      3. run your web conference                     page 23

E- some tips to manage your conference               page 24
     1. conference assistance
     2. mute mode
     3. dial an external number
     4. volume
     5. security
     6. subconferencing
     7. recording

F- security                                          page 25

G- support                                           page 25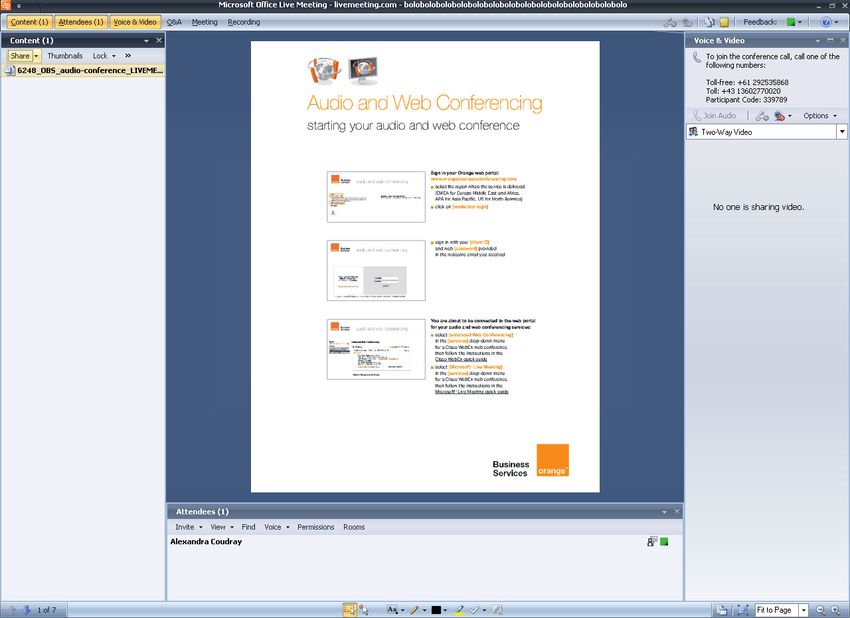
A- how to organize an audio conference call ?
1 – scheduling an audio conference call
schedule your conference by sending an email which gives :
- day and time of your meeting
- access numbers
- participant code
(please find access numbers and participant code in your welcome email)
write here your participant code : ................................................................................................
NB : to schedule a conference with advanced options, connect to
http://www.orangebusinessconferencing.com and log in using your personal information
2 – starting your audio conference call
as a moderator, dial the toll or toll-free access number corresponding to your location. Then
enter your conference moderator code followed by #
(please find access numbers and moderator code in your welcome email)
write here your moderator code : .................................................................................................
your participants dial the toll or toll-free access number corresponding to their location and
they enter the participant code you sent them
3 – you can now begin your audio conference call !
3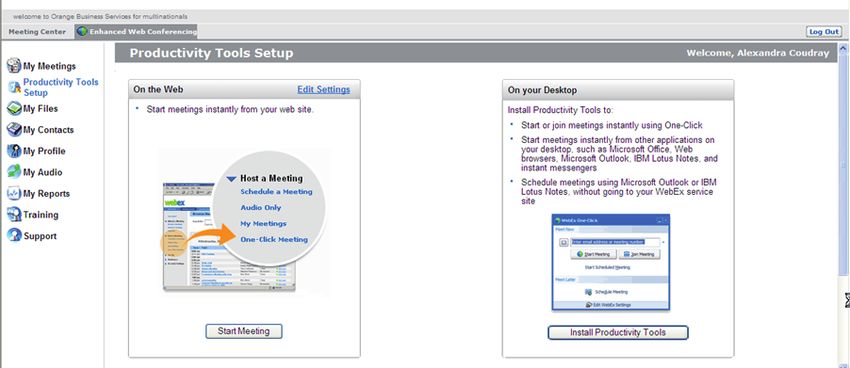
B- connect to the portal and access your interface
sign in your Orange web portal : www.orangebusinessconferencing.com
select your language
sign in with your [client ID] and web [password] provided in the welcome email you received
write here your personal code :
Web > client ID : .............................................. password : .........................................................
4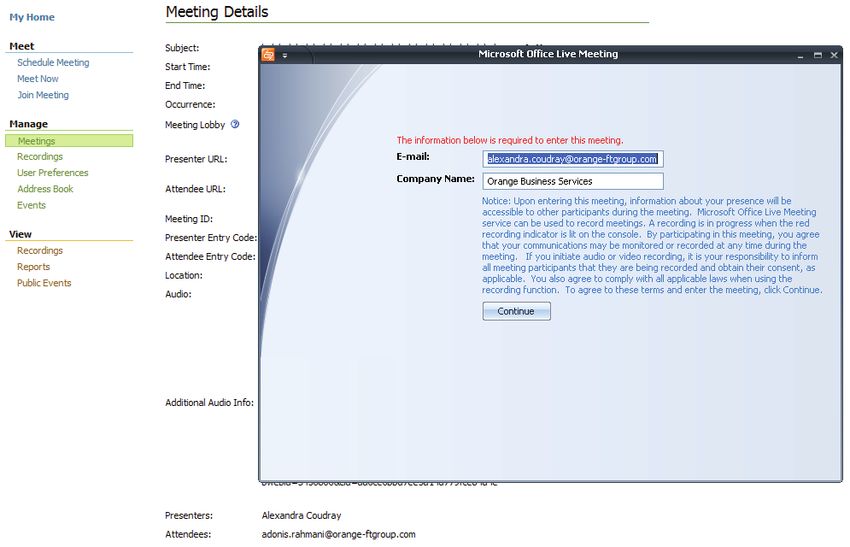
click on [manage your account]
in the [services] drop-down menu
1 depending on your web conferencing solution, click [Enhanced Web Conferencing] (Webex
Cisco®) and go to section C (p.6), or click on [Microsoft® Live Meeting] and go to section D (p.13)
2 then, click on [Start or Manage your Meetings]
1
2
5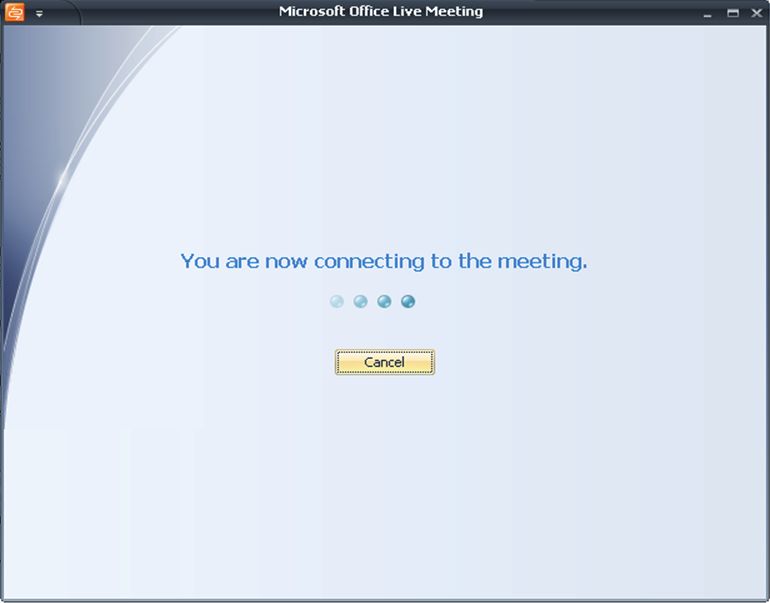
C- with Cisco Webex®
1. scheduling a web conference
on the left, select the option [schedule a meeting]
plan your conference (date and time…)
1 enter a [meeting subject] and a [password] (optional)
2 enter a date for the meeting
3 schedule a time.
-check the time zone
4 enter the meeting duration
1
2
3
4
6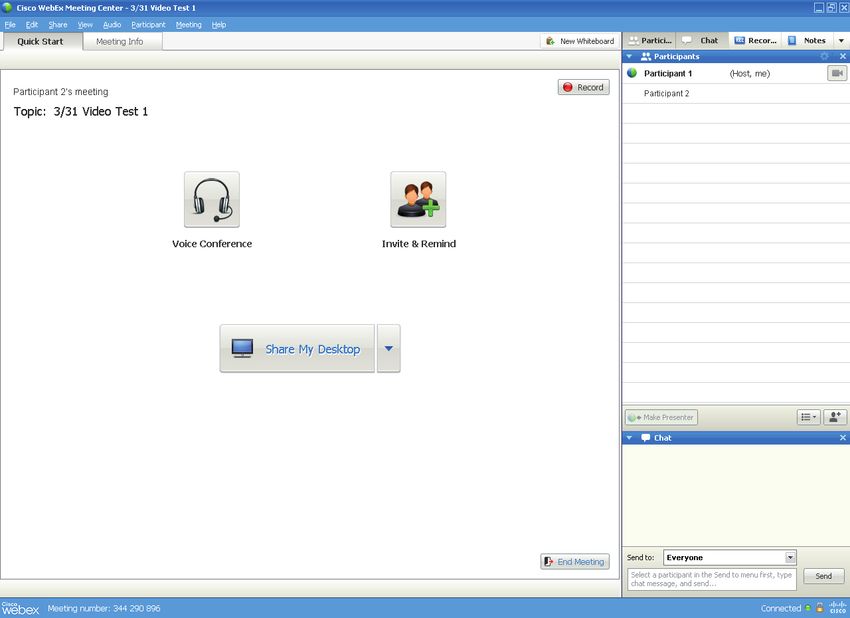
to send your invitation, you have two possibilities:

1 enter attendees email address in the [attendees] section in order to provide them with all the
connection instructions

2   tick the box [send me a copy of the invitation] under the [attendees] section

It is recommended to choose option 2. In this case, you will receive an invitation by email that
you will be able to customize and send directly to all attendees.

                  1

              2

activate Cisco Webex Audio Integration

Cisco Webex Audio Integration is an option available for customers who requested option ena-
blement.

1   click on [change audio option]

                                     1

                                                                                                   7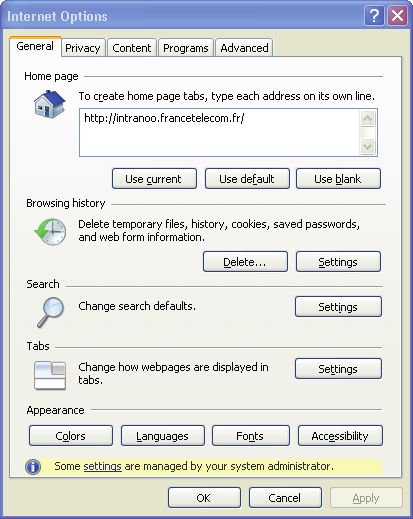
1   tick the box [teleconferencing services] then click on [edit]

2 specify the access number(s) ([call-in local number] toll; [call-in number] toll free) and the
country code by clicking on [country code]

Number format: (0)233213000 – for US it just needs to be a 10-digit number like 800-477-2410
or 8004772410 – please make sure that you have entered the correct number format otherwise,
your account will not be recognized

Note: only two numbers can be indicated. To communicate other access numbers to
attendees, customize the email invitation (see below). Local and toll free numbers are listed
in the email containing your personal information

3   enter the moderator and participant code, available in the email then validate

4   you should reach the page [schedule a meeting]

         1

2

3                                                                   4

                                                                                                   8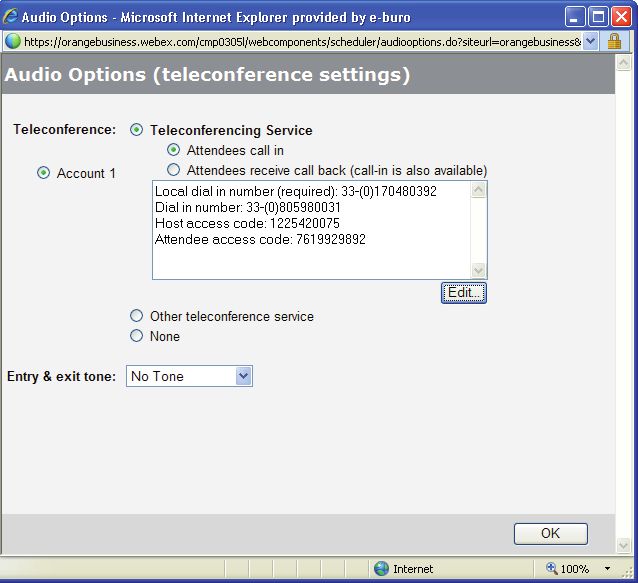
2. launch your web conference
follow step B (p. 4) to reach the Orange Cisco WebEx website
click on [my meetings] in [schedule a meeting], then go to [all meetings]
click on [join/start]
9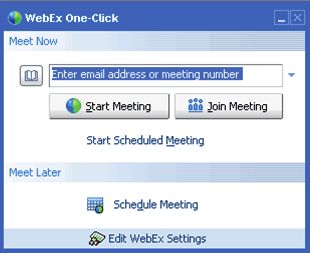
Note : you can launch a meeting without any reservation by clicking on [one click meeting]

You can also invite participants directly from the web conferencing interface!

                                                                                             10
3. run your web conference
you will reach the page that allows you to share documents!
1 control your audio conference activity : view the caller ID and deactivate/activate attendees
microphone
2 chat with your attendees during the session
3 up to 6 webcams can be connected at once
4 take annotation during your conference
5 share your presentations, applications, documents, desktop, webpages, …
6 invite other attendees to join the conference running
5 6
4
1
3
6
5
2
114. WebEx One-Click
WebEx One-Click allows you to start a meeting instantly from your desktop.
It is a simple way to start and join meetings and send meeting invitations without logging in to
your Orange WebEx service site.
WebEx One-Click lets you start meetings instantly from the One-Click panel or from other appli-
cations, such as Microsoft Office, Internet Explorer, Firefox, Microsoft Outlook.
Using this version requires that you download WebEx Productivity Tools :
1 in the Orange Cisco WebEx service Web site, click [Enhanced Web Conferencing] >
[Productivity Tools Setup] (on the left navigation bar)
The Productivity Tools Setup page appears
2 under On Your Desktop, click [Install Productivity Tools]
The File Download dialog box appears.
3 save the installation program to your computer
4 run the installation file and follow the instructions. Once you complete installation, log in using
your account information and then verify your settings in the dialog box
1
1
2
12D- with Microsoft Live Meeting
1. scheduling a web conference
click on [schedule meeting]
Note :
at any time, you can click on [Help] to get Microsoft Live Meeting on-line support
13set up your conference
1 enter the attendees email address, you must separate each address with “;”
2 enter presenters email address with the same rule
3 enter a [subject] (this field is mandatory)
4 select a [date] for the meeting and enter a [start and end time] for the meeting, make sure
time zone is correct
choose your audio conference options
5 tick the box [enable telephone conferencing] and click on [meeting options]
1
2
3
4
5
141 page is filled in by default, you may leave it this way
2 then click on [Audio]
2
1
153 tick the box [enable telephone conferencing]
enter your audio information available in your welcome email with your passcodes :
- enter [toll-free number] for the country in which most of the attendees are located and the area
code and/or
- enter [toll number] for the country in which most of the attendees are located and the area
code
Note: only two numbers can be indicated in this zone. To communicate more numbers with
more location for your attendees, customize the invitation email before sending it to partici-
pants. Access numbers list is available in your welcome email.
- enter [participant code]
- enter [leader code] (moderator code)
4 click on [Set as default]
5 click on [OK]
3
4
5
161 choose the email sending mode:
[send invitation using your email client] : customize the invitation before sending it to attendees
[send invitation using Microsoft® Live Meeting]: send the invitation generated by Microsoft®
Live Meeting application without customization
It is recommended to choose the latter option. In this case, you will receive an invitation by email
that you will be able to customize and send directly to all attendees.
2 click on [send invitations] and access all the meeting details
1
2
17you have now access to the meeting details
3 to modify your meeting , click on [Update Meeting]
3
182. launch your web conference
If you did not schedule your web conference, go to section B (p.4) to know how to reach the
the Microsoft® Live Meeting homepage
to launch your web conference :
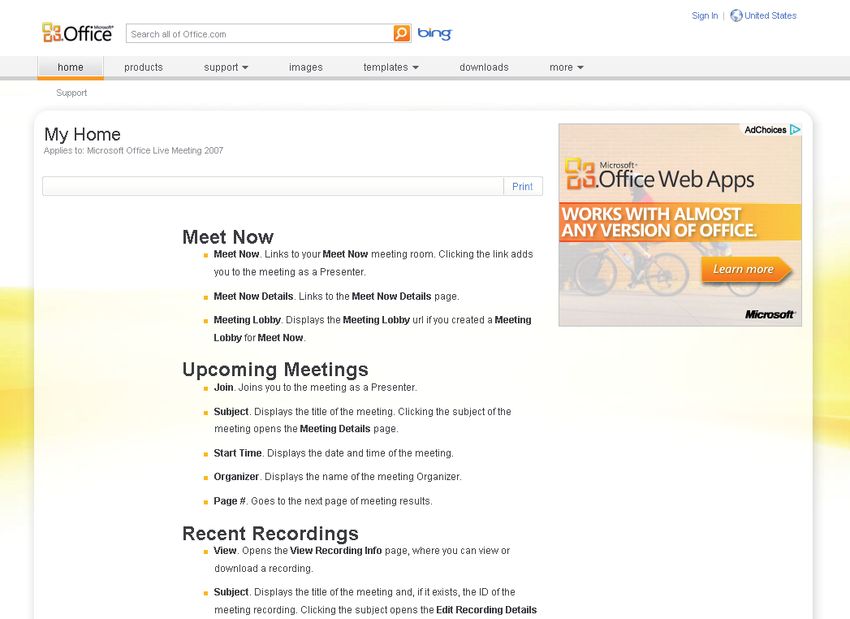
1 click on [meetings] in the [manage] section
2 click on the meeting subject in which you want to attend
1
2
191 click on [join as presenter]
1
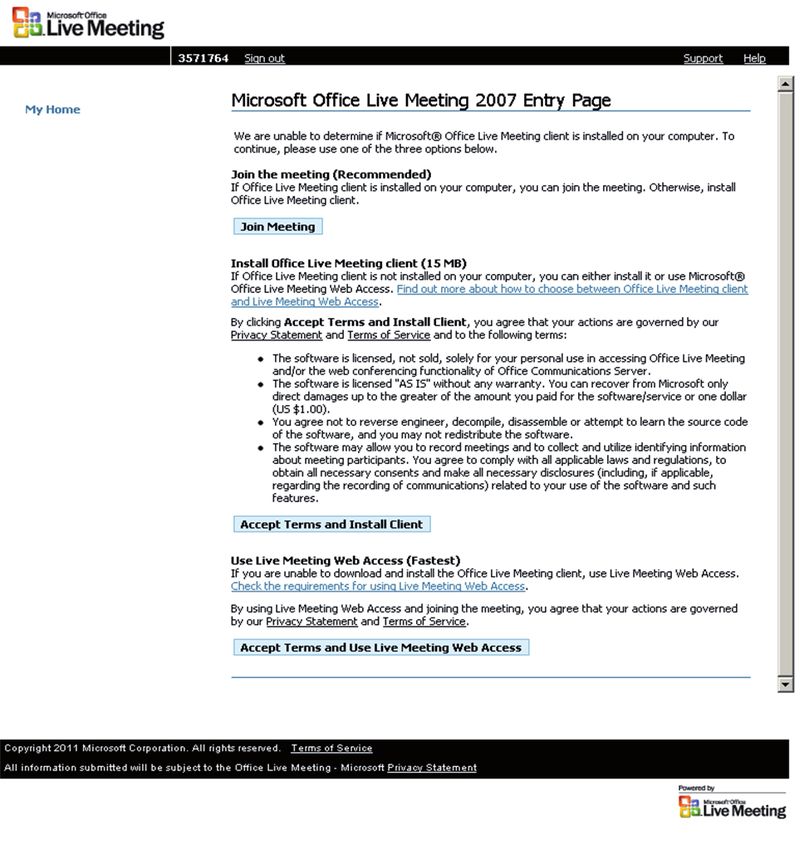
201 click on [accept, install and join]
Note: Microsoft® Live Meeting needs to be installed at the first use only for presenters and
attendees
wait for the downloading to complete
1
21 interface is launching
enter your email address and company name to access Microsoft® Live Meeting interface
223. run your web conference
you will reach the page that allows you to share documents!
1 access your audio Options
2 answer to attendee’s questions during Meeting
3 control attendees list
4 share applications, desktop, documents, whiteboard…
2
1
3
4
23E- some tips to manage your conference
use these star controls from your keypad dialing
*
Two digit controls are only available for moderators.
from your phone.
1. conference assistance 5. security
*1 to hear a help menu *31 to turn Conference Security Code on/off
*0 to reach an operator *91 to hear a participant count
*92 to hear a roll call of participants
2. mute mode *93 to disconnect all participant lines
*6 to mute or «un-mute» line *94 to lock or unlock conference
*96 to mute all participant lines
*97 to un-mute all participant lines 6. subconferencing
*21 to activate subconferencing
3. dial an external number #1-9 to join a subconference
*95 to call an external number ## to go back to the main menu
and add attendees #0 the operator sends back all participants
to the main menu
4. volume
*4 to increase conference volume 7. recording
*7 to decrease conference volume *22 to initiate record and playback
*5 to increase your voice volume *22 again to pause/stop the recording
*8 to decrease your voice volume
Microsoft® Live Meeting interface language used by default is the one selected in your web
navigator. To modify the language you must change it from your web navigator.
go to [Tools] from your web click on [languages] select the language
navigator then go to in [general section] and move it up
[Internet options]
24F- security
tips
don’t forget : « security first »
make sure your personal information for Orange Audio and Web Conferencing Services are kept
in a safe place.
on-demand security
Orange Audio and Web Conferencing Services enable you to modify your security code in each
meeting :
the moderator chooses a unique code and inform its attendees
the moderator activates the security mode by dialing *31. Security code applies for an
audio conference and is deleted after call termination
G- support
to get more assistance during your meeting, please dial *0 you will reach an
operator and get support in realtime. Any participants can dial this shortcut to
have assistance during conference
if you need further help, please call your local support center (support centers
phone numbers are avalaible in your welcome email)
Enjoy your meetings with Orange Audio & Web Conferencing Services !
25You can also read