Panopto Lecture Capture Faculty Guide
←
→
Page content transcription
If your browser does not render page correctly, please read the page content below
Panopto Lecture Capture Faculty Guide
Introduction to Panopto
Panopto Course Capture allows users to capture a video &
audio feed of their classroom along with a screen capture
of their PC desktop or other projection source. It then
automatically packages these feeds together in a web-
accessible presentation for their audience to watch live or
on demand after the presentation has concluded.
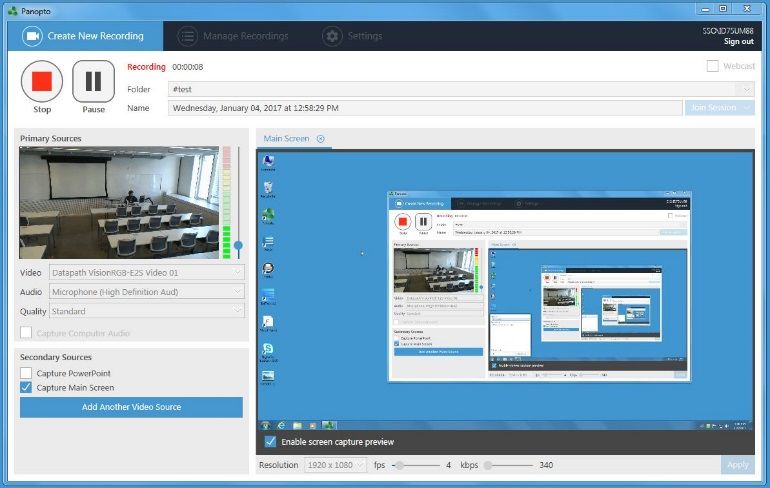
In most Panopto presentations, the camera feed is the
primary source, with the classroom computer as the
secondary source. See the image to the right for an
example of a Panopto course capture session using a
camera as the primary source and a classroom PC as the
secondary source. If more than one secondary source is
used, each one appears in its own tab.
Accounts & Access
Faculty or staff wishing to use Panopto course capture software for recording presentations should complete the
Panopto Class Request Form, which can be found in the Classroom Technology section of the UB website. The form
will require that you supply the following information:
• Name
• Course names and numbers
• Term (e.g. Spring 2017, Fall 2018)
• Classroom building and room number (e.g. Business Center 305)
• Any special needs you may have—for instance, if you’d like for your students to have upload privileges,
or if you only want your videos shared with particular users.
If you have never used Panopto before, OTS staff will contact you to schedule a brief training session on how to use
the software. This session usually takes less than an hour and is mandatory for all Panopto users.
Using Panopto Recorder
1. Launch Panopto Recorder from the desktop shortcut or from the
“Programs” menu.
2. The UB portal login page should automatically appear; sign in
using your UB netID and password. Uncheck the remember me box
so that other users can log in with their own credentials.
3. If the portal login screen does not appear automatically, click the
Sign in with UB Single Sign-on button and follow the instructions
above.
4. If you are not using a lectern microphone you must use the
wireless lavalier (clip-on microphone) or wireless handheld
microphone to ensure clear audio in the recording.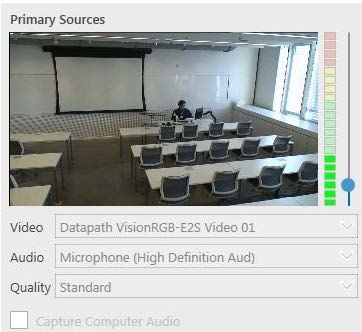
Panopto Lecture Capture Faculty Guide
  5.    Once you have logged in, the program will display the Capture New Recording screen (pictured above). This
        screen includes a room camera preview, an audio input meter, and a desktop capture preview.
  6.    Panopto requires audio and video from a primary source in order to
        create a recording. Make sure you can see a clear preview of the
        video from the classroom camera under the Primary Sources section.
        If this section shows color bars or a black screen with green text, try
        switching the video input device in the drop-down menu beneath it.
  7.    The audio meter next to the video preview should react to your voice
        when you speak into one of the provided microphones. Consistent
        green bars are good, yellow is fine, and red is bad. If your audio
        meter is consistently hitting the red, turn down your input level with
        the adjacent slider.
NOTE Some classrooms come with built-in ceiling microphones. While these
      work nicely to capture student questions during the lecture, we highly recommend that you use the
      provided gooseneck or wireless microphones to ensure a high quality recording of your voice.
  8.    Desktop capture is automatically enabled in Panopto; by
        default the software will show a white computer graphic
        with the text Screen capture in progress (pictured right). If
        you would like to preview the captured desktop, check the
        box labelled Enable screen capture preview.
            o   If you do not wish to capture your desktop, simply
                close the Main Screen tab or uncheck the box
                labelled Capture Main Screen under the
                Secondary Sources section of the window.
  9.    Under the Session Settings section, make sure that you
        have selected the correct destination folder for your
        recording. To change the folder, open the drop-down
        menu and select the correct one. If there are problems
        connecting to the network, you may record an offline
        presentation—to be uploaded when the network connection is restored—by clicking Offline Recording.
  10.   The date and time are automatically used for the session name, but you may change it to whatever you like
        before beginning the recording. Type the name you’d like to give to this session in the Name field.
  11.   If you are recording a presentation for on-demand viewing, you are ready to begin. If you are recording a
        presentation to be viewed live and on-demand, click the “broadcast and record” check box to enable live
        broadcasting.
  12.   When you are ready to begin your presentation, click the red Record button to begin
        recording. You may minimize Panopto, and, if using Powerpoint, begin your Powerpoint
        presentation in full screen mode.

                                                           2
Panopto Lecture Capture Faculty Guide
 13.   If you need to take a short break, click the grey Pause button. Recording
       continues in the background but this section of the recording will not be
       visible in the viewed presentation. Press the pause button again to resume
       recording. Pauses can be edited later if desired (for example, if you forget to
       resume following the break!).
 14.   When you have finished your presentation, click the red Stop button. After a
       short delay, a dialogue window announces that recording is
       stopped; from here you can click Upload to send the recording to
       the server, or—if you are dissatisfied with your video—Delete and
       record again. Panopto will stop the recording and display the
       Manage Recordings screen.
 15.   Once on the Manage Recordings page, you may log out of Panopto;
       click Sign out in the upper right corner. You do not need to wait for
       the upload to complete; you may log out of the PC, but do not
       power the PC off.
 16.   The presentation will be available for online viewing shortly. Go to
       ubalt.hosted.panopto.com to view the presentation.

       For more information on using Panopto Recorder, see Panopto’s
       extensive online documentation at http://support.panopto.com.

Viewing and Sharing Panopto Course Capture Sessions
Go to ubalt.hosted.panopto.com to view the presentation. Your audience must have a username and password to
access the presentations; for members of the UB community, select UB Single Sign-on and use your normal UB
netID and password. After logging in, your audience will see only the folders and presentations to which they have
access. If you are allowing your entire class to access your recordings, your class will automatically be given access
to your folder. Contact OTS Media Classroom Support with your course number to set up course-wide access.

Sharing presentations by email (not recommended)
You may also share your presentations with your audience by emailing them a link to a particular presentation.
This is a good option if you only want to share a specific session (for instance, for an excused absence), or want to
share a session with someone not enrolled in your class or outside the UB community.
    1. Log in at ubalt.hosted.panopto.com with the same username and password you use to log in to Panopto
         Recorder in the classroom.
   2. Navigate to the presentation you wish to share with your audience.
   3. Hover over the blank space to the far right of the presentation you wish to share. Several icons will appear
      in the space.
   4. The first icon displays “share” when you hover over it.
   5. Selecting the “share” icon brings up the “settings” page for this session.

                                                          3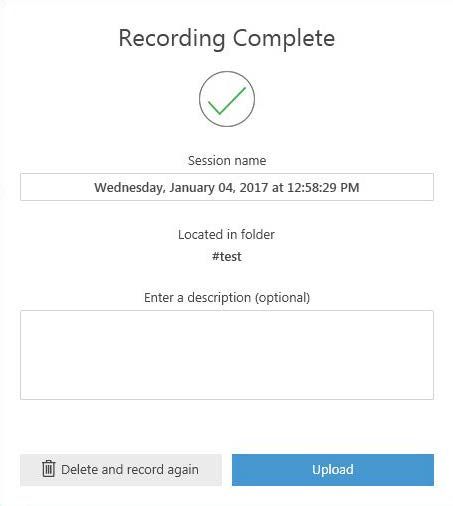
Panopto Lecture Capture Faculty Guide
   6. You may edit the access settings for this session, copy the URL of the presentation to mail it to your
      audience, or use Panopto to directly mail the presentation to your audience.
Panopto mobile app
Students can also access Panopto recordings from their tablet or smartphone using the Panopto app, available
from the Apple App Store (for iOS devices) or the Google Play Store (for Android).
   1. After installing the Panopto app, launch the app.
   2. Enter “ubalt.hosted.panopto.com” into the Panopto Site Screen and click “Log In”
   3. Select the “Account” drop down and change it to “UB Single Sign-on”
   4. Enter your UB NetID and password into the correct fields.
   5. Once you have logged in, select the “home” tab to access the recordings to which you have been given
      access, and select the recording you wish to view. You should not need to logout or enter your information
      again (unless you log out).

                                                          4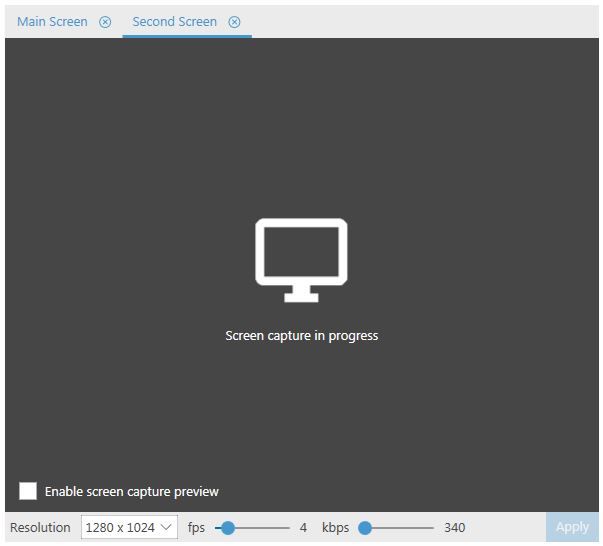
You can also read