PFPGSG - V0319A Getting Started - RUN Powered by ADP Payroll for Partners
←
→
Page content transcription
If your browser does not render page correctly, please read the page content below

RUN Powered by ADP® Payroll for Partners

Getting Started
PFPGSG - V0319A
Trademarks

ADP, the ADP Logo, ADP A more human resource, RUN Powered by ADP, ALINE Card by ADP, Employee Access,
ezLaborManager, HR411, Pay-by-Pay, and TotalPay are registered trademarks of ADP, LLC. ADPCheck is a
trademark of ADP, LLC and/or its affiliates.

Adobe and Acrobat are registered trademarks of Adobe Systems Incorporated. Google Chrome browser is a
trademark of Google, LLC. Apple®, Mac®, iTunes®, iPad®, iPod®, iPod touch®, and Safari® are registered
trademarks of Apple, Inc., registered in the US and other countries. Intuit and QuickBooks are registered trademarks
and/or registered service marks of Intuit Inc. or one of its subsidiaries. Microsoft, Windows, and Windows NT are
registered trademarks of Microsoft Corporation. Firefox is a registered trademark of Mozilla Foundation. Sage, Sage
50 Accounting and related Sage marks are the trademarks of Sage Software, Inc. VISA is a registered trademark of
Visa.

All other trademarks are the property of their respective owners.

Copyright © 2006 - 2019 ADP, LLC. ADP Proprietary and Confidential. All Rights Reserved. These materials may not
be reproduced in any format without the express written permission of ADP, LLC.

ADP provides this publication “as is” without warranty of any kind, either express or implied, including, but not limited
to, the implied warranties of merchantability or fitness for a particular purpose. ADP is not responsible for any
technical inaccuracies or typographical errors which may be contained in this publication. Changes are periodically
made to the information herein, and such changes will be incorporated in new editions of this publication. ADP may
make improvements and/or changes in the product and/or the programs described in this publication at any time
without notice.

PFPGSG - V0319A
Contents
     Working with Clients ................................................................................................... 1
     Data Access ................................................................................................................ 2
       What Is a Referral Client? .................................................................................................. 2
       How Do I Add a Data Access Client? ................................................................................. 2
         If the client phones in their payroll to ADP ...................................................................... 2
         If the client has access to the payroll application ............................................................ 2
       How Do I Reinstate a Client? ............................................................................................. 3
       How Do I Remove a Data Access Client? .......................................................................... 3

     How Secure Is the Data? ............................................................................................ 1
       Security Access Roles ....................................................................................................... 1
         Firm user roles ............................................................................................................... 1
         Client user roles ............................................................................................................. 2
         Accountant Connect (Data Access) only ........................................................................ 3

     Pre-Printed Check Stock Printing Requirements ........................................................ 4
       Ordering Check Stock ........................................................................................................ 4
       MICR Check Stock Printing Requirements ......................................................................... 5
       How Do I Set Up Check Printing Options? ......................................................................... 5

     How Do I Use the Client List? ..................................................................................... 6
       Organizing Your Clients' Companies .................................................................................. 6
       How Do I Sign In to a Client's Company? ........................................................................... 7
       Why Don't I See All My Clients in the Client List? ............................................................... 7
       How Do I Process a Payroll for a Client?............................................................................ 7
         You enter payroll data for the client ................................................................................ 7
         The client enters their own payroll data .......................................................................... 8
       When Should I Notify a Client That I Ran the Payroll? ....................................................... 8

     Company and Payroll Notes ....................................................................................... 9
       Company Notes ................................................................................................................. 9
       Payroll Notes...................................................................................................................... 9
       Tips for Notes..................................................................................................................... 9
       How Do I Add a Company Note for Myself or Someone Else? ..........................................10
       How Do I Add a Payroll Note for Myself or Someone Else? ..............................................10

     Payroll Tasks, Messages, and E-Mails ..................................................................... 11
       The To Do List ..................................................................................................................11
       Messages .........................................................................................................................12
       E-Mail Messages ..............................................................................................................12

     Creating a Company ................................................................................................. 13

RUN Powered by ADP® Payroll for Partners                                i                                                         Getting Started
Setting Up a Company .............................................................................................. 14
Collecting General Company Information ..........................................................................14
Collecting Company Pay Calendar Information .................................................................15
Collecting Company Tax Information ................................................................................15
Collecting Company Earnings and Deductions Information ...............................................16
Collecting Company General Ledger Information ..............................................................16
Collecting Company Workers' Compensation Information .................................................16
How Do I Set Up a Company? ..........................................................................................17
Setting Up Employees and Contractors .................................................................... 18
Collecting General Employee and Contractor Information .................................................18
Collecting Employee and Contractor Payroll Information ...................................................18
Collecting Employee and Contractor Bank Information .....................................................19
Collecting Employee Paid Time Off Information ................................................................19
Collecting Employee Tax Information ................................................................................19
How Do I Set Up Employees and Contractors? .................................................................20
Entering Prior Payroll Amounts ................................................................................. 21
Where Can I Find Prior Payroll Amounts? .........................................................................21
Processing the First Payroll During a Quarter ...................................................................22
How Do I Enter Prior Payroll Amounts?.............................................................................22
Setting Up General Ledger ....................................................................................... 23
Add the General Ledger Feature .......................................................................................23
Set Up Your Chart of Accounts .........................................................................................23
Assign General Ledger Accounts to Company Payroll Items .............................................24
Customize Department Mapping .......................................................................................24
Customize Employee Mapping ..........................................................................................25
What to Do Next ................................................................................................................25
How Do I Create a General Ledger File? ..........................................................................26
Processing a Payroll ................................................................................................. 28
Task 1: Update Employee and Contractor Information ......................................................28
Task 2: Total the Source Documents ................................................................................28
Task 3: Enter Payroll Information ......................................................................................29
Task 4: Calculate the Payroll .............................................................................................30
Task 5: Correct Payroll Errors ...........................................................................................30
Task 6: Run Payroll and Approve Checks for Printing .......................................................31
RUN Powered by ADP® Payroll for Partners ii Getting StartedTask 7: Print Paychecks, Pay Stubs, and Direct Deposit Vouchers ...................................31
Selecting Check Stock...................................................................................................31
Printing Paychecks ........................................................................................................32
Browser Requirements for Printing Checks and Vouchers ............................................32
Including Signature and Logo Images on Paychecks ....................................................33
Printing the Sample Check Report.................................................................................33
What Is MICR? ..............................................................................................................34
Printing a Test Check ....................................................................................................35
How Do I Print Checks on Pre-Printed Check Stock? ....................................................37
How Do I Print MICR Paychecks? .................................................................................38
How Do I Troubleshoot Check Printing Problems? ................................................... 40
Checks Are Not Aligned Correctly .....................................................................................40
Checks Are Printed on the Wrong Paper...........................................................................41
Check Stock Is Jammed in the Printer...............................................................................41
The MICR Line Is Not Aligned Correctly ............................................................................42
How Do I Re-Print a MICR Paycheck? ..............................................................................43
Reconciling Checks .................................................................................................. 44
How Do I Reconcile Checks? ............................................................................................44
Customizing Standard Reports ................................................................................. 45
Exporting Data ..................................................................................................................45
How Do I Run a Report? ...................................................................................................46
Appendix A: System Requirements .......................................................................... 47
Hardware Requirements ...................................................................................................47
Software Requirements - PC.............................................................................................47
Software Requirements - Mac ...........................................................................................47
Software Requirements - iPad® ........................................................................................47
Appendix B: ADP Features and Services ................................................................. 48
401(k)/Retirement Services ...............................................................................................48
ADP Check Printing and Distribution .................................................................................48
ADPCheck ........................................................................................................................49
ADP Time & Attendance ...................................................................................................49
ALINE Card by ADP ..........................................................................................................50
e-Delivery (Paperless Payroll) ...........................................................................................50
e-File and e-Pay................................................................................................................51
HR411 Complete ..............................................................................................................51
Keep Informed ...............................................................................................................51
Manage Day-To-Day .....................................................................................................51
Safeguard Your Business ..............................................................................................51
ADP's Pay-by-Pay .............................................................................................................52
Premium Only Plan (POP) ................................................................................................53
Appendix C: Additional Resources............................................................................ 54
RUN Powered by ADP® Payroll for Partners iii Getting StartedWorking with Clients
There are four different ways that you can choose to work with your clients
using the payroll application.
• You provide all payroll services for the client. The client does not
have access to the payroll application.
Tip: A Worksheet report is provided to help you gather your client's
payroll data. To find the report, select the Reports tab, and then click
Worksheet.
• Your clients have limited access to the payroll application. They can
reset their own passwords, print checks, review their reports, and
download their general ledger data. These clients must be set up with
the Client-View Only (CVO) security access role.
Important: For a client to access the payroll application, the client must
click the Accept Terms of Agreement task on the Payroll Home page,
and complete and accept the Terms of Service (TOS) agreement.
• Your clients can enter payroll information for employees and
contractors, and record manual checks. After they enter data, you
process their payrolls for them. These clients must be set up with the
Client Payroll Entry (CPE) security access role.
• Your referral client authorizes you to view only their reports and tax
forms, and to create and download their general ledger files.
RUN Powered By ADP® Payroll For Partners 1 Getting StartedWhat Is a Referral Client?
Data Access
The Data Access feature allows you to view certain information for the
payroll application clients (referral clients) who have authorized you to do so.
Depending on the client's authorization, you can view their reports and tax
forms, and create and download their general ledger data files.
What Is a Referral Client?
A referral client is a client that uses the payroll application for their payroll
processing and has authorized you to view their payroll reporting information
(reports, taxes, general ledger download file).
How Do I Add a Data Access Client?
Starting Point: Firm View > Client Enrollment
A document is displayed that describes what the client needs to do to
authorize you to view their payroll reporting information.
If the client phones in their payroll to ADP
Starting Point: Firm View > Data Access Tools > Authorization Form
1 Edit the sample Data Access Authorization Form and send it to the
client. Be sure to include your 8-digit Firm ID.
2 Print or save the form to your local drive, and then send it to the client.
They must complete the form and fax or mail it back to the ADP Service
Center. Instructions are included in the Client Enrollment document.
If the client has access to the payroll application
The client must complete the online authorization. Direct them to:
Starting Point: Company > Data Access Tools > Authorization
Click and search for the topic called How Do I Authorize a Firm to View
My Payroll Reporting Information?
RUN Powered By ADP® Payroll For Partners 2 Getting StartedHow Do I Reinstate a Client?
How Do I Reinstate a Client?
Important: If you removed a Data Access client but need to view their
payroll reporting information again, you can reinstate the client. However,
you must still be authorized by the client to view their payroll reporting
information.
A user must have the appropriate security access role to reinstate a client.
Starting Point: Firm View > Client Enrollment
Click the check box next to the client you want to reinstate, and then click
Save.
How Do I Remove a Data Access Client?
Starting Point: Firm View > Client List
1 On the Client List page, click the Data Access client you want to remove.
2 At the bottom of the page, click Remove or Remove Referral (for clients
with Data Access with the payroll application).
Important: If necessary, you can re-instate a client that you have removed.
However, you can view that client's payroll reporting information only if you
are still authorized to do so by the client.
RUN Powered By ADP® Payroll For Partners 3 Getting StartedSecurity Access Roles
How Secure Is the Data?
The following industry-leading security technology is incorporated into the
payroll application:
• Multi-level user authentication – Users must provide key information,
and their user name and password, to authenticate their registration
information.
• 128-Bit SSL information transfer – All information between the user’s
browser and the payroll application is transmitted under 128-bit SSL, the
industry standard for secure financial data exchanges.
• Physical security – The client data is shielded behind several layers of
security infrastructure, including firewalls that limit outside access to the
payroll application.
• Physical data security – After submission, all client data is stored
securely in our state-of-the-art data centers behind several layers of
security, where access is restricted to only validated users and systems
prior to data submission and is backed up regularly.
• Proprietary data protocols – Restricted protocols are used to move
data throughout the application, which also restricts access to the
application by outside users.
Security Access Roles
Firm user roles
The Firm roles are available only in the payroll application Payroll for
Partners.
Firm*
• Access all areas of the payroll application that are required to handle
payroll tasks
• Add, change, and remove other users
• Reset payroll passwords for other users
• Add, change, and delete company groups
• Access assigned payroll details for Data Access clients
Firm Limited EE Entry*
• Limited access to multiple clients, but can't submit or run payrolls
• Access to the Client List, company information (view only), client
employee information, client reports, and client tax forms and e-File/e-
Pay
• Access clients in assigned company groups
• Reset personal payroll passwords and security profiles
• Share reminders with Firm Limited PR & EE Entry users
• Restrict access to all Firm level data, except the Client List page, which
includes all clients that the user has access to view
RUN Powered by ADP® Payroll for Partners 1 Getting StartedSecurity Access Roles
Firm Limited PR & EE Entry*
• Limited access to multiple clients, can submit payrolls, but can't run them
• Access to the Client List, company information (view only), client
employee information, client reports, and client tax forms and e-File/e-
Pay, and general ledger
• Access clients in assigned company groups
• Access the Payroll Worksheet, enter payroll data, and run payrolls for
clients
• Share reminders with Firm Limited EE Entry users
Firm Limited EE & PR Process*
• Access to multiple clients, and can run payrolls
• Access to the Client List, company information (view only), client
employee information, client reports, and client tax forms and e-File/e-
Pay, general leger
• Access the Payroll Worksheet, enter payroll data and, run payrolls for
clients
• Access assigned payroll details for Data Access clients
Client user roles
Client View Only
• View and print reports
• View company and employee info
• Can enter payroll info, but can't approve payrolls
• Print paychecks, if permitted to do so by the Firm user
• Reconcile checks
• Create GL files and view export history
Client Payroll Entry
• Enter payroll info, for one payroll at a time, for each pay frequency, but
can't approve payrolls
• View and print reports
• View company and employee info
• Record manual checks, void checks, and enter third party sick payments
• Print paychecks, if permitted to do so by the Firm user
• Reconcile checks
• Create GL files and view export history
RUN Powered by ADP® Payroll for Partners 2 Getting StartedSecurity Access Roles
Client PR & EE Entry
• Enter payroll info, for one payroll at a time, for each pay frequency, and
can submit payrolls for approval by a Firm user
• View and print reports
• Update employee info
• View company info
• Record manual checks, void checks, and enter third party sick payments
• Print paychecks, if permitted to do so by the Firm user
• Reconcile checks
• Create GL files and view export history
Accountant Connect (Data Access) only
Data Access Admin
• Access the full company list
• View all Data Access payroll details
• Remove and reinstate clients
• Add, change, and remove company groups
• Add, change, and remove other users
• Reset payroll passwords for other users
Data Access User
• View client payroll information selected by the Data Access Admin
• View client groups assigned by the Data Access Admin
• Change personal security profile and password
• Remove clients
RUN Powered by ADP® Payroll for Partners 3 Getting StartedOrdering Check Stock
Pre-Printed Check Stock Printing Requirements
The process for printing checks and vouchers varies a bit depending on the
browser you are using. For details, see Browser Requirements for Printing
Checks and Vouchers on page 32.
To prepare to print paychecks on pre-printed check stock, you or your client
must complete the following tasks:
• If you are using existing check stock, verify that it is compatible with the
check stock the payroll application supports. For more information, see
Ordering Check Stock on page 4.
• Print a test check to ensure that the paychecks will print correctly. For
more information, see Printing a Test Check on page 35.
Important: Clients who print their own paychecks must use pre-printed
check stock only. If you are printing the client's paychecks, you can use
pre-printed check stock or plain MICR check stock.
Ordering Check Stock
To order pre-printed check stock, you'll need to provide your company’s
bank account number and routing (ABA) number. Both these numbers must
be pre-printed on the check stock using Magnetic Ink Character Recognition
(MICR) toner.
When you receive your check stock, be sure to verify the bank account
number, the routing number, and any other information before you print any
paychecks. You can order pre-printed check stock and envelopes or plain
Magnetic Ink Character Recognition (MICR) check stock from the
FormCenter (http://www.form-center.com/adp-run).
In addition to check stock, you can also order envelopes, binders, and a
payroll calendar/employee attendance record on the FormCenter.
RUN Powered by ADP® Payroll for Partners 4 Getting StartedMICR Check Stock Printing Requirements
MICR Check Stock Printing Requirements
To prepare to print Magnetic Ink Character Recognition (MICR) paychecks
for your clients, you must have a MICR printer. For more information on
MICR printers and MICR toner cartridges, go to the FormCenter
(http://www.form-center.com/adp-run).
A MICR toner cartridge is included with your MICR printer; however, you
should always have a spare cartridge available. Unlike regular laser printer
toner, MICR toner carries an electronic signal that allows a bank's
equipment to read the characters in the MICR line accurately. MICR toner
and regular laser printer toner can't be used interchangeably.
After you set up your MICR printer, you must also complete the following
tasks:
• Order plain MICR check stock.
• Order a MICR gauge. A MICR gauge allows you to verify that the
position of the characters in the MICR line, as well as the line itself, are
aligned correctly.
• Review the requirements to print checks and vouchers on page 32.
• Print a test check to ensure that the paychecks will print correctly. For
more information, see Printing a Test Check on page 35.
How Do I Set Up Check Printing Options?
Starting Point: Company > Bank Account
1 In the Who Will Print Checks field, select one of the following options:
• Accountant if you are going to print the client's paychecks.
• Client if the client is going to print their own paychecks.
• Service Center if the service center will print the client's checks.
2 If you are going to print the client's paychecks, select either Plain stock
(MICR) or Pre-Printed stock in the What Type of Checks Will Be
Used field.
Note: The Pre-Printed Stock option is selected automatically for clients
who print their own paychecks.
3 Complete any remaining fields as necessary.
4 Click Save to save your changes.
RUN Powered by ADP® Payroll for Partners 5 Getting StartedOrganizing Your Clients' Companies
How Do I Use the Client List?
You can use the Client List page to easily manage the payroll activities for
your payroll clients. To open a company and process a client's payroll or
perform other payroll activities (such as printing multiple paychecks for a
client, or viewing and printing payroll reports), click the client's name in the
Company Name column in the Client List.
Organizing Your Clients' Companies
You can organize your clients' companies by creating company groups and
assigning companies to them. Company groups are collections of
companies that have something in common. For example, you might create
a company group for weekly payrolls, for executive payrolls, or for
companies in a specific state.
After you create company groups, use the company group fields on the
Business Info page to assign new companies to groups. You can assign
existing companies to company groups by selecting the Company Groups
option in the Security menu on the Firm View tab. After companies are
assigned to company groups, you can assign the group to a specific CPA for
processing and maintenance.
Important: All companies are included automatically in the Full Company
List group.
RUN Powered by ADP® Payroll for Partners 6 Getting StartedHow Do I Sign In to a Client's Company?
How Do I Sign In to a Client's Company?
On the Client List page, click the name of the company you want to open.
The Payroll Home page for the company is displayed. You can make
changes to employee and company data, process the client's payroll, or
print paychecks for one client at a time.
Why Don't I See All My Clients in the Client List?
A client will not be included in the Client List if you cancel the registration
process before you are finished.
If you have multiple clients, check the lower left corner of the list to see if
there is more than one page of clients. If you see Page 1 of 2, the list
continues to a second page. Click the number 2 to display the second page
of clients.
If you are working with a specific company group, the company may not be
included in that group.
If you are looking for a referral client, the client may not have completed the
authorization process yet.
How Do I Process a Payroll for a Client?
The way you process the client's payroll depends on who enters the payroll
data.
You enter payroll data for the client
Tip: A Worksheet report is provided to help you gather your client's payroll
data. To find the report, select the Reports tab, and then click Worksheet.
You can print the report and mail or fax it to your client to use when sending
you payroll information. You can also export it in Microsoft Excel format and
send it to the client electronically.
Starting Point: Firm View > Client List
1 Click the name of the company whose payroll you want to process. The
Payroll Home page is displayed for that client.
2 Click Payroll Home > Run Payroll.
3 Enter pay data as necessary for employees and contractors.
Note: To override employee payroll information for the current payroll
only, click for the employee or and select One -time Overrides.
For more information, click in the upper-right corner of the page.
RUN Powered by ADP® Payroll for Partners 7 Getting StartedWhen Should I Notify a Client That I Ran the Payroll?
4 When you are done entering pay data, click Preview Payroll to review
the payroll.
5 Review payroll preview reports.
6 Click Approve to calculate the payroll.
The client enters their own payroll data
When the client is finished entering payroll data for employees and
contractors, they click on Approve the Payroll Preview page. When the
client clicks Approve, an e-mail is sent to you indicating that the payroll is
ready to process.
Starting Point: Firm View > Client List
1 Click the name of the company whose payroll you want to process. The
Payroll Home page is displayed for that client.
2 In the To Do area, click Resume Payroll Processing.
3 Finish processing the client's payroll.
Important: The client cannot work with another regular or special payroll for
this pay frequency until you finish processing this payroll.
When Should I Notify a Client That I Ran the Payroll?
If the client prints their own paychecks, you should call or otherwise notify
them as soon as you process their payroll. They can then print their checks
at their convenience.
If you provide all the payroll services, including check printing, for the client,
you do not have to notify the client that you processed the payroll.
RUN Powered by ADP® Payroll for Partners 8 Getting StartedCompany Notes
Company and Payroll Notes
Notes allow you to add comments, messages, and reminders in the payroll
application, for yourself and for other users in your company. Notes are NOT
intended for your ADP Service team.
There are two kinds of notes: Company and Payroll.
Company Notes
Company Notes are available by clicking in the upper-right corner of the
page. Lines on the icon indicate that someone has already added a
company note.
Company Notes are visible to all users.
The name of the last person to make a change, as well as the date and time
of the change, is displayed at the bottom of the Company Notes window.
Payroll Notes
Payroll Notes are available while you are entering, reviewing, or processing
a regular payroll. To open the Payroll Notes window, click in the
upper-right corner of the page. Lines on the icon indicate that someone has
already added a payroll note.
Payroll Notes are visible to users who can process payrolls.
The date and time of the last change is displayed at the bottom of the
window.
Tips for Notes
• You can use the standard editing shortcuts, such as Ctrl-Z (undo),
Ctrl C (copy), and Ctrl-V (paste).
• You can move the Notes windows on the screen.
• You can resize the Company Notes window.
RUN Powered by ADP® Payroll for Partners 9 Getting StartedHow Do I Add a Company Note for Myself or Someone Else?
How Do I Add a Company Note for Myself or Someone Else?
Important: Be aware that any notes you add in the Notes window are visible
to all users in your company.
If the note is related to a specific payroll, you might want to add a Payroll
note instead of a Company note.
1 In the upper-right corner of the page, click to open the Notes window.
2 Type your note.
Notes are saved automatically as you type them.
Tip: You might want to include your name or initials and a date so other
users know who wrote the note.
3 To close the Notes window, click the X icon in the upper right corner.
How Do I Add a Payroll Note for Myself or Someone Else?
Important: Be aware that any notes you add in the Payroll Notes window
are visible to all users who can process payrolls.
Payroll Notes are available only in a regular payroll.
1 In the upper-right corner of the page, click to open the Payroll Notes
window.
2 Type your note.
Notes are saved automatically as you type them.
Tip: You might want to include your name or initials and a date so other
users know who wrote the note.
3 If you want the Payroll Notes window to come up automatically when
someone starts the current payroll, click to select the check box at the
bottom of the window.
4 To close the Notes window, click the X icon in the upper right corner.
RUN Powered by ADP® Payroll for Partners 10 Getting StartedThe To Do List
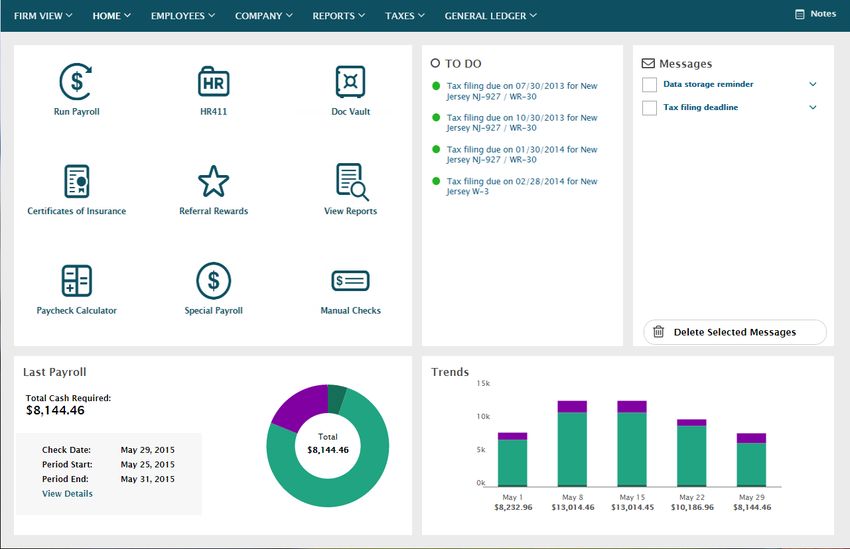
Payroll Tasks, Messages, and E-Mails
The Payroll Home page in the payroll application allows you to manage
payrolls and review payroll tasks and messages.
The To Do List
A payroll task is a task that you must complete in the payroll application.
Most payroll tasks should be completed as soon as possible. In some cases,
you will be prevented from doing certain things until you complete a payroll
task. For example, you can't pay an employee until you complete the Setup
Employee task.
Payroll tasks are displayed, in order of priority, in the To Do list on the
Payroll Home page. When you're ready to complete a task, click the task in
the To Do list.
Depending on the task, clicking it may take you to a page in the application
where you begin the task, or it may open a document or form that you must
complete. When you complete a task, it's no longer displayed in the list.
RUN Powered by ADP® Payroll for Partners 11 Getting StartedMessages
Example: After you complete the Company Info page for a client's
company, the next task you must complete is to set up the company. On the
company's Payroll Home page, click Set Up Your Company to open the
Company Setup Wizard. When you have successfully entered all the
information for the company and closed the Wizard, the Set Up Your
Company task is no longer displayed on the Payroll Home page.
Important: If the company has an outstanding payroll task or message, the
word New is displayed in the Messages or Tasks column on the Client List
page.
Messages
A message is used to tell you about something that you must do, or to
provide information that you should know relating to your payroll.
Example: You will receive a message when statutory and deduction limits
are met for an employee. You will also receive a message notifying you
when the payroll application will be unavailable due to maintenance and
enhancements.
Messages are displayed, in order of priority with the most recent ones first,
in the Messages section on the Payroll Home page. Click the message to
review the text.
Click to open or delete a message or mark it as unread.
Messages are displayed only for specific users in the company. Depending
on the message, it may be displayed only for a certain length of time. You
can delete a message at any time.
Important: If the company has an outstanding payroll task or message, the
word New is displayed in the Messages or Tasks column on the Client List
page.
E-Mail Messages
When necessary, ADP sends e-mail messages to users with the security to
access the payroll application.
Example: Depending on your payroll service, an e-mail message is sent to
individuals who have the roles of Firm and Payroll Administrator if the payroll
has not been processed at the expected time.
Important: E-mail messages are generated automatically. Please do not
reply to them.
RUN Powered by ADP® Payroll for Partners 12 Getting StartedE-Mail Messages
Creating a Company
Before you set up a company for a client, you must select the features for
the company and enter your client’s general company and company contact
information.
Starting Point: Firm View > Add Tax Filing or Add Non-Tax Filing
1 A confirmation message is displayed. Click OK.
2 On the Set Up Features page, select the features you want to set up for
the company you are creating, and then click Next.
3 On the Business Info page, complete the required fields, and then click
Next.
4 On the Company Info page, complete the required fields and any
additional fields as necessary, and then click Next.
Your client’s Payroll Home page is displayed. For details on what to do next,
see Setting Up a Company on page 14.
RUN Powered by ADP® Payroll for Partners 13 Getting StartedCollecting General Company Information
Setting Up a Company
Before you can begin processing payrolls, you must use the Company
Setup Wizard to enter your company information. Refer to the following
topics for a list of the information you will need to have on hand.
• Collecting General Company Information on page 14
• Collecting Company Pay Calendar Information on page 15
• Collecting Company Tax Information on page 15
• Collecting Company Earnings and Deductions Information on page 16
• Collecting Company General Ledger Information on page 16
• Collecting Company Workers' Compensation Information on page 16
• How Do I Set Up a Company? on page 17
The Company Setup Wizard guides you through each of the Company
pages you need to complete to set up a company successfully. Gathering
this information before you start the Company Setup Wizard will help you
complete the Wizard quickly and accurately.
You can maintain most of this information for the client yourself. However, if
you need to ask the client for the information, this section of the guide tells
you where to locate any required information.
Collecting General Company Information
You will need general company information and contact information to set
up bank accounts and payroll checks.
Required Information Where to Find It
Company legal name, address, and Federal Forms 940, 941, 944
phone number
Important: Make sure the name and
address information matches the
legal name and address information
filed with the government.
Company contact information Company personnel directory
Note: Company contact information
includes the name and phone number
of the person whom ADP should
contact if there are payroll questions.
Bank name, account number, and On a check from the bank account
routing number that is used to pay employees and
contractors
Note: For more information on these
fields, see the online help.
RUN Powered by ADP® Payroll for Partners 14 Getting StartedCollecting Company Pay Calendar Information
Collecting Company Pay Calendar Information
To set up the payroll calendar, you need the payroll frequency and current
payroll dates. Payroll dates are used to determine when you receive a
message letting you know that a payroll is due.
Collect the following information for pay calendar entries:
• Pay Frequency
• Check Date
• Pay Period Start and Pay Period End Dates
You can find this information in your existing payroll files.
Collecting Company Tax Information
You need detailed tax information to set up tax payments and to schedule
reminders for tax filings.
Required Information Where to Find It
Federal, state, and local identification Federal, state, and local tax forms
number or Taxpayer Identification (for example, Form 941), or any
Number (TIN) and tax deposit federal, state, or local tax
frequencies correspondence
State unemployment ID number and State unemployment office or State
experience rate Unemployment Quarterly Tax
Returns
Note: Depending on the state,
unemployment rate may be called any
of the following:
• Experience rate
• SUI rate
• Contribution rate
All other ID numbers and experience State tax office or State Tax
rates required by any state agency to Returns
which you must submit payroll taxes
(for example, State Disability
Insurance)
RUN Powered by ADP® Payroll for Partners 15 Getting StartedCollecting Company Earnings and Deductions Information
Collecting Company Earnings and Deductions Information
You must enter specific earnings, benefits, and deductions information.
Some earnings and deductions information is already set up for you. When
you set up your earnings and deductions, you can rename them using terms
that are more meaningful for your company. You can also schedule them for
certain pay periods.
For a complete list of the earnings and deductions that are available in the
payroll application, see the Earnings and Deductions Quick Reference in
Help & Support.
Collecting Company General Ledger Information
In the payroll application, you'll need to set up a Chart of Accounts (COA) to
begin tracking general ledger information. You'll use the COA to assign your
company and employee payroll items to general ledger accounts. You can
either use a pre-defined COA that comes with the payroll application or
create your own.
To create your own COA, you'll need a list of general ledger account
numbers and names from your accounting software.
Company general ledger accounts include the following payroll items:
• Deductions
• Taxes
Employee general ledger accounts include the following payroll items:
• Deductions
• Earnings
• Net pay
• Taxes
Collecting Company Workers' Compensation Information
To create a Workers' Compensation Worksheet, you'll need to set up
Workers' Compensation codes in the payroll application. To do this, you'll
need to collect the Workers' Compensation Classification codes and
descriptions for each job. You can find this information on the Declaration or
Information page of the Workers' Compensation policy or on the annual
Audit report.
RUN Powered by ADP® Payroll for Partners 16 Getting StartedHow Do I Set Up a Company?
How Do I Set Up a Company?
The Company Setup Wizard guides you through each of the Company
pages you need to complete to set up your company successfully.
Starting Point: Home > Payroll Home
1 Under To Do, click Complete Company Setup to open the Company
Setup Wizard.
For help on a field or page, click in the upper-right corner of the page.
The Help window includes help for the current page. You can also select
the Search tab to search for additional help.
2 On each page, complete each of the required fields, and any additional
fields as necessary. The steps to set up the company are displayed
across the top of the page. The highlighted step shows you where you
are in the process.
3 When you complete a page, click Next to go to the next page. When you
are done setting up the company, you must set up the employees and
contractors. For more information, see How Do I Set Up Employees and
Contractors? on page 20.
Important: If you need to take a break, click Finish Later in the bottom-right
corner of the Wizard. When you are ready to continue, click Complete
Company Setup on the Payroll Home page. The Company Setup Wizard
opens on the page where you left off.
RUN Powered by ADP® Payroll for Partners 17 Getting StartedCollecting General Employee and Contractor Information
Setting Up Employees and Contractors
After you finish setting up a company, you're ready to set up the employees
and contractors. Refer to the following topics for a list of the information
you'll need to have on hand. Collecting this information in advance will help
you complete the setup process.
• Collecting General Employee and Contractor Information on page 18
• Collecting Employee and Contractor Payroll Information on page 18
• Collecting Employee and Contractor Bank Information on page 19
• Collecting Employee Paid Time Off Information on page 19
• Collecting Employee Tax Information on page 19
• How Do I Set Up Employees and Contractors? on page 20
Collecting General Employee and Contractor Information
For Employees
• Legal Name and Contact Information (use the Legal Name from the
employee's W-2)
• Date of Hire
• Social Security Number
• Birth Date
• Gender
For Contractors
• Contractor Name (use the name that's displayed on the contractor's
1099-MISC)
• Date of Hire
• Social Security Number or Taxpayer Identification Number
Collecting Employee and Contractor Payroll Information
You need payroll information to pay employees and contractors, and to
calculate employee taxes and deductions.
For each employee, you need to collect the following information:
• Pay Rate (Hourly or Salary) and Frequency
• Earnings Types and Amounts
• Deduction (or Benefit) Types and Amounts
You can find this information in the employees' payroll files.
For each contractor, you need to collect the Pay Rate (Hourly or Amount)
and Frequency.
RUN Powered by ADP® Payroll for Partners 18 Getting StartedCollecting Employee and Contractor Bank Information
Collecting Employee and Contractor Bank Information
If you offer direct deposit, you'll need the following bank information for each
employee and contractor:
• Bank Name
• Account Type (Saving or Checking)
• Routing Number
• Account Number
You can find this information on a voided check from the employee's or
contractor's checking account or from a savings account statement or
deposit slip.
Collecting Employee Paid Time Off Information
To help you track employee paid time off, you need to collect the following
information for each employee:
• Vacation Time Accrual Rate or Allowed and Taken
• Sick Time Accrual Rate or Allowed and Taken
• Personal Time Accrual Rate or Allowed and Taken
You can find this information in your existing Paid Time Off records.
Collecting Employee Tax Information
You need to enter the following tax information for each employee:
• Federal, State, and Local Withholding Status
• Allowances
• Exemptions
• Additional Withholdings (if applicable)
Tax information is available on the employee's federal I-9 and W-4 forms.
RUN Powered by ADP® Payroll for Partners 19 Getting StartedHow Do I Set Up Employees and Contractors?
How Do I Set Up Employees and Contractors?
Before You Begin: This procedure describes how to set up employees and
contractors when you first begin using the payroll application. To hire new
employees and contractors after setup is complete, search for How Do I
Hire an Employee? or How Do I Hire a Contractor? in the online help.
The New Hire Wizard guides you through each of the pages you need to
complete to set up your employees or contractors successfully.
Starting Point: Employees > Add Employee or Add Contractor
1 On each page of the Wizard, complete each of the required fields, and
any additional fields as necessary. The steps to complete setting up
your employee or contractor are displayed across the top of the page.
The highlighted step shows you where you are in the process.
For help on a field or page, click in the upper-right corner of the page.
The Help window includes help for the current page. You can also select
the Search tab to search for additional help.
2 When you complete a page, click Next to go to the next page.
Tip: If you need to take a break, click Finish Later in the bottom-right corner
of the page. When you are ready to continue, click Complete {Employee or
Contractor Name} on the Payroll Home page. The New Hire Wizard opens
on the page where you left off.
RUN Powered by ADP® Payroll for Partners 20 Getting StartedWhere Can I Find Prior Payroll Amounts?
Entering Prior Payroll Amounts
Starting Point: Home > Payroll Home
In the To Do area, click Complete Prior Payroll Amounts to open the Prior
Payroll Amounts Wizard.
If you paid employees or contractors during the current calendar year,
before you began using the payroll application, you must enter their prior
payroll amounts in the payroll application. Prior payroll amounts are
year-to-date totals, broken down by quarter for earnings, taxes, and
deductions. Entering prior amounts ensures that:
• Payroll calculations are correct
• Employees and employers don’t continue to pay taxes if the limits have
already been met
• Quarter and year-end statements, including W2s and 1099s, are correct
The prior payroll amounts that you enter in the payroll application should
include only the amounts accrued by employees and contractors while they
worked for the company during the current year, before you started using
the payroll application. An employee or contractor who worked for another
employer during the current calendar year will receive a federal earnings
statement from the previous employer.
Important: You can use the Prior Payroll Amounts Wizard to enter your
prior payroll amounts quickly and easily. If you do not enter your prior payroll
amounts before processing your first payroll, you will not be able to access
the Prior Payroll Amounts Wizard again.
Where Can I Find Prior Payroll Amounts?
You can use the following documents to locate prior payroll amounts:
• Company payroll-by-payroll detail registers (current payroll provider’s
payroll summary reports)
• Quarterly earnings records
• Ledger cards
• Payroll spreadsheets
• Payroll journals
RUN Powered by ADP® Payroll for Partners 21 Getting StartedProcessing the First Payroll During a Quarter
Processing the First Payroll During a Quarter
When you first start using the payroll application to process payrolls, unless
the pay period includes the first day of the quarter, you must account for any
prior payroll amounts that have accumulated for your employees during the
quarter.
On the Prior Payroll Details page in the Prior Payroll Amounts Wizard, select
one of the following options to enter any amounts that have accumulated for
your employees for the current quarter:
• Quarter-to-date
• Payroll-by-payroll
How Do I Enter Prior Payroll Amounts?
When you finish setting up at least one employee or contractor in the payroll
application, the Add Prior Payroll Amounts task is displayed in the To Do
area on the Payroll Home page.
Important: You must enter prior payroll amounts before you can process a
payroll, manual check, voided check, or third party sick payment.
Starting Point: Home > Payroll Home
1 In the To Do area, click Add Prior Payroll Amounts to open the Prior
Payroll Amounts Wizard.
Important: If your company has no balances for the current year, click
No Balances at the bottom of the page.
2 On each page of the Wizard, complete the fields as necessary, and click
Next to go to the next page.
For help, click . To search for additional help, click the Search tab.
If you need to take a break, click Finish Later in the bottom-right corner
of the page. When you are ready to continue, click Complete Prior
Payroll Amounts in the To Do area. The Prior Payroll Amounts Wizard
opens on the page where you left off.
3 On the last page of the Wizard, click Finish if you entered prior payroll
amounts by quarter, or click No Further Balances if you entered payroll
amounts by check date. The payroll amounts are calculated.
Important: When you click Finish, you'll no longer be able to enter or
change prior payroll amounts yourself. If you need to make changes after
that, you must contact your ADP Service team.
RUN Powered by ADP® Payroll for Partners 22 Getting StartedAdd the General Ledger Feature
Setting Up General Ledger
A general ledger is a history of a company's financial transactions. Each
transaction is identified by an account number. With the General Ledger
(GL) feature, you can set up and maintain accounts for tracking your
company's financial transactions for each payroll.
Before you Begin: You must set up at least one employee or contractor
before you can set up general ledger for the company.
Add the General Ledger Feature
Before you can set up general ledger for your company, the General Ledger
feature must be selected on the Features Overview page.
If you don't see the General Ledger tab, the feature isn't selected.
Starting Point: Company > Features Overview
1 On the Features Overview page, click General Ledger.
Tip: If you're using QuickBooks® or Xero™, click General Ledger for
QuickBooks® or General Ledger for XERO.
2 At the bottom of the page, click Save to save your changes and go back
to the Company Home page.
The General Ledger tab is now displayed.
Set Up Your Chart of Accounts
Starting Point: Payroll Home
1 In the To Do area on the Payroll Home page, click Set Up Your General
Ledger to open the GL Chart of Accounts Setup page.
If the task is not listed on the Payroll Home page, click General Ledger
> General Ledger Setup.
2 In the Chart of Accounts field, select Blank Accounts to set up your
own accounts.
3 The GL Chart of Accounts Setup page includes a check box for
Departments (if they are set up for your company). If you want to verify
or set up custom department assignments, click the Department check
box.
4 Click Next to go to the GL Company Mapping page.
5 At the bottom of the page, click Add Accounts to open the General
Ledger Account Maintenance page.
RUN Powered by ADP® Payroll for Partners 23 Getting StartedAssign General Ledger Accounts to Company Payroll Items
6 In the Account Numbers column in the grid, enter an account number
for the new account. Then, enter the exact description in the Account
Names column.
Tip: The description is case-sensitive and you must use the correct
spelling and number of spaces.
7 To add additional accounts, click Add at the bottom of the page and
enter the next account number and description.
8 After you set up all the accounts you need, click Save to save your
accounts and go back to the GL Accounts - Company page.
Now you're ready to assign the accounts to each payroll item used by your
company.
Assign General Ledger Accounts to Company Payroll Items
Starting Point: General Ledger > Company Mapping
1 On the GL Accounts - Company page, select a general ledger account
for each payroll item.
2 Click Save to go to the General Ledger Home page.
Customize Department Mapping
By default, the mapping assignments set up for the company are also used
for departments. You can customize the mapping assignments for any or all
departments.
Important: The GL Department Mapping page is available only if
departments are set up for the company.
Starting Point: General Ledger > Department Mapping
1 On the GL Department Mapping page, use the Forward (> >>) and
Back (You can also read