Server installation and configuration guide - Nuance Management Center - On-premise version 2021.1
←
→
Page content transcription
If your browser does not render page correctly, please read the page content below
Dragon speech recognition   Guide
Enterprise solution

Nuance Management Center
Server installation
and configuration
guide
For:

On-premise version 2021.1
Copyright
         Nuance ® Management Center
         This material may not include some last-minute technical changes and/or revisions to the software. Changes are periodically made to
         the information provided here. Future versions of this material will incorporate these changes.
         Nuance Communications, Inc. has patents or pending patent applications covering the subject matter contained in this document.
         The furnishing of this document does not give you any license to such patents.
         No part of this manual or software may be reproduced in any form or by any means, including, without limitation, electronic or
         mechanical, such as photocopying or recording, or by any information storage and retrieval systems, without the express written
         consent of Nuance Communications, Inc. Specifications are subject to change without notice.
         © Nuance Communications Inc. 2021
         Nuance, the Nuance logo, the Dragon logo, Dragon, and RealSpeak are registered trademarks or trademarks of Nuance
         Communications, Inc. in the United States or other countries. All other names and trademarks referenced herein are trademarks of
         Nuance Communications or their respective owners. Designations used by third-party manufacturers and sellers to distinguish their
         products may be claimed as trademarks by those third-parties.

Disclaimer
         Nuance makes no warranty, express or implied, with respect to the quality, reliability, currentness, accuracy, or freedom from error of
         this document or the product or products referred to herein and specifically disclaims any implied warranties, including, without
         limitation, any implied warranty of merchantability, fitness for any particular purpose, or noninfringement.
         Nuance disclaims all liability for any direct, indirect, incidental, consequential, special, or exemplary damages resulting from the use of
         the information in this document. Mention of any product not manufactured by Nuance does not constitute an endorsement by
         Nuance of that product.

Notice
         Nuance Communications, Inc. is strongly committed to creating high quality voice and data management products that, when used in
         conjunction with your own company’s security policies and practices, deliver an efficient and secure means of managing confidential
         information.
         Nuance believes that data security is best maintained by limiting access to various types of information to authorized users only.
         Although no software product can completely guarantee against security failure, Dragon software contains configurable password
         features that, when used properly, provide a high degree of protection.
         We strongly urge current owners of Nuance products that include optional system password features to verify that these features are
         enabled. You can call our support line if you need assistance in setting up passwords correctly or in verifying your existing security
         settings.

                           Published by Nuance Communications, Inc., Burlington, Massachusetts, USA
                                 Visit Nuance Communications, Inc. on the Web at www.nuance.com.
                                                                        1/19/2021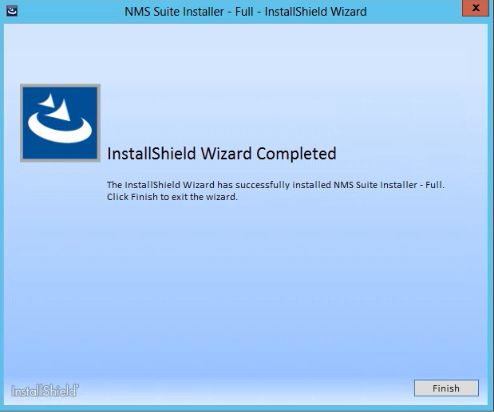
Contents

     Dragon_NMCInstallGuideCover_20160929_v4                              1
     About this guide                                                     v
       Guide overview                                                    vi
         Audience                                                        vi
       Additional resources                                             vii
         Documentation                                                  vii
         Training                                                       viii
         Support                                                        viii
     Chapter 1: Introduction                                              1
       About Nuance Management Center                                     2
       Physical architecture                                              3
     Chapter 2: Preparing for your installation                           4
       About on-premise deployment options                                5
         Comparison: Single-node and multi-node deployments               5
       Installation checklists                                            7
         Pre-installation checklist                                       7
         Installation checklists                                          7
         Post-installation checklists                                     8
       Software requirements—Nuance Management Center                     9
         NMC server and database server                                   9
         NMC console                                                    11
       Hardware requirements—Server                                     12
       Server installation prerequisites                                13
       Security considerations                                          14
         General security principles                                    14
         Installing and configuring Nuance Management Center securely   14
         Nuance Management Center security features                     15
                Authentication methods                                  15
                Password settings                                       15
                Assigning privileges                                    16
                Assigning grants                                        16
                Disabling inactive users                                16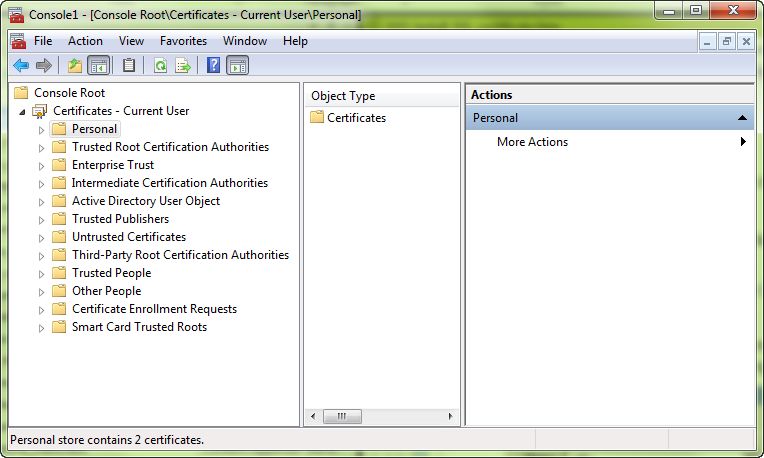
Contents

               Other considerations                                                           17
                 Network bandwidth recommendations                                            17
                 Using a load balancer                                                        17
               Obtaining required server software                                             18
               Opening required ports                                                         19
             Chapter 3: Installing the servers                                                20
               Installing SQL Server                                                          21
               Installing Nuance Management Center                                            22
                 Installing Nuance Management Center—Single-node                              22
                 Installing Nuance Management Center—Multi-node                               33
             Chapter 4: Post-installation tasks                                               45
               Installing and binding the SSL certificate                                     46
                 About certificates                                                           46
                 Installing the SSL certificate on the server (single-node deployments)       46
                 Installing the SSL certificate on a load balancer (multi-node deployments)   49
                 Testing and troubleshooting your SSL configuration                           49
               Verifying the NMS Platform service is running                                  51
                 Starting the NMS Platform service manually                                   51
               Configuring your load balancer                                                 52
               Logging in to the NMC console                                                  53
               Determining your database backup method                                        54
               Configuring the Dragon client for use with Nuance Management Center            55
             Chapter 5: Upgrading Nuance Management Center                                    56
               About upgrading Nuance Management Center                                       57
               Upgrading Nuance Management Center 5.x or 6.x                                  58
                 Upgrade other software                                                       58
                 Upgrade Nuance Management Center                                             58
             Chapter 6: Preparing for your Active Directory single sign-on configuration      61
               Single sign-on overview                                                        62
               Before you begin                                                               63
                 Software requirements                                                        63
                 Other requirements                                                           63
                 Checklist—Planning the single sign-on setup                                  63
               Creating an NMC console Administrator user for Active Directory                65
               Setting the Active Directory connection string                                 66
               Creating and configuring user accounts for single sign-on                      67

       iii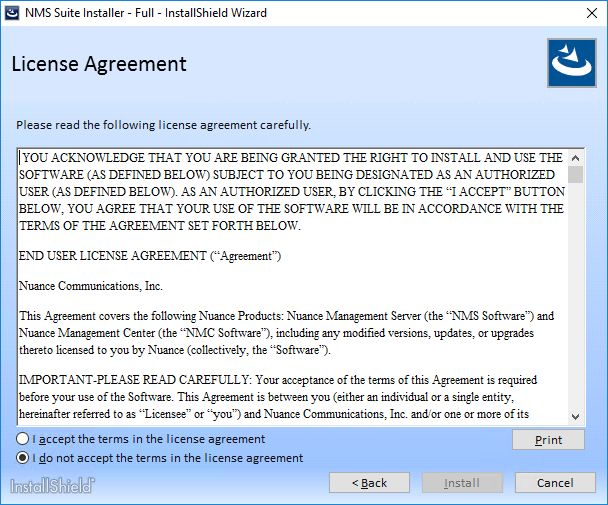
Contents

   Creating user accounts                              67
   Configuring user accounts                           67
  Running the SetSPN.exe Windows utility               68
   About SetSPN.exe                                    68
   Downloading SetSPN.exe                              68
   Executing SetSPN.exe                                68
Appendix A: Database backups and data retention        69
  About database backups                               70
   Disabling automatic database backups                70
  About data retention                                 71

                                                        iv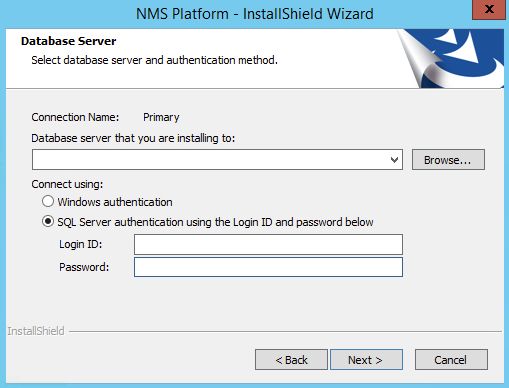
About this guide

Guide overview                         vi
 Audience                              vi
Additional resources                  vii
 Documentation                        vii
 Training                             viii
 Support                              viii

                                             v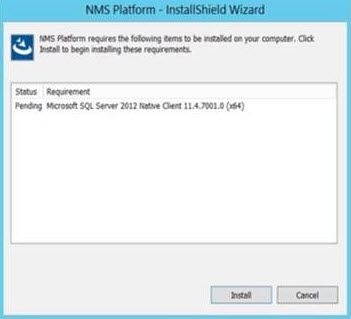
Nuance Management Center Server Installation and Configuration Guide

 Guide overview
         This guide contains installation and configuration instructions for on-premise NMC servers. It also contains
         instructions for configuring single-sign-on authentication.

 Audience
         This guide is intended for administrators whose responsibility is to perform the following:
               l   Install and configure an on-premise NMC server.
               l   Set up and manage single sign-on user authentication.
               l   Install and manage a SQL Server database.
         This guide assumes you have experience in hardware configuration, software installation, database
         management, and networking.

        vi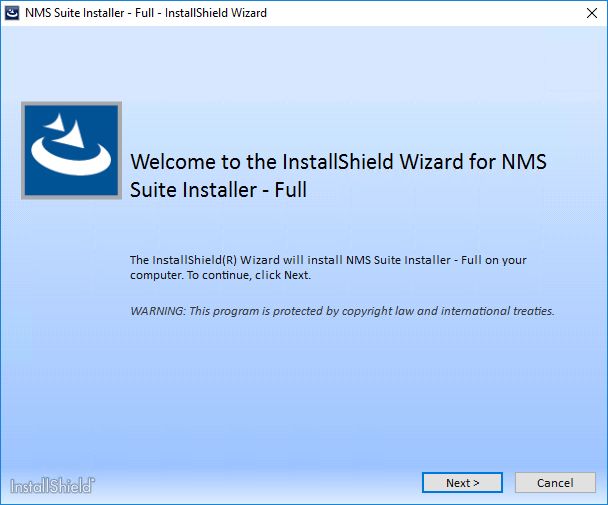
About this guide

Additional resources
     The following resources are available in addition to this guide to help you manage your Dragon installation.

Documentation

      Document                                 Description                                    Location

      Dragon Group Citrix Administrator        Hardware, software, and network                Dragon Support
      Guide                                    requirements for deploying Dragon in a         web site
                                               network of client computers that connect to
                                               a Citrix server to access published
                                               applications.

      Nuance Management Center                 Information on creating and maintaining        Dragon Support
      Administrator Guide                      objects and managing Dragon clients from       web site
                                               the Nuance Management Center (NMC)
                                               console.

      Nuance Management Center Help            Instructions for configuring and managing      When Nuance
                                               the Nuance Management Center (NMC)             Management
                                               console and Dragon clients.                    Center is open,
                                                                                              click the NMC
                                                                                              console Help button
                                                                                              (    ).

      Dragon client Help                       Commands and instructions for dictating,     When Dragon is
                                               correcting, and more with the Dragon client. open, click the Help

                                                                                              icon (   ) on the
                                                                                              DragonBar, and
                                                                                              then select Help
                                                                                              Topics.

      Dragon Release Notes                     New features, system requirements, client      Dragon Help. Do
                                               upgrade instructions, and known issues.        the following:
                                                                                                    1. When
                                                                                                       Dragon is
                                                                                                       open, click
                                                                                                       the Help

                                                                                                       icon (   )
                                                                                                       on the
                                                                                                       DragonBar,
                                                                                                       and then
                                                                                                       select
                                                                                                       Help
                                                                                                       Topics.
                                                                                                    2. Click Get
                                                                                                       started.
                                                                                                    3. Click
                                                                                                       Dragon

                                                                                                                        vii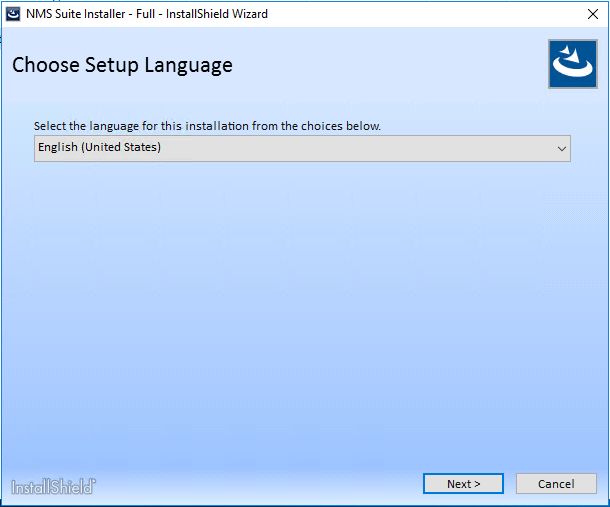
Nuance Management Center Server Installation and Configuration Guide

           Document                                Description                                   Location

                                                                                                          release
                                                                                                          notes.

 Training
          Nuance provides several training offerings, like webinars, demos, and online training courses. For more
          information, see the Nuance University web site:
          https://www.nuance.com/about-us/nuance-university-training.html

 Support
          The Dragon Support web site provides many resources to assist you with your Dragon installation, like
          forums and a searchable knowledgebase. For more information on Support offerings, see the Dragon Support
          web site at:
          https://www.nuance.com/dragon/support/dragon-naturallyspeaking.html

        viii
Chapter 1: Introduction
About Nuance Management Center 2
Physical architecture 3
1Nuance Management Center Server Installation and Configuration Guide
About Nuance Management Center
Nuance Management Center allows Dragon administrators to manage all Dragon clients from a single central
console. The Nuance Management Center (NMC) console allows you to do the following:
l Configure options for clients at the site and group level
l Centrally manage your Dragon product licensing
l Share data, like words and auto-text commands, with Dragon clients and across other Nuance
products
l Audit user session events
l Monitor client usage and trends through reporting
You can choose to install, configure, and maintain your own Nuance Management Center (NMC) server on-
premise, or you can use the Nuance cloud-hosted NMC server.
2Chapter 1: Introduction
Physical architecture
Nuance Management Center is a standard Microsoft ASP .NET MVC web application that is hosted by
Internet Information Services (IIS). The Nuance Management Center components include the following:
l Nuance Management Center (NMC) server—Stores application data, such as organizations,
sites, groups, and users. It also stores transient data, such as log files.
l Nuance Management Center (NMC) console—Allows NMC administrators to create and manage
objects, like groups and users, assign licenses, run reports, and more. The NMC console does not
have permanent data storage. However, it does use a file share for temporary data storage to support
file uploads and downloads.
l Database instance—Stores license information, partial speech profiles, application usage
information, and audit data.
l Dragon clients—Users log in to their client computers where Dragon is installed and connect to
your NMC server to access shared words and commands.
Initially, you install the NMC server, NMC console, and the database instance on the same server. However,
you can optionally move your database instance to a separate database server after the installation. Your
NMC server can be one of the following:
l A single physical machine (smaller installations)
l Multiple physical machines load-balanced by a network traffic switch (larger installations)
3Chapter 2: Preparing for your
installation
About on-premise deployment options 5
Comparison: Single-node and multi-node deployments 5
Installation checklists 7
Pre-installation checklist 7
Installation checklists 7
Post-installation checklists 8
Software requirements—Nuance Management Center 9
NMC server and database server 9
NMC console 11
Hardware requirements—Server 12
Server installation prerequisites 13
Security considerations 14
General security principles 14
Installing and configuring Nuance Management Center securely 14
Nuance Management Center security features 15
Other considerations 17
Network bandwidth recommendations 17
Using a load balancer 17
Obtaining required server software 18
Opening required ports 19
4Nuance Management Center Server Installation and Configuration Guide
About on-premise deployment options
You can select from the following on-premise deployment options for your Nuance Management Center
installation:
l Single-node—You install Nuance Management Center on a single NMC server.
l Multi-node—You install Nuance Management Center on multiple NMC servers. The servers are
load-balanced by a network traffic switch.
The installation checklists and the Nuance Management Center installation instructions address both single-
node and multi-node deployments.
Comparison: Single-node and multi-node deployments
The following table describes the differences between single-node and multi-node deployments.
Single-node Multi-node
l Does not require a common file share. l Requires a common file share
for all nodes to access.
For more information, see the
"Shared drive and user
account/password (multi-node
deployments)" row in “Server
installation prerequisites” on
page 13.
l You install Nuance Management Center on a single l You install Nuance
node. Management Center on each
node in your deployment.
l During the installation, you select the following: l During the installation, you
l On the Setup Type screen, select On a server select the following:
with an SSL certificate installed directly on l On the Setup Type
that server to indicate your SSL certificate will screen, select
be installed on a server. Behind a
l On the Common File Store Settings screen, networking device
with an SSL
select Single node deployment.
certificate installed
to indicate your SSL
certificate will be
installed on the load
balancer.
l On the Common File
Store Settings
screen, select
Shared drive for
multi-nodes
deployment and
provide the common
file store, user
account, and
5Chapter 2: Preparing for your installation
Single-node Multi-node
password.
l You install the SSL certificate on your NMC server. l You install the SSL certificate
on your load balancer.
l Configure your clients for use with Nuance l Configure your clients for use
Management Center by providing your NMC server with Nuance Management
address in the client. Center by providing your load
balancer address in the client.
6Nuance Management Center Server Installation and Configuration Guide
Installation checklists
Use the following checklists to perform your Nuance Management Center on-premise installation.
Pre-installation checklist
Task Reference
Review your deployment options. “About on-premise deployment options” on
page 5
Ensure all system requirements have been met. “Software requirements—Nuance
Management Center” on page 9
“Hardware requirements—Server” on page
12
Ensure all server installation prerequisites have been “Server installation prerequisites” on page 13
met.
Review security considerations. “Security considerations” on page 14
Review other considerations. “Network bandwidth recommendations” on
page 17
“Using a load balancer” on page 17
Obtain the required server software. “Obtaining required server software” on page
18
Open required ports. “Opening required ports” on page 19
Installation checklists
Single-node deployment
Task Reference
Install SQL Server. “Installing SQL Server” on page 21
Install Nuance Management Center. “Installing Nuance Management Center—
Single-node” on page 22
Multi-node deployment
Task Reference
Install SQL Server. “Installing SQL Server” on page 21
Install Nuance Management Center on each node. “Installing Nuance Management Center—
Multi-node” on page 33
7Chapter 2: Preparing for your installation
Post-installation checklists
Single-node deployment
Task Reference
Install the SSL certificate on your server. “Installing the SSL certificate on the server
(single-node deployments)” on page 46
Verify that the NMS Platform service is running. “Verifying the NMS Platform service is
running” on page 51
Log in to the NMC console. “Logging in to the NMC console” on page 53
Determine your database backup method. “Determining your database backup
method” on page 54
Install Dragon clients if you have not already done so, “Configuring the Dragon client for use with
and then configure the clients for use with Nuance Nuance Management Center” on page 55
Management Center.
Applies to: Dragon desktop products only
Multi-node deployment
Task Reference
Install the SSL certificate on your load balancer. “Installing the SSL certificate on a load
balancer (multi-node deployments)” on page
49
Verify that the NMS Platform service is running. “Verifying the NMS Platform service is
running” on page 51
Configure your load balancer. “Configuring your load balancer” on page 52
Log in to the NMC console. “Logging in to the NMC console” on page 53
Ensure you access the NMC console using the load
balancer address.
Determine your database backup method. “Determining your database backup
method” on page 54
Install Dragon clients if you have not already done so, “Configuring the Dragon client for use with
and then configure the clients for use with Nuance Nuance Management Center” on page 55
Management Center.
Applies to: Dragon desktop products only
8Nuance Management Center Server Installation and Configuration Guide
Software requirements—Nuance Management Center
Ensure that your environment meets the following software requirements before installing Nuance
Management Center.
NMC server and database server
The Nuance Management Center installation suite installs your NMC server and database instance on the
same server by default. However, you can optionally move the database instance to a separate server post-
installation. The following table provides software requirements for both scenarios.
Combined NMC
Feature NMC server Database server server and database
server
Operating One of the following: One of the One of the following:
system following:
l Microsoft® Windows Server 2012 l Microsoft®
l Microsoft® Windows
l Microsoft® Windows Server 2012
Windows Server 2012
R2 (64 bit)
Server l Microsoft®
l Microsoft® Windows Server 2016 2012 Windows
l Microsoft® Windows Server 2019 l Microsoft® Server 2012
Ensure you have all current service packs Windows R2 (64 bit)
installed. Server l Microsoft®
2012 R2 Windows
Note: Nuance Management Center does (64 bit) Server 2016
not comply with the Federal Information
l Microsoft® Microsoft®
Processing Standards (FIPS). Do not l
Windows Windows
enable FIPS Compliance Mode on your
Server Server 2019
NMC server.
2016
Ensure you have all
lMicrosoft®
current service packs
Windows
installed.
Server
2019 Note: Nuance
Management Center
Ensure you have all
does not comply with
current service
the Federal
packs installed.
Information
Processing Standards
(FIPS). Do not enable
FIPS Compliance
Mode on your NMC
server.
Windows l Microsoft .NET Framework 4.7.1, None. l Microsoft
components including the ASP .NET .NET
component Framework
4.7.1,
l Internet Information Services (IIS),
including the
version installed with each
ASP .NET
platform
component
9Chapter 2: Preparing for your installation
Combined NMC
Feature NMC server Database server server and database
server
l Internet
Information
Services
(IIS), version
installed with
each platform
Database None. l SQL l SQL Server
Server 2012, 2014,
2012, 2016, 2017,
2014, or 2019
2016,
l Microsoft
2017, or
SQL Server
2019
Native Client
l Microsoft 2012
SQL
Note: If you
Server
do not have
Native
this
Client
component
2012
installed, the
Note: If NMS
you do not installation
have this prompts you
component to download
installed, and install it.
the NMS
installation
prompts
you to
download
and install
it.
Security l SSL certificate, issued by a None. l SSL
certificate authority (CA) certificate,
issued by a
Nuance Management Center does
certificate
not support self-signed
authority
certificates.
(CA)
For more information on SSL
Nuance
certificates, see “Installing and
Management
binding the SSL certificate” on
Center does
page 46.
not support
l Some clients, such as Dragon self-signed
Professional, require the use of certificates.
TLS 1.2 to connect to the NMC
server. If your client requires TLS For more
10Nuance Management Center Server Installation and Configuration Guide
Combined NMC
Feature NMC server Database server server and database
server
1.2, you must enable it on your information
NMC server to allow the clients to on SSL
communicate with Nuance certificates,
Management Center. see
“Installing
and binding
the SSL
certificate” on
page 46.
l Some
clients, such
as Dragon
Professional,
require the
use of TLS
1.2 to
connect to
the NMC
server. If
your client
requires TLS
1.2, you must
enable it on
your NMC
server to
allow the
clients to
communicate
with Nuance
Management
Center.
NMC console
l One of the following:
l Google Chrome version 85.0.4183.121 (Official Build) (64-bit)
l Microsoft Internet Explorer version 11.0.210
l Microsoft Edge version 85.0.564.68 (Official build) (64-bit)
l Microsoft .NET Framework 4.7.1
11Chapter 2: Preparing for your installation
Hardware requirements—Server
If you're hosting your own Nuance Management Center (NMC) server and database server on-premise,
ensure the servers meet the following hardware requirements.
For every 2,000 users:
l One Quad-Core physical server to host the SQL database, NMC server, and NMC console
l Processor: Quad-Core 2 GHz CPU
l Minimum RAM: 8 GB
l Core Application Disk Storage: 4.0 GB for the NMC server
If you choose to have a separate database server for your SQL database, your server should meet the
following requirements:
l Processor: Dual-Core 2GHz CPU
l Minimum RAM: 8
If you're using Roaming user profiles, you'll need a server, separate machine, or RAID array to host the
Master user profiles directory with the following:
l Processor: Intel® Pentium family (http://ark.intel.com/products/family/29862/Intel-Pentium-Pro-
cessor#@Desktop), or AMD Athlon (http://www.amd.com/en-us/-product-
s/processors/desktop/athlon#)
l CPU: 1 GHz minimum (2.4 GHz recommended)
l RAM: 8 GB
l Cache: 512 KB minimum L2 Cache (1 MB recommended)
12Nuance Management Center Server Installation and Configuration Guide
Server installation prerequisites
Ensure you have the following available before installing Nuance Management Center. You must provide the
following during the installation.
Prerequisite Additional Information
Local Administrator privileges You must have Local Administrator privileges on the NMC server to
install Nuance Management Center, as the installation process deploys a
Windows service.
NMS service user Windows user account that runs the NMS Platform service. Can be
LOCAL SYSTEM account, network service, or another Windows
account.
If you choose another Windows account, it must meet the following
requirements:
l Has Log on as a service rights to log on to your NMC server as
a service
l Has Read/Write/Delete access to the NMS file share
You provide this account name and password during the Nuance
Management Center installation.
Database server and database During the Nuance Management Center installation, you'll need to select
user the database server to which you're installing, and the authentication
method. Choose from:
l Windows authentication
l SQL Server authentication
If you choose SQL Server authentication, you must provide the database
user login and password. This user must have dbcreator privileges.
NMS file share location UNC root path used as permanent data storage by the NMC server for
application data, such as sites, groups, and users.
Required for both single and multi-node deployments. If you do not
specify a location, the default location is used (C:\Pro-
gramData\NMS\Filestore).
For multi-node deployments, you must specify the same file share
location for each node on which you install Nuance Management Center.
The NMS service user is used to access this location by default.
Shared drive and user l Common file store for all nodes to access.
account/password (multi-node
l User account and password for the user with permission to
deployments)
access the shared drive.
This can be the NMS service user or a different user account. If
you choose a different user account, the user must have
Create/Read/Update/Delete permissions.
You must specify the same shared drive for each node on which you
install Nuance Management Center.
13Chapter 2: Preparing for your installation
Security considerations
When your organization implements Nuance Management Center, it is critical to install the software and its
system components using secure installation methods to protect the integrity and confidentiality of your data.
It is equally important to manage and monitor your system once installed to ensure that your data is protected
from unauthorized access and misuse.
The following sections provide secure installation and configuration guidelines, and describe the security
features provided in Nuance Management Center to help you manage and monitor your system.
General security principles
l Require strong, complex user account passwords.
Create a password policy to establish password requirements. For example, require a minimum
password length and one aspect of complexity, such as non-alphabetical characters.
l Keep passwords secure.
When you initially create user accounts in Nuance Management Center, send users their username
and initial password in separate email messages. Instruct your users not to share or write down
passwords, or store passwords in files on their computers. In addition, require users to change their
default passwords upon first use, and on a regular basis.
For more information, see the Users must change their password after first login Organization
option and the Maximum password age - password will expire in n days Organization option in
the NMC Help.
l Keep software up-to-date.
Keep all software versions current by installing the latest patches for all components, such as SQL
Server and Microsoft® Windows Server, including all critical security updates.
l Implement the principle of Least Privilege.
In implementing the principle of Least Privilege, you grant users the least amount of permissions
needed to perform their jobs. You should also review user permissions regularly to determine their
relevance to users’ current job responsibilities.
l Monitor system activity.
Review user audit records regularly to determine which user activities constitute normal use, and
which may indicate unauthorized use or misuse.
l Promote policy awareness.
Ensure your employees are aware of Acceptable Use policies, best practices, and standard
operating procedures that are relevant to Nuance Management Center.
Installing and configuring Nuance Management Center securely
The Nuance Management Center installation instructions include procedures that install the application and
system components into a secure state by default. In addition to performing the standard installation
procedures, you can do the following to secure Nuance Management Center.
l Establish best practices for downloading report data.
14Nuance Management Center Server Installation and Configuration Guide
Nuance Management Center provides the option to save report data to a CSV file. Establish best
practices for downloading data to ensure the data remains secure outside of Nuance Management
Center.
Nuance Management Center security features
Nuance Management Center provides the following security features to help you secure your system.
Authentication
You can choose from three different authentication methods. You can also select from flexible password
options to establish a user account password policy.
Authentication methods
Nuance Management Center requires users to authenticate by logging in with a unique username and
password. You can use the following authentication methods.
l Single sign-on via Active Directory—On premise deployments can enable single sign-on to allow
users to log in to Nuance Management Center using their Windows credentials. This is the most
secure method for on-premise deployments as users do not have to manage a separate set of
credentials for Nuance Management Center and administrators do not have to manage a password
policy.
l Native Nuance Management Center authentication—Users log in to Nuance Management
Center using a login and password that you create when you create user accounts in the NMC
console.
Password settings
Nuance Management Center provides password options that you can select to establish a user account
password policy for your user accounts. Using the options, you can require specific password content,
complexity, and expiration. Nuance Management Center audits changes to these options so you know which
user changed them and when.
You can view audit records for these options in the Audit report.
For more information, see the "Organization Details page" topic or the "Viewing audit events" topic in the
NMC Help.
Auditing
The Nuance Management Center auditing feature is a standard feature that cannot be disabled. Auditing
tracks specific system events that occur in the NMC console, capturing information about those events to
allow you to better monitor the actions that occur. The NMC console allows administrators to audit specific
events, such as user or administrator logins, over a specific period of time.
By default, Nuance Management Center retains event data for one year.
For more information, see the "Viewing audit events" topic in the NMC help.
User Access Control
Nuance Management Center allows you to implement user access control using roles and permissions to
restrict user access to only what is necessary for users to perform their job responsibilities. Before
implementing user access control, establish an access control policy based on business and security
requirements for each user. Review your access control policy periodically to determine if changes to roles
and permissions are necessary.
15Chapter 2: Preparing for your installation
Assigning privileges
Privileges determine the ribbons, menus, and options that users can access in the NMC console. You assign
or unassign privileges to show or hide those options. You should assign the least amount of privileges that
users require to perform all tasks relevant to their job responsibilities.
For more information on privileges and assigning them, see the Configuring group security section in the
"Managing groups" topic in the NMC help and the "Privileges reference" appendix in the Nuance Management
Center Administrator's Guide.
Assigning grants
Grants determine the objects that users can access in the Nuance Management Center database, such as
sites, groups, and users. Generally, you assign different grants to providers than you would to administrators.
You should also assign the least amount of grants that users require to perform their job responsibilities.
For more information on grants and assigning them, see the Configuring group security section in the
"Managing groups" topic in the NMC help.
Disabling inactive users
Nuance Management Center allows you to disable inactive user accounts after a number of days of inactivity.
Disabled users can no longer authenticate to Nuance Management Center. By disabling inactive user
accounts, you can prevent unauthorized system access by employees who have left your organization.
For more information, see the Disable inactive users after n days Organization option in the "Organization
Details page" topic in the NMC help.
16Nuance Management Center Server Installation and Configuration Guide
Other considerations
Network bandwidth recommendations
Nuance recommends the following network bandwidth speeds for Nuance Management Center.
Number of clients Minimum network speed
100 10 Mbps
>100 100 Mbps
Using a load balancer
If you have a large organization and you're implementing more than one NMC server, you can include a load
balancer in your network to balance the load on the servers.
The following table describes the recommended settings for your device.
Component Setting
Network Interface Automatic.
Card (NIC)—Gigabit
Switches and gigabit cards must have the same setting.
cards
Network Interface Network link speed and duplex must be set the same on all servers, workstations,
Card (NIC)— and other network equipment, or performance and recognition degradation could
10/100Mb cards occur.
Network speed—100 Full Duplex
Mbps
17Chapter 2: Preparing for your installation
Obtaining required server software
The following server software is required. You can obtain the software from microsoft.com.
l Microsoft .NET Framework 4.7.1
l SQL Server 2012, 2014, 2016, 2017, or 2019
l One of the following:
l Microsoft® Windows Server 2012
l Microsoft® Windows Server 2012 R2 (64 bit)
l Microsoft® Windows Server 2016
l Microsoft® Windows Server 2019
l Internet Information Services (IIS), version installed with each platform
For information on versions that get installed, see https://support.microsoft.com/en-
us/help/224609/how-to-obtain-versions-of-internet-information-server-iis.
18Nuance Management Center Server Installation and Configuration Guide
Opening required ports
You must open the following ports to allow communication between components.
Port Location Description
389 TCP NMC Allows communication between the NMC server and your Active
server Directory, if you are using single sign-on authentication.
443 NMC Allows communication between Dragon clients and the NMC server.
server
Also allows communication between NMC console workstations and the
NMC server.
You must open port 443 regardless of whether you are using the
Nuance cloud-hosted NMC server or you're hosting your own NMC
server on-premise.
1433 Custom Database Allows communication between the NMC server and the database server
server if they are on separate physical machines.
19Chapter 3: Installing the servers
Installing SQL Server 21
Installing Nuance Management Center 22
Installing Nuance Management Center—Single-node 22
Installing Nuance Management Center—Multi-node 33
20Nuance Management Center Server Installation and Configuration Guide
Installing SQL Server
Install SQL Server according to the product instructions. On the screens indicated below, specify the settings
recommended for Nuance Management Center.
1. On the Feature Selection screen, select the Database Engine Services feature.
2. On the Instance Configuration screen, ensure the Default instance option is selected.
3. On the Server Configuration screen, select Use the same account for all SQL Server Services.
1. Enter the username and password of the Windows user account under which the SQL
Server services should run.
If your application server and database server are on the same physical machine,
Nuance recommends using an account in a workgroup.
2. Enter the password that other servers and clients on the Dragon network use to access the
database.
4. On the Database Engine Configuration screen:
l Add at least three user accounts to administer the SQL database, including the account you
created to run all NMS services.
5. On the Reporting Services Configuration screen, select Install the native mode default
configuration.
6. If the Complete with failures screen appears, save the log to a location where you can retrieve it.
Nuance Technical Support can use this log file if any network issues arise.
21Chapter 3: Installing the servers
Installing Nuance Management Center
You install all Nuance Management Center components on the same machine using a single installation
wizard. When the installation is complete, you can optionally move the database instance to a different server
if your database server is a separate physical machine.
Installing Nuance Management Center—Single-node
1. On the NMC server, run NMS Suite Installer - Full.exe.
The installation wizard opens, and the Choose Setup Language screen appears.
2. Select a language from the drop-down list, and then click Next.
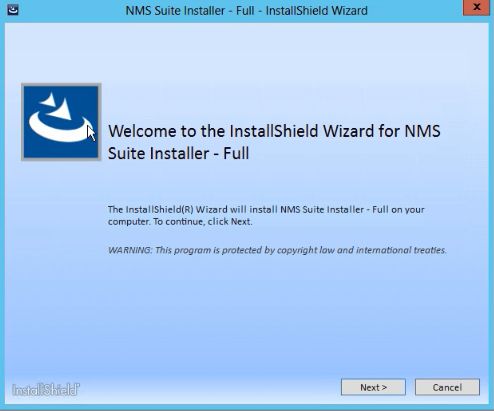
The Welcome screen appears.
22Nuance Management Center Server Installation and Configuration Guide
3. Click Next.
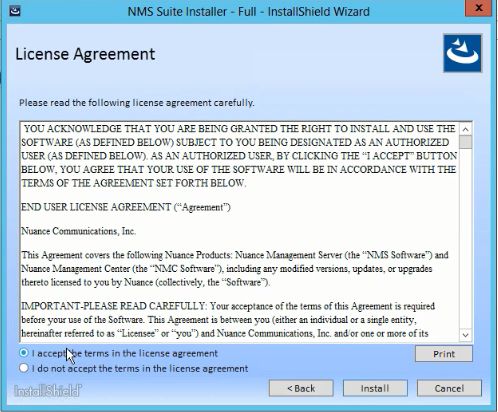
The License Agreement screen appears.
4. Select I accept the terms in the license agreement, and then click Install.
23Chapter 3: Installing the servers
5. If the Microsoft SQL Server Native Client is not already installed on your server, a prompt appears.
6. Click Install.
24Nuance Management Center Server Installation and Configuration Guide
The client is installed, and the Customer Information screen appears.
7. Enter a user name and company name, and then click Next.
The Choose Destination Location screen appears.
8. Choose where to install the NMS platform (default recommended), and then click Next.
25Chapter 3: Installing the servers
The Setup Type screen appears.
26Nuance Management Center Server Installation and Configuration Guide
9. Select On a server with an SSL certificate installed directly on that server (for single-node
installations).
Click Next. The Database Server screen appears.
10. Enter the required database information:
1. Enter the machine name or IP address of the physical server where you have installed the
SQL database server software.
The wizard creates the database and its backup directory in default locations on that server
automatically.
2. Select a method of validating connections to the server:
l Windows authentication—Use a Windows login and password to authorize
access.
l SQL Server authentication—Use a SQL Server login and password.
Choose the same type of authentication for access to the database that you chose
when you installed SQL Server.
3. If you selected SQL server authentication, enter the database administrator login name and
password.
4. Click Next.
27Chapter 3: Installing the servers
The Organization ID screen appears.
11. Enter the unique ID that Nuance assigned to your organization, and then click Next.
You should have received this ID with your Dragon welcome information. Later, you can access your
organization ID in the NMC console.
The Nuance Management Center 'admin' User Password screen appears.
12. Enter a password for the NMC administrator account, and then click Next.
28Nuance Management Center Server Installation and Configuration Guide
You use the administrator login (admin by default) and this password when you log into the NMC
console.
The Dragon Medical Server System User Password screen appears.
13. Specify a password for the default system user created during the installation, and then click Next.
The NMS File Share screen appears.
14. Enter the file share location for the NMC server, and then click Next.
You must specify a UNC root path. For example, \\had001\nmsfileshare_001. If you do not
specify a location, the default location is used (C:\ProgramData\NMS\Filestore).
For more information on the NMS file share, see “Server installation prerequisites” on page 13.
The Setup Type screen appears.
29Chapter 3: Installing the servers
15. Select the type of account to be used as the NMS service user, and then click Next.
l Specific Windows user account—A specific Windows user account that has rights to log
on to your NMC server as a service. For more prerequisites for this account, see “Server
installation prerequisites” on page 13.
l LOCAL SYSTEM—The predefined local account used by the service control manager.
l Network service—Network service that has access to NMS log file directories.
The Logon Information screen appears.
30Nuance Management Center Server Installation and Configuration Guide
16. Enter the user name and password of the Windows service user account, then click Next.
The Setup Type screen appears.
17. Indicate whether the installation should enable automatic database backups, and then click Next.
31Chapter 3: Installing the servers
l Yes—Enables automatic SQL Server database backups. You must be a system
administrator to enable this option.
l No—Disables automatic SQL Server database backups. You must manage your database
backups outside of Nuance Management Center.
If you select No, a warning dialog box appears, prompting you to confirm your selection.
Click one of the following:
l Yes—Disables automatic backups, and the Nuance Management Center
installation continues.
l No—Closes the dialog box, returning you to the Setup Type screen to change your
selection.
The Common File Store Settings screen appears after a few processes complete.
18. Select from the following options, and then click Next.
l Single node deployment—Select if your deployment is a single-node on-premise
installation. Single-node on-premise installations use the AppData folder for file operations
by default.
l Shared drive for multi nodes deployment—Select if your deployment is a multi-node on-
premise installation.
l Storage Path—Shared location to be used as a common file store for all nodes to
access.
l User name—User account that has permission to access the common file store.
l Password—Password for the user account that will access the common file store.
32Nuance Management Center Server Installation and Configuration Guide
l Azure storage for multi nodes deployment—Select if your deployment is a Nuance-
hosted cloud installation (Nuance employees only).
l Storage connection string—Azure storage connection string.
For more information, see “Server installation prerequisites” on page 13.
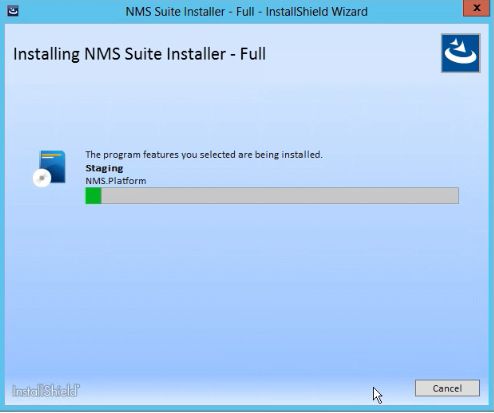
When you click Next, the wizard installs the NMS Platform Service.
19. Click Finish when the installation is complete.
20. If the Windows Server firewall was turned on during the installation, you must now open port 443 to
allow the NMC console to communicate with the NMS platform.
Installing Nuance Management Center—Multi-node
1. On each node, run NMS Suite Installer - Full.exe.
The installation wizard opens, and the Choose Setup Language screen appears.
2. Select a language from the drop-down list, and then click Next.
The Welcome screen appears.
33Chapter 3: Installing the servers
3. Click Next.
The License Agreement screen appears.
4. Select I accept the terms in the license agreement, and then click Install.
34Nuance Management Center Server Installation and Configuration Guide
5. If the Microsoft SQL Server Native Client is not already installed on your server, a prompt appears.
6. Click Install.
35Chapter 3: Installing the servers
The client is installed, and the Customer Information screen appears.
7. Enter a user name and company name, and then click Next.
The Choose Destination Location screen appears.
8. Choose where to install the NMS platform (default recommended), and then click Next.
36Nuance Management Center Server Installation and Configuration Guide
The Setup Type screen appears.
37Chapter 3: Installing the servers
9. Choose Behind a networking device with an SSL certificate installed (for multi-node
deployments).
Click Next. The Database Server screen appears.
10. Enter the required database information:
1. Enter the machine name or IP address of the physical server where you have installed the
SQL database server software.
The wizard creates the database and its backup directory in default locations on that server
automatically.
2. Select a method of validating connections to the server:
l Windows authentication—Use a Windows login and password to authorize
access.
l SQL Server authentication—Use a SQL Server login and password.
Choose the same type of authentication for access to the database that you chose
when you installed SQL Server.
3. If you selected SQL server authentication, enter the database administrator login name and
password.
4. Click Next.
38Nuance Management Center Server Installation and Configuration Guide
The Organization ID screen appears.
11. Enter the unique ID that Nuance assigned to your organization, and then click Next.
You should have received this ID with your Dragon welcome information. Later, you can access your
organization ID in the NMC console.
The Nuance Management Center 'admin' User Password screen appears.
12. Enter a password for the NMC administrator account, and then click Next.
39Chapter 3: Installing the servers
You use the administrator login (admin by default) and this password when you log into the NMC
console.
The Dragon Medical Server System User Password screen appears.
13. Specify a password for the default system user created during the installation, and then click Next.
The NMS File Share screen appears.
14. Enter the file share location for the NMC server, and then click Next.
You must specify a UNC root path. For example, \\had001\nmsfileshare_001. If you do not
specify a location, the default location is used (C:\ProgramData\NMS\Filestore).
For more information on the NMS file share, see “Server installation prerequisites” on page 13.
The Setup Type screen appears.
40Nuance Management Center Server Installation and Configuration Guide
15. Select the type of account to be used as the NMS service user, and then click Next.
l Specific Windows user account—A specific Windows user account that has rights to log
on to your NMC server as a service. For more prerequisites for this account, see “Server
installation prerequisites” on page 13.
l LOCAL SYSTEM—The predefined local account used by the service control manager.
l Network service—Network service that has access to NMS log file directories.
The Logon Information screen appears.
41Chapter 3: Installing the servers
16. Enter the user name and password of the Windows service user account, then click Next.
The Setup Type screen appears.
17. Indicate whether the installation should enable automatic database backups, and then click Next.
42Nuance Management Center Server Installation and Configuration Guide
l Yes—Enables automatic database backups. You must be a system administrator to enable
this option.
l No—Disables automatic database backups. You must manage your database backups
outside of Nuance Management Center.
If you select No, a warning dialog box appears, prompting you to confirm your selection.
Click one of the following:
l Yes—Disables automatic backups, and the installation continues.
l No—Closes the dialog box, returning you to the Setup Type screen to change your
selection.
The Common File Store Settings screen appears after a few processes complete.
18. Select from the following options, and then click Next.
l Single node deployment—Select if your deployment is a single-node on-premise
installation. Single-node on-premise installations use the AppData folder for file operations
by default.
l Shared drive for multi nodes deployment—Select if your deployment is a multi-node on-
premise installation.
l Storage Path—Shared location to be used as a common file store for all nodes to
access.
l User name—User account that has permission to access the common file store.
l Password—Password for the user account that will access the common file store.
l Azure storage for multi nodes deployment—Select if your deployment is a Nuance-
43Chapter 3: Installing the servers
hosted cloud installation (Nuance employees only).
l Storage connection string—Azure storage connection string.
For more information, see “Server installation prerequisites” on page 13.
When you click Next, the wizard installs the NMS Platform Service.
19. Click Finish when the installation is complete.
20. If the Windows Server firewall was turned on during the installation, you must now open port 443 to
allow the NMC console to communicate with the NMS platform.
44Chapter 4: Post-installation tasks
Installing and binding the SSL certificate 46
About certificates 46
Installing the SSL certificate on the server (single-node deployments) 46
Installing the SSL certificate on a load balancer (multi-node deployments) 49
Testing and troubleshooting your SSL configuration 49
Verifying the NMS Platform service is running 51
Starting the NMS Platform service manually 51
Configuring your load balancer 52
Logging in to the NMC console 53
Determining your database backup method 54
Configuring the Dragon client for use with Nuance Management Center 55
45Nuance Management Center Server Installation and Configuration Guide
Installing and binding the SSL certificate
About certificates
Using SSL requires that you obtain an SSL certificate issued by a certificate authority (CA). You can obtain
signed certificates from certificate authorities, such as GoDaddy or Verisign. Nuance Management Center
does not support self-signed certificates. The certificate authority must be a trusted authority known to both
the client computer and the server via a root certificate. To obtain a signed certificate, you'll need to provide
information to the certificate authority about your organization and the server on which you are installing the
certificate in the Certificate Signing Request (CSR). Each certificate authority may require different
information. Typically, the information can include the following:
l Organization name
l Organization location information, such as town and state
l Computer name for the server on which you are installing the certificate
l Extended Key Usage value, such as 2.5.29.37. Extended key usage further refines key usage
extensions, which define the purpose of the public key contained in the certificate.
l Key Size, such as 2048 bits or 4096 bits. Determines the length of the public key in the certificate. A
longer key provides stronger security. You determine the level of security that is appropriate for your
environment.
You obtain this information from your IT department, or from the person who installed and configured your
server.
All SSL Certificates require a private key to work. The private key is a separate file that’s used in the
encryption and decryption of data sent between your server and the connecting clients. A private key is
created by you—the certificate owner—when you request your certificate with a Certificate Signing Request
(CSR). The Certificate Authority providing your certificate (such as DigiCert) does not create or have your
private key.
For more detailed information on installing SSL certificates, see:
http://msdn.microsoft.com/en-us/library/ms733791.aspx
Installing the SSL certificate on the server (single-node deployments)
Clients contact the NMC server on the standard HTTP ports 80 and 443.
1. Install an SSL certificate in the Personal Store under the Local Computer section for the "logon as"
user account under which the NMS service is running.
To add the Certificates Snap-in and view the certificates installed on the local computer, see https://-
technet.microsoft.com/en-us/library/cc754431(v=ws.11).aspx.
46Chapter 4: Post-installation tasks
2. Note the subject of the certificate.
This should match the computer name that the certificate is deployed on, or be a wild card. This must
match exactly the host used in the endpoints. For information on viewing the subject, see https://-
technet.microsoft.com/en-us/library/cc754686(v=ws.10).aspx.
47Nuance Management Center Server Installation and Configuration Guide
3. Copy the thumbprint of the certificate. You use the thumbprint to bind the certificate to the port used
by the primary NMS services in the next step.
For information on retrieving the thumbprint, see https://msdn.microsoft.com/en-us/lib-
rary/ms734695.aspx.
4. Verify that the NMSUseSSL setting is set to true (this should have been done by the installer):
a. In Nuance.NMS.Server.exe.config, located in the NMS Platform installation folder, find
the line near the top that contains the key="NMSUseSSL" tag.
b. Change the value to true:
5. Bind the SSL certificate under IIS to port 443.
a. In the IIS Manager, from the left panel, click Default Web Site.
b. From the right panel, click Bindings....
The Site Bindings dialog box opens.
c. Click Add.
The Add Site Binding dialog box opens.
d. From the Type drop-down list, select https.
e. From the SSL certificate drop-down list, select the certificate that you installed.
48Chapter 4: Post-installation tasks
f. Click OK.
The Site Bindings dialog box appears. Ensure that the binding is displayed correctly.
6. Restart the NMS Platform server to allow any configuration changes to take effect.
Installing the SSL certificate on a load balancer (multi-node deployments)
Nuance uses this mode when the NMC server is behind a load balancing switch that also decrypts SSL. In
this scenario, the load balancer would strip the SSL encryption and forward the messages on to the
appropriate NMC server. Inside the firewall, these messages would be unencrypted, and the NMC server
would receive them as HTTP with no SSL encryption.
This should only be configured by experienced networking personnel. It requires in-depth knowledge
about load-balancing switches, which is outside the scope of this guide.
1. Verify that UseSSL is set to false (this should have been done by the installer):
a. In Nuance.NMS.Server.exe.config, located in the NMC Platform installation folder, find
the line near the top that contains the key="UseSSL" tag.
b. Change the value to false:
2. Restart the NMC server to allow the configuration changes to take effect.
Testing and troubleshooting your SSL configuration
Run these tests on a different computer. Do not run them on the NMC server.
Use the browser
1. Can you access and log into the NMC console?
a. Connect to https:///NMCHTML/.
If you see the Nuance Management Center login page, port 443 is working, and the NMC
console is being deployed properly.
b. Log in to the NMC console. If successful, the console is able to communicate with the
server.
2. Can you access the NMC console status interface?
1. Connect to https:///NMS/Platform/ConfigurationSvc/v1/Status.
An XML response should appear in the browser.
3. Can you make RESTful web service calls?
Attempt to create an NMS session using the browser.
a. Connect to https:///NMS/Platform/AuthenticationSvc/
v1/ValidateCredentials?location=Test&productGuid=9D62C366-6F85-4C4C-9333-
6FE21798D7F4
A prompt for a login and password appears.
b. Use any valid NMC console login and password.
c. If some XML is returned, the NMC console is configured properly and working with SSL.
4. Can you access the NMS API Help pages?
49Nuance Management Center Server Installation and Configuration Guide
1. Connect to https:///NMS/Platform/UserManagementSvc/v1/help
2. Enter any credentials if prompted.
3. An HTML page with help for one of the NMS API sets should appear. If you see this help,
the NMC server is configured and working properly.
Check the Bindings
If the NMC console is not working, ensure that the ports are properly bound to the SSL certificate. To do this,
specify the following from the command prompt:
netsh http show sslcert
Verify that port 443 is bound to the certificate.
50Chapter 4: Post-installation tasks
Verifying the NMS Platform service is running
When the installation completes, the NMS Platform service starts automatically if the NMS service user has
the correct privileges. Post-installation, you should verify that the service is running.
To verify, do the following:
1. Open the Services dialog box.
a. Click the Windows Start menu.
b. In the Search field, enter services.msc, and then press Enter.
c. Specify your administrator username and password when prompted.
2. Locate the NMS Platform service.
If the service is not running, you must start it manually.
Starting the NMS Platform service manually
Before starting the service manually, verify that the NMS service user has the correct privileges. For more
information, see “Server installation prerequisites” on page 13.
If the account has the correct privileges, do the following to start the service manually:
1. Open the Services dialog box.
a. Click the Windows Start menu.
b. In the Search field, enter services.msc, and then press Enter.
c. Specify your administrator username and password when prompted.
The Services window opens.
2. Locate the NMS Platform service.
3. Right-click the service, and then select Properties.
The NMS Platform Properties dialog box opens
4. From the Startup type drop-down list, select Automatic.
5. Click the Start button to start the service.
6. Click OK.
The dialog box closes.
51You can also read