Student Portal User Manual
←
→
Page content transcription
If your browser does not render page correctly, please read the page content below

Student Portal User Manual

Lindenwood University
Student Portal User Manual
Table of Contents
        Login                                                2
        Change Term                                          3
        Logout                                               3
        Calendar                                             4
        Administrative Services-Academic
             My Transcript                                   5
             My Schedule                                     5
        Course Offering                                      6
        Open Course Listing (not in portal)                  7
        Unofficial Registration                              8
        Unofficial Registration Frequently Asked Questions   10
        My Ledger                                            11
        My Financial Aid                                     11
        My Grades                                            11

                              Page 1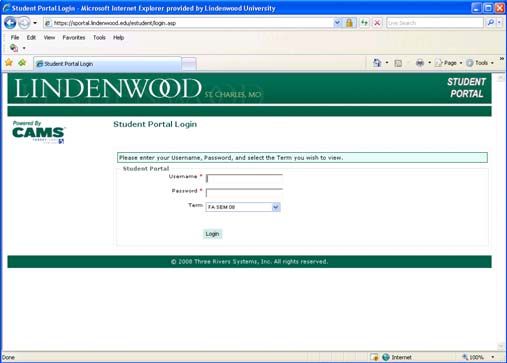
Student Portal
Log In
Access the portal through https://sportal.lindenwood.edu. There is also a link
from the Lindenwood University website. The portal is accessible from either on
or off campus.

Step by Step: Log In
   1. Enter your User Name, which is your LionMail email account: (ex. abc123)
      Note: if you do not know your username for your LionMail account, please
      go to http://www.lindenwood.edu/it/lionmail.asp.
   2. The Password is the same as your initial Password for Lionmail. If you do
      not remember, you can check here:
      https://apps.lindenwood.edu/StudentEmail/welcome.cfm
   3. Click OK or press Enter

This screen is referred to as the portal home page. Any posted announcements
will be viewable from this screen.

                                     Page 2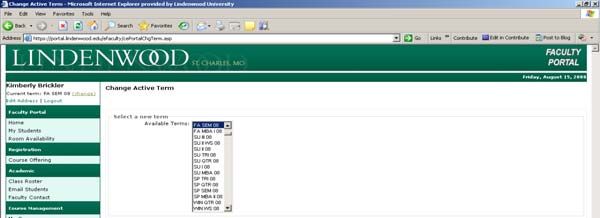
Change Term
Click on the word Change in the upper left corner of the screen. Double click on
the desired term. The term dates follow the calendar and not the academic year.
For example, to view the fall semester for the 08-09 academic year select
FA SEM 08.

Log Out
Click on Log Out to end the portal session. It will also timeout after 20 minutes of
inactivity.

It is imperative that after you log out of the session you close the browser used to
access the student portal. This will prevent anyone from having unauthorized
access to your student information.

                                       Page 3
Calendar
This feature can be used to keep track of appointments and assignments. Just
click on the date and enter the text you would like to display on the calendar. The
text can be edited or deleted at any time.

Faculty will also have the ability to add things to the calendar for students in their
classes. They may or may not choose to utilize this feature so please ask and do
not expect postings from your professors.

                                        Page 4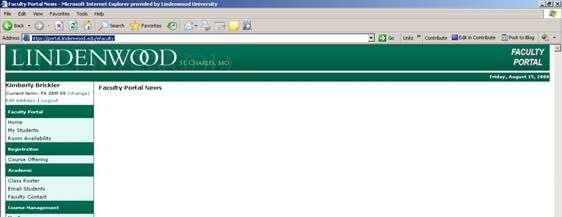
Administrative Services-Academic

My Transcript
You may view or print an unofficial transcript by clicking on Academic > My
Transcript. Any errors should be communicated to Academic Services. For
privacy reasons a sample is not displayed here.

My Schedule
You may view or print your schedule by clicking on Academic > My Schedule. If
the selected term is not the term you are (or were) registered in, it will need to be
changed before the schedule will display-See Change Term for instructions. For
privacy reasons a sample is not displayed here.

                                       Page 5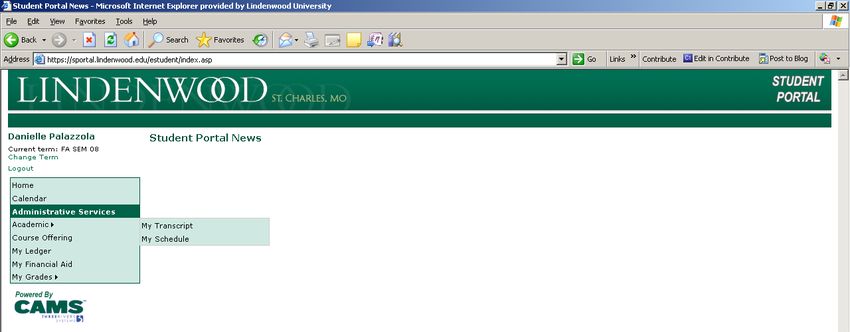
Course Offering
The Course Offering displays course schedule and instructor information for the
selected term.

Courses can be filtered in order to limit the display of the offering. Options for
filtering include the days of the week, the campuses, or by department. Any or all
filters can be applied at the same time.

Step by Step Example: Student can only take Tues/Thurs Classes.
   1.     Hold down the Ctrl key and select Tuesday and Thursday from the
          Scheduled Days filter box.
   2.     Click Apply Filter

To further limit by department, choose the department that the course is offered
through.

To change the filter option click reset filter and select new criteria for display.

Note that closed classes will be included on the listing but will be designated as
*CLOSED* in red.

                                        Page 6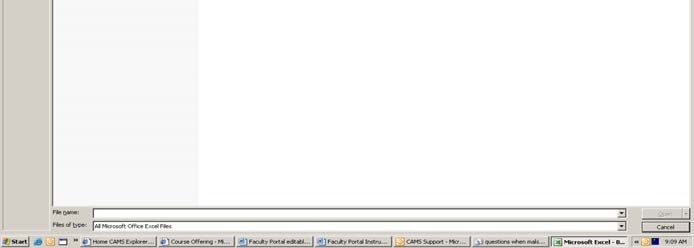
Open Course Listing
An excel spreadsheet is available throughout the campus in order to easily view
the listing of open courses for any term. This is accomplished without the use of
the portal.

Step by Step: View Open Course Listing
   1. Open Excel
   2. Select the P: drive
   3. Select the Enrollment Report folder
   4. Select the appropriate term (note the undergraduate semester courses are
      not in a separate folder)
   5. Select the most recently prepared report. The time of preparation is
      included in the document name.
   6. Choose the appropriate tab for the information needed.

                                      Page 7
Unofficial Registration
In order to register for classes on-line, two things need to happen:
    1. You need to meet with your advisor and they must authorize you to
       register.
    2. The appropriate registration date for your class level has to arrive. For
       example if you are a sophomore and sophomores are scheduled to
       register on November 19, then you cannot log in prior to November 19,
       and expect to register.
           • Registration for graduate students will occur on the date indicated
               in the catalog. Undergraduate students will have a tiered
               registration time based on class level. Seniors first, then juniors,
               then sophomores, and finally, freshmen.
           • The hours required for each class level are as follows:
               o       Senior-84 hours of earned credit
               o       Junior-54 hours of earned credit
               o       Sophomore-24 hours of earned credit
               o       Freshman-less than 24 hours of earned credit
               Please note that the hours you are currently enrolled in do NOT
               count as earned credit. View your transcript to determine the
               number of hours earned.

Step by Step: Unofficial Registration
   1. Verify that the selected term is the term you want to register for. See
      previous instructions if you need help changing the term.
   2. Click on Unofficial Registration
   3. The full course offering for the selected term will be displayed. A sample is
      listed below:

                                       Page 8
In order to shorten the list, click on Show Filter. The following fields can
      be used to limit the display of courses:
          • Dept-Academic School offering the class
          • Course #-as indicated in the course catalog and course offering
          • Type-generally will be left blank
          • Section-generally will be left blank
          • Days- week days the course would meet
          • Time-enter a beginning and ending time for the window of time
               you’re willing to take classes.
          • Campus-put a check mark in the locations where you would like to
               take classes
          Note that the more fields that are completed the more narrow the
          listing will be displayed.

          Below is what the filter screen should look like to select all BA 20000
          courses meeting on MWF

   4. To select a class, click on the Credit box next to the course (see example
      on previous page).
   5. Repeat the filtering process to select the next course you would like to
      enroll in.
   6. Once all desired courses are selected, Click Process Registration.
   7. Click OK.
   8. If your schedule is complete click the printer icon if you would like a paper
      copy. If you would like to add additional courses or make any changes,
      click Unofficial Registration again and repeat the process until you are
      enrolled in all the courses you wish to enroll in.

Show Pending Courses
This option shows all of the courses by Course ID that have been checked until
you click process registration. Below is an example of what it looks like.

                                      Page 9
Unofficial Registration Frequently Asked Questions:
How will I know a class is closed?
Classes that have met the enrollment limit will specify Class is Full in red.
What if I want to drop a course?
While the schedule is Unofficial you have the ability to drop a course. Simply
check the drop box next to the course you no longer want to take in your current
schedule and click process registration.
Will I have the ability to change a section after I’ve already selected one?
You can drop the section you don’t want as described above and click credit next
to the course you do want. When you process the registration the change will be
reflected in your schedule.
Can I sign up for more than one class that meets at the same time?
The system will not allow you to enroll in two courses with the same meeting
time. If this is attempted an error message will be displayed.
Page 10My Ledger
This option will show your current bill with the university for the selected term.
Any errors or discrepancies should be communicated to the Business Office. For
privacy reasons a sample is not displayed here.
My Financial Aid
This option will list your financial aid package for the selected term. Any errors or
discrepancies should be communicated to the Financial Aid Office. Please note
that any aid for terms prior to the use of the current CAMS system will not be
displayed. For privacy reasons a sample is not displayed here.
My Grades
This option allows you to view your mid-term or final grades for each term once
they are posted. Any errors or discrepancies should be communicated with the
appropriate professor.
In addition to grades, the following can be viewed from this screen:
• Student ID number
• Major
• Advisor
• Address
• Phone Number
Any changes to the above should be communicated with the Academic Services
Department by completing the appropriate form.
For privacy reasons a sample is not displayed here.
Page 11You can also read