Teach with space NOSE UP HIGH IN THE SKY - Observing and measuring weather conditions - esero
←
→
Page content transcription
If your browser does not render page correctly, please read the page content below
primary | PR48

teach with space
    NOSE UP HIGH IN THE SKY
    Observing and measuring weather conditions

teacher guide & student worksheets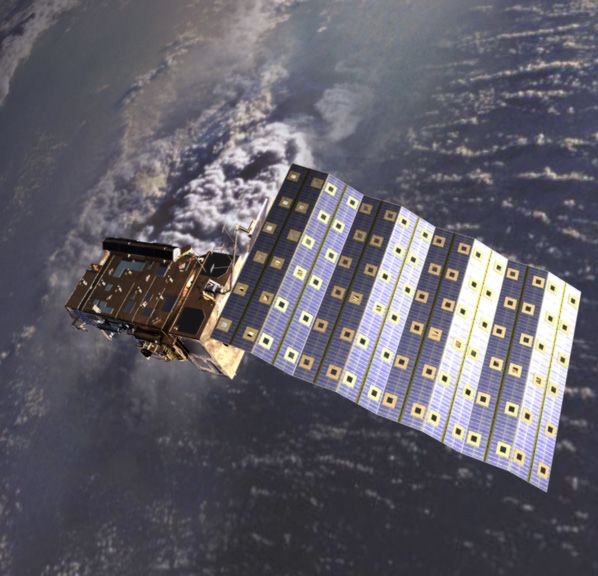
Fast facts                                                             page 3

                        Summary of activities                                                  page 4

                        Introduction                                                           page 5

                        Activity 1: Talking about the weather                                  page 6

                        Activity 2: Sensing the weather                                        page 7

                        Activity 3: Build your weather station                                 page 8

                        Conclusion                                                             page 10

                        Student worksheets		page 11

                        Links		page 15

                        Annex		page 16

                            teach with space - nose up high in the sky | PR48
                            www.esa.int/education

                            The ESA Education Office welcomes feedback and comments
                            teachers@esa.int

                            An ESA Education production in collaboration with ESERO Portugal
                            Copyright © European Space Agency 2018

                                                                    2
teach with space - nose up high in the sky | PR48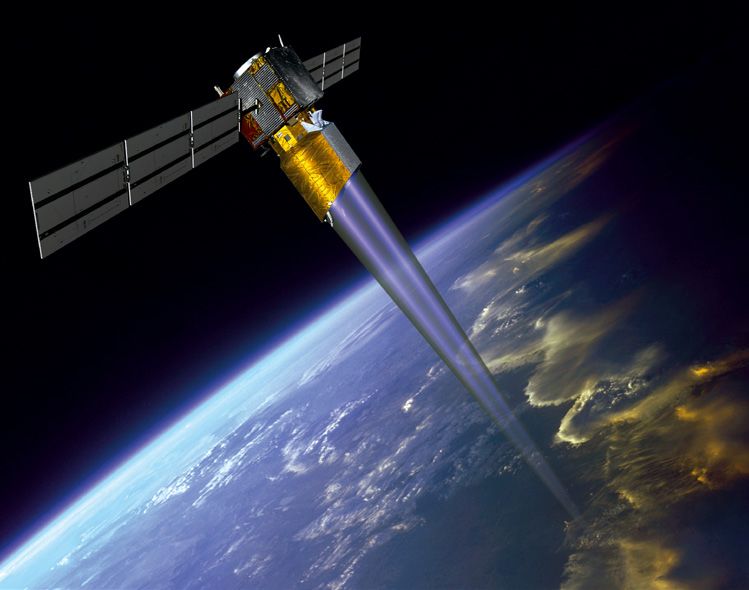
NOSE UP HIGH IN THE SKY
   Observing and measuring weather conditions

    Fast facts                                             Brief description
     Subject: Geography, Mathematics, Science              In this set of activities, students will learn how
                                                           their senses and instruments can be used to
     Age range: 8-10 years old                             describe and measure weather conditions. As
                                                           an introductory activity, students will analyse
     Type: student activity                                local proverbs related to the weather. Then,
                                                           they will use their senses to make weather
     Complexity: easy                                      observations and to learn how to describe the
                                                           weather.
     Lesson time required: 90 minutes
                                                           Students will also build a small meteorological
                                                           station and take weather measurements of
     Cost: low (0-10 euros)
                                                           rain, wind speed and air temperature.
     Location: indoors and outdoors

     Includes the use of: craft material

     Keywords: Geography, Mathematics, Science,
     Weather, Weather observations, Wind, Air
     Temperature, Rain

         Learning objectives
     •   Identify the weather elements (wind, temperature, precipitation).
     •   Observe and record weather conditions.
     •   Identify local weather processes.
     •   Learn that satellites, computers and scientific instruments are used to make weather forecasts.
     •   Learn how to take weather measurements.
     •   Represent and interpret data.

                                                       3
teach with space - nose up high in the sky | PR48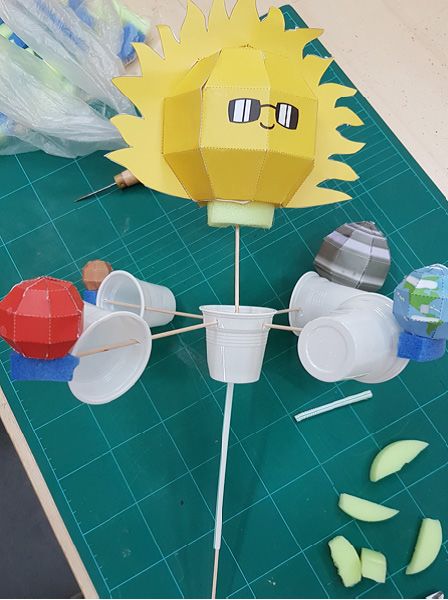
Summary of activities
activity    title                       description               outcome                  requirements    time
   1       Talking about the weather To analyse local proverbs   To understand the         None           30 minutes
                                     related to the weather.     reasoning behind local
                                                                 weather proverbs and
                                                                 how in the past weather
                                                                 forecasting had to
                                                                 rely less on scientific
                                                                 measurements and more
                                                                 on human experience.
   2       Sensing the weather        To make sensory weather     Students learn how       None           30 minutes
                                      observations.              senses can be used to
                                                                 describe weather and
                                                                 that scientists need to
                                                                 have access to scientific
                                                                 instruments to make
                                                                 precise and reliable
                                                                 weather forecasting.
   3       Build your weather         To take weather            To understand how         None           30 minutes
           station                    measurements of wind       to take weather
                                      speed, rain fall and air   measurements with their
                                      temperature.               own weather station.
Introduction
For thousands of years, humans have looked up to the skies trying to predict what the weather
might bring. Nowadays, we can get a weather forecast with just a few clicks on the internet, by
listening to the news, or in a daily newspaper.
Helping to predict the weather is the longest-running application of Earth observation. Over the last
four decades, satellite data have radically improved the accuracy of weather forecasts.
Satellites allow us to monitor large areas of the globe and give us the big picture of what processes
are in the atmosphere. The data provided by weather satellites is complemented by data from a
global network of weather stations, weather balloons, radar systems, ocean monitoring buoys, and
other instruments that help to improve weather forecasting. All these data is processed by powerful
supercomputers using mathematical models of the atmosphere and oceans that are used to predict
weather based on current conditions.
The European Space Agency (ESA) has been dedicated to observing Earth from space since the launch
of its first Meteosat weather satellite in 1977. Since then, three different families of weather satellites
have been operated by ESA: Meteosat first generation; Meteosat Second Generation (MSG); and
Meteorological Operational satellite programme (MetOp).
Europe's satellites are part of a global weather watch; many different countries and institutions
share information from their satellites in order to provide reliable weather forecasts all around the
globe.
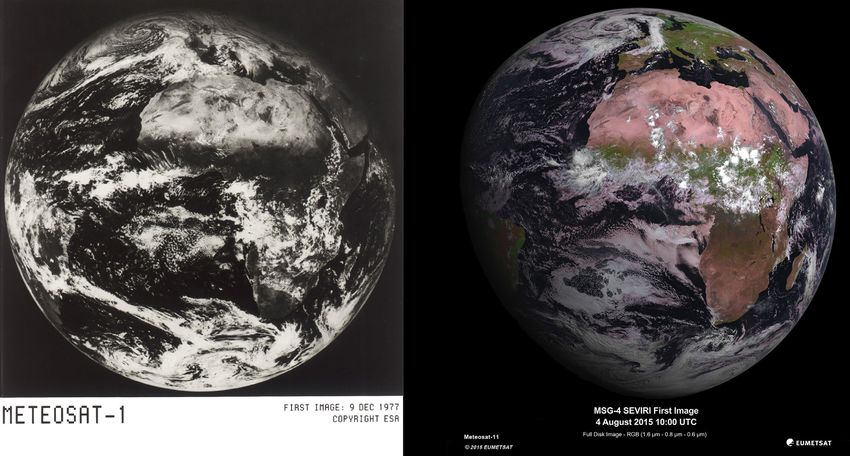
Figure 1
↑ The first image taken by ESA’s first meteorological satellite, Meteosat-1, launched on 23 November 1977 (left).
The first image taken by Meteosat-11, launched on 15 July 2015 (right).
5
teach with space - nose up high in the sky | PR48
Activity 1: Talking about the weather
   In this activity, pupils will be introduced to the topic by analysing some local proverbs related to the
   weather. Pupils will discuss the reasoning behind the proverbs with empirical knowledge.

   Equipment
     • Printed student worksheet for each pupil
     • A list of local proverbs related to the weather
     • Information sources, such as the internet or an encyclopedia

   Exercise
   As a starting point, teachers can ask pupils if they know old sayings or proverbs about the weather.
   Pupils should register at least two. They can use the information sources to find some weather
   proverbs.
   In groups, pupils should try to interpret the reasoning behind one proverb of their choice. They
   should then present their conclusions to the class.

   We suggest that teachers prepare a possible explanation for some local proverbs. There are several
   online sources where it is possible to find information about the science behind weather proverbs.
   Below teachers can find three examples of popular sayings about the weather.

   “Red sky at night, sailors delight; red sky at morning, sailors take warning.”
   The colours we see in the sky are caused by sunlight being refracted into almost all the colours of
   the visible spectrum as they pass through our atmosphere. The Sun’s rays pass through a greater
   length of atmosphere at sunrise and sunset than at any other time of day. The reddish colour results
   from scattering of blue light by particles in the atmosphere, leaving only red light to give the sky its
   beautiful appearance. In addition, dust and small particles are trapped in the lowest layers of the
   atmosphere when the atmosphere is dominated by sinking air (high air pressure areas).

   Weather systems generally travel from west to east in the mid latitudes. Because the Sun rises in
   the east and sets in the west a red sky at sunset means high pressure is moving in from the west so
   the next day will usually be pleasant. A red sunrise means the Sun is reflecting from dust particles
   and clouds that have passed from the west, and a storm may be following in from the east.

   “A ring around the Moon or Sun, and rain approaches on the run.”
   A ring around the Sun or Moon is caused by the refraction of the Sun's light due to ice crystals
   formed in high clouds. These high clouds, or Cirrus clouds, are made up completely of ice crystals
   and often form in advance of a warm front, indicating a change in the weather is on the way. In
   summer months mainly, the ring may be a sign of approaching storms.

   “Seagull, seagull sit on the sand. It's never good weather when you're on land.”
   Seagulls are usually flying or on a flat, calm sea. If the weather gets worst and the sea is not very
   calm they will fly to land in order to avoid strong winds. Another reason may be that some birds
   prefer not to fly during low pressure systems which are associated with bad weather. This may be
   due to the air being thinner which makes flying harder.

                                                       6
teach with space - nose up high in the sky | PR48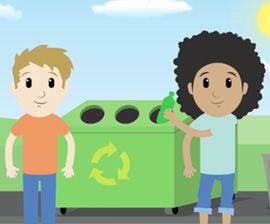
Activity 2: Sensing the weather
   In this activity, pupils will make sensory weather observations to learn how to describe weather
   conditions. They will conclude that to describe weather we can use wind, rain, temperature and
   clouds.

   Equipment
     • Printed student worksheet for each pupil

   Exercise
   Start this activity by first asking pupils how they would describe the weather using their senses
   (what can they see, feel or hear).

   Discuss with the pupils which key words they would use to describe the weather. Example: there
   was more or less heat, more or fewer clouds, more or less wind, more or less rain, etc. Pupils will
   then describe the weather today through a text, a table, or drawing. Guide students to conclude
   that to describe the weather we can use the wind, rain, temperature and clouds.

   Depending on the level of the students, teachers can conclude this activity by analysing a weather
   forecast and asking students to compare their observations with the daily forecast. Ask students
   what is necessary to produce reliable weather forecasts. Students should understand that modern
   weather forecasting makes use of different instruments and applies scientific knowledge to predict
   future weather conditions across the globe from observations made from land, at sea, in the air, and
   from space.

                                                     7
teach with space - nose up high in the sky | PR48
Activity 3: Build your weather station
In this activity, students will make weather measurements with their own weather station. They will
use a thermometer to measure air temperature. They will build an anemometer to measure the wind
speed and a rain gauge to measure how much rain has fallen.
Exercise
Organise pupils into groups to carry out the practical experiment. Explain that they will use and
build different instruments in order to make weather measurements. Ask students if they know any
instruments that do these kinds of measurements.
Students should record all the measurements from their weather station in a weather diary (see
Annex) so that they can conclude how the weather changes over the week. The measurements
should be done at least once a day and more or less at the same time every day.
Younger students may only use their senses to describe the weather and fill the weather description
in the weather diary using the weather and temperature stamps (see Annex).
Exercise 1 - Measuring air temperature
Equipment
• Thermometer
• Weather diary and printed students worksheet
Exercise
Start this exercise by demonstrating how to take a reading on the thermometer in the classroom.
You can then go outside and demonstrate how to take measurements outside. It is important to
wait a few minutes before taking a reading. This allows the thermometer to adjust to the outside air
temperature. When recording the temperature, students should follow some simple instructions:
• Place the thermometer a few centimetres above the ground (to make sure that the thermometer
is not reading the heat from the ground) and out of direct sunlight;
• The thermometer should be protected from rain (or snow);
• When recording the temperature the thermometer should be close to eye level.
Exercise 2 – Measuring wind speed
Equipment
• 5 plastic cups (per group)
• 1 straw
• 3 wooden sticks
• Weather diary and students worksheet
8
teach with space - nose up high in the sky | PR48Exercise Figure 2
Start this exercise by explaining to the students that they will
build an instrument to measure the wind speed. Hand out the
equipment and ask pupils to follow the instructions on their
activity sheets.
Students should make the measurements outside in an open
area. Before measuring, students should test and become
familiar with the instrument. When all the groups have finished
building the anemometer, ask students to suggest ideas of how
to use this model to calculate the wind speed. For example,
students can count how many times the anemometer rotates
in a given time interval, and use this method to measure the
wind speed in cycles per time.
Exercise 3 – Measuring rain
↑ Anemometer to measure wind speed.
Equipment
• Plastic bottle (1,5l - 2l)
• Ruler
• Paper clips
• Marker
• Pebbles
• Weather diary and students worksheet
Exercise
Start by explaining students that they will build an instrument to measure rain – a rain gauge.
Hand out the equipment and ask pupils to follow the instructions on their activity sheets.
Pupils should take their rainfall measurements at least once per day during a week. After each
measurement, pupils should empty the rain gauge until the water level is again at 0mm.
Discussion
Once groups have completed their first readings of temperature, wind speed and rain, discuss the
results as a class. Ask students to explain possible different results among the groups (different
locations, different collecting areas, any differences in the instruments built).
Once groups have completed their weather diary, they should compare their results with the other
groups.
9
teach with space - nose up high in the sky | PR48Conclusion
Nowadays, we refer to technology when we need a weather forecast, however, if we find
ourselves outdoors and out of touch with technology, there are many signs that we can look for
to help us infer something about the weather and avoid getting completely wet or blown about
by the wind.
Where do all the data that are used to predict the weather come from? Pupils should understand
that numerous satellites provide us with the most useful data for weather forecasting. They
continuously observe the Earth and communicate the data back to Earth. The analysis of those
data combined with data from meteorological stations on Earth allow meteorologists to predict
the weather.
10
teach with space - nose up high in the sky | PR48STUDENT WORKSHEET
NOSE UP HIGH IN THE SKY
Observing and measuring weather conditions
Activity 1: Talking about the weather
Long before people could measure the weather scientifically, they told stories to explain the weather.
Do you know any weather proverbs? In this introductory activity, you will explore the meaning of
some of these old sayings.
Exercise
1. Write down two weather proverbs.
2. Choose one of the proverbs that you listed before and try to interpret the reasoning behind it .
Did you know?
For thousands of years, humans have looked up to the skies
trying to predict what the weather might bring. Nowadays,
we can get a weather forecast anytime! Where do all the data
that are used to predict the weather come from? There are
numerous satellites that provide us the most useful data for
weather forecasting. They continuously observe the Earth and
communicate what they see back to our planet. The analysis
of that data combined with the information obtained from
meteorological stations here on Earth allows meteorologists
to predict the weather.
11
teach with space - nose up high in the sky | PR48STUDENT WORKSHEET
Activity 2: Sensing the weather
To create a weather forecast we need to make observations. In this activity, you will make weather
observations using your senses.
Exercise
1. Observe and describe the weather today (you can use a list of words or drawings).
Insert your weather description here:
2. Which senses did you use to make your description?
Did you know?
While the weather can change over a few hours, climate is
measured over many years. Scientists are worried about
the climate changes induced by us on our planet that are
responsible for global warming. A large team of scientists
works in the ESA Climate Change Initiative to understand what
influences the changes in our climate and to identify ways to
lessen them. You can also make a difference, for example, by
walking or using your bike instead getting a ride in a car and
by recycling paper, plastic, glass and aluminum.
12
teach with space - nose up high in the sky | PR48STUDENT WORKSHEET
Activity 3: Build your weather station
In this activity, you will make weather observations using different instruments and create your own
weather forecast. You will learn how to build a small meteorological station with an anemometer to
measure the wind speed and a rain gauge to measure the rainfall.
Exercise 1: Measuring air temperature
Figure A1 To measure the air temperature you will use a thermometer.
1. Start by measuring the air temperature in the classroom.
When recording the temperature the thermometer should be
close to your eye level.
2. Go outside and wait two minutes before you take a reading.
3. Register the temperature in your weather diary.
↑ Thermometer to measure air temperature.
Exercise 2: Measuring wind speed
To measure the wind speed, you will construct an anemometer Figure A2
with the help of your teacher, similar to the one in figure A2.
1. Pierce two holes in four of the plastic cups on opposite sides,
as shown in the image.
2. On the remaining plastic cup, pierce two holes on opposite
sides of the cup and two more perpendicular to those. Also,
pierce the bottom of the cup and stick a straw through it.
3. Place a wooden stick inside the straw so that it is free to
rotate.
↑ Anemometer to measure wind speed.
4. Put the other wooden sticks through the cup holes as in the
images to complete the anemometer.
5. Place the anemometer outside where it is exposed to the wind and test your anemometer.
6. How could you calculate the wind speed with this anemometer?
7. Write your calculations below:
8. Repeat the measurements with the anemometer and register the wind speed in your weather
diary.
13
teach with space - nose up high in the sky | PR48STUDENT WORKSHEET
Did you know?
Weather satellites make use of very special instruments in
order to measure and predict the weather conditions on Earth.
ESA’s Aeolus wind mission, the first space mission to measure
wind on a global scale, carries just one large instrument – a
laser called ALADIN that will probe the lowermost 30km of
the atmosphere to measure the winds sweeping around our
planet. Meteorologists need reliable wind- measurements to
improve the accuracy of weather forecasts.
Exercise 3: Measuring rain
To complete your meteorological station, you will build your own rain gauge to measure how
much rain has fallen.
1. Take an empty plastic bottle and cut off its top (see Figure A3).
Figure A3
↑ How to build a rain gauge to measure the rain.
2. If the bottle has an uneven bottom, place pebbles inside to even it and to keep it from tipping
over if there is wind.
3. Place the top of the bottle upside down into the bottom part, without the cap. Use paper clips
to hold it in place.
4. Add a scale to it by drawing a vertical line on the bottle. Take a ruler and mark a scale
every 5mm or more often, depending how precise you want your scale to be. Label those
measurements “0mm, 5mm, 10mm, 15mm…”.
5. Place the gauge outside and fill it with water until it reaches the 0mm mark. Make sure that
there is nothing overhead your rain gauge (like a tree) that could give you wrong readings.
6. Register the amount of rainfall in your weather diary.
7. Empty your rain gauge after each reading until the water reaches the 0mm mark.
Discussion
Compare your results with the results of your colleagues. If they are very different, what could be
causing those differences?
14
teach with space - nose up high in the sky | PR48LINKS
ESA resources
ESA classroom resources
esa.int/Education/Classroom_resources
ESA Kids
esa.int/esaKIDSen
ESA space projects
ESA’s Earth Observation missions
esa.int/Our_Activities/Observing_the_Earth/ESA_for_Earth
Meteorogical missions
esa.int/Our_Activities/Observing_the_Earth/Meteorological_missions
Aeolus mission
esa.int/Our_Activities/Observing_the_Earth/Aeolus
ESA’s Climate Change Initiative
http://cci.esa.int/
Extra information
List of national meteorological services
en.wikipedia.org/wiki/List_of_meteorology_institutions
MeteoEarth- An app weather that displays various weather indicators
www.meteoearth.com
Earth: a global map of wind, weather, and ocean conditions
https://earth.nullschool.net
EUMETSAT video: How do we monitor the weather from space?
youtube.com/watch?v=zfVeB4s8WWk
ESA, space in videos: Why measure wind?
esa.int/spaceinvideos/Videos/2018/08/Why_measure_wind
15
teach with space - nose up high in the sky | PR48ANNEX
Weekly Weather Diary
Date & Air
Description Wind Speed Rainfall
Time temperature
Monday
Tuesday
Wednesday
Thursday
Friday
16
teach with space - nose up high in the sky | PR48Weather stamps
cloudy rainy sunny
snowy windy
Temperature stamps
40 40 40 40 40
30 30 30 30 30
20 20 20 20 20
10 10 10 10 10
0 0 0 0 0
very cold cold mild hot very hot
17
teach with space - nose up high in the sky | PR48You can also read