Windows XP at DESY A Quick Setup and Configuration Guide
←
→
Page content transcription
If your browser does not render page correctly, please read the page content below
Windows XP at DESY
             A Quick Setup and Configuration Guide
This document describes the setup and configuration of Windows XP using the DESY
Windows XP Compact Disk. The setup is divided into three phases; the text-mode setup,
the GUI-based setup and the configuration steps specific to DESY.
By following the procedures outlined in this guide you will be able to create a Windows
XP system that provides an environment smoothly integrated into the DESY Windows
NT domain and its services framework.

Conventions used throughout this document:
   • Text in bold conveys navigational information such as dialog titles or item names
   • Blue text shows section labels as they are used on screen dialogs
   • Text written in italics denotes interaction with the user

Phase 1: Text-mode setup
Start the installation of Windows XP by booting from the CD media (you may have to
modify the boot sequence in the computers BIOS if the system fails to boot from CD).

The text-mode setup is mostly automated and leaves only two decisions to make
    • the size and number of the partition(s) to create and
    • the type of the file system to be used.
Unless you want to use the computer in a dual boot environment we strongly encourage
you to create a single partition spanning the entire size of the volume. Whatever size you
decide to use, the newly created volume must be at least 1 GB in size to permit the
installation of a working Windows XP system.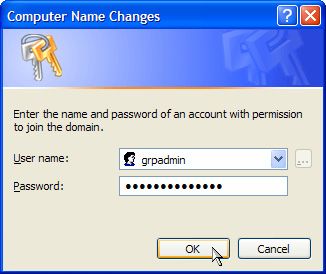
Continue by formatting the file system using NTFS. There is absolutely no reason to
create a FAT file system and you really shouldn’t jeopardize the security and integrity of
your data by not choosing NTFS.

The computer will begin formatting the partition and start copying required files to the
new volume. After a while the system will reboot and start the GUI-based setup.
Phase 2: GUI-based setup
The first dialog raised by setup deals with applicable regional and language options.
In case your system does not use the default German keyboard layout click Details… to
display the Text Services and Input Languages dialog. In the Installed services section
click Add… to install the required input language and make that the system Default input
language. Make your changes permanently available by clicking OK. Click Next > to
move on to the subsequent steps.
Now enter the Computer Name and create an Administrator Password for the local
administrative account. Although quite possible refrain from leaving the administrative
account with an empty password. We strictly advise the usage of strong passwords
comprised of both upper- and lowercase alphanumerical as well as numerical characters
for all of your accounts.

Once again click on Next >. Setup will now continue the installation without any need for
further intervention and will directly boot into the Windows XP logon prompt. You can
then commence with configuring the computer to the specifics of DESY.
Phase 3: DESY configuration specifics
In the part of setup that is DESY-specific you will have to perform the following tasks:
• Setup suitable display properties
• Select the language to display menus and dialogs in. A choice of either German or
English comes preinstalled on the system.
• If you don’t want to use DHCP assign a valid IP address to the network adapter
• IP Adress, Mask + Gateway : ask your Netadmin
• 1.DNS Server : 131.169.40.200
• 2.DNS Server : 131.169.194.200
• …Advanced : (select WINS and add the WINS Server adress)
• WINS Server: 131.169.69.32
• Make the computer a member of the DESY Windows NT domain
• Add the designated user(s) to the appropriate local groups
• Finalize the configuration of the McAfee antivirus suite
If you aren’t already logged on using the Administrator account do so now.
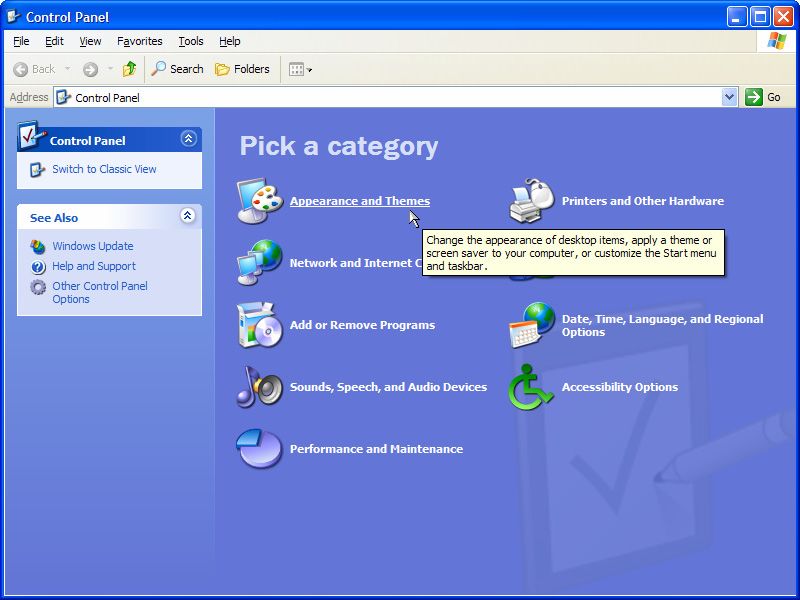
From the start menu open the Control Panel.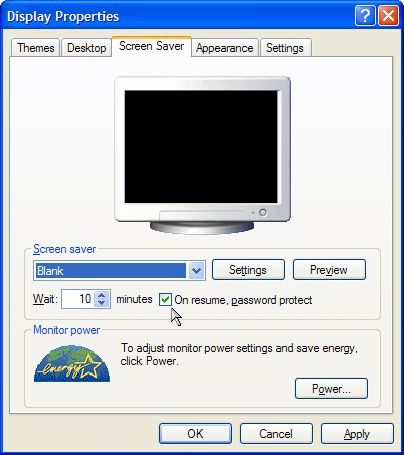
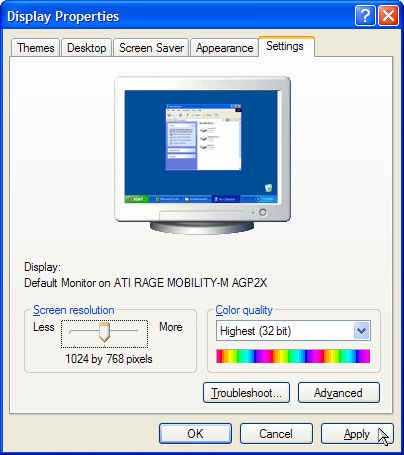
Follow the Appearance and Themes link and click on Display to view the Display
Properties dialog. Reveal the Settings register card and choose an appropriate Screen
resolution and Color quality. Make your choice permanent by clicking Apply.
As a security measure you should also configure a password protected screen saver for
this account. Do so by exposing the Screen Saver register card. Choose a Screen saver
from the list, setup a reasonable short time to Wait and mark On resume, password
protect. Leave the Display Properties dialog by clicking OK.
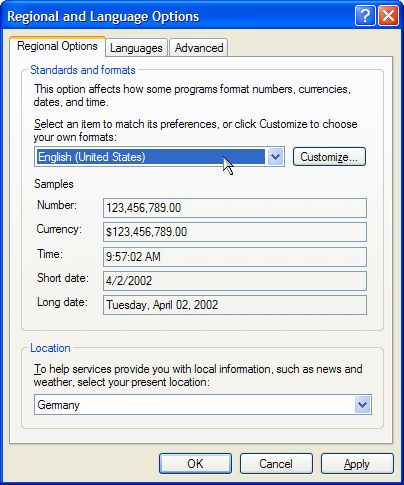
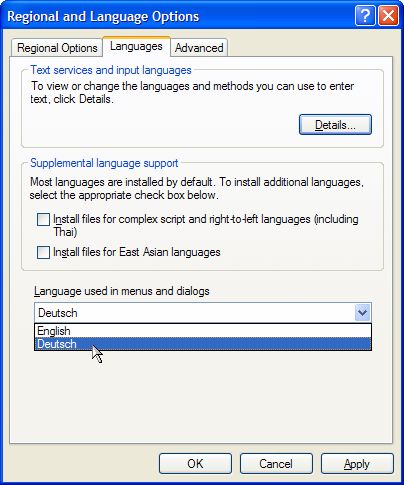
Return to the Control Panel category view and follow the Date, Time, Language, and
Regional Options link. Click on Regional and Language Options to configure the
language related settings. In case you prefer an English-only environment select English
(United States) from the Standards and formats section.

Tip: While installing a multilingual device driver on the computer, the driver’s setup
   routine possibly will behave in strange or undesirable ways. As a work-around you
   might want to establish a temporary English-only environment.
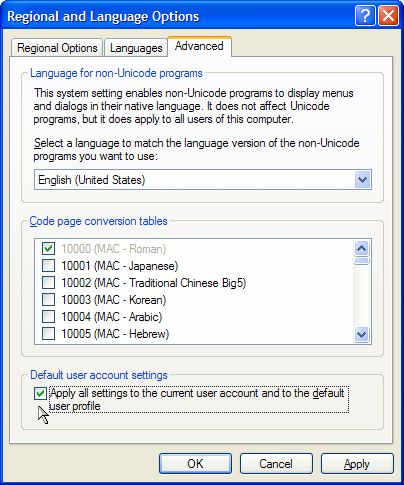
Now reveal the Languages register card. Pick the Language used in menus and dialogs
that best matches your lingual predilection.
In order to make this selection available to all the computers users, toggle to the
Advanced register card and mark Apply all settings to the current user and to the default
user profile. Acknowledge the upcoming warning but do NOT reboot yet.
Go back to the Control Panel category view. If you do not want to use an automatically
assigned TCP/IP address follow the Network and Internet Connections link and open
the Network Connections folder. Right click on Local Area Connection and select
Properties on the context menu. Scroll down the This connection uses the following
items list. Highlight Internet Protocol (TCP/IP) and click the Properties button.

Tip: Incompatibilities between Windows XP and the power management function of
   certain network adapters are known to be the single most reason for either the
   computers standby or hibernate modes to fail. To prevent this from happening click
   the Configure… button and disable all power management functions you can lay your
   hands on.
Use the Internet Protocol (TCP/IP) Properties dialog only if you want to manually
configure the IP address and the Default Gateway for this computer. Click on
Advanced… to further refine the DNS configuration and to specify WINS servers to be
used.

   IP Address, Subnet mask + Default Gateway : ask your Netadmin
   1.DNS Server : 131.169.40.200
   2.DNS Server : 131.169.194.200
   …Advanced : (select WINS and add the WINS Server address)
   WINS Server: 131.169.69.32
Open the start menu and right click on My Computer. Select Properties on the context
menu. On the System Properties dialog reveal the Computer Name register card and
click the Change… button. The Computer Name Changes dialog opens. In the Member
of section mark Domain and enter DESYNT as the domain name.

Authorize your changes and reboot the computer when prompted to.
Open the start menu and right click on My Computer. To run the Computer
Management console select Manage on the context menu. Navigate to Computer
Management (Local) -> System Tools -> Local Users and Groups -> Groups and
double click on Administrators.
In the Administrators Properties dialog click Add… to include the required
administrative group(s) and optionally the user(s) of the computer.

As an alternative to including the user(s) in the Administrators group you might instead
consider placing them into the Power Users group.
To configure the McAfee Antivirus suite navigate to start -> All Programs -> Network
Associates and run the VirusScan Console. Right click on AutoUpgrade and select
Properties on the context menu.
Expose the Schedule register card and mark Enable. Now create a schedule that ties in
with your own work schedule.

Click OK to activate the schedule. Repeat these steps for the AutoUpdate task.
You can also read