Design of Graphical User Interface with MS Visual Studio C++ For Fubarino and Arduino - Generate control and see feedback from your embedded ...
←
→
Page content transcription
If your browser does not render page correctly, please read the page content below
Design of Graphical User Interface
   with MS Visual Studio C++
    For Fubarino and Arduino
          Presentation by Hampton Sailer

    Generate control and see feedback
  from your embedded application with
   Windows PC graphical user interface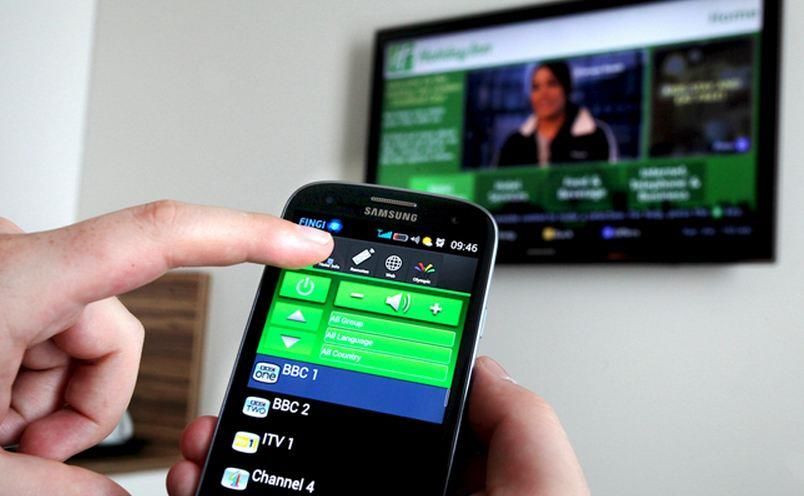
Hampton Sailer, Eatontown, NJ
• 30+ years electronics hardware design using 8, 16
  and 32 bit microprocessors, DRAM, Flash, Ethernet,
  USB, TCP/IP networking. FPGA (Field Programmable
  Gate Array) design using Verilog language, Altera.
• Software design using, C, C++, C#, Java, Basic,
  Fortran, Pascal, assembly language.
• Website design using HTML, CSS, Javascsript, PHP,
  MySql, mobile design with Bootstrap, JQuery Mobile.
• Quite familiar with AC power wiring & construction.
• Theatrical stage lighting, sound systems.

Remote management of
 embedded application                                    Rain detector

                   USB

                Comm port

Wonderware intouch scada    SCADA (supervisory control and data acquisition)
Possible Applications
•   RC race cars, robotic control, model airplanes
•   Music synthesizer control and sequencing
•   Green house environment control
•   Home security, fire and entry detection
•   Home heating and cooling remote control
•   Home lighting control, save energy
•   Monitor sump pump operation
•   Process RFID scans, track GPS location
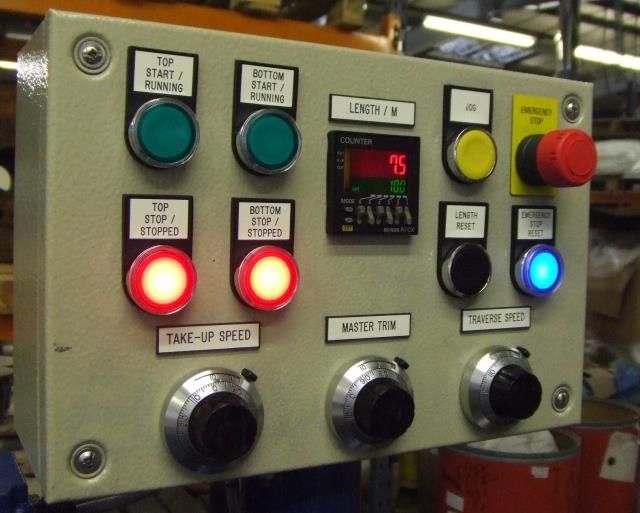
Advantages of a GUI control
• Re-create any configuration of control panel with a software
  compile. No drilling metal panels and adding switches, LED,
  etc.
• Remote control of embedded application from a distance.
• Able to read data back, as well as send control commands.
  Store data for later analysis.
• Retain microcontroller for local closed loop control.
Graphical User Interface (GUI)
                                                            softwarexplorer

Buttons                                                      codeproject

Labels
                                           2.53 Volts     Text Box

          Create Graphical User Interface (GUI)             opcfoundation
          With Buttons, labels, text boxes and
          many other graphical objects called             www.ucancode.net
          “Controls” (in the MS vernacular).               Mathframe.com
            windows+forms+controls+industrial+gauge
                                                             Beau Gauge
                                                        syncfusion radial-gauge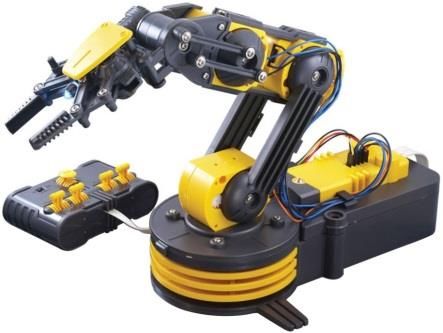
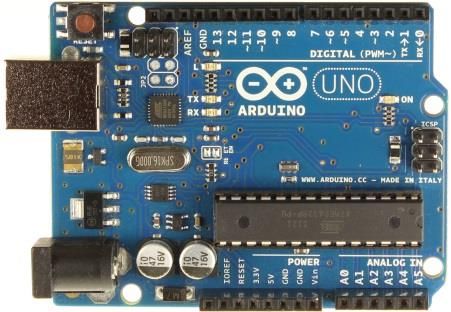
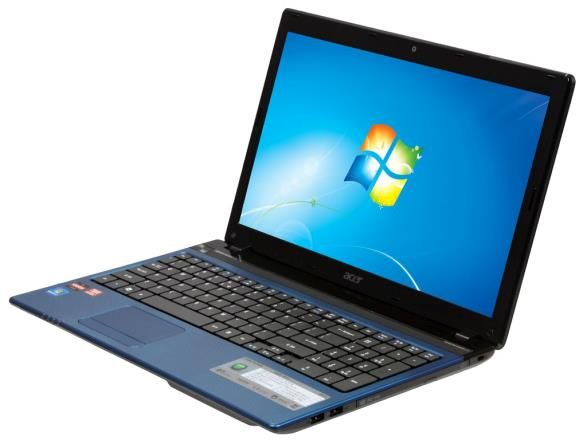
Prerequisites
•   Windows PC (Mac possible with other IDE)
•   Microsoft Visual Studio 2010, 2012 or 2015
•   HW - Fubarino (or Arduino) with USB cable
•   Arduino IDE version 1.65 (Fubarino)
•   Knowledge of C language or Arduino sketch
•   Some I/O stuff, a few switches and LEDs

Object Oriented Design in C#
                           Do not be afraid of Object Oriented Design
                           We do not need to create classes
                           We only need to use system classes
                           Serial port class is used on both ends

                           In Visual Studio:
                           Drag serialPort object from the Toolbox
                           Drop object onto the Windows form
                           Use property Inspector to update port
                           Saves having to create serial Port Object
Woody Allen in “Sleeper”
                           Also see:
                           system.io.ports.serialport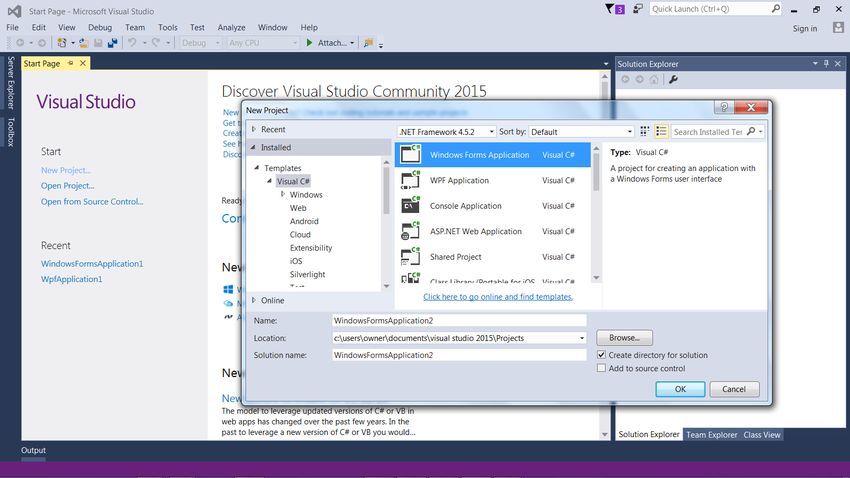
using System;
using System.Collections.Generic;
using System.Linq;                            System library references
using System.Text;
using System.Threading.Tasks;
                                                 User namespace that your
                                                application’s class names will
namespace ConsoleApplication1
                                                          belong to
{
  class myProgram
  {
     static void Main(string[] args)              Main, the program
     {                                                entry point
       int x = 1000;
       Console.WriteLine("Hello Fubar Labs User. " + x );
       Console.WriteLine(DateTime.Now);                            User program code
       Console.ReadLine();        //wait for user to close
     }
  }
}
Serial port data over USB

                                                               Serial.begin(9600);
serialPort1.Open();                                            Serial.available();
serialPort1.PortName = L"COM4";                                Serial.read();
serialPort1.Read(byteArray, 0, 1);                             Serial.write(value);
serialPort1.Write(byteArray, 0, 1);
serialPort1.Close();
                                                        Arduino Serial Port Reference
system.io.ports.serialport

     We need to use serial port objects in order to communicate with each device
Make up Serial data protocol • We will use a “switch” statement in an embedded Sketch to parse the serial data • Simple one byte protocol • Reserve a code for each device you control • Reserve a two codes for run / stop control • Reserve a code to reset state of operation • Reserve a few codes for Read Data command • Write it down!!!
Simple byte protocol from PC to Fubarino

Device       State     Serial Data   GUI control
Relay 1      On        Data = 1      Button 1
Relay 1      Off       Data = 2      Button 8
Relay 2      On        Data = 3      Button 2
Relay 2      Off       Data = 4      Button 7
Relay 3      On        Data = 5      Button 3
Relay 3      Off       Data = 6      Button 6
Relay 4      On        Data = 7      Button 4
Relay 4      Off       Data = 8      Button 5
All Relays   On        Data = 9      Button 12
All Relays   Off       Data = 10     Button 11
Run Sequence On        Data = 11     Button 13
Run Sequence Off       Data = 12     Button 14
Open() the Serial Port class after Initialize
namespace WindowsFormsApplication1
{
  public partial class Form1 : Form
  {
    public Form1()
                                           Look for this
    {
      InitializeComponent();
      serialPort1.Open();      //add this code here
    }
       …
Windows GUI side
Send data on serial port (a command to Fubarino)
var dataArray = new byte[] {1}; //create byte array
dataArray[0] = 13; //assign a value
serialPort1.Write(dataArray, 0, 1) //send data
Receive data
int recData; //create an integer of storage
recData = serialPort1.ReadByte(); //read data
textBox2.Text = recData.ToString(); //process dataCreate a new project in Studio, Windows Form Application
Process at the Windows Side
• Start Visual Studio 2015 Community Editon
• Create a new C# Windows Form Application
• Stretch the User Form width 3 times wider.
• Open the Toolbox from left edge of Designer.
• Open the “Common controls” and drag
  buttons from toolbox to the Form area.
• Add serialPort object from Toolbox to form.
• Edit event handlers by double clicking controls
• After “InitializeComponent();”
      add serialPort1.Open();
Inside the Form Designer
RunObject member access
• The C++ language uses an “indirect member
operator” -> to access a property of a class
member, or call a class method. In C# we use
the dot construction for member access.
• In C++, array^ byteArray =
gcnew array(1);
• In C++, serialPort1->Write(byteArray, 0, 1);
• In C#, var dataArray = new byte[] {1};
• In C# use, serialPort1.Write(dataArray, 0, 1);Fubarino or Ardunio side
communications
• arduino-control-using-a-windows-
presentation-foundation
• http://playground.arduino.cc/Main/Interfacin
gWithSoftware
• http://www.ardulink.org/Fubarino Sketch code
Initialize the serial communication:
void setup() {
Serial.begin(9600);
byte recData;}
void loop() {
if (Serial.available()) {
recData = Serial.read();
switch (recData) {
case 1:
digitalWrite(relay1, HIGH); //relay1 on
break;
case 2:}Favorite SW websites • 2015 Community version of Visual Studio • http://www.cplusplus.com/ - Tutorials C++ • http://www.functionx.com/ - Tutorials all • https://msdn.microsoft.com/library/default.aspx • http://www.tutorialspoint.com/cplusplus/ • http://www.academictutorials.com/cpp/ • http://stackoverflow.com/ - Program Help • http://www.w3schools.com/ - Web Design • https://www.thingiverse.com/ - 3D Models
http://www.cplusplus.com/forum/windows/162326/
Create an empty C++ CLR project and add a Windows Forms to it.
Make a "CLR Empty Project".
Press Ctrl-Shift-A and create a Windows Form (under UI).
Inside the CPP file that is created, paste this code, replacing anything in square
brackets except [STAThread] with the appropriate names:

#include "[FORM NAME].h"
using namespace System;
using namespace System::Windows::Forms;
[STAThread] //leave this as is

 void main(array^ args) {
    Application::EnableVisualStyles();
    Application::SetCompatibleTextRenderingDefault(false);
    [PROJECT NAME]::[FORM NAME] form;
    Application::Run(%form);
}
Right click your project in the Solution Explorer and click Properties.
Under Configuration Properties > Linker > Advanced, change Entry Point to
"main" (without quotation marks).
Under Configuration Properties > Linker > System, change SubSystem to
"Windows (/SUBSYSTEM:WINDOWS)".
You can also read