ASSEMBLY SHEET CONSTRUCTION OF WOODEN PATIO
←
→
Page content transcription
If your browser does not render page correctly, please read the page content below
ASSEMBLY SHEET
\ CONSTRUCTION OF WOODEN PATIO
1

             \ CONSTRUCTION OF WOODEN PATIO

    LES COMPOSANTS

      Here are the parts you need to build a patio
      >Adjustable support pedestals
      >Joists
      >Wooden boards
      >Bitumen sheeting
      >Geotextile ground cover
      >Spacers or an x-shaped wedge
      >5×60 ROCKET A2 stainless steel terrace screws
      >6×100 and 5×40 ROCKET A2 stainless steel screws
      >A board straightener (optional)
      >A spirit level
      >A measuring tape
      >A brick mason’s ruler
      >A radial arm saw
      >A screw gun
      >A chalk line
      >A handsaw

    THE KEY STAGES

      1 - PREPARING THE GROUND
      2 - LAYING THE JOISTS
      3 - GLUING OF WATERPROOFING STRIPS
      4 - LAYING AND FIXING THE BLADES
      5 - CUTS AND FINISHES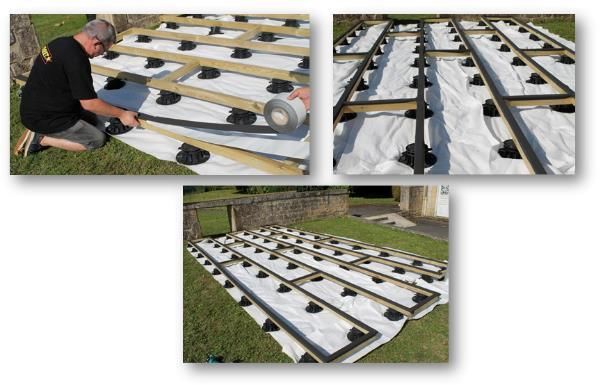
2
\ CONSTRUCTION OF WOODEN PATIO
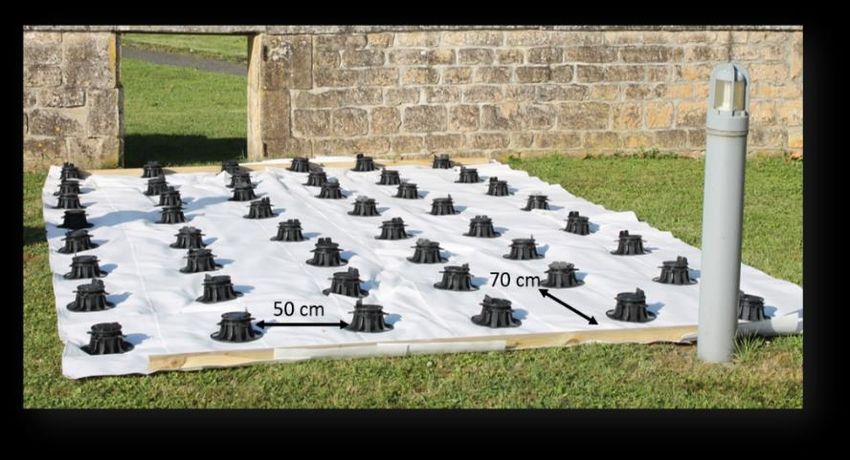
STEP 1 \ PREPARARING THE GROUND
> Start by laying the geotextile tarpaulin over
the entire length of the site. This cover will
prevent the growth of weeds below the terrace
and will save you from weeding between the
blades.
> Place the pedestals over the entire floor to
be covered, at a distance of 50 cm between
the joists and 70 cm in length. The space
between the woods and the ground allows the
terrace to be well ventilated.
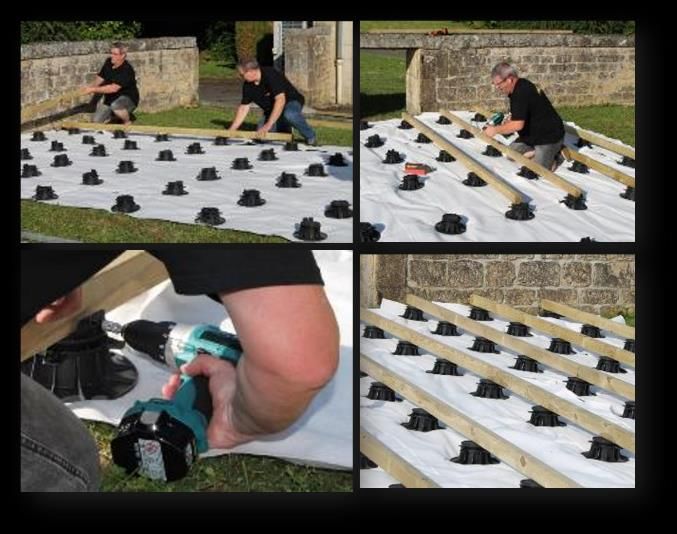
STEP 2 \ LOYING THE JOISTS
> Place the joists on the lines of pedestals and
secure them with 5x40 stainless steel ROCKET
screws.
> Cut small joists to connect the lines
previously fixed to the studs. They will serve as
spacers. Secure them with ROCKET stainless
steel A2 6x100 screws every 3 studs.
> Check the level of the joists using a spirit
level and a mason's ruler.
Screw or unscrew the studs to adjust the height
and level everything. Also check the alignment
of the end of the joists on the exterior side.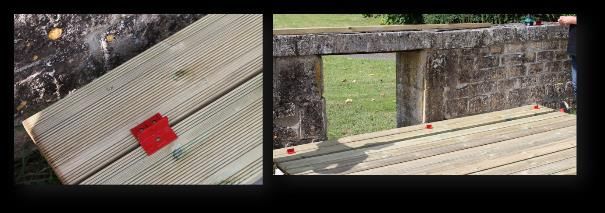
3
              \ CONSTRUCTION OF WOODEN PATIO

       +PRODUCT ROCKET

                             ROCKET A2 stainless steel wood
                             and chipboard screws – a high-tech
                             solution for your outdoor projects
                             Outdoor wooden structures such as patios,
                             cladding and fences require the use of treated or
                             tropical wood in order to cope with bad weather or
                             other vagaries.
                             you also have to pay particular attention when
                             putting these sorts of structures together. At
                             ROCKET we have developed a range of stainless
                             steel screws, available in pozidriv and star head,
                             which retain their levels of performance and
                             design when used outdoors.

    STEP 3 \ GLUING OF WATERPROOFING STRIPS

    >Apply the self-adhesive strips
    bituminous waterproofing joists and
    spacers. Think Remember to fold the
    edges. These insulate and protect the
    deck boards from the joist.
4
                \ CONSTRUCTION OF WOODEN PATIO

    STEP 4 \ LAYING AND FIXING THE BLADES

    > Install the boards perpendicular to the joists. Start at an angle. The other end of the
    plank should be halfway through the joist. Leave a gap of 2 mm between the boards on
    the joist joist. (In our case, our plank is the entire width of the terrace) and an
    expansion space of 10 mm if you are against a wall.

    > Mark the cutting area on the blade and cut it with a saw. Extend the boards on each
    side of the joists for a possible finish (straight cut). The overhang will allow you to
    make a finishing cut.

    > For the following lines, place spacers between the slats to provide an expansion
    space. Continue on the same principle row by row.

    > Make a pilot hole with a stepped drill bit. This is very useful when you have to drill
    and countersink many holes in often hard wood. In order to achieve a clean and
    uniform job, it is preferable to always drill and above all mill to the same depth. Its free
    rotating ring stops on contact with the piece of wood, preventing any marks on the
    blades. The drilling and milling depths can be precisely adjusted. In addition to this, you
    need to know more about it.

    > Fix the plank in the joist with the ROCKET Terrace 5x60 screw.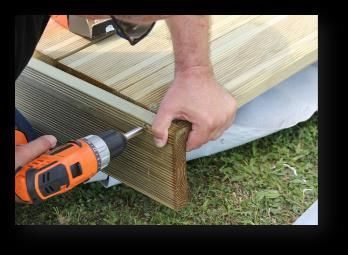
5
               \ CONSTRUCTION OF WOODEN PATIO

         +PRODUCT ROCKET

                                  ROCKET patio screws are ideal for
                                  patios made from hard or tropical
                                  wood.
                                  They are double threaded, which ensures the boards
                                  will stay in place on the joists. As a result of the high-
                                  quality materials they are made from, they are
                                  among the best non-split screws on the market.
                                  Pre-drilling required for hard wood, must comply with
                                  DTU 51.4 (French construction industry standards)

    STEP 5 \ CUTS AND FINISHES

    > On the side, mark the cutting line of the boards with a chalk line. Cut the edge
    of the blades with the saw.
    > Then screw a plank vertically onto the joists to hide the studs on the side of the
    terrace for more aesthetics.
You can also read