Beach-nesting Birds Educational Kit - SOUTH AUSTRALIA
←
→
Page content transcription
If your browser does not render page correctly, please read the page content below
Beach-nesting Birds Educational Kit

SOUTH AUSTRALIA
Contents

Objectives……………………………………………………………………………………………………………...1

Links to Curriculum - South Australia……………………………………………………………………2

Activity 1 - Interactive PowerPoint………………………………………………………………….…….3

Activity 2 - Creating Masks and a Student Story…………………………………………….…….5

Activity 3 - Birds and Beaks…………………………………………………………………………….……..7

Activity 4 – Creating a Beach Food Web Mobile or Wall Display……………………….…..9

Activity 5 – Visiting the Beach…………………………………………………………………………….…..11

Activity 6 – Building Chick Shelters……………………………………………………………………. ….13

Activity 7 – Awareness Raising Banners or Posters………………………………………… …….15

:
Objectives
Wildlife and its conservation is a significant aspect of environmental education, but it can
often be difficult to integrate into ‘lessons/classrooms’ and include hands-on
components. Birds, being visible during the day, occurring in almost all environments
and common species being familiar to most students, provide the perfect opportunity to
do so.

The activities associated with this education kit aim to provide students with an
understanding and appreciation of the wildlife that surrounds them. Local environments
are particularly suitable for investigating wildlife and conservation, as they provide a
greater opportunity for connectedness between the students and what they learn. It
also allows them to see that it is not only the Great Barrier Reef or far-off rainforests
that are important environments, but that their local beaches, waterways and parklands
are just as important and exciting. Ownership of environments has a significant effect
on the way in which we behave towards them and often leads to a more ‘caring’ attitude.

This Beach-nesting Birds education kit is also an important awareness-raising
conservation tool.

School-age children and their families are likely to spend a large amount of time on the
beach over the summer period – the peak breeding time for beach-nesting birds. By
increasing their understanding of Hooded Plovers and other beach-nesting birds, there is
an increased chance that children (and their families) will follow appropriate beach
behaviour to help conserve these threatened birds. Furthermore, by targeting young
children, these conservation messages are likely to influence their appreciation and use
of the beach into future generations. A number of the education sessions and resources
include the creation of awareness-raising materials that can be used locally, which, in
turn, will aid the education of the general public.

                                                                                           1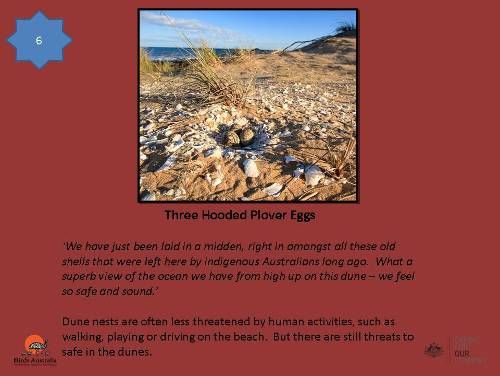
Links to Curriculum - South Australia
Learning Area: Society and Environment
Strand: place, space and environment
Standards:
1.4 Explains and communicates how people interact and identify with environments.
1.6 Participates actively in projects to show understanding of the importance of caring
for local places and natural environments.
2.6 Understands that people cause changes in natural, built and social environments,
and they act together in solving problems to ensure ecological sustainability.
3.4 Identifies and describes significant resources, explains the threats which endanger
them, and suggests strategies to combat threats.
3.5 Interprets and represents data about natural and built environments, resources,
systems and interactions, both global and local, using maps, graphs and texts.
3.6 Identifies factors affecting an environmental issue, and reports on ways to act for
sustainable futures.
4.6 Identifies and describes ways that places and natural environments are valued or
threatened, and discusses strategies related to ecological sustainability.
Learning Outcomes
By completing the activities in this kit students will:
understand the importance of beaches as habitat
identify local species of beach-nesting birds
understand how people’s actions can have both negative and positive effects on the
environment
have gained methods they can use to help improve and protect their local
environments
2
Activity 1 – Interactive PowerPoint
Ages: Reception – Year 8
Class size: 1 – 2 classes
Time: 30 – 45 minutes
Background Information: Hooded Plovers are one of the four main beach-nesting
birds found in Victoria. They are of particular significance as they nest exclusively on
high-energy ocean beaches. As a result of increased human usage of the beach during
their breeding season (spring and summer) their numbers have declined since the 1980s
and their population is currently estimated at between 400 and 500 individuals along the
Victorian coast.
Hooded Plover eggs are small (about the size of a 20-cent piece) and very well
camouflaged, so they are easily trodden on by accident. Further, if the incubating adult
is scared off the nest by passers-by, the eggs may literally bake in the sun, or become
too cold in cool weather; either way, it kills the chick developing in the egg, and the egg
will not hatch. Similarly, when people disturb a fluffy chick, it quickly runs into the sand
dunes and hides. While it is running, the chick uses up valuable energy, and while it is
hiding it is unable to feed (they usually forage at the water’s edge), so that a chick that
is forced to run and hide throughout the day because of human disturbance could easily
starve.
There is more detailed information for each slide found in the notes section in this
presentation (see attached DVD).
Description: In this interactive PowerPoint session students learn about beach-nesting
birds, the threats that they face and how they can help. This session asks the children
many questions, gives them a chance to talk about their own experiences with birds or
on the beach, and they even get a chance to search for Hooded Plover nests, learning
first-hand how difficult they are to spot and the benefits and problems with camouflage.
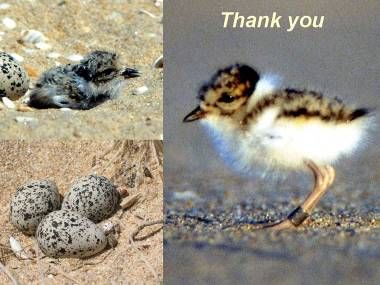
The presentation is based primarily on photographs (Fig. 1), meaning with a small
amount of content/language variation, it can be made suitable for any primary-school-
age group (and even early-secondary-school ages).
3
Figure 1. Examples of the slides used in the school education PowerPoint presentation.

The presentation can also be adapted to have more of a local flavour – adding
photographs of local beaches where the birds are found, hearing some examples of what
is happening in their area to protect the birds and even some examples of stories about
their local birds (e.g. any stories about rescue, near-misses with threats, banded birds
and their history).

                                                                                         4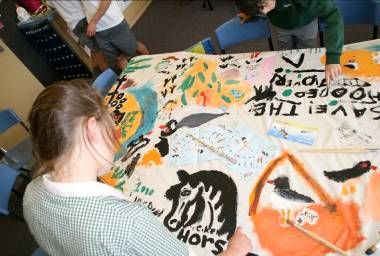
Activity 2 – Creating Masks and a Student Story

Ages:          Grade 2 – Year 8

Class size:    1 class (
Additional Notes: To adapt this for younger ages, the masks could be made after they
have heard the presentation in Session 1, or a similar structure could be followed and an
adult could read out the cards as a story and each child could act out their card as it is
read.

A)                               B)

C)

Figure 2. Example of (A, B) mask cut-outs and examples for decorating masks, and (C) the role play
cards used during the Hooded Plover life role play session (see attachments for full role play
slides/masks)

                                                                                                     6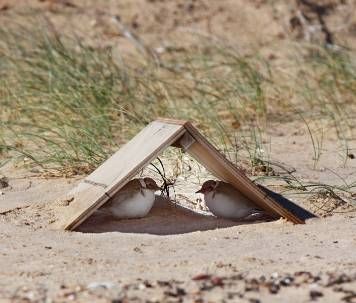
Activity 3 – Birds and Beaks
‘Birds and Beaks’ is a fun activity for students, and it provides them with the chance to
gain an understanding of a number of ecological concepts such as adaption, generalist
and specialist feeders, food webs and ecosystem balance.
Time: 1 hour (this can be adapted by dropping the middle round of the relay
race)
Age: Reception – Year 8 (although be careful of equipment and younger kids
when running: either adapt equipment, or cut out the running)
Supervision: This activity can be run with just one supervisor.
Materials:
Tooth picks *
Elastic bands *
Macaroni *
Paper clips *
Twisters ^
Bulldog clips ^
Scissors (or clothes pegs) ^
Spoons ^
Cups (either per group or per student)
Data sheets
* denotes food and ^ denotes beaks.
Background Information: Adaptation is the evolutionary process whereby a population
becomes better suited to its habitat.
Ask the class – do you know how adaptation works? Adaptations are produced in a
variable population by individuals with better-suited form/attribute (or adaption)
reproducing more successfully, that is, by natural selection. Give an example of natural
selection (there are green and brown beetles in a population, the greens ones are better
camouflage against the leafy vegetation they eat. Therefore more of the brown beetles
get eaten and there are more green beetles to breed and pass on the green gene).
Description: This activity is a fun relay race, with the goal that each team is to collect
as much ‘food’ as possible. The students are to be split into approximately 4 groups,
7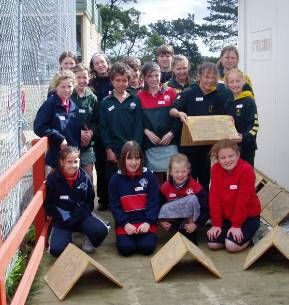
with each member being given a cup and one kind of beak (start with each group getting
one beak type each) and each group is given an activity sheet (example attached in this
kit). The food is then sprinkled in a circle and the students are given 5 minutes to
collect as much food as possible. Students must all start behind the line (in a line is
usually best) and one member from each team runs into the circle , picks up one piece
of food, carries it back and the student repeats. No hands can touch the food and
students can only pick up one piece at a time.

Once the first round has finished get the students to count up the total number of each
food type they collected during the round. Then record each team’s results on a group
data sheet.

Time for discussion! Talk about which birds (beaks) can survive on a wide range of
foods (we call these generalists) and which are a little more fussy (specialists). If a beak
collects even amounts of most food types is it a generalist. If a beak favours one food
type, it is a specialist and can only survive on that one or two types of food. Then ask
the students what might happen if a particular food was wiped out of the ecosystem? If
this food type is important to a specialist, the specialist beak will also be wiped out.
Depending on the year level and topics of study, you can also bring in the idea that
weeds or pest species are often generalists and are therefore able to survive in many
habitats.

If you have time, get back into your groups and provide each with a different beak type
and repeat the relay race. Write up the group’s results again and then discuss your
results, drawing on specific examples so students have a good understanding of the
beaks and foods for the final round. Ask questions such as which bird/beak would
survive best in a habitat with only one specific type of food? If we wanted a specific bird
to visit your garden, which type of food would be best to have there?

In the final round, either give a different beak to each group member, or let the students
choose their own beak (if you are not familiar with group it is often best to take the first
option). They should have learnt though the discussion which beak ‘eats’ which foods.

Through this exercise students have been learning about how birds have adapted their
beaks to food that occurs in their habitat. For the older year levels it important to link
this game, either now or at the beginning, to the process of adaption.

Additional Notes: A wonderful resource to use with this activity is the children’s book
‘The Best Beak in Boonaroo Bay’, by Narelle Oliver.

                                                                                              8
Activity 4 – Creating a Beach Food Web Mobile or Wall Display
This activity makes a wonderful display in the class room, either on one wall or mobiles
hanging from the ceiling.
Time: 30 minutes – 1 hour
Age: Reception – Grade 6
Supervision: This activity can be done with one supervisor, but if constructing mobiles
an extra set of hands would be of great use.
Materials:
White or coloured paper
Picture from magazines
Coloured pencils
Scissors
String or fishing line
Sticky tape
If creating mobiles you also need:
Coat hangers or sticks
Background Information: A food chain shows how nutrients and energy are passed
from organisms to organisms within an ecosystem. We begin with producers (or
autotrophs) which use the sun, via photosynthesis, to create energy. They are called
producers because only they can manufacture food from inorganic raw materials. The
second step in a food web is the herbivores (or primary consumers) which eat the
plants, followed by the omnivores and/or carnivores (both secondary consumers) which
eat plants and animals, or only animals, respectively. Each level of consumption in a
food chain is called a trophic level. However, most food chains are interconnected:
animals typically consume a varied diet, creating links between many organisms and
forming a food web. A food web is a more representative example of the complexity of
true ecosystems.
9Description: Begin by discussing what a food chain and food web are, explaining the
transfer of energy within an ecosystem. Students can then design and create their own
coastal food web either as a class, in a small group or by themselves.
If a class is creating a food web for the classroom, each student can choose (or be
given) a specific organism to create. Use your imagination to come up with wonderful
ways they can do these: a collage from magazines or use feathers the kids have
collected. Then get the kids to work together to connect their organisms with string.
This works best with kids seated on the floor, providing some ‘instructions’ to the
teacher on where to place the string.
If each student is creating their own food-web mobile, then a simpler process, such as
drawing (or colouring prepared outlined pictures) is less time consuming. A stick or coat
hanger is used at the top and string or fishing line to attached to each card/organism. It
is best to punch a hole in the top of each card (either let the students do this or have
them pre-done, depending on age and time). Then simply attach each card together
with the string. It is good to get the kids to draw out their food web first and have a
look, as these really don’t work with complex food webs.
10Activity 5 – Visiting the Beach Ages: Grade 2 – Year 12 Class size: Small group or 1 class (
It is also a good idea to look closely at the sand for Hooded Plover footprints – their
prints are often a giveaway as to the location of the nest. When a dune face is bare,
it can be very easy to see lines of Hooded Plover prints leading from the beach up the
face to a nest.
If Hooded Plovers are nesting or have chicks (may occur in spring and summer) it is
extremely important that you do not get too close to the Plovers. It is imperative that
we do not compromise the safety of the eggs or chicks when viewing the birds.
Therefore avoid times of high-tide for your own safety and to reduce the chance of
crushing a nest when walking higher up on the beach. And avoid the hottest part of
the day (mid-afternoon), particularly on hot days when the air temperature is above
25ºC. Birds that are not nesting will often be resting during this period and will therefore
be more difficult to spot. Birds that are nesting should not be disturbed during the
hottest part of the day, as this increases the chances the eggs will overheat and fail to
hatch.
Hooded Plovers nest above the high-tide mark and up into the dunes. Therefore NEVER
let students up into the dunes. If nesting, one bird will typically look like it is resting
and the other of the pair will be on the lookout. If you get close to the nest the ‘look-
out’ bird will often try to lead you away. It will stay a short distance in front of you,
feeding (or pretending to) and as you get closer it will move a little further ahead, until it
feels you are far enough from the nest, in which case it will typically fly back to where it
began. The adult on the nest will usually leave it when a person is within 50–100m of
the nest, but this varies between pairs. There are many signs that will help you tell if the
pair has chicks. These include head bobbing, rodent-run or broken-wing display; for
pictures and more detailed information visit the BirdLife Australia website
birdlife.org.au
Additional ideas from beach visit:
Draw a bird’s eye view of the beach (Reception – Grade 2)
Creating a map of the beach, include natural and man-made objects. Older students
could produce overlays of threats and develop a ‘protection zone’ (Grade 3 – Year
12).
12IN ADDITION TO THESE BASE EDUCATION SESSIONS, SCHOOLS ARE ABLE TO TAKE THINGS ONE STEP
FURTHER AND GET INVOLVED WITH THE CONSERVATION OF THEIR LOCAL BEACH-NESTING BIRDS.
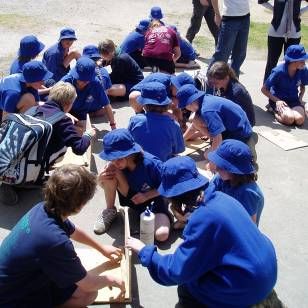
Activity 6 – Building Chick Shelters
Time: 15 – 30 minutes per shelter
Age: Grade 4 – Year 8 (although with sufficient help/supervision younger
students could also create shelters i.e. as a Reception/Year 6 buddy
activity)
Supervision: This activity needs as many helpers as possible (1 adult to every 4–6
students).
Materials (to make 1 chick shelter):
300–400mm x 400mm panel of 12 mm thick exterior plywood (x2)
wooden crossbeam 25 x 25 mm section of ‘garden stake’ (x1)
screws or nails (x6)
Hammer or drill (depending on helpers available)
Clear, waterproof outdoor decking stain
Glue
Paint (for message)
Sand from local beach (optional)
Background Information: Once Hooded Plovers are fledged (can fly), their chance of
survival is significantly increased, therefore major conservation efforts need to occur
during nesting and their first 34–35 days of life. Unlike many bird species, most
shorebirds don’t feed their young. Adults assist their chicks in finding food, but the
chicks must be up and moving about almost as soon as they have hatched. As chicks
are walking on the beach, but unable to fly, they are extremely vulnerable to predators.
They usually use their amazing camouflage to blend in with their environment, but if
chicks get caught out and are unable to make it into the dunes when danger appears,
they often crouch beside a clump of seaweed or driftwood. This is when they are
vulnerable to being trodden on or found by predators.
Chick shelters are used as an on-site conservation tool. By using chick shelters on
specific beaches (wide beaches with little natural cover) we can provide a safe location
for chicks to hide. They provide artificial shelter for chicks when disturbed, or as
13protection from extreme temperatures. Designs have been tried and tested and the
design used and presented in this kit is readily used by Hooded Plover chicks and
successfully helps to increase breeding success.
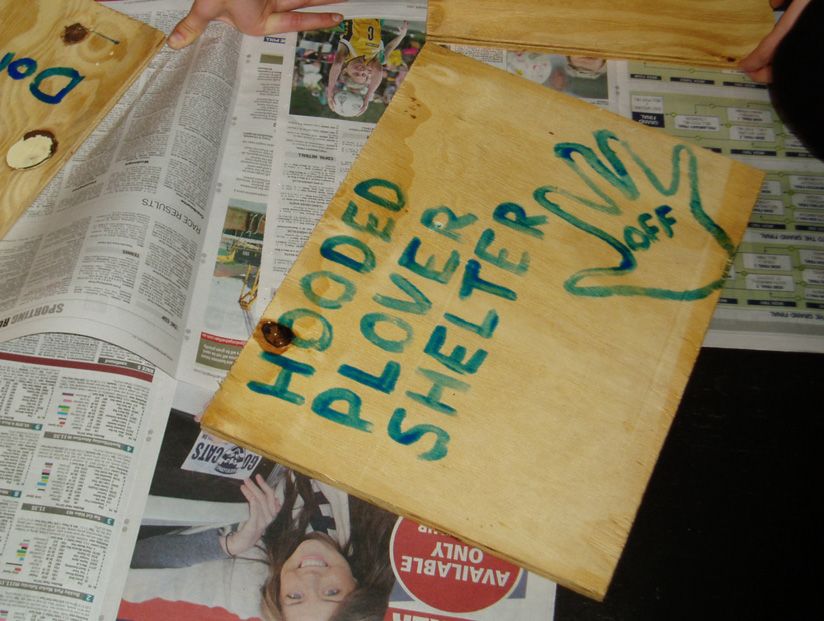
Instructions: Lay one piece of plywood on the ground and the other standing upright so
they join to create a right angle. Then lay the crossbeam on the inside of the join and
attach using screws/nails. Students can paint a message (such as ‘chick shelter, please
leave on beach’) on the INSIDE of the shelter – it is great to get the students to brain-
storm ideas for effective messages before they begin. They then paint the water-proof
decking stain on the outside of the shelter and add some glue and sand to help
camouflage the shelter. The sand is an optional step.
Note: Placement in the field is extremely important and should be undertaken only by trained local
land managers or volunteers, or by BirdLife Australia staff. However, a smaller group of students may
be invited to help with this step.
14Activity 7 – Awareness Raising Banners or Posters
Time: 30 minutes – 3 hours
Age: Any
Supervision: One or two extra helpers, depending on age group
Materials: Posters can be made simply using paper and pencils, or cardboard and
paint.
Banners are constructed on large sheets of calico and painted with fabric paint. Be
creative and use scraps of material, recycle things from school or other ideas that make
these creations a little more eye catching than usual!
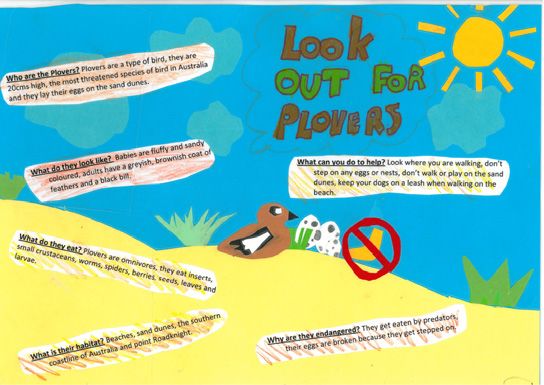
Background Information: These posters/banners can be used around the school,
township or on the beach to help raise community awareness of the Hooded Plover. Craft
ideas are fun for kids and are a subtle way for raising awareness. There are many craft
activities that can be adapted to focus on the Hooded Plover, and two that have potential
to raise awareness in the community are painting of calico bags and felt badges.
Instructions: Before beginning this exercise, discuss potential uses with school
community, BirdLife Australia, coastal land managers, local council and shop owners.
These posters could be used on the beach to inform users of nests or chicks, in shop
windows to raise general awareness, at community events or school fetes.
Students can begin with brain-storming potential conservation messages and designs.
They can then use a range of materials to create posters, signs or banners. Secondary
students can incorporate this into an art subject and use more advanced techniques.
15You can also read