Catalogue 2018 Climbing Equipment
←
→
Page content transcription
If your browser does not render page correctly, please read the page content below

Klaus Dell’Orto_Climbing Technology

                                                                                                                                                                                 | CLIMBING EQUIPMENT CATALOGUE 2018
                                                                                                                      SOUTDC1706ADEA4 _ C. Stenghel, Pian Schiavaneis, Canazei

                                                                                                                                                                                                                       CLIMBING EQUIPMENT
      Climbing Technology is a brand of Aludesign S.p.A.                         Sarl Climbing Technology - France
      via Torchio 22 I 24034 Cisano B.sco BG ITALY
      Central tel: +39 035 783595
                                                                                 Parc des Erables - 6, rue des Artisans
                                                                                 74100 Vetraz Monthoux - FRANCE
                                                                                                                                                                                                                       CATALOGUE 2018
                                                                                                                                                                                 DEUTSCH

      Fax: +39 035 782339                                                        Central tel : +33 (0)4 50493741
      International dpt. : commerciale@aludesign.it                              Mobile : +33 (0)6 20060268
      Domestic dpt. (Italy) : vendite@aludesign.it  www.climbingtechnology.com   Mail: contact@climbingtechnology.fr

Catalogo Outdoor 2018_ Copertina_A4.indd 1                                                                                                                                                                                                  01/06/2017 14:16:46
A. Orlandi / Climbing Technology
                                                                      Climbing Technology behält sich
                                                                         das Recht vor, ohne vorherige
                                                                         Ankündigung Verbesserungen
                                                                                 oder Änderungen der
                                                                               Produkte vorzunehmen.

                                                                               Im Juni 2017 gedruckt.

                                         www.climbingtechnology.com

Catalogo Outdoor 2018_ Copertina_A4.indd 2                                                 01/06/2017 14:16:46
CLIMBING PASSION:
TRUE PASSION CAN ONLY GROW.

Climbing Technology as a brand holds and celebrates 30 years of passion and experience
in the design and manufacturing of personal protective equipment. An accomplice has
definitely been the territory, at the foot of the mountains between Bergamo and Lecco,
where the mountaineering tradition is very strong, we settled here and set about developing
our skills in metalwork and mechanics.
In these 30 years we have breathed and developed an extensive know how and combined
with the latest generation of manufacturing technology it has enabled us to design
and produce devices in order to excel in the vertical disciplines: in the mountains
(mountaineering and sport climbing), in a professional environment (working at height,
working on a rope, rescue) and in a recreational environment (via ferrata and adventure
parks). The specialised diversification and constant research of new materials and new
processing techniques are essential for reaching the new goals: they allow us to create
devices that meet the most advanced technical and sporting requirements.
Every day we pursue three objectives: safety, functionality and simplicity. They are objectives
that cannot disregard the European standards, the European directives, the certification
of the products and the systems of quality management. We know that in order to excel,
we must go further, stimulating and directing the whole team, inside and outside of the
company, to collaborate in the realisation and the distribution of our devices.

We have learnt that in the mountains, as well as in some work situations, we are exposed
to serious dangers: in the context in which we operate there are hidden pitfalls that must
be carefully examined. However that on its own is not enough: those who climb must be
aware of their capabilities and their limitations. And ultimately they must equip themselves
with the appropriate equipment. Our devices are born with the objective to protect and
reduce the risk in case of an accident or a fall. All of us at Climbing Technology are aware
and every day we feel proudly committed to give confidence and security to the users of
our equipment. Always underlining the importance of the “head” of the user.

Climb safely and… have fun!
Carlo Paglioli

                                                                                                  1
P. Biagini, Ombra 8b/+, Finale Ligure   M.Pavana_ Climbing Technology

2
PRACTICAL

                                                                                                                        PRACTICAL EXPLANATIONS
EXPLANATIONS
Why this explanation?

For a long time we have wanted to include in our catalogue a practical explanation of

                                                                                                                        A - SINGLE-PITCH SPORT CLIMBING
how best to use our products. This is not intended to be a manual nor to substitute a
formal climbing course, but simply to give our customers, and friends, a summary of the
main activities involved in climbing and mountaineering.

For us, safety is a constant, absolute “must”. This attitude drives us to invent, produce
and sell products which are safe. A safe product isn’t just one which functions correctly
and which meets the legal standards: a safe product is functional, logical, ergonomic,
long-lasting, easy to use, error-proof, well-designed and attractive to look at. A product
is safe only if all its applications and advantages are explained in details and made
readily available to the user. As well as our articles, our products are sold with clear in-
structions which can be easily downloaded from our website. With the same philosophy,
in the following section, you find a practical real-life explanation of the use of many
Climbing Technology products.

                                                                                                                        B - MULTI-PITCH ROUTES
This Practical Explanations section is in three parts which describe in turn:
A) Single-pitch sport climbing (pag. 4).
B) Multi-pitch climbing (pag. 14).
C) Climbing a Via Ferrata (pag. 24).
Each chapter consists of an introduction, presents the recommended Climbing Technol-
ogy products and a series of diagrams with explanations of how best to use them.

Innovation.

                                                                                                                        C - CLIMBING A VIA FERRATA
Over the years we have brought some truly innovative products to market, and positive
feedback from climbers is a source of real satisfaction for us.
With the belay device Click Up +, we have developed a unique piece of equipment,
designed for indoor and crag climbing, that makes paying out rope a quick and smooth
process. Thanks to the V-Proof System (patent pending) the activation of the assisted-
braking system is enhanced, while the chance of making mistakes with an incorrect
handling of the rope when braking, is reduced. The belay / rappel device Alpine Up
represented a major step forward, letting you belay the leader on all types of terrain
as well as being suitable for self-locking abseiling on double ropes. The pulley / rope
clamp Rollnlock is always useful to have on your harness, in case you need to climb up
the rope or winch in an emergency or routine situation.
You see many of these products “in action” in the following pages and the descriptions
                                                                                                                        TECHNICAL FEATURES

let you understand better their functionalities and advantages.

Note.
The diagrams and explanations that follow are not exhaustive and are not intended to substitute appropriate theoreti-
                                                                                                                        PATENTS, SYMBOLS & STANDARDS

cal and practical training.

For this reason, before use, it is necessary:
• to have received appropriate theoretical and practical training through a recognised specialist course;
• to have read thoroughly the instructions for the device you are using;
• be aware of the risks inherent in climbing and employ techniques to reduce them to a minimum.

                                                                                                                   3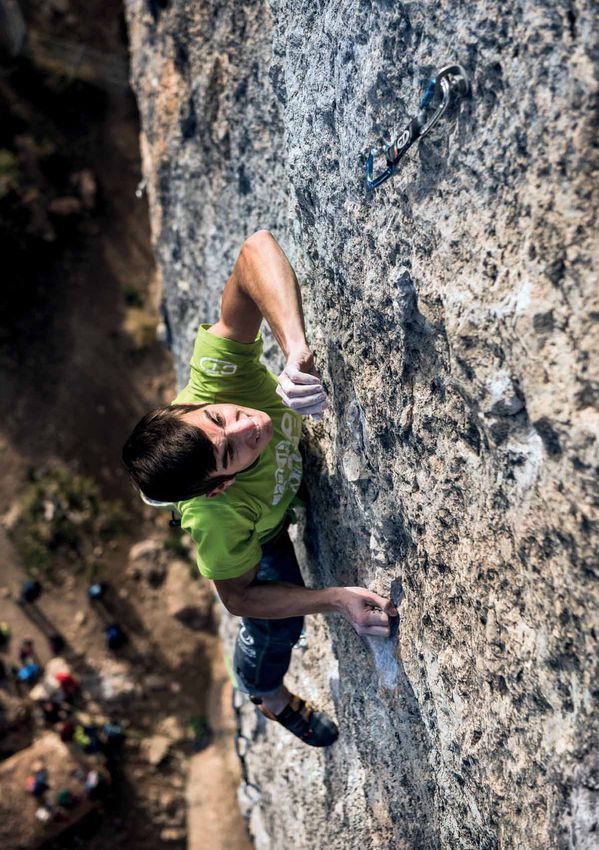
A - SINGLE-PITCH SPORT CLIMBING
    “Sport climbing” means climbing with already-existing fixed protection                            other person belays them, using a belay device, paying out the rope
    points, so as to guarantee the maximum safety in case of a fall. Most                             gradually to enable them to climb and holding the rope to stop a fall,
    (but not all) sport climbing is on single-pitch routes whose length is up                         should it occur. The leader climbs up to the top of the route, to the
    35/40 m. The routes are bolted by enthusiasts or in some cases by                                 belay/lower-off, which has a screw-gate karabiner or a ring specially
    people whose job it is to bolt the routes.                                                        for lowering-off from, through which s/he passes the rope. The belayer
    Each route consists of:                                                                           then lowers the leader to the ground using the belay device to gradu-
    • a series of fixed intermediate anchors, expansion or glue-in bolts;                             ally pay out the rope. The route can now be climbed top rope: with the
    • the end of the route and the point you lower-off from, the “belay”                              rope already passed through the lower-off, people can climb without
    or “lower-off”.                                                                                   risk of leading the route.
    To climb a route, someone must “lead” it, that means they must climb
    up the rock face, clipping the rope into the quickdraws which are
    placed from each successive fixed protection bolt. As s/he leads, the

    A1 - NECESSARY EQUIPMENT

    1) Helmet.                                                                                        5) Single rope.
    Protects your head against falling rocks and/or possible impact with                              Connects the climbers and absorbs the impact of and arrests a fall.
    the rock if you fall.                                                                             For single-pitch sport climbing a single rope is used, marked with 1 .
    2) Sport climbing harness.                                                                        6) Chalk bag.
    Used to connect the climber to the rope and supports her in case of a                             Chalk absorbs sweat on the fingers and improves the grip on the holds.
    fall or when being lowered-off.                                                                   7-8) Slings and screw-gate krabs.
    3) Belay device.                                                                                  They are useful for belaying yourself when you are threading the belay.
    Connected to the harness and to the rope, allows the second to belay                              9) Rope bag.
    the leader, paying out the rope as he climbs, holding the cord in the                             For carrying the rope to the base of the crag and contains a sheet
    case of a fall and gradually paying it out for lowering-off.                                      of cloth on which the rope can be placed on the ground to avoid it
    4) Quickdraws.                                                                                    getting dirty.
    Used to connect the rope to the fixed anchors in the rock, to arrest
    a fall.

        1 / GALAXY                              2 / ON-SIGHT                            3 / CLICK UP +               4 / AERIAL PRO SET /             5 / GRAG 9.4
         100                                    91                                     67                         NIMBLE EVO SET DY                 176
                                                                                                                      43 - 41

        6 / TRAPEZE                        7 / AERIAL PRO SG                         8 / LOOPER DY                    9 / FALESIA / TANK EVO
         178                               43                                       122                             164

    Not exhaustive information: always consult the user’s instructions of each device and the technical manuals.
4   Attention! It is essential to possess a proper technical education.
PRACTICAL EXPLANATIONS
                                                   A - SINGLE-PITCH SPORT CLIMBING

A2 - CLIMBING SEQUENCE

                                                                                     PRACTICAL EXPLANATIONS
LEADING.

The successive steps in leading a
single-pitch route are shown.

1 - Buddy check.
A checks that B has correctly con-

                                                                                     A - SINGLE-PITCH SPORT CLIMBING
nected the belay device to his har-
ness and passed the rope correctly
through the belay device. B checks
A’s knot.

2 - Leading.
B belays, paying out rope to A
who climbs up the route, clipping
a quickdraw onto each bolt and
the rope into the quickdraw.

3 - At the belay.
A has arrived at the end of the
route and has threaded the rope
through the lower-off.

                                                                                     B - MULTI-PITCH ROUTES
4 - Lowering-off.
B pays out the rope through the
belay device to lower A back down
to the ground.
                                       B       A

TOP-ROPING.

                                                                                     C - CLIMBING A VIA FERRATA
The successive steps in top-roping
a single-pitch route are shown.

1 - Climbing top-rope.
After the buddy check, B climbs the
route, removing the quickdraws as
she climbs while A progressively
takes in the rope so that she is be-
layed safely.

2 - At the belay.
B has reached the belay and is
ready to be lowered-off.
                                                                                     TECHNICAL FEATURES

3 - Lowering-off.
A pays out the rope through the
belay device to lower B back down          B
to the ground.

4 - Pulling down the rope.
A pulls down the rope by pulling
on the end B wasn’t tied to. The
rope falls down and the team can
tackle another route.
                                                                                     PATENTS, SYMBOLS & STANDARDS

                                               A

                                                                            5
A3 - PREPARING TO CLIMB
    Two people are need to sport climb, one who
    climbs (A) and the other who belays (B). Be-
    fore starting climbing, a series of actions ensure
    safety:
    • A and B choose the route to climb, making
    sure their rope is of adequate length. It must be                                              B
    at least twice the length of the route;
    • A feeds the rope into an orderly pile on the
                                                                                                                                                                              A
    rope bag, making sure there are no knots. She
    ties a knot in the end of the rope;
    • A and B put on their harnesses and helmets
    correctly;
    • A ties the rope into her harness with a figure of                                                                     CLICK
                                                                                                                                  !
    eight knot while B connects the belay device to
    his harness and passes the rope into it;
    • A and B carry out a Buddy Check.

    Buddy check.
    The Buddy Check is the last and very important
    part of preparing to climb, and the safety of the
    team depends on it:
    • B checks the belay device is functioning cor-
    rectly and A makes sure he does this correctly;
    • B checks A has tied the rope correctly to her
    harness with her figure of eight knot;
    • B makes sure A has enough quickdraws, krabs
    and slings for the climb;
    • A starts to climb, and B belays her.

    A3.1 - ADJUSTING THE ON-SIGHT HARNESS

    1                                                                 2.1                                      2.2                              2.3

    Sport climbing harnesses have only one buckle at the waist, have non-                               belt through the buckle (Fig.1);
    adjustable legs loops and are comfortable to wear. It is important when                             • move the SRS buckle to fix the free end of the waistband (Fig. 3.1÷3.2);
    buying a harness to choose the right size for your body.                                            • make sure the harness is snug without being over-tight and that the
    Before climbing:                                                                                    waistband and leg loops are at the right height (Fig. 2.1÷2.3).
    • make sure you put on correctly the leg loops and waistband;
    • tighten the waistband by pulling on the free end of the belt to pull the

    SRS (Size Regulation System).                                              3.1                                                        3.2
    The On-sight harness features the innovative SRS (Size Regulation Sys-
    tem) which allows optimal adjustment of the harness. Move the SRS
    buckle (Fig. 3.1) to fix the free end of the waistband and improve fitting
    to body shape. Tuck the free end of the belt into the loops provided on
    the waistband for this purpose (Fig. 3.2).

    Not exhaustive information: always consult the user’s instructions of each device and the technical manuals.
6   Attention! It is essential to possess a proper technical education.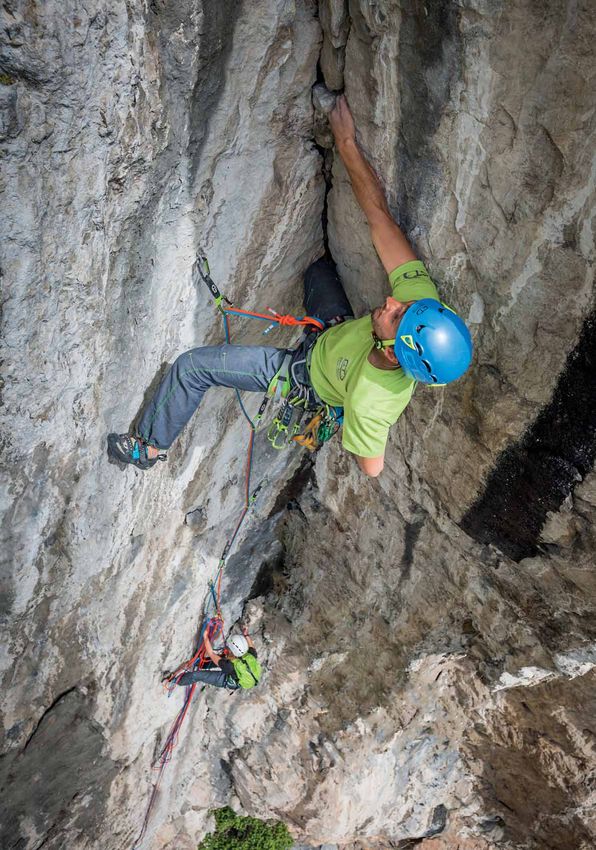
PRACTICAL EXPLANATIONS
                                                                                               A - SINGLE-PITCH SPORT CLIMBING

A3.2 - TYING THE FIGURE OF EIGHT KNOT

                                                                                    cm  2
                                                                                  min. 1
                                                                                                          The figure of eight knot is the safest
                                                                                                          and easiest to tie knot for attaching the
                                                                                                          rope to the climber’s harness. To tie it
                                                                                                          follow the steps shown in the diagram to
                                                                                                          the left making sure that the rope pass-

                                                                                                                                                         A - SINGLE-PITCH SPORT CLIMBING
                                                                                                          es through both the waist loop and the
                                                                                                          loop joining the leg loops. Make sure
                                                                                                          the knot is tied correctly and at least 10-
                                                                                                          12 cm of free end of the rope is left stick-
                                                                                                          ing out.

A3.3 - TYING THE KNOT IN THE END OF THE ROPE
                             min. 12 cm

                                                                                                                                                         B - MULTI-PITCH ROUTES
                                                   The knot in the end of the rope is tied
                                                   so that the rope can’t accidentally run
                                                   through the belay device while lower-
                                                   ing off if you haven’t made sure that
                                                   the rope is at least twice as long as the
                                                   length of the route: don’t forget it!

A3.4 - PREPARING THE CLICK UP BELAY DEVICE

                                                                                                                                                         C - CLIMBING A VIA FERRATA
                                                                                                                                                         TECHNICAL FEATURES
                                                                                                                                                         PATENTS, SYMBOLS & STANDARDS

Installation. Insert a screw-gate krab into the harness’s belay loop,         Functional test. Hold the free end of the rope with one hand and with
open the Click Up’s lever and insert the rope into the Click Up mak-          the other pull the climber’s rope upwards. Make sure the Click Up
ing sure you have it the right way round (follow the symbols). Insert the     blocks the rope, making the distinctive “Click” sound.
screw-gate krab through the device then screw up the gate.

                                                                                                                                                 7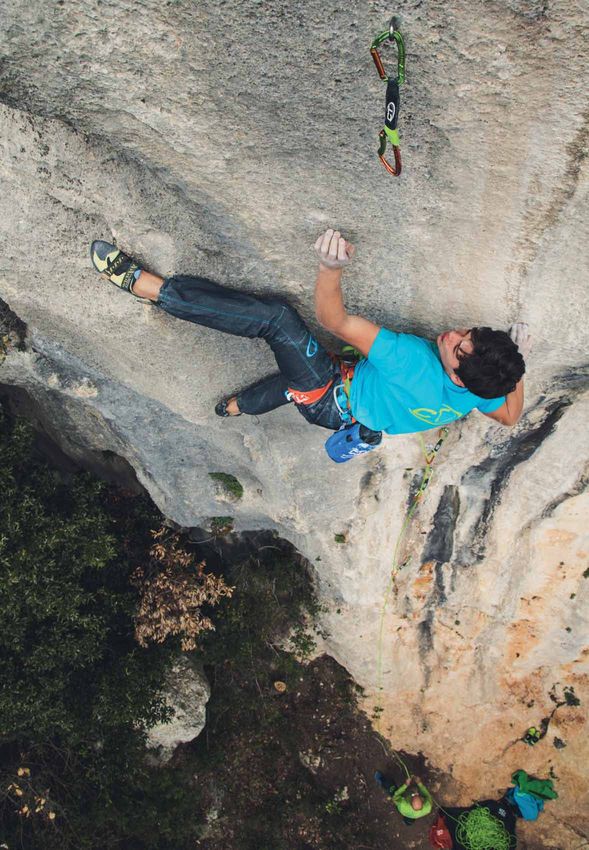
A4 - BELAYING THE LEADER
    Belaying the leader involves paying out rope through the belay device
    to the leader (A), holding the rope in case of a fall and then lowering
    the leader back to the ground once she has climbed the route. This lets
    the leader climb the route in safety.
    To belay well, the belayer (B) should:                                                                                                                                 A
    • be able to use the belay device properly;
    • belay themselves to the ground/nearby crag if they are much lighter
    than the leader (A) or if there is a risk of them falling off an exposed
    ledge from which they are belaying;                                                                                         B
    • pay constant attention to the leader (A) as she climbs and stand as
    close in as possible to the rock;
    • never let go of the free end of the rope;
    • not pay out to the climber (A) more rope than is necessary and be
    ready to take-in slack rapidly if needed;
    • be ready to hold the companion (A) is she falls and lower her to the
    ground as indicated in the instructions of the belay device used.

    When sport climbing it is common to use a belay device with assisted
    braking to belay the leader. Belay devices with assisted braking are
    popular because, in the case of a fall, they automatically lock the rope
    provided the free end of the rope is held. The devices currently on the
    market do not always work perfectly in the following situations:
    • paying out rope quickly to the leader without the rope jamming;
    • they are dangerous if the rope is inserted incorrectly.
    Our Click Up belay device overcomes these disadvantages, thanks to
    its special design:
    • it lets you pay out rope very quickly, without the device jamming;
    • it is very safe because, even if the rope is inserted incorrectly, it still
    lets you arrest a fall and lower the climber to the ground.
    Click Up can be used with single ropes of diameter Ø 8.6-10.5 mm.

    A4.1 - CLICK UP: PAYING OUT ROPE AND HOLDING A FALL

                                                                                                                                                  DANGER

    Paying out rope.                                  Taking-in rope.                                       Holding a fall.
    With one hold pull the climber’s                  With the lower hand pull the                          With the lower hand hold on tight to the rope, moving your hand down-
    end of the rope so it flows through               rope through the Click Up, with                       wards. The Click Up will automatically block the rope, making the dis-
    the Click Up and with the other                   the other pull the climber’s rope                     tinctive “Click”. Important! When belaying you must always hold onto
    make a free loop and feed the                     downwards towards the device.                         the free end of the rope and never let go of it.
    rope into the device.

    Not exhaustive information: always consult the user’s instructions of each device and the technical manuals.
8   Attention! It is essential to possess a proper technical education.
PRACTICAL EXPLANATIONS
A - SINGLE-PITCH SPORT CLIMBING
A4.2 - RELEASING THE ROPE A4.3 - BELAYING TOP ROPE
PRACTICAL EXPLANATIONS
A - SINGLE-PITCH SPORT CLIMBING
B - MULTI-PITCH ROUTES
To start paying out again rope to the climber after she has hung on Use the Click Up in locking mode. With one hand pull the free end of
the rope or after a fall, keep holding the free end of the rope with one the rope through the Click Up, with the other feed the rope from the
hand and with the other hold the Click Up and lift it upwards, so as to climber into the device.Using the device in this way is very safe be-
return the belay karabiner to its initial position. This unblocks the de- cause the climber is constantly belayed with the rope in tension and
vice and you can pay out rope again. the Click Up in locking mode.
A4.4 - LOWERING A4.5 - SAFE EVEN IF USED
THE OTHER CLIMBER INCORRECTLY
C - CLIMBING A VIA FERRATA
ALWAYS SAFE!
Even if the rope is in-
serted incorrectly into
the Click Up, thanks to
the special V-shaped
braking groove, the de-
vice remains effective
for belaying! This is an
important feature because
it combats and reduces
the frequent cases of mis-
taken use that occur with
TECHNICAL FEATURES
other belay devices and
makes the Click Up ideal
for climbing schools, be-
ginners and indoor climb-
ing gyms.
PATENTS, SYMBOLS & STANDARDS
Lowering the other climber. Lowering the other climber even if used incorrectly.
Take in rope and lock the Click Up. Keeping one hand all the time on If the rope is inserted incorrectly (the wrong way round, or the Click Up
the free end of the rope, with the other hold the Click Up as shown in upside-down) the device still permits you to lower the climber safely to
the diagram and with the palm of the hand push the corner of the de- the ground. Keeping firmly hold of the free end of the rope, position
vice downwards. Feed the free end of the rope into the device. it in the braking groove and slowly release rope towards the Click Up
When the climber is on the ground, unblock the device. until the climber is on the ground.
9A5 - LEADING
“Leading” is when the climber (A) climbs up the route using the natural
hand- and footholds present in the rock and clipping the rope into the
quickdraws clipped onto the bolts to protect herself in case of a fall. In
order to climb safety the leader (A) should:
• be correctly tied into the rope and the belayer (B) should belay at-
tentively;
• be aware of her own capabilities and know the appropriate climbing
techniques;
• be able to clip the quickdraw onto the bolt and then the rope into the
quickdraw, as correctly as possible;
• be able to thread the belay.
A
The following diagrams indicate some correct approaches to
placing quickdraws and clipping the rope into the quickdraw
(not exhaustive).
A5.1 - CLIPPING TECHNIQUES
Correct clipping with the right hand, using the finger to steady the low-
er karabiner which has a curved gate to facilitate clipping.
B
Correct clipping with the left hand, using the hand to steady the lower
karabiner. Place the rope so that it comes up though the karabiner and
out towards the climber (see A5.2).
Not exhaustive information: always consult the user’s instructions of each device and the technical manuals.
10 Attention! It is essential to possess a proper technical education.PRACTICAL EXPLANATIONS
A - SINGLE-PITCH SPORT CLIMBING
A5.2 - POSITIONING THE QUICKDRAWS
PRACTICAL EXPLANATIONS
1 2 It is necessary to place the quickdraw so that the gate is away from the direction the
climber is climbing and then clip the rope so that the rope comes up through the kara-
biner and out towards the climber. If these rules are not followed it is possible that the
quickdraw gets turned over and/or during a fall that the rope becomes unclipped.
In the following pictures:
1) Correct situation, the gate is away from the direction of climbing and the rope come
up through and out of the karabiner.
2) Potentially dangerous situation: because the climber’s rope is running in the same
A - SINGLE-PITCH SPORT CLIMBING
direction as the gate of the krab.
3) Real danger: the karabiner is back-clipped and, due to the climber changing direc-
tion, accidents could be caused (Figs. 3.1-3.2).
4) Real danger, becuase the karabiner is back-clipped and the gate is facing the same
direction as the rope.
3 3.1
B - MULTI-PITCH ROUTES
DANGER
In situation 3.1 a mistaken clip
3.2
(back-clip) and the subsequent
change of direction can cause
C - CLIMBING A VIA FERRATA
the quickdraw to turn over and
DANGER the krab attached to the bolt to
unclip in a fall.
In situation 3.2 a mistaken clip
(back-clip) causes the quickdraw
to be lifted up and a subsequent
change of direction can cause
the quickdraw’s sling to become
unclipped.
TECHNICAL FEATURES
4 4.1 In situation 4.1 you see one
of the most probable risks of
back-clipping. In a fall the
rope can open the gate of
the quickdraw, leading to the
rope unclipping itself from the
krab.
DANGER
PATENTS, SYMBOLS & STANDARDS
11A6 - THREADING THE BELAY
At the end of the route the climber will find the belay, normally consist-
ing of two bolts joined by a chain and with a karabiner from which you
can lower-off. In order to be lowered off, the climber must pass the
rope through the karabiner, ask the belayer to take in tight and then
be lowered.
At certain crags, instead of a karabiner for lowering-off, you find a
closed ring or a “maillon rapide” which you cannot open to insert the
rope. In this case you need to “thread the belay”.
To do this safely you need:
- two screw-gate krabs;
- a 60 cm sewn sling or a rope sling.
Take care! If you don’t know exactly how to do this, it’s advisable
not to make up your own methods because you could risk your life! It A
would be preferable to attach the rope to the ring with a screw-gate
krab or with a quickdraw and lower-off.
B
A6.1 - MAKE A LARKSFOOT KNOT
Use a larksfoot knot to join a sewn or rope
sling to the belay loop of your harness. Attach
the other end of the sling with a screw-gate
krab to the lower-off and you are ready to pro-
ceed with threading the belay.
A6.2 - TIE A FIGURE OF EIGHT KNOT
The figure of eight knot is used, after threading
the rope through the lower-off ring, to connect
the rope to the belay loop on the harness us-
ing a screw-gate krab.
Not exhaustive information: always consult the user’s instructions of each device and the technical manuals.
12 Attention! It is essential to possess a proper technical education.PRACTICAL EXPLANATIONS
A - SINGLE-PITCH SPORT CLIMBING
A6.3 - STEPS IN THREADING THE BELAY
PRACTICAL EXPLANATIONS
1 2
In the diagram on this page we see the
following situation.
A has arrived at the belay and finds a ring
to lower off without a karabiner to lower-off
from.
A tells B he has arrived at the lower-off and
has to thread the belay; he reminds B she
A - SINGLE-PITCH SPORT CLIMBING
should keep belaying him.
A connects a sling to his belay loop with a
larksfoot knot and connects the sling with a
screwgate krab to one of the strongest points
of the lower-off.
A can now hang on this sling and he asks B
to give him several metres’ slack. He makes
a loop in the rope.
B - MULTI-PITCH ROUTES
A threads the loop through the lower-off ring A makes a figure of eight knot at the end of
and pulls towards himself the doubled-over the loop and connects the loop to his har-
rope, until he has about 40 cm more rope ness with a screwgate krab. He does up the
than the length of sling he is hanging frome. gate.
3 4 5
C - CLIMBING A VIA FERRATA
TECHNICAL FEATURES
A asks B to take in tight the climbing rope, A sunties the end of the rope tied to his har- A checks that: the rope that pass through the
so that he can check that he has correctly ness and unthreads it from the lower-off ring. lower-off ring and tied with the figure of eight
PATENTS, SYMBOLS & STANDARDS
threaded the rope through the lower-off ring. B is holding him on the rope. knot correctly, the screw-gate krab is load-
The rope, tied directly into his harness with ed lengthways and that its gate is correctly
the new figure of eight knot and the larks- closed. At this point A, with B belaying him,
foot sling, must be slack, otherwise it’s not can unclip the sling with the larksfoot knot
a proper test! and let himself be lowered to the ground.
13B - MULTI-PITCH ROUTES
Multi-pitch routes have more than one “pitch”, that is, they consist To climb each single pitch of a multi-pitch route, one climber must
of more than one rope-lengths between successive stances (belays). lead the pitch while the other, the second, belays him or her. When
There are two types of multi-pitch routes: he reaches the end of the pitch, the leader must construct a stance
• trad/”alpine”. These normally follow lines of weakness up the cliff and belay himself to it and then bring up the second. Then one of the
(cracks, arêtes, corners, etc) and usually terminate at the summit of a two climbers will lead the next pitch belayed by the other and so on
mountain. Typically you find some pitons for protection but you need until the end of the route. At the end of the ascent, depending on the
to uses nuts and Friends in addition for protection. exact nature of the face and the route, you descend on foot along a
• “modern”/sport. These climb areas of the cliff where the rock is footpath or you abseil back down to the base of the route.
more compact (slabs, overhangs, etc) and finish where the climbing
becomes easier and less interesting and are equipped with fixed ex-
pansion or glue-in bolts.
B1 - NECESSARY EQUIPMENT
1) Helmet. Vital in a mountain setting to protect you from rocks fall- 7) Daisy chain and slings. The daisy chain is used to belay yourself
ing from above and/or possible impact with the rock if you fall. and to build a stance. The slings are used to belay yourself, to extend
2) Mountaineering harness. Fully adjustable and offering good pieces of protection or to create anchors from rock spikes or threads.
lumbar support. 8) Hammer and pitons/pegs. Hammered into cracks and holes in
3) Belay device. Allows the second to belay the leader with two half- the rock, pegs can be running belays (runners) or be part of the belay/
ropes, the leader to belay the second as she climbs up and the abseil stance.
descent. 9) Friends and nuts. Placed by hand into cracks or holes in the
4) Screw-gate krabs. For building stances, belaying, and abseiling. rocks, they can be running belays (runners) or be part of the belay/
5) Quickdraws. For connecting the rope to the anchor points in the stance. After use they are removed.
rock, for holding a fall. 6) Pulley / rope clamp. For winching/recovering the second or
6) Twin/half-ropes. Normally two ropes are used, for increased loads and for climbing up the rope.
safety in case of falling stones (if one rope is damaged, you still have 8) Rucksack. Compact and light, for transporting equipment to the
the other one) and permit alternate clipping of protection points; you base of the face and for taking on the route with shoes, food, water,
can also belay two seconds as they climb; you can make long abseils. clothing, etc.
1 / ORION 2 / WALL 3 / ALPINE UP / 4 / CONCEPT / 5 / AERIAL PRO SET /
99 BE UP WARLOCK HMS FLY-WEIGHT EVO SET
89
71 / 73 53 43 - 47
6 / ROUTE 8.2 7 / MULTI CHAIN EVO 8 / THUNDER 9 / FRIENDS 10 / ROLLNLOCK 11 / GRANITE
176 121 119 117 76 170
Not exhaustive information: always consult the user’s instructions of each device and the technical manuals.
14 Attention! It is essential to possess a proper technical education.PRACTICAL EXPLANATIONS
B - MULTI-PITCH ROUTES
B2 - CLIMBING SEQUENCE
PRACTICAL EXPLANATIONS
LEADING THROUGH.
These are the successive steps in
climbing a multi-pitch route:
1 - Leader climbs.
After the Buddy Check, B belays A
A - SINGLE-PITCH SPORT CLIMBING
and gradually pays out the rope to
him as he climbs, placing quick-
draws (or protection, if there are
no fixed anchors) and clipping the
rope into them
2 - Building a stance.
A has reached the end of the pitch,
constructs the stance, belays him-
self to it, takes in the ropes and
puts the rope through the belay A
device.
3 - Bringing up the second.
A belays as B climbs up to the
stance. Once at the stance, B be-
B - MULTI-PITCH ROUTES
lays himself to it.
4 - The next pitch.
B takes over as leader and leads
the next pitch while A belays him. B
ABSEIL DESCENT.
C - CLIMBING A VIA FERRATA
These are the phases of an abseil
descent from a multi-pitch route.
1 - Leader abseils.
A and B have belayed themselves
to the stance and arranged the
ropes through the abseil point. A
abseils down the doubled ropes,
while B remains at the stance and
belayed to it.
2 - Second abseils.
A has belayed himself to the
TECHNICAL FEATURES
stance and has threaded the rope
to be pulled down through the ab-
seil point. B abseils down the dou-
bled ropes.
3 - Pulling the ropes down.
B, pulling on the rope previously
threaded through the abseil point,
pulls the ropes down.
4 - Preparation for next abseil.
A prepares himself for the next ab-
PATENTS, SYMBOLS & STANDARDS
seil while B remains belayed to the
stance.
15B3 - BELAYING ON MULTI-PITCH SPORT ROUTES
“Modern” multi-pitch sport climbing routes tackle a face’s most com- full attention, the Alpine Up will still arrest the fall immediately provid-
pact areas (slabs, overhangs, etc) and often present hard moves and ed the belayer is holding the free ends of the rope. The fall is arrested
higher grades. Such routes can be found at low-level or in high- semi-statically and this requires that the anchors are able to withstand
mountain settings (“Big Walls”). Such routes are have fixed bolts for heavy loads, and for this reason the Click Up mode is advised only
protection and stances equipped for abseiling off. The leader on such on sport routes with fixed bolt protection. The Alpine Up, when used
routes is traditionally belayed using a belay plate or commonly in to belay the leader in the Click Up mode, lets you pay out rope easily
Continental Europe using an “Italian” or “Munster Hitch”; in order and fluidly and to hold the leader during resting on the rope without
for such belaying to work, the dead ends of the ropes must always getting tired.
be firmly held downwards. The belayer must pay constant attention to The Alpine Up can be used with two twin-/half-ropes (Ø 7.3÷9
the leader and always be ready to hold the ropes firmly downwards in mm) or with a single rope (Ø 8.6÷10.5 mm), thus covering the en-
case of a fall. e in contatto visivo tire range of possibilities present and permitting the climbing team to
We have introduced a new belay device for modern multi-pitch sports chose the best solution.
routes, the belay/abseil device Alpine Up, which when used in the
Click Up mode, removes this need for always having to hold the
ropes firmly. In the case of sudden falls and/or the belayer not paying
B3.1 - ADJUSTING THE ASCENT HARNESS
1 2 3
Harnesses for multi-pitch routes have four fastening buckles, so that • pull the straps through the buckles to adjust the sizes of the waist-
they are completely adjustable and can be adapted to the climber band and leg loops (Fig. 1);
wearing more or less clothing, according to the time of year and the • check that the harness fits snugly without being over-tight. You
route. They also provide good lumbar support which is important for should be able to slide a hand between the leg loop and your thigh
long stints belaying. (Fig. 2) and the harness should sit at the correct height;
Before climbing you should: • tie both ropes to the harness with a figure of eight knot (Fig. 3).
• put on correctly the waistband and leg loops;
B3.2 - BELAYING AT THE STANCE.
1 2 3 4 5
The climbing ropes are normally used to attached yourself to the be- For increased safety it is advisable to tie a figure of eight into the other
lay. With one rope make a clove hitch in the karabiner at the central rope (Fig. 4÷5, see pag. 12 for how to tie the knot) and clip this into
point of the belay (Fig. 1÷3). This knot allows easy adjustment of the the belay, to create a second belay point.
distance between you and the stance.
Not exhaustive information: always consult the user’s instructions of each device and the technical manuals.
16 Attention! It is essential to possess a proper technical education.PRACTICAL EXPLANATIONS
B - MULTI-PITCH ROUTES
B3.3 - ALPINE UP - CLICK UP MODE
PRACTICAL EXPLANATIONS
BELAYING THE LEADER
The diagram at the side show the Alpine Up Important! Before starting climbing on a new
being used in the Click Up mode on a sport pitch, the leader’s rope should be clipped into a
multi-pitch climb: quickdraw or krab clipped onto the belay, so that
A climbs the route, placing quickdraws onto the in case of a fall the Alpine Up is pulled upwards:
bolts and clipping the rope into the quickdraws. B if you don’t do this, the Alpine Up may not arrest
belays to the central point of the belay and belays a leader fall.
A, paying out the rope carefully as she climbs.
A - SINGLE-PITCH SPORT CLIMBING
A
B - MULTI-PITCH ROUTES
1 2 3
Installation. Clip the krab into your harness’s Functional check. Hold the free ends of the rope
belay loop. Insert the loop of rope into the Alpine with one hand and with the other pull the climb-
Up, referring to the symbols on the device (Fig. 1). er’s ropes upwards, make sue the device locks the
Insert the krab through the “Click Up Mode” hole ropes and makes a “click” (Fig. 3).
so that the ropes are inside it (Fig. 2).
C - CLIMBING A VIA FERRATA
TECHNICAL FEATURES
4 5 6
Paying out rope. With one hand feed the dead Paying out rope after a fall. To start to pay out
end of the rope into the Alpine Up, and with the rope again after a fall or when the leader first
other pull the rope through the device (Fig. 4). starts climbing, hold the dead end of the rope
PATENTS, SYMBOLS & STANDARDS
with one hand and with the other hold the Al- B
Holding a fall. With one hand hold tight the pine Up as shown and push it forwards to be able
dead end of the rope, moving your hand down- to pay out rope. (Fig. 6). Important! At all times
wards. The Alpine Up will block the rope, making keep a firm grip on the free end of the rope.
the distinctive “Click” (Fig. 5).
17B4 - BELAYING ON TRAD/”ALPINE” ROUTES
“Trad” routes are one of the oldest and most rewarding ways of climb- pay out rope easily, quickly and without the rope jamming. You must
ing a mountain. The setting is beautiful, often isolated and wild. The remember that, in order for the device to effectively brake the ropes,
routes normally follow the natural lines of the face (cracks, arêtes, the free or dead ends must always be held downwards. The belayer
corners, etc) and generally terminate at the summit of a mountain or must pay constant attention and be ready, in the case of a fall, to hold
pinnacle. In the mountains objective dangers multiply and you need a the ropes and arrest the fall.
better all-round preparation as well as good route-finding skills to find The Alpine Up can be used with two twin-/half-ropes (Ø 7.3÷9
the start of the route or the descent. You may find some pegs placed mm) or with a single rope (Ø 8.6÷10.5 mm), thus covering the en-
by the first ascensionists, and you will have to place nuts and Friends. tire range of possibilities present and permitting the climbing team to
On such routes the leader is traditionally belayed with a belay plate. chose the best solution.
On the Continent of Europe, the Italian/Munster hitch is often used.
It can be difficult to pay out rope rapidly with belay plates and similar
devices since the device moves towards the krab, increasing the fiction
on the rope you are trying to pay out.
The Alpine Up, in the Dynamic mode, overcomes this drawback: its
design ensures that it doesn’t move nearer to the krab, allowing you to
B4.1 - POSITIONING QUICKDRAWS ON ROCK PEGS
As described in section A.5.2 (pag. 11), the rope
1
must be clipped correctly into the quickdraws, but it is
equally important to position the quickdraws correctly
onto the anchors fixed into the rock. You have to take
special care with rock pegs so that the karabiners of
the quickdraw are loaded correctly: if the eye of the
peg is horizontal, the quickdraw should be placed so
that its gates are both facing outwards.
Important! The example cases illustrated are not ex-
haustive.
OK!
In the following situations:
2 2.1
1) Quickdraw placed correctly with the gates of
the krabs facing outwards.
2) Quickdraw placed dangerously. The gate of
the lower krab is facing the rock and could be
DANGER held open in case of a fall. The axial load a kara-
biner can hold is substantially reduced if the gate
K! is open and the karabiner could fail (Fig. 2.1).
AC
CR 3) Quickdraw placed dangerously. The gate of
the upper krab is facing the rock: it certain cas-
es, the krab can jam in the eye of the peg and be
subject to increased loading. This reduces the ax-
ial load the karabiner can bear and in the event
of a fall it can break (Fig. 3.1).
!
3 3.1 CK The conclusions are:
CRA
• using quickdraws whose two krabs have their
gates facing the same way makes placing the
quickdraw simpler and reduces the variables
which could lead to the dangerous situations il-
DANGER
lustrated. All Climbing Technology quickdraws
are supplied with their krabs oriented in this way.
• the quickdraws should be placed with their
gates facing away from the rock, to avoid the
dangerous situations shown.
Not exhaustive information: always consult the user’s instructions of each device and the technical manuals.
18 Attention! It is essential to possess a proper technical education.PRACTICAL EXPLANATIONS
B - MULTI-PITCH ROUTES
B4.2 - ALPINE UP - DYNAMIC MODE
PRACTICAL EXPLANATIONS
BELAYING THE LEADER
In the diagram on the right, use of the Al- Important! Before starting climbing on a new
pine Up in Dynamic Mode is illustrated on pitch, the leader’s rope should be clipped into a
an “alpine”/trad route: quickdraw or krab clipped onto the belay, so that
A climbs, progressively hammering pegs into the in case of a fall the Alpine Up is pulled upwards:
rock with her hammer and placing quickdraws if you don’t do this, the Alpine Up may not arrest
onto them. She clips the ropes in alternately to a leader fall.
the quickdraws.
B, belayed to the stance, pays out the rope care-
A - SINGLE-PITCH SPORT CLIMBING
fully to A.
A
B - MULTI-PITCH ROUTES
1 2 3
Installation. Clip the krab into your harness’s Insert the krab through the“ Dynamic Mode” hole
belay loop. Insert the loop of rope into the Alpine so that the ropes are inside it (Fig. 2). The system
Up, referring to the symbols on the device (Fig. 1). is now ready for use (Fig. 3).
C - CLIMBING A VIA FERRATA
TECHNICAL FEATURES
B
4 5
Paying out rope. With one hand Holding a fall. With one hand
feed the dead end of the rope in- hold tight the dead end of the
PATENTS, SYMBOLS & STANDARDS
to the Alpine Up, and with the oth- rope, moving your hand down-
er pull the rope through the device wards (Fig. 5). Important! At all
(Fig. 4). times keep a firm grip on the free
end of the rope.
19B5 - BRINGING UP SECONDS
After the leader reaches the stance he brings up the second(s). It is A belay plate is traditionally used for bringing up one or two seconds
possible to climb as a two (one second, both half ropes are tied into on a multi-pitch route. The traditional belay plate has the following
his harness) or as a three (two seconds, each tied onto one of the half drawbacks when belaying two seconds:
ropes). • if one second is hanging on the rope, you can’t take in rope for the
The correct sequence for bringing up seconds is: other second;
• A arrives at the stance, sets up the belay, belays himself to it and • it is hard to lower a second after they have hung on the rope when
tells B and C that he no longer needs belaying. (UK: “I’m safe!”) the belay plate is used in the “guide” mode - the belay plate is locked.
• A takes in the ropes and inserts them correctly into the belay device. Our new belay devices Alpine Up and Be Up overcomes these prob-
In the “guide mode” to be able to belay two seconds, this is attached lems in the Guide mode. Their designs mean:
directly into the stance and not to the climber’s waist; • you can keep taking in rope to one second when the other is hang-
• A shouts to B and C that he is belaying them and that they can start ing on his rope;
climbing after releasing themselves from the belay; • you can lower a second hanging on the rope. This requires only the
• A, belaying B and C from above, takes in the ropes as they climb. use of one additional krab on the device, no slings are needed.
B5.1 - TYPES OF BELAYS
The belay attaches the climbing team
to the rock when the leader or second
is climbing, when they are both at the
stance or when they abseil down and
is made of at least two anchor points
which should be connected together.
On the left are shown some common
types
yp of stances.
B5.2 - ANGLE AT THE CENTRAL POINT OF THE BELAY
71% F 57% F 52% F
100% F
100% F
57% F
120°
52% F
71% F 60°
90°PRACTICAL EXPLANATIONS
B - MULTI-PITCH ROUTES
B5.3 - ALPINE UP - GUIDE MODE
PRACTICAL EXPLANATIONS
BELAYING THE SECONDS
The diagram to the right shows the use of A is belayed to the central point of the stance
the Alpine Up in Guide mode to belay two and takes in the rope to B and C, maintaining
seconds: a slight tension in the rope to avoid giving loops
B and C are each tied to the end of one of the of slack. With the Alpine Up he can belay two
half ropes and as they climb they remove the seconds at the same time and each second is in-
quickdraws placed by A. dependent of the other.
A
A - SINGLE-PITCH SPORT CLIMBING
STOP!
1 2
OK
!
B - MULTI-PITCH ROUTES
1 2 3
Installation. into the hole marked of the Alpine Up, so that the
Make a loop of the two ropes and insert it into ropes are below it, correctly inserted into the Al-
the Alpine Up, following the symbols on the de- pine Up (Fig. 2). B
vice. Insert a pear-shaped HMS krab through the Functional check.
hole marked,at right angles to the lever, with the Pull the climber’s ropes downwards, to confirm
rope inside (Fig. 1). Clip a Concept SGL screw- the system locks correctly (Fig. 3).
gate krab into the central point of the stance and
C - CLIMBING A VIA FERRATA
A
TECHNICAL FEATURES
C
4 5 6
Belaying 1 or 2 seconds. perpendicular to the Alpine Up. Hold the free
Use both hands to take in progressively the rope ends of the ropes tightly in one hand and with
through the Alpine Up (Fig. 4-5). Important! the palm of the other hand push the HMS krab
PATENTS, SYMBOLS & STANDARDS
During use keep a firm hold of dead ends of the upwards. The lever created with the second krab
ropes. helps you to unlock the ropes and/or lower the
Releasing the rope when in tension. Insert second (Fig. 6).
above the HMS krab a karabiner (A) from a
quickdraw in the hole shown with its the long side
21B6 - ABSEIL DESCENT
After reaching the top of the route, the team abseil (normally back the rope through the descender to make sure that it has been installed
down the same route they have just climbed) down the ropes using correctly and can support his weight, he unclips his sling/daisy chain
a belay/abseil device. Abseiling needs care, good knowledge of the from the belay and starts abseling down, remembering which of the
technique to be used and good organisation. You abseil using your two ropes has to be pulled at the next stance below to pull down the
two climbing ropes joined with a knot and threaded through the ab- ropes.
seil anchor point. There are various devices for abseiling and all require the use of a
The following sequence is used for abseiling: back-up Prusik knot. This knot lets you take your hands off the rope
• both/all three climbers reach the stance of the last pitch, and the to untangle the ropes and stops the descent if you let go of the rope
stance is equipped with a ring for abseiling; (stonefall, illness, etc) but tying this knot takes time and it can be fiddly
• each climber, using a daisy chain or a sewn sling, belays themselves to get right and use easily.
to the stance; The Alpine Up belay/abseil device resolves this problem. When used
• the climbers untie from the climbing ropes, being careful not to for abseiling in the Click Up mode, a back-up Prusik knot is not
drop them(!); needed. The device’s design mean that the ropes remain locked until
• one rope is threaded through the abseil point’s ring/maillon and the descent lever is moved to permit the descent.
the other rope is joined to it with an overhand knot. A knot is tied at Alpine Up, in Click Up mode, presents the following advantages:
the end of each rope and they are thrown down from the stance. • lets you use both hands to untangle the ropes;
• one of the climbers clips his descender into his harness/daisy chain, • automatically arrests the descent if you inadvertently let go of the
and backs the descender up with a Prusik knot. Only after taking in ropes (stone fall, illness, etc.).
B6.1 - CONNECTING THE MULTI CHAIN EVO
Multi Chain Evo is an Innovative daisy
1 chain with loops made of the new single-la- 2
24 kN
yer Dyneema webbing, specific for long ro-
utes and for mountaineering in general. The
particular design of the Multi Chain Evo gua-
rantees a load-bearing capacity of 24 kN:
24 kN
from one end to the other, for each interme-
diate loop or connecting to or more interme-
24 kN
diate loops. The construction out of single
24 kN
loops reduce the possibilities of error or of
the daisy chain coming out of the connector,
as can happen with traditional daisy chains.
24 kN
24 kN
Once installed correctly into the harness, this
daisy chain must be connected to an an-
24 kN
chor point, or to another device, using an
EN 12275 connector correctly inserted into
the upper loop or into any of the intermedia-
24 kN
te loops. To shorten the Multi chain Evo, use
a connector inserted into one of the interme-
diate loops.
24 kN
3 4
To attach the Multi Chain Evo to the harness use only the special knot the body until the knot is tight. Check the knot is correctly tied. Using
which is now explained: thread the bottom loop of the daisy chain the special knot the breaking strength of the Multi Chain Evo remains
through both harness loops as shown and pass it through the tie-in equal to 24 kN.
loop; thread the top loop through the bottom loop and pull it away from
Not exhaustive information: always consult the user’s instructions of each device and the technical manuals.
22 Attention! It is essential to possess a proper technical education.PRACTICAL EXPLANATIONS
B - MULTI-PITCH ROUTES
B6.3 - ALPINE UP - CLICK UP MODE
PRACTICAL EXPLANATIONS
AUTOBLOCKING ABSEIL
The diagram on the right shows the Alpine using the descent lever and the free ropes. As
Up in Click Up mode being used for an auto- needed, thanks to the Alpine Up’s autoblocking
blocking abseil descent: function, he can use both hands to untangle the
A is abseiling with the Alpine Up connected to ropes or remove knots.
the Multi Chain. He controls the rate of descent
A - SINGLE-PITCH SPORT CLIMBING
B - MULTI-PITCH ROUTES
A
1 2 3
Installation. Taking in slack.
Attach the Alpine Up to the daisy chain at least Take in slack so the rope is holding your weight
20 cm above your harness and lock it as indi- (Fig. 3).
cated (Fig.1-2).
C - CLIMBING A VIA FERRATA
A A
C
B B
TECHNICAL FEATURES
4 5 6
Unclipping from the belay. Low fiction abseil descent.
Keeping one hand on the free ends of the rope, In certain circumstances it can be hard to abseil
with the other hand unclip the daisy chain/sling down: if the ropes are hanging freely in space, if
from the stance (Fig. 4) and clip it onto your har- the climber is very light, etc. In these cases it is
ness’s gear loops. necessary to reduce friction in the Alpine Up by
Abseil descent. inserting an additional karabiner (C) in the hole
PATENTS, SYMBOLS & STANDARDS
Always keeping one hand on the free ends of the shown, passing the ropes inside the krab, screw-
ropes, with the other open the descent lever (A) ing up the gate and then descending as described
and press on it and rotate the Alpine Up upwards above and shown (Fig. 6).
(B) a shown. Feed the free ends of the rope into
the device to descend (Fig. 5).
23B7 - BELAY / RAPPEL DEVICE BE UP
Be Up is a multiuse belay / abseil device with innovative and compact • attachment ring is part of body, easily identified to prevent errors
design (registered design), suitable for use with half, twin and single of attachment;
ropes for mountaineering, multi-pitch sport climbing and trad routes. • plasticised steel cable, so you can‘t drop the BE-UP and to limit its
Intuitive and easy to use, the Be Up has a modular braking system to movement during belaying.
optimise braking with all types of rope and allow the auto-locking and
independent belaying of two seconds. Be Up must be used with EN 892 dynamic ropes: half and twin ropes
Extreme flexibility permits: Ø 7.3÷9 mm; single ropes Ø 8.5÷10.5 mm.
• effective belaying of the leader. The particular shape of the Be Up‘s Weight: 85 g. Standard: EN 15151-2:2012 TYPE 4.
body allows rope to be paid out fluidly, rapidly and without jams;
• while belaying the leader on a multipitch route using two ropes, the
Be-Up lets you pay out one rope while the other is locked-off, Be Up
is the only such device that lets you do this;
• effective, modular braking of the rope: the “V” notches are spe-
cially designed to guarantee better braking control when arresting a
fall, abseiling or bringing up seconds;
• the bringing-up of one or two seconds, with auto-locking and each
second being belayed independently of the other (GUIDE MODE).
A) Braking side in stan-
The Be Up‘s special shape and the attachment ring built into the body
C B dard mode. B) Braking
allow you to bring up one or two seconds using twin or half ropes with
D groove. C) Rope loop in-
Ø 7.3 mm. You can continue to bring-up one second while the
sertion hole. D) Braking
other is hanging with their rope locked-off in the Be Up;
side in reduced mode. E)
• the unlocking of the rope and lowering of one free-hanging sec-
E A Hole for belaying karabi-
ond, without difficulty, with twin or half Ø 7.3 mm ropes. Be Up is
ner. F) Hole for suppor-
the only such device that lets you do this, simply by inserting a normal
ting karabiner at the re-
HMS carabiner in the unlocking hole;
lease. G) Plastic coated
• rapidly switching from taking-in (GUIDE MODE) to belaying the
F steel connection cable.
leader, for leading through;
Risk of death! The con-
• abseiling descents, keeping the ropes separate. The “V” notches
nection cable has no re-
allow you to effectively control the rate of descent, without twisting G
sistance to traction, never
the ropes.
use as protection.
Construction details/specification:
• light, extremely functional form, for the highest performance;
• hot-forged body for strength;
B7.1 - BE UP - BELAYING THE LEAD CLIMBER
Installation. Feeding the rope. Holding a fall.
Clip the belay karabiner to the belay loop on the harness (if present, With one hand, bend the free end of Hold the free end of
open the lever and insert the loop). Attach the Be Up to the karabiner the rope and feed it through the Be the rope firmly in one
using the connection cable. Place a loop of rope through the C part of Up and with the other pull and feed or two hands and pull it
the Be Up, referring to the symbols and clip the rope to the karabiner as the climber’s rope through the devi- downwards.
shown. Close the karabiner gate: the system is now ready to use. ce. Always hold the free end of the ro-
pe in one hand.
Not exhaustive information: always consult the user’s instructions of each device and the technical manuals.
24 Attention! It is essential to possess a proper technical education.PRACTICAL EXPLANATIONS
B - MULTI-PITCH ROUTES
B7.2 - BE UP - BELAYING THE SECONDS
PRACTICAL EXPLANATIONS
The picture on the side shows an example of to the anchor point, and the speed of descent is
a climber being lowered with the Be Up de- adjusted using the supporting carabiner for the
vice. A is lowering B with the Be Up connected release.
1 2 3
A
A - SINGLE-PITCH SPORT CLIMBING
Installation (Fig. 1). Connect a wide base HMS kara- Belaying 1 or 2 seconds.
B - MULTI-PITCH ROUTES
biner to the top of the anchor and insert it in the E hole (Fig. 2-3) Use both hands to take in cor-
of the Be Up. Place a loop of rope through the C part of rectly the rope of the seconds climbers
the Be Up, referring to the symbols. Clip the belay karabi- (climber side) through the Be Up. Atten-
ner through the rope and the connection cable as shown. tion! Always hold both free ends of the
Close the karaniner gate. ropes firmly in your hands and taut.
5 6 7
C - CLIMBING A VIA FERRATA
B
TECHNICAL FEATURES
Releasing and gradually lowering of a se- your harness with a screwgate karabiner.
cond (Fig. 5). Using Be Up it’s possible to relea- Connect the karabiner to the lanyard. Clip the Be
se and lower a second in a progressive way, even Up to the karabiner through the connection ca-
under tension and free hanging. Insert an HMS ble. Place a loop of rope through the C part of
karabiner in the hole F. Hold firmly in one hand the Be Up, referring to the symbols and clip the
both ropes and push the karabiner in the F hole rope to the karabiner as shown. Close the kara-
upwards, this, without turning the hole will create biner gate.
an extremely convenient lever that will allow you Apply tension to the prusik knot in order to re-
to release the ropes and/or lower the climbers. main suspended on the rope. With one hand hold
Abseiling (Fig. 6-7). Before abseiling you must: firmly the free end of the rope, than release the
attach yourself to the anchor with a lanyard that karabiner of the lanyard. Manage the prusik knot
is attached to your harness in a safe way; prepa- in one hand so that it does not tighten around the
PATENTS, SYMBOLS & STANDARDS
re the rope for the abseil making sure it is not tan- rope and with the other hand control the speed of
gled and there is a knot in the end of the ropes; descending by accompanying the free end of the
make a prusik knot on the rope and connect it to rope towards the device.
25B8 - PULLEY / ROPE CLAMP ROLLNLOCK
Ultra-light pulley / rope clamp designed for work, rope climbing maneuvers, re-
scue and self-rescue situations. Main technical features:
• mobile side plates for the rope or on sling placement; A
• spring operated cam for use as a rope ascender;
• sliding lock for use as a pulley; B C A) Mobile side plate; B) Fi-
• ideal for the crevasse rescue; D xed side plate; C) Bushing;
• it allows the hauling of light loads; D) Connector hole; E) Lo-
• developed to work also on wet or dirty ropes; E
cking cam; F) Sheave po-
• it can be used to adjust the positioning on webbing or daisy chain. F sition lever; G) Pulley; H)
To be used with ropes EN 1891/EN 892 Ø 8÷13 mm and webbing 10÷16 mm G Sheave position pin.
width.
Weight: 80 g. Standards: EN 12278:2007, EN 567:1997. H
B8.1 - LOCKING MODE B8.2 - HAULING PULLEY MODE
Up
Alto
aut
ben
iba STOP!
STOP!
Max
4 kN
g g
Use. This device slides freely upwards and locks in position. To ascend Use. The device connected to the anchor point allows the rope to sli-
a rope, pull downwards parallel to the rope. de in one direction, and locks in the opposite direction.
B8.3 - SIMPLE PULLEY MODE
1 2 3 4 5
LLNLOCK
LLNLOCK
LLNLOCK
LLNLOCK
AA
AA
AA
AA
AA- DDD
AA- DDD
AA- DDD
AA- DDD
RO
RO
RO
RO
-Y
-Y
-Y
-Y
Y Y Y Y
g
g
Installation (Fig. 1-4). If you wish to switch from hauling pulley mo- Use (Fig. 5). With the cam locked in the open position, the device al-
de to simple pulley mode, move the sheave position lever until it en- lows the rope to run freely in either direction. Make sure the device
gages the pin. Attention! When doing this, hold the rope from the de- works properly.
vice with one hand.
Not exhaustive information: always consult the user’s instructions of each device and the technical manuals.
26 Attention! It is essential to possess a proper technical education.You can also read