CHAINSAW TRAINING PROGRAM - Revision 1.0 SWANNANOA VOLUNTEER FIRE DEPARTMENT www.svfd.net
←
→
Page content transcription
If your browser does not render page correctly, please read the page content below
CHAINSAW TRAINING PROGRAM
             Revision 1.0
                PART 1

  SWANNANOA VOLUNTEER FIRE DEPARTMENT

               www.svfd.net

                    1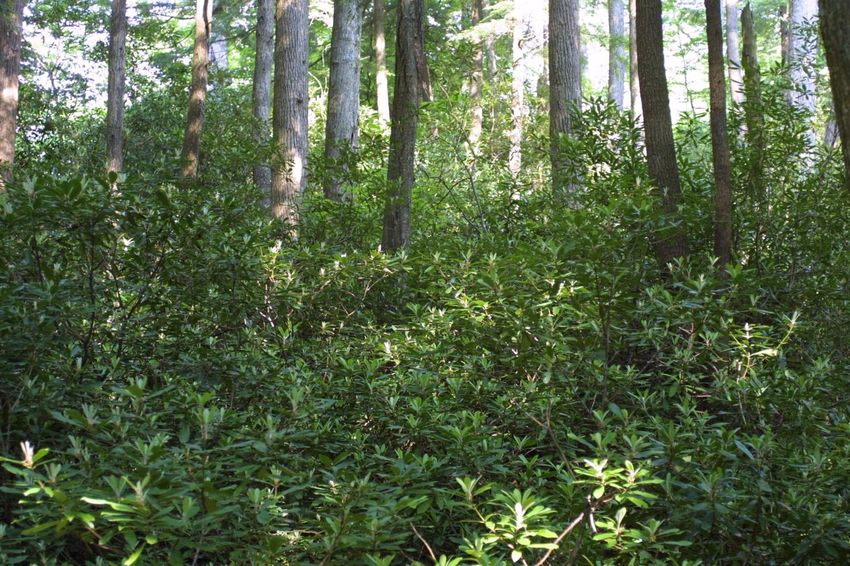
Section 1; Introduction
                                         Chainsaw use during wildland fire fighting operations and storm
                                 clean-up is one of the single most dangerous tasks that can be assigned to
                                 any person. Many firefighters, public works personnel, and home owners
                                 are injured and killed every year while operating chainsaws. With proper
                                 training, experience and an increased state of awareness you greatly reduce
                                 your chances of being injured or killed. This manual is intended to be an
                                 introductory guide to the proper use and maintenance of the chainsaws
                                 employed at the Swannanoa Fire Department. Though this manual will not
                                 teach you the skill and awareness
                                 that comes with ongoing training
                                 and experience, it will present
you with the basics of chainsaw operation.

Safety
                                                       Safety is the number one priority when operating a
                                                chainsaw. Regardless of other factors you should always wear
                                                proper PPE. Even in a situation that will only take seconds or
                                                minutes to complete, it can only take seconds to be seriously
                                                injured or killed during while operating saw. PPE is just as
                                                important as it is with any other hazardous situation that we
                                                encounter. You would not enter a structure fire without proper
                                                turnout gear, or a dive rescue without proper SCUBA gear and
                                                you should not operate a chainsaw without the correct gear.

                                                         Every year experienced and inexperienced saw
                                                 operators are killed and seriously injured. According to the U.S.
                                                 Consumer Products Safety Commission there were over 30,000
                                                 chainsaw injuries in 2007. More than 36% were to the legs and
                                                 knees. It is estimated that the average chainsaw injury takes
110 stitches and can cost $5,600.00 for medical care. It is estimated that in 2008 the cost will be over $12,000
per injury. This brings the cost of chainsaw injuries to over $400,000 per year. The loss of production and loss
of quality of life for the injured cannot be adequately quantified but, may in fact be the single largest cost.

                                                        2
There are 69,000 loggers in the United States today and the cost of
equipping them all with one pair of chaps at an estimate of $75.00 a pair
would be almost 5.2 million dollars. We could only try to imagine how
many people in the US operate a chainsaw without proper PPE. There are
few situations where safety has a more immediate payback than in both
the logging industry and fire and rescue itself.

Safety is number one; we live by that premise, operate by it, and train by
it. Safety has no holiday and this is one situation where we should never
let our guard down. Even if it takes longer to prepare for the job than to
do the job we have saved ourselves thousands of dollars and unthinkable
amounts in the quality of life.

Checklist of Personal Safety Considerations and Attitude
• How do I feel about this sawing assignment?
• Am I exercising sound judgment and awareness?
• Is my attitude influencing me to go against my better judgment (gut feeling)?
• Is my mind on my work project or activity?
• Do I have self-confidence?
• Am I overconfident?
• Am I doing this against my will?
• Is peer pressure a factor?
• Am I professional enough to decline the assignment and ask for assistance?
• Do I have all of the required PPE and sawing equipment to do the job safely? Am I committed to using the
PPE and equipment correctly?
• Am I complacent?
• Am I violating any safe operating
procedures?
• Do I feel hurried or unusually
stressed to get the tree on the ground
or bucked?
• Have all options been considered and
discussed with others?
• Am I in an unfamiliar environment
and timber type?
• Do I watch out for my coworkers,
contractors, and the public?

                                                       3
PPE for Operating a Chainsaw
                                                     Hard hat – The department issued hard hat protects you
                                                    from falling branches, limbs and anything the saw may kick up
                                                    towards your head. In addition to the hard hats issued by the
                                                    department you may see helmets with a screen and hearing
                                                    protection attached.

                                                    Ear protection – Ear protection is essential
                                                   while operating the saw. Some sawyers pull one
                                                   ear protector away from the ear or wear one ear
                                                   plug to listen for sounds the tree will make while
                                                   sawing. This is not reccomended as long term
                                                   exposure to loud sounds will
                                                   cause hearing loss.

     Eye protection – While sawing you will have burning embers, branches, saw
     dust, bar oil and leaves/needles seemingly always coming at your face and
     your eyes in particular. Only use eye wear that is ANSI Z87.1 certified
     (including Oakley sunglasses) when using the saw.

     Long Sleeve shirt – When using saws you must protect your arms from
     debris; this can be accomplished with your yellow Nomex shirt, bunker coat,
     or flannel type shirt.

     Gloves – The most common place to receive burns, cuts and scrapes is your
     hands. Make sure they are protected by gloves at all times, whether you are
     running the saw or sharpening the teeth.

     Long pants - Ensure you have long pants (green Nomex, bunker, or jeans) on
     while operating a saw.
     If wearing bunker pants chaps will also be worn as the bunker paints will not
     provide the protection to legs and waist as chaps will.

     Boots – You must wear footwear designed to prevent injury due to falling or rolling
     objects and objects piercing the soles. Heavy-duty, cut-resistant or leather, 8-inch-high
     laced boots with nonskid soles are required for chain saw use.

     Chaps – Protect the operator from saw cuts to the legs. Chaps have a nylon shell covering
     multiple layers of loose Kevlar fiber. The chaps should be kept clean and must not be stored in
     compartments with gas and oil. When chaps become saturated with oil, bar oil, and gas they
     should replaced do to the flammability during a wildland fire.

                                                     4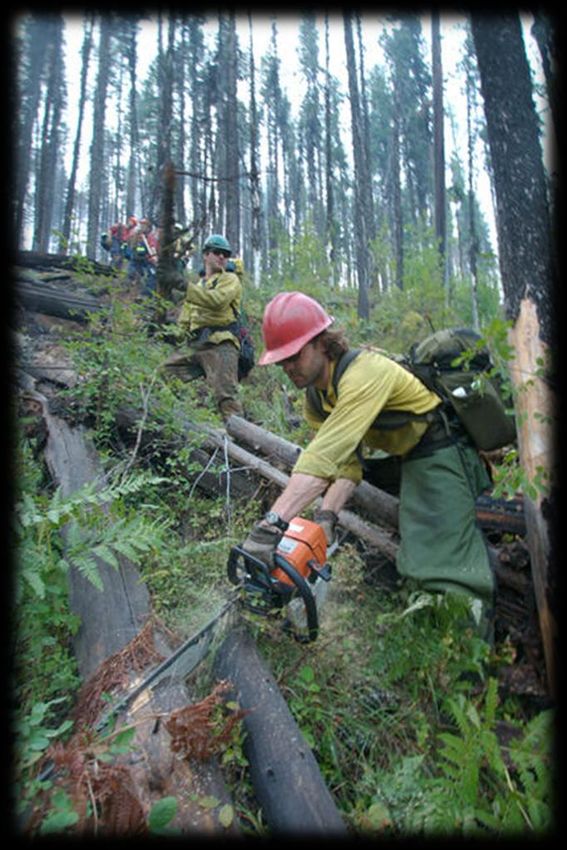
How do chain saw chaps protect the user when a chain saw strikes chain saw
chaps?
Kevlar fibers first resist the cut, and then are pulled into the chain saws drive
sprocket, slowing and quickly stopping the chain (approximately five seconds
or less).

If the chap surface or pad is cut, it cuts the Kevlar fibers. If another cut occurs it
will only pull out the Kevlar strands that have been previously damaged,
resulting in increased chance of injury. When a cut occurs the chaps should be
inspected by the Safety Officer and if need be taken out of service.

                                        Chaps are only sewn along the edges to
                                       ensure the maximum amount of fabric will
                                       pull out to clog the chain and sprocket. A back-coated
                                       nylon shell covers the Kevlar protective pad inside the
                                       chaps. The shell resists water, oil, and abrasions. The
                                       protective pad consists of five layers of Kevlar. Kevlar is an
                                       Aramid fiber similar to the Nomex material used in
                                       firefighter’s clothing.

                                       When chain saw chaps are exposed to temperatures higher
                                       than 500 degrees Fahrenheit, the nylon shell may melt, but
                                       the protective Kevlar pad will not burn.

                                     Chain saw chaps need to be properly adjusted and worn
                                     snug to keep them positioned correctly on the legs. Proper
fit and correct length (two inches past the boot top or clear to the instep) maximize protection.

Inspection and replacement
Chain saw chaps need to be inspected and replaced when appropriate. Replace chain saw chaps
when:
 a. The outer shell has numerous holes and cuts. Holes in the outer shell allow bar oil to be
deposited on the protective pad. The oil acts as an
adhesive, preventing fibers in the pad from moving
freely, and decreasing protection. Holes and cuts
are indicators of near misses or improper use. Never
allow a moving chain to touch the chaps.
 b. Wood chips and saw dust are evident in the
bottom of the chaps.
 c. Repairs have stitched through the protective pad.
Machine or hand stitching the protective pad
prevents the fibers from moving freely, decreasing
protection.

                                                   5
d. Cleaning has been improper. Detergents with bleach additives decrease protection by
compromising fiber integrity. Do not bleach or machine wash or dry chain saw chaps.
e. High-pressure or machine washing has destroyed the protective pad.
f. The chaps have a cut in the first layer of yellow Kevlar that is more than one inch long.

7. Caring for chain saw chaps

Treat your chain saw chaps as a CRITICAL piece of safety equipment. Keep them as clean as
possible. Appropriate and timely cleaning reduces the flammability of the chaps and keeps your
clothing cleaner. Do not use your chaps as a chain stop.

8. Cleaning chain saw chaps

Hose and brush off chain saw chaps to remove dirt. Do not machine wash or machine dry chain
saw chaps.
Use Citrosqueeze, a commercially available citrus-based cleaning product, to clean chain saw
chaps. Citrosqueeze has been tested and approved by DuPont for cleaning Nomex and Kevlar.
Citrosqueeze must be diluted before use.

a. For light soiling, use a Citrosqueeze solution in a spray bottle, mixing 1 part Citrosqueeze
concentrate to 10 parts water. Spray solution on the area to be cleaned and brush the solution
into the chaps with a bristle brush. Wait one-half hour, thoroughly rinse the chaps with cold
water, and allow them to air dry.

b. For heavy petroleum contamination, soak chain saw
chaps in Citrosqueeze solution for a minimum of four
hours, overnight if possible. Brush the chaps with a
bristle brush, rinse them thoroughly with cold water,
and allow them to air dry.

Many pairs of chain saw chaps can be cleaned in a single
soak tank. Use 10 to 15 gallons of solution in a soak
tank.

A United States manufacturer for Citrosqueeze is:
Emco Industries
No. 118–2930 Norman Strasse Rd.
San Marcos, CA 92069
Phone: 888–727–3230

                                                 6
9. Repairs
Clean all chaps before repairing them. Repair cuts and holes in the outer shell as soon as
possible to prevent the protective Kevlar pad from becoming contaminated with bar oil and
petroleum products.
When repairing damage to the chaps’ nylon shell, use a commercially available product called
Seam Grip. Seam Grip provides a flexible, waterproof, and abrasion-resistant patch that will
prevent petroleum products from contaminating the protective Kevlar pad.
 Remove chain saw chaps from service if they have a cut longer than one inch in the top layer
of Kevlar.

To repair holes and tears in the nylon shell:
a. Cut a piece of notebook or printer paper that extends about two inches beyond the edge of
the damage.
b. Slip the paper inside the hole or tear so the paper lies on top of the protective Kevlar pad.
c. Lay the chaps on a flat, level surface and press the nylon shell down onto the piece of paper.
d. Squeeze Seam Grip onto the paper and onto the sides of the tear so that there is good
coverage on all sides of the tear or hole.
e. Allow the patch to dry for at least 12 hours before using the chaps. Seam Grip is available
through outdoor retailers.

All chain saw operators and swampers WILL wear chaps.

                                                7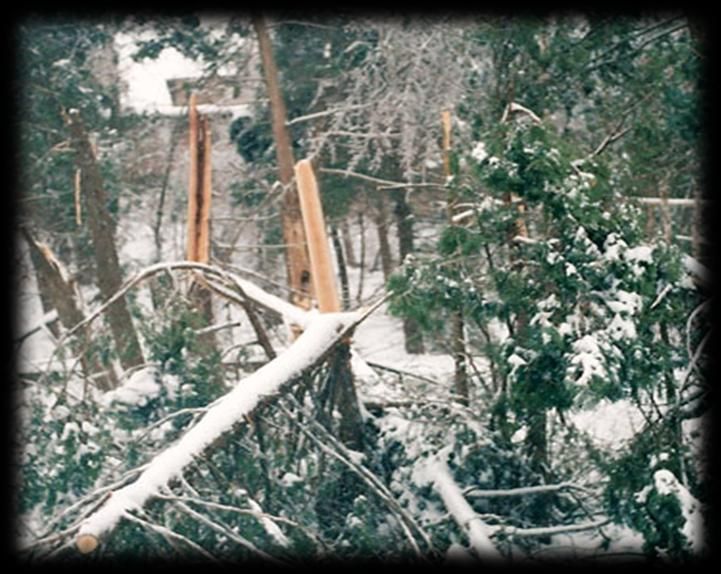
Parts of the Chainsaw:
It is very important to know the parts of a chainsaw so you will be able to fix small problems
that occur(i.e. Your chain jumping off the bar or tighting the chain). Any other problems will be
routed to the equipment maintance personal of Swannanoa fire Dept. If you don’t know how
to fix it properly ask for assistance or take it out of service and report it on the portable
equipment repair sheet.

                                                8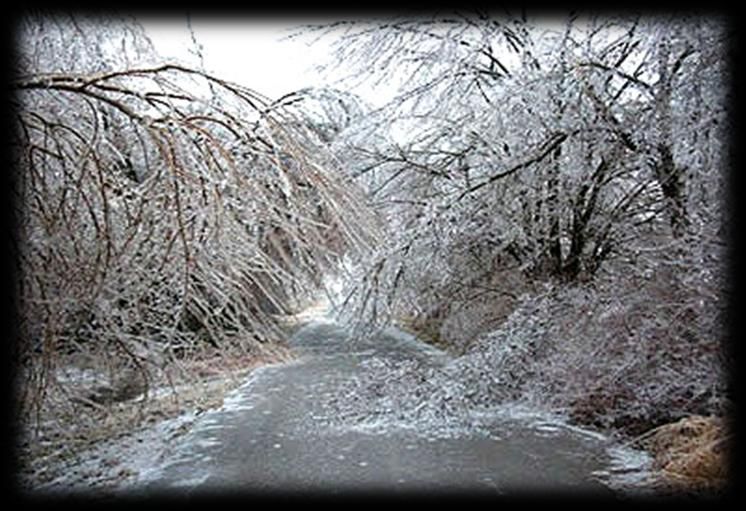
• Bar studs—Hold the bar and chain sprocket             • Throttle trigger—Controls the speed of the
cover in place.                                         engine.

• Front and side chain tensioner—Moves the              • Throttle interlock—Prevents the throttle from
guide bar to maintain proper tension on the             being activated unless it is depressed.
saw chain.
                                                        • On/off switch—Turns the saw on and off.
• Chain sprocket—The toothed wheel that
drives the saw chain.                                   • Choke—Used for starting a cold saw.

• Chain brake—Stops the saw chain if it is              • Air filter cover—Holds the air filter in place
activated by the sawyer’s hand or by inertia            and covers the carburetor.
(during kickback).
                                                        • Air filter—Prevents dirt, dust, and sawdust
• Clutch—Couples the engine to the chain                from entering the carburetor.
sprocket when the engine is accelerated above
idle speed.                                             • Fuel filter—Prevents dirt and other
                                                        contaminants from entering the saw’s
• Chain catcher—Helps reduce the risk of the            carburetor (not shown).
saw chain contacting the sawyer if the chain
breaks or if the chain is thrown off the bar.           • Oil and fuel caps—Seal the oil and fuel tanks.

• Starter grip—A rubber or plastic handle               • Muffler—Reduces exhaust noise.
attached to the starter pull rope.
                                                        • Spark arrester—Prevents hot sparks from
• Bumper spikes (dogs)—Hold the saw steady              leaving the muffler.
against wood.
                                                        • Spark plug—Ignites fuel in the power head.
• Handlebar—Used to hold the front of the
saw.                                                    • Carburetor adjustments—Chain saws have a
                                                        two stage carburetor that provides fuel to the
• Hand guard—Activates the chain brake and              engine in any position that a saw may be held.
prevents the sawyer’s hand from contacting the
chain.                                                  The carburetor has three adjustments:
                                                        —Idle speed sets the speed at which the saw’s
• Gunning marks—Used to determine the                   engine will run by itself.
planned direction of the tree’s fall based on the       —Low-end speed controls the mixture of air
undercut.                                               and fuel on the first half of the throttle.
                                                        —High-end speed controls the mixture of air
• Throttle handle—Used to hold the rear of the          and fuel on the second half of the throttle.
saw.

The high- and low-end adjustments should be made by a qualified saw mechanic. Improper
adjustment can result in poor operation or severely damage the chain saw. If the saw is not running
well for you report it on the portable equipment sheet and let the maintenance person diagnose the
problem.

                                                    9
The Chain Brake:
The chain brake is a very important part of the chainsaw and sawing operations. As with chaps
and other equipment the brake is for your safety. While starting and moving around with the
saw running the brake should always be engaged.
In rough terrain and storm damage where debris covers the ground it is extremely hazardous
to move around with a running saw. Many firefighters have been seriously injured by losing
their footing and falling on the running saw. While moving from task to task in short distances
always engage the chain brake. If traveling long distances turn the saw off and carry it in a safe
manner.
How a chain brake works:
Engaged Kickback injury to the
Disengaged face, no protection or
Handle to rear Handle to front helmet.
All chain saws used in fire and rescue (wildland or structure) should be equipped with a chain
stopping system designed to reduce the risk of injury in certain kickback situations. The chain
brake is designed to stop the rotation of the chain if activated by the operator’s hand or by
inertia if the saw kicks back with sufficient force. In some working positions, the chain brake can
be activated by inertia, stopping the chain within fractions of a second. It is very important to
keep the correct hand position on the top bar of the saw with the thumb underneath the bar
and not resting on top. If a kickback situation occurs all you would have to do is roll your wrist
forward to engage the brake. You learn more about kickback in a later section.
Warning chain brakes will not eliminate all risk of kickback injury!!!!!
10The Chain and Bar:
The Bar – There are two types of bars that we use. The sprocket nose bar and the solid nose bar.
The solid nose is more common on the smaller saws that we use for ventilation.
The sprocket nose has a sprocket that reduces friction at the front of the saw.
A. Guide Bar Maintenance:
The bar can be maintained by first removing it from the power head and holding it at eye
level to determine if it is clean and free of obstructions where the chain passes through.
Spin the sprocket both directions to make sure that is will spin freely. You can apply
lubrication if necessary to the sprocket via the hole on the side where the sprocket is
located.
Most guide bar problems develop in the bar rails and are caused by:
• Incorrect chain tension
• Lack of lubrication
• Improper cutting techniques
• Normal wear
Look for several rail conditions when performing daily maintenance on your saw. These
conditions can be corrected if they are caught early. If they are ignored, they will destroy the
bar or lead to cutting problems.
Poor rail conditions may prevent cutting straight or matching cuts on larger material. In
addition, the chain may be thrown because the chain tension is harder to control.
• Rails are worn down and the groove becomes shallow. If the groove is too shallow and the tie
straps do not touch the rails, replace the bar.
11• The outside edges of the rails develop wire edges. Use a bar dressing or flat file to remove
them.
• The rail is worn low on one side. This causes the chain to cut at an angle. The bar will have to
be ground on a specialized bar grinder. You may need to take the bar to a dealer or to a trained
saw mechanic if your unit doesn’t have a specialized bar grinder. Swannanoa fire and rescue
does not have a bar grinder. Report the problem on the portable equipment repair sheet and
the maintenance department will replace or have the bar repaired.
12Saw Chain Components:
Saw chain— The most common types of saw
chain cutters are chipper, chisel, and
semichisel.
Saw chain is made up of several parts that
work together and must be properly
maintained for maximum performance and
safety. The cutting corner is the part of the
saw chain that does the cutting. The saw chain
has left- and right-hand cutters so that the
saw chain will cut evenly through the wood.
The depth gauge (or raker) determines the
depth of the cut. The cutting corner side
plates sever the cross grains. This is the hardest part of the work. The top-plate chisels and
removes the severed wood fibers, creating the kerf.
1. The three most common types of saw chain cutters used are:
a. Chipper: The most versatile cutter type. Chipper
chain is the easiest to file and will tolerate dirt and dust.
Chipper chain cuts smoothly and is well suited for most
wildland fire chain saw operations.
b. Chisel: The most aggressive cutter type. Chisel comes
in both round and square ground types. The round
ground chisel chain requires the proper size round file
for proper sharpening. It is designed to be used in
production type felling for cutting clean wood.
It is not recommended for brushing or limbing because
of the potential for kickback. This type of chain will dull rapidly in dirty cutting
conditions like those that can be found in fire line conditions. The square ground chisel
chain requires a double bevel, hexagon, or single bevel file to sharpen it.
13c. Semichisel: A less aggressive cutter type than a chisel cutter. A
round file is used with a file guide when filing semichisel chain. The
semichisel cutter is more tolerant of dirt and dust and stays sharp
longer than the other cutters. Low-kickback chain is the most
desirable chain for training inexperienced sawyers. The chain cuts
smoothly and is ideal for cutting brush, small-diameter material,
dimensional lumber, house logs, and other materials that aren’t
normally cut with chain saws. Low kickback chain is available with chipper, chisel,
and semichisel cutters. Less aggressive cutting angles and features added to the
depth gauge and drive links provide lower kick-back response.
2. Other chain parts:
a. Tie strap: Holds the parts of the saw
chain together.
b. Drive link: Fits in the bar groove so
the bar can guide the chain, and into the
chain sprocket so the power head can
pull the chain around the bar. The drive
link also draws oil from the oiler in the
power head into the bar groove to
lubricate the bar and chain. If the drive
links are not well lubricated the chain can
fuse to the bar due to the intense heat.
2. Cutter sequence:
a. Standard (full-comp): This chain has a cutter sequence of: left-hand cutter, tie strap,
right-hand cutter, tie strap, left-hand cutter, tie strap, right-hand cutter, for the length
of the chain. While this type of chain has low kickback, it is less aggressive and requires
more time sharpening.
b. Semiskip (most common for wildfire use): This chain has a cutter sequence of: left-
hand cutter, two tie straps, right-hand cutter, one tie strap, left-hand cutter, two tie
straps, right-hand cutter, one tie strap, and left-hand cutter, for the length of the chain.
14c. Skip or full skip: This chain has a cutter sequence of left-hand cutter, two tie straps,
right-hand cutter, two tie straps, for the length of the chain. This aggressive chain
removes dust and dirt from the cut well, but has higher kick-back.
When ordering replacement chain you must identify:
• Pitch - the measure between any two rivets divided by two (example, 3/8 found on bar tail).
• Gauge - The thickness of the drive link. Some chains have the gauge engraved on the side of
the drive link.
• Number of drivers - 84 for a 24 inch bar (found on the bar tail). You can also hold one driver
and count the full circle of drivers to get this number. It also helps to provide the maker of saw
and bar length. Most bars are marked with this information near the tail. Identify the type of
cutter desired, and whether it should be full-comp or skip.
Note:
The chain we have on our wildland saws is chipper chain with semi-skip spacing. For the
purpose of this manual that means that the chain has a “medium” level of kickback protection.
To put the bar and chain back on the saw:
1. Place the chain on the bar so that the cutting teeth are facing towards the sprocket.
2. Use your scrench to screw the tensioner all the way back to the back of the saw.
3. Align the two bolts and the tensioner pin with the bar and slide it back on – make sure
the chain is properly fit into the sprocket on the power head.
4. While supporting the bar tighten the tensioner until it can support the bar on its own.
155. Place the faceplate back on the saw and place the nuts on but do NOT tighten them all
the way down.
6. Tighten the chain so you can lift the chain and
almost lift the drive link (the part of the chain that
rides in the bar) out of the bar at the widest spot.
7. Tighten the nuts down on the faceplate.
Cleaning the saw – To properly clean the saw, first
open the face plate and remove the bar and chain. You
can use a mild degreaser to remove excess oil and sawdust from all surfaces. Once clean return
the bar, chain and faceplate. Then open the filter cover and remove the air filter. You can
clean the air filter with mild soap and water, or simply by blowing on it. DO NOT use
compressed air to clean it as it may damage the filter and allow for sawdust and oil to enter the
carburetor. When you are done reassemble the saw.
Sharpening the chain – First and foremost you MUST have on gloves and it is suggested
that you have chaps and eye
protection (the filings from the chain
can get in your eyes).
1. Make sure you have the proper
round file (the file size can be
found on the bar near the
power head) Not all chains use
the same size round file.
2. Make sure you have the proper
tension.
3. Set the chain brake.
4. The file must be held at least
one-fifth of the file’s diameter
above the cutter’s top plate.
5. Sharpen at the same angle as 6. Sharpen all the cutters facing the
the indentation at the back of the same side (i.e. All left facing cutters
chain – moving your file towards the first, then right facing cutters)
angle. Do not pull the file back
through.
Summary – Safety and maintenance are one and the same. An improperly maintained chain
can cause kickback, an improperly maintained brake can fail to engage during kickback, an
improperly maintained air filter can cause stalling which will slow your falling and expose you to
an unsecured fire line for that much longer. If all of your PPE is worn properly and your saw
maintained you reduce your risk of injury/death exponentially, so continue learning about saw
maintenance beyond this manual.
16Section 2; Chain Saw Operation:
Carrying the saw:
When carrying the saw make sure that the bar is pointing backwards
if carrying the saw by your side. If you are carrying the saw over
your shoulder you can wrap you bar with your chaps or use a pad –
but make sure that no teeth are exposed near your neck and make
sure the dogs are covered – firefighters have been known to fall and
stab themselves with the dogs.
Fueling the saw:
Make sure that the saw is on the ground. Do not fuel the saw
while it is ANYWHERE other than the ground (do not fill on the
tailgate of a truck, on the six wheeler, etc). Open the fuel fill cap
first (there is a picture of a gas pump and a drop of oil under it)
and fill to just below the lip with
50:1 mix. Do not overfill. Place
the cap back on HAND TIGHT – if
you over-tighten you will strip the
threads. Next open the bar oil
cap (there is a picture of a section
of chain with a drop of oil above it) – this tank is closest to the
front of the saw. Fill with bar oil to just below the lip. This is
easy to overfill – if you do overfill wipe off any excess bar oil.
When refueling around
structure fire operations
limit refuel locations and be
able to identify where you
refueled. Arson K-9s may
alert to a refuel location or
evidence samples may lead
investigators that an
accelerant was used. Let fire
investigators know where
refueling took place.
17Starting the saw:
Now that you have the proper safety equipment, a well maintained and sharpened saw, you are
now ready to start! There are two ways to start the saw.
The kneeling method:
1. Engage the brake by pushing it
forward until it clicks.
2. YELL “Starting Saw”.
3. Place the saw on the ground.
4. Press the throttle interlock.
5. Squeeze the trigger and the
safety on top and move the red
switch on the left all of the way
to the bottom (4 clicks).
6. Place your right foot in the
trigger guard and your left knee
on top of the saw. 9. Pull the cord until the saw starts.
7. Pull the pull start cord until you 10. Once started squeeze the trigger
hear the saw bark (turn over). to move the red switch out of
(Do not let the cord snap back). choke and into “run”.
8. Move the red switch up one 11. Stand up slowly.
notch.
The standing method is the same except instead of having
the saw on the ground the saw is held firmly between your
legs. This is generally the preferred method of starting in
the field - as it is often difficult to find level ground to start
the saw while kneeling. If you use the standing method
maintain control of the saw and DO NOT DROP START. This
damages the saw and is very unsafe. Drop starting is very
dangerous if the brake is disengaged because the saw will
spin out of control. Safety officers and crew leaders on fires
will not allow drop starting.
18Saw Handling: The proper way to hold a saw (for right handed firefighters) is with your left
hand around the bar. Keep your thumb around the handle and do not rest it on the top the
handle. The act of keeping your thumb around the handle is your greatest tool in keeping the
saw from kicking back into your body. Place your right hand in the trigger guard. When you
release the brake reach out with your left hand to pull back on the brake. DO NOT TAKE
EITHER OF YOUR HANDS OFF THE HANDLE BARS TO RELEASE THE BRAKE. If you do you could
lose control of the saw and cause serious injury.
Now you know how the saw works. It’s time to learn how the materials you will be cutting
interact with the saw.
Saw Physics in A Nutshell: There are three reactive forces that you must contend with.
These forces are generally the biggest dangers you will face and account for most injuries. They
include Kickback, Pushback, and Pull-In. With all of the factors having a properly maintained
saw will help prevent this. Do not ever count on your brake to stop the saw.
Kickback – This is the most dangerous of the three forces you will encounter. This occurs
when the front portion of the top of the bar is used to cut. The chainsaw is then forced back
towards you and up – literally kicking back at you. It oftentimes will rip the saw from your
hands and fling it towards your head. The severity of the kick is dependent on the speed of the
chain, the angle the tip was hit at, and what it hit. The two best ways to avoid kickback are to
hold the handle properly with your thumb wrapped around the top bar, and to WATCH THE
TIP. If you cannot see the tip of your saw you should readjust your position so you can proceed
safely. Additionally you should stay out of the radius that the saw will kick back on.
19Pushback – This is when the chain running along the top of the saw gets caught and pushes
the saw back at you. The best way to avoid this is to not cut with the top of the bar, however;
when you must do not twist the saw while cutting and watch for pinching on your bar.
Pull-In – This is when the chain running along the bottom of the bar gets pinched and pulls the saw
towards what you are cutting. This occurs most commonly while cutting thick brush (such as mountain
laurel). The best way to avoid this is keep your saw at full or near full speed prior to cutting.
20Introduction to bucking:
Bucking is the term that describes cutting a log into smaller pieces, generally so it can be
moved. While bucking is often taken for granted it can be hazardous and can challenge your
knowledge of the principals of gravity. In order to properly buck you must first understand a
few concepts. While the tree is down gravity is still acting upon it. The forces pulling upon it
create what is called a bind. A bind is caused by two forces, tension and compression.
The log is being pulled apart by tension force and pushed together by compression force. Areas
of tension and compression occur on opposite sides of the log.
Tension is when the fibers of a log are being pulled apart – (i.e. the log above has fallen down
hill. With gravity acting on this log the top side of the log is under tension. Thus gravity is trying
to pull the log apart).
Compression is when the fibers of the log are being pushed together. (i.e. The log in the
previous figure has fallen down hill. The gravity acting on the log is pulling the top end down
causing compression on the bottom of the log).
It is important to remember that in both of these examples the opposite force is being applied
to the opposite side. With the example above the log is under tension on top and under
compression on the bottom side.
21There are four types of binds:
Top Bind- The tension area is on the bottom
of the log. The compression is on the top.
Bottom bind- The tension is on the top side
and the compression is on the bottom side.
Side bind- Pressure Is exerted sideways on
the log.
End bind- Weight compresses the log’s
entire cross section.
Combination- Most logs will be a
combination of at least two types of bind.
When working in a jackstraw (blow down or
logging slash) area you may encounter
various combinations of binds. These areas
are very dangerous to operate in and the
sawyer and swamper should have full
situational awareness.
The best ways to eliminate binds is to cut
relief cuts (or pie cut) and to use wedges.
Bucking Situational Awareness
• Never buck a tree that exceeds your
ability.
• Consider overhead hazards.
• Is the guide bar long enough for the tree that is being bucked?
• Establish good footing.
• Swamp out bucking areas and escape routes.
• Anticipate what will happen when the log is cut.
• Plan the bucking cut carefully after considering:
—Slope. People and property in the cutting zone can be in the path of rolling logs.
—Tension. Spring poles are trees under tension.
—Compression. Falling or rolling root wads are unpredictable when compression is released.
—Rocks and foreign objects under the log. The log will have a tendency to roll, slide, or bind. --
Broken off limbs hidden underneath the log can roll up and strike the sawyer.
• Assess the area for overhead hazards before beginning bucking.
• Size up the log for possible reaction after the release cut has been completed.
• Establish escape routes and clear any obstacles that might inhibit your escape.
• Cut slowly and observe the kerf for movement that will indicate the location of a bind. A log
can have different types of binds at different places.
22Safe and Efficient Bucking Techniques
In most situations it is safest to buck logs from the uphill side unless the log may move uphill
when it is bucked. This could occur because of the log’s position, weight distribution, and pivot
points. Always consider binds and pivot points. Consult another sawyer if you have questions.
Learn to use the saw’s bumper spikes (dogs) as a pivot point when you are felling or bucking.
This technique will enhance your control of the saw and improve the saw’s efficiency, while
reducing fatigue. Begin bucking by cutting the offside first. This is the side the log might move
to when it is cut, normally the downhill side. Cut straight down until you have space for a
wedge.
• Always protect the saw chain from becoming dull. This will reduce fatigue and lessen chances
of kickbacks and barber chairs. (Barber chairs will be addressed later.)
• Keep the chain out of the dirt and rocks.
23A walk through of bucking operations:
Firefighter Joe approaches a log that is in the path of the fire line that is being
constructed. He evaluates the log and determines that it is necessary to be cut and that
it is safe to cut. As he approaches closer he looks above and determines there are no
hazards such as power lines or burning snags above him. He then looks around the log
and sees there are hazards on the ground such as stump holes, barbed wire, rocks,
vines, etc. He evaluates the binds he will most likely have to contend with and
determines to start from the top of the log and work down. He then stands on the
uphill side so the pieces he cuts will not roll into him. Joe identifies his escape route and
a safety zone he can get to if he has any problems. Joe checks his PPE and his saw to
make sure he has enough fuel and bar oil to complete the task. He makes sure the chain
is sharp and has the proper tension. Just before starting the saw he yells out
“CUTTING!”, and makes sure
there is no one below him. He
starts the saw and begins to cut.
As he begins he realizes the log
is starting to squeeze his bar
(Joe is cutting the compression
side of the log). He stops and
cuts a small pie cut into the log
on the compression side. He
then cuts from the tension side
(after making sure the tip of his
bar is not going to strike
anything he can’t see and cause
kickback) and the piece comes
loose. He continues this
process until the log has been
cut and cleared.
Bucking is a process that
takes time and experience to
get good at. Above all else
ensure you are safe in the
process, and remember if there
is no need to buck a particular
log, or you cannot safely
perform the tasks DON’T.
24Limbing and Brushing:
Limbing a downed tree is similar to bucking. Tension and compression still applies to the branches and
all the same practices apply when limbing. It is important to not get careless when limbing. Make sure
you can see the bar of your saw and do not rush. Limbing a standing tree is often quite dangerous as it
requires you to raise the chainsaw above an area that is comfortable for the operator. It is advised that
you never raise the saw above your shoulders while cutting.
Brushing is when you are cutting small shrubs and plants back. There are a few tips to remember when
brushing. First of all keep an eye on the tip of your saw, it is easy to hit a rock or your own leg (or foot)
while brushing. Another tip is to keep the saw at a high RPM. Failing to do so will cause the saw to jam
on what you are cutting and result in pull-in or push-back.
25Constructing Fire Line with the Chainsaw:
Fire line construction – and initial attack in particular – is where the majority of the saw work will be
done for our department. The sawyer has a number of responsibilities that are specific to the position.
Sawyer responsibilities:
1. Safety (ALWAYS #1)
a. Ensure you have proper PPE and a
properly maintained saw.
b. Have the proper equipment – carry a
saw kit with scrench, file, extra chain
as well as a tool with you.
c. Maintain 10/18/LCES at all times
d. Be aware of changing situations –
this is often difficult when cutting a
tree
e. Maintain prompt communication
with your swamper and supervisor.
f. Know where your crew is and what
they are doing at all times!
g. Maintain a safe cutting area: “A
distance of greater than two tree
lengths shall be maintained between
adjacent occupied work areas on any
slope where rolling or sliding of trees
or logs is reasonably
foreseeable.”(OSHA 1910.266).
When creating line you should be in contact with your direct supervisor. This person should be
identifying where the fire line should be placed as well as any hazards that exist along the
route. Try to utilize the “path of least resistance” when locating fire line.
It is important to cut only what is needed. Removing trees, logs and brush that does not need
to be cut only wastes time and exposes you/your swamper and crew to unnecessary hazards.
As you cut your line don’t leave any sharp branches or stumps that can become puncture
hazards! These will be referred to on the fire line as pongee sticks.
26As you cut make sure your swamper is immediately removing any unburned material and
placing it into the green or black as necessary (green into the green/black into the black).
Make sure any rollers
are secured before you
cut them so they do not
pose any hazards to
your crew or any other
crews which may pass
by. Remember there
may be people passing
by your cuts for many
weeks to come. Secure
or mark with flagging
any hazards you come
across or create in the
process.
If you are cutting line downhill utilize the downhill line construction checklist:
Crew supervisor(s) and fire line overhead will discuss assignments prior to committing crew(s).
A Responsible overhead individual will stay with the job until completed.
Decision will be made after
proposed fire line has been
scouted by supervisor(s) of
involved crew(s).
LCES will be coordinated for all
personnel involved.
Crew supervisor(s) is in
direct contact with
lookout who can see the
fire.
Communication is
established between all crews.
Ensure rapid access to safety zone(s) in case fire crosses below crew(s).
27Direct attack will be used whenever possible; if not possible, the fire line should be completed
between anchor points before being fired out.
Fire line will not lie in or adjacent to a chute or chimney.
Starting point will be anchored for crew(s) building fire line down from the top.
Bottom of the fire will be monitored; if the potential exists for the fire to spread, action will be
taken to secure the fire edge.
If you are on initial attack consider doing a direct attack if the fuel/topography and weather will
allow you to do so.
On bigger incidents you may have the luxury of having another saw team to coordinate with.
Use the more experienced team to trail blaze and the other to follow up. If both teams are of
similar experience rotate to avoid possible exhaustion. Do not push the other team beyond
their skill levels when you are cutting. Remember while speed is important at times it is not a
race. If the second crew is waiting a lot you can either switch teams or the first team can leave
more for the second team. Maintain communications with each other and be aware of safe
cutting areas.
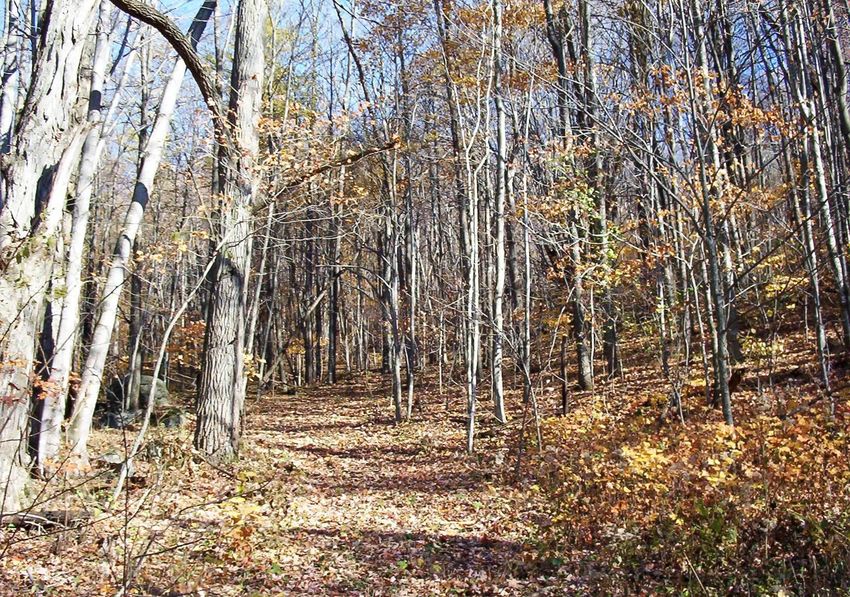
28The following pictures are areas where fire line could be constructed. Which one
is better?
Light vegetation, Leaf litter, Small saplings.
OR
29Heavy Laurel, Undergrowth, Medium size timber.
Where would you place the fireline if you were the sawyer? Would you place the
line in light vegetation with sparsely scattered trees where you and your swamper
will not have to work as hard, or in the heavy laurel and undergrowth where you and
your swamper will work twice as hard and put yourself in danger of approaching
fire?
Laurel slicks as there are referred by some people are very dangerous places for
sawyers, swampers, and fire crews to place line. One reason is the vegetation is so
thick it’s hard to have escape routes to safety zones.
YES; sometimes we have to place line in areas like this but we have no choice.
Laurel will be covered in depth in a later section.
In conclusion to fire line construction the main thing to remember is safety.
Maintain your PPE – hopefully by being aware, remembering your 10/18/LCES, and
communicating with your adjoining forces you will never need. Maintain your saw;
it and your swamper will become your best friends. If something is beyond your
skill level don’t do it! If it is unsafe and unnecessary – don’t do it!
30Storm Damage and Downed Trees:
Storm damage is a
dangerous situation for
a saw crew. You have
the elements of Mother
Nature’s fury (winds,
rain, ice, snow), the
dangers of sawing itself
and all the other factors
such as traffic, power
lines, and the trees
themselves.
When cutting during
storm damage
situational awareness and safety is a must. Wind tossed trees will have binds from
every direction, twists, and hanging branches (Widow Makers) just waiting to ruin
your day. This is where training and experience will pay off greatly. You have been
giving the basics of cutting and this is where you look at a situation and say, “do I
feel comfortable cutting this or should I walk away and let a more experienced
sawyer look at the situation?”
Wind Storms:
When cutting during wind
storms extra caution should be
taken due to the risk of other
trees, limbs and branches falling
around you and your crew. Keep
a lookout at all times and be
aware of the wind speed and
direction at all times.
31Ice and Snow:
Extreme caution should be
exercised when cutting in ice and
snow. Trees will be weighted down
by the accumulation of ice and snow.
During the winter months the sap has
be drawn out of the trees due to
them being in a dormant state for the
cold leaving them brittle and less
elasticity than in spring and summer.
The ground will be unstable and
footing will be treacherous. Make
sure you have good footing and a
clear escape route before cutting.
A lookout must be posited to
watch for other falling trees and
hazards.
Power Lines:
When power lines are involved in any situation we encounter they will be
treated as live lines and no cutting will be done until Progress Energy has de-energized
the lines and deemed the area safe. If there is an excessive amount of lines, poles, and
power distribution equipment on the ground the
scene will be
secured until a
representative
of Progress
Energy
arrives.
32You now have the basics of chain saw operation and safety. In time with more experience and
situational awareness you t will be a great sawyer.
REMEMBER safety has no holiday and all PPE must be used on
every sawing situation!!
33Glossary:
This glossary is adapted from the S–212 Wildland Fire Chain Saws training program.
Ax—A part of the faller’s safety equipment used for pounding and chopping. It also can be used
to plumb the lean of a tree.
Back Cut—The last of the three cuts required to fell a tree. Locate the back cut on the opposite
side of the tree from the undercut (face) and at least 2 inches (the stump shot) above the
horizontal cut of the undercut (face). The back cut must never be continued to a point at which
no holding wood remains.
Barber Chair— A tree that splits vertically when it is being felled. Generally, this is a result of
improper facing or back cutting. A portion of the fallen tree is left on the stump.
Bind—A series of pressures in a felled tree resulting from objects (such as terrain or stumps)
that prevent the tree from lying fl at on the ground. The two major components of bind are
compression and tension. Binds determine the technique and procedure used while bucking.
Blowdown—An area of timber blown over by strong winds or storms.
Bole—A tree stem thick enough for saw timber or large poles.
Boring—Using the nose or tip of the guide bar to saw into the tree while felling or bucking.
Bottom Bind—One of the four basic tree positions commonly encountered while bucking. A
tree with a bottom bind is tensioned on top and compressed on the bottom.
Brushing—Removing the brush and shrubs while swamping out a work area.
Buck—Sawing through the bole of a tree after it has been felled.
Butt—The base of a tree stem.
Calks— Heavy boots containing numerous steel spikes (calks).
Conventional Undercut—The sloping cut taken from the butt of the tree.
Corners—The holding wood on either outside edge of the tree.
CPR— Cardiopulmonary resuscitation.
Danger Tree—A standing tree that presents a hazard because of conditions such as
deterioration or physical damage to the root system, trunk, stem, or limbs, and the direction
and lean of the tree.
34Glossary (cont.)
Dogs (Bumper Spikes)—A chain saw accessory designed for felling and bucking. Chain saw dogs
increase the sawyer’s efficiency during felling and bucking operations.
Dolmar—Container for holding saw fuel and oil.
DOT—U.S. Department of Transportation.
Double Jack—A long-handled sledge hammer used to drive splitting and lifting wedges.
Dutchman— A portion of the undercut that is not removed. A dutchman generally results when
the horizontal and sloping cuts of the undercut do not meet or extend beyond each other. A
dutchman is very hazardous because it can change the felling direction.
End Bind—One of the four basic tree positions commonly encountered while bucking. An end
bind occurs on steep terrain where the force of gravity closes the bucking cuts.
EPA—U.S. Environmental Protection Agency.
Escape Route—A predetermined path used by fallers when felling or bucking. Determine the
direction and distance of the escape route and clear the route before cutting.
Face Cut—See undercut.
First-Aid Kit—A kit including blood borne pathogen protective equipment (as a minimum,
disposable gloves, face masks, eye protection, and CPR clear-mouth barriers) in addition to
standard first-aid supplies.
Forest Service Approved—An item that meets Forest Service specifications or conforms to
Forest Service drawings.
Guide Bar—The part of the chain saw that the chain travels on. Improper use of the bar
(particularly the top and bottom of the bar at the end of the bar’s nose) results in kickbacks and
saw injuries.
Gunning (Sighting)—Aligning the gunning mark with the desired felling direction. Because the
gunning mark is at a 90-degree angle to the bar, the exact position of the undercut can be
established easily in relation to the desired felling direction.
Hanging Wedge—A fan-shaped metal wedge.
Hangup—A situation in which a tree is lodged in another tree and does not fall to the ground.
35Glossary (cont.)
Head Lean—One of the two natural leaning forces found in most trees. Head lean is more
pronounced than side lean.
Holding Wood—Section of wood located between the undercut and the back cut. Its purpose is
to prevent the tree from permanently slipping from the stump before it has been committed to
the undercut. It also helps direct where the tree will fall. The holding wood must never be
completely sawed through.
Hinge Wood—Same as holding wood.
Horizontal Undercut—The first of the two cuts required for the undercut. This level cut is at
least one-third the diameter of the tree.
Itinerary—Planned route of travel, date of travel, destination, and estimated times of
departure and arrival.
Jackstraw— Area where trees have been blown or fallen down in crisscross fashion.
JHA— Job hazard analysis.
Kerf—The slot a saw’s cutters make in the wood.
Kickback— A strong thrust of the saw back toward the faller, generally resulting from improper
use of the guide bar’s nose or from pinching the bar in a cut.
Lay—Refers either to the position in which a felled tree is lying or the intended location of a
standing tree after it has been felled.
Lead—The established direction in which all trees in a quarter or strip are to be felled, usually
governed by the terrain of the area, its general slope, or the skid road system.
Lean—The tilt of a tree away from its vertical position. Often two leans (such as head lean and
side lean) may affect the same tree.
Leaner— A tree that leans heavily.
Limbing—Removing the branches from a felled or standing tree.
MSDS— Material safety data sheet. A compilation of information required under the
Occupational Safety and Health Administration’s Hazard Communication Standard that outlines
36Glossary (cont.)
the identity of hazardous chemicals; health, physical, and fire hazards; exposure limits; and
storage and handling precautions.
NIOSH— National Institute for Occupational Safety and Health.
Offside—The opposite side of the tree from where the faller stands while bucking or felling.
OSHA— U.S. Department of Labor Occupational Safety and Health Administration.
Pie-Shaped Cut—A section sawed from a log during bucking to allow for the directional
pressures of various binds. Removing a pie-shaped section of a log minimizes splits and slabs.
PPE— Personal protective equipment and clothing, protective shields, and barriers.
Pistol-Grip Tree—A tree with a curve at the base of the trunk that makes it difficult to identify
the tree’s lean.
Sapwood—The outer layers of wood in growing trees that contain living cells and reserve
material such as starch.
Side Bind—One of the four basic tree positions commonly encountered while bucking. A tree in
a side bind is under compression on one side and under tension on the other.
Side Lean—One of the two natural leans found in many trees. Side lean is less pronounced than
head lean.
Sitback—Refers to a tree that settles back on the stump, closing the back cut’s kerf. Sitback
usually occurs because of wind or because the tree’s lean has not been determined properly.
Slabbing—A lateral split generally caused by improper technique or by an improper sequence
of bucking cuts.
Sloping Cut—The second of the two cuts required to undercut a tree. This cut must be angled
to allow a wide opening for the undercut.
Snag—Any standing dead tree.
Sound—Wood that is not rotten.
Spider—A gauge used for setting crosscut saw teeth.
Spike Top—A live tree that has a dead top.
37Glossary (cont.)
Spring Pole— A limb or sapling that is bent under a tree or other weight.
Stump Shot—Two inches or more difference in the height of the horizontal cut of the undercut
(face) and the back cut. The difference in height establishes a step that will prevent a tree from
jumping back over the stump toward the faller.
Swamp Out—Clear out brush and other material around the base of trees and the areas where
trees will be bucked to provide safe footing and to remove materials that could cause the saw
to kick back.
Top Bind—One of the four basic tree positions commonly encountered while bucking. A tree
with top bind is under compression on top and under tension on the bottom.
Undercut (Face Cut)—A section of wood sawed and removed from a tree’s base. Its removal
allows the tree to fall and helps direct where the tree will fall. The face is comprised of two
separate cuts, one horizontal, the other sloping. The horizontal cut must be at least one-third
the diameter of the tree. The sloping cut must have enough of an angle to allow a wide
opening. The
two cuts must not cross each other.
USDA—U.S. Department of Agriculture.
Wedge— A plastic or magnesium tool used by a faller to redistribute a tree’s weight in the
desired direction and to prevent a tree from falling backward. It also is used while bucking to
prevent the guide bar from being pinched.
Widow Maker— A loose limb, top, or piece of bark or tree that may fall on anyone working
beneath it.
38You can also read


