Creating and Sharing Workbooks in PebblePad
←
→
Page content transcription
If your browser does not render page correctly, please read the page content below
Creating and Sharing Workbooks in PebblePad

Contents
Adding questions/instructions to a page .......................................................................................................................... 2
Pages and workbook properties ....................................................................................................................................... 5
Sharing your workbook for assessment ............................................................................................................................ 6
Optional Appendix A – adding evidence upload blocks .................................................................................................... 9
Optional Appendix B – Adding instructions and info for Students using “Hints” ........................................................... 10

                                                                                                                                                1
Version: June 2021                                                                                For further support, contact eLearningTraining
                                                                                                  E: eLearningTraining@ecu.edu.au; P: 6304 2255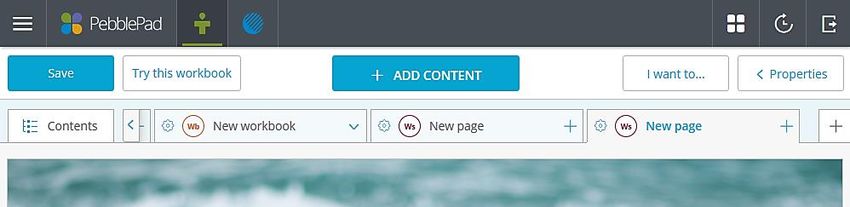
Adding questions/instructions to a page

Step 1.   Open your Pebble+ account from the “Easy Logins”
          section of the ECU Staff Intranet

  Note: You can also use the Pebble+ link in your Blackboard unit if
  it already has one.
  (Instructions for adding the PebblePad LTI tool to your unit are in
  a separate document).

    a

                                                Step 2.     Create a workbook. In the top-left corner of the screen…

                                                 a.        click on the “burger” menu

                                                 b.        choose “Get Creative”

                                                 c.        from the drop-down menu that appears, choose “Create a
                                                           workbook”.

                             b

                                                               c

                                                                                                                      2
  Version: June 2021                                                    For further support, contact eLearningTraining
                                                                        E: eLearningTraining@ecu.edu.au; P: 6304 2255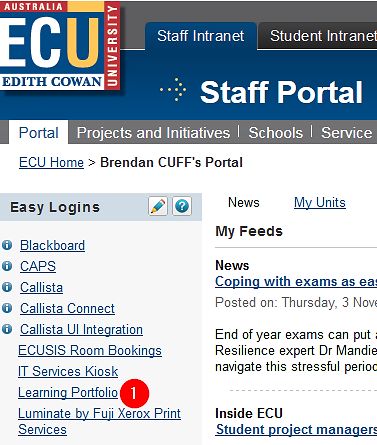
Step 3.   Choose a page type to add to your workbook…

              a. New Template Page – choose this to start entering in your
                 questions, instructions etc.
                 Choose this option to continue with these instructions.

              b. Existing Resource – for when you’ve already made a page of
                 questions and want to insert it into the workbook.

              c. Placeholder Page – these allow students to add their own
                 pages/other Pebble Assets as pages in the workbook.

Step 4.   Save your workbook as circled and then begin adding content…

              a. Click the “Add Content” button at the very top of the screen

              b. Notice that the numerous content types have been arranged under sub-menus.

              c. Click a button to place content at the bottom of your page, or drag it directly to where desired.

              d. View the workbook as a student and try out your questions

                                                     a
                                      d
                       b

                        c

Step 5.   Edit your content. Upon clicking your content
          block its border will go blue, allowing you to…

      •   edit your question labels etc

      •   re-position it on the page using the arrow to its left

      •   delete the content block using “X” in the top right

                                                                                                                     3
  Version: June 2021                                                   For further support, contact eLearningTraining
                                                                       E: eLearningTraining@ecu.edu.au; P: 6304 2255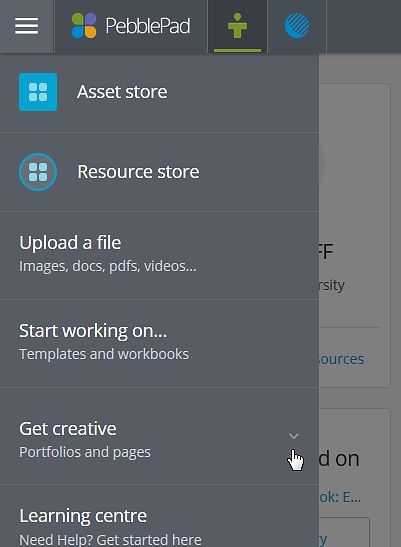
Step 6.   Write your question/instructions. Most content types will ask for a “label” and a “hint or description”.
          “Label” is your question/text, and “hint or description” is an optional second line for further explanations.

Step 7.   You can bring up advanced properties for a content block:

              •   Click on the content block, then

              •   Clicking the “Properties” menu in the top right corner.

              The options you see will be specific to the selected content type.

Step 8.   You can continue building/editing your workbook at any time to by opening the Resource Centre from the
          Pebble+ homepage, then clicking it’s title and choosing “edit resource”, as shown below…

                                                                                                                      4
  Version: June 2021                                                    For further support, contact eLearningTraining
                                                                        E: eLearningTraining@ecu.edu.au; P: 6304 2255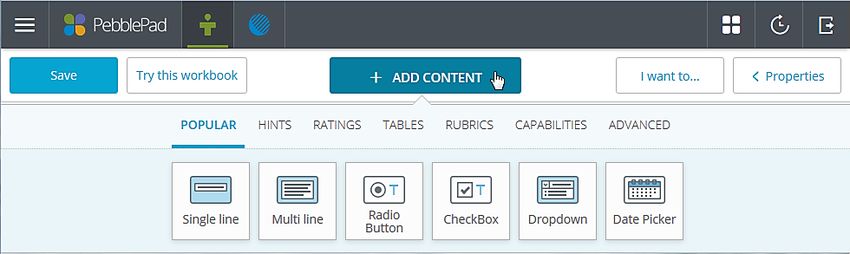
Pages and workbook properties

You can break up your questions into sections/topics by placing them on separate pages, which can be found
running horizontally at the top of the screen…

                                             d
                                                                                                           c
              a                                                                     e                                      b

    a) scroll along your menu using the “” arrows, or click the “Contents” button for specific pages

    b) The “Add New Page” button looks like a “+”and always sits separately on the right.
       Note: don’t confuse this solitary “+” with those that appear as part of any existing pages (eg labelled “c”)

    c) To convert an existing page into part of a drop-down menu, click the “+” attached to that page
       Note: Confusingly these get called “new workbook” until you rename them, but they are “drop downs”

    d) Add new pages to an existing drop-down menu by clicking the “ ” button and selecting “add new item”

    e) Rename any page or drop-down menu by clicking the cog icon and typing over its old name.

    Advanced properties for a page appear after clicking on the page and opening its “Properties” menu (top
    right)…

       •   To reposition pages:
           “Properties” > “Template” > “reorder current page”

       •   To reposition a whole drop-down menu:
           “Properties” > “Workbook” > “Reorder workbook (top level)”

       •   (strongly recommended) Prevent students from submitting duplicate versions of their responses:
           “Properties” > “Workbook” > “Usage” > set it to “Single use only”. If you don’t tick this you will regret it!

       •   To allow students to self-report on their progress by ticking off each page as they complete them:
           “Properties” > “Workbook” > “Progress Tracking” > tick the box to enable.

       •   To control page visibility:
           “Properties” > “Template” > “Page Release”. A page can be made visible
               • to all students, or
               • only on a specified date, or
               • only to those students the lecturer “verifies” as being ready to see that page.
                                                                                                                     5
Version: June 2021                                                     For further support, contact eLearningTraining
                                                                       E: eLearningTraining@ecu.edu.au; P: 6304 2255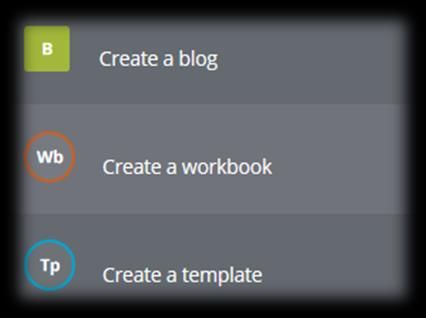
Sharing your workbook for assessment

  After creating the workbook you will need to share it so that students can submit their responses. You must…

Step 1.   Create your ATLAS site now, if your unit does not have one already (instructions in a separate document).
          Each academic unit using PebblePad needs its own ATLAS site, and these need re-creating each semester.

Step 2.   Open your unit’s ATLAS site, by either

      a) Clicking the ATLAS icon you’ve added to your Blackboard site…
         (Preferred) each time you click this link it actually synchronises your class list!

      b) Alternatively, click the ATLAS icon near the
         top left corner of Pebble+…

          this doesn’t synchronise class lists, so really
          the other method is preferable

Step 3.   Create an Assignment submission box by heading to “Management” > “Assignments” as circled.
          Note: ATLAS automatically creates a default assignment, so you’re free to edit that rather than create anew.

          Also note that only one Assignment box will automatically send its grades back to Blackboard - the grades for
          other assignments must be exported to Blackboard via Excel (steps in separate document).

                                                                                               a

                                   b

               c

                                                                                                                         6
  Version: June 2021                                                       For further support, contact eLearningTraining
                                                                           E: eLearningTraining@ecu.edu.au; P: 6304 2255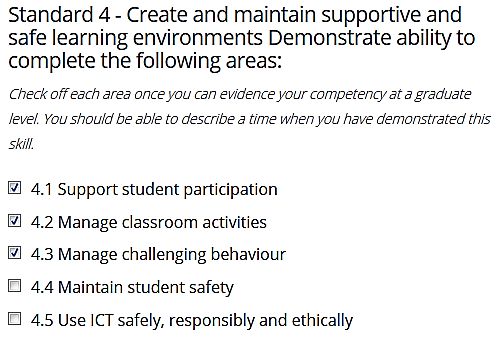
Step 4.   On the page that appears, choose “member-initiated submissions” and give the assignment a Title.

Step 5.   Choose a start-work date and due date. Halfway down
          the page you’ll see several clickable date/time boxes…

          •       Set the first one to Day 1 of semester so students
                  can begin working ASAP

          •       The second one is your (hard) final due date

          •       The third and fourth dates are optional

      Note: if you don’t set a due date here, students can
      continue editing their submissions indefinitely.

Step 6.   The three settings shown on the image below are absolutely vital to preventing submission errors…

      a) Students submit once (eg on Day 1) and then update their 1 submission during semester (until the due date)

      b) Restrict students to submitting only workbooks (prevents accidental submission of other file types)

      c) Accept only auto-submitted workbooks. Prevents accidental submission of unrelated workbooks

Step 7.   When you’re done, hit “Save” (d).

                     a

                         b
              c

                   d
                                                                                                                     7
  Version: June 2021                                                   For further support, contact eLearningTraining
                                                                       E: eLearningTraining@ecu.edu.au; P: 6304 2255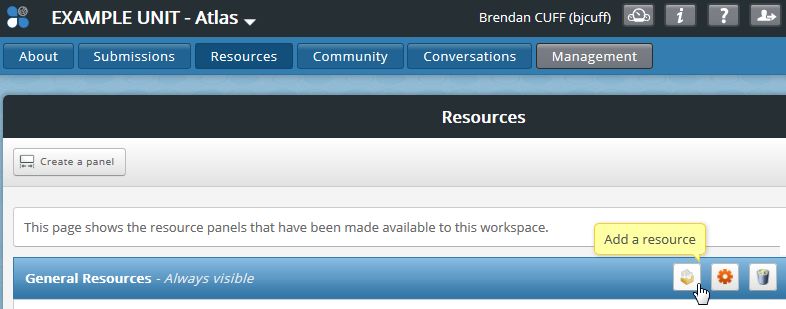
Step 8.   Share the workbook by navigating to the “Resources” tab and clicking “Add a Resource”…

                                          a

                                                                                                  b

 Step 9.   Select your workbook for sharing by clicking “My Workbooks” and the appropriate “select item” button…

                                                           a

                                                                                                  b

Step 10.   Choose your share settings on the page that appears before pressing “Save”. The most important settings
           are:

           a) “Would you like to prompt the user to auto-submit the workbook when saved?”
              Set this to “Yes” and then choose the Assignment box you created earlier.

           b) “Would you like to allow other people to use this resource on their workspaces?”
              Say “No” to this unless you would like this workbook to be available to other academic staff members in
              your School.

           c) “Would you like to allow a user to complete this Workbook in ATLAS?”
              Say “No” to this; the students should be accessing the workbook via Pebble+, not ATLAS
                                                                                                                     8
    Version: June 2021                                                 For further support, contact eLearningTraining
                                                                       E: eLearningTraining@ecu.edu.au; P: 6304 2255
Optional Appendix A – adding evidence upload blocks

This content type allows you to ask your students to attach evidence of learning. There are four variants – the
difference between the variants is the type of reply a student can give when reflecting upon the question,

i.e. whether they reply with…

•       evidence only
                                                                    a
•       evidence + a numeric rating                                                                     b
        (like the example below)

•       evidence + a binary reply

•       evidence + multiple choice reply
        (via radio buttons)                                        c

In June 2021, PebblePad is introducing ‘Capabilities 2.0 with Map My Learning’. Capability blocks and add evidence
fields will have a new look and functionality, and templates and workbooks will have a mapping option for assets.
There is more information about Capabilities 2.0 and Mapping at this PebblePad support link: Capabilities 2.0

The example below shows what a student sees when filling out the “Numeric” variant in Capabilities 2. Students
below are asked to…

        a) reflect on the question and give a numeric rating for their current skill level
        b) click on ‘+Add’ to either
                o add evidence - upload a file or add a text entry; and justify in words the rating they gave to
                    themselves (not pictured) or
                o add a comment – to allow a discussion trail (comment and reply; not pictured)

                                                                        a

    b

Since the collecting of evidence is a central part of PebblePad, an ‘add evidence’ element can be added to most
question types/blocks using the “Properties” menu…

NB: For now (June 2021) the Capabilities 1 view (rosettes) will remain whilst building Custom Templates or
Workbooks. ‘Try this Workbook’ will show the new 2.0 view from the student’s perspective.

                                                                                                                          9
Version: June 2021                                                          For further support, contact eLearningTraining
                                                                            E: eLearningTraining@ecu.edu.au; P: 6304 2255
Optional Appendix B – Adding instructions and info for Students using “Hints”

Apart from adding questions to the workbook you will want to provide students with instructions, info and context –
these instructional types are all found under the “Hints” menu.

Most hint types can be placed next to each other. As shown below, clicking and holding the text-hint (a), and then
dragging it to the right side of the image-hint (b), releasing it only when the thick blue preview line (c) appears.

                                                                                                                          c

                                                                                a

                                                                       b

                                                                               a
The circles opposite show the basic                               b
steps in creating the various
instructional content types...

                                                                  c

When adding a text area you can only see the text-formatting tools by first selecting some text with your mouse…

                                                                                                         The “remove formatting”
                                                                                                         button is especially
                                                                                                         handy when Pasting text
                                                                                                         in from other programs.
Figure 1 these formatting buttons only appear once you've selected some text with your mouse.
                                                                                                                                 10
Version: June 2021                                                                  For further support, contact eLearningTraining
                                                                                    E: eLearningTraining@ecu.edu.au; P: 6304 2255
Optional Appendix C – the “Popular” menu (where the cool buttons hang out?)
The sub-menu “Popular” contains various useful question types that can be broken into three categories…
a) Questions where students must type out a text reply (either a single line or a paragraph)
b) Questions where students tick the box that best fits their opinion (can tick one box or all that apply)
c) A date picker
a b c
The example questions below ask students to make a choice via “checkbox” (left) or “radio button” (right). The
main difference is that “checkbox” allows students to tick multiple replies, whilst “radio button” forces only one.
The image below left asks for a single paragraph answer (“Popular” > “Multiline”). The image below right is a table
asking for several single line answers (from the “Tables” sub-menu, another place to find text question types).
11
Version: June 2021 For further support, contact eLearningTraining
E: eLearningTraining@ecu.edu.au; P: 6304 2255You can also read