Creating Engaging Video Lessons: Tips from Multi-Classroom Leaders - Opportunity Culture
←
→
Page content transcription
If your browser does not render page correctly, please read the page content below
Creating Engaging Video Lessons:
Tips from Multi-Classroom Leaders

       To copy or adapt this material, see
       OpportunityCulture.org/terms-of-use
                                             2020 | 1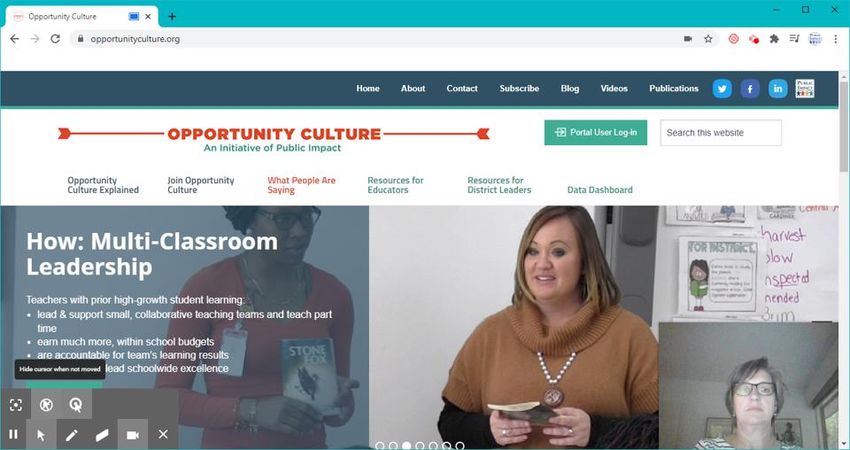
Contents

Creating Engaging Video Lessons             3
Recording Lessons with Zoom                 7
Recording Lessons with Screencastify        11
Using Bitmoji to Personalize Lessons        16
Example: Screencastify Video Lesson         17
Example: Recording Lessons on a Cellphone   18
Other Screen Recording Programs             19
Acknowledgements                            20

                                            2020 | 2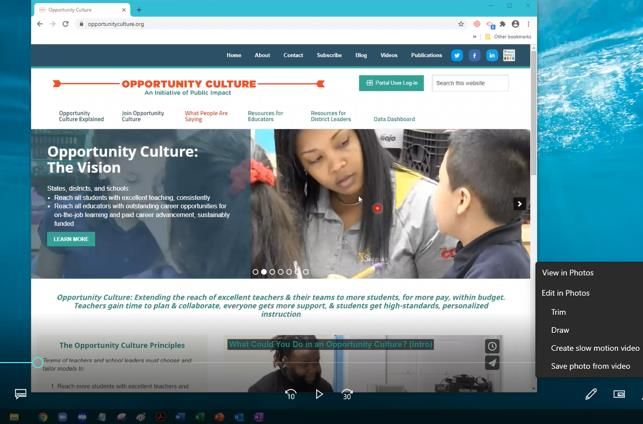
Creating Engaging Video Lessons

• While research shows live instruction is best, many districts
  also choose to create video lessons that teachers can use to
  supplement live student interactions.

• Some Opportunity Culture districts turned to their multi-
  classroom leaders (MCLs) in spring 2020 to create a library
  of engaging video lessons during the shift to remote
  learning.

• This deck shares tips from some of these MCLs on the
  mechanics of recording lessons, and how to create
  engaging lessons easily.

                                                             2020 | 3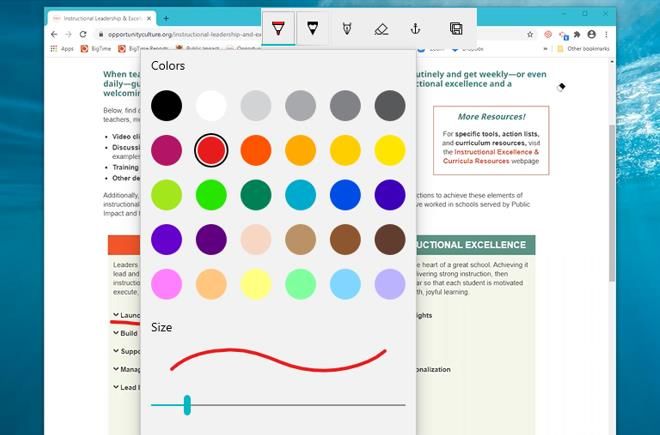
Benefits of Creating Video Lessons

A video library frees teachers’ time to:
• focus on face-to-face learning with students in small groups
• conduct daily social-emotional check-ins with students
• receive more support and coaching from their MCL.

MCLs can also reduce teachers’ time on explaining procedures
and answering questions by creating how-to videos for:
• parents on topics such as using Google Classroom;
• teachers on recording video feedback or instructions for
  students.

                                                             2020 | 4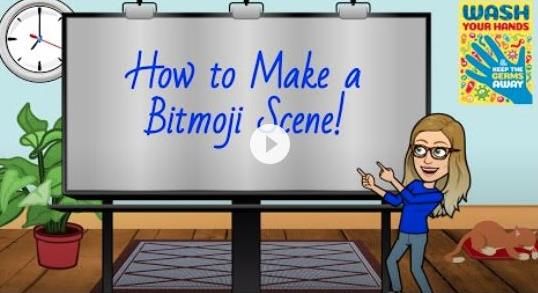
Tips for Creating Engaging Lessons

• Use PowerPoint or Google Slides to introduce concepts to students
  and organize your content.
• Keep lessons short, simple, and focused on a single standard.
• Lessons might include the following elements: Intro of the Standard;
  Do Now; Quick Write; Vocabulary; I Do, You Do, We Do; and Questions.
• Include several pause points to check for understanding: Ask students
  to pause the video to answer questions—re-watching parts if needed—
  before pressing play to continue the lesson.
• Include fun activities for younger students, such as drag & drop games.
• Make slides visually interesting with animation, clip art, colors, and
  bitmoji characters (see slide 16 for details).
• Keep it simple: Limit the number of programs and platforms used to
  create and share lessons with teachers and students.

                                                                           2020 | 5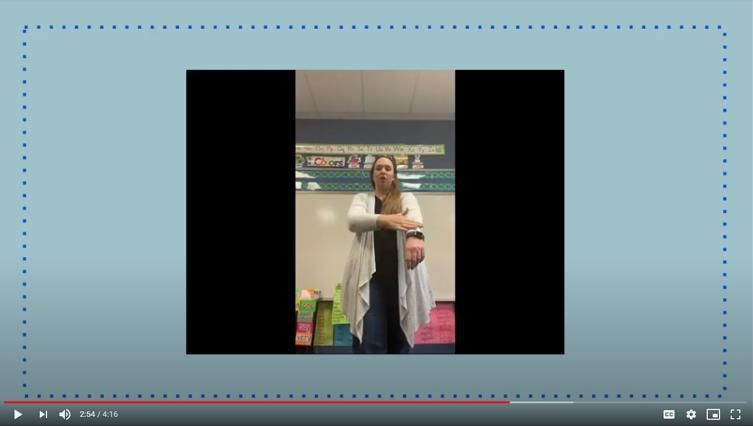
Tips for Recording Lessons

Preparing to record:
• Open lesson slides and any websites you need in your browser window.
• Close all other programs and browser windows.
• Practice switching screen views and clicking through slides.
• Create a script for narration and practice reading it.
Recording your lesson:
• Modulate your voice to help personalize the video, even if your face
  isn’t visible on the screen.
• Don’t worry about re-recording a lesson if you make a minor mistake.
  You can use it as a teaching moment for your students.
• Do keep lessons short so if you make major mistakes, you can easily go
  back and re-record.

                                                                         2020 | 6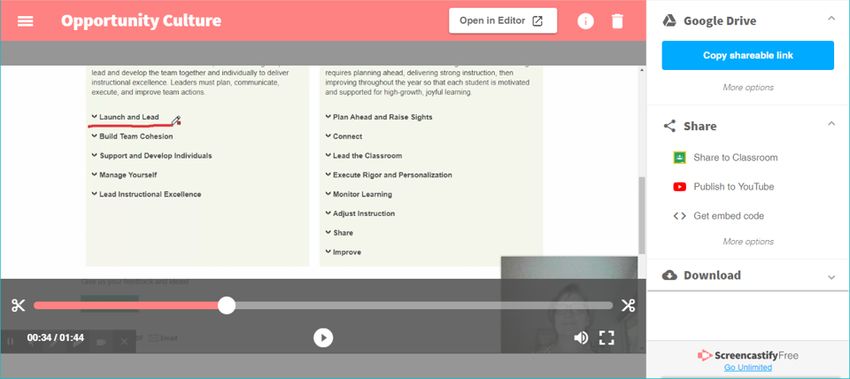
Recording Lessons with Zoom

Benefits to using Zoom:
• Easier than recording videos on a cellphone or video camera, which
  requires uploading them to your computer.
• Zoom allows you to record your computer screen, your webcam view, or
  both.
• When you stop recording, Zoom automatically saves your recording to a
  folder on your computer or the cloud.
• Zoom video files are much smaller than those created with other screen
  recording programs, making them easy to share as an email attachment.
• Zoom’s limited editing capabilities cuts down on the learning curve, while
  still allowing you to trim the start and end points of a video and draw on
  your recordings with pen tools.

                                                                           2020 | 7
Steps for Recording with Zoom

1. Open your slides, web browser, and anything else you will need for your lesson.
   Close all other programs and browser windows.
2. Start a Zoom meeting, with only you as the participant.
3. Click Share Screen. Practice switching screen views and using Zoom controls.
4. Under the More menu in the Zoom controls,* select Show Video Panel to
   include your webcam view in the recording. Select Share Computer Sound if you
   are sharing a web video with students.
5. Use the Annotate features to spotlight items or draw on screen.*
6. When you are ready, click Record under the More menu* and begin playing your
   slide show, sharing web links, etc., all while narrating the lesson.
7. Pause your recording if needed by clicking Pause, under the More menu.*
8. Click Stop Recording at the end of the lesson. The recording will save to the
   Zoom folder on your computer or to the Cloud.
*see next slide for details                                  Share Screen

                                                                                   2020 | 8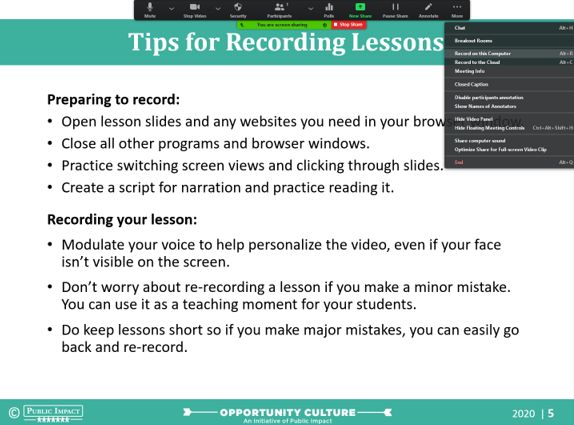
Zoom Screen Share Controls
                 “More” Menu                                               “Annotate” Options

Under More in the Zoom control panel, you can select       You can use Annotate options such as Spotlight or Arrow
options such as Show Video Panel to include your face on   to highlight content on your slides, Draw to add notes, or
screen or Share Computer Sound if you are playing a        Stamp to add icons such as checkmarks, arrows, or hearts
video in your web browser. When sharing your screen, the   to your lesson slides while you are recording.
Record & Pause controls are also under the More menu.

                                                                                                           2020 | 9
Zoom Editing Features
                Editing Menu                                          ‘Draw’ Options

When you open a Zoom recording, you can Play it       Clicking on Draw opens your recording in Photos.
back or access the Editing features by clicking the   Here you can draw on your video using a variety of
pencil icon. Here you can Trim the start and end      pen tools. Once you are finished, click Save and a
points of your video or Draw on the recording.        new “inked” version of your video will be saved.

                                                                                               2020 | 10
Recording Lessons with Screencastify
Screencastify’s free version allows five-minute videos with the ability to trim the
beginning and end; the unlimited version costs $29/year for educators and allows
unlimited recording length and advanced editing features, such as re-ordering
clips in a video or combining videos that you record at separate times.
To use, download the Screencastify app as an extension in Chrome, then click the
arrow icon in the browser window to start a recording.
Recordings are automatically saved to your Google Drive, from which you can
share via Google Classroom or upload to YouTube.
Watch this two-minute welcome video to learn more.
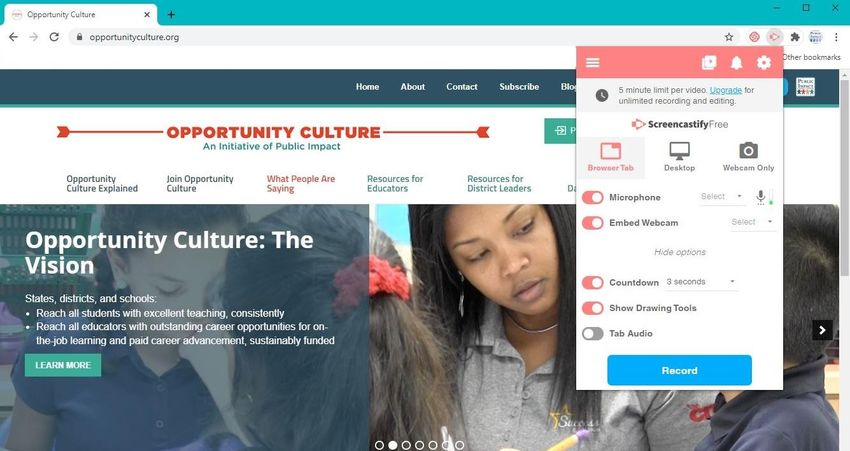
2020 | 11Steps for Recording with Screencastify
Click
1. To begin a recording, click the Screencastify icon in your extension toolbar.
2. Choose whether to record your Browser Tab, Desktop, or Webcam only, and
whether to turn on your Microphone or Embed your Webcam.*
3. Click on More Options to choose additional settings, such as recording your
Browser Tab Audio or the Show Drawing and Annotation tools.*
4. Click the blue Record button. Click the Pause button to pause your recording.*
5. To end the recording, click the icon again, then click the Stop button.*
6. When you end a recording, you will automatically be taken to the Video Page*
where you can edit, save, and share your recording.
7. Recordings will be saved to your Google Drive in a folder called Screencastify.
See this helpful tutorial for details on making your first recording.
*see the following slides for details
2020 | 12Screencastify Recording Settings
Record Browser Tab, Desktop, or Webcam Only; turn on Microphone or Embed Webcam.
Click ‘More Options’ for the Countdown, Drawing Tools, and Tab Audio settings.
Click the blue Record button to start recording.
2020 | 13Screencastify Recording Controls
Drag
Use Drawing & Annotation Tools such as Spotlight and Pen (not available for use with PPT).
Click the Camera button to turn your webcam on/off. Drag to change its size and position.
Click Pause to temporarily stop recording, then click again to pick up right where you left off.
2020 | 14Screencastify Free Editing Options
Name
Share
Trim
When you stop recording, your video will automatically open in the Video Page window.
Use the scissors to Trim the start and end points of your video (more options with Unlimited).
Name your video, then Share on Google Classroom, Publish on YouTube, or get shareable link.
2020 | 15Using Bitmoji to Personalize Lessons
Bitmoji is a popular and easy way to personalize your slide presentations—you
can even join a Facebook group for teachers who use bitmoji themes.
Click the video below to see how to create your own bitmoji avatar and place
yourself in customized scenes.
2020 | 16Example: Screencastify Video Lesson
Click below for an example of a video lesson created by a multi-classroom leader.
She added a bitmoji character and fun scenes to her Google Slides lesson, then
recorded and edited a video of the lesson using Screencastify.
2020 | 17Example: Recording Lessons on a Cellphone
You can also film parts of your lesson using a cellphone or video camera, then
upload the video clips and embed them in lesson slides. Use a tripod with a
cellphone mount or just prop your phone on your desk.
Click the link below to see a video an MCL made of herself doing the kinesthetic
learning activities used in her school’s phonics curriculum, such as arm-tapping
letters while spelling words aloud. She embedded the short video clips into her
Google Slides so her first-graders could join in.
2020 | 18Other Screen Recording Programs
Other screen recording programs include:
Loom
• Pro version is free for students and teachers
• Watch How to use Loom and record your lesson
for Remote & Online learning
Screencast-o-Matic
• Special pricing for districts and educators
• Read 5 Reasons Why You Should Use Video with
Google Classroom
Snag-It
• $29.95 one-time fee for educator license
• Watch Quickest way to record your lessons for
online teaching
2020 | 19Acknowledgements
These MCLs shared their insights on creating engaging video lessons for
students—thank you!
• Phamalae Cummings, Falkener Elementary School, Guilford County Schools, NC
• Andrea Folger, Gentry Primary School, Gentry Public Schools, AR
• Fred Hoffmann, Fairview Elementary School, Guilford County Schools, NC
Public Impact encourages the free use, reproduction, and distribution of this paper for noncommercial
use. We require attribution for all use. Users must include “©2020 Public Impact” and
“OpportunityCulture.org” on all pages where material from this document appears, in whole or in
part, both direct quotes and paraphrased material. Materials may not be sold, leased, licensed or
otherwise distributed for compensation. Opportunity Culture is a trademark of Public Impact. See our
Terms of Use page or contact us for more information.
2020 | 20You can also read