Europe Guide for racing - V 21-02 édition 2021 Denis Dupin - UK Europe Class ...
←
→
Page content transcription
If your browser does not render page correctly, please read the page content below
Denis Dupin
 translated with the precious collaboration of Graham Hutchings, Tim Laws
Thanks to Steve Cockerill for the add on "4th dimension - Downwind sailing"

      Europe Guide for racing
                         édition 2021
                           V 21-02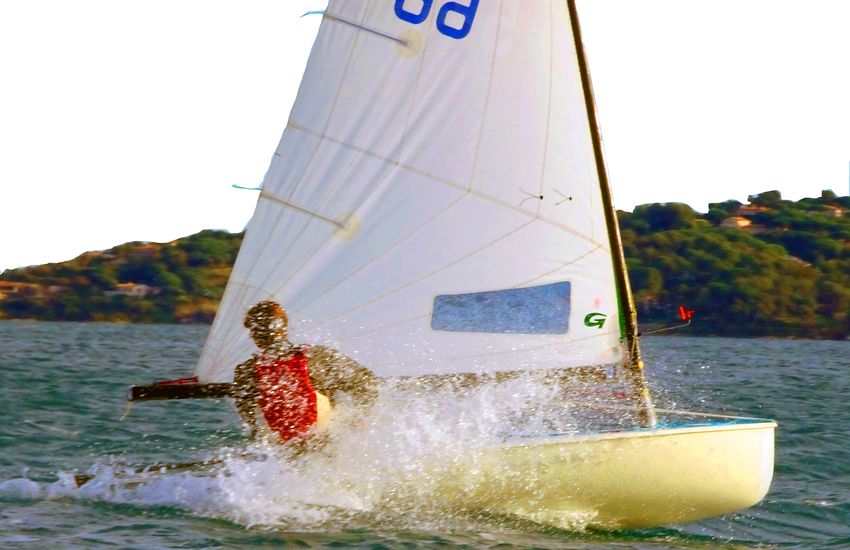
Summary
Summary - Contacts                                                         2
What is the Europe dinghy ?                                                3
Why sailing the Europe ?                                                   4
Buy a boat                                                                 6
Choosing a hull                                                            7
Choosing a mast                                                            8
Choosing a sail                                                            9
Mini or Little sail, or standard ?                                        10
Choose a daggerboard                                                      11
Clothing                                                                  12
Performance elements                                                      13
Builders & resellers - Performance Consulting                             14
Check list- Frequent problems                                             15
Tools - Accessories - Ropes                                               17
Hull fittings                                                             18
Fitting out (rope lengthes)                                               19
Adapt fittings under deck and to sidetanks for an old hull                20
Fitting the vang                                                          21
Boom and mainsheet pulleys- Outhaul systems in the boom                   22
A central strap. Why ? How ?                                              23
Please help, my boat is leaking !                                         24
Replacing the slot gaskets                                                25
Cleaning and polishing the hull                                           26
Reparing the gooseneck                                                    27
Sail telltales                                                            28
Tips & tricks to take care of details…                                    29
Preparing road travel                                                     30
Requirements for racing - International regattas                          31
Racing targets                                                            32
Performance targets and priorities                                        33
Daily oganisation - Preparation routines                                  34
Developping a race strategy                                               35
Compass or not ?                                                          36
Racing with a compass - Using the compass: key moments                    37
The Compucourse; An "anti-migraine" solution                              39
Find the windward side of the start line                                  40
Sailing rules - Learning rules while playing - Class rules                41
Tuning                                                                    42
Basic Settings                                                            44
Easy tuning                                                               45
Adjust settings while sailing                                             46
Speed polars                                                              47
Rake measurement protocol - Basic Settings                                48
Mast bends measurement protocol                                           49
Daggerboard deflections measurement protocol                              50
Analysing a sail                                                          51
Sail measurement protocol                                                 53
Scope of work for Training                                                54
The 4th Dimension- Downwind Sailing by Steve Cockerill, Rooster Sailing   55
Contact IECU - National classes                                           59
A propos de l'évolution du matériel (par Vincent Borsi)                   60

Mini-Guide edition contact
Denis Dupin: 2dupin@laposte.net
                                     Guide-Europe - page 2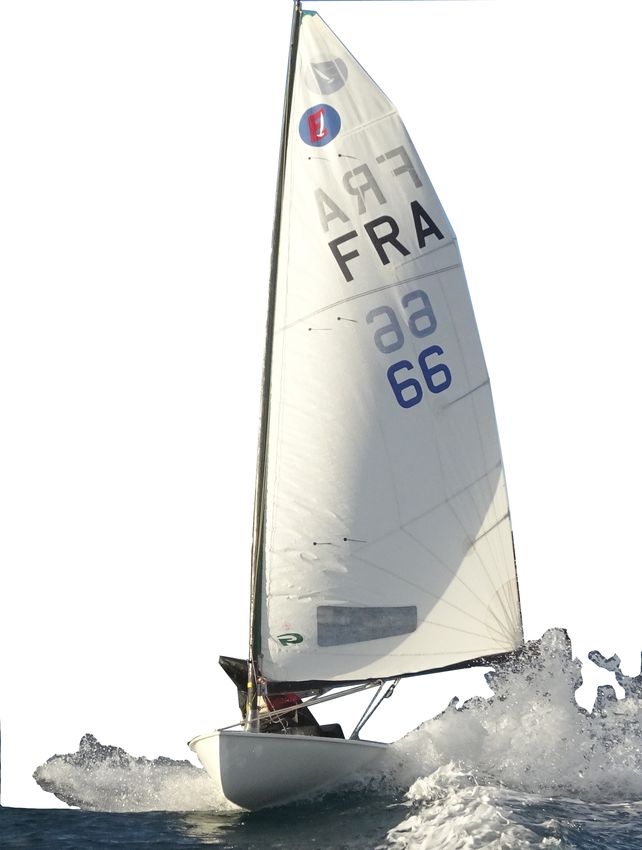
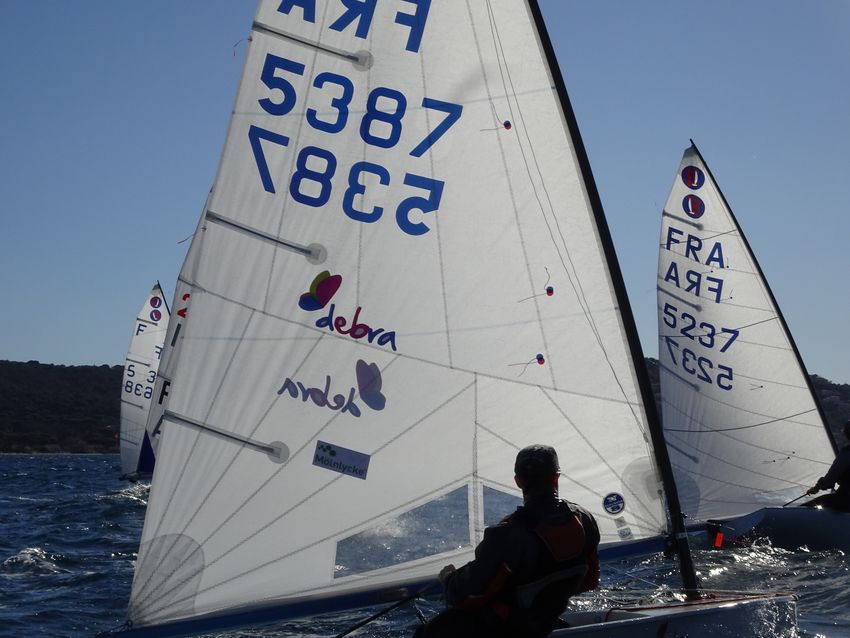
What is the Europe dinghy ?
The International Europe class dinghy is an 11ft (3.35m) long, 4ft 6in (1.38m) wide, 45kg, single-sail mono-
hull dinghy, designed to be sailed by one person. The hull can be constructed in wood, though almost all mo-
dern boats are composite foam sandwich construction. The mast, made of aluminium or carbon is free-stan-
ding, and sails are dacron.

The sail area of the boat is approximately 75ft²(~7m² ) which is comparable to a full-rig Laser. However, in
the Europe, as the mast and sail can be customised to the sailor’s weight and height, this sail area can be uti-
lised by helms who would be far too light for the Laser. The large sail-area on a small, rounded hull shape,
provides a boat that is fast and responsive in light winds and exciting but controllable in stronger conditions.

The class has its beginnings in the European Moth class of the 1960s (which eventually became the Interna-
tional Moth Class – famous in recent years for pioneering hydrofoil racing). In 1963 the FFV (French Fede-
ration Voile) called for submissions for a ‘Monotype’ Moth. The winning design was by Belgian Alois Ro-
land, based on developments of drawings by Pierre Marique. Roland named his boat ‘Europe’ and it quickly
became popular in Belgium and France.

In 1976 the class had grown sufficiently to be awarded International status by the IYRU (the forerunner to
ISAF/WS). In 1989 the class achieved another milestone when it was selected as the Olympic women’s sin-
glehanded dinghy event. This tenure lasted from Barcelona 1992 to Athens 2004, after which the Europe was
supplanted by the Laser Radial.

During the Olympic years the class had many different builders and significant optimisation of hulls and
masts, sometimes at significant expense. Since the passing of the class’ Olympic era the opportunity has
been taken to tighten the rules in many areas with the aim to make the class a stricter one-design.

The class in 2020 is still popular throughout many countries in mainland Europe, with the UK fleet showing
a resurgence in recent years. There are other small pockets of Europe’s spread across the globe, in South
America and even New Zealand. The class holds many well supported events in Europe, with fleets often in
excess of 100 boats, including a World Championship and Youth & Master’s European Championship.

                                           Guide-Europe - page 3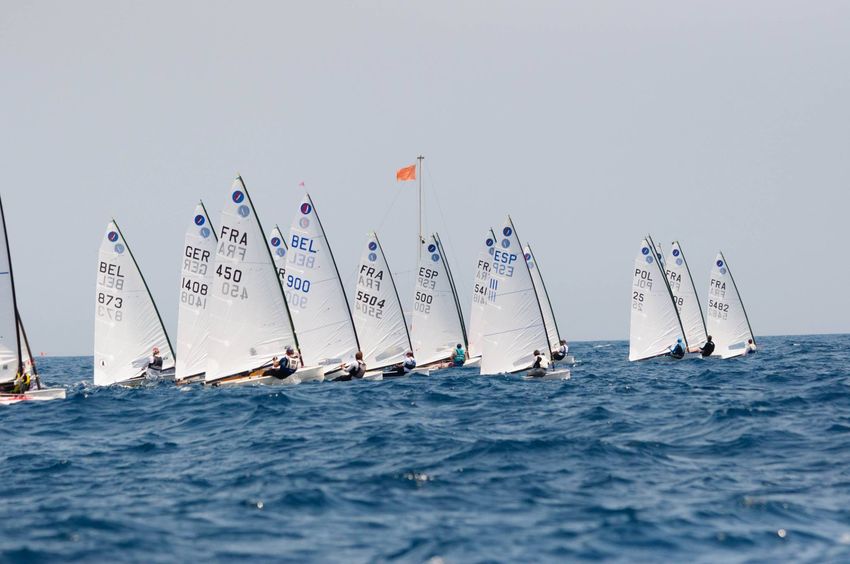
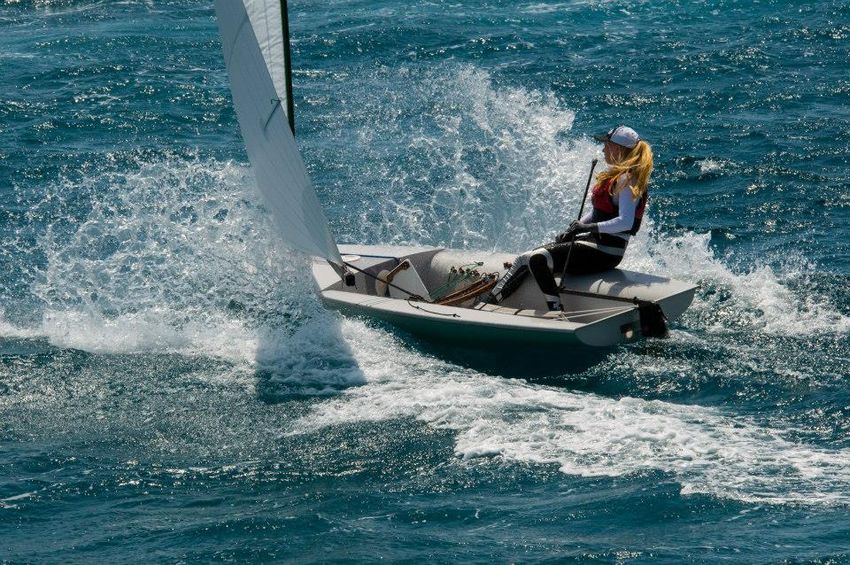
Why sailing the Europe ?
• A simple boat
The Europe is a simple boat. Speed mainly depends on the sailor’s ability to set the sail for the conditions.

• A light boat
The basic hull weighs 45kg with an all-up ready to sail weight of around 60kg. This makes the boat easy to ma-
nage by oneself making it one of the lightest boats around (excluding boats such as the optimist and open Bic).
No bad backs from lugging around heavy boats.

• A huge range of ages and sailor weights
The Europe suits males and femailes equally and caters from those fresh out of junior classes such as the Opti-
mist and Topper, right up to those of ‘advanced age’. Sailors weights range from 40kg to 85kg (no other boat
can do this) with an ideal range of 55 to 75kg. French sailor ‘Pépé’ was once crowned World Champion at the
age of 60!

• Equipment adapted to the sailor
The range of weights and ability of sailor is extended by the choice of equipment that can be tailored to the spe-
cific requirements of the sailor. In particular the carbon mast and sail size and shape can be tailored to the speci-
fic requirements of the sailor

• Rig adjustments
Despite the relative simplicity of the boat, the rig can be adjusted greatly for the conditions. Outhaul, inhaul,
kicker and especially the Cunningham, all led to the sides, control sail shape with the traveller controlling the
angle to the wind. Between races the mast rake can be adjusted too to maintain the balance of the boat.

• A boat that rewards fine tuning
To get the best out of the Europe the sailor needs to be in tune with all aspects such as the balance of the boat,
sail shape, body placement and body movement. Small differences make a large difference on the racecourse
and this teaches the sailor how to get the best out of the boat. Perhaps this is why a great many former Europe
sailors go on to other classes including the Olympic classes, with great succes

                                            Guide-Europe - page 4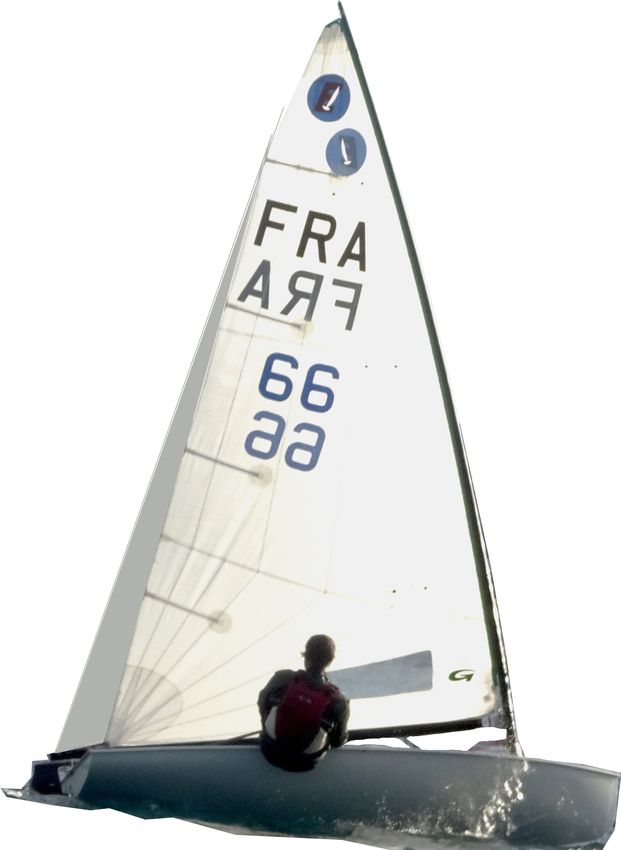
Guide-Europe - page 5
Buy a boat

• New boat

When purchasing a new boat, you should make sure that the IYRU or ISAF plate is on the starboard side of
the bulkhead, depending on the year of construction (blue sticker). You must also check that the contructor’s
badge is to be found on the inner part of the transom.

You should receive the following documents:

The Measurement Form
The Measurement Form must, at least on section 2, be signed by an agreed measurer of the building country.
The Fee Receipt (fees to IECU

After completing paragraph 8 the documents should be registered with your country’s class association to
obtain a sail number.

You shall be sended back the conformity certificate with your national sail number.

This number has to be in your racing sails.

New hulls are available from Winner. Finessa have stopped production. The OSIS moulds have recently
been obtained by a Danish company that is making hulls. Plans for hulls to be made once again in the UK.
And I heard about a new italian hull. (to be confirmed !)

• Second hand boat

There is a lack of second hand boats on the market. Despite this good boats with carbon masts can be bought
for as little as 1500 pounds. Good places to start are the class associations, facebook, Apollo duck, deuxieme
main, etc..

When buying, make sure that the boat is sold with the correct measurement form that corresponds with the
IYRU plaque number. Help can be found with the class associations. Measurement forms should also be
available for the mast, boom, sails, rudder and daggerboard.

Check the IYRU plate or ISAF blue sticker (N° > 7000)
Check that hull number is the same that on the conformity certificate.
Check that the sail numbers are the same.
The reseller must give you the conformity certificate and the Measurement Form of each part of the boat:
hull, mast, boom, centerboard, rudder, rudder head, sails.
Send the papers or copys to he tecnical commission of your country, with the national fees if needed.
You shall be sended back the conformity certificate with the confirmation of your national sail number.

This number has to be on your racing sails.

                                          Guide-Europe - page 6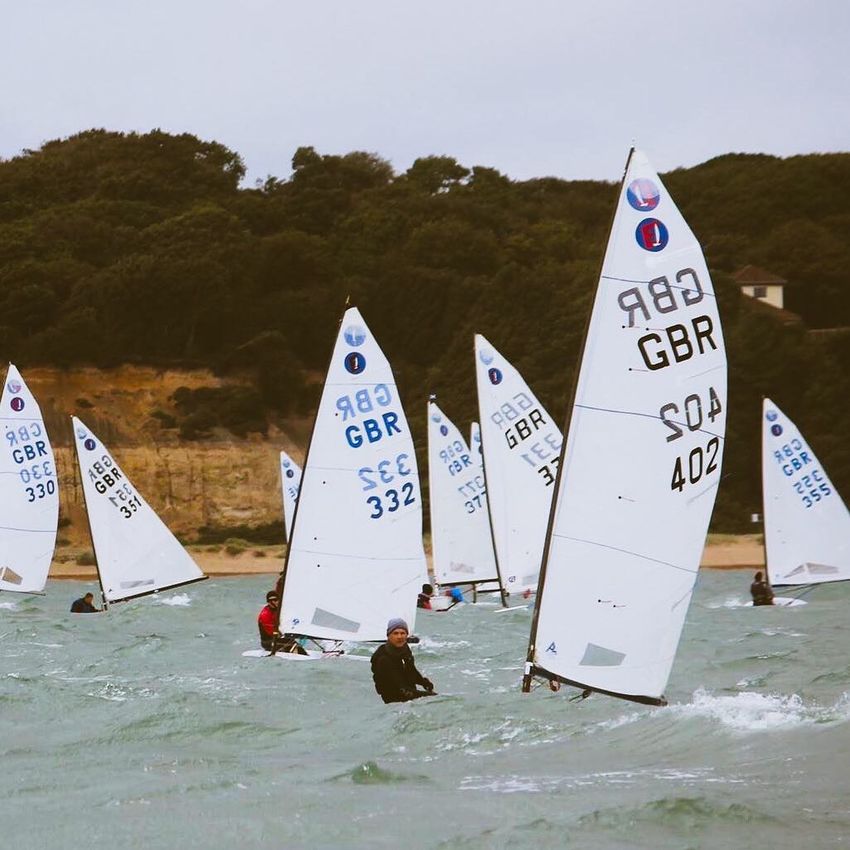
Choosing a hull
Europe hulls last very well. The general condition is probably more important than the age of the hull. Many
hulls in good condition can be found dating from around 1980 to 2004, corresponding to the years that the
Europe was an Olympic class.

Prices vary but a hull (without sails and mast / boom) should cost around 1200 to 2500 euros.
Over 2500 or 3000 euros the hull should be in great shape.

Hull shape
In the past Europes have been made by many constructors, particularly in the ‘Olympic’ years: Roland, Hein,
Lanaverre, Stafler, Van Wattum, Silvestro, Hendriksen-then Boatique, Barracuda, Itsa, Selboat, Boutemy,
Mahifra, Galetti, Cristalli, Tebbertman, Dupeau, Taylor, Optimazur, Duquesnoy, Roga, Rondar, Falat, White,
Vanguard, Boyer, Lennam, Winner Dk, then Winner Es, Borresen, Nautivela, Naaïx, Phileas, Erplast, Fines-
sa, Osis, and may be those forgotten.
The majority on the market at the moment are Winner, Finessa, Osis, Naixx, with a few Rondar, Falat and
White boats in the UK. Very good sailors may notice the difference between hull shapes but for the majority
this makes no difference at all.
Wooden boats, Roland, Silvestro, Galetti, Duquesnoy, Cristalli, are precious "collectors".

Hull surface
A hull that appears to be in poor condition can be repaired to a good finish professionally or by an experien-
ced amateur.

Structure
There are a few key areas to look at when assessing the structure of the hull;

Stiffness – generally, the hull should be stiff. If it flexes then it absorbs energy and slows the boat through
the water.
Mast step – this must be totally solid. Huge forces act here and if it breaks the foredeck will be damaged as
the mast falls
Mast ring – this again must be solid. Many boats have a wooden reinforcement uncer the foredeck that can
be rotten and would need to be replaced
Daggerboard case – look for flexing and cracks
Junction between side-decks and forward bulkhead
Side decks, especially near the traveller track where the sailor would sit
Transom and ruder pintles should be solid
It is a good idea to check that the mast, dagerboard and rudder are all aligned and vertical. This can be done
with care by putting the boat on it’s side.

                                 1973"collector" Silvestro Sail n° FRA 3454
                                          Only five units were built.
                                Is there another else still sailing somewhere ?

                                           Guide-Europe - page 7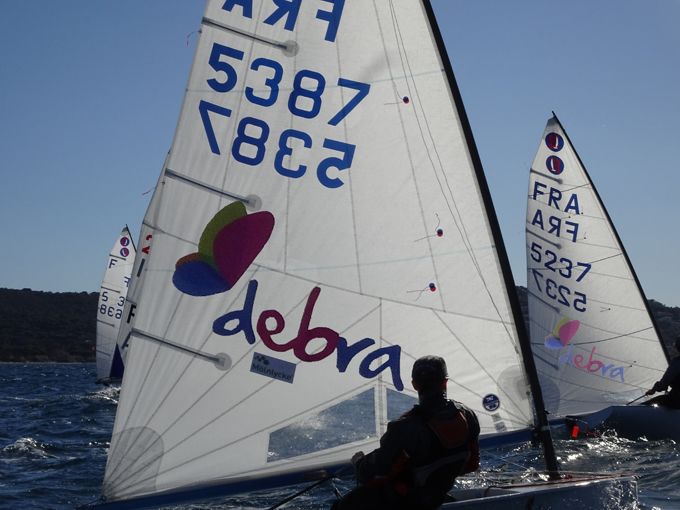
Choosing a mast
Masts have evolved from wood, aluminium, carbon with mast track through to today’s carbon masts with in-
tegral mast track. The latter are the only choice for serious racing but there are many sailors who still use
aluminium masts to great effect. There is a special trophy at the UK Nationals for first boat with an alumi-
nium mast. Of equal importance to the material are the characteristics of that mast. There is no point in
paying for a stiff carbon mast that suits a 70kg sailor if you weigh 55kg. In addition, the sail should be adap-
ted for the particular mast.

- Side bend
Side bend is produced by the lateral forces acting on the sail and is amplified by Cunningham tension. In ge-
neral, a lighter sailor would aim to have a softer mast with more side bend that would allow the sail to depo-
wer at the top. A rough guide is to be found below:
        Sailor             Side bend
    Poids < 55 kg       430 ≤ mm ≤ 375
    55 ≤ kg ≤ 60        370 ≤ mm ≤ 355
    60 ≤ kg ≤ 65        360 ≤ mm ≤ 345
    65 ≤ kg ≤ 70        340 ≤ mm ≤ 325
    70 ≤ kg ≤ 75        320 ≤ mm ≤ 305
      75≤ poids          300 ≤ mm≤ 280

- Back bend
Back bend is a result of leech tension. And again amplified by Cunningham tension. The more the mast
bends, the more;
The sail will flatten, open at the leech and be more responsive in the gusts, but this easy depowering may
come at a price of performance in certain conditions where power is more easily lost. A very stiff mast on the
other hand will have a very narrow range where it cannot adapt readily to the different conditions.
Generaly the back bend is between:
Back bend
300 ≤ mm ≤ 500

- Winning combinations
There is a great variation of masts found at regattas and many can be made to work very well. Side bend is
probably the most important factor and then adapting or choosing a sail to fit.

The actual only manufacturer is Celidh, based in Netherlands:

Sells at Celidh or at Winner Spain:
http://www.carbonmasts.com

Or
http://www.winner.es

                                           Guide-Europe - page 8
Choosing a sail
Many sail lofts will be willing to make Europe sails. Many have had experience in the past when the Europe
was an Olympic class. However only a few are still actively making sails regularly. Green, Wb, Quantum,
North and recently UK sails (Denmark). Sailcloth is usually precut and then stitched together according to
the profile requested, then the luff curve is cut to fit the mast bend. Recently, SailTech has been very active,
developing and making only Europe sails on an individual basis.

New sail
• When ordering, specify your weight and height
• Specify the mast bend characteristics or even its serial number so that the sail adapts perfectly to the bend
of the mast under load

• You may even specific the wind range, sea state of expected using, and your physical condition

It can take between 1-4 weeks to obtain the sail after ordering, depending on the size of the sail loft and the
timing during the year (Be carefull, before the Worlds is a busy period !)

Used sail
A used sail in good condition that was designed for more or less the same weight of sailor and mast can be a
good option if the budget is limited but remains a second best for the reasons outlined above. You should
check the condition of the cloth and the cringles. Ideally, hoist the sail and move the boat to a close hauled
position. Bring the boom down to the transom – provided the rake is set up correctly, if there is a small fold
at most from clew to mid mast, the sail is probably a good fit. If the fold is very pronounced then the fit is
probably not so good.

    Sail worn out              Sail adapted to mast          Fold from midpoint of luff to the clew
    (On the third sail here the fold is not too pronounced and so the and so performance will not be affected.)

                                           Guide-Europe - page 9
Mini or not ?
The measurement rules for Europe sails provide a certain flexibility in the dimensions. Most sails are pushed
to the maximum allowable in an effort to increase sail area but this may not always be the fastest option for
everybody. Around 2010 Green sails started production or a ‘mini’ sail specially adapted for lighter sailors.
More recently, SailTech have introduced the Stormy and Lite versions. These sails have a shorter foot, redu-
cing the leech length and the roach of the sail. The resulting sail has a smaller sail area and less area higher
up the sail. In the same way that yachts reef their sails to increase performance in higher winds, or Toppers
roll the sail round the mast to decrease the sail area, this smaller sail can greatly increase performance in cer-
tain conditions and in certain conditions. Two-boat training and in group training sessions have seen objec-
tive improvements in performance such that sailors under 60kg are quicker around a course in anything over
12kt. All things being equal, the bigger sailor will be faster but the difference between the heavier and the
lighter sailor is reduced with the smaller sail, particularly if the smaller sailor is less experienced.
In heavy conditions when the difference is 10-13%, with the smaller sail this is reduced to 8-10% which is a
2-3% increase in performance. The downside is that in lighter winds the reduction in performance is 1-1.5%.
In practice, the wind is often greater for more of the time and the net gain is usually in favour of the smaller
sail.

We may resume hare arguments against or for using such a sail:

Against
The name suggests that the sail is worse.
In less that 14kt the sail is 1-1.5% less efficient downwind.

For
An increase in performance of 2-3% close hauled in 12+ kt. Off the wind the smailler sail may be more sta-
ble and easier to handle in transitions making the sailor feel able to be more dynamic rather than staying in
safe (and slow) mode. A smaller sail is less physically demanding – useful for thos long days on the water
with multiple back-to-back races.

The Europe class rules allow 2 sails to be used for a regatta. Therefore smaller sailors may find significant
advantage in choosing the correct sail for the conditions

                                 In grey, the part of the sail that is removed giving an efficient smaller profile.

                                           Guide-Europe - page 10
Choosing a daggerboard
The daggerboard may be less important that the mast and sail but nevertheless is an important element to get
right. Because the Europe is relatively slow, the daggerboard has to be relatively large to counteract the side-
ways forces developed. In general the board should be more flexible for the lighter sailor but made-to-mea-
sure boards are not generally available and the gains are likely to be small. The weight of the board may be
an indicator of its flexibility and this should be marked on the measurement certificate. Weight varies from
2-2.8kg.
The graph shows the result of testing flexibility against weight of the board that confirms the relation
between the two.
Although there are no definitive guide, smaller sailors under 60kg should probably aim for a board of 75kg should aim for a board >2.5kg.
New daggerboard
When ordering, specify your weight and height, and the ideal weight of the board. The seller may have a
number of boards in stock of varying weights and builders.
Used daggerboard
• The general state and finish of the board is probably much more important that the flexibility. It should be
smooth, particularly the edges and especially around the areas in contact with the case. It should be straight
and there should be no signs of ingress of moisture. Chack the weight against the measurement certificate.
Curve of flexibility against weight according to the testing protocol. The more the coefficient is raise, the
more flexible the foil
8
7,6
7,3
7 7
7
5,00-5,99
6,2 6,00-6,99
7,00-7,99
6 5,8 5,8 8,00-8,99
5,6 9,00-9,99
5
2,145 2,215 2,265 2,33 2,435 2,445 2,58 2,625
Guide-Europe page 11Clothing
Very few sailors care precisely about their closing.
In this "detail" we recognize the mark of the "big", the picky, those who avoid losing any potential of speed.
Closing must comply with five principles:
- Adapted to the temperature of water and air (sometimes a compromise) & gives sun protection.
- Optimised to the size of the sailor: A heavy helm is best equipping himself with the lightest clothing
possible, so that his weight varies as little as possible when his outfit changes.
- For a lightweight helm the rules offer the possibility of wearing up to 10kg of (wet) clothing*. As soon as
conditions increas to the point that they are overpowered, it is worth considering wearing extra layers to
increase the righting moment created by hiking. Obviously it also usually the case that the conditions require
extra layers for warmth and comfort anyway.
* Class rules
-Present as little air resistance as possible.
- Protect from possible shocks or injuries. The most frequent injuries are:
• Impact of the boom on the head.
• Cuts from the bailers, when righting a capsized boat.
• Cuts to the feet in the cockpit.
- Not cause discomfort or a restriction in movement.
When buying kit it is worth a look at options available for other watersports. These are often cheaper and
may be better suited to your body size/shape that the standard range from sailing labels, in fact often
products may simply be rebadged but otherwise identical (and cheaper!).
Author uses a set of neoprene combinaisons:
clothing weight dry water wind
Nylon boxer+nylon long shirt warm light, medium
neoprene 2 mm boxer 350g warm medium, windy
shorty 1mm 585g warm light, medium, windy
long shorty 1mm 770g warm medium, windy
integral 1 mm neoprene 710g cold light, medium
integral 3 mm neoprene 1360g cold medium, windy
shoes
neoprene 1mm 55g warm
neoprene 3mm 90g cold
Guide-Europe - page 12Performance elements
It is not always possible to buy a totally new boat. Many sailors want to know where the biggest gains are to
be made – which part of the boat is crucial for speed?
The hull
The hull needs to be down to weight, stiff, watertight with a good finish. Fittings such as cleats need to work
well.
Mast and sail
These should be considered together. The sail is adapted to the mast and both must be adapted to the sailor’s
weight and fitness. If you have the wrong mast it might be better to swap with someone in the fleet rather
than continue with the wrong one and buy a sail that will never be right for you.
Daggerboard
Boards should be solid and smooth with intact edges. Full wood boards, wich are not nervous as the modern
sandwich boards (not to be confused with the excellent laminate boards), are to be replaced.
Rudder
As with the daggerboard but less important. Few gains to be made here.
Rudder stock
Must fit well to avoid vibration. Carbon versions are available. The rudder stock must be very stiff or you
should have bad surprises when windy…
The sailor
Undeniably, the most important factor is the sailor. Whilst the boat must be good, the sailor must be in good
physical shape and should sail and train regularly. Sailing should be fun, but practice in the gym or on the
water makes for better sailing. As a guide for what is the most important, on a scale out of 23*, the elements
can be classed as follows:
Sailor 20/23
Mast / Sail 16/23
Daggerboard 15/23
Hull 14/23
Rudder stock 10/23
Rudder 6/23
Two things should be noted. Firstly, in terms of cost / benefit the daggerboard is the best option (and a new
board looks great!). Secondly, this is just a guide and serves as a discussion pont for the boatpark or the bar !
* This sacle is a joking one, refered to one of my favorit sitcom: Kaamelott…
Guide-Europe - page 13Builders & providers
Before buying a new boat, it's interesting to remember that buying a second and boat may be a good oppor-
tunity: Europe stay in good conditions even after many years of use and the second hand market may present
hulls in really good conditions…
At the time of writing there are projects to bring to market new Europe hulls in Denmark using the OSIS
moulds, and to begin construction of new hulls in the UK. We also heard of a hull project in Italy to be con-
firmed…
Hulls
Winner: http://www.winner.es/
Osis: http://www.osis.se/pris.html
Masts
Celidh: http://www.carbonmast.com/
Sails
Green Sails: http://www.greensails.dk
North sails: https://www.northsails.com/sailing/fr/od/europe
SailTech: web site coming soon…
Quantum: http://www.quantumsails.com/
UK Denmark: https://www.sails.dk/
WB: http://www.wb-sails.fi/
Suppliers (hulls, sails, spars, rudders & centerboards, ropes, fittings…)
Paris Voile - www.paris-voile.tm.fr/
Proust: http://www.proust-sailing.com/
Van Laer sailing:https://www.vanlaersailing.be
Winner: http://www.winner.es/
http://shop.winner.es/epages/ed2297.sf/en_GB/?ObjectPath=Categories
UK Europe parts and sail suppliers Picture: Winner Loft
https://www.pinbax.com/
https://www.roostersailing.com/
Coaching - Performance Sailing Consultant
BRO Physical Coaching: Nicolas D’Hondt, Belgium
https://www.facebook.com/BROPhysicalCoaching/
2dVoile Performance: Performance sailing Consultant
Training, race coaching, strategical profiling, performance analysis;
audit, advices, material preparation
Builders consulting - research - tests - development - material adjusting
Denis Dupin: 2dvoile@gmail.com
Guide-Europe - page 14Check list of equipment
Remember – It is unacceptable to have a break or other problem due to poor maintenance. In case of doubt,
repair today, not tomorrow, and do it properly
If OK put a cross in the box, if not checked leave the box blank
if there is a problem put an exclamation mark in the box!
Checks for the mast
! Is the mast straight?
Straightness and cleanliness of the sail-track?
Condition of mast ring?
Condition of mast foot?
! Condition of gooseneck?
! Condition of vang fittings?
Condition of measurement bands?
! Condition of hook/block for main halyard?
Condition of main halyard (3mm Spectra)?
Condition of halyard sheave?
Checks for the boom
Straightness and cleanliness of boom and sail-track?
Condition of measurement bands?
! Condition of vang fittings?
! Condition of mainsheet blocks and associated fittings?
Condition of outhaul (4mm Spectra)
Condition of outhaul blocks?
Condition of mainsheet? (Particularly at attachment points)
Checks for the daggerboard
Straightness & symmetry?
Condition of surface finish? Any scratches or marks?
Condition of leading edge?
! Condition of trailing edge (especially where board contacts back of the case)?
Checks for the rudder and stock
Straightness, stiffness, play (between rudder and stock)?
Condition of tiller extension?
! Condition of tiller extension attachment?
Play in rudder fittings of between tiller & head?
Straightness and symmetry of the blade?
Condition of surface finish?
Condition of leading edge?
Condition of trailing edge?
Does the blade rotate easily?
With rudder down check vertical alignment laterally and fore & aft.
Condition and ease of use of locking pin?
Vérifications pour la coque
Guide-Europe - page 15Checks for the hull
Condition of bow fairlead?
Condition of towline (14m, 6mm floating line)
! Condition and function of mast base fitting?
Condition of blocks at the mast base?
Condition of blocks & cleats and other fittings?
! Straightness and condition of daggerboard case?
Centreboard movement/friction in the case?
Condition and attachment of the traveller?
Condition and function of traveller car and cleats?
Condition of mainsheet blocks and cleats?
Condition and seal of hatch covers?
Sealing and function of the bailers?
Condition of rudder fitting (vertical, central)?
Condition of mast control lines – cunningham/inhaul? (±1 à 2,5m, Ø 1 à 3mm)
Condition of mast control lines – vang/outhaul? (±3m, Ø 3 à 4mm)
Condition of toestraps?
Condition of toestrap elastics?
Condition of toestrap adjustment fittings, cleats and lines?
! Condition of slot gasket?
! Presence of silicon protection at front and back of daggerboard case?
Condition of the hull surface?
Checks for the sails
Condition of the sail-cloth?
Condition of sail-window?
Condition of batten pockets?
Condition of bolt-rope?
Condition of reinforcement around eyelets?
Condition and conformity of sail number?
Measurement certificate and sail signed?
Frequent problems
Boom – loose fixings for mainsheet and Vang
Mast – loose gooseneck fitting, breakage of running rigging (eg outhaul line inside the boom).
Hull – Slot gaskets, control lines
Rear end of daggerboard case – water ingress and absence of rubber protection for daggerboard
Tiller extension
Trailing edge of the daggerboard
Guide-Europe - page 16Toolbox – minimum requirements
Pliars, screwdriver (flat and posidrive / Phillips), knife
Stainless nuts and bolts size 4 and 5
Stainless shackles (straight and twisted)
Silicone / Mastic, acetone, Neoprene glue, duct tape, grey tape
Pro toolbox
as above plus;
Drill (metal) size 3, 4, 5, 8, 10
Metal saw, rivet gun
Threads of wool / telltales
Gelcoat
Sanding paper wet and dry (80, 100, 600, 1000)
Spinaker tape
Accessories
Pencil
Compass (ex: silva 85); compucourse
Firm plastic sheet for transom holes
Bailer (plastic bottle with top cut off), sponge
Ropes
The wider the rope the more the friction. Therefore smaller diameter ropes are generally easier to play and
therefore put less stress on the hands. Therefore controle lines should be of 3m diameter rather than 4 or
5mm. Smaller ropes also weigh less.
The same is true for the mainsheet. A diameter of 8mm compared to 10mm runs more freely and puts less
pressure on the hands. Any smaller though and a loop can easily run into the mainsheet block and get stuck.
Requirements
Location/Part Material Diameter (mm) Length (m)
Painter* Floating line (polyprop 8 plait) 6mm 14m
Control takeups/toestraps Shock/Bungee 4mm Varies
Boom elastic Shock/Bungee 10mm 2m
Mainsheet (3 part) Dyneema or similar 6-10mm 7.5m
Vang (boom-mast) Dyneema 4-6mm Varies
Vang (mast foot to boom) Dyneema 3mm ±2m
Outhaul (mast foot to boom) Dyneema 3mm ± 1.5 m
Inhaul (mast foot to sail) Dyneema 1-2mm ± 1.2 m
Cunningham (mast foot to sail) Dyneema 1-2mm ± 1.2 m
Control lines (to side tanks) Dyneema 3mm ≥ 3m
Guide-Europe - page 17Hull fittings
Side tanks:
clam cleats 27mm with guide (6 for each side tank: cun, inhaul, outhaul, kicker, footstraps, traveller)
clam cleats 38 mm (1for each tank for the mainsheet) or alternatively swivel cleat on the lower mainsheet
block
traveller with 2 to 1 purchase around a 29mm pulley
Floor of the hull
2 lateral footstraps 85cm or one central footstrap of 65cm for sailors over 175cm, with 20mm pulley.
Self bailers, Europe super mini Self bailers RA435200
On the deck
Loop for fixing to trolley
Mast ring and loop for tying down mast
Under deck
Stainless adjustable mast foot with 2x double pulleys for the four sail control lines (outhaul / inhaul / kicker /
Cunningham) with 4 pulleys, one on each line after it passes aft from the mast foot
Bulkhead
4 double pulley-bulkhead
Inspection hatches
4 hattches Ø 15cm, 1 for each side tank, 1 for deck, 1 for bulkhead
1 trappe Ø 10 cm n the front tank in front of the mast ring
Transom
2 stainless gudgeons Ø 10mm
Guide-Europe - page 18Fitting out - ropes
From afar the control lines on a Europe look like a knot of spaghetti but when fitted out properly everything
should work with ease to allow the sailor to change the sail shape whilst sitting out. The lines come from the
boom or sail, pass through the deck to the mastfoot and are rekayed to each side deck.
Each control line has two parts. In blue (on the right of the diagram) an end passes through one of the pul-
leys fixed to the base of the mast and passes backwards to a small pulley, generally Ø16 - 22 mm.
• The other end of the line passes upwards and through a small hole in the mast collar. When rigging it is ea-
sier to do thiswith the mast already nearly in place before dropping the mast a further 10 cm into the mast
foot.
• On the left of the diagram (in red) the control line passes from the side deck, through a pulley in the
forward bulkhead, through the pulley of the line passing around the mast foot, back through the pulley on the
bulkhead and to the other side in a symmetric fashion.
For each control line you will need:
- ± 3m, Ø de 3 - 6 mm, for the line on the side decks (choose a diferent colour for each)
- 1 small pulley fixed to the end of the line from the mast foot
- 1 small pulley fixed to the back of the mast foot (often Two double pulleys for the 4 lines)
- ± 1,20m, Ø 1,5 - 3mm for the inhaul and Cunningham
- ± 2m , Ø 3mm or the Vang and outhaul
Donc pour équiper un bateau, il faut:
- ± 12m de bout Ø 3 - 6 mm
- ± 3m de bout Ø 1,5 - 3 mm
- ± 4m de bout Ø 3mm
- 4 pulleys Ø 16 - 22 mm (generaly the pulleys at the mast foot are already present)
To complete the running rigging you will need a mainsheet of approximately 7.50m, Ø 8 to 10 mm
Guide-Europe - page 19Adapt fittings under deck and to sidetanks for an old hull
For a good understanding of the principle, read the chapter: "Equip your boat".
The older hulls received the controls on the deck.
Many sailors would like to adapt the controls according to the current model:
the adjustment lines pass through the mast ring, descend into pulleys at the rear of the mast foot and end in a
pulley.
Each pulley receives a command which is returned in cleats fixed on each sidetank, passing through the flo-
or. (Vertical wall that closes the deck).
To adapt such a system, it is necessary:
1 - Provide holes in the mast ring.
The carbon masts are all equipped with it.
For the old aluminium masts, you will have to drill the 4-hole ring, Ø 4 mm
2 - Fix two double-pulleys at the rear of the mast foot
3 - Fix 4 double pulley-bulkhead , two each side of the centercase .
Under each pulley, drill a hole, Ø 4 à 6 mm to guide the lines.
(Measurement rules allows holes until Ø 8mm).
You can also take the option of cutting a slot to the size of the double pulley-bulkhead to come and embed
them from the inside.
4 - Fix the adjustment clams to the sidetanks. 4 clams per tank, allowing to receive:
cunningham, inhaul, outhaul, boom vang
To ensure a good tightness of the tanks, do not forget to generously fill the holes and the bottom of the cleats
before passing the bolts and screwing.
Guide-Europe - page 20Fitting the boom vang/kicker
There are two types of vang commonly used in the class:
- Cascade vang
The vang fitting is installed as standard on the boom ア 60 cm from the gooseneck bolt on the mast. The fit-
ting should have one side bolted into a hole drilled into the underside of the boom - if just friction is used
then the fitting tends to creep towards the mast under tension
- A double ended length of dyneema (Ø 5mm) starts from the shackle attached to the mast.
- One end passes through the (Ø 24 or 30mm) block attached to the vang fitting on the boom (P1). Another
block (Ø 18 mm) (P2) is tied to the end of this part.
- The second part of the end passes through the smaller block (P2). At the end of this a double pulley is
attached (Ø 16 or 18mm) (P3).
- The control line end which exits the mast ring passes through one of the sheaves of the double pulley fixed
at the mast/gooseneck (P4). It then passes through one of the sheaves in P3, returns into the second sheave
P4 and passes into the second sheave P3 and attaches to the becket of P4.
- Care must be taken to check that when the control line inside the mast tank is all the way aft (fully pulled
on), then the double block on the cascade is block-to-block with the one on the gooseneck
- Lever vang
This system is based on an aluminium lever is fixed on a pivot through the boom.
- A double ended length of dyneema (Ø 5mm) starts from the shackle/block attached to the mast.
-The two ends attach each side on the upper part of the lever.
- The control line which exits the mast ring passes through one of the sheaves of the double pulley fixed on
the mast (P4), then passes through one of the sheaves on the double pulley at the bottom of the lever (P3),
returns to the second sheave P4, passes into the second sheave P3 and is attached to the becket of P4.
Guide-Europe - page 21Boom and mainsheet pulleys
Variations in the stiffness of the boom itself may have a small but noticeable effect on the performance of the
sail. The role of the boom is to regulate the foot of the sail and the relationship between mainsheet tension
and leech tension.
- the softer the boom, the more it bends to reduce the depth in the lower part of the sail.
- the softer the boom, the more it can flex at the clew in order to open the leech of the sail.
Lighter sailors may opt for a more flexible boom whereas heavier sailors may benefit from a stiffer version
The apparent stiffness may also by adjusted by the position of the boom take-off points for the mainsheet.
Small differences here may have a considerable effect on performance and ‘feel’ of the boat.
In order to allow the leech to open and flatten the lower part of the sail, the take-off points can be moved
marginally forward, and can be placed adjacent to each other. This allows the boom to flex more to allow the
clew to rise and open the leech when a gust hits.
Alternatively moving the take-off points further aft and slightly apart will reduce flex of the boom. However,
this may make it harder to get the boom down on the deck when close hauled.
Attention should be paid to the state of the boom, particularly at the take-off area, to ensure there are no
breakages.
Outhaul system inside the boom
Two examples are shown adapted from J.K Mack in "Rigging Guide", in the previous internet site of the
French Europe Association
Guide-Europe - page 22A central strap. Why? How?
Taller sailors may find an advantage in using a central strap rather than both sides.
There are several arguments:
- Weight: two long straps (85 to 100 cm) are replaced by a shorter one (65 cm), fittings, ropes, sheaves are
removed from the end. Switching to a strap allows you to earn 160g dry.
- Weight centering: the centre strap is … centered
- Less tiring in marginal hiking conditions: When not yet fully hiked, the central strap offers more comfort,
with the strap over your feet and heels against the central cockpit spine. The body is then extended by push-
ing against the spine and the effort is significantly less tiring than when hiking.
- Better transmission of body weight and support: The stretched body position on the central cockpit spine
gives a much more natural body posture than when hiking. The body transmissions on the hull get better
quality.
- The way the strap is fastened means that, in use, the strap is parallel to the centreline (rather than aft - as in
the conventional double toe-strap configuration). Thus in waves the helm doesn’t end up sliding toward the
stern!
Depending on the configuration of your boar, you may need to cut away part of the back of the daggerboard
case, drill a hole on each side Ø 8mm.
Drill a hole in the false keel, according to the length of the strap 65≥d≥85 cm from the daggerboard, Ø 8mm.
Attach a guide (as shown in the photo) in this hole.
Using a wire, pass a 3≥Ø≥5 mm line through this, forward through the false keel to the back of the dagger-
board case.
Attach this line to the back fixing of the strap.
To the front, attatch a small pully to lead the control line to the side tanks.
The front of the strap is fixed by a rope led through an aluminum tube which crosses the housing.
Guide-Europe - page 23Help, my boat is leaking!
It is relatyively common for a boat to take on water in the bulkhead or side decks, especially in rough condi-
tions.
Remember to remove this water at the end of the day’s sailing rather than the following morning. This redu-
ces the risk of water ingress into the hull which can lead to damage and weight gain. When stored dry this
weight will literally evaporate but will leave saly behind.
Side tanks
Water can enter into any of the holes made for fixings such as the inspection hatches, fixing for the traveller
or the cleats. The best way to avoid this is to remove each fitting, clean thoroughly and apply a generous
dose of silicone before fitting firmly once again.
Significant amounts of water may also be due to a leak between the hull and side deck, particularly in older
boats. If this is the case then a more extensive repair will polyester or gelcoat will be required.
Forward bulkhead
Again, water can enter into any of the holes made for fixings and the best way to avoid this is to remove
each fitting, clean thoroughly and apply a generous dose of silicone before fitting firmly once again.
Cockpit
The cockpit can take on large amounts of water, some from obvious causes and some from less obvious cau-
ses.
- Sinking the sides of the transom when tacking
- The evacuation holes in the transom. Close with duct tape or fix a firm plastic sheet (even an X-ray film)
over the hole in a hinge flap.
- The self-bailers can have leaks around them, be loose or the trap door can be ill-fitting. Fix firmly if ob-
viously loose, or take out, clean, apply silicone and replace. New trap doors can be bought for a couple of
Euros, and new bailers can be bought if needed.
- At the back of the daggerboard case. This can be diificult to detect. It usually arises from damage to the in-
side of the case from the daggerboard and so the state of the trailing edge of the daggerboard should be a
clue. A repair should be made on the inside of the case before replacing the protective rubber between the
case and the daggerboard.
Guide-Europe - page 24Replacing the slot gaskets
The slot gaskets must be perfect. If not they will cause significant drag through the water and by letting the
water enter the daggerboard case. Water can also come up through the daggerboard case and into the cockpit
area, sometimes at a rate that is greater than the self bailers can cope with.
Three simple steps.
• Remove the old slot gaskets . Scrape off any bits of gasket or glue left behind, sand and wipe and clean
thoroughly with acetone.
• Smooth with mastic or gelcoat if necessary, including the inside of the case
• Cut new gaskets
New gaskets can be made of Mylar canvas or other semi-rigid material. Cut carefully to the correct dimen-
sions. Clean the side that is to be stuck to the hull with acetone.
• Stick with neoprene glue
Apply a fine layer of glue to the hull and gasket, wait for the required time and place one gasket and the
other. The whole process should take one hour before you are ready to sail
or
- Stick with sykaflex glue
Add the glue as a 1mm layer to the hull side, delicately place the gaskets, add a batten over the top kept in
place by tape to keep the gasket in place and wait the required time. Total time taken from start to ready to
sail finish is between 2-4 hours depending on conditions.
Warning:
The quality of the work depends on the quality of preparation but also the conditions. Warm and dry condi-
tions are best. This type of work can be done in the middle of a regatta if necessary but you must find a
warm and dry area. Neoprene glue is probably the best option because it sets quickly and is readily available
in small tubes. Obviously it is best to check the gaskets regularly and perform repairs well in advance, with
some even suggesting replacing at the start of each sailing season.
! Note!
When repairing the slot gaskets, have a good look at the inside of the case for damage and replace the
rubber protection at the lower back end of the case to protect the trailing edge of the daggerboard.
Guide-Europe - page 25Cleaning and polishing of the hull
Which one of us didn’t wonder how to restore all its brilliance to a used hull?
It’s fairly inexpensive, and it just takes time and patient work...
To protect you from the products used, we recommend using gloves.
First step; great cleaning:
Apply oxalyc acid (or sorrel salt), leave on as recommended, then rinse thoroughly.
Second step: surfacing:
If necessary, repear the larger impacts or scratches with mastic or gel-coat loaded (in which you incorporate
glass powder).
Sanding with abrasive water paper. Very marked areas can be passed to 500 or 600.
Otherwise, use 1000 or 1200.
Third step: polishing preparation
Sanding with abrasive water paper 2000.
If you have a pneumatic orbital, the must is to finish at the Trizact 3000, a special disc that you will find
from suppliers specialized in the sale of composite products.
Fourth step: polishing
Apply polishing paste in small areas. Do not rub too quickly or too hard. Do not heat the gel coat.
The ideal is to have or borrow an orbital machine: pass the polishing paste with a sheepskin.
Fifth step: glossing
Pass wax or fine gloss liquid with microfiber cloths.
With a machine it is faster……
Surely, you're not required to work during the night !
Guide-Europe - page 26Repairing the gooseneck
The gooseneck provides the connection between the mast at the boom.
The gooseneck operates under huge stresses, especially during gybes.
While some goosenecks are bonded to the mast, some are bolted - and if not regularly checked for tightness
there can be a risk of the bolts tearing off the mast - with resultant damage and the boat becoming un-saila-
ble.
Remove the gooseneck and carefully clean the attachment holes (acetone is good for this).
Prepare two pieces, one intended to be glued inside the mast, the other intended to hold the first in place
inside the mast.
Drill holes sized for the bolts in the first piece. In the second piece drill holes of 2.5-3mm diameter.
Pass fine (2mm) dyneema through both holes in the mast, and draw the ends through the bottom of the mast
(a piece of bent wire is useful here).
Pass the ends through the holes in the first piece and tie a small knot in each. These should be small enough
to pass through the bolt holes but bigger than the holes in the second ‘backing’ piece. This is for removing
the backing piece!
Pass the ends through the holes in the second piece and tie figure-of-eight knots as stoppers.
Coat the first piece generously with epoxy (the face that will attach to the inside of the mast).
Insert it and the backing plate into the mast and pull gently on the strings to locate the plates inside the mast.
When the plates are in the correct place put the sting under high tension and leave for several hours for the
epoxy to cure (check the curing time of the epoxy at different temperatures as brands may differ).
When the epoxy has cured use the string to remove the backing plate.
You can now insert the bolts, however it is advisable to use a barrier between the bolts and the carbon mast
to prevent corrosion – Tef-Gel is useful for this.
Guide-Europe - page 27Sail telltales
Telltales are used to ‘see’ the flow of wind over the sail They are placed primarily on the luff of the sail for
the angle of sheeting and the leech to assess leech tension.
Reading the telltales on the luff
When close hauled, laminar flow is achieved when the telltales on both sides of the sail are are lifted from
the sail and run parallel towards the back of the sail.
When the windward telltale is lifting and moving in all directions, the sail should be pulled in or you should
bear away. If the leeward telltale is lifting and moving in all diirections then you should ease the sheet or
head up. In the Europe, as in other boats, there is nothing worse for the sail than oversheeting
Luff telltales
• First line at ± 80 cm from the sail foot.
Two telltales ± 40, ± 45cm from the luff.
The telltale on the other side of the sail should be about 2cm above the other.
• Second line at ± 80 cm over the first.
Two telltales ± 35, ± 40cm from the luff.
• Third line at ± 80 cm over the second.
One telltale at ± 30cm from the luff.
• Fourth line at ± 80 cm over the third.
One telltale at ± 25cm from the luff.
If you wish to decrease the number of telltales, use positions
1,2,4 or 1,4
Leech telltales
Leech telltales are placed at the back of the batten pockets. When
they flow horizontally the air is escaping and the leech is open.
When the telltales are not flowing the leech is closed and the
sail is stalled, killing performance. Optimal pointing may be
achieved when the upper leech telltale is 50% streaming aft,
50% flicking to leeward.
Guide-Europe - page 28Tips & tricks to take care of details…
Using dry silicone or Teflon on frictions part is usefull.
! Carefull: Never put silicone on a sheave or its balls, or on a rail on which they are moving (for example, a
traveller rail). And of course, when you use silicone, make sure you don’t spill it all over the boat!
Mast stand: Before the mast is installed,silicone may be placed on the bolt assembly, on the support plate, in
the mast stand housing. Especially not in sheaves or on adjustment ropes.
Same for the deck ring and the mast ring.
Mast: Before mast is up, clean its ralingue and pass it to silicone: the circulation of the sail will be easier.
Boom: Proceed in the same way for the boom before installing the sail.
Centerboard case: you may use a bit of silicone into the centerboard case, trying to avoid the highest part
whose friction keeps the centerboard in a chosen position.
Bailers: clean, spray the parts that slide will make it easier to operate and will prevent you from pulling too
hard -at the risk of deforming them- when you close them
Automatic axis
Tired of tightening and loosening the shackle? Replace it with a split pin of the same diameter.
Wedge the centercase
Some racers remove the drift set in the centercase by sticking strips of mylar or scotch.
Wedge the rudder fittings
Here is a patience game. Cut small pieces into aluminum can. Insert it into the rudder fittings. Stand the
rudder. As it's not so easy to insert, don't remove it before the end of the regatta.
Take off numbers in a sail: gently pull out the numbers.If the sail is not too old, the numbers are removed
with the glue. If the sail is too old, glue may stand on the sailcloth. It can then be removed with acetone or
K2r.
Remove stickers that resist by gently heating them with a hair dryer.
Protect the ropes or elastics from wear by placing binding on the edges of polyesther
.
Guide-Europe - page 29Transporting your boat
This section is a warning that the majority of major accidents occur during transport of the boat and not on
the water. A majority of problems occur due to poorly attatched boats. Straps are often poorly placed, can
rub so that they break or can be fragile through UV degradation.
Keeping straps in good condition and replacing them when required is key. Wide, strong straps are best.
Don’t hesitate to use 2 straps or a safety piece of rope as a belt-and-braces way of ensuring that the boat
stays on the trailer or roof.
Protection from vibrations
Every effort should be taken to minimalise vibrations. The hull should be secured with wide straps, padding
around the hull and between hull and straps is essential and spars should be secured so that they do not
move. Remember to fix halyards, pulleys and shackles (for example with electrical tape), so that they do not
come loose.
Guide-Europe - page 30Requirements for racing (the admin!)
While at club level and at smaller regattas there is a relaxed attitude to measurement and paperwork, to take
part in bigger events or championships it is best to have all your paperwork in order (even if it never gets
asked for...).
- Insurance form – check the level of cover required as this can vary by country.
- The sailor should be a current paid-up member of their national class association. This is often confirmed
by a stamp or sticker that is affixed to the boat’s measurement certificate.
- A valid measurement certificate -new/replacement certificates can requested from the sailor national
authority who will usually charge a fee.
- Sails should have measurement forms and the sail itself should be signed by a class measurer. The boom,
mast and foils should also have their own measurement forms and matching serial numbers.
Guide-Europe - page 31Racing targets
Class Events
The Europe class offers events for all levels of sailor: From regional regattas and national circuits to national
championships and international events. In countries with larger fleets there may be separate events for
youth sailors, whereas in smaller fleets such as the UK, divisions for masters and youth sailors are incorpora-
ted into open events and championships. For sailors wanting to improve it is always worth attending the big-
ger events, as it is only real world experience that can prepare you for a 50+ boat start line!
On the individual level, the racing target of reference for each rider can be the qualification and participation
in a national Championship.
The most experienced competitors can aim for an international qualification.
The least experienced or almost beginners in competition start with access to the regional levels.
Régional Access is usually free of trials
National Access is actually free of trial access in most of the countries
Actually, the main countries sailing Europe in Europe are Norway, Sweden, Finland, Denmark, Germany,
Belgium, France, Spain.
Great Britains seems to get a "new start" racing Europe.
Italy, Poland, seem to have a program of national races.
Major International races
• most of races are open, foreigner racers need to provide Insurance form
• NEW: Open European championship - All racers. No age condition. Each year
• Masters European Championship - Open - Ladies ≥ 30, Men ≥ 35. Each year
• Youth European Championship - National trials- Youth ≤19 ans. Each year
• Women and Men World Championships. National (or Open week) trials. No age condition. Each year
Few regattas
While the Europe class is not a huge fleet, it has the advantage of easily accessible international events that
other competitor classes do not offer. These events attract large turnouts and high level competition. Some
events are suggested below (but there are plenty of others, especially in Spain):
• World Championships (venue usually in Europe during the northern hemisphere summer – qualification/
selection for country places may apply).
• European Championships for Youth (under 19 years) and Masters . (venue usually in Europe during the
northern hemisphere summer).
• Open Week (the week before the World Championships at the same venue, open to all competitors).
• The Torbole Meeting (April - Lake Garda, Italy).
• Belgian Championships (September - http://www.europeclass.be/).
• French Championships (End of October - https://www.europeclass.fr/ ).
• Kiel Week (June - Kiel, Germany
Guide-Europe - page 32Performance targets and priorities
The season is punctuated by events of various levels. For some of them, you are looking to achieve a particu-
lar result, but before this you need to prepare (and qualify in some cases)! It is necessary to set precise objec-
tives for each specified event, and to stick to them.
World Championships, European Open Championships, Euro Masters, Euro Youth:
The goal is the best possible performance.
However, to achieve the best placing in the overall results it is best to sail conservatively. To go all out to
win every race often results in taking too many risks. It is often better to give way in uncertain boat-on-boat
situations, or risk ending up being slowed by extra manoeuvres, receiving a protest/penalty, or even
damage.…
Selection test for major events
The objective is qualification, not the overall result.
We are only trying to achieve a performance sufficient to make the qualification cut-off. It is worth
remembering that male and female sailors are competing for separate selection slots. As with the
international events conservative sailing pays off avoiding costly mistakes is imperative.
Local and regional open events
These are not a major objective in terms of performance.
However they are a good forum for testing or validating choices of equipment; refining manoeuvres;
improving planning of regatta logistics (timings, food and fluids, etc) or working out wind/tidal strategies at
new venues.
Guide-Europe - page 33Daily organisation - Preparation routines
Having a regular routine to your race days allows you to devote your energy to its main objective of sailing
well. It saves time and energy and helps to minimise stress. Elite sailors are used to managing their time
ahead or launching in a structured way. If attending an event as part of a team it is important to respect any
agreed timetables. A coach can tell you: just by observing sailors preparing for a race, they can spot those
whose attitude to preparation will allow them to compete at the highest level!
Example: Daily organisation/preparation
Launch -3h: Wake up, get up, shower, breakfast, organise sailing kit, prepare lunch, snacks and fluids for the
day, check weather forecast, travel to the club observing the weather on the way (does it agree with the
forecast?), check the noticeboards for anew information from the jury, race committee or any changes to the
results (eg due to the result of protests from the previous day). Check weather forecasts (again) and tide
information (HW time, stream direction and strength). Unroll the sails and rig the boat, check all equipment
is present and working, attend briefings and/or discuss strategic scenarios for the present weather, get
changed, sign on.
Launch: Sail out to the course, observing weather conditions and tidal flows, observe the location of the race
area, it’s orientation and any geogrpahical features that may impact on the wind/tide. Sail upwind and get the
boat set up for the conditions, practice maneouvers to get physically and mentally warmed up. Observe and
record minimum and maximum compass headings, check equipment (and lunch!) is securely stowed.
Identify your main competitors, find a competitor or team-mate and sail upwind together to check speed/
pointing.
Race Start -00:15: Continue to monitor weather and tide conditions on the course, identify laylines for the
ends of the start lines, identify the position of the windward and wing marks, identify any shift pattern and
how it relates to compass headings. Keep checking committee boat for course information and any signals.
Once the pin buoy is set check the line bias and any visible transits. Time the length of the line and recheck
the laylines. Make practice runs to the line to check timing and how long it takes to accelerate. Before a
start, most experienced sailors repeat these tasks, often in the same order, over and over again: the more
information you take, the more you can formulate an effective race strategy.
Between races: hydration, food, analyse the previous race and restart the preparation routines again.
Warning! The time between races is short, don't waste it!
Returning to shore: sign out/tally, check the deadline for protest time if necessary, get changed, debrief,
check over equipment and make repairs/replacements if necessary. If involved in a protest, prepare protest
forms and attend the protest hearing.
Return to accommodation: active recovery, stretching, shower, relaxation, meal, limit screen time
Sleep: bedtime - recovery is an essential factor in performance!
Guide-Europe - page 34You can also read