Fantastic Formations - Marble Arch Caves
←
→
Page content transcription
If your browser does not render page correctly, please read the page content below
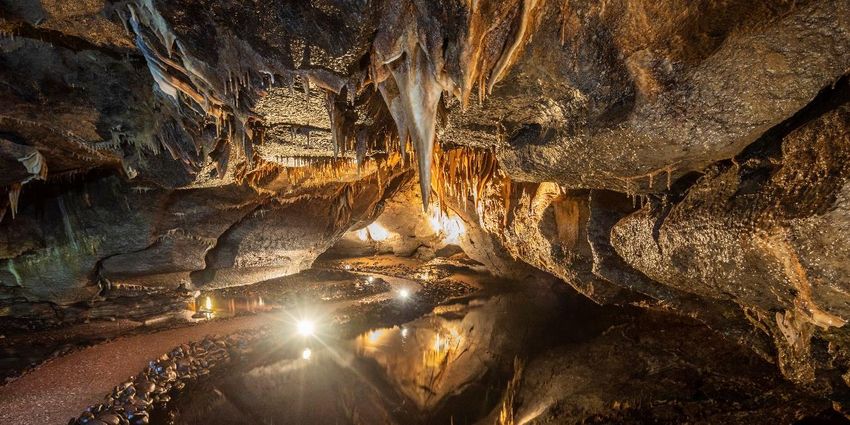
Fantastic Formations

The Marble Arch Caves are delighted to be part of the Northern Ireland Science Festive 2021. This year we
are happy showcase three practical science experiments and demonstrations to help both teachers and
students to get hands-on experience with engaging activities based around the themes of caves.

These activities form part of our teacher resource packs, available to download from our website at
https://marblearchcaves.co.uk/2021/02/08/delve-into-the-deep/. Within these packs you’ll find our practical
experiment cards, lesson outcomes, instructions and methods, class questions, our lesson outline/plan and
our plenary ideas.

To help teachers and students with their experiments the Marble Arch Caves team have also created a
series of three videos, to demonstrate the activities and to aid student learning with some background
information and ideas for extension activities. The three experiments are Fantastic Formations, Slippy
Sinkholes and Raging Rivers. These can be accessed via Youtube at;
https://www.youtube.com/channel/UCRUTEghQ06RYoFCfNNneuiA.

This activity is designed to help students gain a greater understanding of some of the wonderful
formations that grow in caves. The fantastic formations which attract visitors from around the world can
take thousands of years of years to grow, each with their own unique shape and structure.

The processes which lead to the development of the more well-known formations such as stalactites,
stalagmites and cave columns can be tricky to grasp, so our activity helps breakdown the key stages of
how they grow, covering the key words students can learn and the basic science behind why they grow
in cave chambers and passages.

Here you find a list of items and materials students will need in order to begin growing their very own cave
formations. We have also provided a list of key words which students can research before they begin their
experiment. This may help them develop a basic understanding of the geology (the rocks and landscape)
and the hydrology (the water) behind the formation of caves and cave features. These are also covered in
our Youtube tutorials - https://youtu.be/bBIv3UeeRfU
● Epsom salts ● Dissolve
● Warm water (with adult supervision) ● Saturated
● String ● Evaporate
● Scissors ● Crystallize
● Spoon ● Solution
● Small dish, plate or jam pot lid ● Soluble
● 2X jars/beakers
● 2x small weight such as a paper clip or nail
● Food colouring (optional)
Tick ()
I can:
1. Follow written instructions following a demonstration.
2. Describe what has happened using keywords.
3. Record my findings.
4. Suggest improvements for the experiment.
1. Mix the Epsom salts into warm water until it is saturated (this means when no more Epsom salts can
dissolve into the water). The mixture should be clear but have a slightly thicker consistency.
2. Create a base for your experiment using an old tray or plate. Make sure there is room to space out
your jars. Around 20-30cm apart is optimum, this gives space for the formation to form in between.
3. Pour the salt solution into two jars. Up until about ¾ of the depth of the jar is best, this allows room
for adding more water or salt later if necessary, and will avoid the excess salt crystallising at the
surface of the jars.
4. Cut a piece of sting or wool (made of a natural fibre) about 30cm long. Tie a weight to each end of the
string such as large paper clips, nails, bolts or screws.
5. Place each end of the string in opposite jars. Make a ‘M’ shaped bridge between the jars, ensuring the
string hangs down below the water levels in the jars.
6. Put the jar lid or a small container below the ‘M’ of the string to catch the drips.
7. Keep the whole apparatus somewhere safe for three to five days. Record the changes.
1. Decide on group sizes and composition based on individual needs of pupils.
2. Source Epsom salts (or equivalent), hot (not boiling) water, string/wool (made of a natural fibre), scissors,
spoons, small dishes, beakers or jars for each group, and paper clips or screws to act as weights. .
3. Print out or display the method sheet on page 2 for each group and the student note sheets as necessary.
Watch our Experiment video: Link Here
Have you ever seen limescale in a kettle or tap? https://www.youtube.com/watch?v=QNyQGTHa2hM –
introduction to some key terms (how and why things dissolve - solutions).
- Caves can form underground when water dissolves part of the limestone rock, but the dissolved calcium
carbonate doesn’t disappear, it is still in the water. The calcium carbonate can be left behind when the water drips
from or onto a surface, this makes stalactites and stalagmites!
Certain materials can dissolve in water. When something dissolves it becomes part of the solution, but it is still
there. There is a limit to the amount of material that can be dissolved. When no more can be dissolved, the
solution is saturated. As the water evaporates, there is less water to keep the salt dissolved, and this will form salt
crystals . This forms the basis for what happens both in our experiment and in caves.
Make sure to stir the mixture carefully and add small amounts of Epsom salts at a time, when there is a small
amount of salt in the bottom that won’t dissolve, the solution is saturated. You may also notice a slight change in
how the mixture feels when stirring, it becomes slightly viscous. Make sure that the string reaches the liquid in
both containers, and ensure that it bends downwards in the middle so that the drips will come from one place. It is
also useful to wet the string in the solution in the jars before extending the string between them.
Fill out the ‘ what do I think will happen?’ and the ‘why do I think this might happen?’ sections of the experiment
note sheet on page 4. You could also undertake some extension activities testing the following;
What do you think is happening?
Is there anything else that we could try?
What about adding food colouring? Do you think food colouring is a solution?
What about a different colour of food colouring in each jar?
Return to the experiment in 3-5 days to see how the stalactites have grown, and, if appropriate, return to the note
cards so the class can evaluate their predictions.
Do you think putting these stalactites in different places might affect how they grow?
How could we change the solution to change the colour or shape of these stalactites?Name: _________________________ This is an area where you can make notes or observations on what is happening throughout your experiment What do I think will I think that……. happen? Why do I think this might This will happen because……. happen? What happened? I found that………. Why do I think this This happened because……. happened?
You can also read