Field Data Collection using SMART Mobile - SMART Training Taskforce Version 2.0 2020-06 - Spatial ...
←
→
Page content transcription
If your browser does not render page correctly, please read the page content below
1
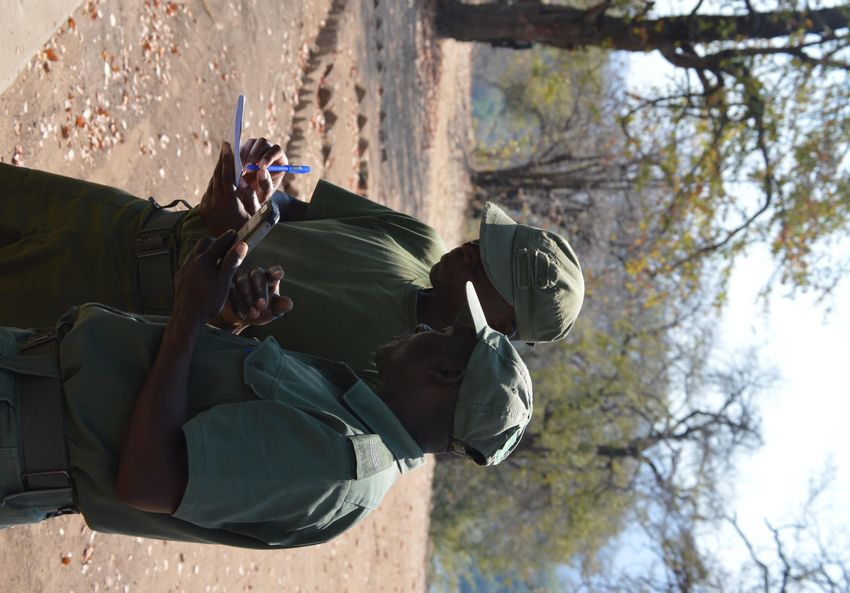
Field Data Collection
using SMART Mobile
SMART Training Taskforce
Version 2.0 2020-06
2

Purpose
The purpose of this training resource is to provide a guide on how to collect field data using automated
processes (SMART Mobile and CyberTracker). The intended target groups for training are field rangers,
other frontline staff and ecological monitoring staff who work on site in terrestrial and marine protected
areas, community conservancies, private reserves and other conservation areas.

Acknowledgements
The training handbook was prepared by the SMART Training Taskforce, a group of dedicated SMART
users who work broadly across geographic regions, sites and situations where SMART is being
implemented, in terrestrial and marine environments. The Training Taskforce is one working group under
the SMART Partnership which currently comprises of the following organizations: Frankfurt Zoological,
Global Wildlife Conservation, North Carolina Zoo, Panthera, Peace Parks, Wildlife Protection Solutions,
WCS, WWF, and ZSL.

Overview
This training resource covers the practical aspects of field data collection using patrol forms, navigation
using GPS, data recording on handheld devices using SMART Mobile in conjunction with configured data
models, and data upload to SMART. The first section of the handbook introduces the rationale for law
enforcement monitoring and the use of field patrol data for decision-making and adaptive management.
The second section covers methods of data collection using logbooks, patrol forms, GPS, smartphones and
SMART Mobile, and special applications (ecological monitoring and profiles data collection). Examples
from some of the >1000 SMART implementation sites are used to provide context. In the final section, core
tasks of the data collector for ensuring SMART data can be useful for adaptive management are presented.

Photo Credits: Zoological Society of London (ZSL)
Cover Image: Zahangir Alom/WCS
Back Cover: James Slade/GWC
3

Table of Contents
    Purpose .................................................................................................................................................... 2
    Acknowledgements .................................................................................................................................. 2
    Overview .................................................................................................................................................. 2
    1. Introduction: the SMART Approach for Law Enforcement Monitoring (LEM) ......................................... 5
    1.1 Overview ............................................................................................................................................. 5
    1.2 What data to collect? Why?................................................................................................................. 6
    1.3 What is the benefit of having geo-referenced data? ............................................................................ 6
    1.4 Importance of data management......................................................................................................... 6
    1.5 Data quality and why it is important ..................................................................................................... 6
    1.6 Information needs for the implementing agency .................................................................................. 6
    1.7 Why SMART? Reasons for choosing SMART over other LEM monitoring tools .................................. 7
    2. Information needs and sources of data ................................................................................................. 7
    3. How are field data collected for use with SMART? ............................................................................... 8
    3.1 Automated data collection using handheld devices ............................................................................. 8
    3.2 SMART Mobile and CyberTracker (Classic) – What’s the difference? ................................................. 9
    4.     Automated data collection using SMART Mobile ............................................................................. 12
    4.1 Installing and using SMART Mobile ................................................................................................... 13
    4.2 SMART Mobile setup ........................................................................................................................ 15
       4.2.1 Prepare to install SMART Mobile (both kiosk or non-kiosk)......................................................... 15
       4.2.2 Prepare your SMART Connect for SMART Mobile (both kiosk or non-kiosk) .............................. 15
       4.2.3 SMART Mobile setup in non-kiosk mode .................................................................................... 16
       4.2.4 SMART Mobile setup in Kiosk Mode ........................................................................................... 20
       4.2.5 SMART Mobile Setup continued (both kiosk or non-kiosk) after installation of the SMART Mobile
       software on the device ......................................................................................................................... 25
    4.3 Preparing to record observations with SMART Mobile ...................................................................... 31
    4.4 Recording observations using SMART Mobile .................................................................................. 36
    4.5 Detailed Steps for Recording Observations using SMART Mobile ..................................................... 38
    4.6 Importing SMART mobile patrols into SMART ................................................................................... 44
    4.7 Report bugs and other feedback on SMART Mobile .......................................................................... 46
    4.8 Exporting patrol data for sharing ....................................................................................................... 47
    4.9 Field exercise: Data collection using SMART Mobile equipped devices ............................................ 48
    5. Automated data collection using CyberTracker (Classic) .................................................................... 48
    5.1 Preparing to record observations with CyberTracker (Classic) .......................................................... 48
    5.2 Recording observations using CyberTracker ..................................................................................... 51
    5.3 Detailed Steps for Recording Observations in CyberTracker ............................................................. 53
    5.4 Importing CyberTracker Patrols into SMART ..................................................................................... 58
    5.5 Exporting patrol data for sharing ....................................................................................................... 61
    6. Special applications ............................................................................................................................ 62
    6.1 Mobile Data Collection using SMART Connect ................................................................................. 62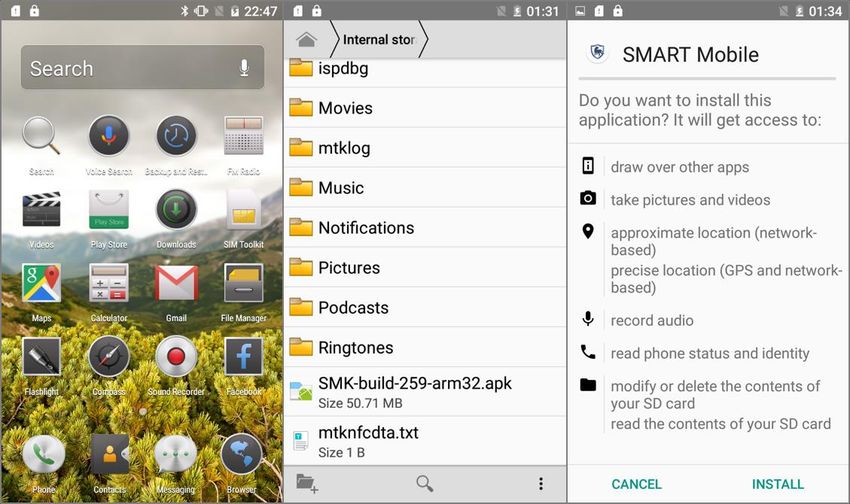
4

7. Using SMART for adaptive management; tasks for the data collector ................................................ 63
Frequently Asked Questions................................................................................................................... 65
Android settings and troubleshooting SMART Mobile.............................................................................. 67
Annex 1: Enhancements of SMART mobile over Cybertracker Classic ................................................... 72
5

1. Introduction: the SMART Approach for Law Enforcement Monitoring
(LEM)
1.1 Overview
The SMART Approach for law enforcement monitoring involves a five-step process starting with the
collection of field data by ranger patrols, through to decision-making and strategic planning (Fig. 1).

    ●   Ranger patrols - Patrol teams collect and record data on where they go and what they see, such
        as human activities (e.g., signs of poaching, habitat encroachment, timber cutting), interventions
        (e.g., arrests, issuing of fines, confiscations of weapons and other restricted or banned equipment)
        and/or observations of wildlife and habitat features.

    ●   Data input – Patrol teams report their patrol activities through a debrief, and patrol data and routes
        are checked for quality and/or errors and are then stored in the SMART patrol database.

    ●   Mapping and reporting - Data are processed into highly visual tables, charts, and maps showing
        patrol effort, coverage and results, forming the basis for patrol analysis and evaluation.

    ●   Feedback and evaluation - Regular meetings with rangers are held to discuss patrol effort,
        effectiveness and results to ensure all stakeholders are kept informed and to demonstrate the value
        of ranger efforts.

    ●   Strategic planning - Managers, rangers, and other stakeholders plan adaptive patrol strategies
        based on analysis of previous results and set new patrol targets. These plans are communicated to
        the field staff and the cycle begins again.

               Fig. 1. The SMART Approach for adaptive management of conservation areas.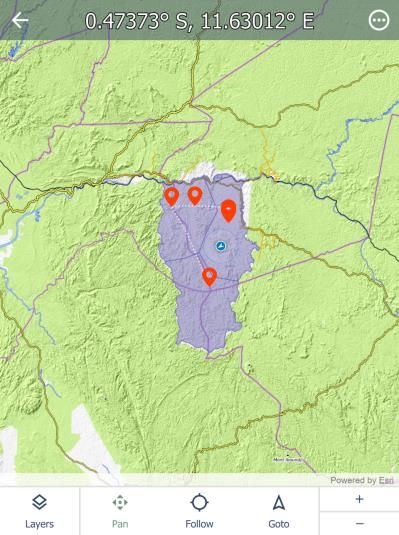
6

1.2 What data to collect? Why?
Data collected by field teams should have inherent value for the management of the conservation area.
Valuable data will include observations of wildlife, human activities (both legal and illegal), the condition of
natural features, such as feeding, breeding and roosting areas, and movements and activities of patrol
teams. Data must be recorded accurately and honestly so that decisions made on the basis of the
observations are the most informed decisions possible.

1.3 What is the benefit of having geo-referenced data?
In order for managers to understand the distribution of threats and wildlife inside the conservation area, and
where needed, direct field teams to take appropriate follow-up action, observations collected by patrol
teams need to be geo-referenced. This means that each observation has a location and time attached to it
that makes it possible to plot the observation onto digital maps of the conservation area. The quickest and
most accurate way to do this is by using a dedicated Global Positioning System (GPS) device or a
handheld device with GPS function. As such, the GPS is an important tool for information or intelligence-led
patrolling.

1.4 Importance of data management
Increasing threats to wildlife and habitats puts increasing pressure on managers to respond with the right
decisions in a time efficient manner. Ranger teams need to be deployed to threat hotspots so they can
arrest poachers, detect snares and traps and prevent wildlife crime from happening thus, saving the lives of
animals. To ensure this happens, accurate and honest data should be recorded by rangers in the field, and
this data needs to be turned into information in as close to real-time as possible. Patrol data may not be the
only kind of data used to make decisions (see below).

1.5 Data quality and why it is important
Rangers and other field staff play a primary role in ensuring good quality data are collected in the field (Fig.
2). Only good quality data can be included in basic analyses (queries and summaries) and reports to
management. Rangers may need to verify the locations and times of observations of human activities
recorded by patrols, and confirm any unusual observations, such as records of endangered species, or
details of enforcement interventions, infractions recorded and actions taken. Poor quality data should be
addressed by conducting training or refresher training as needed, to upgrade skills and by using various
approaches to motivate rangers to achieve a higher level of performance.

        Fig. 2. Decisions made using data will only be as good as the data that has been collected.

1.6 Information needs for the implementing agency
At the time of writing, nearly 1,000 sites in more than 65 countries are involved in SMART deployments.
This includes 16 countries which have adopted SMART as a national monitoring system for their protected
areas. More than 115 government agencies are currently involved in these deployments. Each agency has
its own needs for information that can help with effective park protection and management, monitoring of
7

endangered species and threats. For example, managers of national parks and marine protected areas
require information on human impact in order to implement plans for managing recreation areas and other
managed use zones. Wildlife sanctuaries and game reserves are set up to protect focal species, so
managers require information on the distribution of those species and the spatial and temporal distribution
of threats to wildlife and their habitats. Community conservancies are established to manage human use of
lands, so managers need to assess impacts on natural resources that may be used by local people.

1.7 Why SMART? Reasons for choosing SMART over other LEM monitoring tools
SMART is the world’s leading tool for conservation law enforcement monitoring (LEM) and protected area
management1. SMART LEM enables the collection, storage, communication, and evaluation of data on
patrol efforts, patrol results, and threat levels, along with feedback from decision-makers to the frontline.
Data collection is possible through the use of paper forms plus GPS, or via handheld digital devices.
Available in multiple languages, data analysis is facilitated by an easy-to-use query wizard (see: SMART
Essentials Training Handbook, page 59). Implementation of SMART LEM can enhance law enforcement
effectiveness, improve morale of protection teams, and reduce threats to wildlife and other natural
resources at numerous sites across the world1. When effectively employed, to create and sustain
information flow between rangers and conservation managers as part of the SMART Approach, SMART
LEM can be used to substantially improve protection of wildlife and their habitats.

2. Information needs and sources of data
To ensure effective planning and management, managers need to be able to come up with answers for a
range of questions about conservation areas:
      -   What are the threats?
      -   Which species are currently at risk to threats, such as poaching?
      -   Which species may be at risk in the near future?
      -   Where are the problem areas?
      -   What resources are available for protection activities?
      -   Where have patrols happened and where are the gaps in patrol efforts?
      -   Are threats increasing or decreasing over time?
      -   Are patrols effective? Are we achieving the aim of protection?

Data useful for answering such questions will come from various sources. Including, but not limited to:
      1. Patrol data. Field patrols conducted by law enforcement staff and community rangers produce data
         on human activities, especially those that pose a threat to the conservation area, data on area
         coverage and presence as well as data such as resource use (e.g. vehicles, stations) and workforce
         hours spent in the field. They may also collect vital information on the wildlife or other resources
         protected by the conservation area.
      2. Intelligence. Surveillance conducted by special monitoring and investigation teams, informants,
         and wildlife crime hotlines produce data useful for creating intelligence records and networks on
         wildlife crime and other illegal activity.
      3. Incidental records. Reports from other sources, such as community members, tourists and/or tour
         operators, produce data on observations of rare or endangered species and human activities,
         including marked animals or individuals of special interest.

1
    See 2018 SMART Annual Report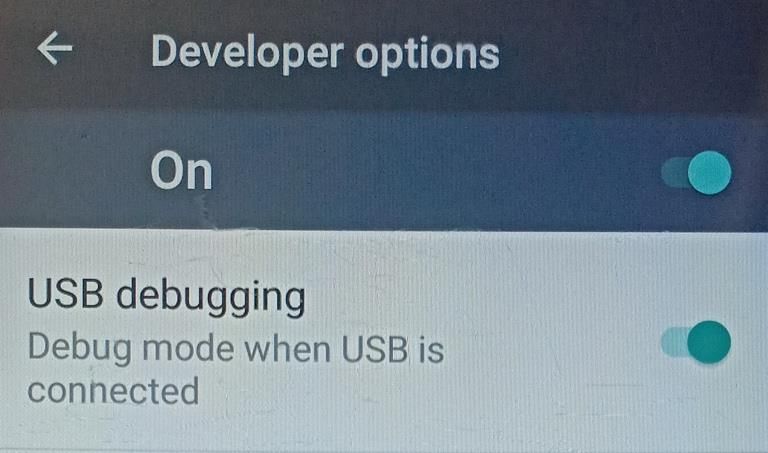
8
4. Special events. Data collected by camera-traps, acoustic devices and drones may produce
useable records about human or wildlife activity and movement.
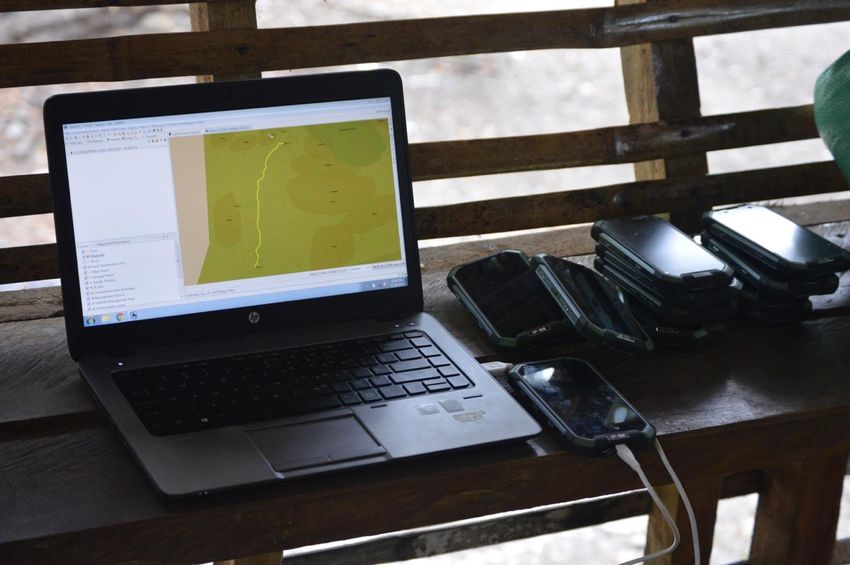
3. How are field data collected for use with SMART?
There are two broad categories of data collection: manual data collection, involving filling in of paper forms
together with a GPS device, and automated data collection, involving use of handheld electronic devices
such as PDAs, tablets and smartphones (Fig. 3). Both are designed to help rangers collect information in a
standardised way. This allows information collected over time, or by different observers, to be comparable,
which is a critical factor in studies employing many field rangers or field staff. Each approach has its
advantages and disadvantages that need to be evaluated when considering which particular method to
employ in a conservation area. For the purposes of this handbook, we will focus instruction on automated
data collection using the SMART Mobile or CyberTracker. For further information about manual data
collection using SMART please see: SMART Technical Training Manual: Module 3: Patrols).
Fig. 3. Field data collection methods using SMART.
3.1 Automated data collection using handheld devices
Handheld devices such as PDAs, tablets and smartphones may further simplify and
speed up the process of data collection and transfer when used in conjunction with
SMART Mobile or CyberTracker Classic, an application for the collection and
visualization of field data. SMART Mobile and CyberTracker currently run off of the
Android Operating System (OS), with plans for an Apple iOS version in the near
future. CyberTracker Classic remains available on Windows Mobile.
Important: The desktop application of CyberTracker is only available for the Windows OS, meaning that
the import or export of Patrol/Survey Configurable Models or data collected from the field cannot be
currently done on a Mac OS or Apple computer not running Windows.
SMART Mobile/CyberTracker are used to record observations based on a configured version of your
SMART data model (see: SMART Technical Training Manual: Module 9: CyberTracker Plug-In and Smart
Mobile). GPS waypoint and tracklog and observation data are collected simultaneously and uploaded to
SMART in a semi-automated process (see details in section 3.3.4 below).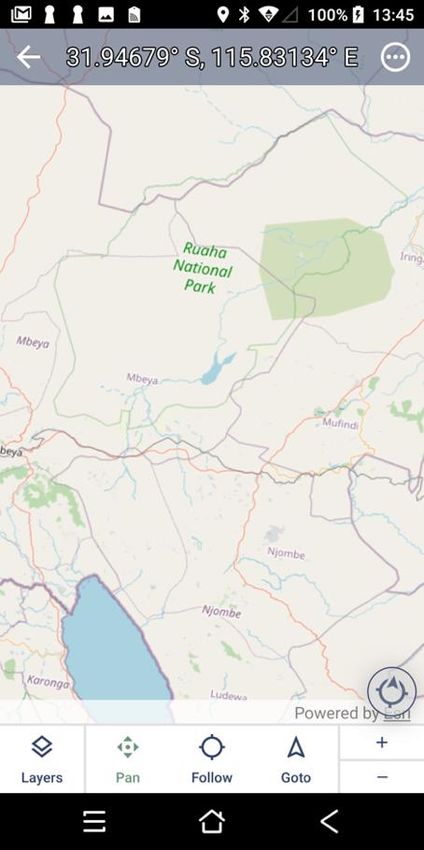
9

3.2 SMART Mobile and CyberTracker (Classic) – What’s the difference?
SMART Mobile is powered by CyberTracker Classic (CT), offering functionality and user experience
enhancements specifically requested by the SMART user community, as well as much tighter integration
with the SMART desktop software and SMART Connect. SMART Mobile uses a GPS-enabled mobile
device to collect both observations (text and/or icon-based data entry and digital images) and GPS data in
a single unit. Patrols and observations can then be transferred directly into SMART desktop by connecting
the device, or remotely through SMART Connect (see: SMART Technical Training Manual: Module 13:
Connect Plug-in) in semi-automated processes.
There are many advantages of SMART Mobile that make it an improvement over CyberTracker. This
includes the following features:
Modern easy to use user interface - SMART Mobile has a modern easy to use user interface (Fig. 4).

    a)                                b)                                  c)

                   d)                                   e)
Fig. 4. The user interface includes a) smooth scrolling, b) easy to use lists, c) high-resolution icons, d) dark
mode, e) multi-language support (including support for a broader range of languages), and font scaling to
allow text to be easily read.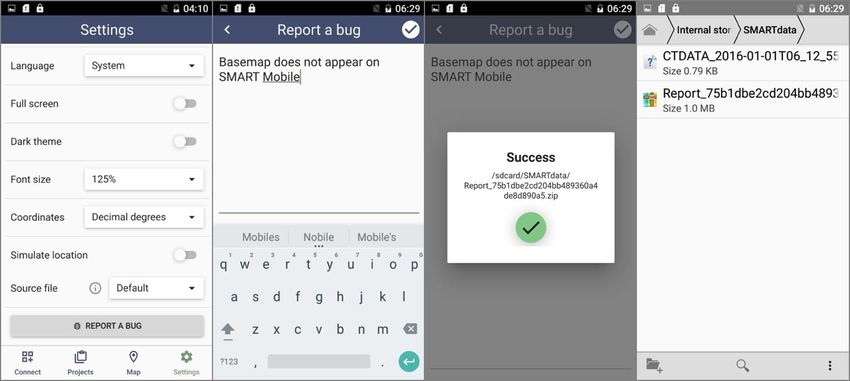
10

Modern state of the art mapping - The state-of-the-art mapping in SMART Mobile, includes the ability to
complement online base maps with offline maps generated directly from SMART desktop (Fig. 5).

   a)                                   b)                             c)
Fig. 5. The user experience includes map features such as a) pinch-zoom, b) map rotation and c)
navigation follow mode.
Navigation to previous observations and detailed sighting history views – this feature turns SMART
mobile into a functional navigation device (Fig. 6). Other mapping features of SMART mobile are;
   •    Sightings, Incidents, Tracks are visible
   •    Offline maps overlaid on base map
   •    10 online base maps: OpenStreetMap, National Geographic, Satellite, Oceans, etc.
   •    Offline mode where no basemap is required
   •    Layers can be turned on and off
   •    Inspect
   •    Navigation with realtime pointer
   •    Compass
   •    Detailed data
   •    Satellite view
   •    Smooth panning, pinch-zoom and rotation
   •    Rotate to north at top button
   •    Zoom in, zoom out buttons
   •    Follow modes: user, follow, navigation
   •    Co-ordinates in decimal degrees, degrees minutes seconds, degrees decimal minutes and UTM
11

                       a)                                    b)                                   c)

     Fig. 6. a) View your sighting history a) in the field, b) individual sightings can be edited without
     disrupting patrols/surveys, c) supports users to navigate to previously visited locations.

     Multi-leg patrols - Patrol type can now be changed while the patrol is in progress. Also, patrols can
     now be easily paused and resumed. When paused the track timer is disconnected, ensuring
     that SMART delivers an even more accurate measure of effort (Fig. 6).

              Fig. 7. New functionality for multi-leg patrols allows changes to patrol metadata on the fly.
12
Desktop demo version for training - SMART Mobile also has a Desktop demo version for Windows which
works exactly the same as the mobile version that can be used for training. The GPS simulation can be
customized for your location as part of the training.
Robust kiosk mode - We’ve built a robust kiosk mode that locks the device for use only
by SMART Mobile. Kiosk mode can be exited with a pin.
Simple, Customizable, Themes - Ability to customize the look and appearance of SMART Mobile from
within SMART selecting theme colors and your own project icon.
Independent incidents during patrols/surveys - During or outside of a patrol or survey, observations can
be recorded independently from a patrol or survey. These observations are recorded as independent
incidents in SMART (Fig. 8).
a) b)
Fig. 8. a) If you are collecting ecological records data on a mission but have a protocol of recording human-
wildlife conflict or poaching signs independently, b) you can now easily record these as independent
incidents without interrupting your overall data collection
Additional details are provided in Annex 2. Instructions on how to use both SMART Mobile and
CyberTracker Classic are outlined below. Please consider above and information contained in Annex 2
before you decide which application you want to use.
For details on using CyberTracker Classic skip to section 5 - Automated data
collection using CyberTracker (page 49)
4. Automated data collection using SMART Mobile
SMART Mobile represents a significant enhancement to the existing functionality of CT, including:
touch/swipe controls, advanced mapping and navigation, natively translated languages, further support for
all Unicode languages, multiple data point entry on one screen, flexibly change patrol metadata on the fly,
configure real-time alerts for key observations, kiosk mode, and many other new functionalities which are
summarized below.13
4.1 Installing and using SMART Mobile
Prerequisites
To use SMART Mobile:
• You must have an Android device, version 4.4 or higher (iOS is not currently supported, but is
planned for a release later this year). You can view what Android version you have in the device’s
System Settings.
• You must have installed SMART Desktop version 6.3 (earlier versions are not supported).
• If you use SMART Connect, you will need SMART Connect version 6.3 (earlier versions are not
supported).
• You must decide whether you want to use the kiosk mode version or the non-kiosk mode version of
SMART Mobile (see below).
Important
• SMART Mobile is available in a kiosk mode version. This version needs to be specifically chosen
and requires additional steps to set up so it is imperative that you decide whether or not this is
necessary before selecting the version of SMART Mobile you plan to use (e.g. kiosk vs. non-kiosk).
What is kiosk mode?
Kiosk mode is a function which locks your device to the function of a specific application and prevents the
use of any other application. Essentially, using kiosk mode will turn your device into a SMART-Mobile-Only
device.
Deciding Whether to Use Kiosk Mode
When to use kiosk mode
Deciding whether to use kiosk mode is highly dependent on your particular use case. If you feel it is
necessary to lock a device to SMART Mobile only then kiosk mode is for you. This might be to ensure that
devices procured for SMART data collection are used only for this function and nothing else. By dedicating
your mobile device for SMART mobile data collection, kiosk mode simplifies data collection, focuses
attention on that task alone, and conserves device resources.
When not to use kiosk mode
If you or your field team need to use other functionality on data collection devices, then kiosk mode is not
required. Other apps that may be used in the field include telephone function or communication
applications, additional navigation applications, specific camera applications, and others (note: SMART
Mobile does record track data and images). If your field teams do not need these other applications, then
you may want to consider using kiosk mode.
Once you have made a decision about whether or not to use kiosk mode, you must make a change in the
SMART Conservation Area (CA) on your computer in the settings for your configurable model.
Login into your SMART CA then go to Conservation Area > Configurable Model.
• Select the model you wish to use from the list14 • Select Edit and go to the CyberTracker properties tab • Select Edit profile and check/uncheck the Kiosk mode box • Save the change
15

4.2 SMART Mobile setup
Note: if you decide to use kiosk-mode please navigate to page 20 for setup instructions. The following
instructions are for the non-kiosk version of SMART Mobile.

4.2.1 Prepare to install SMART Mobile (both kiosk or non-kiosk)
        A. Preparing the Android device:
        Before you install SMART Mobile on an android device you need to prepare your android handheld
        device. On your Android handheld device, you need to:
           a) Have a file manager: Any file application, pre-installed or downloaded, that allow one to
               browse folders on the device should work.
           b) Enable “Use Unknown Sources”
                1. From a Home screen, swipe up or down from the center of the display to access the
                   apps screen.
                2. Navigate: Settings. > Apps.
                3. Tap Menu icon (upper-right).
                4. Tap Special access.
                5. Tap Install unknown apps.
                6. Select the unknown app then tap the Allow from this source switch to turn on (see
                   other suggested Android settings p. 66)
           c) Set the location mode to device only
                7. In the device Settings go to Security & Location (see other suggested Android settings p.
                   67)
                1. maybe differ between Android versions)
                2. Under Privacy go to Location.
                3. Set Location Mode to Device only (use GPS to determine location).
If you ARE using SMART Connect, proceed to 4.2.2. If you ARE NOT using SMART Connect
at your site, proceed to 4.2.3.
4.2.2 Prepare your SMART Connect for SMART Mobile (both kiosk or non-kiosk)
     A. Sync all your desktop and Connect SMART instances and all local data on your desktop is synced
        with your Connect instance.
     B. Backup your existing SMART desktop database.
     C. Backup your existing SMART desktop database using the File -> Backup System menu option.

NOTE: To avoid losing data, before making any changes to SMART, always sync your
desktop and make a backup of your Conservation Area.
16
If you are setting up a device in kiosk mode go to section 4.2.4 p.19.
4.2.3 SMART Mobile setup in non-kiosk mode
You will set up your device with SMART mobile then learn the procedures for using the app to collect
observational data.
A. Uninstall any previous version of SMART Mobile (if applicable).
B. Download the latest SMART Mobile application (file has the name format
SMK_build_(number)_arm32.APK) file.
C. Note: We are continuously working to make SMART Mobile better. Newer builds may be
released with bug fixes and UX improvements. The latest build (along with change notes) can
always be found here.
We recommend that you use the latest build when possible.
D. Save the .APK file in an easily found location on your computer (e.g., the same root folder as
your SMART Desktop installation).Connect your mobile device to your computer. In SMART
Desktop, go to Field Data > SMART Mobile > Install SMART Mobile on Device…
NOTE: This wizard will overwrite the existing APK on your device with the most current
version. (Fig. 11)
E. Click the “...” button and browse to the folder where you saved the APK file and select it and
click Next.17
F. Select the option Copy SMART Mobile to Device.
G. Click Next.
H. Select the device you would like to export to. If the device is not shown check that it is in file
transfer mode and refresh the list. Always select internal storage if given the option of SD
card. Ensure to de-select SD card option.
I. Click Copy application to selected devices. This ends the desktop setup, now go and
check your device for the SMART Mobile application.18
J. Now looking at your device, install the SMART Mobile Application (see screenshot examples
below)
a. On your Android device, use the file manager to find the SMART Mobile APK file.
b. Select the SMART Mobile APK file to launch the installation.
c. Select Install
d. Once the installation has finished, select Done.
e. You will be prompted to “delete the installation package”. Click Yes.19
K. You may be prompted to switch your Android device’s home launcher app to SMART. If you
receive this message, do NOT select switch launcher apps. (Note: This prompt may be different
on your device.)
L. Launch SMART Mobile.20
Continue to 4.2.5 SMART Mobile Setup (page 23)
4.2.4 SMART Mobile setup in Kiosk Mode
For information on what kiosk mode is and whether you should use it, refer back to 4.2 SMART
Mobile Setup page 15.
Install SMART Mobile to the Device
A. In SMART Desktop, go to Field Data > SMART Mobile > Install SMART Mobile on Device…
B. Click the “...” button and browse to the folder where you saved the .APK file and select it and
click Next.21
C. Select the option Configure SMART Mobile as a kiosk.
D. Click Next.
E. Click Next.
F. Now you must install the driver which allows this computer to install kiosk mode onto your
device. Select install / reinstall driver.22
G. Right click on “android_winusb” (file type: Setup Information) and select install.
H. Click Next.
You must then follow the prompts on screen including:
I. Factory reset the device by opening settings on your device and selecting “Factory Data
Reset”.
J. Wait for the device to restart.
K. Follow the instructions and press skip when asked to create an account.23
L. Change the time and date back to the correct date and time using the settings on the device.
M. Change the GPS settings in location to use GPS only.
N. Enable “Developer Mode” > About phone > software information and tap on the build number
(or version) 10 times to access developer mode.24
O. Enable “USB debugging” by opening the settings, search for USB debugging under developer
options and toggle this on.
P. Connect your device to your computer – select “allow USB debugging” if prompted and select
OK.
Q. Configure your device by selecting “Provision the device”.
R. Click Finish.
S. Launch SMART Mobile.
Exiting Kiosk Mode
Once your mobile device has been configured for kiosk mode, you can only exit out of kiosk mode by:25
● Typing in your pin; or
● Factory resetting the device.
4.2.5 SMART Mobile Setup continued (both kiosk or non-kiosk) after installation of the SMART
Mobile software on the device
Choose a configurable model for data collection
Depending on the mandate for the patrol, you will select a data model for use with collecting data. The data
model will include relevant categories and attributes of data that are to be collected. Designing data models
is a topic for advanced administration. Here we will simply take a look at the configurable model and see
what it contains.
Reminder: The Data Model for a Conservation Area is made up of all the possible categories and
attributes you may want to record when making an observation. A Configurable Model is how the Data
Model can be edited to appear for different patrol mandates, i.e. law enforcement, research or wildlife
monitoring. For more information, see: SMART 6 Technical Training Manual, Module 9: Data Model
Management
1. From SMART Desktop Select Conservation Area > Configurable model > ‘Name of model’.
2. Click edit to inspect the categories and attributes associated with the model
3. Check to make sure the SMART Mobile settings follow what you see below by selecting ‘Field Data-
>CyberTracker Classic->CyberTracker Properties’ in SMART.
4. Kiosk Mode on or off as per choice made in Section 4.1 above
5. Track Timer can be between 3 and 10 secs
6. Set GMT/UTC time offset for your location
7. If you make any edits to the settings, make sure to select Save.
NOTE: For SMART 6 these configurations apply to both SMART Mobile and Cybertracker Classic.
You will configure properties for both here.26 SMART Mobile: Additional Configurable Model Features Language: SMART Mobile, unlike Classic CyberTracker, is capable of rendering any Unicode language as text on the device. In order to do this, you need to edit the text of your configurable model. Open a configurable model, select Edit and select all the categories and attributes, one-by-one, and simply type in whatever language you want displayed on the device. Icons: Creating and exporting configurable models to SMART Mobile is much the same as for CyberTracker Classic. However, SMART Mobile enables the use of icons which display on the device instead of, or alongside, text in order to assist in cases where field staff are unable to read the instructions or work better with images. In order to enable these on your device you need to edit your configurable model. Locate the configurable model you plan to export to your device and select Edit. For each group, category and attribute you are able to decide whether you want to display text, image or both text and image. SMART comes pre-loaded with a set of icons for the default data model. If your data model uses the same category you can simply use “Image: Data Model (Default Image)”. If your data model does not have a
27

default image (or you would prefer a different icon) you can do this by selecting “Custom” under “Image”.
You can then select an icon from your hard drive (or select another built-in SMART icon) and associate this
with your group, category or attribute.

Once you’re happy with the structure and design of your configurable model click Save.
Optional step: Check what your configurable model looks like in the simulator
SMART Mobile Desktop Simulator Instructions for Windows (64 Bit)
     •   Download the zipped SMART Mobile simulator program files
     •   The SMART Mobile desktop simulator is the SM-build-275-win64.zip file in the SMART Mobile
         delivery folder.
     •   Extract the files to a local folder on your computer.
     •   Open SMART desktop and export a Patrol Package to file.
             o When exporting to a file, set the filename to C:\users\\Downloads or
                 C:\users\\Desktop, being sure to replace  with whatever your local
                 user name on the machine comes out as.
             o NOTE: The Patrol Package must be in Downloads or on the Desktop, because the simulator
                 can scan both of those locations for patrol package files.
             o NOTE: The exported file MUST have a ZIP extension.
28
• Navigate to the location where you extracted the SMART Mobile simulator program files and open
the executable file (SMART_Mobile.exe).
• The simulator will open as it would display on a mobile device.
o The simulator program will open and autoscan your downloads folder, and then display the
configurable model (i.e., your patrol package) that you exported into the downloads folder.
o NOTE: The simulator will not auto-scan the desktop on launch, so you will need to click the
"Refresh" button in the lower left of the main page of the simulator.29
• Click on the configurable model and run SMART Mobile on the desktop.
Export your configurable model to SMART Mobile
A. Open your SMART database.
B. Connect your device.
C. Export the configurable model you will be using by clicking, “Field Data->SMART Mobile->Export
Patrol Package”.30 o Set “Export Location” as “Device”. o Choose your Configurable model and CyberTracker Properties. o Select your preferred basemap (Leave min/max at the defaults, and lower the “Max” to number (e.g., to 1 or 2) to speed up the export). o Check Collect Independent Incidents and select your Configurable Model an Independent Incident Model if you wish to enable this option D. Click “Export…”
31
E. Disconnect the device.
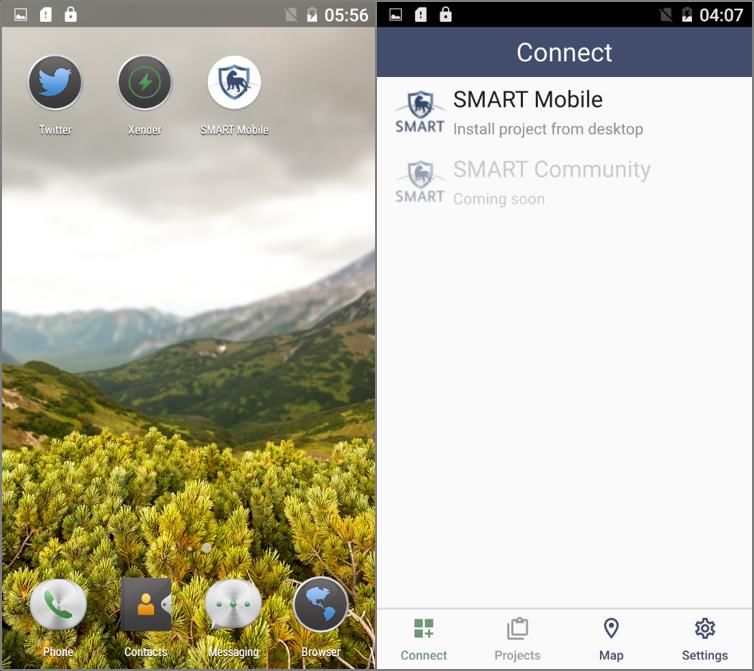
F. Open SMART Mobile on your device.
G. Click SMART Mobile on the Connect screen. This will scan your device for new projects.
Your configurable model should autoload in the Projects screen and be ready for use.
NOTE: When updating a configurable model for example to add new employees added to list) and needing
to update the devices, if it’s the same patrol package name, SMART Mobile will overwrite it. Just go
through the same workflow as before to export the configurable model to the device.
4.3 Preparing to record observations with SMART Mobile
● Turn on the SMART Mobile-equipped device
● Turn on the GPS on the device.
● Start the SMART Mobile application by tapping on the SMART Mobile icon on
your home screen. You will see a screen that looks like the one above.
NOTE: SMART Mobile can accommodate multiple configurable models for example for different
patrol mandates or objectives. In the example below the device can be used either for recording law
enforcement or wildlife patrols, each with its own unique configuration.
● Tap on the configurable model for the field activity you want to undertake.
If you need to exit from SMART Mobile after you have selected the configurable model enter the default exit
pin code “1234” and press the green button, or have your SMART data manager enter the correct pin
code. See: SMART Technical Training Manual: Module 9: CyberTracker Plug-In and Smart Mobile for more
details on pin codes and ‘Kiosk mode’.32
After selecting the configurable model, you are ready to begin recording the Patrol Configuration
• Select Start Patrol then you will see a screen to enter the patrol configuration
• The GPS automatically starts to look for satellites and will return the location after achieving a 3D fix
o SMART Mobile will not allow a patrol to start until it has gotten a location (i.e., you will see
coordinate in the “Location” box). This may take a few minutes if the device is new and
getting a GPS location for the first time or hasn’t been used recently.33
• Use the dropdown menus to select the associated metadata:
o patrol transport type
o armed status
o team name
o station name
o patrol mandate
• First select values for patrol transport type
• Then select the team name
• Then select the station name
• Then select the Patrol Mandate. This will correspond with the configured data model being used
• For Employees scroll down the list and check the boxes next to the names of staff participating in
the patrol
• Select the Leader by highlighting his/her name, then click the arrow in the upper left of the screen to
go back to the Employees menu, then check the tick box in the upper right of the screen34
• If you want to specify objectives or comments those will require entering text into the relevant fields,
then check the tick box in the top right of the screen35
• When you are finished entering the patrol configuration check the tick box in the top right of the
screen. This will take you to the Patrol screen from where you can begin to record observations36 4.4 Recording observations using SMART Mobile From the patrol screen you may end, pause or change your patrol, simply select “Patrol” to enter the menu at the bottom of your screen. You should select Pause patrol when the team is not actively engaged in search activity for example when taking a meal break, when waiting for radio orders from a patrol supervisor, or if a vehicle is broken down. You can only pause a patrol if you checked the pause patrol box in the Cybertracker settings. Hit Pause patrol again to restart the patrol after it was paused. Note: The ‘Pause Patrol’ function must be enabled in the CyberTracker properties for it to be visible on patrol (See Section 4.2.5 – above). You may want to change the transport type, mandate, employees or leader during the patrol as the situation requires. A significant enhancement in SMART Mobile is the ability to change patrol metadata during the patrol. For example, if your patrol began as a foot patrol and later continued by vehicle, you would use this function to change your patrol transport type from “foot” to “vehicle” with the ease of a few taps, rather than having to end and restart your patrol with different data. The device will make a note of when and where this occurred for more accurate information on your patrols. Once you download the data to SMART, the different sections of the patrol will automatically display as different patrol legs.
37

You would select End patrol after you have completed your patrol route, have returned to your station or
have stopped recording observations and do not plan to resume again for the rest of the day or evening.

During a patrol you can also access the following functions:
   a) Map: Check your GPS location while on patrol and view observation locations and the tracklog
   b) History: Check the observations that were recorded during the patrol
   c) See individual observations, times & dates

a)                                 b)                                 c)
38

4.5 Detailed Steps for Recording Observations using SMART Mobile

Select ‘Make observation’ at the top of the screen to record patrol observations (below a) relating to
SMART data model categories (wildlife, human activities, features and patrol movements etc). In the
example below an observation of human activity is recorded b) then details of people encountered is
recorded c) along with a photo d). To finish entering data for an observation select the tick box at the top
right of the screen (see red box in top-right of d below). Once the observation has been recorded, save the
incident selecting the green button at the bottom right of the screen (below e).

a)                                 b)                                  c)

d)                                  e)
39

     Multiple observations can be made at each location (incident). Each time a new observation is
     added select ‘Make Observation’.

     In the example below, a person was encountered at a camp with a wildlife carcass. This
     represents three unique pieces of data (observations) at one location/event (incident) that should be
     collected as part of the data model. To begin, the observer first enters the relevant details for the
     person (below a-d) and clicks on the white check in the top right of the screen (below d). This
     completes the data entry for Observation #1 (the person) at the incident. The observer would then
     go through the process again for both the camp (e-h) and the carcass (i-l), making sure that each
     time the relevant details of the observation are recorded. After entering all of the relevant data for
     each observation and ticking the white check at the top of the screen, the observation will appear in
     list of observations recorded at that incident (below m). Note, that below in (m), both ‘Camp’ and
     “Carcass” appear beneath “People – direct observation”. Once all observations have been recorded
     at the incident, save the incident selecting the green button at the bottom right of the screen (below
     m).

a)                               b)                                  c)
40 d) e) f) g) h) i)
41

j)   k)   l)

m)
42

Maps
SMART mobile allows you to use your device for navigation with a multi-featured map;
   •   Sightings, Incidents, Tracks are visible
   •   Offline maps overlaid on base map
   •   10 online base maps: OpenStreetMap, National Geographic, Satellite, Oceans, etc.
   •   Offline mode where no basemap is required
   •   Layers can be turned on and off
   •   Inspect
   •   Navigation with realtime pointer
   •   Compass
   •   Detailed data
   •   Satellite view
   •   Smooth panning, pinch-zoom and rotation
   •   Rotate to north at top button
   •   Zoom in, zoom out buttons
   •   Follow modes: user, follow, navigation
   •   Co-ordinates in decimal degrees, degrees minutes seconds, degrees decimal minutes and UTM

SMART Mobile: Additional Data Collection Features
Independent Incidents:
SMART Mobile now allows you to collect data not associated with a patrol, on a handheld device. To use
this feature, you will need to install the ‘Independent Incident’ plugin to your SMART database via the ‘File
> Install New Plugins’ menu. Once you have done this, you can re-export your patrol package and select
a configurable model to be used for independent incidents which can differ from your chosen patrol model.
For more information on independent incidents see: SMART 6 Technical Training Manual Module 11:
Independent Incident Plug-in.

   B. Mobile data export from device
   To export data collected from SMART Mobile to your computer:
      1. Click “Export Data” in SMART Mobile
43
2. SMART Mobile will create one or more JSON files for each project and place it in a new folder
called “/SMARTdata”44
4.6 Importing SMART mobile patrols into SMART
It is not necessary to use SMART mobile in a connected environment. SMART mobile data
collection can be done outside of telephone 3G or 4G networks. However, if you are using SMART
Connect with the data queue wifi settings enabled (see the Advanced Administration with SMART
connect training handbook) simply ending your patrol will send data to the data queue which can
be downloaded directly into SMART desktop.
For offline use, to import the data collected in SMART Mobile directly to SMART Desktop:
A. Connect your mobile device to your computer using the cable
B. Make sure device is connected for ‘file transfer’
C. Open SMART Desktop and go to Field Data>SMART Mobile>Import…
C. Select to Import From your Device and SMART will automatically pull your data from your device.45
D. Alternatively you can transfer the data from the SMARTDATA folder on the device to a folder on the
desktop, and from there Import from Files to SMART. Click the Green cross and select the file to
import.
E. Once the file is ready for import select whether you want to Create a New Patrol or Add to Existing
Patrol Leg46
F. Once imported the New Patrol will appear in the list of patrols in the Patrol View
4.7 Report bugs and other feedback on SMART Mobile
The SMART Mobile app you are using is a new public release version. It has already received extensive
field use and testing, however, there remains the possibility of glitches. Please report all bugs and any
general comments (e.g., “Feels like too many clicks to get from X to Y”) about your experience using
SMART Mobile following the steps below. This will ensure we efficiently address all comments/concerns to
improve SMART Mobile.
A. Compile the relevant details about the bug reported or your user experience feedback in
an email:
a. In the Subject of the email:
i. Enter a short description of the bug or feedback.
b. In the Body of the email, provide a more detailed description of the bug reported including
the following information:
i. SMART Mobile version and build installed (e.g., Version 1.0 Build 261)
ii. Mobile device used
iii. For bugs:
1. What behavior was expected
2. Steps to reproduce the issue
3. Feedback on if the issue is a blocker to further use
iv. Your name (so we can contact you with any questions about your bug report or
feedback)
c. Add any relevant Attachments to the email, such as:
i. Screenshots
ii. Bug report zip file exported from SMART Mobile
D. Send your email to smartmobiletester1+r2mdoaz1vvwo5ajmakpc@boards.trello.com,
copying smartpm@smartconservationsoftware.org and rpaz@wcs.org
You may be contacted with follow up questions or requests to retest to confirm the bug you reported
has been successfully resolved.
To Create a bug report in SMART Mobile
A. In SMART Mobile, go to Settings and click Report a Bug
B. Write a brief description of the bug and click the Save check mark
C. SMART Mobile will create a zip file with the bug report (including details about your SMART
Mobile configuration) and place it in a new folder called “/SMARTdata”47
If you need assistance with using SMART mobile or Cybertracker Classic, please contact the SMART
Program Manager (smartpm@smartconservationsoftware.org).
4.8 Exporting patrol data for sharing
After importing the SMART Mobile patrol data to SMART you will export the patrol to a separate folder in
your computer which you may need to do to share data between computers:
1. Create a folder in your computer with the name of your team-SMART Mobile equipped device or
phone number-date of patrol. Example: RukwaLuafi1-BVG2-21April2020.
2. Open the SMART software > click on Patrol on menu bar > click on Export Patrols > select the
patrol or multiple patrols you want to export from the drop-down list by clicking on them (a tick
mark will appear in front of the selected patrol) > click on Browse > Select the folder you created
(Example: RukwaLuafi1-BVG2-21April2020) > Click on OK > > click on Export.
3. The patrol data may be shared via USB or email with data manager for importing into another
SMART database.48
4.9 Field exercise: Data collection using SMART Mobile equipped devices
• Divide into teams to conduct a practice patrol around the training site
• Collect data on the handheld devices; record the patrol configuration, then start taking observations
at simulated crime scenes
• Try to be vigilant and observant, especially for signs of human activity, wildlife, and features. Also
record the start and end of a patrol, and any changes in movements of the patrol teams such as rest
stops or change of transportation (foot to vehicle, vehicle to foot etc.)
• When the patrol is finished, import your data to SMART via the SMART Mobile or CyberTracker field
data interface. Compare patrol results between teams.
5. Automated data collection using CyberTracker (Classic)
Assuming that a SMART data manager has loaded CyberTracker and a configurable model onto the device
(see: SMART Technical Training Manual: Module 9: CyberTracker Plug-In and Smart Mobile) for detailed
steps), protected area staff can now begin to collect data from the field.
In the example presented we use a real data model from the Bangladesh Sundarbans Management Forest,
one of the case studies for SMART implementation, demonstrating the use of CyberTracker Classic.
5.1 Preparing to record observations with CyberTracker (Classic)
To begin the process of recording data:
● Turn on the CyberTracker-equipped device
● Turn on the GPS on the device.49
● Start the CyberTracker application by tapping on the CyberTracker icon on your home
screen. You will see a screen that looks like the one below.
● Tap on the configurable data model which has been exported to the device. There may be
several data models available so tap on the one that is designated for your patrol. In the
example below the name is “Sundarbans.”
If CyberTracker starts with the screen as shown below, enter the default exit pin code “1234” or have your
SMART data manager enter the correct pin code. See: SMART Technical Training Manual: Module 9:
CyberTracker Plug-In and Smart Mobile for more details on pin codes and ‘Kiosk mode’.50
● Now you will see the screen below.
● Tap on “Sundarbans”
You should see one of the two screens below (Note: To begin a CyberTracker patrol you will need to see
the 2nd screen right side below as this means the GPS has acquired a satellite connection):
● If the 1st screen appears, tap on back arrow on the bottom of the screen. The 2nd screen should
appear.
● Tap on Start New Patrol to ‘Begin Patrol’ and tap on Forward icon at the bottom right corner of the
screen.
● Wait for the GPS signal to Begin Patrol (See yellow highlights in the display screen below).
Note: You need to see the GPS coordinates like the right screen below.51
● Complete the Patrol Configuration screens to define the Patrol characteristics (See section 3.3.3 below
for detailed steps for recording an observation in CyberTracker)
Note: By tapping on the forward arrow at the bottom right corner of the screen you can skip optional
sections. This may be enabled/disabled when setting up the configurable data model.
5.2 Recording observations using CyberTracker
After the patrol configurations are entered you are now able to collect observation data.
Make Loads the configured data model (in this example, “Sundarbans”)
Observation to allow entry of observations
End Patrol Ends the Patrol
Stops recording track information during extended rest periods to
avoid having the track information accumulate. This option should
Pause Patrol only be used during extended stationary rest periods. After
(Rest) selecting (tapping on) Pause Patrol (Rest), you have to tap on
Save icon to confirm Pausing Patrol.52
All Paused Patrols should be resumed by tapping on Save icon
to start recording track information and collecting data. The track
information will resume from the last recorded position.
Caution: If you do not select Resume Patrol before restarting a
patrol, the GPS tracklog will not be recorded.
Resume
Patrol
Opens up the Options screen.
Displays the time interval when GPS track points are collected. If
there is no number visible in the triangle, then the device will not
record track information. Check the interval after installation of
CyberTracker with a simulated patrol and make the necessary
changes in ‘Field Data > CyberTracker Properties > GPS (tab) >
Track Timer’ in SMART on your computer and re-export the patrol
to the smartphone or tablet.
Back arrow to return to previous screen.
Forward arrow to advance to next screen.
Saves the observation.
If no GPS signal is available, you will be prompted to skip GPS
collection and advance to the next screen. This will create a
Skip GPS
waypoint without recording location coordinates. During patrols
never skip GPS.
Creates a new GPS waypoint location and assigns the observation
Save As New
to the new waypoint. If a waypoint is not saved, no observation data
Waypoint
will be recorded.
Add to Last Assigns the observation to the previous waypoint. This should be
Waypoint used when multiple observations are recorded at a single location.53
For example, more than one observation (a person, snares,
poacher’s camp, etc.) are all observed together in the same
location. Multiple observations at a single waypoint are referred to
as an ‘Incident’ in SMART terms.
5.3 Detailed Steps for Recording Observations in CyberTracker
Note: The detailed steps below reference the specific example data model, ‘Sundarbans’ – at each site, the
information will differ depending on the configurable data model used.
Practical exercise
● Tap on Data Model “Sundarbans” (or the equivalent on your device) at the top of the screen.
Then tap on Forward icon at the bottom right corner of your screen.
● Tap on Start New Patrol at the top of the screen and wait for GPS signal (see yellow highlights
in the example under 3.3.1). Once the GPS signal appears, tap on the Forward icon .
● Tap on Begin Patrol then on Forward icon .
● Tap on “Yes or No” for arms then on Forward icon .
● Tap on a “Team” then on Forward icon .
● Tap on a “Station” then on Forward icon .
● Tap on a “Mandate” then on Forward icon .
● Tap on Forward icon to skip Objective.
● Tap on Forward icon again to skip Comments.
Note: You can tap on an empty part of the screen to bring up the keyboard so you can type in Objectives or
Comments.
● Select “Team Members” then tap on Forward icon .
● Select “Team Leader” then tap on Forward icon .
● Select “Make Observation” then tap on Forward icon .
● Select “Position” then tap on Forward icon .
● Select “Patrol Start” then tap on Forward icon .
● Select “Save As New Waypoint” then tap on Forward icon .
● Tap on “Save” icon (the Arrow pointing down into a box) on the left side of Forward icon
to capture your GPS location and save your data.
● Wait for the GPS coordinate to be 100% completed (see left figure below). Now “Next Task”
screen appears, and you are ready to record another observation (see right figure below).You can also read