HOW TO GENERATE OFFLINE MAPS FOR SURVEY SOLUTIONS IN QGIS - NET
←
→
Page content transcription
If your browser does not render page correctly, please read the page content below
HOW TO GENERATE OFFLINE MAPS FOR SURVEY SOLUTIONS IN QGIS
INTRODUCTION
In this tutorial we will show you how to generate in QGIS the mapping input to configure offline maps for
Survey Solutions that will be displayed in both the Map Dashboard and the Geography Question.
We recommend reading the documentation about the Geography Question and the Map Dashboard at the
Survey Solutions knowledge base before you go through this tutorial. It will help you to better understand
what the mapping features in Survey Solutions are for and how they work.
In this tutorial we will cover the necessary operations in QGIS to produce offline maps automatically using
the Atlas tool.

1. INSTALL QGIS
We will use QGIS to generate and prepare all the GIS inputs for the Geography Question. QGIS is open-source
GIS software freely available here: https://qgis.org/en/site/forusers/download.html.
If you need help to install the software in your computer, you can check on the QGIS for census and survey
mapping manual.

2. PRODUCE THE MAP LAYOUT
    2.1. Load the administrative unit layer (e.g. Enumeration Areas, Census districts)

Once QGIS is installed on your computer, start the program and click on                          to generate a New Project
instance.
Load the layer corresponding to the administrative unit framework (in this example enumeration area)
utilized in the questionnaire loaded in the Survey Solutions server. The easiest way to do this is to drag and
drop the .shp file into the map canvas. 1

1This applies in case of using shapefile format, for other formats such as Geopackage (.gpkg), Keyhole Markup Language (.kml) the
"drag and drop" method works as well.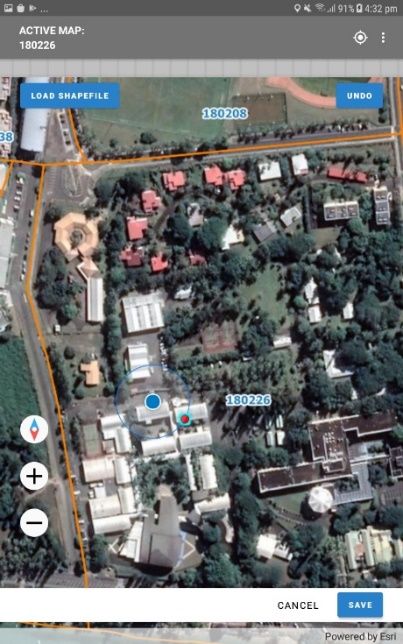
HOW TO GENERATE OFFLINE MAPS FOR SURVEY SOLUTIONS IN QGIS
                                                                                                      Page 2

   2.2. Configure the projections
We need to set the project's and the layer's projection to WGS 84 Pseudo-Mercator. This is a requirement
for the correct operation of the offline maps in the Survey Solutions Interviewer app (Version 20.09).
Check and modify project's projection
  a. In the bottom-right corner of the QGIS interface the CRS used by the project is displayed.

  b. Click on                   to open Project Properties and go to CRS.
  c. In this panel, it is possible to select the CRS that will be used by our project.
  d. Use the search bar to find a suitable CRS for your project. In this case, we will search for “WGS 84 /
     Pseudo-Mercator - EPSG: 3857".
  e. Select the CRS with code EPSG: 3857.
  f. Click OK.

Check and modify layer's projection
  a. Open Layer Properties to check which CRS the layer is using (to open Layer Properties, double-click
     on the layer’s name in the Layers panel).
  b. Go to INFORMATION. In the INFORMATION FROM PROVIDER section, you will find the CRS used by
     the layer. Click OK.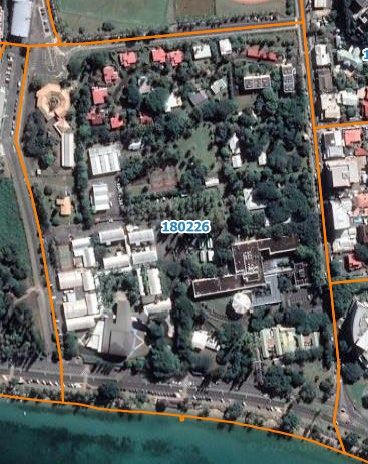
HOW TO GENERATE OFFLINE MAPS FOR SURVEY SOLUTIONS IN QGIS
                                                                                                  Page 3

c. If the CRS used is different from WGS 84 Pseudo-Mercator EPSG:3857, follow the steps below.
d. In the Layers panel, right-click on the layer’s name and go to EXPORT > SAVE FEATURES AS…

e. Next to FILE NAME, click on       to open the file explorer and select the name and location of the
   new layer.

f.   Next to the CRS bar, click on    to open the Coordinate Reference System Selector.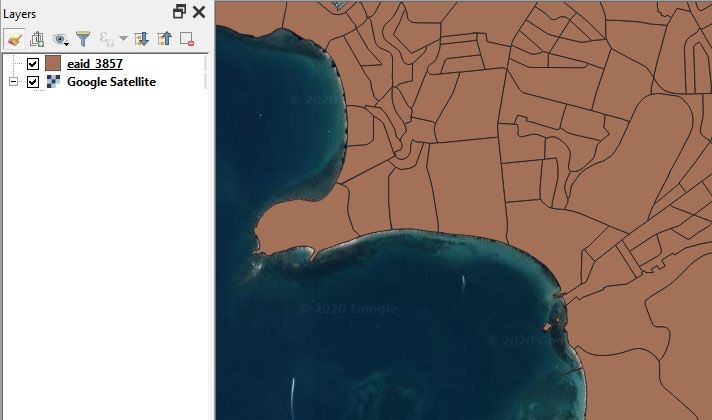
HOW TO GENERATE OFFLINE MAPS FOR SURVEY SOLUTIONS IN QGIS
                                                                                                    Page 4

  g. In the FILTER bar, type: 3857

  h. Select the WGS 84 / PSEUDO-MERCATOR CRS in one of the panels below and click OK.
  i. Back on the Save Vector Layer as… panel, click on the OK button.

   2.3. Configure layers and styles
Add satellite image to the map using XYZ tiles
  a. In the Browser panel, right-click over XYZ TILES and select NEW CONNECTION…
HOW TO GENERATE OFFLINE MAPS FOR SURVEY SOLUTIONS IN QGIS
                                                                                                       Page 5

  b. Under NAME, add the name we want see on the Browser panel for this connection, such as Google
     Satellite.
  c. Paste it into the URL bar https://mt1.google.com/vt/lyrs=s&x=%7Bx%7D&y=%7By%7D&z=%7Bz%7D
  d. Click OK.
  e. In the Browser panel, below XYZ TILES, the connection GOOGLE SATELLITE should now be
     available.
  f. Display the satellite image background from Google on the map canvas by double-clicking on
     GOOGLE SATELLITE.
  g. Make sure that in the Layers Panel, the satellite image is located below the administrative unit layer
     to ensure we visualize the ADMINISTRATIVE UNIT layer over the satellite image.

To learn how to add other base maps available, you can check on chapter 3.5 of the QGIS for census and
survey mapping manual.
Setting administrative units layer style
The basic idea of the map is to show the boundaries of the administrative units labelled with the code on top
of the satellite image. Something like the example below.

To get to this result we need to set the style of the administrative unit layer with a transparent fill combined
with a contrasted color for the outline.
  a.   Open Layer Properties by double-clicking on the layer.
  b.   Go to SYMBOLOGY and select SINGLE SYMBOL option in the drop-down menu located on top.
  c.   Click on SIMPLE FILL to modify the polygon style settings.
  d.   In FILL COLOUR, select transparent fill.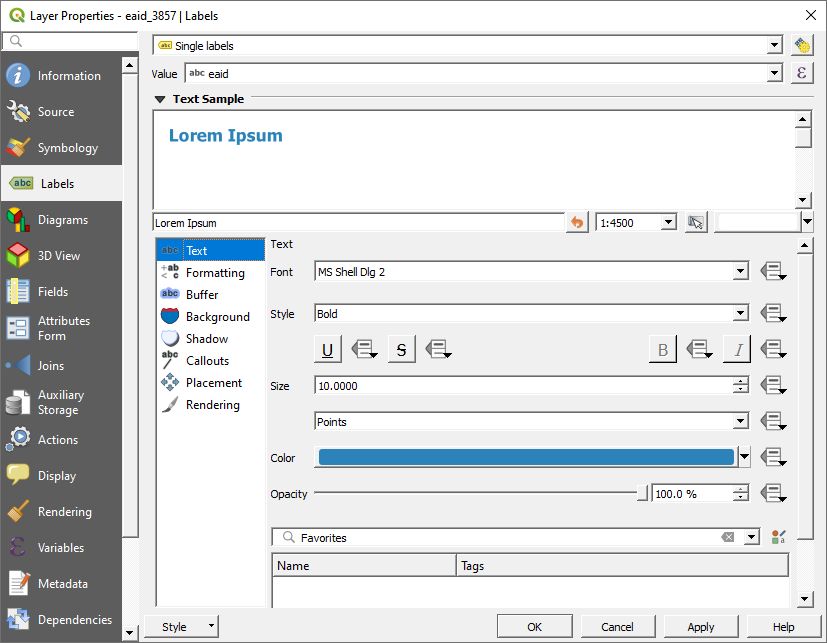
HOW TO GENERATE OFFLINE MAPS FOR SURVEY SOLUTIONS IN QGIS
                                                                                                      Page 6

  e. In STROKE COLOUR, select a colour for the outline of the polygon that contrasts with the
     background in order to improve the visibility of the boundaries.
  f. In STROKE WIDTH, find a compromise between the level of detail and the visibility of the polygon’s
     limits.
  g. Click APPLY to preview the results on the map and, once you are happy with them, click OK to save
     the changes.

Follow the following steps to add the labels for the administrative unit codes of each polygon.
    a. Open Layer Properties by double-clicking on the layer.
    b. Go to LABEL and select SINGLE LABELS option in the drop-down menu located on top.
    c. In VALUE select the field containing the administrative units' code that you want to display on the
       map. In our case we select the field eaid.
    d. In TEXT select the font, colour, size and style of the text displayed.

    e. To improve the contrast of the text over the satellite image, go to BUFFER and check the DRAW
       TEXT BUFFER BOX.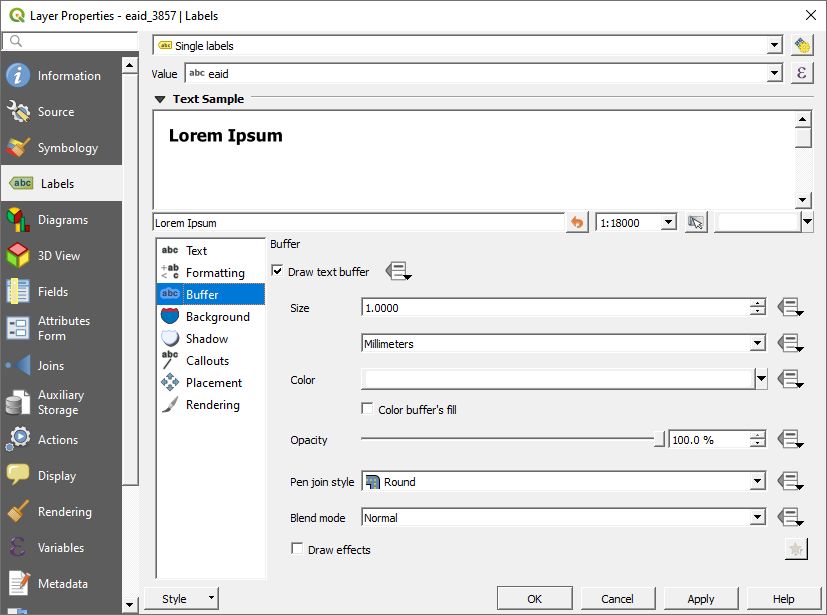
HOW TO GENERATE OFFLINE MAPS FOR SURVEY SOLUTIONS IN QGIS
                                                                                                   Page 7

  f.   Click APPLY to preview the results on the map and, once you are happy with them, click OK to
       save the changes.

  g. Don’t forget to click on      to regularly save your changes in the project.

3. CONFIGURING ATLAS TO AUTOMATE THE MAP CREATION.
  3.1. Creating a basic layout

  a. To open a new layout, click on     , or, in the top menu, go to PROJECT > NEW PRINT LAYOUT.
  b. Give the layout a name, then click OK and the Print Layout interface will appear with a blank
     layout.

  c. To add a map canvas, click on   and draw the rectangle where the map will be placed. In this
     example we do not want to have any white margins in our map, therefore we will adjust the map
     frame to the page border.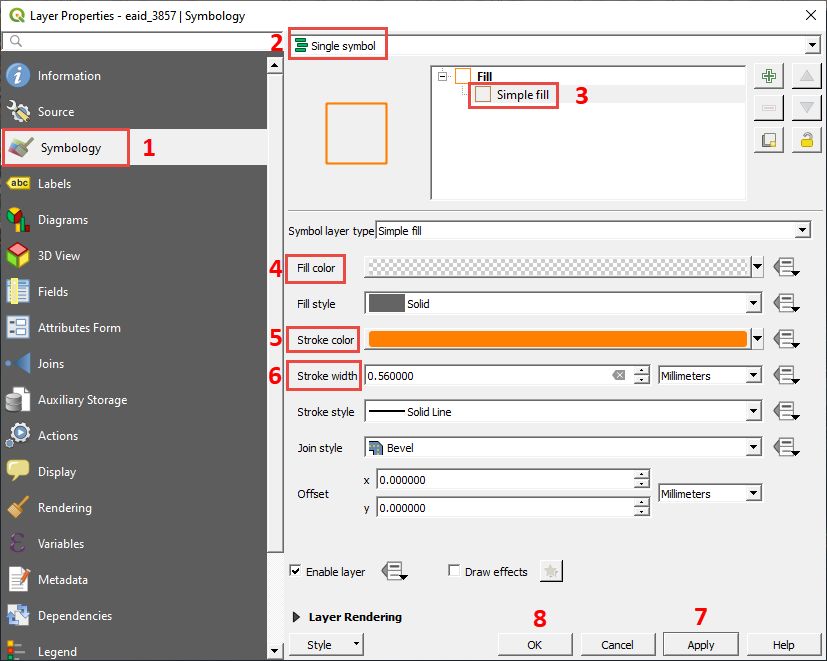
HOW TO GENERATE OFFLINE MAPS FOR SURVEY SOLUTIONS IN QGIS
                                                                                                      Page 8

   3.2. Atlas configuration
Now we are going to configure the atlas to automate the map creation. In a nutshell, QGIS will jump from
one polygon to another creating a map, exporting it into .tif format and naming each file with the
corresponding administrative unit's code.
  h. The Atlas menu should appear on the right side of the interface where the different layout menus

     are located. If it does not appear automatically, you can either click on or go to ATLAS >
     ATLAS SETTINGS.
  i. In the Atlas menu, check GENERATE AN ATLAS box.
  j. In COVERAGE LAYER, select the administrative unit layer (in our case eaid_3857), as this is the
     layer that contains the polygons that we want to map.
  k. Do not check the option HIDDEN COVERAGE LAYER, as we need to display the administrative unit
     boundaries on the maps.
  l. In PAGE NAME, select the administrative unit code field to assign page names using the
     administrative unit codes.
  m. Leave the FILTER WITH option unchecked.
  n. Check the SORT BY option and select the administrative unit code field to sort the maps using the
     administrative unit code.

  o. Uncheck SINGLE FILE EXPORT WHEN POSSIBLE, click on              , delete the default expression and
     enter the following: administrative unit code (in our case "eaid").
  p. In IMAGE EXPORT FORMAT, we will select .tif as it is the compatible format with Survey Solutions server.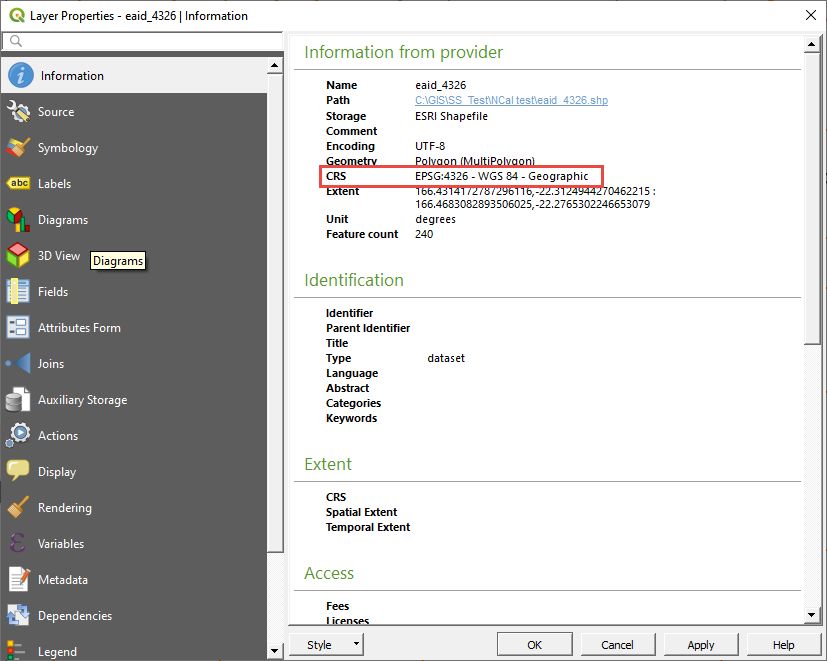
HOW TO GENERATE OFFLINE MAPS FOR SURVEY SOLUTIONS IN QGIS
Page 9
q. In the canvas, select the map and go to the Item Properties menu. Scroll down to find the
CONTROLLED BY ATLAS option and check it.
r. Select MARGIN AROUND FEATURE and set 20% (we modify this parameter according it to our
needs and how much surface we need to visualize around the polygons).
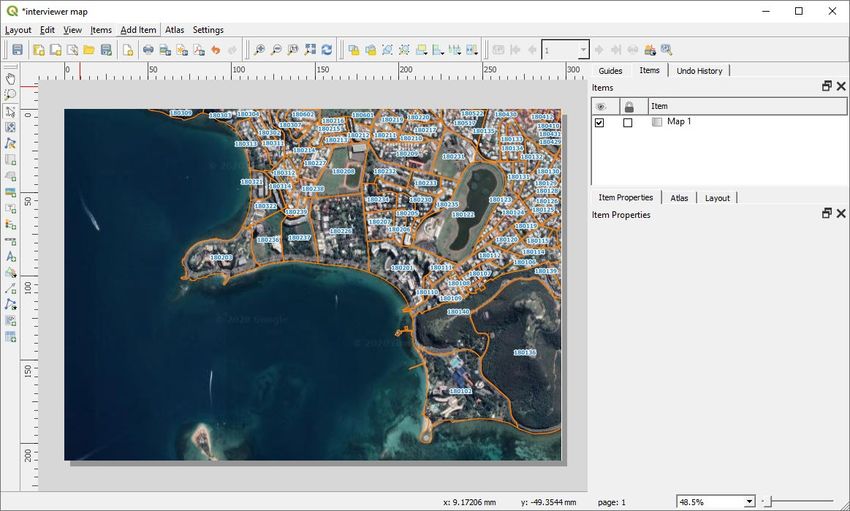
s. Go to the top menu and click on to enable the ATLAS TOOLBAR. Use the
buttons to navigate through the different maps. By using the pages display , we can go
directly to the different administrative unit, as we have already configured the PAGE NAME
parameters in this way.
t. Make sure that you regularly save any changes to the project by clicking on .
u. In the top menu of the Layout Interface, go to ATLAS > EXPORT ATLAS AS IMAGES…
Another option is to click on , located in the ATLAS TOOLBAR.
v. Select the directory to where the maps will be exported.
w. In the Image Export Options panel, we will set a resolution seeking a compromise between a
reduced size of the files and the correct display of the images. In our example case we choose a
resolution between 75 and 125 dpi.
x. Click on SAVE to start with the exporting process.
If you want to learn more about the atlas tool, you can check on the chapter 7 in the QGIS for census and
survey mapping manual.You can also read