Google Earth For Genealogists - Michael Baker -July 2018 Quebec Genealogical eSociety
←
→
Page content transcription
If your browser does not render page correctly, please read the page content below
Google Earth For Genealogists

     Michael Baker –July 2018
   Quebec Genealogical eSociety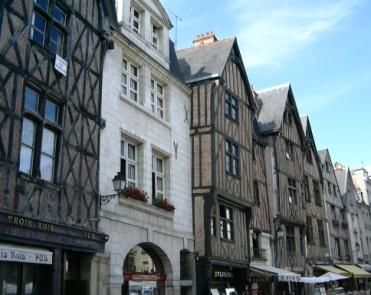
Google Earth – Which
Version?
• Do not confuse with Google Maps
• Google Earth is available in different versions.
As of June 2018:
As a webpage: https://www.google.com/earth/
• Will eventually replace all the other versions
• Requires Chrome web browser
• Does not yet have all the features we will use today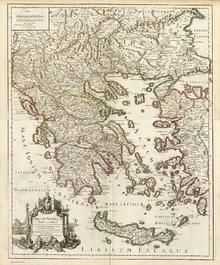
Google Earth – Which Version?
Mobile app
• Available from respective app stores for Android, iOS, Windows
• Free
• Lacks the features we will use today
Windows desktop application
• Google Earth Pro is a free download from
https://www.google.com/earth/desktop/
• Has all the features we will use today
• Used by many scientists and professionals
• Do not be put off by the “Pro” adjective
• This is the version to use for now
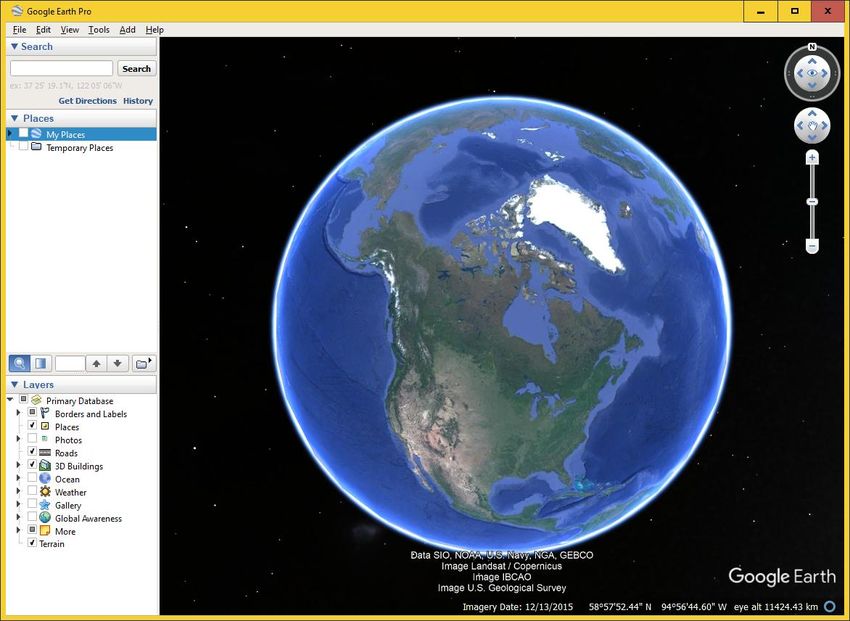
Initial Settings
Settings are in the View
menu (above), and the
Layers panel (below)

Suggested Initial Settings – View
                       Menu
Under the View menu, make sure the following
 boxes are ticked:
  1.   Toolbar (optional)
  2.   Sidebar
  3.   Show Navigation -> Always
  4.   Status Bar
  5.   Scale Legend (optional)
  6.   Atmosphere, Water Surface (optional – looks cool)
  7.   Explore -> Earth (unless your family is from the
       moon)
Suggested Initial Settings –
                     Layers Panel

Under the Layers panel, make sure the following
 boxes under Primary Database are ticked:
  1.   Borders and Labels -> Labels
  2.   Places
  3.   Roads
  4.   3D Buildings
  5.   Terrain
A layer is a set of information that is placed on the
    map. You can turn layers on and off as needed.
Navigation
•   Drag the map with your mouse, or keyboard arrow
    keys, to move your view
•   Use the mouse wheel to zoom in and out
•   Shift-drag up and down to adjust the viewing angle
    (tilt)
•   Shift-drag left and right to change the viewing
    direction
•   Can also use navigation controls on right hand side
•   Under View menu, click Reset to reset tilt and
    direction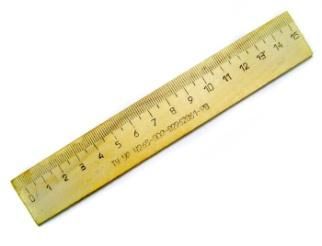
Searching
• Search for a place using Search panel on left
  hand side:
  –   Place names & points of interest
  –   Address
  –   Latitude and longitude
• When searching, Google Earth looks first for
  places near the current map location.
• Therefore, it is usually easier to go first to the
  general location (e.g. Montreal, Canada) before
  searching for a specific address or point of
  interest.

Street View

1. To enter street view, click and hold the person icon
   (right-hand side). Blue lines showing the extent of
   street view will start to appear. Without letting go,
   drag person icon onto a street. Wait for street view to
   load.
2. Within street view, drag mouse left, right, up and
   down to rotate view (or use keyboard arrow keys).
3. Look down street and click to move along street.
4. Click Exit Street View button (top right) to exit.

Placemarks
1. Position your view over general location.
2. Click Placemark icon on toolbar (or Add menu ->
   Placemark)
3. Drag placemark to exact location
4. Give it a name in Placemark properties box. You may
   also add descriptive text and insert photos from your
   computer.
5. In the Places panel, drag the placemark link to the
   folder you want.
6. Save often!!!! Under File menu, Save -> Save My
   Places.
Places and Layers

1.   Placemark links in the Places panel are organized using folders.
2.   Right-click and Add -> Folder on My Places or an existing folder to create
     a sub-folder. Name your folder.
3.   Drag the links to move between folders, or change the order within a
     folder. Double-click a placemark link to go there.
4.   Toggle the checkboxes beside placemark links and layers to show/hide
     on the map.
5.   Toggle the checkbox beside folder to show/hide on the map everything
     in that folder.
6.   Click small arrowheads beside folders and layers to expand/collapse
     them.
7.   Save often!!!!!!!!
Distance Between Two Locations • Position your view so both locations are visible. • Click Ruler icon in toolbar (or Tools menu -> Ruler). • Drag ruler dialog box out of the way. Click Path in the dialog box. • Click start location. Then follow streets and click points along the route to end location.
Rumsey Historical Maps

1. In the Layers panel, tick Gallery -> Rumsey
   Historical Maps
2. Rosettes appear where a map is available:
  Some maps are general, covering large areas with no
     details; some are local with details
3. Click the rosette for map to appear.
4. A link to the map appears in Temporary Places
   under the Places panel. Toggle the checkbox
   beside the link to hide/reveal the map. Toggle
   3D Buildings in Places panel to hide/reveal
   present day.
Sharing Your Results You may share your placemarks with other Google Earth users: 1. Right-click a single place, or a folder for a group of places. Choose Save Place As... 2. Name the .kmz file and save it to a convenient location 3. Send an email with the .kmz file attached The recipient can click (or save) the .kmz file and it will open in Google Earth. Or they can open it via File -> Open...
Sharing Your Results As a
            Narrated Google Earth Video
1. Visit the places you want to show first. This allows Google
   Earth to cache the data so your video will be smoother.
2. Click the Record Tour button in the toolbar

3. Click the Record and Mic buttons in the bottom left
   corner of the screen
4. Visit the places you wish to show.
5. When done, click the Stop button. Click the Save button
   to save the tour as a place.

6. Follow the instructions on the previous slide to save the
   tour as .kmz file which you can email to others.
Ideas for a Google Earth
Detective
Confirming and resolving addresses:
• Use street view to look at the location.
• Is it the right age and type of building?
• Does the neighbourhood look right?
• Are there nearby landmarks that fit with
known facts or family anecdotes?Fill in the Story • Use 3D Buildings to look around the neighbourhood • Are there stores, parks, landmarks, public buildings that would have been of interest to the family? • In rural areas, how would the terrain and distance to the closest town affect life? • Use the ruler to check distances. Do the travel times make sense? • Look at Rumsey Historical maps and other layers.
Recommended Reading

• Geography and Genealogy: “The Future of
  the Past”; Mark W. Gallop; Generations, the
  Journal of the New Brunswick Genealogical
  Society, Inc; Fall 2017; pages 45-48

Mark is a member of our eSociety!
You can also read