Living - INNOVATOR? - Shack Dwellers Federation of Namibia
←
→
Page content transcription
If your browser does not render page correctly, please read the page content below
Living   Intelligent, integrated and holistic approaches that inspire.

                          IDEAS
                      FOR HOME
                  IMPROVEMENT

                                     HOW TO
                                     BUILD A
                                      SOLAR
                                     COOKER

                       ARE YOU AN
     INNOVATOR?
The “LIVING PERMACULTURE”                         project is a
participatory design and development initiative funded by the
Southern African Innovation Support Fund (SAIS).

The project innovates and designs Permaculture inspired
solutions together with shack dwellers in Windhoek, Gobabis,
Dordabis and Lusaka, Zambia. It is an 18-months project
(October 2019 – March 2021).
Dear reader,

Permaculture is a system of agricultural and social design principles for “human-centred” landscapes. Its intelligent,
integrated and holistic approach has made Permaculture one of the fastest growing grassroots movements around
the world. Permaculture minimizes external inputs and sets up closed systems – that’s a great approach for people
who do not have money.

The “Living Permaculture” project brings this innovative design system to Namibia. In this handbook you find ideas
for backyard gardening and home improvement that have been developed by shack dwellers.

Are you an inclusive innovator? If so, some of the solutions might inspire you to start a business.

We hope you enjoy the handbook!

Ina Wilkie
Project Coordinator

Content
Introducing the project								pg. 02

Permaculture									pg. 04

Backyard gardening								pg. 08

Permaculture in Namibia								pg. 10

Inclusive Innovation								pg. 13

Solar panel cooker									pg. 18

Posters greywater filter and shack insulation					                                                    pg. 21
open the staple to take out the poster

Solar box oven									pg. 24

                                                                                                                    01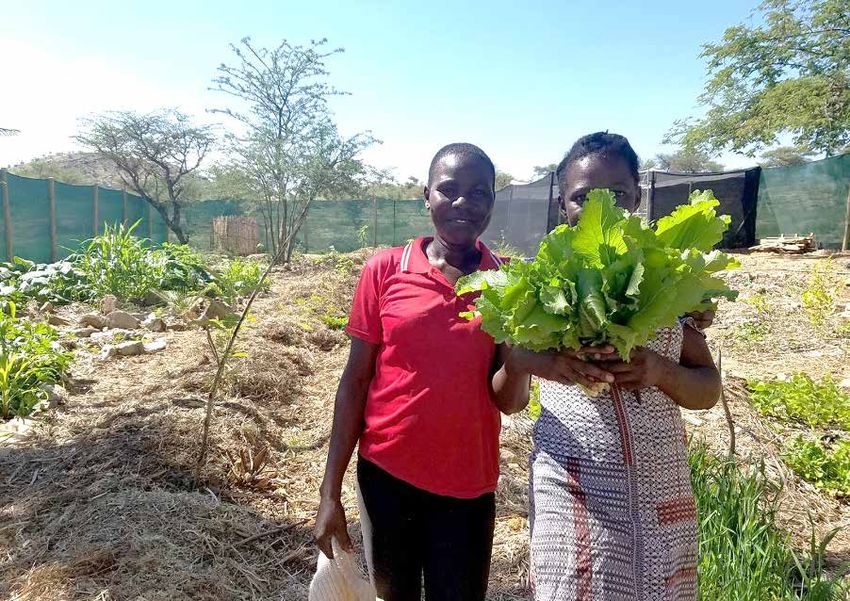
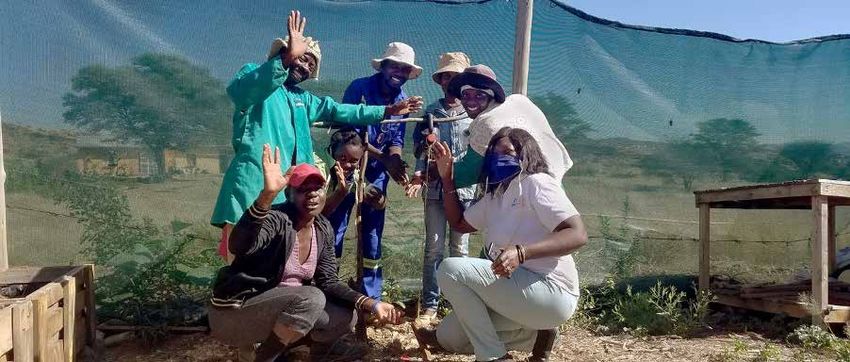
Living Permaculture

 Permaculture is about creating real independence, starting at home. Permaculture design assists us to use inputs
 like energy, water, sun more efficiently and improve our environments, leading to better health all around. And it
 can help us save money! We have facilitated a Permaculture Course designed specifically for shack dwellers from
 Windhoek, Gobabis, Dordabis and Lusaka (Zambia). The project will continue working with our design champions,
 communicate the solutions we developed together, facilitate outreach activities through the Shack Dwellers
 Federation and Namibia Housing Action Group and seed funding for entrepreneurs.

 The Windhoek Tippy Tap Challenge

 We came out of Milestone 1 of the SAIS Living Permaculture project with a group of highly motivated people who
 were excited to start inventing and building in their settlements. That’s when the coronavirus stopped us in our
 tracks. While puzzling over how we can re-plan our activities, we came across the tippy tap and started the Windhoek
 2020 tippy tap challenge. 28 producers built 2298 tippy taps in Windhoek’s informal settlements in April to help
 people fight coronavirus. Our focus was on using recycled materials wherever possible and on inventing as we go.
 You can find more info and a gallery with tippy taps at https://tippytapchallenge.wordpress.com.

 Appropriate technology

 The idea of appropriate technology is that people understand their own needs better than anyone else and can
 therefore invent the technological innovations necessary to meet those needs. The notion of appropriate technology
 goes back to the social movement led by Mahatma Gandhi whereby low-tech self-sufficiency or “village technology”
 was reclaimed to subvert and ultimately prevail over the British Empire. In this understanding, appropriate technology
 is a means to liberation.

02
That’s NIFTI!

Together with Nina Maritz Architects and supported by GIZ, we started the NIFTI initiative – Namibian Innovation
for the Informal. The intention is to spur innovative thinking and design and to develop prototypes of solutions for
everyday living, aimed at general problems found in informal settlement life – water supply, food security, sanitation,
heat and cold in dwellings, etc. The process is participatory, involving community members in all stages – from
identifying the main problems, through brainstorming and selecting solutions, to designing and making prototypes.

Farm Okukuna

Farm Okukuna in Gorengab Extension 3 is partner and implementing site of the Living Permaculture project. The
farm is a project of the City of Windhoek and the World Future Council. Community members run a market garden
and compost businesses. Farm Okukuna is also a training centre around nutrition, growing food, and innovation for
shack dwellers. Currently, the prototypes of solutions featured in this handbook such as grey water filters, solar
oven, shack insulation and dry toilet systems are being tried and tested at Farm Okukuna. Follow us on:
www.facebook.com/GrowingFoodinWindhoek/

                                                                                                                     03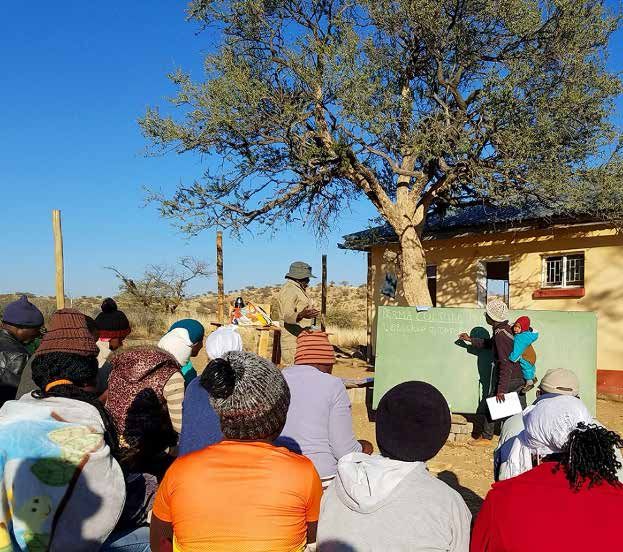
What is Permaculture?

 Permaculture is a design approach to creating sustainable human habitats, without impacting negatively on
 the natural environment around us, as well as afar from us.

 If we carefully observe our climate, our buildings, our social environment, and our available plants and animals,
 we can design our home spaces into a productive, useful and abundant support system for people.

 The originators of Permaculture put together an approach to human livelihoods, culture and economy that
 would ensure that no harm came to the Earth, that people were respected and supported, and asks in turn that
 we give back surplus (extra) time, energy and resources to the Earth and to care of People.

 The intention in Permaculture is for people to reclaim their rights and abilities to be self-sufficient without
 damaging the resources we have wherever possible. This starts at home, and spreads out into our communities,
 cities and farms.

 Compiled by Alex Kruger
 Alex Kruger has been involved with
 Permaculture since 1993, when she
 graduated from Fambidzanai Training
 Centre in Zimbabwe. Alex is based in South
 Africa. Her work has spanned urban to rural
 contexts, working with all income groups
 and their challenges. She has applied
 Permaculture design to natural building,
 green technology, schools, youth work, seed
 saving, food preservation, health and many
 other systems. Her passion lies in unlocking
 the potential for change in people. Alex
 facilitated a Permaculture Course specifically
 for shack dwellers from Windhoek, Gobabis
 and Dordabis at Farm Okukuna in Goreangab,
 Windhoek in February 2020.

 “With Permaculture, people learn to identify and address environmental challenges, such as flooding and overheating.
 They are inspired to save water and to green their environment. This does not only support healthy lifestyles, it also
 builds social cohesion and thus can combat crime,” Alex explains.

 The house as an ecosystem
 Permaculture systems are based on natural systems – what we call ecosystems. The breakthrough in Permaculture
 was realising that we needed to create human habitats that were similar to natural ones.

 If we can redesign our home spaces and lives to function more like an ecosystem, we will create situations where
 there is very little waste, and much abundance produced. Through the Permaculture design process, we will be able
 to achieve this. This means that our homes will use as many renewable resources as possible, heat and cool itself,
 and that we will be able to produce for human needs in the space around the home.

04
Basic human needs

Humans need food, shelter, clothing, energy, love and a meaningful life in order to truly reach their potential. For
most of the world, many of these needs are not met. At the moment, very few of us have any control over where
our food comes from, how it is produced; nor over our sources of electricity, heat and water. We increasingly look to
government, parastatals and industry to provide these needs. But if we take charge of what we need, we really can
make sense of our lives.

What does sustainability mean?
“Sustainable” is a buzz word that is used very loosely by people to describe many things. We look at sustainability
as asking not only ‘can we sustain ourselves and thrive as human beings today?’ but ‘will our children’s children be
about to sustain themselves far into the future?’. Sustainability is a long-term, future-thinking strategy, considering
what will happen in the future as a result of the choices we make today.

One understanding of sustainability is to look forward seven generations. This means that the way we live now,
how we use natural resources, land, and fossil fuels, should be done in such a way that our grandchildren seven
generations from now can live in the same way, or better. This simple explanation of sustainability asks us to look
at the consequences of our actions, and the fruits of our labour. It urges humans to change their behaviour and
consumer patterns quite radically to ensure that there will be enough resources 140 years from now, for everyone.

Thinking and designing sustainably means that we take into account the impact our actions today will have on the
future. If we plant a fruit tree today, perhaps our children and grandchildren will have fruit to eat. If we pollute our
nearby river, then perhaps our children and grandchildren will struggle to find clean water to drink. Sustainability
asks us to create a better world for our children than the one we have today.

   Permaculture has been described as the fastest growing grassroots movement in the world!

                                                                                                                      05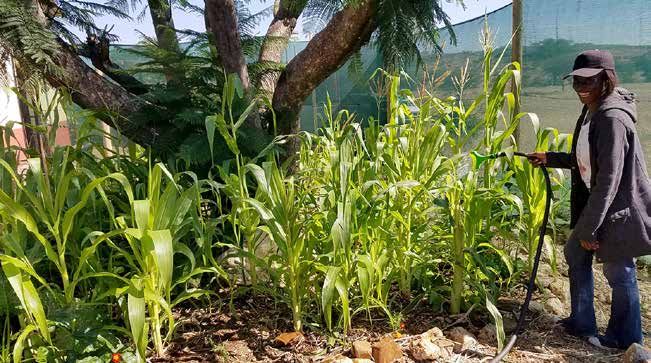
Permaculture ethics

 Permaculture has ethics which are values that guide our thinking and decision making. We need shared or common
 values in order to make decisions together.

 Earth care
 All our actions must avoid harming the earth, and we also need to actively regenerate and heal damaged ecosystems.
 All forms of life have a right to live as they play a critical role in the global ecosystem.

 People care
 All peoples should be respected and cared for. This ethic also relates to caring for ourselves, our health and our
 mental/emotional wellbeing. It is also about reaching out to other people in a positive way.

 Surplus share
 This ethic is about giving back. It essentially teaches not to hoard, and only to use what we really need! When we do
 have extra time, energy, knowledge or even money, we should dedicate them towards the first two ethics so that the
 world around us continually improves.

 In some ways the society around us no longer upholds these values, and encourages us to value external things,
 like money, status and objects. Permaculture asks us to come back to the basic values that really matter and create
 a society more positive than the one we live in now. Another aspect of Permaculture is that we create a global
 nation which values the same ethics – this means we can create a global family that has nothing to do with political,
 economic or religious boundaries.

06
Principles of Permaculture

These principles help us to think about how we are going to act and implement our designs.

 OBSERVE AND INTERACT                                    People tend to think along the same thinking
 Beauty is in the eye of the beholder                    patterns. This principle asks us to change the way
 Your perceptions will influence what you see            we look at the world. It also says that the attitude
                                                         with which we look at the world will shape what
                                                         we see. If we really observe what is happening
                                                         around us, we will be able to assess our situations
                                                         more clearly. Through a deeper understanding of
                                                         processes and patterns around us we can really
                                                         make positive changes.

 CATCH AND STORE ENERGY                                  All energy – wind, water, sunlight and nutrients
 Make hay while the sun shines                           must be used as many times as possible before it
                                                         leaves the system. If we miss the incoming energy,
                                                         we have lost an opportunity. The house is a good
                                                         example of catching and storing energy. This
                                                         principle asks us to be wide awake to opportunities,
                                                         and to use them positively.

 OBTAIN A YIELD                                          Self -sufficiency is the first step. Make sure that
 You can’t work on an empty stomach                      your system yields products. These can be food,
                                                         harvested water, and medicines. Obtaining yields
                                                         also keeps us motivated. Our understanding of
                                                         yields has also changed, so we incorporate social
                                                         and environmental benefits too in the category of
                                                         yield.

 APPLY SELF REGULATION AND ACCEPT FEEDBACK               Know the difference between needs and wants and
 The sins of the fathers are visited on the children     limit unnecessary wants. Accepting feedback is
 unto the seventh generation                             about listening to the feedback or results you get
 Your actions follow you                                 from Permaculture systems (and humans), and
                                                         adapting accordingly. On a broader scale, we always
                                                         need to think about the impacts of our actions on
                                                         the world now, and into the future. This principle
                                                         emphasises sustainability and the need to set up
                                                         systems that can provide for themselves.

 USE AND VALUE RENEWABLE RESOURCES AND                   Use biological resources rather than non-
 SERVICES                                                renewable. In terms of gardens – this is about using
 Let nature take its course                              compost and natural sources of fertility instead of
                                                         chemicals. We also understand that nature provides
                                                         services, and need to plan those into the designs
                                                         too. Some natural services we can utilise are pest
                                                         management, pollination and the cleaning of water
                                                         through plants and wetland systems.

 PRODUCE NO WASTE                                        Absolutely every resource that can be, should be
 A stitch in time saves nine                             recycled into your system. Waste is any resource
 Deal with problems as they arise so that they don’t     that is not being utilised, and therefore becomes
 get worse                                               pollution. Careful planning also means that energy
                                                         (work, time and thought) is also not wasted.

                                                                                                                07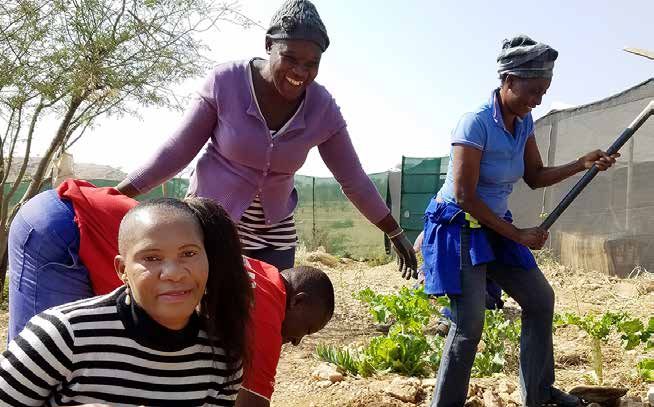
Backyard Gardening
 Compiled by Foibe Sakaria, Tresia Shikongo, Paulina Nghipandulwa

 A backyard garden refers to a small portion of land that one can use to grow fruits and vegetables within a
 limited space.

 Why a backyard garden is important

 ü   It can save us money by not spending too much on fruits and vegetables that we can grow ourselves.
 ü   Gardening helps reduce stress and high blood pressure as it is very good for our minds.
 ü   It helps us to save water by re-using it.
 ü   It gives us easy access to fresh fruits and vegetables.
 ü   Growing your own food gives you complete control over the chemicals used during the growing process.
 ü   Gardening makes good use of space and protects the soil.

 Backyard Garden

 •   Decide what you would like to grow.
 •   Observe and find a suitable location (place) for
     your garden (sun, wind, water).
 •   Arrange your garden beds.
 •   Prepare the soil before you plant (level the soil
     and add manure).
 •   Plant your seeds.
 •   Add mulch to keep the soil moist.

08
Pit bed
• Find a place with running water (can be from a
shower or tap).
• Loosen the soil.
• Dig a hole in the center of the pit bed and pile the
soil around the hole. This is the garden area.
• Throw dry leaves, green leaves and cardboard
into the hole.
• Plant your seeds on the garden area.
• Add mulch to the garden area.
• Keep adding kitchen waste to the pit hole.
Plant pool
• Use containers to plant in. These can be cut cool
drink bottles, ideally not clear plastic because
the roots like shade. Make some small holes in
the bottom and fill container with earth. Plant
seeds inside.
• Find a suitable place with morning sun.
• Dig a trench /pool.
• Cover the inside of the trench with plastic. Cut-
open dogfood sacks work well.
• Fill the inside of the pool with water.
• Put the containers of the seedlings in the pool.
• Cover the water in the trench with mulch
(cardboard) to avoid evaporation.
Compost Bag
• Organise a bag.
• Choose your compost location (shade).
• Organise green leaves, dry leaves (can be
grasses) and manure.
• Layer them accordingly: dry organic, then green
leaves, then a bit of manure. Then continue the
process until the bag is full.
• Add water to the bag regularly to keep it moist
(but not too wet).
• Add kitchen waste regularly such as potato and
carrot peels.
• When the compost is ready (turns brown in
colour) then use it in the garden as manure.
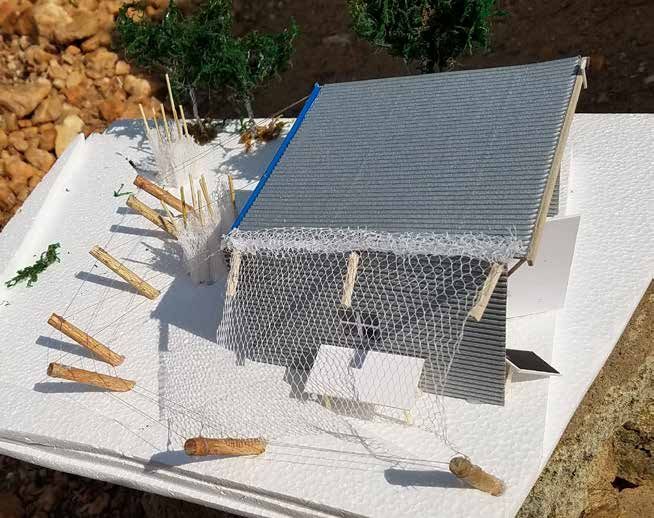
09Living Permaculture in Namibia
Compiled by Stephan Eins, Eloolo Permaculture and Tariro Muparadzi
dry toilet outdoor shower fence and wire as trellises for roof overhang to outdoor kitchen
tree-planting feeds plants climbing plants like grapes provide shade in and garden with
system with water to provide shade from the hot summer morning sun
summer afternoon sun
The idea is to integrate the surrounding environment of the shack in its function and support, in other words to
enhance the living experience through thoughtful intervention and adjustment of the immediate area.
Before you start changing or influencing your immediate environment take the time to observe the movement
of the sun, wind and other elements in your neighbourhood so that you can create a comfortable and
supportive home. Plans for permanent structures and plantings (like trees and hedges) should be carefully
assessed before implementation so that they are placed well within the overall picture/design.
Think about how you and your amily spend the day at home. Which activities take up most of your time and
where would the best place be for this. Then you can imagine or sketch out a rough plan of where is the best
place for the shower, cooking area, social/seating area, veggie patch etc.
10Sun & Shade Water
In summer we want to avoid the direct sun but in Catch it as high up as possible and look at where you
winter we need it to warm up and to grow food/ want most of it, so you can guide it in that direction.
plants. The connection here is sun/shade to either Please be cautious as water can be very erosive and
heat or cool. create a lot of damage.
We have a lot of local trees that are deciduous (leafs The connection here is water (rain, shower and
in summer and no leafs in winter), so by placing such laundry) with plants (vegetable, fruit, medicinal,
plants we can create shade or sun as we need it. shade and windbreak). For example: place your
shower above (up- hill) most plants as this is a lot
For example: using wire, rope or sticks you can create of regular water and gravity can take it where you
a simple structure onto which climber like passion want it. Now you can grow climbing plants or a taller
fruit grow and cover an outdoor seating area. Then in hedge to create a long term visual but also productive
winter there will be sun coming through as the plant barrier around your shower.
drops its leafs and in summer you will sit in the shade
with lovely fruit hanging above your head.
Check
ü Growing food: There are many different ways of growing food. Trees are more resilient than vegetables
but they do take time to get to fruiting stage. So it is good practice to start with both! Start some of the
fruits that grow well in your area in pots and at the same time a vegetable garden. There are a lot of
veggies you can successfully grow in pots as well. Always start small and expand if needed.
ü Water: Catch and store as much as possible – from rain water to grey water in containers and in the
ground! Try to stop water runoff and store it in the ground. (Let the soil soak it up!)
ü Sun: Think about summer and winter, as well as where you need or want sun and where you don’t. Then
create the shade you need. (Think temporarily and long term!)
ü Wind is totally underestimated. As our winds are very dry 90 % of the year, we should try to keep it away
from our plants. But you do want some air movement through the house or yard at some time in the year
so place plants or structures in such a way that the wind gets blocked or channelled. (Evergreen shrubs
make great permanent windbreaks!)
ü Keep your bigger picture in mind, learn from your mistakes and successes, constantly re-evaluating the
situation and make adjustments/changes when needed.
11Growing food Vegetables and fruit trees need sunlight to grow, but especially vegetables don’t want too much sunshine like we have in Namibia. The morning sunshine is the best one for our veggies and young trees in pots. In winter the sun is somewhat lower than in summer so the north eastern side of the house is a good spot. Mid-day and late afternoon in summer is the hottest sun and should be avoided/shaded out. Our hard and direct sun is not only bad for the plant but also for the soil, so please try to always cover the soil with mulch (cardboard, paper, leaves, grass etc...). For the soil to be healthy and alive (so it can give the best support to your plants) it needs to be moist most of the time and you need to add organic materials regularly (leafs, grass, manure, kitchen scraps added to the soil regularly as mulch or in addition). Your or your neighbours’ shower water is running downhill? Now you can create a “pit bed”. Dig a hole and pile up the soil around it. The hole is your pit; the soil around it your berm. Pile organic materials into the pit and keep on adding very regularly. Make sure the shower water runs into the pit. On the berm plant 5 papayas, some beans, spinach and tomatoes. As the water fills the pit, it slowly seeps into the berm and also keeps the organic matter moist so decomposition can take place which provides nutrients for the plants. Once the papayas have reached about 1.5m height, you can use the stems to hold up a wind and sun shade material as well as fence out the neighbourhood chicken. 12
Are you an innovator?
Are you ready for inclusive innovation?
Do you want to start a business?

Check out if inclusive innovation is for you!
...with these ideas and tips from BopInc (www.bopinc.org )

Is this you?
Inclusive innovators often have the following qualities:

1. They are purpose-driven: They are relentlessly looking to address major issues with new solutions. They
   look beyond the financial return to understand the long term impact of their actions.
2. They are observing: Their empathy and strong observing skills enable them to understand their customers
   and identify the real job to be done by their innovation.
3. They are able to cope with conditions of frugality: They know how to deal with resource scarcity,
   complexity and non-optimal business environments.
4. They are agile: They do not cling on to their initial ideas and are ok with throwing all their plans out of the
   window and making new plans when conditions turn out differently or change along the way.
5. They are true collaborators: They interact and keep in touch with a diverse group of people, in order to
   extend their perspective on problems and leverage support from ecosystem partners.
6. They are action-oriented: They spend more time getting things done “in the field” than accepting trophies
   at philanthropic events.
7. They think like designers: They showcase creative problem-solving skills to overcome unforeseen
   challenges and are capable of connecting and linking seemingly unrelated questions, ideas, problems or
   information in new ways.
8. They are not afraid to fail: They try out new ideas as early as possible and embrace failures as learnings.
9. They are self-disciplined: They have the perseverance and self-accountability to not postpone unpleasant
   or difficult activities, but overcome obstacles and complete the tasks as they have planned them.

                                                                                                                13
Rate your business idea and discover where you stand
A good inclusive innovation mixes Impact, Desirability, Viability, Feasibility, and Suitability.
1. Impact: Does your innovation improve the lives of underserved communities? Does it create jobs and equal
opportunities for women? Do you know the environmental risks and do you have a strategy to mitigate
them?
2. Desirability: Does your innovation solve a problem or need experienced by consumers? Do customers
want your innovation and are they willing to pay for it? The value of your innovation must be very clear
and relevant for it to be desirable.
3. Viability: Can you make money from your innovation and is this sufficient to grow your business? Are you
aware of competitors?
4. Feasibility: Is it technically and organisationally possible for you to manufacture your innovation and
deliver the quality you promise to your customers? Do you have a marketing strategy? Are you aware of
legal restrictions?
5. Suitability: Are you the right person to pursue this innovation? Does your team have a track record of
business operation in the market? Do you have an open attitude and can you respond to changing market
conditions?
14Designing
For many innovators, the most practiced approach takes a consumer problem as a starting point. This is usually
the safest approach as well, particularly if your consumers are already expressing a desire to have this problem
solved. When brainstorming and evaluating different ideas, ask these three questions for every idea:
1. How many people would be willing to pay for this idea?
2. How would I get paid with this idea?
3. How much would I get paid for this idea?
Note how in this design process you first open up (discover), then limit your ideas down (define).
Bringing your innovation to market
• Every innovation needs a Go-To-Market strategy. An idea will not sell itself, particularly not in underserved
markets.
• It is very costly and risky to take on all marketing and distribution activities yourself. Especially when you
are new to a market, success lies in establishing the right partnerships.
• When selling something new, you will first need to gain the trust of consumers. They will only invest if the
benefits are understood and, even better, experienced first-hand.
• Consumer retention is just as important as consumer acquisition. It allows you to build a steady consumer
base that you can leverage as ambassadors to reach new consumers.
Ask yourself the following questions:
• What are you good at and what are your ambitions as an entrepreneur? You may want to keep your business
small and outsource last-mile distribution and sales of your product altogether.
• How much can you invest? Do you have the capital to set up your own supply chains and sales teams? Or
would it be better to partner with someone for this?
• What is the level of control you want over sales? How might this endanger your brand, value proposition
or relationships with end-users?
• Where would your consumers expect to buy your product or access your service?
• Do you need to provide a finance solution to your consumers? Durables are often too expensive for people
to buy at once, therefore you or your partners might need to provide credit.
15Why buy?
Check your value proposition to your potential customer
Pain describes how your innovation will functionally solve
What does your target consumer aspire to and the problem identified, e.g. a low-cost bike allows
what problem prevents him or her from reaching children to cut their time to school in half, allowing
that aspiration? Using the insights gathered in them to spend more time studying and helping in the
your consumer research, identify your consumers’ household. An emotional gain describes how your
aspirations e.g. ‘I want my kids to be well educated, innovation will make the user feel, e.g. a portable
healthy and successful’, or ‘I want to have privacy curtain to bring to the open toilet provides personal
when I go to the toilet’. From these aspirations, clarify dignity. This is a crucial element and links back to the
the pain experienced e.g. ‘My kids have to walk 3 aspiration.
hours to reach the school’ or ‘the village latrines
make me feel unsafe’. Reasons to believe
Why would your consumer believe you? Give evidence
Gain on how this innovation delivers on the stated gains
How does your solution solve your consumer’s and why it is better than its alternatives. Often this is
pain? Make the functional and emotional gains of what buyers refer to when they explain their choices.
your proposed solution very clear. A functional gain
16Creating a business that thrives
This tool can help you quickly assess whether your idea is worth pursuing from a financial perspective.
Step 1: Make informed assumptions
1. Expected costs: What are your estimated monthly costs?
• Think of the costs of labour, possible rent, materials, transport etc. You can find a lot of this information
through market research.
• Keep in mind that some of your costs are variable, which means they will increase or decrease
depending on the number of units sold.
• Do not forget to include a salary for yourself and your team in the estimation of costs.
2. Estimated revenue: How many units do you expect to sell per month?
• Make monthly sales projections for each product/service that you offer. How many potential
consumers are there, how many consumers will you realistically serve and how many transactions
will your consumers make per month?
• Key tip: To set your prices, do some research on competitors pricing and consider the price point you
need to reach financial sustainability.
3. Starting capital: How much money do you have to kick-start your business?
• You will need some capital to cover initial costs and make your first sales. How much capital do you
have available to invest in the launch of your business idea? How much can you raise from friends
and family?
• Once you have your starting capital, refer back to your costs and estimate how many units you can and
should initially produce and sell with this capital.
• Key tip: If you are considering getting a bank loan, do not forget to include the interest repayments as
monthly costs.
Step 2: Explore different scenarios
Now that you have these estimated values, you can start evaluating your chosen revenue model(s).
• Calculate different revenue models that you want to test.
• Compare these different possible scenarios of revenue. Test and compare at least a one-time payment
model (more rapid growth) and one recurring payment model (better cash flow).
• Allow for some time to try out different scenarios
Step 3: Review your assumptions
Take some time to review your assumptions. Consider sharing them with someone who is familiar with your
business and target group. Some questions that you can ask yourself are:
1. How long will it take until I can expect to reach the break-even point?
2. Can I raise the capital I need to cover the time until I expect to become profitable?
3. Can I realistically sell that many units per month at the chosen price point?
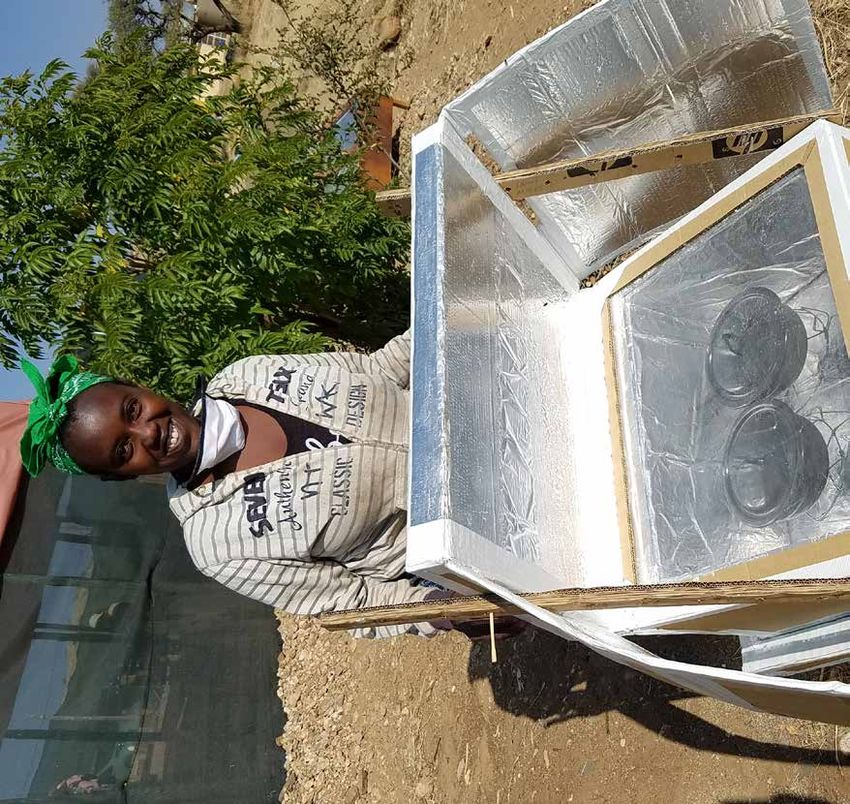
17NIFTI Simple Panel Solar Cooker
Making the NIFTI Simple Solar Panel Cooker (NSPSC) is as easy as A, B, C! It is the simplest kind of panel
cooker that you can make and costs next to nothing. It works very well to cook small amounts of food. It folds
up and is also ultra-portable.
The roofing insulation you need usually comes in 40 m rolls. Either get offcuts from a builder or club together
with friends and neighbours to buy a roll. You can make about 44 panel cookers from such a roll. You might
also want more than one cooker, so that you can cook more food at a time – rice in the one, sauce in another,
veggies in a third?
A. MATERIALS & TOOLS: You need very little to make • One or two washing pegs
this. • Some very thick wire and thin wire, for making
the pot stand
• Some roofing insulation (Bubble-foil, Sisalation, • A bucket or an old tyre
or similar), as long as it is shiny and reflective on • A small black pot with a black or clear lid
at least one side • A clear plastic bag, larger than your pot
• Some scissors
B. MAKING THE NIFTI SIMPLE PANEL SOLAR COOKER
1. The insulation is usually 1,25 m wide. Cut off a
piece of about 90 cm long.
2. On the long side, mark the edge at 40 cm from
each corner.
3. Cut in at right angles from the two marks 40 cm
deep, to make three flaps at the bottom.
4. Make a wire circle about 2 cm smaller than the
opening in the bucket or tyre.
5. Bend the ends of the wire around so that the
circle doesn’t pull loose and tie it with binding
wire.
186. Take more wire and weave it across the circle
back and forth to make pot stand.
7. Tie the junctions with binding wire to make it
stable. Your cooker is done!
C. SETTING UP AND USING THE NIFTI SIMPLE PANEL
COOKER
1. Safety first – do not look directly into the shiniest
part of the box oven, as doing so repeatedly is
bad for your eyes. If you can, wear polarising
sunglasses.
2. When taking out pots or lifting lids, use oven
gloves or a cloth to protect your hands from
burning on the hot pots.
3. Slide the two side flaps of the panel inwards in
front of the centre and peg them together with a
washing peg.
4. Put the bucket or tyre in a sunny spot on flat
ground and put the folded panel on it so that the
hollow of the panel sinks a bit into the opening.
Makes sure it faces the sun.
(If you use tyres instead of a bucket, you can always
stack 3 or so on top of each other to put your cooker
at working height).
5. Put the pot stand in the centre, put your pot of
food with the lid tightly closed inside a plastic
bag, and put it on the pot stand. Close the bag
and make sure as much sun reflects on the pot
as possible.
6. Leave it to cook for several hours. Move the panel
from time to time to get the most sun on the pot.
(Don’t be tempted to open it every so often to
check if it is cooking – if the heat is let out of the
bag, it takes longer to cook!
7. Here we use a black pot with a clear lid. You can
see the carrots and tomato inside. We plugged the
hole in the lid with a little chewing gum to make
sure the steam doesn’t come out – a steamed up
bag lets through less sunlight.
8. When taking out the pot, make sure not to burn
your hands. (Yes, it does get that hot!)
19D. HOW TO MAKE YOUR ALUMINIUM POTS BLACK
If you don’t have black pots and don’t want to buy
new ones, you can paint your aluminium pots (Hart
or similar) black.
• Sandpaper
• Schoolboard paint - stir it well to get rid of any
lumps before painting.
• Paintbrush - don’t let the paint dry in the brush
• Turpentine (to clean your brushes)
• Newspaper to protect your work-surfaces
• A rag for your hands and brushes.
1. Before starting to paint, first roughen the outside
surfaces of the aluminium pot and lid by rubbing
it with sandpaper. Remember to do the bottom
as well.
2. Wash and dry the pot well. Dust and grease on
the surface will prevent the paint from sticking
to it.
3. Paint a thin layer of blackboard paint on the
outside and let it dry completely. Paint another
thin layer on and let it dry, preferably overnight.
TIP – several thin coats of paint dry faster & are
much more durable than one thick coat.
E. SOME SOLAR COOKING TIPS AND TRICKS:
The cooking speed depends on how hot the day is, how much sun there is, how windy it is, how large the pots
are, how much and what kind of food it is. (The more food, the longer it takes to cook, and beans/ lentils cook
slower than wet vegetables, for example.)
1. Use only black or dark colour pots, as they need 5. Use less water than you would on a conventional
to b absorb the sun’s heat to cook the food inside. stove, as less will evaporate from the pot.
Light shiny pots will reflect the heat away.
6. Smaller amounts of food in smaller pots cook
2. Make sure the lid of the pot fits tightly, as faster – rather make a second cooker to use than
otherwise too much moisture escapes and try to cook with too big a pot on the one.
steams up the inside of the bag, resulting in less
sun entering the pot. 7. Preparation - cutting the food in smaller pieces
will make it cook faster and more evenly.
3. Start cooking early to get the most out of the sun.
Don’t worry about the food burning – it won’t 8. Practice and test with different kinds of food and
burn easily. get to know it. You’ll learn quite soon what works
and what doesn’t.
4. Don’t open the bag or the pot many times to
check the food, as it will lose heat and then take
much longer to cook.
20Preparing the buckets
BUCKET 2: BUCKET 3: BUCKET 4:
Make a few holes into the bottom. The small Cut a hole into the bottom and a bigger hole Cut a hole into the lid.
holes will slow the flow of the water. into the lid.
Preparing the filter materials Assembling the filtration system
Take bucket 3. Place the cut T-Shirt inside and add washed charcoal. Tie up the charcoal
Collect the filter materials. Wash them separately in the T-Shirt and turn upside down so that the knot is facing down. Repeat with sand and
until the water comes out clean. The sand used needs gravel. Around half of the bucket should be filled with charcoal and the other half equally
Cut 3 old T-Shirts.
to be similar to river sand (not clay or thick sand). with sand and gravel.
Living Permaculture Project
NIFTI Namibia Innovation for the Informal SHACK DWELLERS FEDERATION OF NAMIBIA nina maritz
NAMIBIA HOUSING ACTION GROUP architectsStep 1: Make the side sheets Step 2: Fill the panel Option 2: Egg cartons
Each insulation panel needs two sheets of 1.2 metres by 1.2 metres, 2 cm thick. Option 1: Toilet paper rolls
Flatten cardboard boxes and measure a sheet of 1.2 m by 1.2 m. Layer the cardboard Cut the cardboard centre of a toilet paper roll Cut the top section off the egg carton.
until you have a combined thickness of 2 cm for each sheet. Cut out. Glue together. Place in the middle. Apply glue to the sheet and stick Apply glue to the sheet and stick down
a brick or something heavy on top and leave to dry. down. Rolls must be close to each other. next to each other.
Step 4: Installation
Step 3: Close the panel Install the finished panels inside the shack.
Cut 4 strips of cardboard which fit the thickness and the Use wires or string to attach them to the roof
length of the panel and glue them onto the sides. and west and south facing walls.
Living Permaculture Project
NIFTI Namibia Innovation for the Informal SHACK DWELLERS FEDERATION OF NAMIBIA nina maritz
NAMIBIA HOUSING ACTION GROUP architectsShack Insulation
Shacks made of corrugated sheet metal get very hot inside in summer. The insulation panels made from cardboard
trap the hot air inside them and so help cool the inside of the shack. In winter, they help keep the shack warm.
Tools Needed Materials RequiredGrey Water Filter
How to use the Grey water filter
Bucket 1: Collection
Bucket 2: Supply
Bucket 3: Filtration
Bucket 4: Collection
With this filter, large dirt particles are filtered out of grey
water (water used previously for washing). Use gravel, sand,
charcoal and cloths as filter material. You can use the filtered
water for garden watering, household cleaning or toilet
flushing - but not for drinking or cooking!
Tools Needed Materials Requiredin the T-Shirt and turn upside down so that the knot is facing down. Repeat with sand and
gravel. Around half of the bucket should be filled with charcoal and the other half equally
Take bucket 3. Place the cut T-Shirt inside and add washed charcoal. Tie up the charcoal
NIFTI 3 Solar Box Oven
Assembling the filtration system
The NIFTI 3 solar box oven is made from cardboard
and does not have a door. Instead, the box lifts off the
Cut a hole into the lid.
base. You put your pots on the base and then put the
box over it. To access the pots again, lift the box.
BUCKET 4:
nina maritz
architects
The inside wall of the box shell has a different shape
from the outside, to reduce the internal volume in
proportion to the size of the solar collector, and
improve the oven’s efficiency. The reflector lid also
has two wings to add more reflection from the sides.
with sand and gravel.
A. MATERIALS & TOOLS:
Preparing the buckets
Cut a hole into the bottom and a bigger hole
1. You can find the following materials for free or may have them already:
• Old corrugated cardboard boxes from grocery heat inside - like scrunched-up newspaper, more
shops, bottle stores, furniture shops, etc. to make cardboard, roof insulation offcuts, toilet paper
BUCKET 3:
the shell of the box oven. (It should all be of the rolls, recycled Styrofoam packaging (the white
into the lid.
same thickness and thin enough to fold without stuff that makes little round balls when broken –
breaking. Test it across the corrugations, as this easy to find, works well, but messy and not good
until the water comes out clean. The sand used needs
will be the most difficult to fold). for the environment)
SHACK DWELLERS FEDERATION OF NAMIBIA
Collect the filter materials. Wash them separately
to be similar to river sand (not clay or thick sand).
• A damp clean cloth to wipe off excess glue if you • Empty tins or plastic containers to mix your glue
NAMIBIA HOUSING ACTION GROUP
make a mistake and another clean dry cloth to in & wash your brushes
dry the glass and remove any residue of glue. You • Clothes pegs to keep glued joints in place till
can use any old material if it is clean. they dry.
Preparing the filter materials
• Insulation filler to put inside the shell to keep the
NIFTI Namibia Innovation for the Informal
Make a few holes into the bottom. The small
holes will slow the flow of the water.
2. You may have to buy the following materials (see picture below):
Living Permaculture Project
• 2 sheets of size 52 cm x 69 cm clear 2 to 3 mm • some string to tie parts while drying,
BUCKET 2:
Perspex or 3 to 4 mm glass – just called glass • 2 or 3 rolls of very strong white tape,
in the instructions, for the collector. Perspex is • 4 smooth sticks, about 15 cm long, like sosatie
Cut 3 old T-Shirts.
more expensive, scratches easily, but is lighter sticks or chopsticks, or straight thick wire to use
and less breakable than glass. as spacing pegs for the props,
• a thick roll of heavy-duty kitchen foil, • some very thick wire and thin wire, for making
• 1 litre white wood-glue (also called cold glue, the pot stand.
such as Ponal or Alcolin),
21You will need the following tools (some are expensive, but well worth getting):
• a pen or pencil; (another wide brush for painting larger areas
• some paper scissors; more quickly helps, but is not essential);
• a utility knife with replaceable blades (like • pliers to bend and cut wire;
Stanley); • a protractor (“grade-boog”) to measure angles
• a steel ruler (having both a 30 cm and a 100 with,
cm one is easiest, but for the long one you can • a set square (triangle with one corner 90
always use a flat strip of metal or wood, as long degrees) to make sure that corners are square
as it is straight); or a cut square of card with exactly 90 degrees
• a thin paintbrush for painting glue into corners corners;
3. You will also need the NIFTI 3 paper pattern (pages 42-44):
The pattern has the following sections: • the reflector lid with wings - reflects more
• the main box shell - forms the walls of the oven; sunshine into the box;
• the solar collector spacers and frame pieces – • the base, or floor - insulates from the bottom and
spaces the glass apart for double-glazing, and is loose from the box.
securely fixes the glass onto the top of the box; • the props - adjusts the reflector angle and holds
it in position.
4. For cooking you will need, in addition to the solar box oven:
• One medium and one small thin-walled, black • also very important - a pot stand (can be made
cooking pot, like Kangol enamelled pots, or Hart from wire), or some flat pieces of wood at least 5
aluminium pots, painted black with blackboard cm high - lifts the pot 5 cm above the floor to get
paint; reflected heat from the bottom too;
• very important – oven gloves or a cloth to use • a wooden spoon for stirring and tasting; and of
when taking out the pots (they get ULTRA hot!); course; your food
B. BEFORE STARTING TO MAKE YOUR BOX OVEN, READ THIS
Following these recommendations will save you lots of time, effort and probably money as well. Safety is also
critical, so take special note of those points.
1. Try to build with a friend, rather than alone – it will be easier, and two heads are always better than one
when it comes to following instructions.
222. Work on a long and clean flat surface (add some tables together or work on a clean floor). If you cannot
find a long enough table or floor space, it is better to cut most parts separately and tape them together,
rather than folding them.
3. Read all the instructions through completely first, 4. VERY IMPORTANT:
to make sure you understand. While building, First fold all the pattern pieces and make sure it
every now and again, re-read ahead, so that you fits before gluing or taping anything. Having to
know what is going to happen in the steps after remove tape or cut open again after gluing will
the current one, to avoid mistakes. mess up the parts and you may have to re-cut
from the start.
5. BE CAREFUL when using the utility knife– it is
can cut off a finger!
• Put your forefinger and thumb (of the hand
not holding the knife), as far away as from
each other as you can, on the steel ruler,
away from the edge, to press the ruler down
and keep it stable. If the ruler slips, you can
cut yourself, so be careful!
• ALWAYS cut against the steel ruler to make
sure your lines are straight and to protect
your fingers.
• NEVER put your fingers or any other body
part in the way of the knife.
• ALWAYS pull the knife towards you, do not
try to cut away from you, as you will have
less control and it can slip more easily.
6. Keep clean water, soap, a towel and some sticking
plaster handy, so that if you do cut yourself, you
can wash the wound and dress it to stop the
bleeding. If someone gets cut, stop everything
and first deal with the wound. 11. Only apply glue to cardboard, NOT foil, as it will
make the foil difficult to handle.
7. When cutting, do not try to press hard enough
to cut the board with one stroke. Rather cut 12. When you mark out any patterns, make sure that
with a gentle shallow stroke and repeat it 3 to 4 the lines are square (that they are 90 degrees
times until you are through the whole cardboard with each other) and check frequently with the
thickness. This will both make it easier and result protractor or set square. If they are not square,
in a neater cut. the panels will not fit together, and you will
struggle to get it all assembled.
8. Put a thick piece of cardboard as a cutting mat
UNDER any cardboard that you are cutting with
the utility knife. This will make sure that you do
not blunt or break your knife.
9. Mix the glue 50% with water, and apply it in thin
even strokes. If it is too thick, it will spread out
too much and there will be glue all over the place,
not just where you want it – a sticky mess.
10. After applying glue, leave it for about half a
minute, it will stick more easily.
23C. MAKE A TEST MODEL FROM PAPER
1. Before you start building the oven, first make a
small paper model - take one of the two 1: 10
scale patterns and cut it out of normal paper
with the scissors around the outside and on all
the solid lines.
2. Now fold these pieces of paper along the dotted
lines and put it together to make sure you
understand how building the oven works. You
can follow the steps for the large oven for the
folding and putting together. This is much easier
than doing the whole thing, making a mistake
and having to start again.
D. BUILDING THE REFLECTOR LID
You can start with the reflector lid, so that it can dry while you are building the box shell, but the sequence of the different
parts is not critical. While glue is drying on one piece, carry on with another to save some overall time.
1. Tape together enough flattened cardboard boxes
to get a sheet big enough for the pattern piece.
2. Mark out the whole pattern on the cardboard,
using the ruler, even the lines that will be folded
and not cut.Use a dash line for the fold-lines
and a solid line for the cut lines, then you won’t
confuse them. Make sure everything is square!
3. Cut out the outline of the lid, as well as the
slits shown between the main reflector and the
wings. (Don’t make the same mistake as we did
of putting on foil before cutting the slits, which
made a mess of the foil when we had to cut the
slits.)
4. Fold along the lines of the lid inner and outer
sides and outside edge. Make sure you fold to the
correct side, (the wings fold the other way from
the rest).
5. Glue the flaps to the sides and tape over the
joints. Keep the inner edge open so that you can
insert the insulation there.
6. Through the open inner edge, stuff the cavity with
your insulation material. Make sure it is packed
tightly enough that it will not shift over time, but
not so tight that it makes the side of the box bulge.
7. Glue and fold in the flap that would seal the cavity.
Tape it in place. Leave it to dry while working on
another piece.
24E. APPLY FOIL TO THE REFLECTOR LID
1. Cut the foil to the right length and
so that it slightly overlaps the long
edge of the area to be foiled. You
will need two strips for the wider
sections.
2. Mix the wood glue half-and-half
with water in small amounts (just
as much as you need for the next
task) and stir it well.
3. Paint glue on the cardboard in thin,
even strokes & let the glue dry a
few seconds till it is tacky & not so
wet.
TIP: Make sure to wash the
brushes well in water if you are
not going to use them for some
time (more than an hour or so), as
the glue may set and permanently
damage the brush).
4. Hold the foil piece you have cut to
size on either side so that it sags
in the middle. Gently lower so that
the centre touches the cardboard
first.
Then gently lower it more on either
side so that the foil flattens out.
It is helpful to be two people -
one holding the foil and another
flattening it out.
255. Use a roll of soft clean fabric to smooth the foil
away from the middle while it drops down and
try to avoid making creases in the foil. Cover the
entire inner lid and inner wings with the foil in
this way.
6. Leave it to dry and carry on with one of the other
pieces, like the box shell.
7. After the glue has dried, cut the edges off. There is
no need to take it around the edges of the reflector
lid, as the edges will be protected by tape.
8. First tape the rounded corners: Put the tape on
the thin edge so that it stands up on both sides.
Make 4 to 5 vertical cuts around the curve and
fold each piece down in turn to the surface. This
keeps the tape from bunching and gives stronger
and neater corners.
9. Tape the sides by putting half the width of the
tape along the edge on the foil, and folding it over
onto on the other side. Overlap with the corner
tape pieces to cover the entire edge.
10. Tape the slits by applying tape to the one side of
the slit and pushing it through the slit to fold back
on the other side. Do both sides, and then put tape
on the ends that overlaps the slit by about 4 cm.
Split the tape with the utility knife along the slit
sides and push the central portion through and
stick it to the other side.
F. BUILDING THE OVEN BOX SHELL
We are calling it a shell, because it is double sided and you put the insulation inside the two sides of the “shell”.
1. Follow the same steps as 1 to 3 of the REFLECTOR LID. Here you can see the paper pattern on the cardboard
after the outline is cut.
262. Cut out the outline of the box,
but don’t cut the notches or slits
between panels yet. (Here Riaan
is holding the outline, before the
notches and slits between panels
have been cut).
• Crease the cardboard along the
fold-lines (see photos at step 6).
Fold in the following sequence:
• First make the bottom fold-over
and bottom flap folds (fold to
the back).
• Then make the centre fold-
overs (fold to the back).
• Now do the box side folds and
outer side flap (fold to the back).
• Now do the side flaps for the
inners (fold to the front)
3. You can now flatten the entire panel
again to cut the notches and slits as
in the photo.
4. Now only cut out the notches
indicated on the pattern. By not
cutting out before folding, you are
making sure that the folds are all
lining up across the panels.
5. Once all the notches and slits are
cut, you can measure out the foil
and glue it on the inner faces and
fold-overs of the box, in the same
way as for the reflector lid (steps 1
to 5).
6. Make sure that the foil is glued over
the folds already folded to their
maximum – i.e. in such a way that
there is extra foil to go over the fold,
otherwise it will tear when you fold
it finally. (You can add another foil
layer later, so not to worry too much
if it does tear).
277. For the box, unlike the reflector lid, make sure
that the foil goes over the edge, to waterproof the
cardboard.
8. Cut slits in corners to make neat fold-overs in the
foil, and glue the foil to the other side, about 2
cm wide.
9. Let it dry quite a bit before the next step while
continuing with one of the other pieces.
10. Now assemble the box by folding in the sides to
make the 4-walled box.
11. Glue the outer side flap to the front outer edge,
make sure everything is square and tape over the
joints. Leave it to dry a little before continuing.
12. Fold the top fold-overs and the inner sides to the
inside.
NB: Don’t glue anything until you are sure everything
fits as it should!
2813. Once you are sure it all fits well, now glue
the flaps to the side panels on the inside
of the cavity between the outer and inner
panels.
If the cardboard is thin enough you can
also staple it together after gluing. If so,
ensure that the flat side of the staple
faces the inside of the oven, so that it
cannot break the foil liner later.
14. Use a washing peg to keep the joint in
place and put some stones in to keep the
two sides of cardboard together while
the glue dries.
Do NOT do the bottom fold-overs yet!
They must be open for the insulation to
go into the cavity.
G. INSULATING THE BOX SHELL
1. When the glue is dry, stuff the cavity with
your insulation material like you did for
the reflector lid (step D 6).
2. Now you can do the bottom fold-overs,
then glue the flaps and slide them in to
seal the filled cavity. Tape the edges to
keep the surfaces in place while the glue
is drying.
3. Line the inside and bottom of the box
with another layer of foil (especially
where the foil has torn on the fold line).
It is crucial to take new foil over these
tears, to protect the cardboard from
getting wet .
(Here you can see Riaan putting foil on
the underside of the box. The collector
frame sides are tied to the box with
string, while their glue is drying)
4. After this, tape along all the folded
edges, to seal any gaps than might have
occurred.
29H. FIXING THE SOLAR COLLECTOR IN PLACE
The solar collector is made of two layers of glass with a spacer
between them to make double glazing, fixed to the top of the box with
a cardboard frame. Less heat will escape the box through double
glazing than through a single glass pane.
1. First cut the spacer pieces from cardboard. You need between half
and one cm space between the two panes of glass, so, depending
on the thickness of your cardboard, you must add more pieces
and layer the card so that your combined spacer pieces at least
half a cm or up to 1 cm thick.
2. Glue your spacer pieces in layers together to make a frame,
making sure that you alternate the corner overlaps to make it
stronger, and that they are completely square.
3. Now put tape around the inner edges of the spacer frame to
protect it from moisture. (We used foil in the photos, but the tape
should work better).
4. Put the first sheet of glass on the box and tape the edges to keep it
in place. Make sure that the tape doesn’t go over the inner edges
and cast shadows on the inside.
5. Put the spacer frame on the first sheet of glass/ Perspex and tape
to keep it in place. We used glue, and it makes a mess, so don’t
glue it – rather use tape.
6. Put the next sheet on top of the spacer (first make sure that both
panes are completely clean, as you won’t get the dirt out once it is
sealed); and tape all round to secure it in place.
7. The size now depends on how the size of your folded box, which
may be different from the pattern. Thus measure the size of the
completed box and then mark out the frame pieces. Cut out only
the basic outer frame pieces, without mitres or angles.
8. Fit the basic frame cut-outs to the box and mark the side angles
and the mitres. Do not cut the 45-degree (mitre) corners off until
you have checked it carefully.
You may have to fit and
mark it several times
before it is correct.
You can use also a life-
size paper pattern and
tweak it until you have
it just right, before
using it to mark out and
cut the cardboard.
309. Now you can glue on the frame over the
double-layered glass to keep it in place on
the box. First glue the top edges, let it dry
with the box upside down, then do the sides
one-by one, each time putting weight on it
while drying. Make sure the glue has set
a bit before you put the pieces together, so
that you do not get streaks of glue squeezing
out or dribbling onto the glass from the
joint. Put weights against the glued sides to
keep it in place until it has dried.
I. FIXING THE REFLECTOR LID TO THE BOX
OVEN
1. Fold the reflector lids inwards to lie flat on
the reflector. Put the lid with the wings on
the underside on top of the box, with the
long end piece folded down and fitting flat
to the back of the box. Mark the line where
the end piece meets the top of the box.
This will be your reflector lid backwards
fold line. Crease this line so that it can fold
backward.
2. Put glue on the end piece of the reflector lid
and on the back of the oven, and fix them
together.
3. Let the box lie on its back so that you can
weigh the glued panel down. You may have
to tie the lid to the box so that it doesn’t
flap open, or support the end piece below.
Here the lid is open on the right, with the
wings folded in, and we used cardboard to
support the end piece.
4. Let it dry thoroughly and then tape the joint
between the collector and the reflector
lid, to reinforce the joint and ensure that it
doesn’t open up the glued joint.
31You can also read