Making Strides Provides complete venous leg ulcer (VLU) management - Smith+Nephew
←
→
Page content transcription
If your browser does not render page correctly, please read the page content below

Wound                     Infection    Exudate      Compression
  Overview             Cleansing     Skin Care   Management   Management   Therapy

Making
Strides
Provides complete venous
leg ulcer (VLU) management

Your goal is to help your patients
with VLUs get back to their lives.
Smith & Nephew is there for you—
every step of the way.
Wound                                                      Infection    Exudate                    Compression
  Overview                      Cleansing                     Skin Care                    Management   Management                 Therapy

Overview                                                                                                      VLU 101
VLU care can be complex.1 We’re making strides to bring you the                                               Venous leg ulcers (VLUs;
                                                                                                              also known as varicose or
partnership you need, delivering a complete portfolio of products to                                          stasis ulcers) pose significant
                                                                                                              challenges to patients and
support every stage of treatment.                                                                             healthcare systems: they are
                                                                                                              frequent, costly to manage,
Meet the Smith & Nephew VLU product suite, a five-step system for aiding                                      recurring, and may persist
                                                                                                              for months or years.1
the management of VLUs—throughout the healing process and
beyond. Our strategy includes both wound care and compression.
                                                                                                              • A
                                                                                                                 bout 1% of the Western
And together, these form the cornerstone of industry best practices for                                         population will experience
                                                                                                                a VLU in their lifetime 1
VLU treatment.
               1,2

                                                                                                              • V
                                                                                                                 LUs develop as a result
                                                                                                                of venous hypertension 1,2
We know the effect that VLUs can have on patients. They may experience
                                                                                                              • A
                                                                                                                 patient’s risk for a VLU
depression, anxiety and social isolation.1 So we deliver comprehensive                                          increases with age 1,2

product support that can help manage infection and create an                                                  • T hey are more common in
                                                                                                                 women than in men 1,2
environment conducive to healing,3-7 all while considering your cost                                          • In conjunction with proper

requirements.                                                                                                     wound care, compression
                                                                                                                  is considered the foundation
                                                                                                                  of VLU management—
                                                                                                                  improving healing rates and
                                                                                                                  preventing recurrences 1,2

For detailed product information, including indications for use, contraindications,
precautions and warnings, please consult each product’s Directions for Use prior to use.

 Directions for Use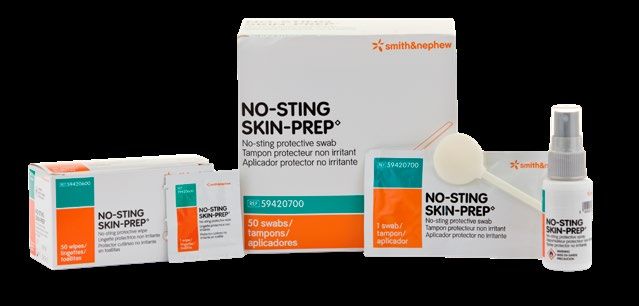
Wound                                                   Infection    Exudate                   Compression
   Overview                       Cleansing                      Skin Care                Management   Management                Therapy

Step 1:
Wound Cleansing
Best practices for VLU treatment begin with wound cleansing. Cleansing aids
in the removal of exudate and other foreign material such as dirt and debris.1
DERMAL WOUND CLEANSER effectively meets the needs of this all-important initial stage,
providing gentle, antimicrobial cleansing 5:
• Active antimicrobial ingredient, benzethonium chloride, helps prevent bacterial
                                                                                                             Directions for Use 5
  contamination that otherwise slow down VLU healing8
                                                                                                               Clean the affected area
• pH buffered and non-irritating
• Dual-action trigger spray offers direct stream (10-11 psi) or mist application                               Apply a small amount of this
                                                                                                                product on the area 1 to 3 times daily

                                                                                                               Follow with saline or normal protocol

For detailed product information, including indications for use, contraindications,
precautions and warnings, please consult the product’s Directions for Use prior to use.

  Directions for Use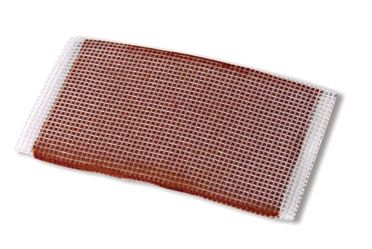
Wound                                                     Infection                  Exudate                     Compression
    Overview                     Cleansing                     Skin Care                   Management                 Management                  Therapy

Step 2: Skin Care
It is important that a structured skin care regimen be implemented to maintain skin integrity. The VLU periwound is
delicate and must be maintained and protected to ensure successful healing.1
SECURA™ and NO-STING SKIN-PREP™ products effectively manage the clinical needs of intact and compromised skin.9,10

Cleanse                                      Protect

SECURA Total Body Foam Cleanser 11           SECURA Dimethicone Protectant 13             SECURA Extra Protective Cream14     NO-STING SKIN-PREP 16
• No-rinse antimicrobial foam cleanser • A skin protectant that can also be               • Long-lasting protection from      • Liquid film–forming
• 75% less cleaning time                 used to moisturize and condition                   moisture                            skin protectant
  compared to soap and water 12          skin                                             • Contains 30% zinc oxide           • Protects skin from irritation due to
• pH-buffered formulation                    • Contains 5% dimethicone                    • Protects skin from maceration15     wound drainage or other types
                                             • Easy to apply; leaves a non-greasy,                                              of moisture damage
• CHG compatible                                                                          • Adheres to macerated skin
                                               breathable protective barrier36                                                • Effective waterproof and
• Helps control odor21
                                             • Helps treat and prevent                                                          breathable barrier for up to 96
                                               skin maceration36                                                                hours, under normal, non-
                                                                                                                                adhesive use*37

For detailed product information, including indications for use, contraindications,
precautions and warnings, please consult the product’s Directions for Use prior to use.

  Directions for Use                                                                                                                    *Not to exceed dressing wear time.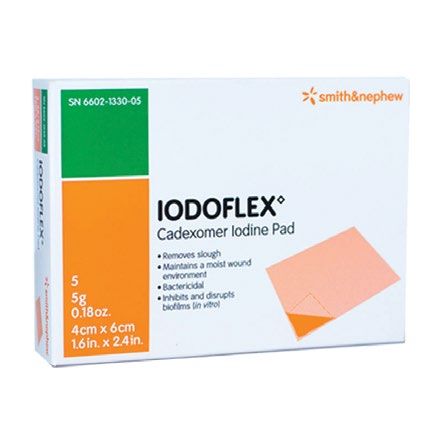
Wound                                                    Infection           Exudate                   Compression
   Overview                      Cleansing                     Skin Care                  Management          Management                Therapy

Step 3:
Infection Management
Resolving the signs and symptoms of infection is a critical step in creating
an effective environment for healing a VLU. Infected ulcers have been reported to
delay healing by up to four weeks compared to non-infected ulcers.3,17
Bacteria, slough, debris and excess exudate are all barriers to healing that IODOFLEX™ Cadexomer Iodine
Dressing has been proven to resolve.3,6 IODOFLEX forms a gel over the wound surface as it absorbs fluid and
removes exudate, slough and debris from the wound surface. As the gel absorbs exudate, iodine is released,
killing bacteria and changing color as the iodine is used up.6

IODOFLEX reduces bioburden6,18-21:
                                                                                                                    Directions for Use 6
• Delivers non-cytotoxic, safe and controlled sustained availability of cadexomer iodine 0.9%
  concentration                                                                                                       Remove the carrier gauze on one
                                                                                                                       or both sides of the IODOFLEX pad
• Bactericidal against 103 isolates of MRSA and 101 strains of P. aeruginosa (in vitro)
• Provides a broad spectrum antimicrobial activity against common wound pathogens in vitro                            Cut or mold to the shape of the
                                                                                                                       wound and cover with appropriate
  including antibiotic resistant bacteria such as MRSA and VRE
                                                                                                                       secondary dressing

                                                                                                                      IODOFLEX should be changed
                                                                                                                       when it has become saturated with
                                                                                                                       wound fluid, and all the iodine has
                                                                                                                       been released

For detailed product information, including indications for use, contraindications,
precautions and warnings, please consult the product’s Directions for Use prior to use.

 Directions for Use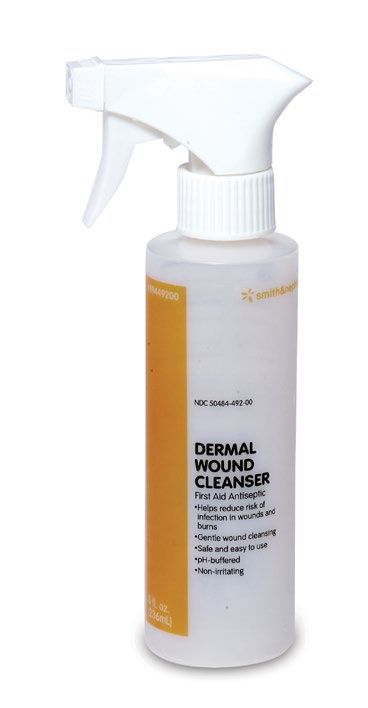
Wound                                                                      Infection                         Exudate                   Compression
    Overview                     Cleansing                        Skin Care                                 Management                        Management                Therapy

Step 4:
Exudate Management
Constantly checking dressings for fear of leakage that could damage the periwound                                                                   Directions for Use 22
area can increase dressing changes, escalating costs and time, and frustrating
                                                                                                                                                      Cleanse the application site. Ensure
clinicians and their patients.1,3                                                                                                                      surrounding skin is clean, dry and
                                                                                                                                                       free from excess hair
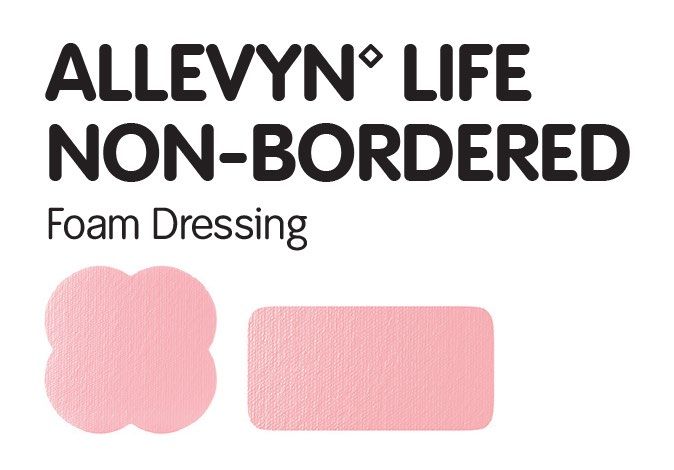
ALLEVYN™ LIFE Non-Bordered Foam Dressing provides a unique five-layer structure that is designed with
instant fluid lock technology to absorb, then lock in fluid immediately.22-25 Under compression,* ALLEVYN LIFE                                        Select an appropriate dressing
                                                                                                                                                       size. Ensure the dressing covers the
Non-Bordered has been shown to:                                                                                                                        entire wound area to be protected,
                                                                                                                                                       and remove the liners
Capabilities
• Absorbs 154% more fluid vs. Mepilex [tm]26†‡       • Absorbs viscous exudate 29                                                                     Smooth over. Ensure dressing
                                                                                                                                                       covers the wound. Do not stretch
• Retains 93% of absorbed fluid27†‡                  • Has a 49% longer average wear time                                                              the dressing. The dressing can be
• Reduces the frequency of dressing                    than clinicians’ usual dressing28                                                               repositioned as required

  changes by 34%28                                   • Absorbs vertically 30II                                                                        Secure with secondary retention
                                                                                                                                                       such as tape, bandage or PROFORE
Features/Benefits22,23                                                                                                                                 Compression Therapy
• Cuttable and conformable                           • Suitable for use on fragile skin
                                                      *Suitable for use under compression.
                                                      †
                                                         Based on in vitro data.
                                                      ‡
                                                         On average.
                                                      §
                                                         In ALNB product pilot evaluation with 29 patients vs. clinicians’ usual dressings.
                                                      ||
                                                         Based on proven performance on wound model data.

For detailed product information, including indications for use, contraindications,
precautions and warnings, please consult the product’s Directions for Use prior to use.

  Directions for Use
Wound                                                                Infection     Exudate                       Compression
    Overview                     Cleansing                     Skin Care                              Management    Management                    Therapy

Step 5:                                                                                                                   Directions for Use 31,32

Compression Therapy                                                                                                         PROFORE (WCL) sterile wound contact
                                                                                                                            layer: Remove from the pack with sterile
                                                                                                                            forceps and apply to the wound. Hold in
                                                                                                                            place until covered by PROFORE #1.
Compression therapy is the gold standard treatment for VLUs and known to
significantly increase VLU healing rates and reduce the risk of recurrence.1,2                                              PROFORE #1 natural padding bandage:
                                                                                                                            Apply using a simple spiral technique and
                                                                                                                            50% overlap. Do not apply tension.
Proven effective in both hospital and community studies, the PROFORE™ System is designed to deliver effective
pressure that allows you to manage VLUs successfully in as little as 12 weeks.4,7,31-33                                     PROFORE #2 light conformable
                                                                                                                            bandage: Apply over PROFORE #1,
                                                                                                                            using a simple spiral technique; apply at
                                                                                                                            mid-stretch and 50% overlap. For
PROFORE and
                                                              PROFORE Lite*                                                 maximum patient comfort, leave a slight
PROFORE Latex Free                                                                                                          border of PROFORE #1 visible to prevent
                                                                                                                            subsequent bandages rubbing on the
                                                                                                                   33
• Four-layer graduated compression                            • Three-layer reduced compression bandage system              skin. Cut off any excess PROFORE #2.
                                                                                                                            Use tape to secure.
  bandage system 7,34,35                                      • Delivers continuous compression 24 hours a day
• Delivers continuous compression 24 hours a day                for up to 7 days 33                                         PROFORE #3 light compression
  for up to 7 days 31,32                                                                                                    bandage: Use a figure 8 technique at
                                                              • Designed specifically for the management of                 50% extension. Use the central yellow
• Designed specifically for patients with VLUs who              “mixed”-etiology leg ulcers with an ABI between             line as guidance for 50% overlap.
  have an ankle brachial index (ABI) between                     0.6 and 0.8 33                                             Use tape to secure.
  0.8 and 1.131,32                                                                                                          PROFORE #4 flexible cohesive
                                                                 *Not made with natural rubber latex32,33
                                                                                                                            bandage (for PROFORE Lite): Use a
                                                                                                                            spiral technique with 50% extension and
                                                                                                                            50% overlap. Press lightly on the bandage
                                                                                                                            to ensure that the bandage adheres to
                                                                                                                            itself. Apply the bandage steeply across
For detailed product information, including indications for use, contraindications,                                         the foot to reduce buildup of material over
precautions and warnings, please consult the product’s Directions for Use prior to use.                                     the front of the ankle.

  Directions for Use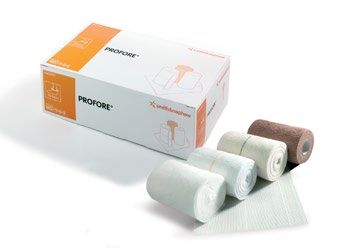
References
1. Harding K, Dowsett C, Fias L, et al. Simplifying venous leg ulcer management. Consensus recommendations. London, UK: Wounds International; 2015.
http://www.woundsinternational.com/consensus-documents/view/simplifying-venous-leg-ulcer-management. Accessed May 14, 2018. 2. Singer AJ,
Tassiopoulos A, Kirsner RS. Evaluation and management of lower-extremity ulcers. N Engl J Med. 2017;377(16):1559-1567. 3. European Wound
Management Association (EWMA). Position Document: Wound Bed Preparation in Practice. London, England: MEP Ltd; 2004. 4. Moffatt CJ, Franks M,
Connolly, et al. Randomized trial comparing two four-layer bandaging systems in the treatment of venous leg ulceration. Poster presented at: Symposium
on Advanced Wound Care and Medical Research Forum on Wound Repair; April 1997; New Orleans, LA. 5. Dermal Wound Cleanser Instructions for Use.
Smith & Nephew. 6. IODOFLEX™ Instructions for Use. 7. Moffatt CJ, Franks PJ, Oldroyd M, et al. Community clinics for leg ulcers and impact on healing.
BMJ. 1992;305(6866):1389-1392. 8. Schultz GS, Sibbald RG, Falanga V, et al. Wound bed preparation: a systematic approach to wound management.
Wound Repair Regen. 2003;11(suppl 1):S1-S28. 9. SECURA™ Cleanser formulation F522. 10. Birch S, Coggins T. No-rinse, one-step bed bath: The effects on
the occurrence of skin tears in a long-term care setting. Ostomy Wound Manage. 2003;49(1):64-67. 11. SECURA Total Body Foam Cleanser Instructions for
Use. 12. Byers P, Ryan P, Regan MB, Shields A, Carta SG. Effects of incontinence care cleansing regimens on skin integrity. J Wound Ostomy Continence
Nurs. 1995;22(4):187-192. 13. SECURA Dimethicone Protectant Cream Instructions for Use. 14. SECURA Extra Protective Cream Instructions for Use. 15.
Woo KY, Beeckman D, Chakravarthy D. Management of moisture-associated skin damage: a scoping review. Adv Skin Wound Care. 2017;30(11):494-501
16. NO-STING SKIN-PREP™ Instructions for Use. 17. Oyibo SO, Jude EB, Tarawneh I, et al. The effects of ulcer size and site, patient’s age, sex and type and
duration of diabetes on the outcome of diabetic foot ulcers. Diabet Med. 2001;18(2):133-138. 18. Phillips PL, Yang Q, Davis S, Sampson EM, et al.
Antimicrobial dressing efficacy against mature Pseudomonas aeruginosa biofilm on porcine skin explants. Int Wound J. 2015;12(4):469-483. 19. Sundberg
J, Meller R. A retrospective review of the use of cadexomer iodine in the treatment of chronic wounds. Wounds. 1997;9(3):68-86. 20. Salman H, Leakey A.
A report to Smith & Nephew Medical Ltd. The in vitro activity of silver sulphadiazine and cadexomer iodine against recent clinical isolates of methicillin-
resistant Staphylococcus aureus, methicillin-resistant coagulase-negative staphylococci and Pseudomonas aeruginosa. Report number 194-03-01
(March 2001). 21. Zhou LH, Nahm WK, Badiavas E, Yufit T, Falanga V. Slow release iodine preparation and wound healing: in vitro effects consistent with
lack of in vivo toxicity in human chronic wounds. Br J Dermatol. 2002;146(3):365-374. 22. ALLEVYN LIFE Instructions for Use. 23. Rossington A, Drysdale
K, Rachel W. Clinical performance and positive impact on patient wellbeing of ALLEVYN™ Life. Wounds UK. 2013;9(4):91-95. 24. Smith & Nephew. Data on
file. DS.16.328.R v2 ALLEVYN LIFE Non-Bordered physical testing. 25. Smith & Nephew. Data on file. DS.16.470.R ALLEVYN LIFE Non-Bordered horizontal
wound model. 26. Smith & Nephew. Data on file. DS17.529.R Comparison of fluid absorption under compression between ALLEVYN LIFE Non-Bordered
and Mepilex. 27. Smith & Nephew. Data on file. DS17.598.R Comparison of fluid retention under compression of ALLEVYN LIFE Non-Bordered and
Mepilex. 28. Smith & Nephew. Data on file. 171103;10,20-22 Pilot study data summary. 29. Smith & Nephew. Data on file. DS.16.334 v2 ALLEVYN LIFE
Non-Bordered fluid uptake testing. 30. Smith & Nephew. Data on file. DS.16.469.R ALLEVYN LIFE Non-Bordered Vertical Wound Model. 31. PROFORE™
Instructions for Use. 32. PROFORE Latex-Free Instructions for Use. 33. PROFORE Lite Instructions for Use. 34. Blair SD, Wright DD, Backhouse CM, Riddle
E, McCollum CN. Sustained compression and healing of chronic venous ulcers. BMJ. 1988;297(6657):1159-1161. 35. Moffatt C, Stubbings N. The Charing
Cross approach to venous ulcers. Nurs Stand Spec Suppl. 1990;(10):6-9. 36. Brett, D., The justification of non-greasy /breathable protective barrier for
dimethicone protectant formulation (DP): 2017. 37. Study to determine the wash off resistance and Durability of a Barrier Film. Rpt # 09-58A.

                                             www.smith-nephew.com
Advanced Wound Management                    Customer Care Center               ™Trademark of Smith & Nephew
Smith & Nephew, Inc.                         +1-800-876-1261                    TM
                                                                                 All Trademarks acknowledged
Fort Worth, TX 76109                         T +1-727-392-1261                  ©2018 Smith & Nephew
USA                                          F +727-392-6914                    MSEE1-14953-0618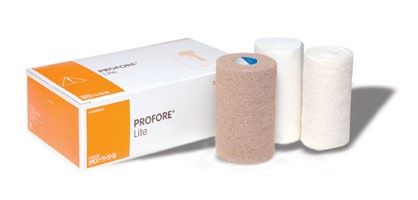
Wound                   Infection    Exudate      Compression
Overview   Cleansing   Skin Care   Management   Management   Therapy

Appendix:
Directions for Use
Wound                   Infection    Exudate      Compression
    Overview                                 Cleansing   Skin Care   Management   Management   Therapy

     Back to Wound Cleansing

Directions for Use

DERMAL WOUND CLEANSER
First Aid Antiseptic Spray Cleanser

Step 1
Clean the affected area.

Step 2
Apply a small amount of this product on the area
1 to 3 times daily.

Step 3
Rinse with saline or normal protocol.

Step 4
Cover wound with sterile dressing or bandage
as needed.

Step 5
If applying dressing or bandage, let dry first.
Wound Infection Exudate Compression
Overview Cleansing Skin Care Management Management Therapy
Back to Skin Care SECURA Total Body Foam Cleanser
SECURA Dimethicone Protectant
Directions for Use SECURA Extra Protective Cream
NO-STING SKIN-PREP
SECURA™ Total Body Foam Cleanser
Foam Cleanser Antimicrobial Skin Cleanser
Step 1
Apply cleanser liberally on affected area, then
wipe clean. No rinsing necessary.
Step 2
Keep bottle upright, do not shake. Remove cap,
depress nozzle.Wound Infection Exudate Compression
Overview Cleansing Skin Care Management Management Therapy
Back to Skin Care SECURA Total Body Foam Cleanser
SECURA Dimethicone Protectant
Directions for Use SECURA Extra Protective Cream
NO-STING SKIN-PREP
SECURA™ Dimethicone Protectant
Dimethicone Skin Protectant Cream
Step 1
Apply as needed.
Step 2
Change wet and soiled diapers, garments and
linens promptly.
Step 3
Cleanse the affected area and allow to dry.
Step 4
Apply cream liberally as often as necessary with
each diaper, garment or linen change; especially
at bedtime or anytime when exposure to soiled
diapers, garments, linens, feces or urine may
be prolonged.Wound Infection Exudate Compression
Overview Cleansing Skin Care Management Management Therapy
Back to Skin Care SECURA Total Body Foam Cleanser
SECURA Dimethicone Protectant
Directions for Use SECURA Extra Protective Cream
NO-STING SKIN-PREP
SECURA™ Extra Protective Cream (EPC)
Skin Protectant
Step 1
Change wet and soiled diapers, garments and
linens promptly.
Step 2
Cleanse the affected area and allow to dry.
Step 3
Apply cream liberally as often as necessary
with each diaper change; especially at bedtime
or anytime when exposure to soiled diapers,
garments, linens, feces or urine may be
prolonged.Wound Infection Exudate Compression
Overview Cleansing Skin Care Management Management Therapy
Back to Skin Care SECURA Total Body Foam Cleanser
SECURA Dimethicone Protectant
Directions for Use SECURA Extra Protective Cream
NO-STING SKIN-PREP
NO-STING SKIN-PREP™
Protective wipe and swab
PRECAUTIONS WARNING
Please follow Directions for Use provided by your Step 6 Should any signs of irritation (reddening, NO-STING SKIN-PREP is flammable: use in a
physician, nurse or healthcare professional. If no When used under adhesive products, inflammation), or sensitivity (allergic reactions) well-ventilated area. Avoid using around flames
instructions were provided, follow the directions as reapplication is necessary each time the product appear, discontinue use and consult a and sources of ignition. Keep out of the reach of
indicated below: is changed, as the film can be removed by the healthcare professional. children. For external use only.
adhesive. Ensure that NO-STING SKIN-PREP is dry
Step 1 before application of adhesive products. Do not use on patients with a known allergy to any Storage conditions
Skin should be clean and dry prior to application of of the ingredients.
NO-STING SKIN-PREP. Step 7 Store in a dry place (Wound Infection Exudate Compression
Overview Cleansing Skin Care Management Management Therapy
Back to Infection Management
Directions for Use
IODOFLEX™
Cadexomer Iodine Pad
APPLYING IODOFLEX CHANGING IODOFLEX STORAGE INSTRUCTIONS
Step 1 Step 1 Store in a dry place (GMLPBMA:ABLMHKRH?:GRMARKHB==BLHK=>K
one or both sides of the
IODOFLEX Pad. Step 2
suspected sensitivity to iodine :K>LNLIMB;E>MH:EM>K:MBHGBGMARKHB=
If necessary, soak the gauze for F>M:;HEBLFPBMASILICONE
ADHESIVE
SILICONE GEL
Wound
MODERATE
TO HIGH
MODERATE DRESSING
Infection Exudate Compression
Overview ADHESIVE
DRESSING
Cleansing
TO HIGH
ABSORBENCY
CAN BE CUT
Skin Care Management Management Therapy
LIFE Non-Bordered
Back to Exudate Management
SILICONE
ADHESIVE
MODERATE
TO HIGH
SILICONE GEL
ADHESIVE
DRESSING
MODERATE
TO HIGH
ABSORBENCY
DRESSING
CAN BE CUT LIFE Non-Bordered
Directions for Use
LIFE Non-Bordered SILICONE MODERATE
ADHESIVE TO HIGH
SILICONE GEL MODERATE DRESSING
ALLEVYN™ LIFE Non-Bordered
ADHESIVE TO HIGH CAN BE CUT
DRESSING ABSORBENCY
SILICONE MODERATE
ADHESIVE TO HIGH
SILICONE GEL
ADHESIVE
DRESSING
Advanced Foam Wound
MODERATE
TO HIGH
ABSORBENCY
Dressings
LIFE Non-Bordered
DRESSING
CAN BE CUT
LIFE Non-Bordered
SILICONE
ADHESIVE
MODERATE
TO HIGH FREQUENCY OF CHANGE )+
.-"(',
SILICONE GEL MODERATE DRESSING
SILICONE MODERATE ADHESIVE TO HIGH CAN BE CUT
ADHESIVE TO HIGH
SILICONE GEL
ADHESIVE
MODERATE
TO HIGH
DRESSING
DRESSING
CAN BE CUT
ABSORBENCY
During the early stages of treatment, inspect the Do not use with oxidising agents such as
DRESSING ABSORBENCY
dressing frequently. Dressings can be left in place hypochlorite solutions (e.g. EUSOL) or
Step 1 LIFE Non-Bordered for up to 7 days. Dressings should be changed hydrogen peroxide, as these can reduce the
Cleanse the application site. depending on the condition of the wound and absorbency of the dressing
Ensure surrounding skin is surrounding skin or when exudate is within 0.5cm
SILICONE
ADHESIVE
MODERATE
clean, dry and free from
TO HIGH
(3/16in) of the dressing edge. The diagram below If reddening or sensitisation occurs
SILICONE GEL
ADHESIVE
MODERATE
excess hair.
TO HIGH
DRESSING
CAN BE CUT is for guidance only and the decision of when to discontinue use
DRESSING ABSORBENCY
change should be dependent upon clinical
Step 2 assessment and local protocols: Single use only, if used on more than one
Select an appropriate dressing patient, cross contamination or infection may
size. Ensure the dressing occur
covers the entire wound area
to be protected. Once the pouch is opened, do not retain
unused dressings for application at a later
Step 3 date
Remove the first liner and No need to Consider Change
anchor the adhesive side of change changing
the dressing to the skin.
Removal: Lift one corner and slowly peel back until
completely removed.
Step 4
Remove remaining liner.
18200203
18200203
18200203 56621
56621
56621
Step 5
Smooth over. Ensure
dressing covers the wound.
Do not stretch the dressing.
The dressing can be
repositioned as required.
Step 6
Secure with secondary
retention, e.g., OPSITE™ Flexifix,
OPSITE Flexifix Gentle, tape,
bandage or compression
therapy.
18200203 56621Wound Infection Exudate Compression
Overview Cleansing Skin Care Management Management Therapy
Back to Compression Therapy PROFORE
PROFORE Lite
Directions for Use
PROFORE™
Multi-Layer Compression Bandaging System – Latex free formulation
Before applying the PROFORE System for
the first time: APPLY THE PROFORE SYSTEM IN THE FOLLOWING SEQUENCE:
Step 1 Step 1 Step 3 – PROFORE #2 WARNING: Do not continue wrapping until it is
Make certain the Ankle Brachial Wash and dry the leg and apply a moisturizing Light conforming bandage. all applied. This will create too much pressure
10cm x 4.5m (4in x 14ft 8in) stretched.
Pressure Index (ABI) is above cream to the unbroken skin. at the top of the leg. Cut off the leftover
10cm x 3m (4in x 9ft 8in) unstretched
0.8. The determination of ABI bandage and secure with tape, or ask the
Step 1a Again wrap the foot in a spiral
by Doppler ultrasound testing patient to hold it in place.
Remove the PROFORE Wound manner starting at the base of
is recommended.
Contact Dressing from the pack the toes and continuing over Layer 2 – PROFORE
Step 5 – PROFORE #4
Step 2 with sterile forceps and apply the heel and up the leg to just #2 Light
Cohesive compression bandage.
conformable
Measure the ankle circumference. PROFORE directly over the wound below the knee. As with bandage adds 10cm x 5.25m (4in x 17ft 2in) stretched
should not be applied to legs with an ankle surface. If the wound is larger bandage #1, overlap half the absorbency and 10cm x 2.5m (4in x 8ft 2in) unstretched
smoothes out the Apply PROFORE #4 from the
circumference of less than 18cm/7 1/4 inches. than the contact dressing, Wound contact bandage as you roll it up the PROFORE #1 layer,
dressing leg. Secure at the top with a preserving the base of the toes, wrapping the
PROFORE Wound Contact
piece of tape, or ask the patient elastic energy of foot in a spiral manner. Layer 4 – PROFORE
If the ankle circumference is less than 18cm/7 1/4 Dressings can be purchased the compression
to hold it in place. layers. PROFORE #4 should be applied #4 cohesive
inches, wrap extra padding (PROFORE #1) around separately. The contact dressing will not stick to compression
at 50% tension. Overlap half bandage applies
the ankle area to increase the circumference to the surface of the wound, and when the wound
Step 4 – PROFORE #3 the bandage as you wrap it up compression and
more than 18cm/7 1/4 inches before applying the begins draining after compression is applied, the Light compression bandage. maintains the
the leg, ending just below the
PROFORE System. drainage will pass through the contact dressing to 10cm x 8.7m (4in x 28ft 5in) stretched system in place for
knee. Again, remember to up to 1 week.
be absorbed by the padding layer. 10cm x 3.1m (4in x 10ft 2in) unstretched
Step 3 enclose the heel. PROFORE #4
Apply PROFORE Layer #3
Identify bony prominences on the leg and make Step 2 – PROFORE #1 will adhere to itself and no tape
bandage from the base of the
sure these bony points are well padded using the Absorbent padding bandage. is necessary to keep it in place.
toes to just below the knee, Layer 3 – PROFORE
10cm x 3.5m (4in x 11ft 4in)
PROFORE #1 roll. (See Step 3 – PROFORE #2). making sure to enclose the #3 Light
Wrap the foot in a spiral manner compression IT IS IMPORTANT, ESPECIALLY WITH BANDAGES
heel. To apply PROFORE Layer bandage is highly
Before subsequent applications: starting at the base of the toes #3 AND #4, TO ENCLOSE THE HEEL WITH
#3 from the base of the toes to conformable and
Measure the circumference of the ankle again and continuing in a spiral able to BANDAGE. THE COMPRESSION THAT THE
the ankle, use a simple spiral
because one application of PROFORE can reduce manner up the leg to the knee. Layer 1 – PROFORE accommodate SYSTEM PLACES ON THE LOWER LEG COULD
#1 Absorbent technique. Then, from the ankle difficult limb shapes.
the swelling in the leg over a period of 1 week. Overlap half the bandage as DAMAGE TISSUE THAT IS NOT ENCLOSED.
padding bandage to the knee, use a figure 8 PROFORE #3 is the
An ankle that measured 8 inches in circumference you wrap it up the leg. Very absorbs exudate,
technique at 50% extension.
only layer to be
applied using the
prior to the first application of PROFORE may have thin, bony legs or legs with a protects bony
prominences and Use the central line as figure 8 technique.
FREQUENCY OF CHANGE
been reduced to less than 7 inches in prominent calf bone should be redistributes guidance to achieve 50% The wrapped leg may be left undisturbed for up to
circumference after a week of compression protected with extra padding pressure evenly
overlapping. Use tape to secure. Get the feel of
around the leg. 7 days. Occasionally, wound drainage will soak
bandaging and would require extra padding (PROFORE #1). The pressure 50% stretch by stretching 12 inches of the bandage through the bandages completely before a week
before applying PROFORE. under the bandage could to its maximum (about 24 to 30in), then let it relax has passed. This will usually happen during the
bruise and harm unprotected/unpadded skin, to halfway back. The tension you feel at 50% initial phase of therapy. If it happens, remove the
especially over bony parts of the leg. (Apply any stretch should be the tension you feel as you PROFORE System and apply another.
leftover padding bandage directly over the wound bandage up the leg. With most legs, except the
to absorb more wound drainage.) very largest, you will have some of the #3 bandage
left over when you reach just below the knee.Wound Infection Exudate Compression
Overview Cleansing Skin Care Management Management Therapy
Back to Compression Therapy PROFORE
PROFORE Lite
Directions for Use
PROFORE™ Lite
Multi-Layer Compression Bandaging System – Latex free formulation
Note: Only apply PROFORE Lite following training in its
application and with knowledge of the use of compression
therapy in patients with compromised arterial circulation.
Before applying the first bandage,
check the following: APPLY PROFORE Lite IN THE FOLLOWING SEQUENCE:
Step 1 Step 1 – PROFORE WCL Sterile wound contact Step 4 – PROFORE #4 Flexible cohesive
Assess the patient thoroughly to ensure that layer. bandage.
sufficient arterial supply exists to apply Remove from the pack with sterile forceps and Apply from toes to knee using a spiral technique
compression therapy. The use of Doppler apply to the wound. Hold in place until covered by with 50% extension and 50% overlap. Apply the
ultrasound is essential. Ankle:brachial pressure PROFORE #1. Do not use contents if pouch is bandage at 50% extension around the foot to help
index (ABPI) should be greater than 0.6. opened, damaged or is past the expiry date. If an prevent edema and steeply across the front of the
alternative dressing is used under PROFORE, refer foot to reduce buildup of material over the front of
Step 2 to the manufacturer’s directions for use under the ankle. Following application, press lightly on
Measure the ankle circumference to confirm that it compression prior to application. the surface to ensure that the bandage adheres to
is greater than 18cm/ 7 1/8in (padded). itself. Where the product is used on infected
Step 2 – PROFORE #1 Natural padding bandage. wounds, the infection should be inspected and
Step 3 Apply from the base of the toes to the knee using treated as per local clinical protocols.
Assess the patient’s limb for bony prominences or a simple spiral technique and 50% overlap. Use
calf fibrosis. Ensure that these are well protected any leftover padding to further protect any bony PROFORE Lite may be worn on the leg for up to
using the PROFORE #1 padding to distribute prominences or to improve absorption capacity if 7 days. If any problems occur, please seek
pressure evenly. the wound is heavily exuding. medical advice.
Step 3 – PROFORE #2 Light conformable
bandage
Apply from the base of the toes to the knee, over
PROFORE #1, using a simple spiral technique,
apply at midstretch and 50% overlap. For
maximum patient comfort, leave a slight border of
PROFORE #1 visible to prevent subsequent
bandages rubbing on the skin. Cut off any excess
PROFORE #2. Use tape to secure.You can also read


