OIL DRUM CHARCOAL BARBECUE - Assembly Instructions - Best Buying Support
←
→
Page content transcription
If your browser does not render page correctly, please read the page content below
Assembly
Instructions
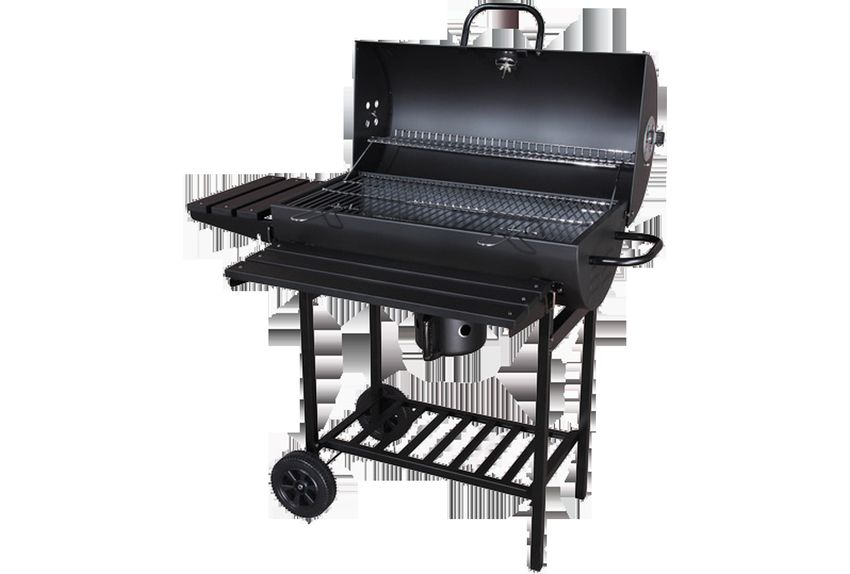
OIL DRUM CHARCOAL
BARBECUE
Overview

                    1   2       3       4   5    A

                                                 B

                                                 C

                                                 D

                                                 E

                                                 F

    24                                           G

    23                                           H

    22                                           I

    21
    20
    19
    18
    17
    16
    15                                      6b
    14                                      6a
    13
    12b
    12a
    11

           10   9           8       7

2
Scope of delivery/product components

Scope of delivery/product components
Components

 1 Lid                                     18 Side table support (2×)
 2 Lid support                             19 Side table batten (3×)
 3 Handle (2×)                             20 Charcoal grid
 4 Thermometer with bracket and            21 Cooking grid handle (2×)
   wing nut
                                           22 Cooking grid
 5 Air vent (2×)
                                           23 Warming grid
 6 a. Long leg front (with extra part)
   b. Long leg back                        24 Lid connection plate (2×)

 7 Front table fold support (2×)           Connecting elements supplied

 8 Front table support (2×)                    A M6×15 screw (12×)

 9 Shelf                                       B M8 nut and washer (2×)

 10 Wheel (2×)                                 C M6×10 screw (pre-attached on side
                                              table support 18 ) (4×)
 11 Axle
                                              D M5×10 screw, spring washer, and
 12 a. Short leg front (with extra part)      wing nut (2×)
    b. Short leg back
                                               E M6×12 screw and nut (14×)
 13 Leg support (2×)
                                               F M6×20 screw and washer (4×)
 14 Front table batten (3×)
                                               G M5 nut (2×)
 15 Ash catcher
                                               H M6x19 screw (2×)
 16 Ash catcher support
                                               I M5×25 screw and nut (12×)
 17 Bowl
Required tools (not included)
                        25                                   26
 25 Slot or Phillips                  26 Wrench size
    screwdriver                          10 mm (M6)
                                                                  10

                        27                                   28
 27 Wrench size                       28 Wrench size
    8 mm (M5)                            13 mm (M8)
                              8                                   13

                                                                                  3
Table of content Table of content Overview..................................................................................................................2 Scope of delivery/product components................................................................. 3 General information................................................................................................ 5 Reading and storing the assembly instructions........................................................... 5 Intended use...................................................................................................................... 5 Explanation of symbols.....................................................................................................5 Safety.......................................................................................................................6 Safety notes........................................................................................................................ 6 Assembly instruction...............................................................................................9 Step 1: Assemble the legs................................................................................................ 10 Step 2: Assemble the stand.............................................................................................. 11 Step 3: Assemble the bowl...............................................................................................12 Step 4: Assemble the lid...................................................................................................13 Step 5: Complete the barbecue...................................................................................... 14 Step 6: Install barbecue grids......................................................................................... 15 Use.......................................................................................................................... 16 The first time you grill.......................................................................................................17 Prepare and light the barbecue..................................................................................... 17 Grilling................................................................................................................................ 17 Refilling charcoal.............................................................................................................. 18 Cleaning................................................................................................................. 19 Storage...................................................................................................................20 Technical data........................................................................................................20 Disposal..................................................................................................................20 Disposing of packaging.................................................................................................. 20 Product disposal.............................................................................................................. 20 4
General information

General information
Reading and storing the assembly instructions
          These assembly instructions are a part of the Oil Drum Charcoal Barbecue
          (hereinafter simply called "product"). They contain important information
          about assembly and use.
          Read the assembly instructions carefully, in particular the safety
instructions, before using the product. Failure to follow these assembly instructions
may lead to severe injuries or product damage.
The assembly instructions are based on the standards and regulations that are valid
with the country-specific directives and laws.
Keep the assembly instructions for future reference. If you pass this product on to a
third party, you must also supply the assembly instructions.
Intended use
The barbecue is exclusively intended for outdoor use to cook or heat food.
It is exclusively intended for private use and not for the commercial sector.
Use only charcoal and briquettes for the grill complying to DIN EN 1860-2.
Only use the barbecue as described in these assembly instructions. Any other use is
considered improper and may lead to product damage or even personal injury. Do
not modify the barbecue. The barbecue is not a toy.
The manufacturer or retailer assumes no liability for damage caused by improper or
incorrect use.
Explanation of symbols
The following symbols are used in these assembly instructions, on the product or on
the packaging.

              This symbol provides you with useful additional information on
              handling and use.

                                                                                      5
Safety
Safety
WARNING! Do not use the barbecue in a confined and/or habitable space e.g.
houses, tents, caravans, motor homes, boats. Danger of carbon monoxide poisoning
fatality.
The following signal words are used in these assembly instructions.
This signal symbol/word denotes a hazard with
WARNING! an average risk level that could lead to death or
severe injury if it is not avoided.
This signal symbol/word denotes a hazard with a
CAUTION! low risk level that could lead to mild or moderate
injury if it is not avoided.
This signal word provides a warning about
NOTE! potential material damage.
Safety notes
General Safety Notes
- WARNING! This barbecue will become very hot, do not move it during operation.
- Do not use indoors!
- Do not use this grill under any overhead combustible construction.
- WARNING! Do not use spirit or petrol for lighting or re-lighting! Use only
firelighters complying to EN 1860-3!
- Do not use this grill within 1.5 m of any combustible material. Combustible
materials include, but are not limited to, wood or treated wood decks, patios,
and porches.
6Safety
- Use heat-resistant barbecue mitts or gloves (conforming to EN 407, Contact Heat
rating level 2 or greater) while cooking, adjusting air vents (dampers), adding
charcoal, and handling thermometer or lid.
- Use proper tools, with long, heat-resistant handles.
- Do not use water to extinguish burning fat. Close the lid and air vents to remove
all oxygen from the flame.
- Never dump hot charcoal or ashes where it might be stepped on or be a fire
hazard.
- Never dump ashes or charcoal before they are fully extinguished.
- Allow the barbecue to cool down completely before cleaning it.
- During use, the screw connections can loosen and adversely affect the stability
of the barbecue. Verify the strength of screw connections before each use. If
necessary, tighten all screws again to ensure a firm footing.
Risks for persons
- This barbecue may be used by persons with reduced physical, sensory or mental
abilities or lack of experience or knowledge if they have been supervised or
instructed in the safe use of the appliance and have understood the risks arising.
- Keep packaging film, styrofoam, or small parts away from children. Danger of
suffocation!
- WARNING! Keep children and pets away!
- The barbecue will be hot during cooking, and should never be left unattended.
- Do not wear clothing with loose flowing sleeves while lighting or using the
barbecue.
- Never bend over the hot barbecue during grilling.
- The use of alcohol, prescription, or nonprescription drugs may impair the
consumer’s ability to properly assemble or safely operate the barbecue.
- Never touch metal parts. They may be very hot.
- Touch the barbecue only on the handles.
- The barbecue may have sharp edges where you could cut yourself. Use working
gloves when unpacking, assembling, cleaning and maintaining the barbecue.
Before use
- Keep the barbecue on a secure, level surface at all times, clear of combustible
material.
- Do not place the barbecue close to entrances or busy areas, such as roads.
- The barbecue must not be transported while it is still hot!
- Do not use the barbecue with liquid fuels.
- Be prepared for a fire or an accident. Always have a fire extinguisher and a first
aid kit ready.
- Max. fuel capacity: 1.5 kg of charcoal.
7Safety
Instructions for lighting
- Build a pyramid of charcoal in the centre of the charcoal grate and insert a
couple of lighter cubes according to EN 1860-3 within the pyramid.
- Always put charcoal on top of the charcoal (lower) grid. Do not put charcoal
directly in the bottom of the bowl.
- Light the charcoal in an area protected from wind.
- Use a long match or lighter, light the lighter cubes.
- It is recommended that the barbecue be heated up and the charcoal kept red
hot, with the lid on, for at least 30 minutes prior to cooking for the first time.
- After ca. 20 minutes the charcoal is fully lit when it is covered with a coating of
white ash. Then spread the charcoal evenly across the charcoal grid.
- Do not cook before the charcoal has a coating of ash.
8Assembly instruction
Assembly instruction
CAUTION!
Risk of injury!
Some parts of the barbecue might have sharp edges. Touching
these parts can cause cuts.
- Wear protective gloves!
Use the following instructions and graphics to assemble the barbecue:
- Complete each assembly step in the given order. Do not skip any step.
- Do not fully tighten the nuts and bolts before assembling all the parts.
At least two adults are required to assemble the barbecue
Wear protective gloves during assembly.
Before starting assembly, familiarise yourself with the individual parts.
Step 1: Assemble the legs...................................................................................... 10
Step 2: Assemble the stand.................................................................................... 11
Step 3: Assemble the bowl.....................................................................................12
Step 4: Assemble the lid.........................................................................................13
Step 5: Complete the barbecue............................................................................. 14
Step 6: Install barbecue grids................................................................................15
9Assembly instruction
Step 1: Assemble the legs
1
25
A
13
6b
6a
12b
12a
1. Place the short legs 12a / 12b and the long legs 6a / 6b on the floor as shown.
2. Connect the short legs 12a / 12b and a leg support 13 . Connectors: 4 × M6x15
screw A .
3. Connect the long legs 6a / 6b and a leg support 13 . Connectors: 4 × M6x15
screw A .
10Assembly instruction
Step 2: Assemble the stand
2
25
28
13
10
B
11 A 9
1. Attach both pairs of legs to the shelf 9 . Connectors: 4 × M6x15 screw A .
2. Insert the axle 11 through the holes at the end of the short legs.
3. Attach the wheels 10 to the axle. Connectors: 2 × M8 nut and washer B .
Washer between wheel and leg.
11Assembly instruction
Step 3: Assemble the bowl
3
F 3 25
17
26
10
E
E 16
Attach nuts and washers inside the lid.
1. Place the bowl 17 on the stand.
2. Attach the bowl to each leg. Connectors: 8 × M6×12 screw and nut E .
3. Attach a handle 3 to the bowl on the far side of the wheels. Connectors: 2 ×
M6×20 screw and washer F .
4. Attach the ash catcher support 16 to the bottom of the bowl. Connectors: 4 ×
M6×12 screw and nut E .
12Assembly instruction
Step 4: Assemble the lid
4
2 3 4 25
27
D 8
26
5
10
E
5
E
24 E F 24 E
Attach nuts and washers inside the lid.
1. Insert the tab of lid connection plate 24 to the slot on the lid end.
2. Fix the lid connection plates 24 to the lid. Connectors: 2 × M6×12 screw and nut
E .
3. Attach the lid support 2 with horizontal side down inside and the handle 3
outside the lid: 2 × M6×20 screw and washer F .
4. Insert the thermometer 4 from the outside into the hole in the lid.
5. Fix the thermometer inside the lid with bracket and wing nut 4 .
6. Fix the air vents 5 on the lid. Connectors: 2 × M5×10 screw, spring washer, and
wing nut D .
13Assembly instruction
Step 5: Complete the barbecue
4
5
25
I
27
19
18 8
C
H
I
14 8 7
Attach nuts and washers inside the lid.
1. Fix the lid to the bowl. Connectors: 2 × M6×19 screw H .
2. Attach the front table battens 14 to the front table supports 8 . Connectors:
6 × M5×25 screw and nut I .
3. Attach the front table to the front legs with the front table fold supports 7 .
Connectors: 4 × M4 nuts pre-attached on front table fold supports.
4. Attach the side table battens 19 to the side table supports 18 . Connectors: 6 ×
M5×25 screw and nut I .
5. Attach the side table to the bowl. Connectors: 4 × M6×10 screws C pre-
attached on side table supports.
6. Make sure all nuts and bolts are fully tightened.
14Assembly instruction
Step 6: Install barbecue grids
6
4
21 23 27
8
G
22
20
15
1. Insert the rod of the warming grid 23 in the holes in the lid.
2. Secure the rod of the warming grid. Connectors: 2 × M5 nut G .
3. Make sure all nuts and bolts are fully tightened.
4. Place the charcoal grid 20 inside the bowl.
5. Place the cooking grid 22 on the bowl.
6. Slide the ash catcher 15 into the ash catcher support at the bottom of the bowl.
15Use
Use
WARNING!
Risk of burns
This barbecue will become very hot! Touching may cause burn
injuries.
- Use heat-resistant barbecue mitts or gloves (conforming to EN
407, Contact Heat rating level 2 or greater) while cooking,
adjusting air vents (dampers), adding charcoal, and handling
thermometer or lid.
- Use proper tools, with long, heat-resistant handles.
- Never touch the cooking or charcoal grid, ashes, charcoal, or
the grill to see if they are hot.
- Let the steam escape first, if you open the lid.
- WARNING! Keep children and pets away!
WARNING!
Risk of fire
The barbecue will be hot during cooking! Combustible materials
nearby may ignite.
- Do not use indoors!
- Do not use under roofed areas.
- Make sure there are no combustible fumes or liquids, such as
petrol, alcohol, etc., in the vicinity of the barbecue,
- Do not use this grill within 1.5 m of any combustible material.
Combustible materials include, but are not limited to, wood or
treated wood decks, patios, and porches.
- Do not use grill in high winds.
- Have a fire extinguisher ready.
16Use
The first time you grill
1. Before first use clean all parts to come into contact with foodstuffs especially the
cooking grid 22 and the warming grid 23 , according to chapter “Cleaning”.
2. It is recommended that the barbecue be heated up and the charcoal kept red
hot, with the lid on, for at least 30 minutes prior to cooking for the first time.
Prepare and light the barbecue
Observe the safety notes, especially "Before Use" and "Instructions for lighting"
1. During use, the fittings may loosen and impair the stability of the grill. Therefore,
check the strength of the fittings before each use. If necessary, tighten screws to
ensure a firm footing.
2. Keep the barbecue on a secure, level surface at all times, clear of combustible
material.
Do not place the barbecue close to entrances or busy areas, such as roads.
3. Open the lid 1 and remove the cooking grid 22 if necessary.
4. Place the charcoal grid 20 in the bowl.
5. Build a pyramid of charcoal in the centre of the charcoal grate and insert a
couple of lighter cubes according to EN 1860-3 within the pyramid.
WARNING! Do not use spirit or petrol for lighting or re-lighting! Use only
firelighters complying to EN 1860-3!
For safety reasons, the barbecue must not be operated with liquid fuel.
Max. fuel capacity: 1.5 kg of charcoal.
Always put charcoal on top of the charcoal (lower) grid. Do not put charcoal
directly in the bottom of the bowl.
6. Only light charcoal in wind-protected areas.
7. Use a long match or lighter, light the lighter cubes.
8. After ca. 20 minutes the charcoal is fully lit when it is covered with a coating of
white ash. Then spread the charcoal evenly across the charcoal grid.
The barbecue is prepared for cooking.
Grilling
Do not cook before the charcoal has a coating of ash.
■ Depending on the type of food, the lid 1 can be opened or closed. The lid
should be closed for food that requires cooking for longer.
■ To regulate the cooking temperature open or close the air vents on lid and ash
catcher.
17Use
■ On the warming rack 23 grilled food can be stored and, with closed lid, be kept
warm.
■ When finished cooking close the lid and air vents on lid and ash catcher to
extinguish the charcoal.
■ Allow the barbecue to cool completely and clean it according to chapter
“Cleaning”.
Refilling charcoal
Grilling time can be extended by refilling charcoal. Make sure that enough embers
are still available on the charcoal grid 20 to reignite the added charcoal.
WARNING!
Risk of burns by flashes
Improper refilling of the grill with charcoal may cause burn
injuries.
- Use heat-resistant barbecue mitts or gloves (conforming to EN
407, Contact Heat rating level 2 or greater) while cooking,
adjusting air vents (dampers), adding charcoal, and handling
thermometer or lid.
- Do not place lighter cubes on the embers or the refilled
charcoal.
1. Open the lid 1 and remove the cooking grid 22 with the cooking grid
handles 21
CAUTION! The cooking grid is hot! Use heat-resistant barbecue mitts or gloves to
prevent burn injuries!
2. Place the cooking grid on a heat resistant surface. Keep others away from the
hot cooking grid!
3. Carefully refill charcoal on the charcoal grid 20 . Make sure not to add too much
charcoal.
4. Reinstall the cooking grid.
5. As soon as the smoke has settled and the charcoal is completely burning, you
can continue cooking.
Do not cook before the charcoal has a coating of ash.
18Cleaning
Cleaning
WARNING!
Risk of burns
This barbecue will become very hot! Touching may cause burn
injuries.
- Allow the barbecue to cool completely before cleaning!
Clean the cooled barbecue after each use. Discoloration on the air vents, the lid, the
charcoal grate and other parts are normal signs of use and are neither hygienically
questionable nor a defect.
Do not use flammable or aggressive detergents, steel brushes,
abrasives, or other hard objects that could scratch the surfaces.
Do not remove ashes until all charcoal is completely burned out and fully
extinguished and barbecue is cool.
1. Allow the barbecue to cool completely before cleaning!
2. Open the lid 1 and remove the warming grid 23 and the cooking grid 22
with the cooking grid handles 21 .
3. Remove and empty the charcoal grid 20 .
4. Sweep the ash in the bowl into the ash catcher, remove the ash catcher and
empty it.
Remove the completely cooled ash regularly. As ash contains salt, it can cause
rust when wet!
5. Clean the parts by hand with commercially available dishwashing detergent. In
the case of heavy or burned soiling, also use special degreasing kitchen cleaners
(observe instructions of the respective manufacturer!).
6. Clean the inside and outside surfaces with warm soapy water and a sponge.
7. Allow all parts to dry completely before reinstalling.
19Storage
Storage
1. Allow the barbecue to cool completely and clean it according to chapter
“Cleaning”.
2. Use handle and wheels to relocate the barbecue.
3. Check the strength of the fittings. If necessary, tighten screws to ensure a firm
footing.
4. Clean the barbecue and allow it to dry completely.
5. Only cover the BBQ when it is raining to avoid waterlogging.
6. Store the barbecue at a dry place protected from the elements when not in use.
Technical data
Model: OD-004
Dimensions (W × D × H): 114 × 66.5 × 100 cm
Weight: 18 kg
Fuel: Charcoal
Max. fuel capacity: 1.5 kg
Item number 804849
Disposal
Disposing of packaging
Dispose of packaging according to type. Sort the paperboard and
cardboard as waste paper and the film as recyclable material.
Product disposal
Dispose of the product in line with the guidelines and disposal regulations
applicable in your country.
20Great care has gone into the manufacture of this product and it should
therefore provide you with years of good service when used properly. In
the event of product failure within its intended use over the course of the
first 3 years after date of purchase, we will remedy the problem as quickly
as possible once it has been brought to our attention. In the unlikely event
of such an occurrence, or if you require any information about the product,
please contact us via our helpline support services, details of which are to be
found both in this manual and on the product itself.
GB IE
PRODUCED IN CHINA FOR:
ALDI STORES LTD. PO BOX 26, ATHERSTONE
WARWICKSHIRE, CV9 2SH
ALDI STORES (IRELAND) LTD.
PO BOX 726, NAAS, CO. KILDARE
Visit us at www.aldi.com
3
AFTER SALES SUPPORT
804849
GB 0121 36 80 339 IE 01 50 60 684
www.bestbuyingsupport.com
MODEL:
YEAR
OD-004 06/2021 WARRANTYYou can also read