PROGRAM MANUAL 2019 - Ottawa Public Health
←
→
Page content transcription
If your browser does not render page correctly, please read the page content below

PROGRAM MANUAL 2019
      I Love To Garden
Land Acknowledgement
                Reconnaissance du territoire
 Odàwàng kì ombàkonigàde ega wìkàd kà mìgiwàniwang Màmìwininì Aishinàbe-wakì.
        Pimàdizìg Màmìwininì Anishinàbeg kàgigekamig kì abig ondaje akìng.
       Odanishinàbewiziwiniwà obimàdjiwowiniwà ogì nanegàdjichigàdànàwà
                          nanàj ako nongom iyo abinàs.
      Kichi Odenaw Odàwàng okikàdjìyàwàn pimàdizìn Màmìwininì Anishinàben
                          kaye okikàdjitònàwà iyo akì.

Ottawa is built on unceded Algonquin           Ottawa est bâtie sur un territoire non
Anishinabe territory.                          cédé de la Nation algonquine Anishinabe.
The peoples of the Algonquin Anishinabe        Les peuples de la Nation algonquine
Nation have lived on this territory for        Anishinabe vivent dans ce lieu depuis des
millennia. Their culture and presence have     millénaires. Leur culture et leur présence
nurtured and continue to nurture this place.   l’ont imprégné et l’imprègnent encore.
The City of Ottawa honours the peoples         La Ville d’Ottawa rend hommage aux
and the land of the Algonquin Anishinabe       peuples et au territoire de la Nation
Nation.                                        algonquine Anishinabe.

                                                                                            II
Acknowledgements
Thank you to everyone who contributed to the development of this
manual by brainstorming ideas, sharing information and by pilot
testing activities and recipes.
Additionally, we would like to extend a special thank you to the Healthy
Kids Community Challenge for providing funding for this project.
Where noted in this manual, information has been included or adapted
from the following sources:
   Denver Urban Gardens School Garden and Nutrition Curriculum (2015)
   FoodShare Toronto (2018)
   Garden Guide (2015) published by the Community Gardening Network of Ottawa
   KidsGardening.org Helping Young Minds Grow (2018)
   Loblaws Dietitian Program (2018)
   Nourish Curriculum, www.nourishlife.org. Copyright WorldLink, all rights reserved.
   Rob Danforth (2018), urban organic vegetable and herb gardener in Ottawa

Copyright © City of Ottawa 2019.
All rights reserved. The City of Ottawa gives the user of this program manual the right to photocopy or print
learning topics, activity sheets, recipes, and games for his or her use or for the use of his or her group. All other
forms of reproduction are strictly prohibited without the prior written permission from the City of Ottawa.

 III
Disclaimer Statement
The City of Ottawa hereby disclaims all liability associated with the material presented in this program manual.
Please read this disclaimer statement carefully before you start any of the activities or recipes set out in this
program manual.
All persons using the I Love to Garden Program Manual are hereby advised as follows:
The instructions and advice presented in the Program Manual are not intended as a substitute for qualified
medical counselling and may not be suitable for every person.
The City of Ottawa, including its employees and volunteers, does not assume any liability for any loss, damage,
expense or injury, including death that any person may suffer, due to any cause whatsoever, as a result of his/
her participation in any of the activities described in the Program Manual or any use of any kind whatsoever
of the program manual.

                                                                                                             IV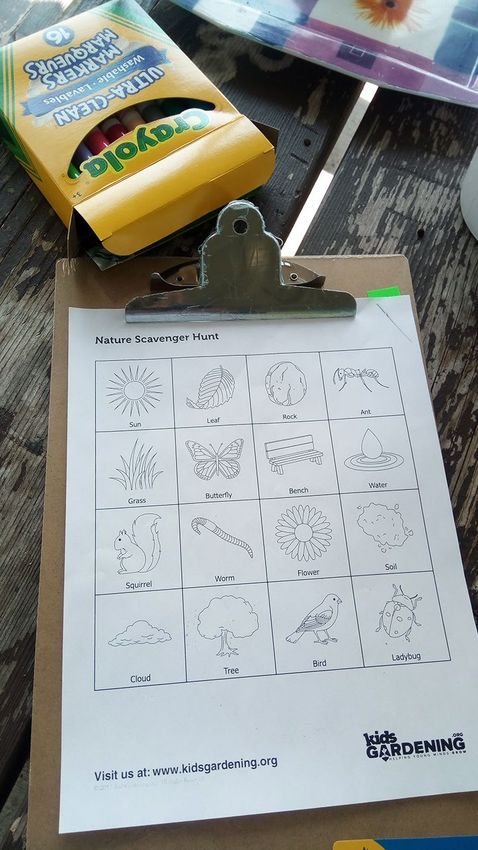
Table of Contents
Introduction...........................................................................................................................................................1
Why Encourage Children to Garden?...................................................................................................................2
Nutrition Education from the Garden to the Kitchen ........................................................................................3
How to Engage Parents and Guardians ..............................................................................................................4
Different Types of Gardens...................................................................................................................................5
Container Gardening 101.....................................................................................................................................7
Activities.................................................................................................................................................................8
    About a Sprout.........................................................................................................................................................................................9
    Build your own Bottle Planter.............................................................................................................................................................15
    Growing Food Scraps............................................................................................................................................................................20
    Grow Your Own Salad and Herb Garden........................................................................................................................................26
    Matchmaking Game..............................................................................................................................................................................28
    Garden Poetry..........................................................................................................................................................................................30
    Connect the Dots ...................................................................................................................................................................................34
    Toss It Up – Salad Cook-Off.................................................................................................................................................................37
    Scavenger Hunt.......................................................................................................................................................................................42
    Word Hunt.................................................................................................................................................................................................45
Recipes...................................................................................................................................................................48
    Minty Lemonade.....................................................................................................................................................................................49
    Green Monster Smoothie.....................................................................................................................................................................51
    Very Berry Smoothie..............................................................................................................................................................................53
    Minty Fruit Salad.....................................................................................................................................................................................55
    Green Hummus........................................................................................................................................................................................57
    Fresh Salsa (Pico de Gallo)...................................................................................................................................................................59
    Fattoush Salad..........................................................................................................................................................................................61
    Herbed Potato Salad..............................................................................................................................................................................63
    Kale Pesto Pasta.......................................................................................................................................................................................65
    Garden Vegetable No-Bake Pizza......................................................................................................................................................67
    Quick Pickle Recipe................................................................................................................................................................................69
    Creamy Caesar Dressing.......................................................................................................................................................................72
    Creamy Avocado Salad Dressing.......................................................................................................................................................74
Appendices............................................................................................................................................................76
Introduction
What is ‘I Love to Garden’?
I Love to Garden is a community-based program for children          The I Love to Garden Program Manual
and youth aged six to twelve that supports Ottawa Public            provides you with:
Health’s Healthy Eating Active Living Guidelines. The activities    •   Hands-on gardening and healthy
and recipes in this manual can be used by teachers, after-school        eating activities
program staff, summer camp staff and by parents and guardians.      •   Healthy recipes, featuring fresh
This program manual will help you to teach children how                 produce that can be grown in Ottawa
plants grow, basic gardening skills and how to prepare healthy      •   A resource section full of additional
seasonal meals and snacks using produce that can be grown in            information on gardening and healthy
Ottawa.                                                                 cooking with children and youth

How to use this manual
I Love to Garden has 10 activities, 13 recipes as well as many resource on gardening and cooking with children.
Many of the activities and recipes can be completed in 30 minutes, with a few of them taking 45 to 60 minutes.

  Activities: Each activity has a ‘background’ section to give you important information about the activity.
  Some activities include graphics which can be used as teaching tool. Most activities include conversation
  starters to help you engage children on the topics of gardening, food and nutrition. Some activities also
  have a parent engagement section to help you share information about the day’s lesson with parents.

  Recipes: Each of the recipes were hand-selected because they include produce that can be grown right
  here in Ottawa. These vegetables are identified in a “Grow Me” feature on each of the recipes. You may refer
  to the resources in Appendix A for details on how to grow these yourselves. At the back of each recipe
  you will find an “Info Bites” section with nutrition information about some of the foods you are preparing.
  You can share this information with the kids while you cook. Many of the recipes only need basic kitchen
  equipment and many don’t require any cooking, allowing those who work in small or in shared spaces to
  fully participate.

  Appendices: The appendices have a lot of information on gardening and cooking with children. In this
  section you will find information on selecting healthy recipes, age-appropriate cooking skills as well
  as sample registration forms for parents or guardians and certificates of completion for both “Master
  Gardeners” and “Master Chefs”.

               The I Love to Garden program is an addendum to Ottawa Public Health’s I
               Love to Cook and Play program. To learn the foundation of healthy cooking
               with children and for ideas of games, please refer to the
                                  I Love to Cook and Play program manual.

 1
Why Encourage Children to Garden?

   Increase vegetable and fruit           Increase preference for vegetables       Increase sense of responsibility
              intake                                   and fruit

                                           Children who are involved in garden
Children who take part in growing and      programs are more likely than their      Gardening teaches children to look
preparing healthy foods are more likely     peers to identify and prefer a wider   after and care for other living things
         to eat healthy food                       variety of vegetables

      Develop teamwork skills                  Understand where food                    Appreciate nature and
                                                    comes from                            the environment

 Children who garden as a group need      Children who grow food understand         Children who garden spend time
  to learn how to communicate and         what a plant needs to grow and thrive     outdoors and develop respect for
            work together                       and where/how it grows               plants and the magic of nature

 Increase time spent being active                                                        Increase self-esteem

   Gardening is a relaxing way to be                                                 Gardening allows us to nurture
                active                                                             something and to transform a seed
                                                                                          into an edible food

                                                                                                                      2
Nutrition Education from the Garden to the Kitchen

Gardening is a great opportunity to influence children’s food preferences and to teach them about healthy
eating in a fun, interactive environment. It is important to teach children in a way that is relevant to them.
Here are some tips for supporting children in gardening:

     1. Engage children in as many aspects of gardening and cooking as possible, including planning,
        planting, growing, harvesting, cooking and cleaning up. Promote healthy food choices at every
        step!

     2. Speak in terms that children understand. For example, when talking to younger children, talk
        about the colours of the vegetables and the importance of “eating the rainbow”.

     3.   Talk about where food comes from and how it is grown in a positive way by highlighting their
          vibrant colors, smells and textures.

     4. Offer consistent healthy eating messaging across all activities. For example, if you take the time to
        grow fresh vegetables, make an effort to also serve healthy snacks.

     5. Inspire children to be curious about new foods by being a good role model and trying new foods
        yourself.

     6. Do not pressure children to eat. Your role is to offer a variety of foods and the children’s role is to
        decide if and how much they want to eat.

     7. If you have leftovers, send them home for the children to share with their families along with a
        letter explaining what the food is.

 3
How to Engage Parents and Guardians
Parents and guardians are important role models in their children’s lives and have a big impact on the food
decisions made at home. Involving parents and guardians will make it more likely that children will receive
consistent healthy-eating messaging. For these reasons, it is important to include parents and guardians in
healthy eating and gardening programs from the beginning.

                            Six ways to engage parents and guardians

                              Share the recipe of what you prepared that day

                              Share the activity sheet that was used that day

                                 Share pictures of the children gardening

                     Invite parents/guardians to share a meal prepared by the children

                         Share monthly updates of what is growing in your garden

                            Invite parents/guardians to volunteer in the garden

                                                                                                       4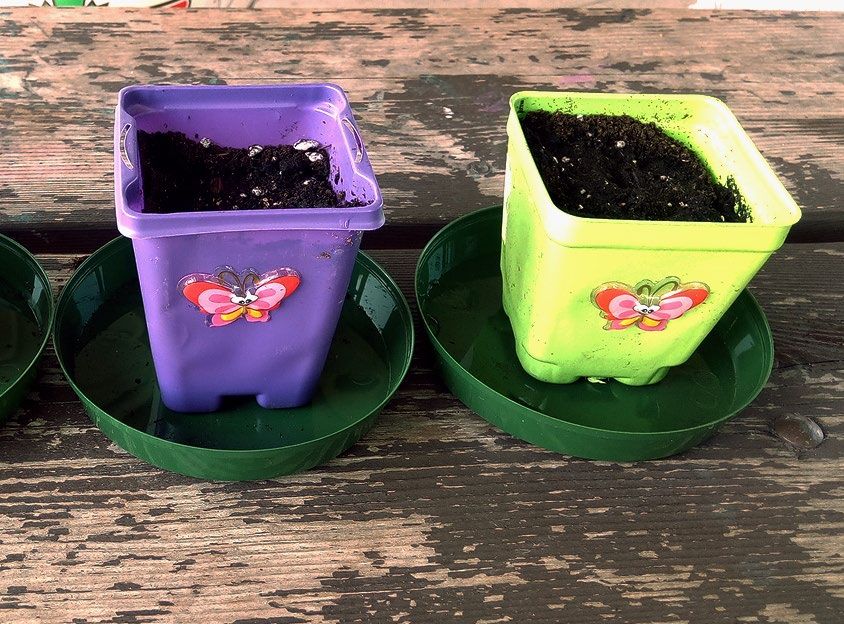
Different Types of Gardens
     The type of garden you choose is entirely up to you and will depend on your physical space. Keep your garden small and manageable for the first year. It
     will be easier to expand a well-functioning garden in the future. Kids can have fun growing a variety of herbs, vegetables and fruits. If you want to start a
     community garden on City Land, please contact Just Food to determine the requirements needed.

Garden Type       Description              Benefits                                   Considerations                        Basic Requirements

In-Ground         • Garden bed that is     • Low cost and convenient to               • Soil contamination may              • Seeds
Garden Beds          dug directly into        establish.                                 be present in the ground,          • Garden Tools
                     the ground.           • Size and shape are not restricted by a      particularly in urban settings1.
                                                                                                                            • Land / Space
                                              container and garden design is easily   • Soil nutrients and properties
                                              modified.                                  will vary based on local           • Appropriate permissions for land/ space
                                                                                         conditions. Compost and/or soil       use
                                                                                         amendments may be required.        • Committed volunteers

Container         • A smaller garden       • Low land requirements.                   • Need to add compost to soil         • Clean soil
Garden               endeavor that uses    • Containers can be placed wherever           annually                           • Seeds
                     various containers       there is enough sunlight.               • Soil needs to be cleaned and
                     to grow herbs,                                                                                         • Garden tools
                                           • Convenient to use in shared or small        covered for the winter
                     vegetables or                                                                                          • Containers (ie: pots, buckets, planters)
                     fruits.                  spaces.
                                                                                                                            • Committed volunteers

Raised Beds       • Raised garden beds     • Reduced risk of soil contamination.      • Need to add compost to soil         • Clean soil
                     are typically made    • Easier to access                            annually                           • Seeds
                     with untreated                                                   • Soil needs to be cleaned and
                     lumber and filled     • Can be built in non-traditional                                                • Garden tools
                                              locations                                  covered for the winter
                     with clean soil.                                                                                       • Land / Space
                                                                                      • Cost of lumber and building
                                                                                         materials                          • Appropriate permissions for land/ space
                                                                                                                               use
                                                                                                                            • Lumber and tools to build raised beds
                                                                                                                            • Budget, time and skills to build raised
                                                                                                                               beds
                                                                                                                            • Committed volunteers

                                                                                                                                      Continues on the reverse

 5
Garden Type Description Benefits Considerations Basic Requirements
Hydroponic • Uses a water and • Grow indoors in small spaces. • Start up costs • Seeds
Garden (ie: nutrient solution • Can grow food all year round with • Require special nutrient solutions • Rockwool soil
instead of soil to grow lights for the water
Tower Garden) • Special containers
grow.
• Very quick growing time for greens • Hydroponic solution
and herbs compared to traditional
soil gardening • Committed volunteers
Children’s • Child friendly • Child and youth oriented educational • Some features suited to kids • Clean soil
Gardens spaces for children spaces needs/desires. • Seeds
can learn and • Children are heavily involved in the • Different bed heights.
For example, the play in a garden • Garden tools
main gardening activities • Some of the children’s favourite
two Children’s environment. • A site with lots of sun & shade
• Natural partners for nearby schools, plants may take years to
Gardens located daycares, etc. develop. • Appropriate permissions for land/ space
at 321 Main St use
and 1825 Trim • Seating
Road • Storage
• Committed volunteers
1
Gardeners using in-ground beds are encouraged to seek further information to understand the possible risks from soil contamination and the
importance to consider the health and suitability of the soils at the garden site. Additional information related to urban gardening can be provided
upon request to Ottawa Public Health.
6Container Gardening 101
Learn how to build good gardening soil to grow your vegetables, how to recycle soil year over year to reduce costs and how to
garden successfully in containers. Keep this resource nearby because it will be necessary for a few of the activities.
Do I need to use a particular type of soil for container gardening?
• Yes. In small containers you can lift, we recommend using organic potting mix as opposed to garden soil
or black earth. The potting mix is much lighter so it is easier to move the container to work with the plants
and makes it ideal for balconies, balcony rails, fences, and roofs.
• If you are gardening in a container that will not be moved, you can use garden soil or black earth problem
(it is very heavy when wet). as long as the weight will not be a problem.
What type of compost should I use in my container garden?
• Organic compost, made from vegetable and fruit scraps is the best option for your garden. However, if you
cannot make your own compost you can purchase compost or sheep, cow or horse manure from garden
centres.
How do I mix the soil and the compost together?
• Moisten the potting mix with water so it is wet, but not enough for water to run out if it is squeezed.
• The potting mix will shrink by ¼ if you fill containers while the mix is dry and then wet it.
• Combine 2/3 wet potting mix and 1/3 compost or manure in your growing pot and mix well before
planting. This will feed your garden for 2-3 months. However, if you plant heavy feeders (e.g. tomatoes and
any plant producing large fruit – except root vegetables), you will have to rake and water-in some organic
fertilizer (e.g. chicken manure pellets) after 1.5 months.
How full does my pot need to be?
• Fill the pot with the mix of compost and potting mix to 1 inch below the top.
Can I re-use my potting mix next season?
Yes, you can! However, it is best not to leave it in the container over the winter; your potting mix needs to be
properly cleaned of roots and stored for the winter.
1. Pull out all the plants and weeds.
2. Empty the contents of the pot on a tarp, and rake out the roots.
3. Save your soil outdoors in a garbage bag, compost bin, or in your garden plot.
4. In spring, add compost to the container soil, about 1/3 of the volume of the container (See “How do I mix
the soil and compost together”).
If I can’t move my container, do I need to empty it in the fall?
• No. If your container is so big that you cannot dump it out that’s okay. Let the soil dry out then pull out the
roots and cover it for protection (water expands as it freezes and can destroy pots). In spring, add compost
to the container soil, about 1/3 of the volume of the container (See “How do I mix the soil and compost
together”).
7Activities
About a Sprout
                                     Overview:
                                       Children will be able to name the different parts of the seed and
                                       understand what a seed needs in order to grow into a plant.
                        7 days
                      to watch the   Background Information:
                       seed grow.
                                       In today’s activity, you will learn what seeds are made of and
                                       about the changes they go through to become the plants that
Materials:                             you see and eat every day.
                                       Refer to the two graphics on the following pages, “A Trip Inside a
    • Dry bean seeds, broad
      bean seeds work well             Bean Seed” and “About a Sprout”, to help explain what seeds are
      (6 per child)                    made of as well as what they need to grow into plants.
    • Bowl of water
    • Magnifying glasses               On “A Trip Inside a Bean Seed” you can see the different parts of the
      (optional, but helpful)          seed. All dried seeds are wrapped in a seed coat, which protects
    • Paper towels                     them until conditions are ideal for growing. The seed keeps
      (1 per child)                    everything it needs to grow into a plant inside the seed coat. This
                                       includes tiny leaves, a stem, roots, and a temporary food supply. The
    • Resealable sandwich
      bags (1 per child)               temporary food supply of the bean is stored in special leaves called
                                       cotyledons. The cotyledon is what makes seeds a rich food source
                                       for humans and other animals, like sunflower seeds for example!
                                       On the graphic titled “About a Sprout”, you will see the steps
          Dig this!                    the seed goes through to become a plant. The first step is called
                                       sprouting. The seed needs three things to sprout: ideal growing
 If you sprout one bean seed
every day for seven days, your         conditions, water and oxygen. Ideal growing conditions can be
group will be able to see all the      different for different seeds. Some need a lot of light or heat, while
       stages at once!                 others prefer growing where it is colder and darker - this is why we
                                       cannot grow bananas in Canada! The seed will absorb water and
                                       oxygen through its seed coat. This allows the seed to start getting
                                       bigger and the seed coat to break open (compare a soaked bean
to a dry bean). If at any point in the sprouting process the seed’s three basic needs stop being met (ideal
growing conditions, water and oxygen), the seed will stop growing. Try it yourself! Let some of the bean
seeds dry out, but continue to water the others. As shown on the “About a Sprout” picture, the bean seed
you soak will sprout roots, followed by the shoot, which contains the stem and leaves. Sprouting can take
anywhere from 7 to 14 days.

9
Conversation Starters:
Q: Can you think of any tasty seeds that humans eat?
A: Consider those that are eaten whole (sunflower, rice, peanuts) and those that are processed so they don’t
look like seeds (wheat flour, ground flax).
Q: What are the three basic things seeds needs to sprout?
A: Oxygen, water, and ideal growing conditions (heat and light).
Q: Where does the plant store it’s temporary food supply?
A: The cotyledons
Preparation
12 - 24 hours before doing the activity, soak some of the dried beans in a bowl of water so each child has 2
soaked beans.
Activity
1. Review the different parts of a seed, their purposes, and how seeds become plants:
Pass around copies of “A trip Inside a Bean Seed” and “About a Sprout”. Look at the pictures and review
the different parts of the seed. Discuss what each part does for the seed to grow into a plant.
2. Demonstrate how to dissect the soaked bean seed:
Gently peel off the seed coat with your fingers. Using your fingernails, slice one of the seeds in half
down the middle to separate the two sides. Gently put the two halves of the bean on the table in front
of you. Look closely to see all parts of the seed.
3. Seed dissection:
Give each child two soaked bean seeds and let them dissect their seeds. Ask them to identify each part
from the picture, and explain their purpose.
4. Sprout dry bean seeds in a bag:
Give each child a damp paper towel, a sealable plastic bag and 4 dried bean seeds. Wrap the bean seeds
in the damp paper towel, and then seal the towel inside the airtight plastic bag. Attach a personalized
“My Sprout” tag (see following pages) to each bag. Place the bag in a warm sunny spot and let the seeds
sprout for about 7 days, until they sprout stems and small roots. Children should check on their beans
daily to monitor their progress and to make sure the paper towel stays damp. If the paper towel dries
out, simply wet it again and re-wrap the bean seeds. Once sprouting is complete after about 7 days,
the older children can use their math skills to come up with what percentage of their beans sprouted
successfully.
5. Planting in soil:
Once the seeds have sprout, plant them in a container with a 3:1 ratio of potting mix and compost (see
Container Gardening 101 for details on building good container soil). Put the containers outside, or by a
sunny window, where they can get six or more hours of sunlight per day. Water regularly to keep the soil
moist, but not wet. Moist soil is damp to the touch and when it is squeezed, no water drips out. Watch
your beans grow!
10Ad-on:
Follow-up this activity by repeating the same steps, but put the seeds in different conditions (dark, cold,
hot, sunny) to see which seeds sprout the fastest.
Parent Engagement:
Ask the children to draw what their beans look like every day as they sprout, and to carefully label all the
parts of the seed as they grow. Have them show their drawings to their parents and teach them about the
different parts of the plant.
11A Trip Inside a Bean Seed
First Leaves
Embryonic Root
Seed Coat
Cotyledon
Adapted with permission from Denver Urban Gardens School Garden and Nutrition Curriculum.About a Sprout
Cotyledon Leaves
The very first leaves of the plant The leaves are where the plant make its energy
(food) through a process called
photosynthesis
Stem
Supports the plant and acts like the “plumbing
system” by carrying water, nutrients and
glucose (sugar) to all parts of the plant
Seed Coat
Protective outer layer Roots
Anchor the plant and pull nutrients from
the soil to create its foodMY SPROUT MY SPROUT BELONGS TO: BELONGS TO: DATE PLANTED: DATE PLANTED: MY SPROUT MY SPROUT BELONGS TO: BELONGS TO: DATE PLANTED: DATE PLANTED: MY SPROUT MY SPROUT BELONGS TO: BELONGS TO: DATE PLANTED: DATE PLANTED:
Build your own Bottle Planter
                                    Overview:
                                      Build your own sub-irrigated planter out of a used bottle. Plant seeds
                                      in the planters and learn how to care for living things as they grow.

                                    Background Information:
                                      Sub-irrigated planters are watered from the bottom, not from the
                                      top, which means that fewer nutrients are washed out of the soil
 Materials:
                                      when the plant is watered. Another advantage of watering your
     • Potting mix (3 cups per        planters from the bottom is that the plant can drink water as it
       child)                         needs it. Use the graphics on the following pages, or a pre-built sub-
     • Organic compost (2 cups        irrigated planter, to explain how this type of planter works.
       per child)                     Plants are alive, and they need three things to grow and be healthy:
     • 2 five-gallon buckets (one     1. Water: Plant food (i.e. nutrients) mix with the water in the soil
       for water and one for the         and the plant drinks up the water-nutrient mixture through its
       potting mix)                      roots. Plants also use water to make their food – a type of sugar
     • Measuring cups to scoop           called glucose.
       the soil                       2. Food (i.e. nutrients): Plant food comes from the air and the soil. It
     • Empty 2 liter bottles             is important to keep the air we breathe clean and the soil in our
       (1 per child)                     gardens well fed so that the plants can get everything they need
     • Utility knives                    to grow and produce food for us! We can keep the soil well fed by
     • Scissors                          giving it compost or manure and by planting seeds in different
                                         spots.
     • 4” x 4” squares of window
       screen, panty hose or          3. Sun: Plants can use sunlight to make food for themselves
       cheesecloth (1 per child)         through a process called photosynthesis. Plants use sunlight to
                                         turn water and carbon dioxide into a type of sugar called glucose
     • Kitchen elastics (1 per
                                         that helps the plant grow. This process also creates oxygen that
       child)
                                         the plant releases into the air for us to breathe. Win-win!
     • Green bean seeds of the
       bush variety (2 per child)   Conversation Starters:
     • Instructions for care          Q: What are the three essential things that plants need to grow?
       (1 sheet per child)            A: Water, food and sun.
     • Water                          Q: What are the benefits of watering the plant from below?
                                      A: The plant loses less of its nutrients from the soil and it can drink
                                      when it is thirsty.
          Dig this!                   Q: Why do we mix compost with potting soil before planting seeds?
   Place the bottle planters in       A: Compost is very rich in nutrients (plant food) and when mixed
  the sunniest window (south          with the potting soil it gives the plants the perfect balance of
     or east) to get the most         nutrition to grow strong.
            sunlight.
                                      Q: What window direction (north, south, east or west) is the best to
                                      help a plant to grow?
                                      A: South facing windows are best because they get more sun.
15
Preparation:
• Follow steps 3 to 10 to prepare a planter ahead of time to show the children what it should look like.
Activity:
Prepare the soil:
1. In one of the 5-gallon buckets, ask each child to add 2 scoops of potting mix and 1 scoop of compost
until the bucket is half-way full.
2. Slowly add water to the bucket, while the children mix the soil and compost together with their hands.
The potting soil should expand and you will know you have added enough water when the soil is
damp, but not wet enough that water runs out when you squeeze it.
Prepare Planters (see the graphics on the following pages for a visual description of how to
prepare your planter
3. Make a small cut along the ridge near the top of the bottle so that the children can start cutting the top
off with scissors.
4. Make three evenly spaced ½” wide by ½” tall flaps along the ridge at the bottom of the bottle. Note that
you will be adding water to the bottom of the planter, so make sure these flaps are high enough that
water will not run out.
5. Starting where the initial cut was made, children can carefully cut the top of the bottle off with scissors
to separate the top from the body of the bottle.
6. Turn the top section of the bottle upside down and place it inside the upright body of the bottle. Using
a marker, trace a line on the top section to mark the portion that sticks out.
7. Using scissors make small vertical cuts from the edge of the line every ½” around the entire top.
8. Give each child a piece of window screening or panty hose and a zip tie or kitchen elastic.
9. Pull the cover of your choice over the mouth of the bottle and tie it off with the zip tie or kitchen elastic.
This will prevent the soil from falling down in the water reservoir
10. Push the top of the bottle, mouth side facing towards the table, all the way to the bottom of the bottle,
until the mouth touches the bottom
11. Add your soil.
12. Plant seeds according to package directions.
13. Sprinkle a little bit of water on top (just this once) and add water to the reservoir. If children will be
bringing the planter home, you can skip this step for now.
Parent Engagement:
Send the children home with their planters and a set of instructions for
taking care of them (see following pages).
Building your own Sub-Irrigated Planter was originally produced by FoodShare Toronto and adapted for Ottawa Public Health’s
I Love to Garden Manual. To see the original, as well as other downloadable resources, please go to www.foodshare.net.
16Taking Care of Your Sub-Irrigated Bottle Planter
1. When you get home, find a window that has sun shining through it for at least
part of the day (south-facing is best). Place your planter near the window. If you
have a sunny spot in your yard, you can also leave your planter outside.
2. Add water to the planter by pouring it through one of the flaps in the bottom
part of the bottle.
3. Add some water to the soil at the top of the planter to help the seed to start to
grow. You will not need to water the top part again. Water from the bottom part
will soak up through the soil in the neck of the bottle and keep the rest of the
soil damp.
4. Wait until the water in the bottom part has run out before adding more.
5. Watch your green beans grow and harvest them when they are ready.
Taking Care of Your Sub-Irrigated Bottle Planter
1. When you get home, find a window that has sun shining through it for at least
part of the day (south-facing is best). Place your planter near the window. If you
have a sunny spot in your yard, you can also leave your planter outside.
2. Add water to the planter by pouring it through one of the flaps in the bottom
part of the bottle.
3. Add some water to the soil at the top of the planter to help the seed to start to
grow. You will not need to water the top part again. Water from the bottom part
will soak up through the soil in the neck of the bottle and keep the rest of the
soil damp.
4. Wait until the water in the bottom part has run out before adding more.
5. Watch your green beans grow and harvest them when they are ready.
17Steps To Build Your Bottle Planter
The mixture of potting
soil and compost/ manure
fills the bottle, leaving 1/2
inch at the top
Water from the bottom
instead of the top through
flaps cut out at the
The neck of the bottom. This helps keep
bottle sits in the the nutrients in the soil
water and acts as a instead of washing them
wick to bring water away from the top.
upwards towards
the plant’s roots.
The window screening at
the mouth of the bottle
keeps the soil put.
181 2
Fasten screening
Cut
over bottle mouth
flaps evenly spaced
with elastic band
around bottle Cut off the top of
the bottle
3 4 5
Fill top section with At home, add water
growing mix and to resevoir and
plant seeds sprinkle a little on
the top
(just this once)
Push the top section inside the
bottom section until mouth
touches bottom
6
Place in a
sunny area and
watch your plant
grow!
Building your own Sub-Irrigated Planter was originally produced by FoodShare Toronto and adapted for Ottawa Public Health’s
I Love to Garden Manual. To see the original, as well as other downloadable resources, please go to www.foodshare.net.Growing Food Scraps
Overview:
Children will grow new plants from bits and pieces of vegetables
that might normally go in the compost. This is a great way to reduce
food waste!
Several weeks
to grow Background Information:
Growing new vegetables from vegetable scraps is a great way to
get a second life out of them and to reduce the amount of food we
waste. A lot of time, effort and energy go into producing food. The
Materials:
food we eat goes through many steps before getting to our plates
• Vegetable scraps (1 per and at each step, resources such as water, fuel, machinery, time
child, or a few for the and effort are used. Wasting food is like growing a garden and then
group to share) throwing it away when it is ready. The graphic on the following
• Options: 1 – 2 inches page shows how food gets from the farm to your plate and the
of the base of a celery, resources used to produce food on a large scale.
or the white parts of In Canada, about half (50%) of all food wasted is wasted in the
green onions home and 80% of the food we waste at home is perfectly edible,
• Shallow bowl (1 per that is a lot of food! Growing food closer to home is a great way to
celery) reduce our carbon footprint since our food does not travel as far,
and we can harvest what we need, when we need it.
• Cup (1 per bunch of
onions) Conversation Starters:
• Water Q: There are many reasons why we should try to waste less food.
• Food colouring (optional) Can you think of any?
A: Wasting less food can help us save money, and reduces our impact
on the environment since we’re not spending fuel transporting
food that we don’t eat.
Q: How does growing vegetables in your own garden compare to the steps outlined in the “Industrial
Food System” picture? What steps are we skipping?
A: Transporting, processing, packaging, wholesaling and retailing. We are skipping five of the nine steps.
Q: What are some of the benefits to the environment when we grow some of our own food?
A: We can harvest our vegetables and fruits when we need them, and this can help us waste less food. It
also puts less stress on the environment since the food does not travel as far.
Note:
As you teach the activity, remind the children that because we live in Canada, it is difficult to grow all of
our own food. Whether you grow your own or you buy your vegetables at the store, it does not change
how nutritious they are!
20Preparation:
If you will be asking the children to bring food scraps from home, send the sample letter to parents/
guardians the week before the activity. If you will be providing the food scraps yourself, the letter on one of
the following pages outlines what you should save and bring to complete the activity.
Add-On:
Add food dye to the bowl of water the celery is growing in to see the celery change colour from the bottom
up as it drinks the water.
21I N D USTR IAL FO O D SYSTE M
G ROWI NG HARVESTING TRANSPORTING P R O C E S S I N G PA C K A G I N G WH OLE SA LI N G R E TA I L I N G E AT I N G DISPOSING
Growers use Farm Transporta- Food Workers Wholesalers Retailers People People
heavy workers tion workers processors operate sell and sell foods to buy, discard
equipment gather the move the use factory machinery distribute customers, prepare, leftover
to prepare ripened food by equipment to put large usually in and eat food and
soil, and crop from air, truck, to chop, food into quantities supermarkets, the food. packaging.
plant and the field train, ship, grind, dry, cans, bags, While most
of foods to grocery
boil, can, or
maintain using large or barge. boxes, stores. stores, or is recyclable
freeze food
crops on machinery, Transporting or other other stores. or com-
to preserve
huge farms harvesting may containers postable,
it or to make
of single great happen at for sale. much of it
it more
“monocrops.” quantities many steps convenient. The ends up in
at once. and for very Processed packaging landfills.
long hauls. food is protects
often greatly food and
altered from helps sell
its natural it.
state.
X
Nourish Curriculum Guide © WorldLink Developed by the Center for Ecoliteracy
Industrial Food system » tiré du programme Nourish Curriculum, www.nourishlife.org. Copyright WorldLink, tous droits réservés.
Industrial Food System graphic, www.nourishlife.org. Copyright WorldLink, all rights reserved.Growing Food Scraps
Green Onion
You can harvest your
green onion tops as
soon as they are long
enough!
Place green onions in jar Place jar on a sunny Change water every other
with water windowsill day
23Celery
You can harvest your
celery tops as soon
as they are long
enough!
Place celery base in Change water
small bowl with water - Place bowl on a sunny
every other day
stalks facing upright windowsill
24Dear Parent(s)/Guardian(s), Next week, on __________________________ (month, day) in the I Love to Garden program, we will be doing an activity called “Growing Food Scraps”. We will grow new vegetables using the root of another vegetable to learn about food production and food waste. If possible, please save one of the two options below for next week’s activity: 1. 1 – 2 inches of the base of the celery, or 2. The white parts of a bunch of green onions Save the celery and onion roots in the fridge until the day of the activity. They should still be fresh, not moldy or rotting, for the activity to be successful. Thank you for your participation and support, ______________________________________ (Program Leader) ______________________________________ (Telephone number) Dear Parent(s)/Guardian(s), Next week, on __________________________ (month, day) in the I Love to Garden program, we will be doing an activity called “Growing Food Scraps”. We will grow new vegetables using the root of another vegetable to learn about food production and food waste. If possible, please save one of the two options below for next week’s activity: 1. 1 – 2 inches of the base of the celery, or 2. The white parts of a bunch of green onions Save the celery and onion roots in the fridge until the day of the activity. They should still be fresh, not moldy or rotting, for the activity to be successful. Thank you for your participation and support, ______________________________________ (Program Leader) ______________________________________ (Telephone number)
Grow Your Own Salad and Herb Garden
                                       Overview:
                                         Children will plant lettuce or herb seeds in their container gardens,
                        4-8 weeks        care for them as they grow, and harvest it when it is ready. This
                       until harvest     activity can be done indoors or outdoors.

                                       Background Information:
  Materials:                             Leafy greens and herbs can grow in an outdoor garden, a tower
     • Growing containers that           garden or in an upcycled bottle in your apartment. Salad and
       are 6 – 9 inches deep             herb gardens are a perfect introduction to gardening for children
                                         because they grow quickly and can be done anywhere.
     • Sharp probe (if container
       does not already have             All the greens need to grow and thrive is a good mix of potting soil
       drainage holes)                   and compost, sunlight and water. Lettuce and herbs can grow well
     • Solid drainage tray               outdoors with just 4-6 hours of direct sunlight per day. If you are
                                         growing indoors, put your pot in the sunniest window since indoor
     • Potting soil and compost          light is not as strong as outdoor light.
       see “Container Gardening
       101” for details                  Container gardens tend to dry out more quickly than bigger
                                         garden plots so keep an eye on the soil and water often. Keep the
     • Lettuce seeds such as
                                         soil moist, but not wet, and avoid the soil getting too dry and the
       mesclun mix
                                         plant wilting. This may mean watering nearly every day in July and
     • Herb seeds such                   August. If the soil dries out too quickly, you can put mulch, straw,
       as chives, oregano,               leaves, compost, newspaper or black plastic around your greens to
       rosemary and thyme                keep the soil moist for longer.

  Children can make their own growing containers using recycled plastics. It is recommended to use plastics
  numbered 1, 2, 4 and 5 and to avoid plastics numbered 3, 6 and 7. Whatever container you choose to use,
  it is important that your container has drainage holes. If they are not already there, you can make your own
  by poking a few small holes in the bottom for the water to escape. If you accidentally poke holes that are
  a bit too big, line the bottom of your container with landscape fabric or a kitchen scrub pad before filling
  your pot. To avoid making a mess, put your growing container in a solid drainage tray to catch run-off water
  before watering your seeds.

Conversation Starters:
  Q: What do lettuce and herbs need to grow and be healthy?
  A: Sunlight, water and “nutrients (plant food).” Plant food will come from the mixture of potting soil and
  compost.
  Q: How will you enjoy your lettuce once it’s grown?
  A: In a salad, in a wrap or a pita, raw on its own, with some hummus spread in the middle or in a sandwich!
  There are no wrong answers here, encourage the kids to be creative!

26
Conversation Starters (continued):
Q: What types of meals do you think your herbs would go well
in?
A: Basil on a pizza, on pasta, or to make pesto. Thyme goes
great with chicken or more savory dishes. Chives make a nice
garnish on scrambled eggs. Oregano is great in pasta sauce.
Rosemary is excellent when baked with root vegetables. There
are no wrong answers here, encourage the kids to be creative!
Activity:
1. Prepare your soil by mixing a 3:1 ratio of potting mix and
compost. See “Container Gardening 101” for details on how Salad garden growing in an upcycled 2
to prepare your soil. liter bottle.
2. Prepare growing containers. If there are no drainage holes,
help the children make some using a sharp probe (hammer
and small nails, screwdriver or paring knife).
3. Cover the drainage holes with landscape fabric or green
kitchen scrub pads if the holes are too big and soil can
easily escape.
4. Fill the containers with a moist mixture of potting soil and
compost that you prepared in step 1.
5. Plant lettuce and herb seeds according to package
directions. Younger children may need help because the
seeds are so small.
6. Place growing containers in drainage trays and move to a
sunny spot. If planting outdoors you want to get minimum
4-6 hours of sunlight per day and if planting indoors you
want a minimum of 8 hours of sunlight per day.
7. Give planters a light watering; just enough so that the seeds
get wet and the soil is damp. Balcony herb garden in a portable
8. Watch your greens grow and remember to water as soon as container pictured above, from left to
the soil starts to get dry. right, are chives, oregano, rosemary
and thyme.
9. To harvest the lettuce, simply use scissors to cut the greens
1 inch above the soil line, leaving a few large leaves in the
center to keep the plant healthy. Your lettuce will likely
produce more leaves for you to eat if you keep taking care
of it. To harvest the herbs, simply cut off a few “branches” at
a time, being careful not to take more than 1/3 of the plant.
Parent Engagement:
Engage parents in this activity by sending them pictures of their child planting their salad and herb gardens.
Once the gardens are grown, share some herbs and lettuce with them to try at home in a recipe that week.
Images courtesy of Rob Danforth – Urban Organic Vegetable and Herb Gardner
27Matchmaking Game
Overview:
Engage all of the senses in this interactive display of dried and
fresh herbs. Children will point-out different herbs and match up
the fresh herbs to their dried counterparts by smelling and tasting
them.
Background Information:
Materials: Dried and fresh herbs taste significantly different and it will be
• Both dried and fresh interesting for the children to try to match them up in a blind taste-
herbs of your choice (e.g. test.
rosemary, basil, parsley, If you find yourself with an abundance of fresh herbs, you can
chives, mint and sage) dehydrate them yourself and store your dried herbs in an airtight
• Shallow bowls or small container for later use. Dried herbs will keep for 1-3 years, but will
plates (1 per herb) start to lose flavour over time.
• Spoons (1 per bowl/
plate) Here are two ways that you can dehydrate your own herbs:
• Masking tape Hanging Bundle
• Permanent marker Bundle the fresh herbs, tie a string around the stems, then hang
upside down in a well-ventilated area until dry. Check daily to make
sure they are drying well and are not damp between the leaves. The
herbs should take about 1 week to completely dry.
Lay Flat to Dry
Dry the herbs on a flat surface that can get airflow underneath it.
For example: a baking rack covered with paper towel or a window
screen. Lay the herbs on top of the flat surface (be careful not to
stack them so they dry properly). The herbs should take about 1
week to completely dry.
Cooking with Herbs
When cooking with herbs, you can always use dried in place of fresh but there are a few things to remember
when making the swap.
• Fresh herbs will lose their flavour if added early on in the cooking process so add them at the very end
of the cooking.
• Dried herbs need time to release their flavours, so add them early in the cooking process.
• Dried herbs are more concentrated in flavour than fresh herbs so you typically need 3 times less dried
herbs than fresh herbs, and vice versa. For example, if a recipe calls for 3 teaspoons of fresh basil, you can
use 1 teaspoon of dried basil.
28Preparation:
• Harvest or purchase the herbs you will taste. Make sure you have both dried and fresh versions of each.
• Label the bottoms of the bowls/plates with masking tape to identify the herbs in a way that the children
don’t know which is which.
• Place the herbs in their labelled dishes with a spoon.
Activity:
1. Ensure the children wash their hands thoroughly with soap and warm water before starting the activity.
2. Place all of the herbs in the center of the table. If your group is large, divide the group into smaller
groups of 4 or 5 children and ensure everyone has the same display of herbs.
3. Pass the herbs around and taste the dried and fresh herbs, one herb at a time. For example, taste dried
and fresh basil before moving on to the next herb.
4. What differences do you notice? Do dried or fresh herbs have more flavour?
5. Ask the groups to pair-up the dried and fresh herbs and guess which herbs are which.
6. Repeat the activity with as many different herbs as you would like!
Ad-on:
Do this activity blindfolded for an extra challenge, or for kids who are pretty familiar with the different
herbs.
Match Making Game – Garden Edition was originally produced by FoodShare Toronto and adapted for Ottawa Public Health’s
I Love to Garden Manual. To see the original, as well as other downloadable resources, please go to www.foodshare.net.
29Garden Poetry
Overview:
Children will taste several vegetables, and find the words to
describe how the look, feel and taste. They will then create a poem,
song or story using the descriptive words they come up with.
Background Information:
Adjectives, are words that describe, or add more information about
Materials:
things. When adjectives are taken out of a sentence, the sentence
• 1 vegetable or herb of will still make sense but it is less descriptive. For example, here is a
your choice (e.g. mint, sentence without adjectives: “I ate lettuce and carrots with my lunch,”
parsley, cilantro, sage, and here is a sentence with adjectives “I ate fresh green lettuce and
kale, romaine, swiss crunchy orange carrots with my lunch.”
chard, bok choy, carrots,
Encourage the group to brainstorm some adjectives with you. Ask
tomatoes) (2 pieces per
them to describe items they see around them. Words describing
child)
colour, shape, size and smell are all adjectives. You can play “I Spy
• Paring knife with my Little Eye” to encourage children to come up with adjectives,
• Cutting board or see the list of adjectives on the following page for inspiration.
• Activity sheet (1 per After tasting the foods and describing the look, texture and taste,
child) students will apply what they learned by creating a poem, song
• Pencils or story featuring the adjectives. These forms of storytelling allow
children to express their thoughts, feelings and creativity. In the
storytelling process, encourage children to reflect on where the food
comes from to add context to their story.
30Activity:
1. Taste testing:
a. Display the vegetables that you will taste in front of the group. Reflect as a group on where the food
comes from, and how it got here today. Is it from the garden, or the grocery store? How did it get
to your garden or to your grocery store? This discussion will help give some context for the writing
activity later on.
b. Prepare the vegetables you will taste by washing them under cold water. Make sure that each child
has two pieces of each, and that they do not to eat them right away.
c. Use the activity sheet and the adjectives on the following pages, to help the children describe what
they see, feel and taste by following the 3 steps below:
• First, ask the group to describe what they see.
• Second, ask them to place the second piece of the vegetable on their tongue and close their
mouth. Hold it here for 5 seconds before starting to crunch. What flavours do they taste?
• Third, ask them to describe what they feel with their hands and their mouth (use the
adjectives on the sheet to help them differentiate between texture and flavour).
• Repeat steps above with as many vegetables as you want. The more vegetables you taste,
the more adjectives the children will have to work with to write their poem, song or story.
2. Story telling:
a. Divide the group into groups of two. This will help generate more ideas, creativity and build
teamwork skills.
b. Give the groups 10-15 minutes to write a poem, song or story about the food they tried and their
adjectives describing the look, texture and flavour.
c. Invite the groups to present their creations to the rest of the class. This is a great way to practice
their public speaking skills!
Parent Engagement:
Invite the parents to the last 30 minutes of the session so that they can hear their kids present their poems,
songs and stories to the group.
31Look Feel Taste
What does the vegetable look like? What does the vegetable feel like? What does the vegetable taste like?
Colour Crunchy Earthy
Shiny Soft Tart
Dull Sticky Creamy
Dirty Gooey Bitter
Strange Crumbly Savory
Good Mushy Yummy
Round Spongy Fruity
Flat Dry Sour
Long Tangy
Thin Delicious
Square Sweet
Crooked SaltyMy vegetable is Look What does the vegetable look like? Feel What does the vegetable feel like? Taste What does the vegetable taste like?
Connect the Dots

                                   Overview:
                                     Children will explore their taste buds by sampling a few different
                                     vegetables or fruits (from the store or the garden). They will connect
                                     the dots on the “tasting flower” to express what they taste.

                                   Background Information:
Materials:                           The tongue is covered in taste buds. You can see them when you
   • Vegetables or fruits            look in the mirror and stick your tongue out; they are all those little
     of your choice. It may          bumps you can see on the top of your tongue. Taste buds are called
     be fun to compare the           papillae (puh-pill-ee) and kids have over 10,000 of them! Adults tend
     differences between             to have fewer taste buds and can have as little as 5,000 taste buds.
     store bought and                This may help explain why some foods taste stronger to kids than
     homegrown vegetables            they do to older adults.
     or fruit from your garden.      Your taste buds are constantly being replaced and have a life cycle
     For example:                    of only two weeks. This is why if you burn your tongue drinking
     • Tomatoes                      something hot, it will only hurt for a few days – your taste buds are
     • Cucumbers                     being replaced!
     • Lettuce                       The tongue can taste many different flavours. The five main flavours
                                     that we taste are bitter, salty, sweet, sour and umami. Contrary to
     • Canned vegetables
                                     popular belief, we do not have specific spots on our tongue to pick
       versus fresh
                                     up the different flavours; all of our taste buds can pick up all of the
       vegetables
                                     flavours!
   • Activity Sheet                  Today’s activity will require mindful eating. This means tasting foods
   • Different coloured              slowly and with intention. Mindful eating is a good way to connect
     pencils or markers              with the food that we eat and to appreciate our food. By eating
   • Rulers                          slowly, you will be able to identify the different flavours and textures
                                     of the foods you will try and to rate them on a scale of 1 to 5.

         Dig this!                 Conversation starters:
      Before cutting up the          Q: What does the food look like? Does it have a bright colour? Is it
     vegetables and fruits for       shiny or dull? Is it long, round, square or thin?
    tasting, show the children
     the produce in its whole        Q: When you let the food sit on your tongue, what does it taste
 form. This will help them spot      like? Is it sweet, sour, bitter, earthy?
   the vegetable or fruit in the     Q: What does the food feel like when you bite into it? Is it soft or
    grocery store. You can also      hard?
   show them how to prepare          Q: What does the food feel like when you start chewing it? Is it
  the vegetable or fruit and ask     chewy, crunchy or mushy? Is it juicy or dry?
them to help you wash and cut
 the produce, if time permits.

34
You can also read