Technika STBHDIS2010 Freeview HD Set Top Box - Model: STBHDIS2010
←
→
Page content transcription
If your browser does not render page correctly, please read the page content below
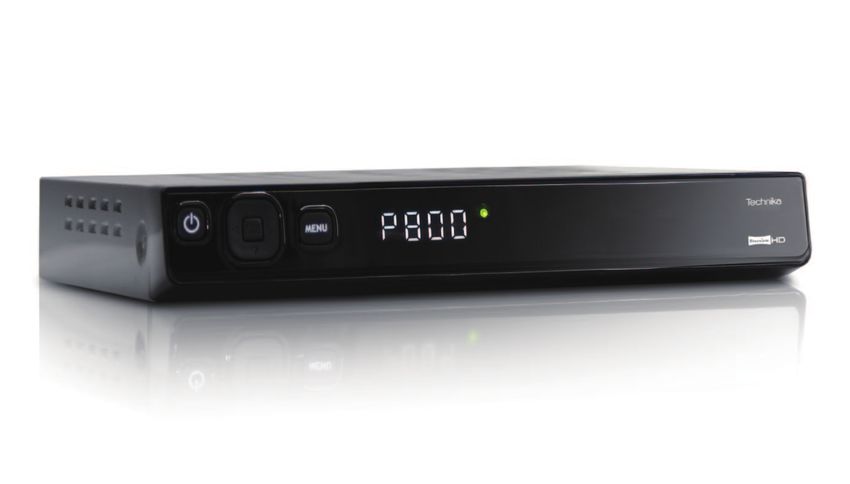
Model: STBHDIS2010

 Technika STBHDIS2010 Freeview HD Set Top Box
Contents

Connecting your box ................................ 4               Digital text .......................................... 19
Tuning your box ....................................... 5            Menu operations ................................ 19
Receiving Channel Zero ............................ 5                Channels menu .................................. 20
Safety is important ................................... 6            Channel organizer .............................. 20
In the box ................................................. 6       Channel groups .................................. 21
    Safety information................................ 7             Install menu ....................................... 22
    Keep these instructions ...................... 7                 Channel tune ...................................... 22
Important ..................................................8        Factory reset ...................................... 23
Electrical information ................................8             Version ............................................... 23
    Mains supply ....................................... 8           Ethernet............................................... 24
Parts identification .....................................9          Settings .............................................. 25
Front Panel.................................................9        Language ............................................ 25
Rear Panel..................................................9        TV ....................................................... 25
Remote control ......................................... 10          Time ................................................... 26
Installing batteries in the remote control .. 11                     Audio Description................................ 26
Using the remote control .......................... 11               Parental pin ........................................ 27
Connecting the TV aerial ........................... 12              Advanced............................................. 27
Connecting to the TV and other devices ... 12                        Updates .............................................. 28
    Coaxial cable ....................................... 12      Channel Zero ............................................ 29
    SCART cable ........................................ 12       Accessing Channel Zero services ............. 29
    HDMI cable .......................................... 13      Troubleshooting guide .............................. 30
Basic operating instructions ......................14             Additional information .............................. 31
    Switching on for the first time ............. 14              Specifications ........................................... 31
    Standby ............................................... 14    Warranty .................................................. 31
    Source selection .................................. 14
    Selecting a channel ..............................15
    Volume .................................................15
    Programme swap .................................15
    Information display ..............................15
    Subtitles................................................16
    Audio Description ................................ 16
    Channel list ...........................................16
    Channel favourites list ..........................17
    TV Guide ...............................................17
  Setting the timer .................................... 18
Quick start guide
Connecting your box
UHF Aerial
TV
HDMI Cable
Scart Input on TV
1. Connecting to your TV TV RF In
Connector
le
ab
TC
AR
SC
RF In
Connector Scart Output to TV
Internet USB
SPDIF R TV VCR
AC 110-240V~,
50/60Hz, 9W
L
RF IN RF OUT ETHERNET HDMI VIDEO
RF Out
Connector
Scart to VCR / Recorder
RF Cable SCART Cable
2. Connecting to a VCR
or DVD recorder VCR/ Recorder
Scart Input on VCR / Recorder
RF In Connector
VCR / Recorder
VCR/ Recorder
RF Out Connector
4Quick start guide
Tuning your box Receiving Channel Zero
The first time you switch your box on, it will Press the button to put the box into
automatically tune all available Freeview TV standby, Channel Zero interactive services
and radio channels. will now be downloaded to your box. See
Channel Zero on page 29.
1. Press the button to turn the box on. A
welcome menu appears after a short time
2. Press the OK button to enter the tuning Services will be fully loaded when the red
menu. light on the front of the box changes to
3. Once the automatic search has been amber. This should take a few hours.
completed, all channels are stored and the
first available channel is shown.
5Introduction
Safety is important
To ensure your safety and the safety of
others, please read the Safety information
BEFORE you operate this product.
Keep this information in a safe place for
future reference.
In the box
You will find the following:
1. Set Top Box
2. Remote Control
3. Quick Start Guide
4. User Guide
Note: If any of the items listed
are damaged or missing, please
contact the TESCO electrical
help line on 0845 456 6767.
6Safety information
IMPORTANT SAFETY INSTRUCTIONS -
WARNING: TO REDUCE THE
READ CAREFULLY BEFORE USE RISK OF FIRE OR ELECTRICAL
SHOCK, DO NOT EXPOSE THIS
Keep these instructions BOX TO WATER OR MOISTURE.
1. Do not use this box near water THE BOX MUST NOT BE
2. Clean only with a slightly damp cloth EXPOSED TO DRIPPING AND
3. Do not block any ventilation openings SPLASHING AND NO OBJECTS
4. Install in accordance with the supplied FILLED WITH LIQUIDS SHOULD
Quick Start Guide and this User Guide BE PLACED ON THE BOX
5. Do not install or operate near any heat
sources such as radiators, stoves, or other
apparatus that produce heat
6. Protect the power cord from being walked
on or pinched, particularly at plugs, and
WARNING: RISK OF ELECTRIC
the point where it exits from the box
SHOCK. THIS BOX CONTAINS
7. Do not allow the power cord to overhang
NO USER SERVICEABLE
the edge of a table
PARTS. DO NOT REMOVE ANY
8. Unplug this box from the mains and aerial
COVERS
during lightning storms or when unused
for long periods of time
9. To avoid interference, switch this box off
while operating other radio devices in the
immediate vicinity
10.Refer all servicing to qualified service
personnel. Servicing is required when the
box has been damaged in any way, such
as the power cord or plug being damaged,
liquid being spilled on or objects have
fallen onto the box, the box has been
exposed to rain or moisture, does not
operate normally, or has been dropped
11. No naked flame sources such as candles
should be placed on the box
7Safety information
Important Electrical information
This box generates, uses and can radiate Mains supply
radio frequency energy and, if not installed
and used in accordance with these The mains operating voltage is detailed on
instructions, may cause harmful interference the rear of the box
to radio communication.
The mains lead on this box may be supplied
However, this is no guarantee that with a moulded plug incorporating a fuse.
interference will not occur in a particular Should the fuse need to be replaced, an
installation. If the set top box does cause ASTA or BSI approved BS1362 fuse must
harmful interference to electrical devices, be used of the same rating. If the fuse cover
which can be determined by turning the is detachable never use the plug with the
box off and on, the user is encouraged to cover removed. If a replacement fuse cover
try to correct the interference by one of the is required, ensure it is of the same colour as
following measures: that visible on the pin face of the plug.
1. Re-orient or relocate the receiving aerial If there is no alternative to cutting off the
2. Increase the separation between the mains plug, dispose of it immediately, having
external device and the box first removed the fuse, to avoid a possible
3. Connect the external device into an outlet shock hazard by inadvertent connection to
on a circuit different from that to which the mains supply
the box is connected
4. Consult the dealer or an experienced radio/
TV technician for help
8Parts identification
Front Panel
1 2 5
3 4
1. STANDBY Power On/Standby.
2. Channel up / channel down
3. Volume up / volume down
4. OK Confirm selection in menu/on screen displays.
5. MENU Open the menu so that you can change the settings of your Digital Box
Rear Panel
4 7 8 12
SPDIF R TV VCR
USB AC 110-240V~,
L 50/60Hz, 9W
RF IN RF OUT ETHERNET HDMI VIDEO
1 2 3 5 6 9 10 11
1. Connect to RF in 7. Coaxial Digital audio
2. Connect to RF out 8. Right Audio Out
3. ETHERNET- for future interactivity 9. Left Audio Out
4. USB- for future interactivity 10. TV Scart: connect to TV
5. HDMI output (High Definition 11. VCR Scart: connect to a VCR or a DVD Recorder
Multimedia Interface) 12. Power lead
6. Composite video
9Parts identification
Remote Control
STANDBY Power on/standby MUTE Turn the volume on and off
NUMBER PAD Enter values and
select the channel directly by
entering its number
TV/R Switch between TV and radio TV/VCR Switch between TV and VCR
programmes programmes
AUDIO Change audio language BACK Switch between the current channel
and previous one; Goes back to the previous level of menu.
Channel Zero( ) Selects channel zero FAV ( ) Favourites channel
interactive services
EXIT Exit from current menu;invoke the service information
TEXT Display digital teletext where available menu when no menu active
VOL +/- Volume up / down P +/- Channel up / down
RED, GREEN, YELLOW and BLUE
For interactive functions
NAVIGATION
OK Confirm selection in menu/on
Navigate up/down/left/right
in menus/on screen displays screen display
MENU Open the menu so that you can
change the setting of your Digital Box INFO Display the information bar
WIDE Adjust the aspect ratio of SUB Show subtitles
the video output
GUIDE Selects the TV guide AD Switch on /off audio description when available
Play Pause
Stop
Skip Forward Fast Forward
Skip Back Fast Rewind
Reserved
For interactivity
10Remote control
Installing batteries in the remote WARNING! DO NOT LEAVE
control BATTERIES IN THE REMOTE
CONTROL FOR EXTENDED
1. Remove the battery compartment cover at
PERIODS AS THEY CAN LEAK
the rear of the remote control by
OR CORRODE CAUSING
depressing the retaining clip.
DAMAGE TO THE REMOTE
2. Install two AAA batteries as shown,
CONTROL. CHECK THEM
ensuring the polarity matches that shown
PERIODICALLY AND REPLACE
in the battery compartment.
THEM AS REQUIRED.
3. Replace the battery compartment cover.
WARNING! DO NOT MIX
BATTERY TYPES. WHEN
INSERTING BATTERIES,
REPLACE ALL BATTERIES AT
THE SAME TIME. DO NOT MIX
OLD AND NEW BATTERIES.
Using the remote control
WARNING! EXHAUSTED
To use the remote control, point it at the box BATTERIES MUST BE TREATED
and press the required buttons. WITH CARE AND DISPOSED OF
You must be within 6 metres and at an angle ACCORDING TO ANY SAFETY
of less than 30 degrees from the centre of OR RECYCLING REGULATIONS
the box. IN FORCE IN YOUR LOCAL
AREA. NEVER DISPOSE OF
BATTERIES INTO GENERAL
Note: Sunshine or other strong WASTE, OR FIRE.
light sources may interfere
with the signal from the remote
control. In this situation turn the
box away from the light source.
11Connecting the box
Connecting to the TV and other
WARNING! ENSURE THE devices
TV AND ALL ANCILLARY
EQUIPMEN ARE UNPLUGGED The Quick Start Guide shows the simplest
FROM THE MAINS BEFORE and most effective way to connect the box to
MAKING ANY CONNECTIONS! ancillary equipment. Alternate methods are
listed below.
Coaxial cable
Connecting the TV aerial
If your TV does not have a SCART socket,
Connect the TV aerial to the ‘RF IN’ socket
you can connect the box to the TV using
on the rear of the box with a 75 ohm co-axial
a coaxial cable. Connect the coaxial cable
plug. For best results use a high gain TV
between the ‘RF OUT’ socket on the rear of
aerial, preferably roof or loft mounted.
the box and the aerial socket on your TV.
Use a professionally installed external, roof
Using this connection method will also allow
mounted aerial wherever possible.
your TV to receive a signal when the box is
To improve the picture quality in a poor
switched off.
signal area, purchase and install a signal
amplifier.
SCART cable
You can connect the box to your TV and VCR
using a SCART cable. This connection uses
component video signals, i.e. the red, green
and blue (RGB) content of the video are sent
on separate signals.
To connect the box to your TV, connect the
SCART cable between the ‘TV’ SCART socket
on the rear of the box and the SCART socket
on your TV.
RF IN RF OUT
12Connecting the box
Note: Please consult your VCR
instruction guide for details on
how to connect your box to your
VCR.
HDMI cable
You can connect the box to your TV HDMI
socket with a HDMI cable. This connection
will output the uncompressed digital video
and audio signals.
To connect the box to your TV, connect the
HDMI cable between the HDMI socket on the
rear of the box and the HDMI socket on your
TV.
13Operating the box
Basic operating instructions
Note: You can re-tune your box
Switching on for the first time again at any time. See Channel
tune on page 22~23.
You need to perform automatic channel
tuning when you turn the box on for the first
time Standby
To perform automatic tuning: Press to put the box into standby,
Channel Zero’s services and content are
1. Make sure your box is connected to the loaded in standby. See Channel Zero on page
mains and that it is connected to the aerial 29.
2. Press to turn the box on. After a short
time, a welcome menu appears 2. Press The box automatically goes into standby after
the OK button to enter the tuning menu. 3 hours if you do not use the remote control.
You can adjust this time by changing the TV
settings. See TV on page 25.
Note: You can make the box in
passive standby pressing for 3
seconds.
However, this will cause Channel
Zero’s content to be lost and the
box will have to be re-loaded
according to the basic operating
instructions – see Accessing
3. Press OK to begin the automatic tune
Channel Zero services on page
4. The box searches for and displays all
29.
the available TV and radio channels
5. Once the automatic search has been
completed, you will be prompted to
Source selection
select ‘Yes’ to see the list of channels or
‘No’ to start watching TV.
Press the TV / R button to switch between TV
and radio channels.
14Operating the box
Selecting a channel Programme swap
Press the NUMERIC buttons to select the Press the BACK button to switch between the
channel you require. Do not use leading ‘0’s current channel and previous channel.
For example to select channel 17, press the 1
button, the 7 button and then the OK button.
Information display
Press the P+ or P- to scroll up or down Press the INFO button to show the
through the channels. Information display screen. Press it again to
clear the display.
Note: Pressing a leading ‘0’ causes
activation of the Channel Zero
interactive service feature. See
Channel Zero on page 29
Volume
Press the V+ or V- buttons to increase or
decrease the volume. A volume indicator
appears at the bottom of the screen.
The Information display provides information
Mute on the following:
• Channel name and number.
Press the MUTE button to mute the sound.
• Viewing progress bar.
The speaker symbol on the volume indicator
• Programme description.
is crossed out .Press the MUTE button again
• Date and time.
or the V+ or V- buttons to restore the sound.
• Colour icons show which groups a
The speaker symbol on the volume indicator
channel belongs to.
will no longer be crossed out.
• A heart icon is displayed if the channel
15Operating the box
has been set as a favourite. Audio Description
• A lock icon is displayed if parental lock
has been set. 1. To turn Audio Description on, press the
• A stripe icon is displayed if the channel AD button. An Audio Description ‘ON’
has subtitles. indicator is shown at the top of the screen
• A ‘TXT’ icon is displayed if a digital text with language.
service is available. 2. To turn Audio Description off, press the
• An ‘AD’ icon is displayed if the channel AD button again. An Audio Description
has audio description. ‘OFF’ indicator is shown at the top of the
• A ‘HD’ icon is displayed if the channel screen.
is a high definition program.
Channel list
• A ‘SD’ icon is displayed if the channel
is a standard definition program.
The Channel list provides a complete listing
of all the available TV and Radio channels.
1. Press the ◄or ►buttons to display
information for the next programme on
1. Press the OK button to display the Channel
the same channel.
List.
2. Press the ▲ or ▼ buttons to see
information for the previous or next
channel without changing channel
3. Press the INFO button again to clear the
Information display screen .
Subtitles
1. To turn subtitles on, press the SUB button.
A subtitles ‘ON’ indicator is shown at the
top of the screen with language.
2. To turn subtitles off, press the SUB button
again. A subtitles ‘OFF’ indicator is shown 2. Press the ▲ or ▼ buttons to select a
at the top of the screen. channel. Also, you can press the P+ and
P- buttons to scroll up and down a page of
Note: See Language on page 25
channels at a time.
to change the subtitle language
3. Press the OK button to change the
within the Settings Menu.
selected channel in the Channel list.
16Operating the box
4. Press the BACK button to exit the Channel
list without changing channel.
If you have created any channel groups,
press the corresponding colour button to
display only the channels that belong to that
group.
2. Press the ▲ or ▼ buttons to select a
favourite channel. You can also press the
P+ and P- buttons to scroll up and down a
page of channels at a time.
3. Press the OK button to change the
selected channel.
4. Alternatively, you can press the BACK
Press the 0 button to display all channels. button to exit the Channel favourites list
without changing the channel.
Note: Refer to Channel groups on
page 21 for how to create groups TV Guide
of channels.
Press the GUIDE button to display a guide of
channel and programme information for the
next 7 days in the form of a list. Typically the
Channel favourites list GUIDE will provide
The Channel favourites list displays just your • Current time and date
favourite channels. • Current channel number and name
1. Press the FAV button to display the • Preview pane of the current channel
Channel favourites list. • Broadcast schedule of programmes for the
next 7 days, 5 channels at a time
17Operating the box
1. To display the TV Guide, press the GUIDE
button. 3. Press the INFO button again to clear the
2. Press the ▲ /▼ / ◄ and ► buttons to description.
navigate through the channels and 4. Press the BACK button to exit the TV
programmes. You can also press the P+ Guide.
and P- buttons to scroll up and down a
page of channels at a time.
3. Press the GREEN button to view the
programme schedule for the next day.
4. Press the RED button to view the Setting the timer
programme schedule for the previous day.
You can set your box within TV Guide to
wake up and tune to a programme. To do
With a programme selected, you can view this:
information, such as the start and finish 1. Press the ▲ /▼ / ◄ and ►buttons to
time, the programme name and a brief highlight the programme.
description. 2. Press the YELLOW button. The highlighted
programme changes colour to indicate
1. Press the ▲ /▼ / ◄ and ► buttons to that the programme is scheduled to be
highlight the programme. played. (You can clear the timer recording
2. Press the INFO button once. The full by pressing the YELLOW button again).
programme description is shown in the
upper half of the screen.
18Operating the box
1. Press the TEXT button to display Digital
text.
2. Press the ▲ and ▼ buttons to select a
topic such as weather or news.
3. Press the OK button to select a topic.
4. Press the ▲ /▼ / ◄ and ► buttons to
navigate around the topic pages.
5. Press the RED, GREEN, YELLOW and
BLUE buttons to use the Digital Text
shortcuts.
6. Press the TEXT button to exit Digital text.
3. Press to put the box into standby.
4. The box will wake up and tune to the
programme and return to standby when it
is finished.
Menu operations
Note: Please consult your VCR The on-screen menus allows you to adjust
instruction guide for details on and control the box.
how to connect your box to your
VCR, and how to programme it to 1. Press the MENU button to access the
record from the box at the right on screen menus.
time. 2. Press the ▲ and ▼ buttons to view the
different menus.
Digital text
3. Press the ►or OK buttons to access the
menu options.
Digital text is an information service that
4. Press the ▲ and ▼buttons to view the
displays text on your TV screen.
menu options.
5. Press the OK button to access a menu
You can view pages of information on a
option, Press the BACK or ◄ button to
variety of topics which are listed in the Digital
exit the menu options.
text menu.
6. Press the BACK button to exit an
on screen menu.
Note: Digital text may not be
available for all channels
19Operating the box
Channels menu 1. Press the MENU button, then press the
▲ /▼ / ◄ and ►buttons to navigate to
The Channels sub-menu allows you to the ‘Organise’ label under the ‘Channels’
manage your channels. You can create section in Menu.
groups, choose favourites, and much more. 2. Press the ▲ and ▼ buttons to select a
channel.
Channel organizer 3. Press the 1 button to mark the channel as
a favourite. A heart icon appears in the
The Channel organizer sub-menu allows you ‘Fav’ column. The channel can be
to manage your channels. unmarked by pressing the 1 button again.
4. Press the 2 button to lock a channel. A
• mark a channel as a favourite lock icon appears in the ‘lock’ column next
• set a parental lock to the channel name. Once a channel
• skip a channel when the P+ and P- buttons is locked, the channel can only be viewed
are pressed when watching TV by entering the password. For more
• delete a channel information on passwords, see Parental
Pin on page 27.
5. Press the 3 button to skip a channel. A tick
icon appears in the ‘skip’ column next to
the channel name. Once you choose to
skip a channel, you can no longer select it
using the P+ and P- buttons. The ‘skip’
feature can be cleared by pressing the 3
button again.
6. Press the 4 button to choose a channel to
delete. A cross icon appears in the
‘delete’ column next to the channel name.
Press the OK button to delete the
channels marked for deletion.Press the
BACK button to exit Channel organiser
Note: Any changes made in this without deleting the channels.
menu will affect the Channel list, 7. Press the 5 button to rename a channel. A
Favourite list and TV Guide keypad screen (similar to a mobile phone)
is displayed.
20Operating the box
common theme (e.g. ‘news’, ‘children’,
Note: You must re-tune in menu to ‘movies’) or by interest to a user (e.g. ‘Sue’,
restore deleted channels. See ‘Michelle’, ‘Dad’).
Channel tune on page 22.
1. Press the MENU button, then press the
▲ /▼ / ◄ and ►buttons to navigate
to the ‘Groups’ label under the ‘Channels’
section in Menu.
8. Press the◄ and ►buttons to move the
cursor and the NUMERIC buttons, one or
more times to enter a character.
9. You can delete the character under the
cursor by pressing the RED button.
2. Press the OK button.
10. Press the OK button to accept the new
3. Press the press the▲ / ▼ buttons to
channel name and return to the previous
navigate to a channel of interest.
menu.
Alternatively, press the BACK button if you
want to exit to the previous menu without
changing the channel name .
Channel groups
You can create groups of channels by a
21Operating the box
4. Press a COLOURED button to add or more times to enter a character.
remove that channel from the group of the 8. You can delete the character under the
same colour. cursor by pressing the RED button.
5. You can give each group a name by 9. Press the OK button to accept the new
pressing the ▲ /▼ / ◄ and ► buttons to group name and return to the previous
select the required group. menu. Alternatively, press the BACK
button, if you want to exit to the previous
menu without changing the group’s name.
Install menu
The Install sub-menu allows you to tune or
reset your box.
Channel tune
You can re-tune your box:
6. Press the 0 button to add or rename a
group. A keypad screen (similar to a
1. Press the MENU button.
mobile phone) is displayed.
2. Press the▲ /▼ / ◄ and ►buttons to
select the ‘Tune’ label under the ‘Install’
section in the Menu.
7. Press the ◄ and ► buttons to move the
cursor and the NUMERIC buttons, one or
22Operating the box
3. Press the OK button to begin. press ►and then OK to confirm.
4. You are asked to confirm whether you Once the "OK" button press, a password
want to proceed. Press the OK or BACK require dialog display, enter the correct
button if you do not want to re-tune, password to perform the factory reset (default
otherwise press ►and then OK to password is 0000).
confirm.
CAUTION: RETURNING THE
5. The box searches for and displays all the
BOX TO ITS FACTORY DEFAULT
available TV and radio channels.
CLEARS ALL SETTINGS.
6. Once the automatic search has been
completed, all channels are stored and the
THE PIN IS RESTORED TO THE
first available channel is shown.
DEFAULT ‘0000’ VALUE
Note: You should re-tune your box
if you move home. Note: To prevent accidental
erasure,factory reset does not
reset the Channel Zero settings in
your box.
Note: You should re-tune your box
periodically because new channels To perform a full reset that includes
may become available. also the Channel Zero settings,
press the following sequence of
buttons: MENU, 2, 7, 1, 8, 2, 8, 4,
Factory reset 5, 9, 0.
You can restore the default settings for your The box will go into standby
box to the original factory values: automatically
1. Press the MENU button.
2. Press the▼ button to select the ‘Install’ Version
option.
3. Press the ◄ and ►buttons to select the The Version menu shows hardware and
‘Factory Reset’ option. software information.
4. Press OK to begin.
5. You are asked to confirm that you want to To see the version number:
proceed. Press the OK or BACK button if 1. Press the MENU button, then press the
you do not want to re-tune, otherwise ▲ /▼ / ◄ and ► buttons to navigate to
23Operating the box
the ‘Version’ label under the ‘Install’ section
in Menu.
2. The version number is displayed beneath
the ‘Version’ label.
When selecting the AUTO function and an
Ethernet cable is connected then, the circle
marked around the icon will be in green
colour. And the Ethernet settings will be
configured automatically as shown in the
Ethernet figure below.
"Ethernet" allows you to set IP address
manually or automatically.
When the user select the MANUAL and an
Ethernet cable is connected then, the circle
When selecting the AUTO function and an
mark around the icon will be in green colour
Ethernet cable is not connected then, the
due to successful link up. The ethernet
circle marked around the icon will be in red
settings need to be entered manually as in
colour. And the default value of the ethernet
the snapshot.
settings will be 0 as shown in the snapshot.
24Operating the box
Language
• ‘Preferred audio’ allows you to set your
first choice for audio.
• ‘Alternative audio’ allows you to set your
second choice for audio.
• ‘Subtitles’ allows you to set the language
in which subtitles are displayed (if
subtitles are enabled, see Subtitles on
page 16).
• ‘MHEG Language’ allows you to set the
language in which digital text is displayed
Once correct settings have been entered the (see digital text on page 19).
settings need to be saved. Please select the • ‘Hearing impaired’ allows you to activate
OK key to save the new settings as shown in special subtitles for the hearing impaired
the snapshot. (if they are available).
TV
Settings
You can customize the operation of your
box according to your needs and the type of
equipment that your box is connected to.
1. Press the MENU button, then press the
▲ /▼ / ◄ and ► buttons to navigate to
the relevant type of setting in the
‘Settings’ section in Menu.
2. Press the OK button.
3. Press the ◄ or ► buttons to obtain the • ‘Brightness’ allows you to adjust the
correct setting value. display brightness settings.
4. Press the OK button to save the settings • ‘Contrast’ allows you to adjust the
and return to the previous menu. display contrast settings.
25Operating the box
• ‘Aspect ratio’ allows you to choose from Audio Description
4:3, 4:3 pan scan, 4:3 letter box and 16:9.
• ‘Resolution’ allows you to choose the
HDMI video output format.
• ‘Video output’ allows you to choose the
output signal type according to what your
TV can display.
• ‘Antenna power’ allows you to turn the
aerial power on or off.
• ‘Auto standby’ allows you to set the
period after which the box will go into
standby to reduce power consumption.
Time Audio Description allows you to adjust audio
description language, audio type, volume.
• ‘Time mode’ allows you to control whether
the time and date are set manually
or automatically.
Note: It is strongly recommended
that you leave ‘Time mode’ in
‘Auto’.
• ‘Date’ allows you to set the date when in ‘Preferred language’ allows you to set audio
manual time mode. description preferred language.
• ‘Time’ allows you to set the time of day ‘Audio type’ Allow you select the audio mode
when in manual time mode. as stereo/left/right for audio description.
• ‘Local time’ allows you to set the time ‘Volume’ Allow to set the volume level of
zone when in manual time mode. Audio Description from 0 to 100%. The
default value is 80%.
26Operating the box
Parental PIN 4. Press the NUMERIC buttons to enter the
new password.
The Parental pin menu allows you to set a 5. Confirm your new password by re-entering
pin in order to protect locked channels. again using the NUMERIC buttons.
To set a password and apply a parental
rating.
1. Press the MENU button, then press the
▲ /▼ / ◄ and ► buttons to navigate to
Advanced
the ‘Parental PIN’ label under the ‘Settings’
section in Menu.
The advanced menu allows you to adjust
the HDCP switch, digital audio output
mode, SPDIF Synch delay.
2. Press OK.
3. Press the NUMERIC buttons to enter the
old password. If you have not changed the
password before, the default is ‘0000’.
‘HDCP’ HDCP means High Bandwidth Digital
Content Protection.It's one of the digital
content protection mechanism. HDCP On
means the HDMI output is only visible to
HDCP supported TV's. HDCP off means the
HDMI output can be seen in any TV's.
27Operating the box
‘Digital Audio Output’ This option is used to
select compressed/uncompressed mode for
Digital Audio output.
Digital Audio output mode compressed
means compressed data is routed through
the Digital Audio output.
Digital Audio output mode uncompressed
means PCM data is routed through the
Digital Audio output
‘SPDIF SYNC delay’ SPDIF SYNC delay is
the user preferred delay in the SPDIF audio Auto: The box will automatically download
output to sync between the video and the and install any updates received.
SPDIF output audio.
Updates
The Settings menu includes an Updates sub-
menu. This controls how the box handles
automatic software updates which are
received via the aerial. These updates are
only downloaded when the box is in the
normal standby mode.
Manual: When you turn the box on for the
next time, an update notice will be shown on
screen. You can then choose to install the
update by pressing the OK button.
Press► and then the OK button to cancel the
update. The update will also be cancelled if
no keys are pressed within 5 minutes.
28Operating the box
The light on the front of your box changes
from red to amber when Channel Zero is
ready.
If you accidentally disconnect the box from
the mains, just plug it back in and leave it in
standby and it will reload automatically.
Off: The Receiver will ignore the updates. Channel Zero is broadcast periodically to
keep your box completely up to date.
Channel Zero
Channel Zero is an interactive system that
allows your box to receive enhanced services
such as news, weather, TV magazines and Accessing Channel Zero services
games without changing channels.
Channel Zero downloads and stores the latest Press either the Channel Zero button or
services when your box is in standby. the 0 button on your handset to access the
There are no services in the box when it is Channel Zero services. See Remote control
unpacked for the first time. on page 10.
Press to put your box in standby (which
reduces power consumption) overnight or
when you are not using it. The light on the
front of the box will change to red.
The box will load the Channel Zero services
ready for you to use within a few hours
29Troubleshooting guide
Troubleshooting
Check that the box is correctly plugged in
No picture, no sound Check the television is connected to a suitable power source
Check the electrical supply is turned on
Ensure that the box and TV are powered on
Check that the cables are fitted securely
No picture
Ensure the aerial is connected
Press the TV / RADIO button to change the channel type
Press the MUTE button and check if Mute mode is set
No sound Switch to another channel and see if the same problem occurs
Press V+ button to see if the problem can be solved
Re-tune your box
No picture on some channels Check that your aerial is correctly installed
Ensure the selected channel is broadcasting
Leave your box in standby when it is not in use: see Standby on page
14
Cannot receive Channel Zero
The light changes from red to amber when Channel Zero is ready
services
You may not be able to receive a signal in your area – see www.ch-
zero.tv for more details
No colour on some channels Check if the same problem exists on other channels
(black and white) Ensure the correct picture settings are selected
Check that the aerial is correctly connected
Spots on some or all channels
Check that the aerial is in good condition
Disconnect the box from the power supply, wait 10 seconds,
Controls not working
reconnect the box to the power supply
The remote control is not aimed correctly at the box
The front panel of the box is obstructed
No response to remote control
The remote control batteries are inserted incorrectly
The remote control batteries are exhausted
30Additional Information
Specifications
Specifications of the box that you have just purchased may vary
from the information in this table due to technical innovations.
Power requirements AC 110-240V~, 50/60Hz
Power consumption On: 9W
Temperature Working: 0° C~40° C
Storage: -30° C~80° C
Humidity Working: 20%~80%
Storage: 5%~90%
Warranty
Your TESCO appliance is covered by a warranty for 12 months from the date of
purchase. If a fault develops during this period, please contact the TESCO electrical help
line on 0845 456 6767. Please have your original purchase receipt with you when you
call. This warranty in no way affects your consumer rights.
UK: Waste electrical products/batteries should not be disposed of with
household waste. Separate disposal facilities exist, for your nearest
facilities. See www.recycle-more.co.uk or in-store for details.
ROI: Produced after 13th August 2005. Waste electrical products/
batteries should not be disposed of with household waste. Please
recycle where facilities exist. Check with your Local Authority or
retailer for recycling advice.
31Tesco Stores Ltd,
Delamare Road, Cheshunt, Herts, EN8 9SL
Technika Helpline: 0845 456 6767 (Calls cost up to 4p per
minute from a BT landline, other providers may vary)You can also read