USER MANUAL - Bimas Bikes

Page created by Gregory Daniel
 
CONTINUE READING
USER MANUAL - Bimas Bikes
USER MANUAL
                                                                            BIMAS BIKES

    ECC-Bimas N.V. • Vredeweg 46 Hal-5 • 1505 HH Zaandam
Phone number 075 711 3043 • service@bimasbikes.com • www.bimasbikes.com     LOVE AT FIRST RIDE
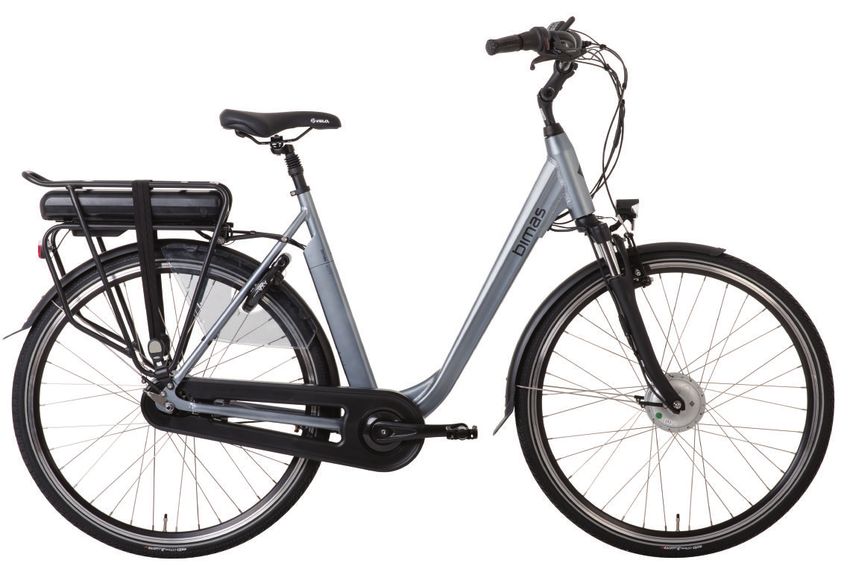
USER MANUAL - Bimas Bikes
USER MANUAL
                                                                                                                           BIMAS BIKES

                                                                                         CONTENTS
                                                                                                                                  E-bikes
                                                                                         Preface                              4   Main components                              14
                                                                                         1. Safety                            5   15. General E-bike information               15
                                                                                         1.1 Bike                             5   15.1 Battery and range                       15
                                                                                         1.2 Helmet and clothes               5   15.2 Disconnect the battery                  15
                                                                                                                                  15.3 Charging the battery                    15
                                                                                         1.3 Weather                          5
                                                                                                                                  15.4 Additional battery information          16
                                                                                         1.4 Traffic                            5
                                                                                                                                  15.5 Disposal                                16
                                                                                         1.5 Lights                           5   15.6 Technical data                          16
                                                                                         2. Key points                        6   16. Pedal assistance                         17
                                                                                         3. Accessories and equipment         6   16.1 Pedal assistance                        17
                                                                                         3.1 General                          6   16.2 Switching pedal assistance on and off 17
                                                                                         3.2 Children seats                   6   16.3 Additional information pedal assistance 18
                                                                                         3.3 Bicycle carrier                  7   17. Warranty                                 19
                                                                                         3.4 Trailers                         7       Contact details                          19
                                                                                         4. Maintenance                       7

                                                                                         5.    Saddle                         8
                                                                                         5.1   Desired seat height            8
                                                                                         5.2   Saddle adjustments             8                                                     3
                                                                                         6.    Handlebar                      9
                                                                                         6.1   Desired steering settings      9
                                                                                         6.2   Set steering wheel             9
                                                                                         7.    Lighting                       9
                                                                                         7.1   Turning light on and off        9
                                                                                         8.    Brakes                        10
                                                                                         8.1   Brake adjustments             10
                                                                                               (Shimano V-Brakes)
                                                                                         8.2   Coarse adjustment brakes      10
                                                                                         8.3   Fine adjustment brakes        11
                                                                                         8.4   Replacing brake pads          11
                                                                                         9.    Speeds                        11
                                                                                         10.   Lock                          12
DISCLAIMER                                                                               11.   Rim                           12
                                                                                         12.   Suspension fork               12
This manual is subject to change due to new developments and therefore no rights         13.   Pedals                        12
can be derived from the data and descriptions in this manual. The content is therefore   14.   Torques                       13
not binding. The original is drawn up in Dutch and can be found on www..bimasbikes.com         Warning 1                     13
© 2020 BimasBikes                                                                              Warning 2                     13
USER MANUAL                                                                         USER MANUAL
                                      BIMAS BIKES                                                                         BIMAS BIKES

                                                                                                                                        Maximum permissible load total bicycle
                                                                                         1. SAFETY                                      + rider + luggage:
    PREFACE
                                                                                                                                        E-bikes: 150 kg
                                                                                         1.1 Bike                                       Normal bicycles: 120 kg
    This manual contains information for the safe use and maintenance of your bicycle.   Only use a bicycle that is suitable for you
    Only the most important parts of the bicycle and the most common adjustment          in terms of dimensions and adjustments.
    options are described. The latest version of this manual can be found                Also use it only for the actual purpose,       1.2 Helmet and clothes
    at www.bimasbikes.com.                                                               namely moving the rider in traffic.              Always wear an approved helmet (DIN-EN
                                                                                         The Bimas Bikes are only intended for          1078) while cycling and striking,
    Your bike may also include manuals for specific parts with additional information.    use on paved roads, gravel or sandy r          tight-fitting clothing that cannot get
    All manuals can also be found at www.bimasbikes.com.                                 oads in good condition and cycle paths.        between rotating parts. Wear well-fitting
                                                                                         The tires always remain in contact with        shoes that ensure sufficient grip with the
                                                                                         the ground. Some of the bikes are equipped     pedals in all weather conditions.
                                                                                         with suspension but only to increase the       Clothing/ shoes that get soiled while
                                                                                         riding comfort and not to improve              cycling cannot be claimed from
                                                                                         performance in unpaved terrain.                Bimas BIkes.
                                                                                         Keep in mind that steering and braking
                                                                                         behavior can affect each other contradictory.   1.3 Weather
                                                                                         Think of braking too hard in a corner where    Always consider the weather conditions
                                                                                         the bicycle can slip.                          under which you are going on the road.
                                                                                                                                        Adapt your speed to these weather
                                                                                         Consult your dealer for advice on              conditions as your braking distance
4                                                                                        determining the correct size and               increases in rain and snow and grip with       5
                                                                                         adjustments. Do not expose the bicycle to      the road surface decreases. in extreme
                                                                                         heavy loads and improper use. After an         cases it is better to take your bike by
                                                                                         accident or fall, have your bicycle checked    the hand.
                                                                                         by a specialist for damage and replace
                                                                                         the damaged parts if necessary. Always         1.4 Traffic
                                                                                         consult the manual of the electrical system    Every user is legally obliged to keep his
                                                                                         for an E-Bike. This is supplied with your      bicycle in a safe and roadworthy condition
                                                                                         bicycle and can also be found on               for traffic. Make sure you know these legal
                                                                                         our website.                                   obligations so that you are not confronted
                                                                                                                                        with unwanted situations. Also make sure
                                                                                         - The left brake lever operates the front      you know and follow the local and national
                                                                                         brake, the right brake lever operates the      traffic rules.
                                                                                         rear brake.
                                                                                         - Never slide the seat post beyond the         1.5 Lights
                                                                                         mark on the post out of the frame.             The Bimas Bikes bicycles meet the legal
                                                                                         - Never slide the stem beyond the mark         obligations and are suitable for public
                                                                                         on the stem from the fork.                     roads. However, there are bicycles that are
                                                                                         - Always respect the specified tightening       not allowed on public roads in fog, twilight
                                                                                         torques on the components (                    or dark conditions because the necessary
                                                                                         see point 14 page 13).                         lighting is missing. For these bikes, get
                                                                                                                                        light units for use under the
                                                                                                                                        aforementioned conditions.
USER MANUAL                                                                                       USER MANUAL
                                     BIMAS BIKES                                                                                       B I M AS B I K E S

    2. KEY POINTS
                                                                                                    3.3 Bicycle carrier                                - New brake pads for disc brakes
    Check:                                                                                          - If possible, remove all loose parts such as        must have a pre-usage test-brake
    - Wheel mounting. Make sure that any         - Is not mounted on a carbon fork.                   pumps, bags and water bottles before               in a safe place.
      quick-releases are fully closed.           - Including the content does not exceed              placing the bicycle on the carrier.              - Update paint damage immediately.
      This requires some strength. If the          5 kg in the case of handlebar bags or baskets.   - If possible, also remove the battery and         - Lubricate your chain regularly to
      clamping force is too low, this can be                                                          display from your bicycle in case of an            prevent wear and corrosion. Also
      increased by turning the nut clockwise3.2 Children seats                                        E-bike.                                            check your chain tension and have it
      when open and then closing the quick  Prevent damage and accidents and have                   - Prevent damage to your bicycle by                  tensioned by your dealer if necessary.
      release again.                        your dealer advise you on the choice of child             incorrectly or overtightening the mounting         Tensioning is necessary if the chain
    - Handlebar/ pen mounting               seats that you place/ mount on your bicycle.              construction.                                      can be moved up and down more
    - Tire pressure: never exceed the       Take the following points into account:                 - Make sure that the lighting of the carrier         than 10 mm from the tensioned position.
      maximum allowable pressure indicated  - Only buy an EN 14344 approved child seat.               works properly and that the lighting and         - Have a wheel wobble repaired
      on the tire. Bimas Bikes advises you to
                                            - Cycling with a child affects the riding behavior         the number plate are clearly visible.              directly by the dealer.
      use a bicycle pump equipped with a      of the bicycle and extends your braking               - Check your bike for damage upon arrival.
      tire pressure gauge when inflating       distance. Preferably place the child seat on
      your tire.                              the back of the bicycle.                              3.4 Trailers
    - Tire profile.                          - Prevent limbs from getting between                    - The use of trailers and so-called trailer
    - Braking effect.                          moving parts.                                           bicycles is not permitted..
    - Lighting.                             - Prevent fingers from getting between
    - Gears.                                  the suspension parts of the saddle.                   4. MAINTENANCE
6   - Saddle height.                        - A child up to a maximum of 20 kg can be                                                                                                          7
    - Operation of front suspension.          transported in a child seat. However,                 Have your bicycle serviced by your dealer.
    - Function and confirmation pedals.        never exceed the weight indicated on the              It is sensible to have the first turn take place within
    - Fold your kickstand before you drive off.luggage rack. This can lead to breakage of            3 months and the second after 1 year.
                                              the luggage carrier and serious accidents.            Remember that regular checks can prevent a lot
                                            - The child must wear a helmet and seat                 of unnecessary damage in the long term and
    3. ACCESSORIES AND EQUIPMENT              belt fastened.                                        therefore a lot of unnecessary costs.Never deviate
                                            - Always take the child out of the child seat           from the original specification and settings
    3.1 General                               first and only then place the bicycle on               during maintenance.
    Prevent damage and accidents and have the stand.
    your dealer advise you on the choice of - Never mount more than one child seat on               When servicing yourself, consider the following points:
    accessories that you mount / mount on     your bicycle.                                         - Do not use a pressure washer or car
    your bicycle. Please consider the       - The driver must be at least 16 years old to             wash to clean your bicycle.
    following points so that the accessory:   transport a child.                                    - Do not allow electrical components to
    - Does not cover lighting.                                                                        come into contact with water.
    - Does not pinch cables.                                                                        - Prevent oil and grease from coming into contact
    - Does not damage handlebar and frame.                                                            with rims, brakes and brake discs to ensure good
    - Does not affect the steering behavior.                                                           braking performance.
    - Is not mounted on an aluminum                                                                 - Brake pads wear out, so adjust the fine adjustment
      handlebar.                                                                                      from time to time.
USER MANUAL                                                                                 USER MANUAL
                                       BIMAS BIKES                                                                                BIMAS BIKES

    5. SADDLE                                                                                    6. HANDLEBAR
                                                                                                                                               6.2 Adjusting the handlebars
    5.1 Desired seat height                                                                      6.1 Desired steering settings                 adjusting the height (2.1A), the depth (2.1B)
    Seat height refers to the distance         You can tilt the saddle and adjust it forwards    guideline for determining the distance        and the angle of inclination (2.1C) you can
    between the seat of the saddle and         and backwards (1.1). To do this, loosen the       between the handlebars and the saddle,        adjust the handlebars to the desired
    the pedal in the lower position.           nut underneath the saddle with a wrench (1.2).    you should be able to hit the handlebars      position.
    The seat height is correctly adjusted      Do not forget to tighten this nut again as soon   with your fist while resting your elbow on
    when the knee is slightly bent while       as the correct position is reached.               the tip of the saddle. This rule of thumb s   To adjust the height of the handlebars,
    you have your foot on the pedal                                                              hould be seen as a guideline, because the     first remove the plastic cover cap.
    (in the down position). Do not hesitate                                                      final setting is above all very personal.      Then loosen the expander bolt with a
    to ask your dealer for advice!                                                               Please note that too great a distance         hex key (2.2). After you have set the
                                                                                                 between saddle and handlebar is often         correct height, tighten the bolt again.
    !PAY ATTENTION! If you can place                                                             the cause of neck, back and shoulder          Then check whether your steering
    your feet flat on the floor,                                                                   complaints. Bimas Bikes advises you to        wheel is properly secured
    your saddle is too low                                                                       adjust the handlebars and saddle to your
                                                                                                 wishes together with your dealer.
    5.2 Saddle adjustments                                                                                                                     7. LIGHTING
    The height of the saddle can be adjusted
    by loosening the hex screw of the seat                                                                                                     7.1. (De-) Activating light
    post clamp with a hex key.                                                                                                                 Bicycles with hub dynamo:
                                                                                                                                               Via the on / off button on the light unit
8                                                                                                                                              you simultaneously switch on the front          9
                                                                                                                                               and rear lighting.
                                                                                                                                               Bicycles with battery lighting:
                                                                                                                                               Light units at the front and rear must be
                                                                                                                                               switched on separately via the
                                                                                                                                               on / off button.
                                                                                                                                               Bicycles with electrical system:
                                                                                                                                               For switching on the lighting, consult
                                                                                                                                               the manual for the relevant system. S
                                                                                                                                               ometimes these bikes have one battery
                                                                                                                                               light unit on the front that must be s
                                                                                                                                               witched on separately via the
                                                                                                                                               on / off button.

                                                                                                                                               !PAY ATTENTION! When you cycle
                                                                                                                                               without the battery, you can not use
                                                                                                                                               some or all of the lights on some bicycles.
                                                                                                                                               .
USER MANUAL                                                                                  USER MANUAL
                                       BIMAS BIKES                                                                                  BIMAS BIKES

     8. BRAKES
                                                8.2 Rough brake settings                          8.3 Refined brake settings
     8.1 Brake adjustments (V-Brakes)           If the adjustment of your brakes shows a          With the cable adjustment screw
     The brakes must be adjusted so that        large deviation from the desired adjustment,      (attached where the brake cable
     when you squeeze the lever a quarter       you will first have to change the rough             leaves the lever), you can fine tune t
     to half (3.1) the entire braking surface   adjustment of the brakes. You can adjust the      he brakes (eg roller brakes). By loosening
     of the brake pads is pressed against       rough adjustment of your brakes by loosening      the cable tilting screw, release the cable
     the rim 3.2).                              the cable clamp bolt with a hex key (3.3).        a little and tighten the cable
                                                You can then squeeze the brake arms to            outwards (3.5).
                                                your desired distance with your thumb and
                                                index finger (3.4). Please secure that the inner
                                                braking cable is underneath the clam bolt.
                                                Once correct, tighten the clamp bolt.

10                                                                                                                                                                                            11
                                                                                                                                               9. SPEEDS

                                                                                                                                               Your bicycle may have gears. You can
                                                                                                                                               operate the gears by turning the right
                                                                                                                                               handle (4.1). With hub gears you can shift
                                                                                                                                               during standstill. With derailleur systems
                                                                                                                                               this is only possible when the bicycle drive
                                                                                                                                               is active. Do not shift more than one gear
                                                                                                  8.4 Replacing brake pads
                                                                                                                                               at a time.
                                                                                                  The brake pads must be replaced when
                                                                                                  the notches are not visible anymore (3.6).
                                                                                                  To be able to replace the brake pads,
                                                                                                  you must first screw in the cable
                                                                                                  adjustment screw so that the brake
                                                                                                  cable relaxes (3.5). Then press the
                                                                                                  brake arms together with your thumb
                                                                                                  and index finger (3.4) and disconnect
                                                                                                  the brake cable (3.7). You have enough
                                                                                                  space to loosen the mounting bolts
                                                                                                  of the brake pads (3.8).
USER MANUAL                                      USER MANUAL
                                        BIMAS BIKES                                       B I M AS B I K E S
     10. LOCK
                                                       14. TORQUES
     Your bicycle is equipped with a ring lock.
     The ring lock can be closed by turning            Part                                         Torque (Nm)
     the key clockwise and then pushing                Satori EZ-3-A-head                           9-10
     the lock bracket down. Then pull the              Stem expander bolt (fig 5.2)                  20
     key out of the lock when you have                 Seat post clamp bolt                         5-7
     reached the lowest position with the bracket.     Pedals                                       30
                                                       Brake pads                                   5-6
     11. RIM                                           Wheel nut front (1)                          20-25
                                                       Wheel nut back (1)                           25-30
     The brake surface of the rim has a wear
     indicator in the form of one or sometimes         Warning 1
     two grooves. When this groove is no longer        As with most mechanical parts, a bicycle / E-Bike is also subject to wear and high loads.
     visible, the rim must be replaced.                Different materials and parts react differently to wear and loads. A component may break
                                                       suddenly at the end of its service life and possibly injure the cyclist. It is therefore good
     12. SUSPENSION FORK                               to pay attention to scratches, fractures and / or discoloration during inspections and
                                                       to have parts replaced in time.
     A "Preload" setting may be present on
                                                       Warning 2
     the left side of the suspension telescopic
                                                       With composite (carbon) parts, collision damage can remain invisible to the user.
     fork. With this rotary knob you can make
                                                       These parts must either be returned to the manufacturer for inspection and
     your fork more rigid by turning the knob
12   clockwise.
                                                       assessment, or these parts must be destroyed and replaced. Carbon parts                         13
                                                       should also not be exposed to high temperatures (radiation).
     13. PEDALS

     The pedals usually have an L (eft) or R (ight).
     Lock the right pedal by turning the open-ended
     spanner clockwise. Lock the left pedal by
     turning the spanner counter clockwise.
USER MANUAL                                                                                              USER MANUAL
                                        BIMAS BIKES                                                                                                 BIMAS BIKES

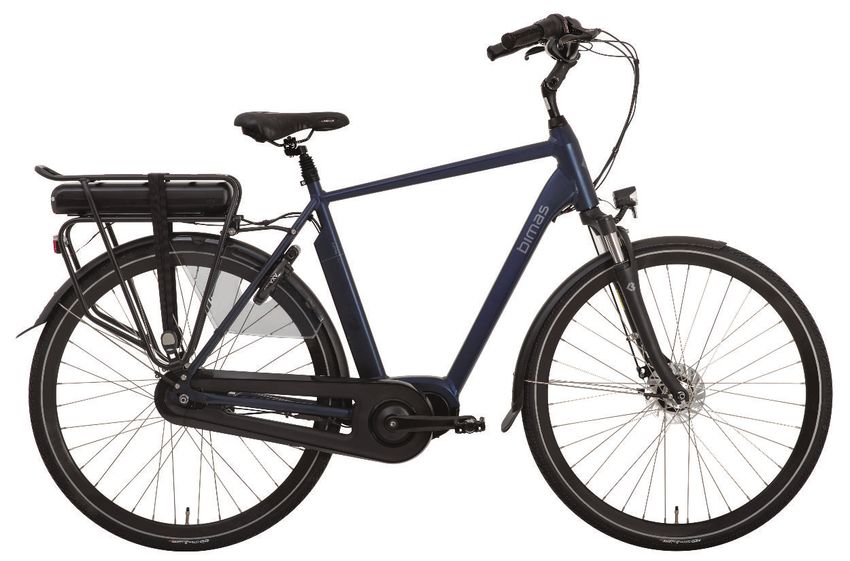
     E-BIKES                                                                                                  15. GENERAL E-BIKE INFORMATIE
     MAIN COMPONENTS
                                                                               2                              15.1 Battery and range
     E-Bike - Front wheel motor                                                                               The amount of energy that can be stored in your battery will decrease over time.
                                                                                                              The amount of energy expressed in Wh in combination with the E-bike system
                                                                                                              used determines how far you can ride your electric bicycle. In addition, the following
                      3        4                                                                              factors affect your range:
                                                                                                              - The choice of degree of pedal assistance.
                                            E-BIKES
                                            HOOFDCOMPONENTEN
                                                                                                              - Speed.
                                                                                                              - Weather conditions; wind, temperature.
                                                                                                              - Gear selection
                                                                                                              - Route profile; slopes.
                                                                                                              - Type of bicycle
                                                                                                              - Type of road surface.
                                                                                                              - Rider weight.
                                                                                                              - Tire type and tire pressure.

                                                                                                              15.2 Disconnect the battery
                                                                                                              The lock to unlock the battery is located on the left side of the battery. For this you can
                                               5
                                                                                      1                       use the key of the anti-theft lock if no loose keys are included.
14                                                                                                                                                                                                          15
                                                                                 2                            At the back of the battery is a handle integrated to which you can
                                                                                                              pull the battery out of the carrier. After inserting
     E-Bike - Mid motor                                                                                       the battery, remove the key to unlock your bicycle.

                                                                                                              15.3 Charging the battery
                  3           4                                                                               The battery can be charged separately or
                                                                                                              on the bike. Only use the supplied charger.
                                                                                                              1. Unscrew the plastic cover cap (Fig. 2.3)
                                                                                                              2. Connect the charger to the battery
                                                                                                                 (fig. 2.4)
                                                                                                              3. Connect the charger to 220V!
                                                                                                              !Only use this order!

                                                                                                              Battery
                                                                                                              An orange light is on during charging.
                                                                                                              It turns green as soon as the battery is
                                                                                                              fully charged.
                                               5               1
                                                                                                              Charger
                                                                                                              A red light is on during charging. It turns
     1. Motor             4. Controller                            The A-weighted sound pressure level        green as soon as the battery is fully
     2. Display           5. Pedal sensor                          at the users ears is less than 70dB (A).   charged. (Fig. 2.1).
     3. Battery
USER MANUAL                                                                                 USER MANUAL
                                        BIMAS BIKES                                                                                BIMAS BIKES
     Points of attention
     - Disconnect the charger as soon as the battery is charged.                                  Charger
       This prevents shortening the life of the battery.
     - A completely empty battery should be recharged immediately.                                Technische data                    Bafang C01.2A.EN
       Cells that have been empty for too long can be irreparably damaged.                        Voltage                            49.2 V
     - Make sure that the battery is charged at least half of a full battery charge every
       three months. If this is not done, the battery can be irreparably damaged.                 Power                              2A
     - Remove the battery from the bicycle if you are not going to use it for a long time.
     - Only use the battery charger in dry, well-ventilated areas.                                Battery
     - The battery charger is not resistant to moisture and / or fall shocks.                     Technische data                     Bafang 450Wh
     - The battery is not resistant to falls.
                                                                                                  Battery cells                       Lithium-Ion
     15.4 Additional battery information                                                          Charging time                        4.5 uur
     Avoid short circuits and never connect the positive contact of the battery to the negative
     contact. The battery is splash-proof and therefore resistant to rain. So you can use your    Nominal voltage                     43 V
     bike in bad weather. Be careful with large amounts of liquids and do not expose them to      Nominal capacity                     10.4 Ah
     the battery, especially when the battery is disconnected from the bicycle. The burden on
                                                                                                  Energy                               447 Wh
     the environment is not heavy, electricity is counted as a clean form of energy.
                                                                                                  Operational temperature              -20°C tot 60°C
     The performance of your battery will decrease at low temperatures. The battery pack can
                                                                                                  Storage temperature                  -10°C tot 35°C
     be fully charged approximately 1000-1200 times under ideal conditions.
     The performance will slowly decrease over time and over time. and eventually the battery     Permitted charging temperature       0°C tot 45°C
16   pack has to be replaced. Do not expose the battery to high temperatures (> 50 ° C),                                                                                                       17
                                                                                                  Weight                               3.5 kg
     such as heating, direct sunlight and fire. Do NOT disassemble the battery. Consult the
     dealer in case of problems. For long-term storage, place the battery in a                    Waterprotection class                IP66
     shady, cool and dry place
                                                                                                  16. PEDAL ASSISTANCE                           16.2. Switching pedal assistance on and off
     ``The mentioned range is optimal at a                                                                                                       As soon as you switch on the control panel,
     measured temperature of about              15.5 Disposal
                                                                                                  16.1 Pedal assistance                          the pedal assistance is switched to the last
     +/- 25 ° C. The guideline is that the      Your battery (like batteries) must be returned
                                                                                                  The e-bike is equipped with electric pedal     position used. With the arrow keys you can
     capacity decreases by 1% at 1 ° C          at the end of its life cycle to be recycled.
                                                                                                  assistance. The engine complements your        increase or decrease the level of support.
     temperature drop.´´                        It is best to do this at your dealer. So never
                                                                                                  own effort, increasing your performance         You can switch off the pedal assistance by
                                                throw your battery into household waste.
                                                                                                  while delivering less power. The operation     moving the assistance to the "0" position with
     15.6. Technische data                                                                        of the pedal assistance depends on the         the down arrow on the control panel. Keep in
                                                                                                  speed at which the pedals are rotated and      mind that with a heavy support the battery will
     Motor                                                                                        the cycling speed. If there is no pedaling,    drain faster than with a lighter support
                                                                                                  the engine does nothing. When starting up,     (see figure 3.1)
     Technische data                     Bafang FM G311.250         Bafang M400
                                                                                                  the support that the engine offers is large
     Position                            Front wheel                Mid frame                     so that you can easily get started.
                                                                                                  An e-bike with pedal assistance up to a
     Nominal Continuous power            250 W                      250 W
                                                                                                  speed of 25 km / h with a maximum
     Nominal voltage                     43 V                       43 V                          power of 250W and which only supports
     Nominal torque                      30 Nm                      80 Nm                         as long as the rider pedals himself is
                                                                                                  called an EPAC. EPAC stands
     Waterprotection class               IP65                       IP65                          for Electrically Power Assisted Cycle.
USER MANUAL                                                                                USER MANUAL
                                        BIMAS BIKES                                                                                  B I M AS B I K E S

     16.3 Additional information pedal assistance                                                    17. GUARANTEE
     - Thanks to the powerful support, you will easily reach higher speeds than you are used to.     For more information about our consumer warranty, we refer to our website
       First try the bicycle in a traffic-free environment in order to get used to your new bicycle.   www.bimasbikes.com. If you do not know how to reach our website, you can
     - Getting on the e-bike is different, when the pedal assistance is switched on, it is also       contact us by phone or email. We will then provide you with the current
       different from a normal bicycle. You will drive away more easily. Do not be surprised          warranty conditions.
       by the support and familiarize yourself with the support before going into heavy traffic.
     - We recommend that you use support program 1 for cycling away from a stationary                Contact details:
       position.                                                                                     Email: service@bimasbikes.com
     - When the pedal assistance is turned off, the e-bike cycles with extremely little               Phone number: +31 75 711 3043
       resistance. This means that the e-bike can also be used without a battery,
       like a regular bicycle.
     - The operation of the pedal assistance depends on the speed at which the pedals
       are rotated and the cycling speed.
     - The pedal assistance is legally limited at a speed of 25 km / h. This means that
       if you go towards a speed of 25 km / h, the pedal assistance will gradually
       decrease to zero.

     !PAY ATTENTION! When driving off, keep in mind that the pedal assistance will
     increase your effort. Don't get too excited.

18   !PAY ATTENTION! Switch off the assistance when you get off the e-bike.                                                                                                        19
     Never walk with the assistance switched on.

     !PAY ATTENTION! Keep both brakes squeezed when standing still with assist engaged.
You can also read