User Manual IMIS 2014-2020 - for the Beneficiary report module for Beneficiaries under the Slovakia-Hungary
←
→
Page content transcription
If your browser does not render page correctly, please read the page content below
User Manual
            for the
      IMIS 2014–2020
    Beneficiary report
           module

         for Beneficiaries
    under the Slovakia-Hungary
Cross-border Cooperation Programme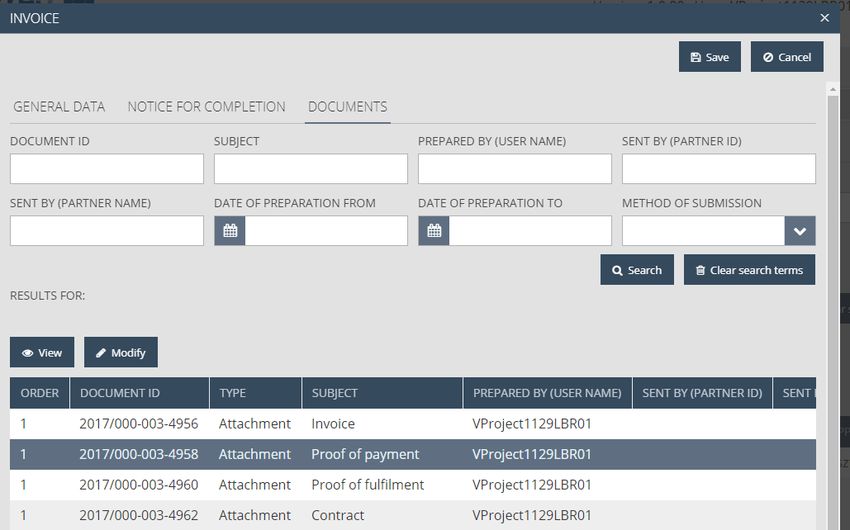
Table of Content
1     How to use this manual? ................................................................................................................. 3
2     Technical instructions ...................................................................................................................... 3
    2.1      Technical requirements ........................................................................................................... 3
    2.2      General rules of use................................................................................................................. 3
    2.3      Rules of field use ..................................................................................................................... 4
3     How to access the IMIS 2014–2020 Front Office? .......................................................................... 6
    3.1      Login ........................................................................................................................................ 6
    3.2      Menu ....................................................................................................................................... 8
4     Beneficiary Report (BR) module – Submitting a beneficiary report................................................ 8
    4.1      BR datasheet – Main Data ..................................................................................................... 10
      4.1.1         Settlement end date define .......................................................................................... 10
    4.2      “Reporting periods” screen ................................................................................................... 12
    4.3      Tenders screen ...................................................................................................................... 12
    4.4      Invoices screen ...................................................................................................................... 14
      4.4.1         “New Invoices” screen................................................................................................... 16
      4.4.2         “Add invoice” screen ..................................................................................................... 24
    4.5      “Activities” screen ................................................................................................................. 24
      4.5.1         Main data ...................................................................................................................... 25
      4.5.2         Documents .................................................................................................................... 26
      4.5.3         History ........................................................................................................................... 27
    4.6      “Indicators” screen ................................................................................................................ 28
      4.6.1         Main data ...................................................................................................................... 28
      4.6.2         Documents .................................................................................................................... 29
      4.6.3         History ........................................................................................................................... 30
    4.7      “Information & Publicity” screen .......................................................................................... 30
      4.7.1         Main data ...................................................................................................................... 31
      4.7.2         Documents .................................................................................................................... 32
      4.7.3         History ........................................................................................................................... 32
    4.8      “Financial progress” screen ................................................................................................... 33
    4.9      “Budget cost” screen ............................................................................................................. 33

                                                                                                                                                           1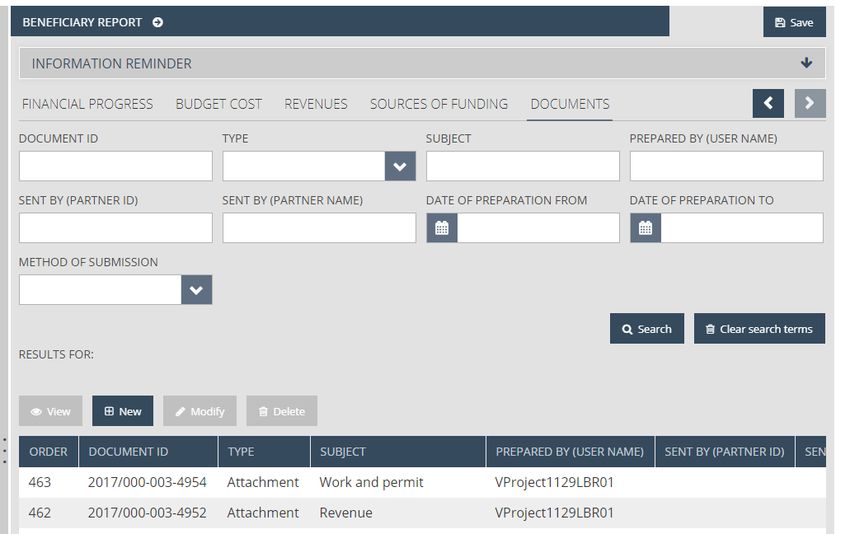
4.10     "Revenues” ............................................................................................................................ 34
      4.10.1        New Revenue general information ............................................................................... 34
      4.10.2        “Notice for completion” screen..................................................................................... 35
      4.10.3        “Documents” screen...................................................................................................... 36
    4.11     “Sources of funding” screen .................................................................................................. 36
    4.12     “Documents” screen ............................................................................................................. 38
5     How to modify, view or delete a beneficiary report? ................................................................... 38
    5.1      View beneficiary report ......................................................................................................... 38
    5.2      Modify beneficiary report ..................................................................................................... 39
    5.3      Delete beneficiary report ...................................................................................................... 39
6     How to generate a form from the beneficiary report? ................................................................. 40
7     How to submit the beneficiary report? ......................................................................................... 40
8     Digital signature and verification of the beneficiary report before submission (by signatory users)
      41
9     The submission process................................................................................................................. 45

                                                                                                                                                     2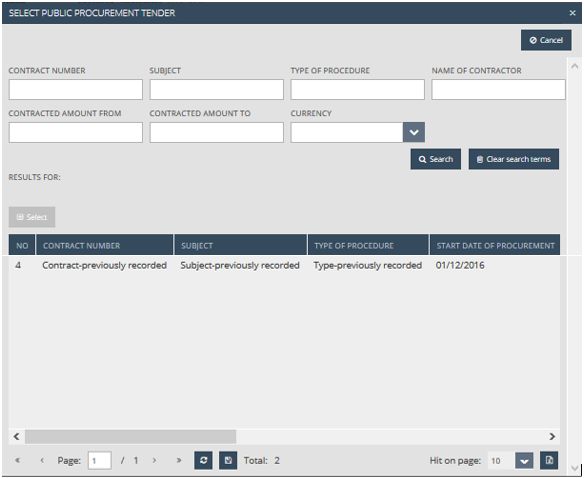
1 How to use this manual?
This User Manual primarily aims to provide guidance to Beneficiaries of the Slovakia-Hungary Cross-
border Cooperation Programme on using the IMIS 2014–2020 Monitoring and Information System.
The Beneficiaries can report on their commitments made in the project module through the Front
Office.
Beneficiary reports can be submitted electronically through the IMIS 2014–2020 Front Office
Beneficiary report module.
This Manual
describes how Beneficiary reports can be completed and submitted, and
provides practical and technical information on how to record data.
Before starting any work, please
ensure that your computer meets the technical requirements (“Technical instructions”
chapter),
read through all chapters of the Manual to get a deeper understanding of the screen
structures and the logic of the system.
When completing the report please refer to the corresponding chapters of the Manual.
2 Technical instructions
This chapter provides information on the minimum technical requirements, the general rules of use
and the rules of using fields and buttons.
2.1 Technical requirements
All client computers intended for running the IMIS 2014–2020 Beneficiary report module have to
meet the following technical requirements:
Operating system: desktop operating system is recommended (e.g.: Microsoft Windows).
Resolution: 1280×768 or higher.
Web browser: Mozilla Firefox 46.0.1 or later, Google Chrome 50.0 or later, Internet Explorer
11.0 or later is recommended.
Cookies have to be enabled in the browser.
PDF reader (e.g.: Adobe Reader).
Word processor (e.g.: Microsoft Office) for opening DOC files.
Internet access.
2.2 General rules of use
The IMIS 2014–2020 is a web application which means that any disruption in the internet
connection can interrupt communication between the server and the client computer. If this
happens, the screen is greyed out and the following message is displayed: “Server
connection lost, trying to reconnect…” – work session can be continued after restoring the
internet connection, unless the session has expired. In this case, you need to log in again.
3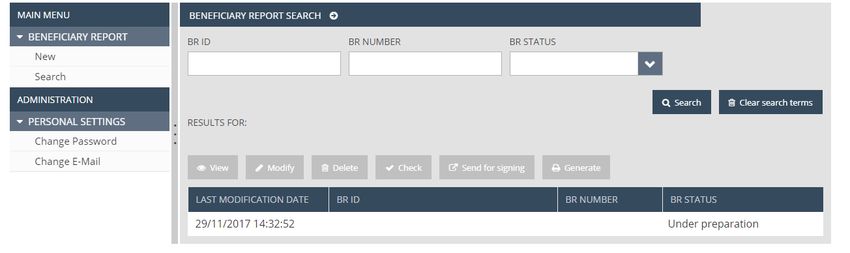
After 60 minutes of inactivity the connection between the server and the client is
automatically interrupted for security reasons and the following error message is displayed:
“Session expired…”. Press the Esc button and log in again.
Please note that only 1 user can work on the same beneficiary report at a time. Avoid parallel
use (e.g. when a person is recording financial data, while another person is completing text
fields.) Parallel use can lead to malfunction and can result in loss of data.
2.3 Rules of field use
The system uses several kinds of fields that have specific characteristics and require a different
method of use.
Grey background fields: read-only fields containing values automatically completed by the
system or elsewhere recorded by the beneficiary.
White background fields: normal input fields.
White background fields with red border: similar to the normal input fields but they are
required fields. Also, fields are marked with red border if the data entered in them differ
from the expected values. In this case, moving the mouse pointer over the field displays the
relevant validation message as a tooltip.
4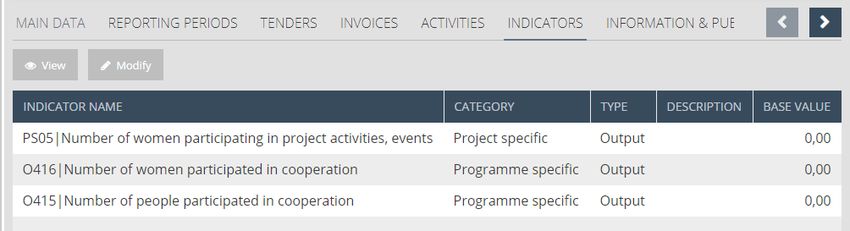
Drop-down fields: these fields contain lists of preset values from where users can pick an
item; they open by clicking on the arrow.
Date fields: users can enter the date here in the specific format (dd/mm/yyyy) or select the
given date by clicking on the calendar icon.
5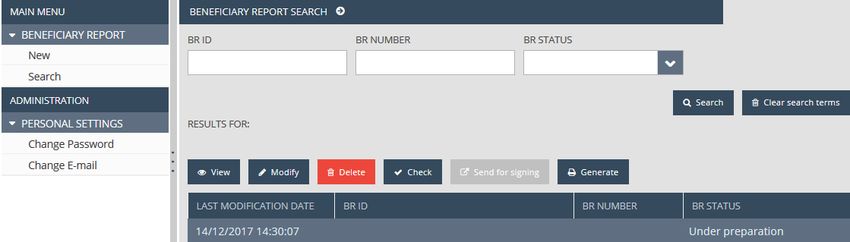
3 How to access the IMIS 2014–2020 Front Office?
Beneficiary reports can be prepared and submitted using the Front Office module of the IMIS 2014–
2020 Monitoring and Information System.
Click on the HU_IMIS_2014-2020_SKHU_BR link to open the Front Office screen in a web
browser in English language.
The preferred web browser is Mozilla Firefox.
Do not edit the same beneficiary report at the same time in multiple web browsers.
There is no autosave feature for the module but each page can be saved manually (Save).
The submission process of beneficiary reports can be abandoned any time (Save).
The module can be used subject to the following rules:
3.1 Login
• Please follow the steps in the automatic e-mail to install the certificate required for accessing
the system.
• Add the certificate to the browser. To do this in Firefox go to “Settings”, “Privacy and
security” and “Certificates”. Click on “View certificates”, go to the “Own certificates” tab and
click on “Import”, then press OK. Please restart your browser after installation.
• Click on the IMIR 2014-2020 link or the “Login” link in the system message to get to the
following screen:
• Finally, log in on the IMIS 2014–2020 Login screen by entering the username and temporary
password received in e-mail. Please press the “Sign in” button. By logging in you
automatically accept the Terms of Use.
• Please note that the password expires, so you have 2 hours to log in with it. If more than 2
hours have passed since receiving the email, you can ask for a new temporary password by
clicking on the “Forgot Password” button on the Login screen.
6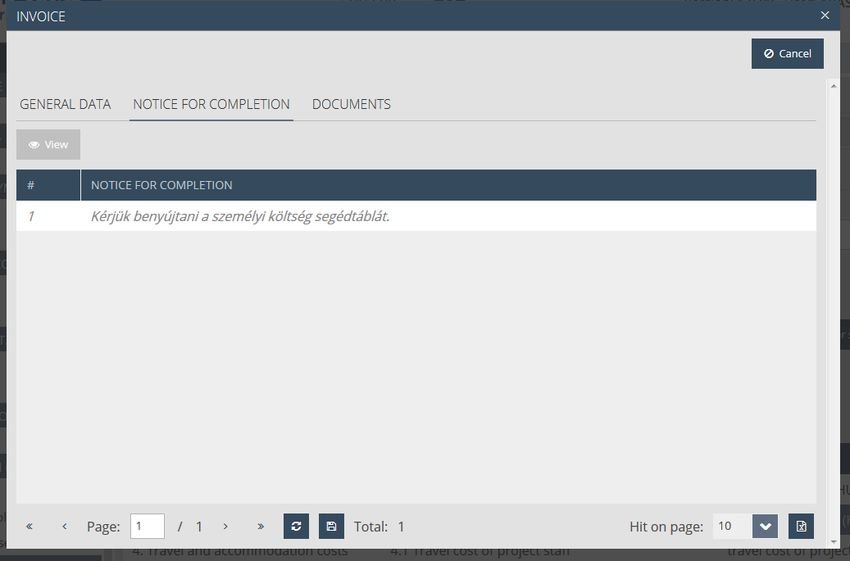
•   Change your password after the first login (first enter the system generated temporary
    password then enter the new password twice.) The new password must be at least 8
    characters and must include uppercase and lowercase letters and numbers. You can change
    this password any time by clicking on “Change Password” on the Front Office opening page.

                                                                                           7
3.2 Menu
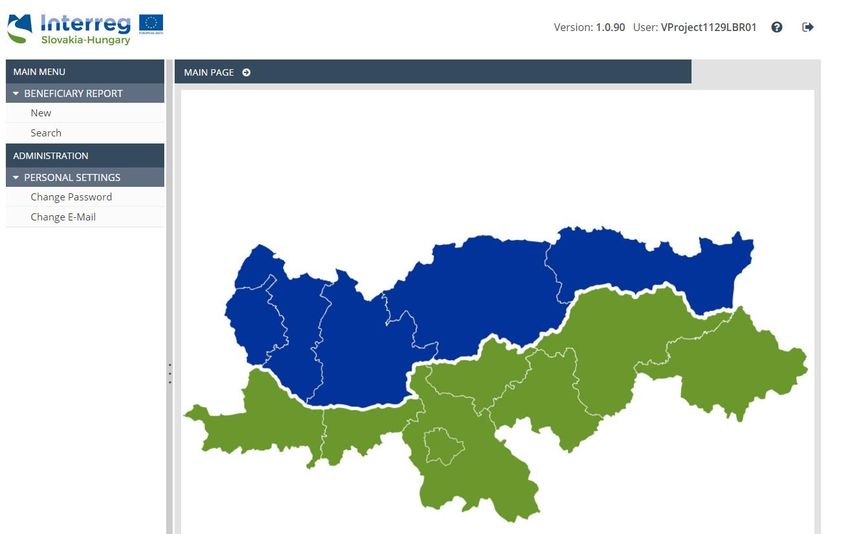
After successful login the Front Office opening page will be displayed:
The menu on the left has two sections:
Beneficiary report – here you can start a new beneficiary report (BR), or search for a
previously submitted or started one.
◦ New – start a new beneficiary report (BR).
◦ Search – view all beneficiary reports (BR). All beneficiary reports (BR) will be listed
regardless of their current status: submitted but not yet accepted, accepted and
rejected reports, as well as those which are currently edited or returned for
modification.
Personal Settings – here you can change your password and email address.
◦ Change password – click here to change your password.
◦ Change email – click here to change your email address.
Click on the small arrows preceding the “Beneficiary report” and “Personal settings” section names
to collapse or open the menus. Use the vertical grey bar to the right of the menu bar to close, open
or adjust the size of the menu bar.
Click on the icon in the top right corner for the User Manual, and on the icon to quit the
system (after confirmation).
4 Beneficiary Report (BR) module – Submitting a beneficiary report
The Beneficiaries can report on their commitments made in the project module through the Front
Office.
8A new beneficiary report can only be submitted for verification if the beneficiary report previously
submitted for verification has been evaluated.
To start a new report – as a recording user responsible for the given project part – please click on
“New” under “Beneficiary report” in the menu bar on the left.
If you – as a recording user responsible for the given project part – would like to continue editing a
previously started report, please click on the “Search” under “Beneficiary report” in the menu, select
the report you want to edit, and then click on “Modify”.
94.1 BR datasheet – Main Data
The primary data for the BR are the data of the relevant project and project part, which are displayed
to the user in read-only mode (the user cannot change these data).
The following fields can be viewed:
“BR number” – The beneficiary report’s number is automatically completed after submission.
“BR ID” – The beneficiary report’s identification number is automatically completed after
submission.
“Project part ID” – The individual identification number of project part.
“Project acronym” – The short name of the project.
“Project title” – The name of the project.
“Start date of project” – The start date of the project.
“End date of project” – The end date of the project.
“Beneficiary” – The name of the beneficiary of the project part.
“Lead beneficiary name” – The name of the lead beneficiary of the project.
“Contact person name” – The name of the contact person of the beneficiary of the project
part.
“Reporting period(s)” – The reporting period covered by the BR.
“BR settl. period start date”– The start date of the settlement period; its value can be
adjusted with the “Define” button.
“BR settl. period end date” – The end date of the settlement period; its value can be
adjusted with the “Define” button.
“Final Beneficiary Report” – Whether the given beneficiary report is a final report.
4.1.1 Settlement end date define
The start and end date of the BR can be specified based on the reporting periods displayed by clicking
on the “Define” button. The modification data of the settlement period related to the BR are
displayed on the following screen.
10 “Reporting period(s)” – Reporting period or periods loaded automatically, based on the start
and end dates.
“BR settlement period start date” – Select the start date of the beneficiary report’s
settlement period.
“BR settlement period end date”– Select the end date of the beneficiary report’s settlement
period.
“Final beneficiary report” – Mark the checkbox if the given beneficiary report is a final
report.
For reference, the table displays the reporting periods of the project part.
The following function buttons are displayed:
“Save” – After checking the datasheet, in case the information provided is correct, the data
are saved. If the entered information is incorrect, an error message informs the user that an
error is present in the data and about the error itself.
“Cancel” – By clicking the button the system aborts the entry, modification or view of the
information activity data.
114.2 “Reporting periods” screen
The screen lists the reporting periods for the project part. The table rows are the reporting periods,
which are automatically numbered.
The “Reported” column shows the periods for which BR has been submitted and approved, and the
reporting deadline for each reporting period.
4.3 Tenders screen
The Beneficiary should record all of the tenders, which have invoices in the given reporting period on
the Tenders tabsheet.
The following function buttons are displayed:
“View” – If there is a selected item in the search results list, the function is active and by
clicking on the button the selected tender’s datasheet opens in view mode.
“New” – Click on the button to open a new public procurment tenders datasheet in record
mode.
“Modify” – If there is a selected item in the search results list, the function is active and you
can click on the button to open and modify the data of the selected tender.
“Add tender” – If the relevant tender was recorded in the previous Beneficiary report and
it’s not listed in the „Contract number” field, the Beneficiary has to add again the tender to
the given BR, by clicking on the button.
“Delete” – The function button is active if an item is selected in the search results list. After
confirmation in a pop-up window, the selected item can be deleted from the list.
12The following fields are available in record mode:
“Contract number” – Enter the number of the public contract.
“Subject” – Provide a brief description of the procurement (goods, service, works).
“Type of procedure” – Specify the type of the procurement. Please use the following
options: competitive negotiated procedure, local open tender procedure, international open
tender procedure, international restricted tender procedure.
“Start date of procurement” – Enter the start date of the procurement procedure.
“Date of decision” – Enter the date of decision.
“Date of contracting” – Enter the date of contracting.
“Contracted net amount in original currency” – Enter the total net value of the contract in
the original currency.
“Currency” – Select the currency of the contract from the drop-down list.
“Name of contractor” – Enter the name of the contractor.
“Comment” – If you have any comment in relation to the public procurement, please enter
here.
The following function buttons are displayed:
“Save” – After checking the datasheet, in case the information provided is correct, the data
are saved. If the entered information is incorrect, an error message informs the user that an
error is present in the data and about the error itself.
“Cancel” – By clicking the button the system aborts the entry, modification or view of the
information activity data.
The following pop-up window appears by clicking on “Add tender”:
13In the upper section with the given filters the result list can be narrowed. The previously recorded
tenders will be listed. Click on “Select” to choose the relevant one.
4.4 Invoices screen
The screen lists the data of invoices recorded to a budget line. In this screen you can search for
specific invoices, add new invoices to relevant budget lines, and modify, view and delete the data of
previously recorded invoices.
In case of flat rate type costs it is not possible to upload invoices. The value of these budget lines is
automatically calculated based on the specified formula on the basis of the “Total Reported amount”
and is displayed in the table.
14The following search boxes can be used to filter the search results of already recorded invoices:
“Budget heading” – The search results will only include invoices recorded for the given
budget heading.
“Budget line” – The search results will only include invoices recorded for the given budget
line.
“Budget item” – The search results will only include invoices recorded for the given budget
item.
“Invoice Number” – Filters the search results by invoice number.
“Supplier name” – Filters the search results by supplier name.
You can perform a search with the set search criteria with the following function buttons:
“Search” – Click on the button to start a search on the set search criteria.
“Clear search-terms” – Click on the button to delete the set criteria in the search field.
You can do the following with invoices:
“View” – If there is a selected item in the search results list, the function is active and by
clicking on the button the selected item’s datasheet opens in view mode.
“New” – A new invoice can be recorded and by clicking on the button the item’s datasheet
opens in record mode.
“Modify” – If there is a selected item in the search results list and the invoice has not yet
been accepted by the controller, you can click on the button to open the selected item’s
datasheet and modify the data of the selected item.
“Delete” – The function button becomes active when the invoice has not yet been accepted
by the controller. After confirmation in a pop-up window, the selected item can be deleted
from the list.
15 “Add invoice” – An invoice search panel will be opened where previously recorded but not
yet fully reported invoices can be added to the beneficiary report.
The amount of the invoices will be aggregated in the lower section of the table: the “Total invoices”
line aggregating the sum of invoices and the “Lump sum amount” line containing the lump sum
amount will be displayed. The “Total amount” field provides the sum of the two lines.
4.4.1 “New Invoices” screen
A new invoice can be entered on the following screen, by filling the number of the invoice to be
entered and the name of the issuer of the invoice, as a first step.
The following fields are displayed:
“Invoice number” – Enter the number of the invoice.
“Supplier name” – Enter the name of the invoice issuer.
When saving, the system checks if there was a recording with the same “Invoice number” – “Supplier
name” combination.
4.4.1.1 General data of invoices (“General Data”) screen
After saving, the recording session continues on the “General data” screen:
1617
The following fields are displayed:
“Invoice number” – The number of the invoice.
“Supplier name” –The name of the supplier.
“Multiply?” – If the given invoice has already been recorded in the system the checkbox is
automatically marked.
“Multiply info box” – If the invoice has been recorded earlier, the system automatically
marks the checkbox and displays in the field the identification number of the project part and
the beneficiary report where the invoice was reported.
“Procurement” – Please selcect the relevant type of the procedure.
“Contract number” – Based on the selected procedure, the Contract number can be
selected. If „Not relevant” option was selected, the contract number is not active (e.g. in case
of staff cost) If any other option was selected, the user can select from the recorded Tenders.
“Subject” – Subject of the tender. Automatically filled in.
“Type of procedure” – Automatically filled in from the Tender screen.
“Description” – Provide a description for the invoice.
“Issued” – Enter the date of issue of the invoice.
“Performance date” – Enter the performance date indicated on the invoice.
“Paid on” – Enter the date on which the invoiced amount was paid.
18 “Budget heading” – Select from the drop-down list the budget heading corresponding to the
invoice.
“Budget line” – If relevant, select from the drop-down list the budget line corresponding to
the invoice.
“Budget item” – If relevant, select from the drop-down list the budget item corresponding to
the invoice.
“VAT reclaimer” – If the beneficiary is entitled to reclaim VAT, the checkbox is automatically
marked.
“Comment (Beneficiaries/Control Body)” – If relevant, provide comment for the invoice.
“Currency” – Select the currency of the invoice from the drop-down list.
“Exchange rate” – The exchange rate used by the system is automatically completed.
“Different exchange rate” – Mark the checkbox if the EUR value of the invoice is calculated
at an interest rate other than what is applicable to the date of the report, in line with the
programme rules.
“EUR.to cur.dif.exchange rate” – Enter the exchange rate if the EUR value of the invoice is
calculated at an interest rate other than what is applicable to the date of the report, in line
with the programme rules.
“Amount in selected currency – NET amount” – Enter the net amount of the invoice in the
selected currency.
“Amount in selected currency – VAT amount” – Enter the amount of VAT in the selected
currency.
“Amount in selected currency – Gross amount” – The gross amount of the invoice is
calculated automatically based on the net amount and the VAT amount of the invoice.
“Amount in selected currency – Reported amount” – Enter the amount you wish to report.
“Amount in selected currency – Eligible expenditure occurring outside the eligible area” – If
relevant, enter the amount of expenditure included in the invoice that occurred outside the
eligible area.
“Amount in selected currency – Accepted amount” – Once accepted by the first-level
controller, the amount will be displayed in the selected currency.
“Amount in selected currency – Eligible amount” – Once accepted by the first-level
controller, the eligible amount will be displayed in the selected currency.
“Amount in selected currency – Not eligible amount” – Once accepted by the first-level
controller, the ineligible amount will be displayed in the selected currency.
“Amount in EUR – NET amount” – Automatically calculated net value of the invoice in EUR.
“Amount in EUR – VAT amount” – Automatically calculated VAT amount of the invoice in
EUR.
“Amount in EUR – Gross amount” – Automatically calculated gross value of the invoice in
EUR.
“Amount in EUR – Reported amount” – Automatically calculated reported amount in EUR.
“Amount in EUR – Accepted amount” – Automatically calculated accepted amount in EUR.
“Amount in EUR – Eligible amount” – Automatically calculated eligible amount in EUR.
“Amount in EU – Not eligible amount” – Automatically calculated ineligible amount in EUR.
19 “Comments of the LB/B (if there is eligible expenditure occurring outside the eligible area)”
– Please provide comment if the invoice includes expenditure that occurred outside the
eligible area.
“Checked – Accepted amount” – Once the amount is accepted by the first-level controller,
the checkbox is automatically marked.
“Justification of deduction” – If the amount is not fully accepted by the first-level controller,
this field displays the justification of the deduction.
“Under judicial procedures” – Where relevant, the checkbox is automatically marked if the
invoice is affected by irregularity procedure.
For costs other than normal invoices, please see instructions below:
Special instructions for STAFF COST:
“Invoice number” – Please use the format: staff/number of reporting period/name of the
employee (e.g. staff/01/MintaJános).
“Supplier name” – Name of the employee.
“Description” – Position in the project.
“Issued” – First day of the first reported month.
“Performance date” – Last day of the last reported month.
“Paid on” – Payment date of the contributions or wage of the last reported month (which
was paid later).
“Amount in selected currency – NET amount” – Full amount on the calculation sheet.
“Amount in selected currency – VAT amount” – Not to be used (empty).
“Amount in selected currency – Gross amount” – Automatically calculated.
“Amount in EUR – Reported amount” – Enter the amount you wish to report.
“Comment of the Beneficiary” – Months to be reported.
Special instructions for TRAVEL AND PER DIEM:
“Invoice number” – Please use the format: travel/number of reporting period (e.g.
travel/01). In case of per diem please use the format: per diem/number of reporting period
(e.g. per diem/01).
“Supplier name” – Name of the persons who travelled.
“Description” – Travel and/or per diem.
“Issued” – First day of the first reported month.
“Performance date” – Last day of the last reported month.
“Paid on” – Payment date of the last cost to be reported.
“Amount in selected currency – NET amount” – Full amount on the calculation sheet.
“Amount in selected currency – VAT amount” – Not to be used (empty).
“Amount in selected currency – Gross amount” – Automatically calculated.
“Amount in EUR – Reported amount” – Enter the amount you wish to report.
20The following function buttons are displayed:
“Save” – After checking the datasheet, in case the information provided is correct, the data
are saved. If the entered information is incorrect, an error message informs the user that an
error is present in the data and about the error itself.
“Cancel” – By clicking the button the system aborts the entry, modification or view of the
information activity data.
4.4.1.2 “Notice for completion” screen
If the first-level controller responsible for verification has identified completion criteria that were not
met in relation to the invoice, they will be listed here. The beneficiary can view such notices here.
4.4.1.2.1 “View” notices screen
The following fields are displayed:
“#” – Number of notice.
“Notice for completion” – Text of notice.
214.4.1.3 “Documents” screen
Documents of the invoice may be uploaded on the screen.
The upper section of the screen is a search bar with the following search filters:
File name (id) – the unique identifier of the file.
Type – the filename extension.
Original file name – the filename.
Sequence number – the sequence number of the file.
You can view the uploaded documents in the selected folder by clicking on the “View” button. To
upload a new document or perform operations on previously uploaded ones, select the folder and
click on the “Modify” button.
22In the lower section of the screen you can perform the following file operations:
Download – download file.
Upload – upload a new file.
Delete – delete the uploaded file.
Reorder – reorganise the uploaded files.
Click on the “Upload” button and the “Upload file” dialogue box will appear. Select the file you want
to upload and click “Open”.
Please note that the maximum upload file size is 30 MB but there is no restriction on the combined
size of the documents. It is important that compressed zip files can also be uploaded.
The selected and uploaded file will appear in the search result list within the given folder.
At least one document must be uploaded to the “Invoice” folder for each recorded invoice.
234.4.2 “Add invoice” screen
In this screen you can add such invoices to the BR which have already been recorded in the system
but the requested and/or accepted cumulative amount of which is less than the gross invoiced
amount.
The following search filters can be used:
“Invoice Number” – Filters the search results by invoice number.
“Supplier name” – Filters the search results by the invoice issuer’s name.
To add an invoice from the search results to the beneficiary report, click on the “Select” button.
The following functions are available:
“Search” – Click on the button to start a search on the set search criteria.
“Clear search terms” – Click on the button to delete the set criteria in the search field.
4.5 “Activities” screen
The beneficiary can view the activities undertaken by it within the given project part, the reporting
periods relevant to the implementation of such activities, and the current status of the activities. The
progress of all activities must be reported in all reporting period.
The lines of the screen are defined on the project level.
The following function buttons are displayed:
24 “View” – If there is a selected item in the search results list, the function is active and by
clicking on the button the selected action’s datasheet opens in view mode.
“Modify” – If there is a selected item in the search results list, the function is active and you
can click on the button to open the selected item’s data sheet and modify the data of the
selected activity.
4.5.1 Main data
The main data of the activity can be viewed and added on this screen.
The following fields can be filled:
“Activity name” – The name of the activity is automatically completed.
“Activity status” – Select from the drop-down list the status of the activity relevant to the
given period.
“Activity originally planned” – Checked automatically based on whether the
implementation of the activity was planned in the reporting period.
“Original description” – The original description of the undertaken activity, loaded
automatically from the project data.
“Current description” – Provide a description of the given activity for the given period.
„Output description” – The original description of the activity.
The following function buttons are displayed:
25 “Save” – After checking the datasheet, in case the information provided is correct, the data
are saved. If the entered information is incorrect, an error message informs the user that an
error is present in the data and about the error itself.
“Cancel” – By clicking the button the system aborts the data entry or modification.
4.5.2 Documents
In this screen you can upload and view the professional supporting documents relating to a given
activity.
The upper section of the screen is a search bar with the following search filters:
File name (id) – the unique identifier of the file.
Type – the filename extension.
Original file name – the filename.
Sequence number – the sequence number of the file.
In the lower section of the screen you can perform the following file operations:
Download – download file.
Upload – upload a new file.
Delete – delete the uploaded file.
Reorder – reorganise the uploaded files.
Click on the “Upload” button and the “Upload file” dialogue box will appear. Select the file you want
to upload and click “Open”.
Please note that the maximum upload file size is 30 MB but there is no restriction on the combined
size of the documents.
It is important that compressed zip files can also be uploaded.
26The selected and uploaded file will appear in the search result list within the given folder.
4.5.3 History
The table lists previous beneficiary reports so that you can view progress reports submitted for the
given activity earlier.
274.6 “Indicators” screen
All indicators which the beneficiary have undertaken are shown in a table on the screen.
The following function buttons are displayed:
“View” – If there is a selected item in the search results list, the function is active and by
clicking on the button the selected indicator’s datasheet opens in view mode.
“Modify” – If there is a selected item in the search results list, the function is active and you
can click on the button to open the indicator’s data sheet and modify the data of the
selected item.
4.6.1 Main data
In this screen you can view the main indicator data and enter main progress data for the indicator in
the given period.
The following fields are displayed for filling:
28 “Indicator name” – The name of the indicator – automatically completed.
“Indicator category” – The category of the indicator – automatically completed.
“Indicator type” – The type of the indicator – automatically completed.
“Unit” – The measurement unit of the indicator – automatically completed.
“Base value” – The base value of the indicator – automatically completed.
“Target value” – The undertaken value of the indicator – automatically completed.
“Actual value” – Enter the indicator value achieved in the given period (please enter
difference from the value reported in previous period).
“Previously reported and validated value” – The value reported and accepted in previous
beneficiary reports in relation to the given indicator – automatically completed.
“Achieved value” – The cumulative value of values accepted in the previous PR&AfR –
automatically completed.
“Remaining value” – The remainder amount– automatically completed.
“Indicator original description” – The original description of the undertaken indicator,
loaded automatically from the project data.
“Indicator current description” – Provide a description of the given indicator for the given
period.
The following function buttons are displayed:
“Save” – After checking the datasheet, in case the information provided is correct, the data
are saved. If the entered information is incorrect, an error message informs the user that an
error is present in the data and about the error itself.
“Cancel” – By clicking the button the system aborts the data entry or modification.
4.6.2 Documents
In this screen you can upload and view the professional supporting documents evidencing the
progress of the indicators.
The screen works the same way as described in the “Documents” chapter above.
294.6.3 History
The table lists previous beneficiary reports so that you can view progress for the indicator given
earlier.
4.7 “Information & Publicity” screen
This screen lists the BR related information activities undertaken by the beneficiary in the project.
The screen displays the reporting periods for which the beneficiary undertook the given information
activities.
The following function buttons are displayed:
“View” – If there is a selected item in the search results list, the function is active and by
clicking on the button the selected item’s datasheet opens in view mode.
“Modify” – If there is a selected item in the search results list, the function is active and you
can click on the button to open the selected item’s data sheet and modify the data of the
selected information and communication activity.
304.7.1 Main data
The main data of the report can be specified for the selected information activity.
The following fields are available:
“Information & Publicity type” – Type of the information activity – automatically completed.
“Status is this report” – Enter current status of the information activity in the given
reporting period.
“Originally planned” – This field is automatically completed if the activity was originally
planned for the given period.
“Original description” – Description of the undertaken activity – automatically completed.
“Description in this report” – Provide a description of the information activity for the
reporting period.
“Used language” – The used language of the information activity – automatically completed.
“Communication tool” - The name/tool of the planned communication activity.
“Measurement unit” – Please specify the measurement unit of the selected communication
activity- automatically completed.
“Planned quantity” – The planned quantity of the communication activity - automatically
completed.
„Actual quantity” – Please fill in the actual quantity of the communication activity.
31 „Planned number of reached people” – The number of people intended to be reached by
the communication activity - automatically completed.
„Actual number of reached people” – Please fill in the actual number of people reached by
the communication activity.
The following function buttons are displayed:
“Save” – After checking the datasheet, in case the information provided is correct, the data
are saved. If the entered information is incorrect, an error message informs the user that an
error is present in the data and about the error itself.
“Cancel” – By clicking the button the system aborts the entry, modification or view of the
information activity data.
4.7.2 Documents
In this screen you can upload and view the documents evidencing the progress of the information
activity. The upload method is the same as described above.
4.7.3 History
The table lists previous beneficiary reports so that you can view progress reports submitted for the
information activity earlier.
324.8 “Financial progress” screen
The screen lists the data of current and previous progress reports indicating the planned and
remaining amount of the project part.
The list displays the beneficiary reports of the project part in chronological order. The first row of the
table shows the latest beneficiary report.
The first column shows whether the given report has been submitted at project level by the lead
beneficiary, and if so, the identifier of such report is indicated in the second column. The table also
shows the amount reported in the given report and the amount of the effective budget before and
after submission and approval of the report.
4.9 “Budget cost” screen
In this screen the beneficiary can view the costs reported so far and intended to be reported in the
given project part, broken down by budget line. Values are indicated in EUR and calculated by the
system so they cannot be changed by the user.
The table also has a “Total” line which shows the sums of the values and percentages for each
column at the bottom.
334.10 "Revenues”
Where relevant, you can add any revenue generated in the given reporting period.
If you incurred any revenue in relation to the project, please indicate the amount here. Please note
that justified advances and the payments of approved amounts under the subsidy contract do not
qualify as revenue.
)
The following function buttons are displayed:
“View” – If there is a selected item in the search results list, the function is active and by
clicking on the button the selected supporting documents of revenue datasheet opens in
view mode.
“New” – To add new revenue invoice click on the button to open a new revenue invoice
datasheet in record mode.
“Modify” – If there is a selected item in the search results list, the function is active and you
can click on the button to open the selected revenue invoice’s data sheet and modify the
data of the selected revenue invoice.
“Delete” – The function button is active if an item is selected in the search results list. After
confirmation in a pop-up window, the selected item can be deleted from the list.
4.10.1 New Revenue general information
34The following fields are available:
“Documents of equivalent probative value ID” – Enter the identifier of the document
supporting the revenue.
“Name of partner” – Enter the name of the partner.
“Description of the revenues” – Provide a description for the revenue.
“Revenue incurred on” – Enter the date of generating the revenue.
“Date of accounting the revenue” – Enter the accounting date of the revenue.
“Revenues foreseen in the AF” – Mark this checkbox if the revenue was planned.
“Currency” – Select the currency of the revenue from the drop-down list.
“Exchange rate” – The exchange rate used by the system is automatically completed.
“Different exchange rate” – Mark this checkbox if you wish to use an exchange rate other
than the one applicable to the month of report submission, in line with the programme rules.
“Exchange rate if different” – Enter the exchange rate if you wish to use an exchange rate
other than the one applicable to the month of report submission, in line with the programme
rules.
“Amount in selected currency – Total amount” – Enter the total amount of revenue in the
selected currency.
“Amount in selected currency – Reported amount” – Enter the amount you wish to report.
“Amount in selected currency – Accepted amount” – Once accepted by the first-level
controller, the amount will be automatically displayed in the selected currency.
“Amount in EUR – Total amount” – The total amount of revenue in EUR – automatically
completed.
“Amount in EUR – Reported amount” – The revenue amount to be reported in EUR –
automatically completed.
“Amount in EUR – Accepted amount” – The accepted amount of revenue in EUR –
automatically completed.
“Checked – Accepted amount” – Once the amount is accepted by the first-level controller,
the checkbox is automatically marked.
The following function buttons are displayed:
“Save” – After checking the datasheet, in case the information provided is correct, the data
are saved. If the entered information is incorrect, an error message informs the user that an
error is present in the data and about the error itself.
“Cancel” – By clicking the button the system aborts the entry, modification or view of the
information activity data.
4.10.2 “Notice for completion” screen
If the first-level controller responsible for verification has identified completion criteria that were not
met in relation to the revenue, they will be listed here. The beneficiary can view such notices here.
35The following function buttons are displayed:
“View” – If there is a selected item in the search results list, the function is active and by
clicking on the button the selected revenue datasheet opens in view mode.
4.10.2.1 “View” notices screen
The following fields are displayed:
“#” – Number of notice.
“Notice for completion” – Text of notice.
“Completion date” - Date of notice (for completion).
4.10.3 “Documents” screen
The documents relating to the revenue can be uploaded here in the manner described above.
4.11 “Sources of funding” screen
Here you can view the financial data of beneficiaries broken down by source of funding.
3637
4.12 “Documents” screen
In this screen you can the document folders of the beneficiary report. This is also the place where
documents uploaded for invoices, activities etc. are summarised.

The upload method is the same as described in the “Documents” chapters above.

5 How to modify, view or delete a beneficiary report?
5.1 View beneficiary report

After data entry the report can be saved with the “Save” button. The BR will then appear in the
search results in Beneficiary report – Search in the menu.

After saving the beneficiary report, click “Search” in the “Beneficiary report” module to open the
“Beneficiary report search” screen. The search results will include all previously created beneficiary
reports. Select the report you want to view and click on the “View” button above the search results.

This will open the screen described above in relation to creating a new beneficiary report with the
difference that all data displayed are view only; the beneficiary report cannot be modified here. Click
on the menu or the heading of the screen to exit the view mode.

                                                                                                    38
5.2 Modify beneficiary report
After saving the beneficiary report, click “Search” in the “Beneficiary report” module to open the
“Beneficiary report search” screen. The search results will include all previously created beneficiary
reports. Select the report you want to modify and click on the “Modify” button above the search
results.
This will open the screen described above in relation to creating a new beneficiary report where the
data can be edited. Click on the “Save” button to save your modifications or click on the menu or the
screen heading to exit without saving.
If the professional controlling units find any deficiencies or points requiring clarifications in the
submitted beneficiary report, they will send it back for amendment together with an email
notification. In this case the status of your report will change to “Need amendment”, and you will
have to resubmit the report after remedying the deficiencies (as described in chapter 7).
Note that you may only modify the beneficiary report if its status is “Under preparation” or “Need
amendment”. In any other case the “Modify” button will be inactive and the report cannot be
modified.
5.3 Delete beneficiary report
After saving the beneficiary report, click “Search” in the “Beneficiary report” module to open the
“Beneficiary report search” screen. The search results will include all previously created beneficiary
reports. Select the beneficiary report you want to delete and then click “Delete” above the search
results.
You will be prompted to confirm your intention of deleting the beneficiary report. Click “Cancel” to
abort the deletion process and “OK” to continue. The deleted beneficiary report will no longer
appear in the beneficiary report search results.
Note that you may only delete the beneficiary report if its status is “Under preparation”. In any other
case the “Delete” button will be inactive and the report cannot be deleted.
The deletion of beneficiary reports cannot be undone so before clicking “OK” in the confirmation
window please ensure that you really want to delete the beneficiary report.
396 How to generate a form from the beneficiary report?
After saving the beneficiary report, click “Search” in the “Beneficiary report” module to open the
“Beneficiary report search” screen. The search results will include all previously created beneficiary
reports. Select the beneficiary report from which you want to generate a form and click on the
“Generate” button above the search results.
This will open a download window where you can open or save the generated form (in PDF format).
As the data will only be finalised upon submission, the generated form will be marked as DRAFT in
the header and the footer.
This function is available at any stage during the creation of the beneficiary report, so it is not
necessary to have all fields completed.
7 How to submit the beneficiary report?
If you have completed and saved the beneficiary report (see chapter 5), click “Search” in the
“Beneficiary report” module in the menu to open the “Beneficiary report search” screen. The search
results will include all previously created beneficiary reports. Select the beneficiary report you want
to submit and click on the “Check” button above the search results. This will run an automatic check
which can have the following outcomes:
Check failed – if the autocheck identifies errors in the beneficiary report, a popup window
will appear with clear error messages. Click on the “Download the error list” button to open
or download the error list in .DOC format, or click “Cancel” to close the popup window and
continue editing the report. The report can only be submitted if all listed errors have been
corrected.
40 Check successful – if the autocheck finds no errors in the beneficiary report, the user will be
notified in a popup message about this and the user can submit the report.
The “Check” function can be used anytime so you can check any screen of the beneficiary report
while editing.
Please note that if you reopen the given report with the “Modify” button after a successful check
(“Check successful” message), the check results will disappear and the user must run the autocheck
again on the modified report to forward it to the signatory user.
To submit the beneficiary report click “Search” in the “Beneficiary report” module in the menu,
select the beneficiary report you want to submit and click on the “Send for signing” button.
(Successful autocheck is a prerequisite for submission, so if the “Send for signing” button is inactive
please run autocheck by clicking on the “Check” button.)
The “Send for signing” button will cause a popup window to appear requesting you to confirm that
you really want to forward the beneficiary report for signing. Click “OK” to submit the beneficiary
report and “Cancel” to exit without submission. In the latter case the beneficiary report remain
editable.
If the upload is successful, a popup message will appear and the status of the beneficiary report will
change to “Under signature” in the Beneficiary report search screen.
After send for signing the final beneficiary report form can be downloaded from the “Beneficiary
report” folder on the "Documents” screen of the beneficiary report, in the same way as previously
uploaded documents which can also be viewed and downloaded on the “Documents” screen of the
beneficiary report. After send for signing, only the “View” and “Generate” functions will be available
for the beneficiary report.
8 Digital signature and verification of the beneficiary report before
submission (by signatory users)
The beneficiary report must be signed electronically. This can be done by the signatory user
responsible for the project part.
41You can also read