YAWIK Documentation Release 0.35.2 - CROSS Solution
←
→
Page content transcription
If your browser does not render page correctly, please read the page content below
YAWIK Documentation
          Release 0.35.2

         CROSS Solution

               Jan 15, 2021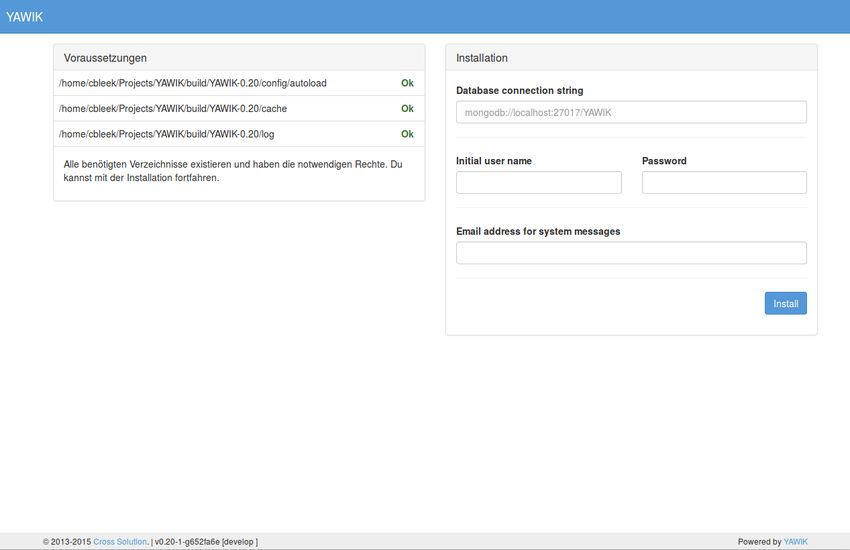
Contents

1   About YAWIK                                                                                                                                                                                                     3
    1.1 Important Links for developers . . . . . . . . . . . . . . . . . . . . . . . . . . . . . . . . . . . . .                                                                                                    4

2   Requirements                                                                                                                                                                                                    5

3   Preparations                                                                                                                                                                                                    7
    3.1 Ubuntu 18.04 . . . . . . . . . . . . . . . . . . . . . . . . . . . . . . . . . . . . . . . . . . . . . . .                                                                                                  7
    3.2 Debian 10 . . . . . . . . . . . . . . . . . . . . . . . . . . . . . . . . . . . . . . . . . . . . . . . . .                                                                                                 8
    3.3 Install mongo Database . . . . . . . . . . . . . . . . . . . . . . . . . . . . . . . . . . . . . . . . .                                                                                                    8

4   Installation                                                                                                                                                                                                    9
    4.1 Installation with composer . . . . . . . . . . . . . . . . . . . . . . . . . . . . . . . . . . . . . . . .                                                                                                  9
    4.2 Install without composer . . . . . . . . . . . . . . . . . . . . . . . . . . . . . . . . . . . . . . . . .                                                                                                 10
    4.3 Install for Developers . . . . . . . . . . . . . . . . . . . . . . . . . . . . . . . . . . . . . . . . . .                                                                                                 10

5   Runtime                                                                                                                                                                                                        13
    5.1 Using Apache       .   .   .   .   .   .   .   .   .   .   .   .   .   .   .   .   .   .   .   .   .   .   .   .   .   .   .   .   .   .   .   .   .   .   .   .   .   .   .   .   .   .   .   .   .   .   13
    5.2 Using Nginx .      .   .   .   .   .   .   .   .   .   .   .   .   .   .   .   .   .   .   .   .   .   .   .   .   .   .   .   .   .   .   .   .   .   .   .   .   .   .   .   .   .   .   .   .   .   .   14
    5.3 Authentication     .   .   .   .   .   .   .   .   .   .   .   .   .   .   .   .   .   .   .   .   .   .   .   .   .   .   .   .   .   .   .   .   .   .   .   .   .   .   .   .   .   .   .   .   .   .   15
    5.4 Debugging . .      .   .   .   .   .   .   .   .   .   .   .   .   .   .   .   .   .   .   .   .   .   .   .   .   .   .   .   .   .   .   .   .   .   .   .   .   .   .   .   .   .   .   .   .   .   .   15

6   Upgrade                                                                                                                                                                                                        17
    6.1 0.24 => 0.25 . . . . . . . . . . . . . . . . . . . . . . . . . . . . . . . . . . . . . . . . . . . . . . .                                                                                                 17
    6.2 0.31 => 0.32 . . . . . . . . . . . . . . . . . . . . . . . . . . . . . . . . . . . . . . . . . . . . . . .                                                                                                 18

7   Configuration                                                                                                                                                                                                  19
    7.1 Authentication . . . . . . . . . . . . . . . . . . . . . .                                                 .   .   .   .   .   .   .   .   .   .   .   .   .   .   .   .   .   .   .   .   .   .   .   .   19
    7.2 Example: Setting up Facebook, Xing or LinkedIn Login                                                       .   .   .   .   .   .   .   .   .   .   .   .   .   .   .   .   .   .   .   .   .   .   .   .   20
    7.3 Authentication . . . . . . . . . . . . . . . . . . . . . .                                                 .   .   .   .   .   .   .   .   .   .   .   .   .   .   .   .   .   .   .   .   .   .   .   .   20
    7.4 Mail . . . . . . . . . . . . . . . . . . . . . . . . . . . .                                               .   .   .   .   .   .   .   .   .   .   .   .   .   .   .   .   .   .   .   .   .   .   .   .   22
    7.5 Jobs . . . . . . . . . . . . . . . . . . . . . . . . . . . .                                               .   .   .   .   .   .   .   .   .   .   .   .   .   .   .   .   .   .   .   .   .   .   .   .   23
    7.6 Sitename . . . . . . . . . . . . . . . . . . . . . . . . .                                                 .   .   .   .   .   .   .   .   .   .   .   .   .   .   .   .   .   .   .   .   .   .   .   .   25
    7.7 Apache . . . . . . . . . . . . . . . . . . . . . . . . . .                                                 .   .   .   .   .   .   .   .   .   .   .   .   .   .   .   .   .   .   .   .   .   .   .   .   25
    7.8 MongoDB . . . . . . . . . . . . . . . . . . . . . . . .                                                    .   .   .   .   .   .   .   .   .   .   .   .   .   .   .   .   .   .   .   .   .   .   .   .   25
    7.9 Debugging . . . . . . . . . . . . . . . . . . . . . . . .                                                  .   .   .   .   .   .   .   .   .   .   .   .   .   .   .   .   .   .   .   .   .   .   .   .   25

8   Modules                                                                                                                                                                                                        27

                                                                                                                                                                                                                    i
8.1    Core . . . . . . . . .     .   .   .   .   .   .   .   .   .   .   .   .   .   .   .   .   .   .   .   .   .   .   .   .   .   .   .   .   .   .   .   .   .   .   .   .   .   .   .   .   .   .   29
     8.2    Auth . . . . . . . . .     .   .   .   .   .   .   .   .   .   .   .   .   .   .   .   .   .   .   .   .   .   .   .   .   .   .   .   .   .   .   .   .   .   .   .   .   .   .   .   .   .   .   46
     8.3    CV (Curriculum vitae)      .   .   .   .   .   .   .   .   .   .   .   .   .   .   .   .   .   .   .   .   .   .   .   .   .   .   .   .   .   .   .   .   .   .   .   .   .   .   .   .   .   .   47
     8.4    Applications . . . . .     .   .   .   .   .   .   .   .   .   .   .   .   .   .   .   .   .   .   .   .   .   .   .   .   .   .   .   .   .   .   .   .   .   .   .   .   .   .   .   .   .   .   47
     8.5    Organizations . . . . .    .   .   .   .   .   .   .   .   .   .   .   .   .   .   .   .   .   .   .   .   .   .   .   .   .   .   .   .   .   .   .   .   .   .   .   .   .   .   .   .   .   .   53
     8.6    CompanyRegistration        .   .   .   .   .   .   .   .   .   .   .   .   .   .   .   .   .   .   .   .   .   .   .   .   .   .   .   .   .   .   .   .   .   .   .   .   .   .   .   .   .   .   54
     8.7    Orders . . . . . . . .     .   .   .   .   .   .   .   .   .   .   .   .   .   .   .   .   .   .   .   .   .   .   .   .   .   .   .   .   .   .   .   .   .   .   .   .   .   .   .   .   .   .   55
     8.8    Jobs . . . . . . . . . .   .   .   .   .   .   .   .   .   .   .   .   .   .   .   .   .   .   .   .   .   .   .   .   .   .   .   .   .   .   .   .   .   .   .   .   .   .   .   .   .   .   .   55
     8.9    PDF . . . . . . . . . .    .   .   .   .   .   .   .   .   .   .   .   .   .   .   .   .   .   .   .   .   .   .   .   .   .   .   .   .   .   .   .   .   .   .   .   .   .   .   .   .   .   .   61
     8.10   Geo . . . . . . . . . .    .   .   .   .   .   .   .   .   .   .   .   .   .   .   .   .   .   .   .   .   .   .   .   .   .   .   .   .   .   .   .   .   .   .   .   .   .   .   .   .   .   .   61
     8.11   Solr . . . . . . . . . .   .   .   .   .   .   .   .   .   .   .   .   .   .   .   .   .   .   .   .   .   .   .   .   .   .   .   .   .   .   .   .   .   .   .   .   .   .   .   .   .   .   .   62
     8.12   YawikXingVendorApi         .   .   .   .   .   .   .   .   .   .   .   .   .   .   .   .   .   .   .   .   .   .   .   .   .   .   .   .   .   .   .   .   .   .   .   .   .   .   .   .   .   .   62
     8.13   Stackoverflow API . .      .   .   .   .   .   .   .   .   .   .   .   .   .   .   .   .   .   .   .   .   .   .   .   .   .   .   .   .   .   .   .   .   .   .   .   .   .   .   .   .   .   .   63
     8.14   Settings . . . . . . . .   .   .   .   .   .   .   .   .   .   .   .   .   .   .   .   .   .   .   .   .   .   .   .   .   .   .   .   .   .   .   .   .   .   .   .   .   .   .   .   .   .   .   63
     8.15   SimpleImport . . . . .     .   .   .   .   .   .   .   .   .   .   .   .   .   .   .   .   .   .   .   .   .   .   .   .   .   .   .   .   .   .   .   .   .   .   .   .   .   .   .   .   .   .   63
     8.16   JobsByMail . . . . . .     .   .   .   .   .   .   .   .   .   .   .   .   .   .   .   .   .   .   .   .   .   .   .   .   .   .   .   .   .   .   .   .   .   .   .   .   .   .   .   .   .   .   63

9    Customize                                                                                                                                                                                                 65
     9.1 CSS . . . . . . . . . . . . . . . . . . . . . . . . . . . . . . . . . . . . . . . . . . . . . . . . . . . .                                                                                           66
     9.2 Formular Fields . . . . . . . . . . . . . . . . . . . . . . . . . . . . . . . . . . . . . . . . . . . . .                                                                                             66
     9.3 View Helper Scripts . . . . . . . . . . . . . . . . . . . . . . . . . . . . . . . . . . . . . . . . . . .                                                                                             67

10 Guidelines                                                                                                                                                                                                  69
   10.1 Programming Guidelines related to code-maintenance . . . . . . . . . . . . . . . . . . . . . . . . .                                                                                                   69
   10.2 Common JavaScript Trigger . . . . . . . . . . . . . . . . . . . . . . . . . . . . . . . . . . . . . . .                                                                                                70
   10.3 Naming Conventions . . . . . . . . . . . . . . . . . . . . . . . . . . . . . . . . . . . . . . . . . . .                                                                                               70

11 Behat                                                                                                                                                                                                       71

12 API                                                                                                                                                                                                         73
   12.1 Transfering Jobs . . . . . . . . . . . . . . . . . . . . . . . . . . . . . . . . . . . . . . . . . . . . .                                                                                             75

13 Frequently Asked Questions                                                                                                                                                                                  77
   13.1 FAQ: Mails . . . . . . . . .               .   .   .   .   .   .   .   .   .   .   .   .   .   .   .   .   .   .   .   .   .   .   .   .   .   .   .   .   .   .   .   .   .   .   .   .   .   .   .   77
   13.2 FAQ: Navigation . . . . . .                .   .   .   .   .   .   .   .   .   .   .   .   .   .   .   .   .   .   .   .   .   .   .   .   .   .   .   .   .   .   .   .   .   .   .   .   .   .   .   77
   13.3 FAQ: Translation . . . . . .               .   .   .   .   .   .   .   .   .   .   .   .   .   .   .   .   .   .   .   .   .   .   .   .   .   .   .   .   .   .   .   .   .   .   .   .   .   .   .   79
   13.4 FAQ: General . . . . . . . .               .   .   .   .   .   .   .   .   .   .   .   .   .   .   .   .   .   .   .   .   .   .   .   .   .   .   .   .   .   .   .   .   .   .   .   .   .   .   .   79
   13.5 FAQ: Documentation . . . .                 .   .   .   .   .   .   .   .   .   .   .   .   .   .   .   .   .   .   .   .   .   .   .   .   .   .   .   .   .   .   .   .   .   .   .   .   .   .   .   80
   13.6 FAQ: XML Feeds . . . . .                   .   .   .   .   .   .   .   .   .   .   .   .   .   .   .   .   .   .   .   .   .   .   .   .   .   .   .   .   .   .   .   .   .   .   .   .   .   .   .   80
   13.7 FAQ: Customize Formulars                   .   .   .   .   .   .   .   .   .   .   .   .   .   .   .   .   .   .   .   .   .   .   .   .   .   .   .   .   .   .   .   .   .   .   .   .   .   .   .   81

14 Indices and tables                                                                                                                                                                                          83

Index                                                                                                                                                                                                          85

ii
YAWIK Documentation, Release 0.35.2

     Contact contact@yawik.org
     Revision 0.35
     Date Jan 15, 2021
Contents:

Contents                                                          1
YAWIK Documentation, Release 0.35.2 2 Contents
CHAPTER           1

                                                                                              About YAWIK

YAWIK offers a web based solution for managing job applications. Jobs ads can be entered or pushed to the system.
The system assigns application forms to job ads. Applicants and Recruiters can connect to YAWIK using social
networks.
So what is YAWIK?
YAWIK is a modular system for human resources. It can be used as a job board, as a simple data entry tool for job
openings or as an application management system. It should give applicants the opportunity to quickly and easily
create a Hire-Me-Page. Currently it is possible to integrate YAWIK into a corporate website by extending it with an
own module (see Customize). On the long term it is designed to become a distributed system for connecting recruiters
and applicants.
YAWIK is a PHP web application. It’s based on Laminas and mongo. The target group of YAWIK are companies and
candidates.
As started in 2013, YAWIK is quite new but stable enough to be used by aprox 20 companies to manage applications.
Why do we do this?
We believe that:
    • Candidates should be able to easily apply to a job advertisement
    • Candidates should have sovereignty over their application data
    • Recruiters should be able to easily find candidates
    • Open Source and Human Resources fits together
How came YAWIK to be?
YAWIK was initiated by Carsten Bleek, owner of “CROSS Solution”. “CROSS Solution” was able to convince
customers about the YAWIK idea. An initial group of [sponsors](https://yawik.org/sponsoren/) was found, and YAWIK
was born.

                                                                                                                  3
YAWIK Documentation, Release 0.35.2
1.1 Important Links for developers
• Sources: https://github.com/cross-solution/YAWIK
• Demo: https://yawik.org/demo/
• Forum: https://forum.yawik.org/
• Scrutnitzer: https://scrutinizer-ci.com/g/cross-solution/YAWIK/
• Coveralls: https://coveralls.io/github/cross-solution/YAWIK
• Openhub: https://www.openhub.net/p/YAWIK
4 Chapter 1. About YAWIKCHAPTER 2
Requirements
• php >= php 7.2
• Laminas
• mongodb >= 3.*
• php-mongodb >= 1.7
• php-intl
• php-gd
• php-curl (only needed to install dependencies via composer)
• php-dom (only needed to install dependencies via composer)
• php-openssl (only needed to install dependencies via composer)
• php-mbstring (only needed, if the PDF module is used)
YAWIK should run on any OS, which supports the above software components. In real life, we’ve seen YAWIK
running on Linux Ubuntu, Debian, FreeBSD and OSX. It’s possible to run YAWIK on AWS.
On FreeBSD, make sure, the php fileinfo extention is available. Fileinfo extention is needed by validating file uploads.
The YAWIK development happens under mainly Ubuntu.
5YAWIK Documentation, Release 0.35.2 6 Chapter 2. Requirements
CHAPTER            3

                                                                                                    Preparations

YAWIK needs PHP >=7.2 for execution and the described extensions from the requirements.
For the installation via Composer (this is the easiest way at the moment) npm is needed. The Nodes Package Manager
executes grunt tasks at the end of the installation which copy images, convert LESS to CSS and compress JS.
Data is stored in a MongoDB. The easiest way is to install a MongoDB locally. If this is not possible, you can use a
MongoDB provider like mlab.com or google.
Apache or nginx can be used as webserver. For testing you can use the PHP buildin server.
And of course you need composer.
In the different Linux distributions there are dirverse differences. So you have to proceed differently until an installa-
tion via composer works.

3.1 Ubuntu 18.04

Installation of PHP7.2 and apache2. Ubuntu 18.04 comes with php7.2.3 and ext-mongodb 1.3.4. You’ll need at least
ext-mongodb ^1.5.0. You’ll have to build it from PECL by yourself or use the great ondrej repos.

sudo apt install software-properties-common
add-apt-repository ppa:ondrej/php

install npm version 10. It’s needed to run grunt tasks at the end of the installation.

apt install curl
curl -sL https://deb.nodesource.com/setup_10.x | sudo -E bash -
sudo apt-get install -y nodejs

If you want to run php7.2

apt install php-mongodb php7.2 php7.2-curl php7.2-xsl php7.2-intl php7.2-common php7.
 ˓→2-cli php7.2-json php7.2-gd curl libapache2-mod-php7.2 \

     php7.2-cli apache2 php7.2-xml php7.2-mbstring composer unzip git

                                                                                                                        7
YAWIK Documentation, Release 0.35.2 With php7.3 we’ve noticed an issue which leads to crashes in the apache module. At least in LXC containers. 3.2 Debian 10 Debian 10 comes with PHP7.3 by default. sudo apt install php-mongodb libapache2-mod-php php-curl php-gd php-intl php-json php- ˓→dom curl gzip git php composer npm This installs everything to install YAWIK via composer. Note: npm is only needed because at the end of the installation a few grunt tasks copy images, generate CSS and compress JS. It’s a good idea not to install it the apt, but via https://github.com/nodesource/distributions 3.3 Install mongo Database https://docs.mongodb.com/manual/installation/ YAWIK runs with mongo 2.4. So you can use the mongod version, which is shipped with your distribution. However, you should use a later version. Otherwise you have to enable the text search, which is disabled in 2.4 by default. In 2.6 and above the text search is enabled by default. You can install e.g. mongo 3.2 by: (Our demo is running 3.2, development is done with 4.x) https://docs.mongodb.com/manual/administration/install-on-linux/ We’ve installed mongo the following way: sudo apt-key adv --keyserver hkp://keyserver.ubuntu.com:80 --recv D68FA50FEA312927 echo "deb http://repo.mongodb.org/apt/ubuntu xenial/mongodb-org/3.2 multiverse" | ˓→sudo tee /etc/apt/sources.list.d/mongodb-org-3.2.list sudo apt-get update sudo apt-get install -y mongodb-org If your linux comes with systemd, you can start your mongod with service mongo start. If you need an init script, because your linux comes with sysv, you can fetch it from mongodb github repository cd /etc/init.d/ curl https://raw.githubusercontent.com/mongodb/mongo/master/debian/init.d > mongod chmod +x mongod update-rc.d mongod defaults Start your mongod with /etc/init.d/mongod start 8 Chapter 3. Preparations
CHAPTER 4
Installation
YAWIK is a modular system. It can be used as a job board or as an applicant management system. If you want to
change the layout, the navigation or the functionality, you have to build your own module.
Our yawik/standard can be used as a template for such a module.
4.1 Installation with composer
A YAWIK instance can be build with composer.
composer create-project yawik/standard path/to/yawik
This will install YAWIK with all development dependencies. You can add additional modules with
cd path/to/yawik
composer require [modulename]
For a list of available modules, check https://packagist.org/?type=yawik-module
If you do not want to have all development dependencies on your production server, you need to copy all files except
the vendor directory and all directories under public from path/to/yawik to a new directory. In this directory
you then run
composer install --no-dev
Alternatively you can create a new yawik project and copy the files config/modules.config.php and
composer.lock from path/to/yawik. Then run the composer install
composer create-project --no-dev path/to/yawik-production
cd path/to/yawik-production
cp path/to/yawik/config/modules.config.php ./config
cp path/to/yawik/composer.lock path/to/yawik/composer.json .
composer install --no-dev
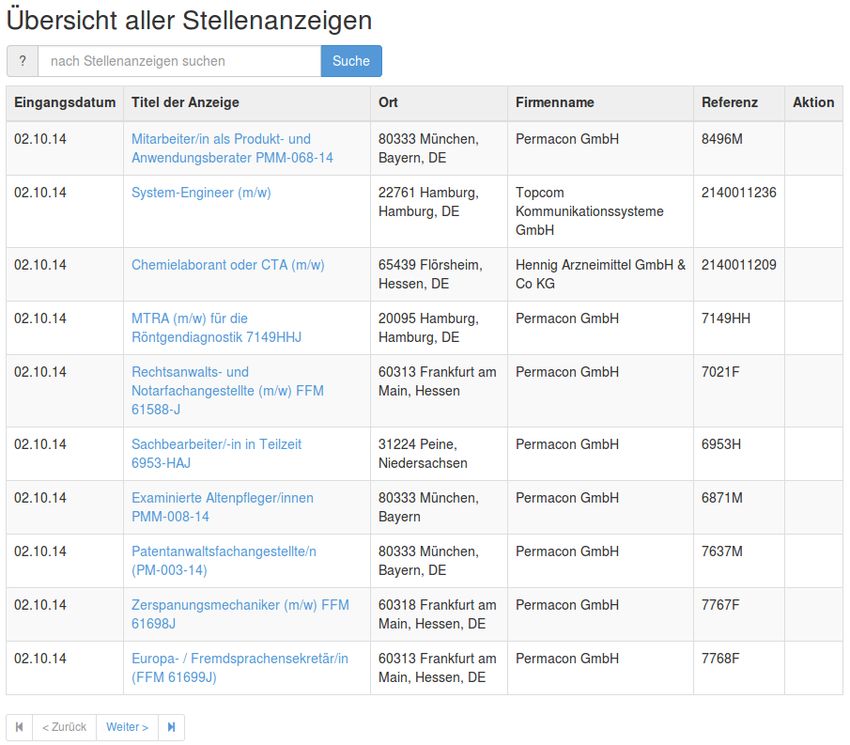
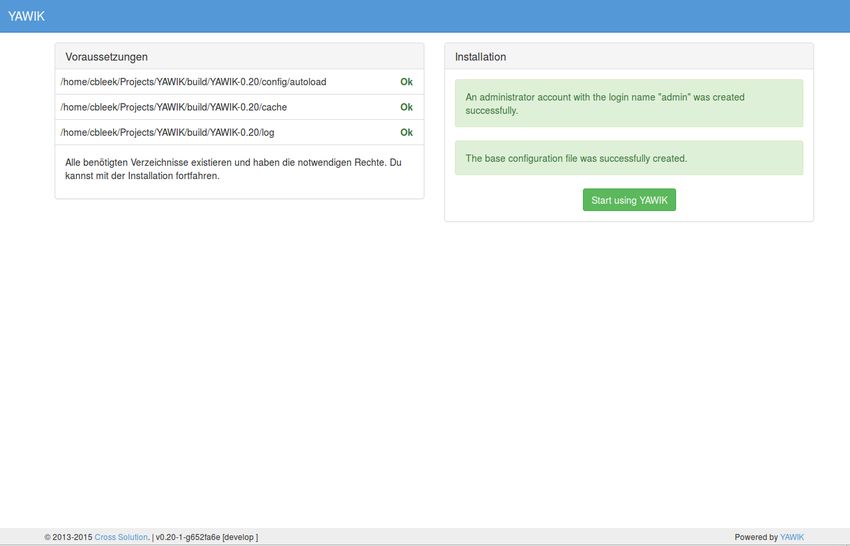
9YAWIK Documentation, Release 0.35.2 Finally you need to transfer the path/to/yawik-production to your webserver. For configuring apache to server YAWIK, please look in the section below. Document root must be the public directory. 4.2 Install without composer Get the latest YAWIK Package from Sourceforge. Packages are build as ZIP or TGZ archive. They extract into a subdirectory YAWIK-x.y.z. If you preserve the permissions, the directories cache and log should be writable after extraction. tar preserves permissions with the p-Option. So unpack a TGZ with tar -xzpf YAWIK-y.x.z.tgz. unzip preserves the permissions by default (at least on ubuntu 14.4). So unpack a ZIP archive with unzip YAWIK-x.y.z.zip By pointing your browser to the YAWIK-x.y.z/ public directory, an installation page appears. You’ll be asked to enter a mongodb connection string, a username, a password and an email ad- dress. Note: YAWIK will run in production mode by default. So if you make modifications to the config au- toload files you have to remove the cache/module-classmap-cache.module_map.php and cache/ module-config-cache.production.php. 4.3 Install for Developers if you want to modify the YAWIK code, you should clone the repository from Github. The repository does not contain any dependency. You have to im- port all dependencies by executing the ìnstall. sh script located in the YAWIK root. This scripts imports all external libraries via composer. In addition, it creates the directories log, cache ùnd config/ autoload and set the directory permissions to a+w. git clone https://github.com/cross-solution/YAWIK cd YAWIK ./install.sh After the execution you are ready to point your browser to the public directory. You’ll get the install wizard and after enter- ing the initial user, the database connection and an email address you are ready to use YAWIK. At this point your `config/autoload directory contains only one file yawik.config.global.php containing the database connection string. The initial user is created with the àdmin role in the database. $ ls YAWIK/config/autoload yawik.config.global.php 10 Chapter 4. Installation
YAWIK Documentation, Release 0.35.2

All other configurations are currently done manually by copying
the `*.dist files from the modules configuration directory to
the autoload directory and removing the “.dist” part.

Note:  To disable the caching of the config autoload files you need to set an environment variable called
APPLICATION_ENV to the value “development”
If you use apache,  you can do                   this   in   your   virtual   section   config   with   SetEnv
APPLICATION_ENV="development"

4.3. Install for Developers                                                                                 11
YAWIK Documentation, Release 0.35.2

12                                    Chapter 4. Installation
CHAPTER           5

                                                                                                    Runtime

5.1 Using Apache

If you want to use Apache, you probably need root access to the machine you’ve installed YAWIK on. In addition you
need to enable the rewrite module of apache.

sudo a2enmod rewrite && sudo service apache2 reload

Then you have to make sure that the DocumentRoot of apache is pointing to YAWIK/public and apache is allowed
to Access the YAWIK directory.
A VirtualHost section might look like.

     ServerName yawik.example.com
     DocumentRoot /var/www/YAWIK/public
     AddDefaultCharset utf-8

      # set an env to disable caching.
      #SetEnv APPLICATION_ENV "development"

           DirectoryIndex index.php
           Options Indexes FollowSymLinks MultiViews
           AllowOverride All
           # for apache >=2.4
           Require all granted

          # for apache
YAWIK Documentation, Release 0.35.2
sudo a2ensite yawik.example.com.conf && sudo service apache2 reload
now you should be able to login into your YAWIK by pointing a browser to
http://${YAWIK_HOST}
Note: Be sure you either export the variables YAWIK_HOST and YAWIK_HOME or replace them with the actual
values in the apache config file.
Also your Webserver should not be able to access your build.properties. You can safely remove this file after you’ve
run the installation is done.
5.2 Using Nginx
A configuration file for Nginx looks like this
server {
listen 80;
server_name my.yawik.host;
root /your-location/YAWIK/public;
index index.html index.htm index.php;
charset utf-8;
location / {
try_files $uri $uri/ /index.php$is_args$args;
}
location ~ \.php$ {
fastcgi_param SCRIPT_FILENAME $document_root$fastcgi_script_name;
fastcgi_pass unix:/run/php/php5.6-fpm.sock;
fastcgi_param APPLICATION_ENV production;
include /etc/nginx/fastcgi_params;
}
}
Todo: We need more details on setup nginx here. - Where to put the server config - What commands to run.
Yawik can be downloaded at https://sourceforge.net/projects/yawik/files/
5.2.1 Configuration
Configuration files are located in config/autoload. Config files are returning an associative array. All arrays are
merged, so the order how the configuration files are processed is relevant.
Files with names ending in *.global.php are process first. As a second files ending in *.{env}.php. {env}
can have at least the values production, and development. If the environment variable APPLICATION_ENV
is set, and if files named *. development.php exist, then these configurations are processed. If no environment
variable ist set, production is assumed.
At the end *.local.php files are processed.:
14 Chapter 5. RuntimeYAWIK Documentation, Release 0.35.2
Modules are coming with there own config directory. Configuration files of modules can be named *.config.
php. This allows you to split configurations into sections. E.g. a router.config.php file should contain an associative
array defining routing specific things.
If the enviroment is set to production, all configurations are cached in cache/module-classmap-cache.
module_map.php. There is currently no way to invalidate the cache. You have to remove this file, if you alter files
in config/autoload.
5.3 Authentication
to enable login via Facebook, Xing, LinkedIn or any other hybridauth adapter simply copy the mod-
ule.auth.local.php.dist file to config/autoload/module.auth.local.php and adjust your keys and secrets.
1YAWIK Documentation, Release 0.35.2 16 Chapter 5. Runtime
CHAPTER           6

                                                                                                        Upgrade

composer update should do the task.
But: never forget to backup before upgrade.
1) backup your mongo data with the mongodump command. This will create a directory dump containing all your
mongo databases. You can restore these databases with the mongorestore command.
YAWIK creates all needed mongo indexes automatically. But this only works, if an index is not already available.
Since some indexes have changed in the past, it might be required to drop all indexes, so YAWIK will be able to create
all needed indexes.
To drop all indexes, go to your mongo shell and type:

set1:PRIMARY> db.users.dropIndexes();
set1:PRIMARY> db.applications.dropIndexes();
set1:PRIMARY> db.jobs.dropIndexes();

  2) Move your YAWIK Installation to a new location, so you are able to undo the upgrade any time.
3) Install the new Version. Eighter via git or unpack the latest ZIP/TGZ Package from sourceforge. In contrast to a
fresh installation, you do not access your updated YAWIK via a Browser. Copy all config/autoload/* files of
your moved old YAWIK installation into to config/autoload directory of your new installation.
  4) Now you can access your new YAWIK via a Browser.

6.1 0.24 => 0.25

New users get a status. You can update old Users by

db.getCollection('users').update({'status': {$exists : false}}, {$set: {'status': {
    "name" : "active",
    "order" : NumberLong(50)
}}}, {multi: true})

                                                                                                                   17
YAWIK Documentation, Release 0.35.2
Companynames ares searchable and sortable. If you want to make older companies searchable and sortable to, run the
following query
db.getCollection('organizations.names').find().forEach(function(name) {
db.getCollection('organizations').update({organizationName: name._id}, {$set: {_
˓→organizationName: name.name}}, {multi: true});
})
6.2 0.31 => 0.32
0.32 requires to use the ext-mongodb extension. You have to replace your ext-mongo by ext-mongodb.
18 Chapter 6. UpgradeCHAPTER 7
Configuration
Configuration files are located in config/autoload. Config files are returning an associative array. All arrays are
merged, so the order how the configuration files are processed is relevant.
Files with names ending in *.global.php are process first. As a second files ending in *.{env}.php. {env}
can have at least the values production, and development. If the environment variable APPLICATION_ENV
is set, and if files named *. development.php exist, then these configurations are processed. If no environment
variable ist set, production is assumed.
At the end *.local.php files are processed.
Modules are coming with there own config directory. Configuration files of modules can be named *.config.
php. This allows you to split configurations into sections. E.g. a router.config.php file should contain an associative
array defining routing specific things.
If the enviroment is set to production, all configurations are cached in cache/module-classmap-cache.
module_map.php and cache/module-config-cache.production.php. There is currently no way to
invalidate the cache. You have to remove these files, if you modify files in file:config/autoload.
7.1 Authentication
to enable login via Facebook, Xing, LinkedIn or any other hybridauth adapter simply copy the mod-
ule.auth.local.php.dist file to config/autoload/module.auth.local.php and adjust your keys and secrets.
1YAWIK Documentation, Release 0.35.2
(continued from previous page)
10 "enabled" => true,
11 "keys" => array ( "key" => "", "secret" => "" ),
12 ),
13 "XING" => array (
14 "enabled" => true,
15 "keys" => array ( "key" => "", "secret" => "" ),
16 ),
17 "Github" => array(
18 "enabled" => true,
19 'keys' => array ( "id" => "", 'secret' => ""),
20 "scope" => ''
21 ),
22 "Google" => array(
23 "enabled" => true,
24 'keys' => array ( "id" => 'xxxxxxxxxxxx-xxxxxxxxxxxxxxxxxxxxxxxx.apps.
˓→googleusercontent.com', 'secret' => ''),
25 "scope" => 'https://www.googleapis.com/auth/userinfo.profile https://www.
˓→googleapis.com/auth/userinfo.email',
26 ),
27 );
28 ?>
7.2 Example: Setting up Facebook, Xing or LinkedIn Login
YAWIK$ cp module/Auth/config/module.auth.global.php.dist config/autoload/module.auth.
˓→global.php
All placeholders in the configuration files which match ‘%%.*%%’ are deprecated. They are relics of the
build.properties area. Since 0.20 an intall wizard is available which introduces an initial user with the admin role.
....
"keys" => array ( "id" => "%%facebook.appid%%", "secret" => "%%facebook.secret%%"
˓→),
....
Note: you need a Facebook, Xing or LinkedIn App, if you want to integrate the social networks . So take a look how
to create an App with Facebook, Xing or LinkedIn.
Copy the .dist files from the modules/ /config dir into the config/autoload directory. Don’t forget to remove the “.dist”
suffix. Addjust the values and remove the cache/modules- files.
7.3 Authentication
to enable login via Facebook, Xing, LinkedIn or any other hybridauth adapter simply copy the mod-
ule.auth.local.php.dist file to config/autoload/module.auth.local.php and adjust your keys and secrets.
1YAWIK Documentation, Release 0.35.2
(continued from previous page)
6 "scope" => "email, user_about_me, user_birthday, user_hometown, user_
˓→work_history, user_education_history",// optional
7 "display" => "popup"
8 ),
9 "LinkedIn" => array (
10 "enabled" => true,
11 "keys" => array ( "id" => "your-consumer-key", "secret" => "your-
˓→consumer-secret" ),
12 "scope" => "r_fullprofile, r_emailaddress"
13 ),
14 "XING" => array(
15 "enabled" => true,
16 'keys' => array ( "key" => 'your-consumer-key', 'secret' => 'your-
˓→consumer-secret'),
17 "scope" => ''
18 ),
19 "Github" => array(
20 "enabled" => true,
21 'keys' => array ( "id" => 'your-consumer-key', 'secret' => 'your-
˓→consumer-secret'),
22 "scope" => ''
23 ),
24 "Google" => array(
25 "enabled" => true,
26 'keys' => array ( "id" => 'your-consumer-key', 'secret' => 'your-
˓→consumer-secret'),
27 "scope" => 'https://www.googleapis.com/auth/userinfo.profile https://
˓→www.googleapis.com/auth/userinfo.email',
28
29 ),
30 );
31 ?>
The configuration structure was simply taken from the hybridauth library. So the “enabled” field means enabled for
the hybridauth library. It does not mean “enabled” for login. To enable a social network for login you have to ad the
lowercased key to enableLogins array. You have to copy the auth.options.global.php.dist to config/autoload/
auth.options.global.php and adjust your values.
1 $options = array(
2 /*
3 * default email address, which is used in FROM headers of system mails
˓→like "new registration",
4 * "forgot password",..
5 */
6 'fromEmail' => 'email@example.com',
7
8 /*
9 * default name address, which is used in FROM headers of system mails
˓→like "new registration",
10 * "forgot password",..
11 */
12 'fromName' => 'YAWIK Website',
13
14 /*
15 * Subject of your registration Mail
16 */
(continues on next page)
7.3. Authentication 21YAWIK Documentation, Release 0.35.2
(continued from previous page)
17 'mailSubjectRegistration' => 'your registration',
18
19 /*
20 * enable social networks for login and registration. The names must
˓→match the keys used in
21 * in the 'hybridauth' section of you module.auth.global.php file
22 */
23 'enableLogins' => ['linkedin','github','xing','google','facebook'],
24
25 /*
26 * if true, users are allowed to register.
27 */
28 'enableRegistration' => true,
29
30 /*
31 * if true, users can reset their password.
32 */
33 'enableResetPassword' => true,
34 );
7.4 Mail
To configure an SMTP Server, copy MailServiceOptions.config.local.php to your config/autoload directory and
adjust the values.
7.4.1 Setting the senders address
copy the auth.options.global.php into your config/autoload and set the fromEmail value.
7.4.2 Setting Mail Texts
The mail texts are defined by the following templats. You can overwrite the mails by mapping the following keys
1 'mail/header' => __DIR__ . '/../view/mail/header.phtml',
2 'mail/footer' => __DIR__ . '/../view/mail/footer.phtml',
3 'mail/footer.en' => __DIR__ . '/../view/mail/footer.en.phtml',
4 'mail/forgotPassword' => __DIR__ . '/../view/mail/forgot-password.phtml',
5 'mail/register' => __DIR__ . '/../view/mail/register.phtml',
6 'mail/job-created' => __DIR__ . '/../view/mails/job-created.phtml',
7 'mail/job-pending' => __DIR__ . '/../view/mails/job-pending.phtml',
8 'mail/job-accepted' => __DIR__ . '/../view/mails/job-accepted.phtml',
9 'mail/job-rejected' => __DIR__ . '/../view/mails/job-rejected.phtml',
10 'auth/mail/new-registration' => __DIR__ . '/../view/mail/new-registration.
˓→phtml',
11 'auth/mail/user-confirmed' => __DIR__ . '/../view/mail/user-confirmed.phtml',
12 'jobs-by-mail/form/subscribe/form' => __DIR__ . '/../view/jobs-by-mail/form.
˓→phtml',
13 'jobs-by-mail/mail/jobs' => __DIR__ . '/../view/mail/jobs.phtml',
14 'jobs-by-mail/mail/confirmation' => __DIR__ . '/../view/mail/confirmation.
˓→phtml',
22 Chapter 7. ConfigurationYAWIK Documentation, Release 0.35.2
The mail texts can be translated by adding the languages to the mapping keys. The Logic is coded in: https://github.
com/cross-solution/YAWIK/blob/develop/module/Core/src/Core/Mail/HTMLTemplateMessage.php#L246
1 'mail/job-created.fr' => __DIR__ . '/../view/mails/job-created.fr.phtml',
2 'mail/job-pending.fr' => __DIR__ . '/../view/mails/job-pending.fr.phtml',
3 'mail/job-accepted.fr' => __DIR__ . '/../view/mails/job-accepted.fr.phtml
˓→ ',
4 'mail/job-rejected.fr' => __DIR__ . '/../view/mails/job-rejected.fr.phtml
˓→ ',
7.5 Jobs
1 $options = array(
2
3 /**
4 * If not set, the email address of the default user is used
5 * @see Jobs\Options\ModulesOptionFactory
6 */
7 'multipostingApprovalMail' => '',
8
9 /**
10 * If a target Uri is set, a rest Request is sent to this target in case
11 * a job posting was accepted.
12 */
13 'multipostingTargetUri' => '',
14
15 /**
16 * default Logo, if a company has no logo.
17 */
18 'default_logo' => '/Jobs/images/yawik-small.jpg',
19
20 /**
21 * Maximum size in bytes of a company Logo
22 */
23 'companyLogoMaxSize' => 100000,
24
25 /**
26 * Allowed Mime-Types for company Logos
27 */
28 'companyLogoMimeType' => array("image")
29 );
30
31 ### do not edit below ###
32
33 return array('jobs_options' => $options);
7.5.1 Setting channels
Currently prices and channels are hard coded. The operator of YAWIK is responsible for publishing a jobposting to n
ordered channel.
1 $channel['yawik'] = array(
2 'label' => 'YAWIK',
(continues on next page)
7.5. Jobs 23YAWIK Documentation, Release 0.35.2
(continued from previous page)
3 'prices' => [ 'base' => 99, 'list' => 99, 'min' => 99, ],
4 'headline' => /*@translate*/ 'publish your job on yawik.org for free',
5 'description' => /*@translate*/ 'publish the job for 30 days on %s',
6 'linktext' => /*@translate*/ 'yawik.org',
7 'route' => 'lang/content',
8 'publishDuration' => 60,
9 'params' => array(
10 'view' => 'jobs-publish-on-yawik'
11 )
12 );
13
14 $channel['jobsintown'] = array(
15 'label' => 'Jobsintown',
16 'prices' => [ 'base' => 650, 'list' => 698, 'min' => 499, ],
17 'headline' => '30 Tage, incl. Karrierenetzwerk',
18 'description' => 'publish the job for 30 days on %s',
19 'linktext' => 'www.jobsintown.de',
20 'logo' => '/Jobs/images/channels/jobsintown.png',
21 'route' => 'lang/content',
22 'publishDuration' => 30,
23 'params' => array(
24 'view' => 'jobs-publish-on-jobsintown'
25 )
26 );
27
28 $channel['fazjob'] = array(
29 'label' => 'FAZjob.NET',
30 'prices' => [ 'base' => 1095, 'list' => 1095, 'min' => 1095, ],
31 'headline' => '30 Tage auf dem Karriereportal der FAZ',
32 'description' => 'publish the job for 30 days on %s',
33 'linktext' => 'FAZjob.net',
34 'logo' => '/Jobs/images/channels/fazjob_net.png',
35 'route' => 'lang/content',
36 'publishDuration' => 60,
37 'params' => array(
38 'view' => 'jobs-publish-on-fazjob-net'
39 )
40 );
41
42 $channel['homepage'] = array(
43 'label' => /*@translate*/ 'Your Homepage',
44 'prices' => [ 'base' => 0, 'list' => 0, 'min' => 0, ],
45 'headline' => /*@translate*/ 'enable integration of this job on your
˓→Homepage',
46 'description' => /*@translate*/ 'enable %s of this job on your Homepage',
47 'linktext' => /*@translate*/ 'integration',
48 'route' => 'lang/content',
49 'params' => array(
50 'view' => 'jobs-publish-on-homepage'
51 )
52 );
53
54 return array('multiposting'=> array('channels' => $channel));
24 Chapter 7. ConfigurationYAWIK Documentation, Release 0.35.2
7.6 Sitename
7.7 Apache
point the DocumentRoot of your Webserver to the public directory.
ServerName YOUR.HOSTNAME
DocumentRoot /YOUR/DIRECTORY/YAWIK/public
DirectoryIndex index.php
AllowOverride All
Order allow,deny
Allow from all
Note: you should SetEnv APPLICATION_ENV development in your VirtualHost section, if you plan do
develop.
7.8 MongoDB
7.9 Debugging
You can enable the debugging mode by setting the following configuration:
'tracy' => [
'mode' => false
]
This will enable displaying of error messages on the screen and disables sending of email error notifications to the
recipients specified in the following configuration:
'tracy' => [
'email' => 'first.recipient@domain.tld, second.recipient@domain.tld'
],
The complete debugging configuration with default values consists of:
'tracy' => [
'mode' => true, // toggles the production/development mode (true = production,
˓→false = development, null = autodetect, IP address(es) csv/array)
'bar' => false, // toggles the diagnostics bar (a small bar placed in the bottom
˓→right corner of a browser displaying system info such a memory usage, elapsed time,
˓→...)
'strict' => true, // sets the error level strictness (bool = cause immediate
˓→death, int = matched against error severity)
'log' => __DIR__ . '/../../../log/tracy', // sets the path to a log directory
˓→(this directory keeps error.log, snoozing mailsent file & html exception trace
˓→files)
(continues on next page)
7.6. Sitename 25YAWIK Documentation, Release 0.35.2
(continued from previous page)
'email' => null, // sets the recipient(s) of email error notifications in the
˓→production mode (multiple recipients are separated with a comma or presented as an
˓→array)
'email_snooze' => 900 // sets the interval for sending email error notifications
˓→in seconds
],
7.9.1 Debugging Mails
To send all mails to one or more specific mail addresses, regardless of the original recipients in To:, Cc: and Bcc:
headers, you can set the configuration:
'mails' => array(
'develop' => array(
/*
* Every mail send from the system will be send ONLY to this address(es),
* regardless of the original set recipient(s) (including CC and BCC).
* Use comma to separate addresses.
* Use an empty string (or comment out) to disable.
*/
'override_recipient' => '',
),
),
If you put this configuration in an autoloaded config file which name ends in .development.php, it will be loaded only,
when the environment variable APPLICATION_ENV is set to “development”. This allows for quick enabling and
disabling without the need to modify configuration files.
26 Chapter 7. ConfigurationCHAPTER 8
Modules
we use module system of the ZF2. Modules are configured in their config directory. You can use multiple config-
uration files by using the \Core\ModuleManager\ModuleConfigLoader utility. This way you can split up
your configuration in smaller chunks (e.g. put all your configuration about routings into a router.config.php
and about templating into a template.congig.php), which are easier to find, read and maintain.
Modules can simply be enabled by adding their names to an array in config/config.php.
1
Directory Structure of a module
27YAWIK Documentation, Release 0.35.2
directory description example
language contains gettext language files
public place for images, css or javascript
config place for configuration files
test place for unit tests
src Controllers, Models etc.
view view scripts
A module can implement the following Features:
• Dashboard Widgets
• Configuration formulars
• Command line tools
28 Chapter 8. ModulesYAWIK Documentation, Release 0.35.2
currently the following modules exists:
8.1 Core
Contents:
8.1.1 Assets
Assets are common JS libraries like jquery, bootstrap or select2. It makes sense to manage these assets by npm.
This means, all needed JS libraries are listed in package.json. If an additional library is needed, it can be added
via npm i --save-dev . This will update the package.json and download the package to the
node_modules directory. Our bin/install-assets.sh copies all needed javascript, css, fonts, etc. files to the public/
assets directory, which is accessable by the web server.
You can download all required JS files and copy them to their location in the assets dir with:
npm install
bin/install-assets.sh
You can allways remove and reinstall assets with
rm -R public/assets/*
npm install
bin/install-assets.sh
this will copy all needed JS files into public/assets.
8.1.2 Formular Handling
Author Mathias Gelhausen
Forms are essential. YAWIK uses forms almost everywhere. The main goals of forms are:
• Consistent look&feel
• Binding to Entities
Build-In form classes and helpers
[TODO: Fill in.. ]
Form classes
\Core\Form\Form
This is the very base YAWIK form class, which extends \Zend\Form\Form.
It implements \Core\Form\DescriptionAwareFormInterface and \Core\Form\DisableElementsCapableInterface.
It sets the default hydrator to \Core\Entity\Hydrator\EntityHydrator (which allows the form to bind YAWIK entities.)
8.1. Core 29YAWIK Documentation, Release 0.35.2 \Core\Form\BaseForm An extension of \Core\Form\Form, which creates a form with a target fieldset and a default buttons fieldset. It is meant to provide a ad-hoc solution for creating forms with a consistent look and handling. \Core\Form\Container The Container bundles several forms together, which work on one entity, enabling them to patch their behaviour together. Container have some specific methods for identifying or handle an explicit form. Most of these methods just pass some information to all subsequent forms setParams(array $params) is placing a hidden input filed in every subordinated forms. This comes in handy for the identification of an entitity. setEntity(EntityInterface $entity) Interfaces View helpers \Core\Form\View\Helper\FormContainer \Core\Form\View\Helper\Form \Core\Form\View\Helper\SummaryForm Learning YAWIK forms [TODO: Here must be some text. . . .] We try to make our forms’ look and feel consistent across the application. Therefor there are many form classes and view helpers available to help creating, handling and rendering forms. Form All YAWIK forms are handled by one javascript file, unless it has the html attribute data-handle set to a value other than yk-forms. This javascript bind on the submit event, makes a ajax call to the forms’ action and takes care of displaying the error messages, if any. It then triggers an own event called yk.forms.done and passes the ajax call result to all listeners. BaseForm Most of our forms share a common structure: Some elements (inputs), grouped optionally in fieldsets and the “Submit” and “Cancel” buttons at the bottom. To simplify creation of such forms, there’s the \Core\Form\BaseForm class. You specify the fieldset with the elements, and the BaseForm adds a Button-Fieldset automatically. 30 Chapter 8. Modules
YAWIK Documentation, Release 0.35.2

The specified fieldset will be used as base fieldset of the form, so binding objects to the form will effectivly bind it to
the fieldset. (see ZF-Doc)

Examples

Simplest BaseForm: Set the base fieldset to a form element manager service name.

class MyForm extends BaseForm
{
    protected $baseFieldset = 'MyFieldset';
}

Provide factory specification as base fieldset:

class MyForm extends BaseForm
{
    protected $baseFieldset = array(
        'type' => 'MyFieldset',
        'options' => array( /* ... */ ),
        /*...*/
    );
}

Overwrite parent methods to further customize:

class MyForm extends BaseForm
{
    protected function addBaseFieldset()
    {
        $fs = new Fieldset();
        /* configure your fieldset as you want */
        $fs->setUseAsBaseFieldset(true);
        $this->add($fs);
    }

     protected function addButtonsFieldset()
     {
         /* add the desired buttons fieldset here, e.g.: */
         $this->add(array(
             'type' => 'MyButtons',
         ));
     }

SummaryForm

The most used form will
be the SummaryForm,
which is an extension of
BaseForm, that lets you
render a form in two pre-
sentation modes:
    • Form Mode (Form
      Mode)

8.1. Core                                                                                                               31
YAWIK Documentation, Release 0.35.2
• Summary Mode
(Summary Mode)
Each presentation mode
is rendered as a sub
container in one html
container, and one of
these containers is hid-
den while the other is
displayed.
The summary container
gets a “edit”-button in
the top right corner on
hovering. Clicking this
button will toggle the
presentation modes.
Clicking the submit or
cancel button in the form
will - in case of submit only if the results’ valid field is true - toggle also the presentation modes.
The view helper SummaryForm takes care of rendering the form and includes the necessary
Javascript files.
Note: The summary presentation renders only the base fieldset.
If the SummaryForms’ base fieldset implements the
\Core\Form\ViewPartialProviderInterface, it’s possible to provide a view partial for Fig. 2: Summary Mode
the fieldsets’ form view and summary view separately or provide one partial to render
both modes. The view helper decides what to do on this criterions:
• To render the form part: It appends .form to the partial name and tries to resolve this template name using the
ViewResolver. If this template name can be resolved, it is used to render the form, if not, the template with the
original name is used.
• To render the summary part: It appends .view to the partial name and tries to resolve this template name
using the ViewResolver. If this template name can be resolved, it is used to render the summary, if not, the
template with the original name is used and a variable named “renderSummary” is passed with the boolean
value “TRUE”.
If no view partial is provided, it loops over the elements of the form and renders the elements as list of element labels,
element values pairs.
Prior to rendering, the activated mode can be set. (Either form or summary)
The summary form javascript expects a field “content” in the ajax call result (json), which holds the rendered summary.
This content then replaces the old summary content.
Examples
Create a summary form:
class MyForm extends SummaryForm
{
protected $baseFieldset = 'MyFieldset';
}
render in view:
32 Chapter 8. ModulesYAWIK Documentation, Release 0.35.2
$this->summaryForm($form);
Handle in controller:
public function myFormAction()
{
$services = $this->getServiceManager();
$forms = $services->get('FormElementManager');
$form = $forms->get('MyForm');
$request = $this->getRequest();
if ($request->isPost()) {
$form->setData($request->getPost());
if ($form->isValid()) {
$helper = $services->get('ViewHelperManager')->get('summaryform');
return new JsonModel(array(
'valid' => true,
'content' => $helper($form)
));
} else {
return new JsonModel(array(
'valid' => false,
'errors' => $form->getMessages(),
));
}
}
return array(
'form' => $form
);
To render Using ViewPartialProviderInterface in a SummaryForm (remember to use the base fieldset to set the par-
tial. . . )
class MyForm extends SummaryForm
{
protected $baseFieldset = 'MyFieldset';
}
class MyFieldset extends Fieldset implements ViewPartialProviderInterface
{
protected $partial = 'my-form';
public function getViewPartial()
{
return $this->partial;
}
public function setViewPartial($partial)
{
$this->partial = $partial;
return $this;
}
}
Render both presentation modes in one partial “my-form.phtml”:
8.1. Core 33YAWIK Documentation, Release 0.35.2
Render the presentation modes in separate views “my-form.form.phtml” and “my-form.view.phtml”
Container
Simple Form
8.1.3 Navigation
YAWIK uses laminas-navigation. The following example shows, how you can modify the navigation. Our Jobboard
makes YAWIK running like a Jobboard. On a jobboard a navigation normally contains a public link to employers,
who are offering jobads. No authentication is required to see the list of companies. This can be configured like:
'acl' => array(
'rules' => array(
// guests are allowed to see a list of companies.
'guest' => array(
'allow' => array(
'route/lang/organizations',
),
),
),
),
If YAWIK runs as an Applicant Tracking System (like in our YawikDemoSkin), a list of companies may contain the
customers of a hr company. Such a list must not be show to the public. This can be configured like:
'acl' => array(
'rules' => array(
// guests must not see a list of companies.
'guest' => array(
'deny' => array(
'route/lang/organizations',
),
),
// recruiters see the link
'recruiter' => array(
'allow' => array(
'route/lang/organizations',
),
(continues on next page)
34 Chapter 8. ModulesYAWIK Documentation, Release 0.35.2
(continued from previous page)
),
),
),
8.1.4 Pagination
Author Mathias Gelhausen
Pagination in the view layer
Author Mathias Gelhausen
Syntax
The process described here assumes you render the actual content (the item list) of the pagination container in a
separate view script which allows you to load subsequent pages with an ajax request.
Add a pagination container in the main view script:
This is the most basic container. The corresponding javascript will add a for the “empty” message and a
for the loading indicator.
The actual HTML will then look like
Sorry, your search yields no results.
Sorry, loading results failed.'
(continues on next page)
8.1. Core 35YAWIK Documentation, Release 0.35.2
(continued from previous page)
It is possible to alter any of the divs by simple render an element with the corresponding class name in the pagination
container. If you want to simply alter the messages to be displayed you can also do this with data-* attributes on the
container div
The javascript will bind to the click events of any link inside an element with the class “pagination”, as the Pagina-
tionControl view helper of the Laminas Framework will do.
Once such a link is clicked, the loading div is displayed, an AJAX request is issued to the url of that links href attribute
and the content of the div.pagination-content is replaced by the response. The javascript will bind to the click events
of any link inside an element with the class “pagination”.
If an empty string is returned from the AJAX request, the div.content will get hidden and the div.message will be
displayed. On an error the div.error is displayed.
You can trigger a load programmatically with javascript
$('.pagination-container').paginationContainer('load', '/the/url/to/load/from?
˓→with=parameter');
Example
This is taken from the Jobs Module and is the pagination container of the Jobboard. $jobs in this case is the paginator
service passed along from the controller.YAWIK Documentation, Release 0.35.2
(continued from previous page)
and the script which renders the items:
/
/YAWIK Documentation, Release 0.35.2
(continued from previous page)
8.1.5 Notifications
YAWIK comes with a notification system to easily display notification messages to the user. These messages are
persisted in the session and can be retrieved even after a redirection (e.g. Login)
Once a message is displayed (rendered), it is removed from the session.
Controller Plugin
Yawik provides the controller plugin “Notification” (service name “notification”) to set notification messages in dif-
ferent namespaces.
It is merely a wrapper for Zend Framework’s FlashMessenger. It provides own namespaces and shortcut methods to
add notifications according to Twitter Bootstrap alert class names.
The plugin is registered in the ControllerPluginManager under the key “Notification”
Names- Class Constant Meaning
pace
success Notifica- An action was successfull
tion::NAMESPACE_SUCCESS
warning Notifica- Action was (partly) successfull
tion::NAMESPACE_WARNING
danger Notifica- Action was not successfull (error)
tion::NAMESPACE_DANGER
info Notification::NAMESPACE_INFO General info notification w/o special mean-
ing
In a controller action, simply call the plugin via the magic __call mechanism
$this->notification()->success('Updates successfully changed.');
return $this->redirect(...);
The plugin provides following methods:
• success($message)
• warning($message)
• danger($message)
• error($message) [alias for danger(), for convinience]
• info($message)
• addMessage($message, $namespace = ‘info’)
38 Chapter 8. ModulesYAWIK Documentation, Release 0.35.2
• __invoke($message = null, $namespace = ‘info’)
Rendering
To render notifications it is necessary to render the template which is registered under the key core/notifications in the
view manager’s template map.
The default view script provided renders all notifications in a div container with the class “yk-notifications” using the
“Alert” view helper.
Notifications are rendered in the following order:
• Danger
• Warning
• Success
• Info
You can place notifications into your general layout by following these steps:
1. In the layout script, above the output of the headScript-Helper, render the notifications partial and capture to a
variable. (Because the template injects a javascript to the headscript container)
2. Echo the capture variable at the position where the notifications should be.
//...
// ...
Alert View Helper
The alert view helper takes a message and renders it in the bootstrap markup for an dismissable alert box. It is
registered in the view helper manager under the key “Alert”.
This is an info messageYAWIK Documentation, Release 0.35.2
• info($content = true)
• warning($content = true)
• danger($content = true)
• success($content = true)
Passing “true” (or nothing) to a shortcut method is the same as starting capture with the according type.
This is an info message
The resulting html will look something like this:
×
This is an info message
8.1.6 Logging
All PHP errors are logged into the log/tracy directory. This directory may contain the following files:
• error.log: contains a list of exceptions, errors and notices
• exception----.html: contains a single HTML formatted exception
trace
• email-sent: is used for snoozing email notifications and usually contains ‘sent’ text
The path to this directory is configured in:
'tracy' => [
'log' => __DIR__ . '/../../../log/tracy',
],
8.1.7 Headscripts
To inject script tags (with and without source) to the head section of the rendered output, YAWIK makes use of the
Headscript view helper of Laminas Framework.
Inject scripts from a view script
To inject a script tag from a view script:
40 Chapter 8. ModulesYAWIK Documentation, Release 0.35.2
Inject scripts via module.config.php
It is possible to inject head script tags using the module.config.php.
// inside module.config.php
return array(
//...
'view_helper_config' => array(
// ...
'headscript' => array(
// append a script for all routes. (ommitting base path, it is added
˓→automatically)
'path/to/script.js',
// append a script for a special route name (or child routes)
// note: you need to wrap script path in an array due to ZFs' config
˓→ merging.
'routename' => array('path/to/script.js'),
// to prepend a script, you need to pass arguments to the headscript
˓→ helper:
'routename' => array(array(Headscript::FILE, 'path/to/script.js', 'PREPEND
˓→ ')),
),
),
// ...
);
Note: The scripts from module.config.php are not included, if you use the default Headscript helper in your layout.
You need to retrieve the ConfigHeadscript service from the view plugin manager, as its factory injects the scripts.
8.1.8 Mails
Mails have two essential agents
• a message-service, which is liable for gathering and providing data and rendering the mail
• a mail-service, which is liable for sending the mail
when creating own mails, you usually extends the message
All related classes are in the Core-Modul, the interaction in in this diagram: http://www.gliffy.com/go/publish/7191865
Using the MailService
Mails can be used everywhere, where have access to the application-serviceLocator.
When you need to send a mail, there are four steps to do
1. call the mail-service
8.1. Core 41YAWIK Documentation, Release 0.35.2
2. get a message-service from the mail-service (there are two distinguished types)
3. feed the message-service with informations
4. use the mail-service to send the message-service
The two types of message-service:
• Templates, which uses scripts for the body and render them like usual views. This is more preferred ap-
proach for mails with lots of text, and also with mails for different languages
• Derived classes, which is preferred when there is a lot of processing is involved.
Using a script as body
When using a script the message-service in some way behaves like a viewmodel, it takes in arbitrary variables, which
can be accessed in the script. Also you can set a template, which is resolved by view-maps or view-pathes. In the
scripts you can use PHP, and since the script is included into the message-service, you can set or change in the script
mail-specific attributes like header oder subject. Scripts are an alike to views.
To use a script you have to instanciate a mail service and a htmltemplate service
$mailService = $serviceManager->get('Core/MailService');
$mail = $mailService->get('htmltemplate');
$mail->entity = $entity;
$mail->link = $previewLink;
$mail->setTemplate('mail/myScript');
$mail->setSubject( /*translate*/ 'A Title');
$mail->setTo($email);
$mail->setFrom($userEmail, $userName);
$mailService->send($mail);
The script is set in the code, so there you can make the choice of the content, by simply choosing a script. But always
remember to consign the location of the script in the template-map.
Note: The mail service injects itself in the view script in the variable “mail”, so you can access the mail service
with $this->mail. But if you alter the headers (e.g. by setting a subject) you need to call the mail services
renderBodyText() method prior to sending. Otherwise when using some transports (e.g. Smtp), the modifica-
tions made to the headers are NOT affecting the actual mail to be send.
This is caused by an internal implementation detail of the Zend Framework classes.
Using an own class
Own classes provide all information by methods. Own classes are the preferred choice when informations are volatile
or special (like including pictures or other mimetypes). Look the classes in Applications\Mail for example.
The own classes must be announced in the config like
'mails' => array(
'invokables' => array(
'myOwnClass' => 'xxx\Mail\myOwnClass',
With being announced, the mail-service can instantiate and initialize this class properly.
42 Chapter 8. ModulesYou can also read