2019 Best practices to design training courses for science education at school Project ID: 2017-1-IT02-KA201-036739
←
→
Page content transcription
If your browser does not render page correctly, please read the page content below

2019
Best practices to design training courses
         for science education at school
 Project ID: 2017-1-IT02-KA201-036739

                  0
TABLE OF CONTENTS

CONTRIBUTORS AND AUTHORS OF THE REPORT ...................................................................................... 2
INTRODUCTION .......................................................................................................................................... 3
THE PROJECT IDEA ..................................................................................................................................... 3
NATIONAL CONTEXTS ON SCIENCE EDUCATION ....................................................................................... 5
    GENERAL INFORMATION ....................................................................................................................... 5
    SCIENTIFIC FIELD .................................................................................................................................. 11
ACTIVITY SHEETS ....................................................................................................................................... 14
TOOLBOX: INQUIRY-BASED SCIENCE EDUCATION (IBSE) ......................................................................... 15
    ZOETROPE ............................................................................................................................................ 17
    BERNOULLI ........................................................................................................................................... 18
    GEARS................................................................................................................................................... 20
    MAGNETISM ........................................................................................................................................ 22
    OPTICAL ILLUSION ................................................................................................................................ 23
    ELECTROSTATIC JUMPS! ..................................................................................................................... 24
    DISCOVERING ACID AND BASES BY COLOURS ..................................................................................... 25
    LEAF LIFE LAB ....................................................................................................................................... 26
    LET’S SWING......................................................................................................................................... 28
    RAIMBOW SOUP .................................................................................................................................. 30
    COKE DRINKS & MENTOS..................................................................................................................... 31
    WATER PURIFICATION ......................................................................................................................... 34
    HIDDEN IRON ....................................................................................................................................... 36

    LED TORCH ........................................................................................................................................... 39

    HIDDEN OBJECTS ..........................................................................................................................................42
   MAGNETIC TRAIN .........................................................................................................................................44
   ACID RAIN .....................................................................................................................................................45
   MUSIC, PHYSIC & FUN .......................................................................................................................... 47

   OSMOSIS ............................................................................................................................................... 49

   REDUCING FRICTION............................................................................................................................. 52

   CONCLUSIONS....................................................................................................................................... 53

                                                                                1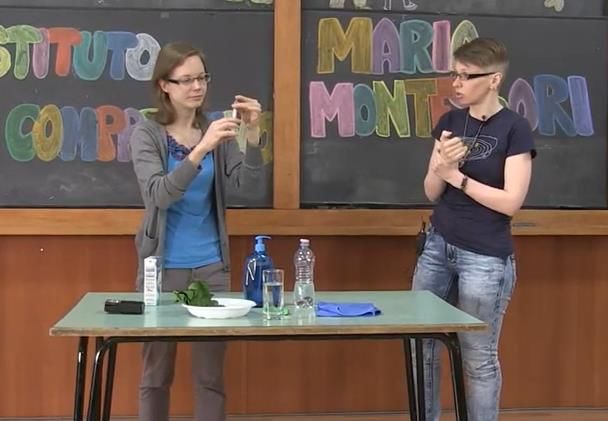
CONTRIBUTORS AND AUTHORS OF THE REPORT

Italy

Estonia

Greece

Romania

“The European Commission support for the production of this publication does not constitute an endorsement
of the contents which reflects the views only of the authors, and the Commission cannot be held responsible
for any use which may be made of the information contained therein”
                                                        2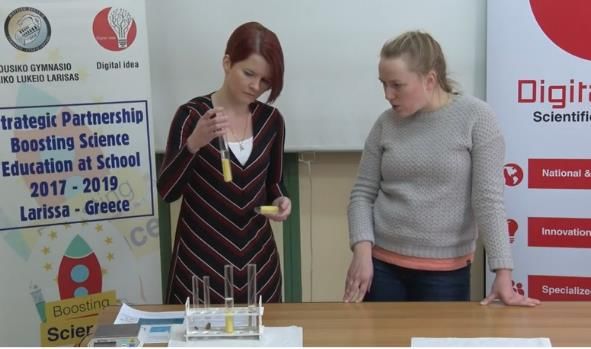
INTRODUCTION

Boosting Science Education at School is a 2-year Erasmus Plus Strategic Partnership project running from
October 2017 to 2019, aiming at bridging the gap between schools and science.
The partnership is composed of the coordinator Associazione Euphoria (Italy), four scientific organizations
– The science zone (Italy), Digital Idea (Greece), Science Centre AHHAA (Estonia), Ludor Engineering
(Romania) – and four schools of different levels – Istituto Comprensivo “Maria Montessori” (Italy),
Moysiko Gymnasio-geniko Lykeio (Greece), Tartu Tamme Gümnaasium (Estonia) and Scoala Gimnaziala
Barnova (Romania).
The project aimed at developing an exchange of best practices between schools and organizations active
in promoting science among schools, in order to create synergies between the educational and scientific
world.
This exchange was thought to facilitate the introduction of more attractive practices in teaching science
at school and to develop an exchange of methodologies between the associations, in order to figure out
the best ways in which they can settle a stable collaboration with schools.
The project aimed at inspiring science teaching by encouraging communication between teachers,
scientists, and associations involved in different ways in the European science education, and supporting
teachers in modernizing their methodologies and activities in the classroom.
Consequently, the project also aimed at improving motivation, learning and pupils’ attitudes in science
education, resulting in an increased scientific literacy and recruitment to science-based careers,
equipping young people with the skills to achieve their full potential, and ultimately convert better jobs
into better lives.

THE PROJECT IDEA

The project idea grew up combining three main considerations:

1) the educational system as a whole is facing new challenges both at national and EU level. The impact
of the economic crisis and the globalization contributed in making significant changes in the role played
by schools which are expected to:
- facilitate the transition to the labour market providing students with new competences;
- support students to choose their future careers;
- be more attractive and foster excellence between students.

2) the crucial role of science in education: science brings to innovation and to research. Students should
acquire skills in science subjects, in order to become young scientists capable of innovation in a
competitive society rooted in knowledge. Fostering science at school will also enable students to decide
whether they want to pursue an upper education in the subject.

3) the key role of science in the society: science literacy is also important to enable future citizens to
participate effectively in democratic decision making and policy making that, in the near future, will
increasingly involve science. Our students, for example, might be called to vote about issues such as use

                                                    3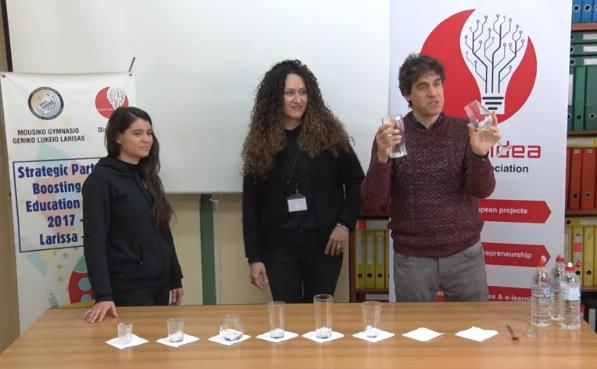
of GMOs, human cloning, energy resources etc. As stated by OECD Secretary-general Angel Gurrìa, “from
taking a painkiller to determining what is a “balanced” meal, from drinking pasteurised milk to deciding
whether or not to buy a hybrid car, science is ubiquitous in our lives. And science is not just test tubes
and the periodic table; it is the basis of nearly every tool we use – from a simple can opener to the most
advanced space explorer. More important, science is not only the domain of scientists. In the context of
massive information flows and rapid change, everyone now needs to be able to “think like a scientist”:
to be able to weigh evidence and come to a conclusion; to understand that scientific “truth” may change
over time, as new discoveries are made, and as humans develop a greater understanding of natural forces
and of technology’s capacities and limitations.”

Starting from this context, partners firmly believe that it is crucial to bridge the gap between schools and
science: it is a fact that many schools do not include in their educational path experimental phases and
inquiry-based methods which are useful to teach the subject and make it more attractive for students.
   As a consequence, school staff needs to be trained in order to adopt inquiry-based and other proven
methods for more effective science teaching. This could help teachers in better preparing their pupils,
involving them in different scientific activities and put them in contact with the “real” science.
   This is why we intend to provide teachers with practical supports and tools to develop more engaging
scientific activities and… boosting science education at school!

                                                     4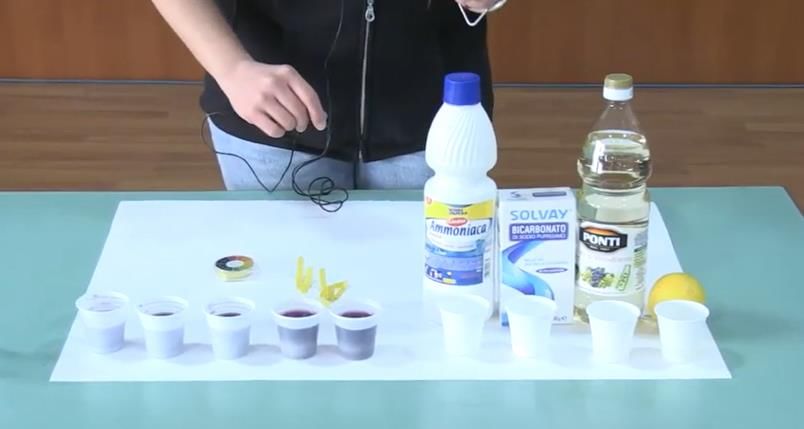
NATIONAL CONTEXTS OF SCIENCE EDUCATION

Teaching science at school is different in every country. Differences range from numbers of hours
dedicated to science to the methodologies applied - from a more theoretical to a more practical and
hands-on approach, for example.
In the following tables we would like to show a comparison of the different educational systems of the 4
countries involved in the project, with a specific focus on the science field.

GENERAL INFORMATION:

    Schools levels sorted by age of students

                               Primary                   Lower                   Upper
     Countries                                         Secondary               Secondary
                                school                   school                  school

                            From 6/7 to             From 13/14 to             From 16 to
       Estonia
                              13 years                 16 years               18/19 years

                            From 6 to 10            From 11 to 13            From 14 to 18
         Italy
                               years                    years                    years

                            From 6 to 12            From 13 to 15            From 16 to 18
       Greece
                               years                    years                    years

                            From 6/7 to             From 11 to 14            From 14 to 18
      Romania
                              11 years                  years                    years

                                                   5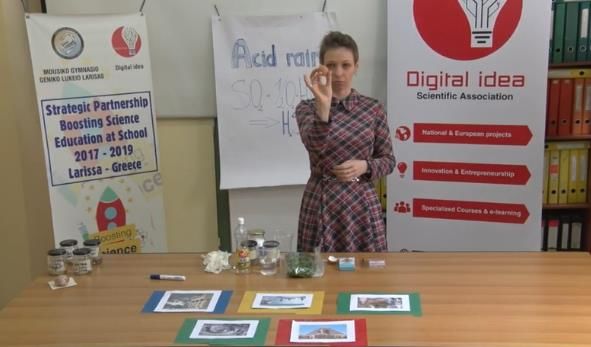
Number of days in the school year

              Primary           Lower        Upper
Countries                     Secondary    Secondary
              school            school       school

 Estonia        175             175           175

  Italy     Minimum 200   Minimum 200     Minimum 200

 Greece         175             175           175

Romania         168             168           154

                          6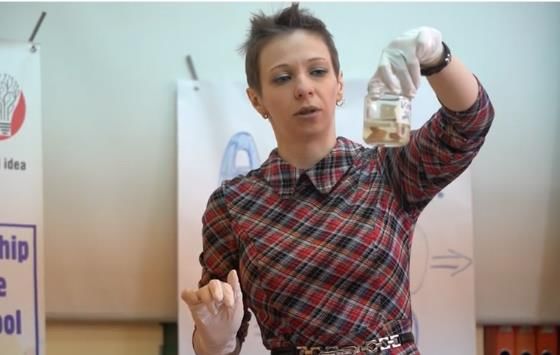
Number of hours in the school day

            Primary         Lower       Upper
Countries                 Secondary   Secondary
            school          school      school

 Estonia      4-6            6-7         7

  Italy       5-8            6-7         5-7

 Greece       5-6            6-7         6-7

Romania       4-5            5-6         6-7

                      7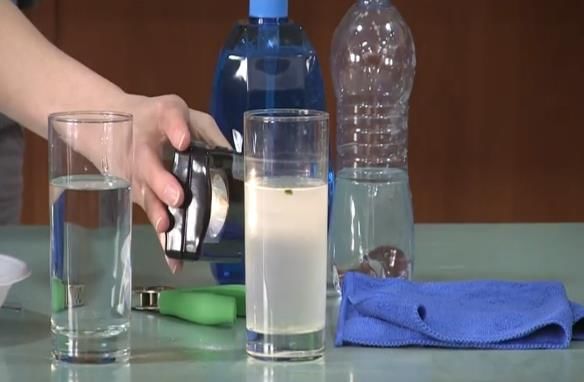
Study materials: free or not

                                Primary                      Lower       Upper
     Countries                                             Secondary   Secondary
                                school                       school      school

      Estonia                   Free (*)                    Free (*)    Free (*)

                                                            Paid by     Paid by
        Italy                     Free
                                                            families    families

      Greece                      Free                       Free        Free

     Romania                      Free                       Free        Free

(*) In Estonia, only workbooks are paid by families.

                                                       8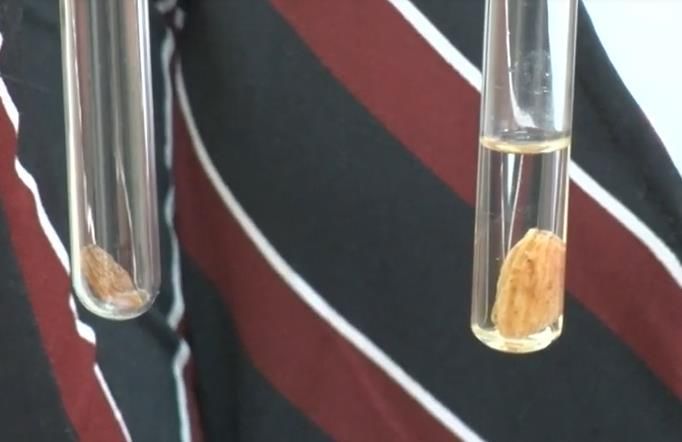
Headmaster's autonomy in the school
          management
Countries                              All levels

            The Headmaster hires teachers and leads the school
            in every aspect, for example, he/she is responsible for
            the relations between the municipality (the state)
Estonia     and school. The Headmaster decides (with a board of
            teachers and parents) the general direction of the
            school (study branches and image).

            The Headmaster is "responsible for the management of financial
            and instrumental resources and the results of the service. The
            Headmaster organizes school activities according to efficiency and
            effectiveness criteria and is the owner of trade union relations"
            (legislative decree n. 165/01, art.25). The Headmaster is a School
  Italy     Manager managing the financial resources, and must periodically
            report the budget to the Council of Institute, where all the members
            of the Educating Community are represented (teachers, parents,
            administrative staff, students). He/she signs each document issued
            by the school, for which he/she is responsible.

            All positions of school headmasters are filled by
            formal qualifications and interview to Ministry of
            Education committee. Headmaster with a board of
Greece      teachers follow the programme set by the ministry of
            education. Headmaster is at the top of the school
            community and he is an administrative and scientific
            pedagogical officer in this area.

            All positions of school headmasters are filled by
            exams. The school headmaster is what we call a "line
Romania     manager" or "middle manager": he/she directly
            coordinates processes, is in relationship with the
            students and teachers, parents and local autority.

                                9
Teachers' autonomy in organizing
lectures
Countries All levels
Teachers need to follow the curriculum given by the
State, but they are free to decide how they teach and
Estonia grade as long as they fulfill the objectives of the
curriculum.
Teachers' autonomy is given both as individuals “teachers are
guaranteed freedom of teaching as to didactic autonomy and as
their free cultural expression”, and as Institutions “The autonomy of
educational institutions is a guarantee of freedom of teaching and
cultural pluralism and is embodied in the implementation of
Italy education and training aimed at the development of the human
person, adapted to different contexts, to the demand of families
and to the specific characteristics of the subjects involved". In this
framework, teachers are invited to follow the National Curriculum
Guidelines, drafted by the Ministry of Education for each school
level.
Teachers each day apply the curriculum
predetermined by the Ministry of Education.
Greece However the school counselors help the teachers to
propose the way of teaching each subject.
There is a unique school curriculum, approved by the Ministry of
Education for all disciplines, which applies at national level. Apart
from this, each teacher can manifest his originality in designing and
unfolding lessons. In the current system, to become a teacher, one
Romania has to follow a university course and to graduate from the Psycho-
pedagogic Module that gives the right to teach. After graduating,
the person has to take part in the competition where you he/she
gets a job as a teacher. All teachers are continuously forming, taking
part in exams in education and exams for grades.
10SCIENTIFIC FIELD:
Approach to science: academic or
practical?
Primary Lower Upper
Countries Secondary Secondary
school school school
Depends on the
Depends on the Depends on the
teacher. Mix of
Estonia teacher. Mostly
academical and
teacher. Mostly
practical. academical.
practical.
Depends on the
Depends on the Depends on the
teacher. Mix of
Italy teacher. Mostly
academical and
teacher and the
practical. type of school
practical.
Mix of Mix of
Mix depending
Greece academical and academical and
on the subject.
practical. practical.
Mix of
Romania academical and Academic Academic
practical.
11Number of STEM lessons per week
Primary Lower Upper
Countries Secondary Secondary
school school school
23 Maths 13 Maths 13 Maths
Estonia 10 Natural 20 Natural 20 Natural
Sciences (*) Sciences Sciences
4 Maths, 2 3-7 Maths,
6-10 Maths,
Natural Sciences
Italy 2 Natural
1 Geo, 2 2 Natural
Sciences, 2 Geo Sciences, 1 Geo
technology
5-6 Maths
4 Maths 5-7 Maths
Greece 3-4 Natural
6 Sciences 8-12 Sciences
Sciences
4 Maths
4 Maths Depends on the
Romania 1 Natural school profile
6 Sciences
Sciences
(*) In Estonia, teachers have a maximum of hours/lessons to be given to students within the primary,
lower secondary and upper secondary level. For example, the primary level lasts 6 years, and they have
10 lessons for 1-3 grades and 13 lessons for 4-6 grades. But the division of such lessons over the years
(e.g. the actual number of the lessons per week) depends on the teachers’ choice.
12STEM subjects for each level (*)
Primary Lower Upper
Countries Secondary Secondary
school school school
Maths, physics,
Maths, natural Maths, natural chemistry,
Estonia sciences sciences (*) biology,
geography
Maths, physics,
Maths, Maths,
biology, earth
geometry, geometry,
Italy natural sciences biology, earth
science,
astronomic geo,
and ICT (**) science, ICT
chemistry, ICT
Maths,
physics,chemistry, Maths, physics,
Maths, natural
Greece sciences biology, ICT, chemistry,
geography biology, ICT
Maths, physics, Maths, physics,
Maths, natural
Romania sciences
chemistry, chemistry,
biology biology
(*) Please pay attention that this table must be read in relation with the one explaining the different ages
for the levels in the different countries. It affects the diverse subjects for each level.
(**) In Estonia, natural sciences consist of biology and geography in grade 7 and separate chemistry and
physics lessons in grade 8.
(***) In Italy, ICT includes coding.
13ACTIVITY SHEETS
Along our project, we organized 4 training activities during which each scientific partner showed its
experience in organizing laboratories and activities to boost interest towards STEM subjects among
students, and prepare teachers in dealing with them.
After, we have prepared 20 video tutorials thanks to which teachers can replicate such activities at school.
The spoken language of the video tutorials is English, but they have been subtitles in Estonian, Italian,
Greek and Romanian so they are useful also for teachers who do not speak English.
Each video tutorial is accompanied by a description of the experiments, the learning scenario and various
tips to implement them. You will find all such information in the next activity sheets.
You can find all the video tutorials on our Youtube Channel: www.youtube.com/boostingscience
14TOOLBOX: INQUIRY-BASED SCIENCE EDUCATION (IBSE)
Before using our video tutorials and the linked activity sheets, we would like to provide you with an extra-
input.
Of course, you will be free to replicate the activities as you wish in your classroom, but we would like to
suggest you a method which could stimulate even more the scientific approach within your students: the
inquiry-based science education (IBSE) teaching of science through investigation.
It is a pedagogical method that puts the ideas, questions and observations of children at the center of the
educational experience1.
In doing so, both the scientific communicators (in general, the educators), both the children (the students)
share the same responsibility in the learning process: here, the freedom to research how some
phenomena occur – through experience and confrontation with one's own classmates - manifests itself
in the responsibility for the construction of collective knowledge2.
Together, educators and students build learning experiences by accepting mutual responsibility in the
design and the evaluation of the various phases of learning and improving the individual, as well as in that
of the whole class.
This peculiarity of the IBSE method implies a greater commitment during the educational experience,
both on the part of the pupils and on the part of the communicators: pupils are required to participate
actively in the definition of the investigation path, tutors need to re-learn with the kids every time.
In short, we could operationally condense the IBSE method in this way:
We put the ideas and reasoning of the students to the focus of the discussion, developing with
them both the initial path outlined by them and the investigation which follows;
We create an environment for respectful discussion: we value the contribution of all;
We intervene to get the students to give their contribution to the survey, ensuring that students
have clear ideas and pay more attention to key concepts;
We develop together questions that arise to interest them even more in the subject and ask them
further questions;
We give instructions or we take mini lessons when it is evident that the students need any new
tools or concepts for progress.
1
Ontario Ministry of Education. Inquiry-based learning. Student Achievement Division - Ontario
2Michel Rocard, Valérie Hemmo, Peter Csermely, Doris Jorde, Dieter Lenzen, and Harriet Wallberg-Henriksson. Science Education Now: a Renewed
Pedagogy for the Future of Europe. European Commission
15Inquiry-based learning consists of 5 phases3:
1. Orientation: building interest – finding connections with everyday life, daily news, watching
videos.
2. Conceptualization (questioning and/or hypothesis generation): inquiry question consists of
measureable inquired feature (e.g “how far will it fly?”) and affecting factor (“The amount and
type of fuel”), in hypothesis additionally there is also expected effect. With younger kids, instead
of hypothesis it is better to start with making assumptions and later practice how to form
assumptions into hypothesis.
3. Investigation (exploration or experimentation and data interpretation): Planning the experiment
(what to measure, what should be constant, how to collect data), choosing suitable equipment
(things can be shared to enhance additionally to teamwork also cooperation of teams), carrying
out the experiment, analyzing data, correcting plan and trying again if needed (in case of
engineering cycle).
4. Conclusion: Do the results support hypothesis or can the inquiry question be answered?
5. Discussion through all the phases (communication, reflection), also includes critical thinking.
Take a look at the experiments and their accompanying materials on pages 33-43 of this Best practice
report, you will find experiments, worksheets and teacher guides following the IBSE method, designed by
Science Centre AHHAA.
You can also have a look at some experiments carried out by The Science Zone according to the IBSE
method: https://www.youtube.com/channel/UC70JvV5jWJIHGe40HBxUXTQ
And now... are you ready to start boosting science at school?
3Margus Pedaste, Mario Mäeots, Leo A. Siiman, Ton de Jong, Siswa A. N. van Riesen, Ellen T. Kamp, Constantinos C. Manoli, Zacharias C. Zacharia,
Eleftheria Tsourlidaki. 2015. Phases of inquiry-based learning: Definitions and the inquiry cycle. Educational Research Review, 14, 47-61.
16Zoetrope (1/1) Duration: 45 minutes;
Learning scenario Objectives: construct a zoetrope
and relate its operation to film
Divide the class into groups of 5-6 kids and give them the and video;
materials for the experiment. Work with them during the
activity. First, take an A4 piece of paper and make templates for Covered subjects: science;
kids in order for them to know where to cut it. They have to form persistence of vision;
one long strip. This is the basic part of the zoetrope, it should engineering;
look like a cylinder with small holes cut at the same distance
from one another. Second, wrap the strip around the cylindrical Topics: optical illusions, zoetrope;
container and tape it in place. If it is difficult for you to find a
cylindrical container you can use CD disks. In this case, you have Target group: students aged 6-12
to change the template, this one needs to be applied to the disk. years;
Third, using a craft knife or scissors, cut the cylinder to size and
cut out the slots. Remove the template. Four, poke a hole in the Materials: cardboard, black paint,
middle of the bottom of the can and push a pencil partway cylindrical food container, printed
through the hole. If you used a cd disk, it is already cut. Fifth, draw with animation, adhesive
paint the outside of the cylinder black. Using black paint you can tape, scissors, small marble ball;
raise the effectiveness of the zoetrope. Six, cut out two strips
with images, tape them together to form one long strip and Words for internet search:
place it inside the zoetrope. Place the marble ball on the hole Zoetrope
that you poked. Finally, ask students to look through the slots at
the images on the inside of the zoetrope as they spin it. It helps Further information:
to hold the zoetrope under a bright light. Show kids the video https://en.wikipedia.org/wiki/Zo
tutorial and show them that you can do the zoetrope etrope
experiment with 3D horses. Tell them a story about zoetrope
and explain that this is a pre-film animation device. Link to the video tutorial:
Explanation https://youtu.be/LV31pc65-70
The zoetrope consists of a cylinder with slits cut vertically in the
sides. On the inner surface of the cylinder is a band with images
from a set of sequenced pictures. As the cylinder spins, the user
looks through the slits at the pictures across. The scanning of the
slits keeps the pictures from simply blurring together, and the
user sees a rapid succession of images, producing the illusion of
motion. The 3D zoetrope relies on the same principles but instead
of flat 2D frames it uses 3D models and instead of the slits it uses
a strobing LED light to illuminate each frame for a fraction of a
second. The strobe and slits are necessary to freeze the frames,
otherwise, you would just see a blur.
17Bernoulli (1/2) Duration: 45 minutes;
Learning scenario
Objectives: gain awareness of
the Bernoulli Principle;
Introduction - 10 minutes:
explain that air pressure
Speak with kids about flying. Ask them what they know about it
decreases as the speed of the air
and give them suggestions to guide their thoughts. You can ask
increases and that air pressure
them about birds and planes, about the wings of the birds and
acts in all directions; apply the
planes. Guide the discussion to the point where kids think about
Bernoulli Principle;
air. Ask again questions and give them indication to guide their
thoughts. What is the role of the air in the process of flying?
Covered subjects: physics;
Does the air help? Can you say something about the
characteristics of the air? Make some suggestions about
Topics: Bernoulli's Principle; lift
pressure and density.
(force);
Divide the group - 10 minutes:
For a better understanding of the experiments, divide the class Target group: students aged 6-10
into groups of 5-6 kids and give them separate places into the years;
classroom. Give them papers and markers and ask them to
select the most important ideas from the discussion below. This Materials: for everyone - paper
way you will help kids to put in order the ideas and to think 15x2 cm, 2 ballons, 1 hanger,
about what they do not understand. Kids will connect ideas thread; for demonstration - a
about birds, planes, wings, air, and flight. hair dryer, balls of different sizes
Experiments - 20 minutes: (some of them should be made
Give kids the pieces of paper you cut. You can use recycled paper of polystyrene);
and cut it to 15x2 cm. Tell them that they have to take the piece
of paper into their hand then hold it close to the mouth, and Words for internet search:
blow on top of the paper. Speak with them about what is Bernoulli; Bernoulli Principle; lift
happening. Let them discuss and give opinions. Prepare the force;
second experiment. Give kids one hanger, 2 ballons, and thread.
Explain to them what they have to do with all of this. You can Further information:
see in the video tutorial how to use the materials. After setting http://bit.ly/2WPo6PD
up the experiment let kids blow between the two balloons and
discuss. Ask kids what happened in the two experiments and http://bit.ly/2Zy0d0H
what is strange about them. Speak about why the piece of paper
goes up and why the two balloons stick together. Then prepare Link to the video tutorial:
for the third experiment. Set the hair dryer to cool, switch it on, https://youtu.be/i3u9lPXN_BA
and point it at the ceiling. Put the ping-pong ball in the stream
of air. Be careful to put the ball exactly on the stream of air. Hold
the hairdryer steady and watch as the ping-pong ball floats in
the stream of air.
Be careful to put the ball exactly on the stream of air. Hold the
hairdryer steady and watch as the ping-pong ball floats in the
stream of air. Move the hair dryer from left to right and watch
how the ball moves as well, staying in the stream of air. Ask the
students whether the ball is being pushed up or pulled up.
18Bernoulli (2/2)
Learning scenario
Ask a student to place his hand above the ball. The ball should
drop.
This represents turbulence above an airplane wing. Prepare the
fourth experiment. For this, you will need a bigger ventilator. Try
to float two or more balls in the same air stream. Ask kids what
they think, how many can you float at once? How do they
behave when there is more than one? Place balls of different
sizes and watch how they behave on the stream of air.
Instructions and tips for the students:
Ask kids to get from their house hangers and thread, and give
them the opportunity to find some more interesting balls.
After the experiment ask them to write conclusions and main
ideas. This way you can make them think about what they saw
and what they learned about.
Explanation
Bernoulli Principle states that as air moves around an object, it
creates different pressures on that object. When the air moves
faster it creates less pressure. When the air moves slower it
creates more pressure. Why the piece of paper goes up?
Because when you blow the air you are increasing the speed of
it over the paper and the pressure above the paper decreases.
The higher pressure below the paper pushes up and causes the
paper to rise. Why the two balloons stick together? The fast-
moving air that you blow between the balloons lowers the air
pressure between them. Both balloons are moving closer to the
area where there is less pressure. How can we explain the flight
of different balls? There are two primary explanations for this
demonstration. A.) There is a moving stream of air traveling
around the ball resulting in an area of less pressure. The ball is
prevented from falling out of the moving stream of air because
it is pushed in by the higher pressured air adjacent to the moving
stream of air. B.) The air travels around the ball and is moving at
the greatest velocity at the top of the ball, resulting in an area of
low pressure above the ball. The ball is drawn toward the area
of low pressure. This area of low pressure can be disturbed by
placing a hand above the ball.
19Gears (1/2) Duration: 30 minutes;
Learning scenario Objectives: Explain the role of
gears in mechanical devices;
Introduction: explain how gears can be used to
The purpose of this lesson is to give kids something to think create motion;
about, to make them curious to ask questions and to find
answers. First, divide the class into groups of 5-6 kids. Use their Covered subjects: physics;
help to organize the class and to put the tables into separate
spaces for each group. Give them gears of different sizes and tell Topics: gears, motion;
them to play with them. They will have three gears of different
sizes: small, medium and big. Tell them to choose two of them Target group: students aged 6-10
and to start playing and observing. Students can change the years;
gears after they observe them and if they need they can rotate
the three gears at the same time. Once they rotate two gear Materials: gears of different
they have to observe something. Ask them what they observe. sizes;
Help kids find the right questions and the right answers. Ask
them about the number of teeth, about the sense of rotation, Words for internet search: gears,
about the speed. After finding their answers ask kids to write motion;
down the main ideas and to draw useful explanation.
Understanding gears:
Further information:
Organise a game and ask kids to think about where they can use
http://bit.ly/2x0696q
gears and for what. Ask them to write down the uses. After 5
minutes of speaking and analyzing ask kids to present their list http://bit.ly/2FcO3lY
and to explain why they thought this way. With this game, kids
will try to remember if they saw gears in some mechanical Link to the video tutorial:
devices and they will name them. You can speak about bicycles https://youtu.be/TirFWNyr2bM
where gears work together to change the relationship between
the driving mechanism and the moving parts. On a bicycle you
change gears depending on terrain. Motion Another part of the
lesson is to explain motion. We will explain three types of
motion, circular motion, linear motion and oscillatory motion.
Ask kids to think about each one of this moves and to say what
they think about it. Ask them to give examples.
Give them materials to test each of this moves. They already
have gears, give them a ruler for linear motion and a small
pendulum for oscillatory motion.
Show kids the video tutorial and discuss what they learned.
Speak about the way all of those three moves are connected in
the mechanical device.
Feedback, experience: there are more ways in which you can do
this lesson. You can make a mechanical device like the one
presented in the video tutorial.
20Gears (2/2)
Learning scenario
It is easy to make it if you use a 3D printer. If this is not a solution
for you, you can make your own gears from cardboard. Choose
a cardboard, one that is thick, or two pieces less thick that can
be glued together, cut it in circles of different sizes and insert
beads with pins on the edges.
Explanation
Gears are helpful in machines of all kinds, not just bicycles.
They're a simple way to generate more speed or power or send
the power of a machine off in another direction. Gears are
simple machines. When we try to connect two gears of different
sizes, we can:
Change direction: When two gears mesh together, the second
one always turns in the opposite direction. So if the first one
turns clockwise, the second one must turn counterclockwise.
Increase force: If the second wheel in a pair of gears has more
teeth than the first one it turns slower than the first one but with
more force.
Increase speed: If you connect two gears together and the first
one has more teeth than the second one, the second one has to
turn round much faster to keep up. So this arrangement means
the second wheel turns faster than the first one but with less
force.
We can use gears to explain different types of motion. You can
see this in the video tutorial, circular motion with the gear, linear
motion, and oscillatory motion, with the hand. You can see that
gears are used for transmitting power from one part of a
machine to another.
21Magnetism (1/1) Duration: 45 minutes;
Learning scenario Objectives: determine which
objects are magnetic and which
Encourage students to discuss their experience with magnets,
are not; observe that magnets
then let them know that they are about to perform a series of
have two sides like the Earth;
simple experiments that will show which of a group of objects
will be attracted to a magnet.
Covered subjects: physics;
Divide the class into groups and give each group the materials.
Before the experiment, ask students to predict which materials
Topics: magnetism;
will be attracted by the magnet and which will not. Ask kids to
write down their prediction in two charts. Ask students to test
Target group: students aged 6-12
each object or substance with the magnet. On their charts,
years;
they should record what was attracted by the magnet and
what was not. Ask them if their predictions confirmed. Then
Materials: 2 common magnets for
give kids the compasses and ask if they know what are they
every child, 10 strong magnets;
used for. Ask them if they know something about the Earth and
compass for every group;
about its magnetic field. Explain that the north pole of a different objects including some
magnet points roughly toward Earth's north pole and vice- that will and some that won’t be
versa. That's because Earth itself contains magnetic materials attracted by a magnet (e.g.
and behaves like a gigantic magnet. Think about ancient aluminum foil, paper, keys, clips,
people, for them, magnetism must have seemed like magic. beans); a computer with Internet.
We can see that if we hold two bar magnets so their north
poles are almost touching, they'll push away from one another; Words for internet search:
If magnet's north pole is near the other magnet's south pole, magnetism, magnet, north pole,
the magnets will pull toward one another. south pole, compasses;
Explanation Further information:
A magnet has two ends called poles. One is called a north pole http://bit.ly/2WLaV1S
or north-seeking pole, while the other is called south pole or
south-seeking pole. The north pole of one magnet attracts the Link to the video tutorial:
south pole of another magnet, while the north pole of one https://youtu.be/N7hWXaBXH7g
magnet repels the other magnet's north pole. Magnets can
attract other magnets or other magnetic materials through a
magnetic field. The red pointer in a compass is a magnet and
it's being attracted by Earth's own magnetism. Earth behaves
like a giant bar magnet with one pole up in the Arctic (near the
north pole) and another pole down in Antarctica (near the
south pole). If the needle in your compass is pointing north,
that means it's being pulled toward something near Earth's
north pole. Since unlike poles attract, the thing your compass
is being attracted to must be a magnetic south pole. What we
call Earth's magnetic north pole is actually the south pole of
the magnet inside Earth.
22Optical Illusion (1/1) Duration: 45 minutes;
Learning scenario
Objectives: understand why
This lesson can serve an important purpose in class and in life in optical illusions occur; explain
general. The main objective is for kids to understand why optical different types of optical
illusions occur. We can say that we can't always trust our eyes. illusions;
Divide the class into groups of 5-6 kids and give them the printed
papers with the illusions. You can choose whatever you want. Covered subjects: optics, physics;
We recommend 10 images with optical illusions.
This image is an example, it represents the Müller-Lyer illusion. Topics: perceptions;
It consists of two stylized arrows that appear to have different
sizes. Ask kids to analyze each image, to explain it and to Target group: students aged 6-12
demonstrate why it is an illusion. After the first experiment, years;
show kids the video tutorial and then talk with them about what
they saw. Ask them to explain the illusions. Ask helpful questions Materials: a computer and a
and give the indication to guide their thoughts. Ask kids if they video projector; printed pictures
know why the optical illusions happen. with optical illusions;
Explanation Words for internet search:
Things can appear as more than one thing at different times Optical illusion, perception;
depending on how you look at them. Things aren't what you
think they are. Things can be more than one thing at the same Further information:
time, and your mind and sight can be tricked by something rather
http://bit.ly/2wZy0DG
simple in the end.
Ambiguous cylinder illusion - Based on whether you're looking at
http://bit.ly/2MSqPIl
it in a mirror or in person, it's a shape that appears to
simultaneously be two different shapes, a small plastic square or
a circle. Each piece is the exact middle ground between a circle
http://bit.ly/2N2iUs2
and a square. The tops of the sides are wave patterns. Two sides
dip up, and two sides dip down. Combined, the sides "correct" Link to the video tutorial:
the shape, depending on which way the shape is projected in a https://youtu.be/TEstaBDYh9U
mirror.
Straight Pole Curved Hole Optical Illusion - You can see a rotating
pole that somehow appears to fit through a curved hole. How
does this work? The first thing to note is that the pole is not
attached perpendicularly to the base but it's at an angle. Because
the straight pole is at an angle, the base of the pole passes
through the hole first. Then, each section of the rest of the pole
slowly passes through, working upward until the whole thing fits.
Impossible object illusion - Why is it impossible? Because it is a
two-dimensional object made to look three dimensional —
depending on the angle you perceive it at. The impossible
triangle presents itself as an object that seamlessly conjoins
different sides of a triangle, but that depends on the angle you
look at it.
23Electrostatic jumps! (1/1) Duration: 45 minutes;
Learning scenario Objectives: exploring how static
electricity works, the existence
Put the sheet of paper on a flat surface (a table), then put the of different charges and the
supports at the corners. Drop some sugar, salt and pepper on behaviour of different materials
the paper and then put the plexiglass sheet above the under electrostatic force.
supports. Rub the plexi with the woolen cloth and see what
happens. Then repeat the experiment with lentils, paper, Covered subjects: science,
aluminium. physics;
Divide the pupils in groups of 5. Let them try the basic
experiment and then vary the experimental setting and Topics: static electricity;
observe what happens. For example, change the distance
between plexi and the table, use a different cloth (material) to Target group: students aged 8-13
rub the plexi, change weight and dimensions of the objects years;
and/or material of the support. Observe that attraction
depends on distance, “intensity” of rubbing, materials you Materials: for one group - white
used (stronger for conductors). For a success in the experiment paper sheet (1 per group); 4
you have to use very light objects and spread them widely and isolating supports (wooden,
evenly on the paper. Let the students do the experiment with plastic, etc.); a bunch of light and
your help and take notes of observations . small objects like sugar grains,
salt, pepper, dried lentils, pieces
Explanation of paper, pieces of aluminium
foil; 1 woolen cloth; 1 sheet of
Matter is generally neutral but it can be electrified by rubbing
plexiglass (20x20 cm);
it, that is by trasferring charges by mechanical work. Plastic
(plexi) is negatively charged when rubbed with wool (cloth),
Words for internet search: static
this induce a redistribution of charges in nearby objects, by
electricity, Coulomb’s Law,
polarization for insulators (paper, lentils, sugar, pepper,salt)
charge, conductor, insulator,
and by induction for conductors (aluminium). The objects are
electrostatic force;
attracted to the plexi due to the electrostatic force (opposite
charges). Notice that you can see also repulsion between
pieces of aluminium (they get the same charge by contact). Link to the video tutorial:
https://youtu.be/K74RoAvfhms
24Discovering acid and bases by colours (1/1) Duration: 45 minutes;
Learning scenario Objectives: to measure acidity
and basicity by interaction of
Prepare the cabbage juice by boiling the red cabbage in a pot
substances with a pH indicator;
until it becomes violet, then filter it. Prepare five glasses and
put them side by side. Fill each glass three-fourths with
Covered subjects: science,
cabbage juice. Add bicarbonate to one glass, vinegar to
chemistry;
another one, lemons and ammonia to another (using syringes,
be careful ammonia is dangerous). Keep a glass of purple
Topics: acid and bases; chemical
cabbage juice to show the colour of a neutral solution. Stir
reactions; enviromental
with a spoon and observe that the colour changes in different
properties, pH and
ways in each glass. You can also check with pH indicator stripes
neutralization;
the acidity of substances that you add and see that the colour
is the same of the cabbage with the substance. In the Target group: students aged 12-
classroom, let the students choose the liquids to mix and ask 14 years;
them to write down in a table the transformations they
observe. Let the students do the experiment with your Materials: for 20 kids - spoons (3
guidance and take notes of observations. per group of students); small
glasses (5 per group of students);
Explanation red cabbage juice (for 2 liters,
boil half of a red cabbage in 3
Substances are classified as either acid or a base. Acids have a
liters of water for 30-45 mins);
low pH and bases have a high pH. We can tell if a substance is
bicarbonate (half a glass – 200 g);
an acid or a base by means of an indicator. An indicator is
vinegar (1 glass); 2 lemons
typically a chemical that changes colour if it comes in contact
(sliced); ammonia (half a glass);
with an acid or a base. Red cabbage contains a pigment called
syringes without needle (1 per
anthocyanin that changes colour when it is mixed with an acid group of students) to provide
(red) or with base (blue-green). kids with ammonia without them
handling it directly; pH indicator
stripes (5 per group of students);
Words for internet search: Red
cabbage, PH, acidity, PH
indicator, anthocyanin;
Link to the video tutorial:
https://youtu.be/wdyDqNfqKm8
25Leaf Life Lab (1/2) Duration: 20 minutes;
Learning scenario
Objectives: to investigate the
First, pour water into the transparent glass, then add half of a role of light on oxygen
tea spoon of bicarbonate and a drop of soap and mix the production in photosynthesis;
solution. Cut 5 or more uniform leaf disks using the hole punch.
Remove the plunger of the syringe and place the leaf disks into Covered subjects: biology;
the syringe barrel. Replace the plunger and push it being
careful not to crush the leaf disks. Fill the syringe with the Topics: plant physiology,
bicarbonate solution from the glass. To press out the gas from photosynthesis;
the leaf disks, cover the syringe-opening with a thumb and
draw back on the plunger to create a vacuum. Hold this
Target group: students aged 10-
vacuum for about 10 seconds while swirling the leaf disks to 13 years;
suspend them in the solution. Let off the vacuum. It may need
a few repeats to remove all the gas from the leaf disks. You can Materials: for one group -
see that the gas is removed when the leaves go to the bottom sunlight or strong artificial light
of the syringe. Finally, put the leaf disks back into the glass (not commercial LED); tea
under a light source and wait until the leaves slowly go up and spoon; transparent glass;
reach the surface. It may take a few minutes. In the classroom syringe (no needle!!); hole
divide the pupils in groups of 5 and let them do the experiment punch; bicarbonate (baking
and then vary the materials and notice what happens. For soda, half of a tea spoon); dish
example, trying different light sources they can see a soap (1-2 drops); spinach leaves;
difference in the time it takes for the leaves to float. The water (a glass);
students can notice that the best light source is sunlight while
commercial LED does not work. This is because the wavelength Words for internet search:
of light produced by commercial LED is different than the one Photosynthesis, oxygen
plants use. Once all the leaf disks have floated to the top, production, leaf disk, plant;
students can place the glass in a dark cupboard and see how
long it takes for them to sink. Pupils can try leaves from Link to the video tutorial:
different plants. They will notice that the plants that have the https://youtu.be/wS3TFERvU9E
leaf surface smooth and not too thick, take less time to float
than the others. Let the students do the experiment with your
guidance and take notes of observations.
Explanation
Photosynthesis is a process used by plants to convert light
energy into chemical energy stored in carbohydrate
molecules. To do photosynthesis, plants need carbon dioxide,
water and light. Using photosynthesis, sugar molecules and
oxygen are produced.
26Leaf Life Lab (2/2)
Explanation
The bicarbonate added to the water serves as a source of
carbon dioxide while soap decreases the surface tension of
water so the leaf disks could easily drop to the bottom of the
glass.
Actually, normally leaf disks float because they contain gas
inside them. When the air spaces are replaced by water, the
overall density of the leaf disk increases and the disk sinks.
When you see the leaf disks slowly going up, it is due to the
oxygen produced. As density of gas is lower than water density,
the leaf rises up, finally reaching the surface.
27Let’s swing (1/2) Duration: 45 minutes;
Learning scenario Objectives: to learn the concepts of
Single Pendulum
periodicity, frequency and
This experiment involves many different steps and activities,
resonance; to develop qualitative
so it is a good choice to make the students split tasks among
(description) and quantitative
(measurement) scientific
themselves.
methodology approaches;
Let the students build a pendulum using a rigid frame (a chair
on a desk), the fishing wire and nuts and decide the number of
Covered subjects: science,
complete oscillations they want to observe. Using the
mechanics (physics);
stopwatch, make them observe and write down the time
needed for the pendulum to perform the decided number
Topics: oscillations and resonance
oscillations.
in a pendulum; periodic motion
Make the students repeat the experiment as many times as
they want (around 10x), then help them decide a single
and transfer of energy;
number to represent all the results obtained: you could Target group: students aged 10-12
suggest them to take their ‘average’. years;
Repeat the above procedure by changing some details:
1) number of nuts tied to the bottom end of the wire; Materials: for one group/10 kids-
2) starting position of the nut; metal nuts (x 12); fishing wire (10
3) material composing the wire; m); other kinds of thread (10 m
4) length of the wire. each; ropes, ribbons, etc); some
It’s very important to change one detail at a time, while kind of rigid support (1-1.5 m tall);
keeping the other details the same. tape (a few pieces, if need to hold
Make the students compare the results coming from the some structures); stopwatch for
different experiments and draw some conclusion. Ask them measuring time (accuracy of tenths
the question: does the time needed to complete the number
of seconds is enough; e.g., those
of oscillation you decided, change bynchanging the details of
from smartphone apps);
the experiment?
paper, pens and colors to record
results, make plots, tables and
sketch the experimental setup;
Coupled Pendulum
For this experiment, it is better to use a softer thread than the
Words for internet search:
fishing wire: try with a thin rope. Tie two end of a rope to two
Pendulum (motion), oscillation,
rigid structures, so that it is horizonal and well stretched (this
coupled pendulum, air friction;
is very important). Build two pendula by fixing their upper end
to the horizontal rope. Make sure that both pendulas are
Link to the video tutorial:
steady. Displace the nut of one of the two pendulas and let it
https://youtu.be/5aPqS5wohek
go. Observe what happens.
28Let’s swing (2/2)
Explanation
Single pendulum – First, you will notice that the pendulum
makes always the same movement: back and forth, back and
forth, …and it always take the same time do it! This property is
called ‘periodicity’: a movement is ‘periodic’ when it repeats
itself over and over, taking always the same time. In particular,
the time needed to perform one of these equal movements
(one oscillation, in the case of a pendulum) is called ‘period’.
Hopefully, you will then notice that the time needed to
perform a fixed number of oscillations will not depend on the
initial displacement of the nut, the number of nuts tied to the
bottom end of the wire nor the material composing it. Instead,
it will depend on the length of the wire! In particular, the
longer it is, the longer it takes to complete a single (or a certain
number of) oscillation.
Coupled pendulum – Once the first pendulum starts moving,
you will notice that after a little time, the amplitude of its
movement will start reducing until it almost stops, while the
other pendulum (which was initially still) will actually start
moving more and more. Waiting some more time, the second
pendulum will reduce its movement, while the first one will
start moving again, and so on. What is happening?
Everything which moves has some energy. This energy can be
transmitted to other objects to make them move too: the only
thing needed for this to happen, is a mean to transfer this
energy. Pendula are continuously transferring energy to one
another through the horizontal wire which connects their
upper ends: if you notice, while they oscillate, they also move
like thye are rolling on themselves. So, once one pendulum
starts transferring energy to the other, it will start moving less,
because it is away its energy. The other one, on the contrary,
will receive energy, and use it to start moving.
29Rainbow soup (1/1) Duration: 40 minutes;
Learning scenario Objectives: to make a comparison
Take a smooth, tight and tall glass. Put in the glasses 7 ml of of densities among solid and liquid
each liquid in the following order: syrup, milk, dish soap, water with a density column;
with food colouring, sunflower oil, denatured alcohol. Use
pipettes to help yourself to pour liquids. Drop very gently small Covered subjects: science, physics;
objects into the glass and observe.
In the classroom, divide the pupils in groups of 5. Let students Topics: density, property of
choose the order of the liquids to be poured into the matter;
densimetric column and try to identify the characteristics of
Target group: students aged 8-12
liquids that are denser than those that are less dense. To better
years;
observe the different liquid layers, it is important to pour the
different liquids very slowly. Do not immediately give pipettes Materials: 1 transparent glass; 2
to the students, let them choose different tools with which to pipettes; 7 ml of denatured alcohol
gently pour the liquids. Let the students do the experiment (90%); 7 ml of fresh milk; 7 ml of
with your guidance and take notes of observations. dish soap; 7 ml of syrup (for
example mint); 7 ml of sunflower
Explanation oil; 7 ml of water; food colouring; 2
The density of a material is the number of particles of that rubbers; 2 lentils; 2 grains of rice;
material in a precise volume. Let us consider a cubic different small items available;
centimeter of material A and one of material B. If in the first
there are 50 particles (material A) and in the second there are Words for internet search: density,
100 particles (material B) then we will say that material B is densimetric column, mass VS
denser than material A. density, properties of materials;
But very often these particles are too small to count. So it can Link to the video tutorial:
be useful to understand if a material is more or less dense than https://youtu.be/fpa9ZuaUnV4
another. In the case of liquid materials, we can use the
densimetric column to evaluate which one is more dense than
the other. We can simply pour them in a glass, on top of each
other as shown in the experiment: water is denser than oil and
alcohol but is less dense than milk and syrup etc.
We can also estimate the density of small objects immersed in
the densimetric column by comparison: for example a
sunflower seed is less dense than the alcohol while a plastic
pen cap is less dense than dish soap, but more dense than oil
and water. Be careful though: very often the concept of
density is exchanged with the concept of weight! The weight
depends on the force of gravity and for example it changes if
we go to the moon. Density, instead, is a specific feature of a
material and it does not depend on how much material we use
or where we put it.
30Coke drinks & Mentos (1/3) Duration: 45 minutes;
Learning scenario
Objectives: to determine what to
The team’s task is to determine what to add to coke to achieve add to coke to achieve as high
as high eruption of foam as possible. eruption of foam as possible
Before taking the experiment outside, you can conduct
preliminary tests indoors using 0.1–0.2 liter of coke in smaller Covered subjects: chemistry,
containers (there will be no eruption if you use a glass).
physics
If you plan to pour the test substances directly into a cola Topics: gas solubility; pressure;
bottle, it is worth conducting the experiment outdoors. Place supersaturated solution; surface
the bottle on a flat and firm surface so it would not fall over. tension; states of matter;
Use wooden blocks or rocks for support. It is recommended to chemical reaction and its
use personal protective equipment (goggles and coats). characteristics; formation of
raindrops, snowflakes and
The quicker you can get the selected substance into the bottle,
bubbles;
the more powerful the eruption will be. You can pour in candy
or tablets using a sheet of paper rolled into a funnel. You can
Target group: students aged 12-
also put them in another container with a narrower opening
18 years;
and use it to quickly pour them in the coke bottle.
In addition to the aforementioned test equipment, you can Materials: Diet coke (at least 0.5
also use your own creativity and knowledge to test various l; the final experiment requires
substances. at least one additional bottle -
larger ones produce better
results) - keep it in the fridge
Explanation
before use; mentos scotch
When you open a soft drink bottle, you can hear its unique mints, both peppermint and
hissing sound and see bubbles of carbon dioxide rising to the other flavours (1 roll); smooth-
surface of the drink. The bubbles were not visible when the surfaced hard candy, e.g.
bottle was still unopened. Carbon dioxide has been dissolved Mynthon; activated charcoal
in the drink under great pressure—the greater the pressure tablets; dishwashing liquid (or
the more gas dissolves. some other cleaning agent);
other substances of interest (e.g.
Uncapping the bottle relieves the pressure inside it. At lower
table sugar); an outside area and
pressure, the liquid can no longer ‘fit’ as much carbon dioxide
rocks for securing the bottle;
as before—the solution becomes supersaturated. A
paper, a funnel or a narrow
supersaturated solution is a solution that contains more
container for pouring candy in
dissolved substance than you can actually dissolve in it.
the bottle; personal protective
Consequently, the excess dissolved substance attempts to
equipment for each team
escape as gas or by sedimentation. member: a plastic raincoat,
safety goggles, rubber gloves
where necessary, glasses,
containers or flasks;
31You can also read