Activity Guide 4-H Inspire Kids to Do
←
→
Page content transcription
If your browser does not render page correctly, please read the page content below
4-H Inspire Kids to Do
Activity Guide

Inspire kids to do all year long with fun,
skill-building activities.
TIP: You can print this or save a digital version for new ideas anytime. Many of the activities are shown
as an abbreviated version—just visit the web page listed for each activity to get the full version with
additional instructions and information!
30 minutes | Grades: 5–12

Butterfly Parts
and Marks
Activity
Learn how to identify and describe a butterfly using body
part names and field marks.

 Learn more 4-H.org/Butterfly

        Field marks                                                 Insect anatomy

                                              Head                                                   Two antennae

                                            Thorax                                                   Most insects
                                                                                                     have wings

    Field marks are the
    characteristic colors,
    patterns, shapes and
                                         Abdomen                                                     Six legs
    sizes that enable you
    to accurately describe
    and identify butterflies.                                          Exoskeleton

                                               Colors & patterns

  Colors and patterns help butterflies in different ways. Certain markings warn predators they taste bad. Some
  colors can attract mates. Dull colors help the butterfly blend into its environment, and eyespots and flashy colors
  scare or startle predators. Dark colors help warm the butterfly’s body. Sometimes the male and female of one
  type of butterfly has different field marks. Which defenses do these butterflies have? Colors? Markings?

                                                                                                                         1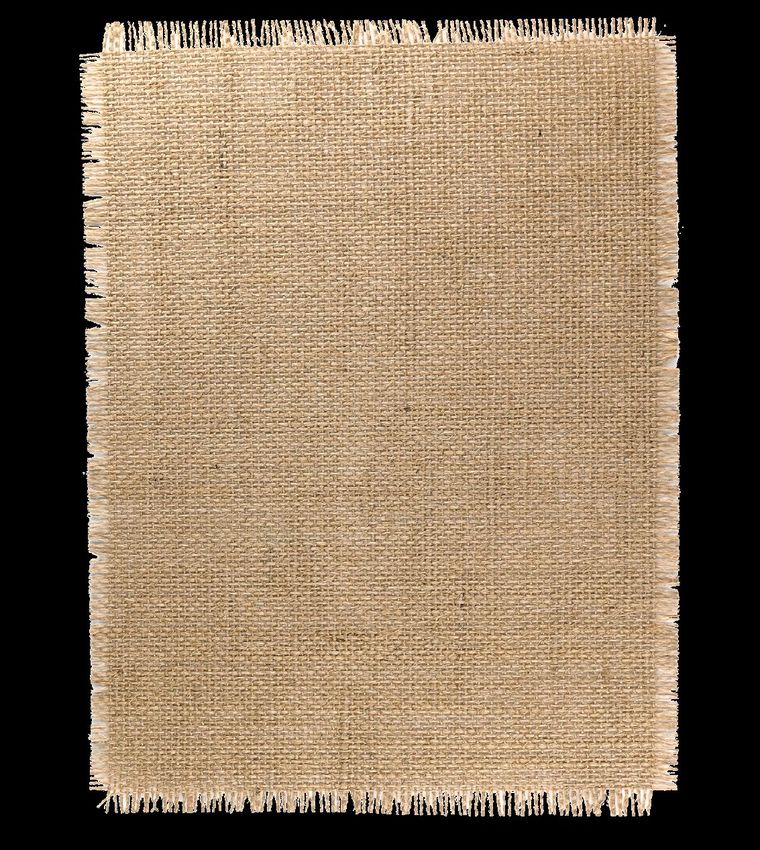
20 minutes | Grades: Pre-K–2

                              Fizzy                                                 Teach kids how chemical reactions
                                                                                    are impacted by a catalyst.
                                                                                     catalyst is a material that speeds
                                                                                    A
                                                                                    up reactions but doesn’t react

                              Foam
                                                                                    itself. In this case, we’ll create a
                                                                                    colorful foam fountain by adding
                                                                                    yeast to a mixture of chemicals.

                                                                                    Questions to engage kids:
                                                                                    • What did you observe before

                              Fun
                                                                                      adding in the water and yeast?
                                                                                    • What changed when you added
                                                                                      in the mixture?
                                                                                    • What do you notice if you touch
                                                                                      the bubbles?

                                                                                      Learn more 4-H.org/FizzyFoam

      1
      Combine warm water and
                                            2
                                            Pour hydrogen peroxide into
                                                                                          3Pour water/yeast
      yeast in a bowl and set aside.        bottle. Add in a few drops of                  mixture into bottle.
      Put bottle in the baking pan          food coloring and a couple                     Remove funnel quickly
      to avoid mess.                       squirts of dish soap.                          and stand back.

                                                              Brought to you by HughesNet and The Ohio State University

                                                                                                         45 minutes | Grades: 3–5

                                       Can-Can Robot
                                       Learn how moving and non-moving parts interact when building a machine.

                                              AA battery                                        Fine-tip marker

Grow                                                       Pencil eraser                                    Rubber bands

vegetables
in an egg                                          Paper                          Cup                         Tape

carton.                                                                                            Toy
                                                              Wire                                motor
Learn how to cook and
preserve them.
                                          Get the full instructions for this activity at 4-H.org/Robot
 Visit: 4-H.org/GrowVegetables
        4-H.org/FoodPreservation        Brought to you by HughesNet, University of California Agriculture and Natural Resource
                                        and Nebraska Extension

                                                                                                                                 2
20 minutes | Grades: 3–5

Low-
Cost
Robotic
Hand
                   Supplies                   Description
                                              An outstanding Georgia 4-H’er, Nicholas, created a YouTube channel
                                              full of low-cost projects to ensure that ALL children have opportunities
                                              to learn about STEM and get excited about science. Check out his
                                              video on how to build a robotic hand for less than $0.50.

                           +

                                5 Straws
                                with a bend
    Hand Template

                       +

                                              Activity Steps
               +                              1. Print out hand template from 4-H.org/HandTemplate
                                              2. Cut out hand template.
                         Pair of
 String                 Scissors              3. Fold each line on the template toward the palm of the hand.
five 24-inch
   pieces                                     4. Lay straws on each finger cutting them to match the template.
                       +                      5. Cut each straw into 3 parts (1 cut on the second line down on the
                                                 finger, 1 cut on the palm).
                                              6. Glue straw pieces to the template.
                                              7. Repeat steps 4–7 for each finger.
                           +                  8. Put a string through the pinky finger and pull the string to the
                                                 bottom of the other side of the hand.
                                              9. Glue the string to the back side of the hand.

                              Glue Sticks     10. Repeat for each finger.
        Glue Gun
                                                For hand template, visit 4-H.org/HandTemplate
                                                For video instruction, visit 4-H.org/RoboticHand

                                                                                                                         3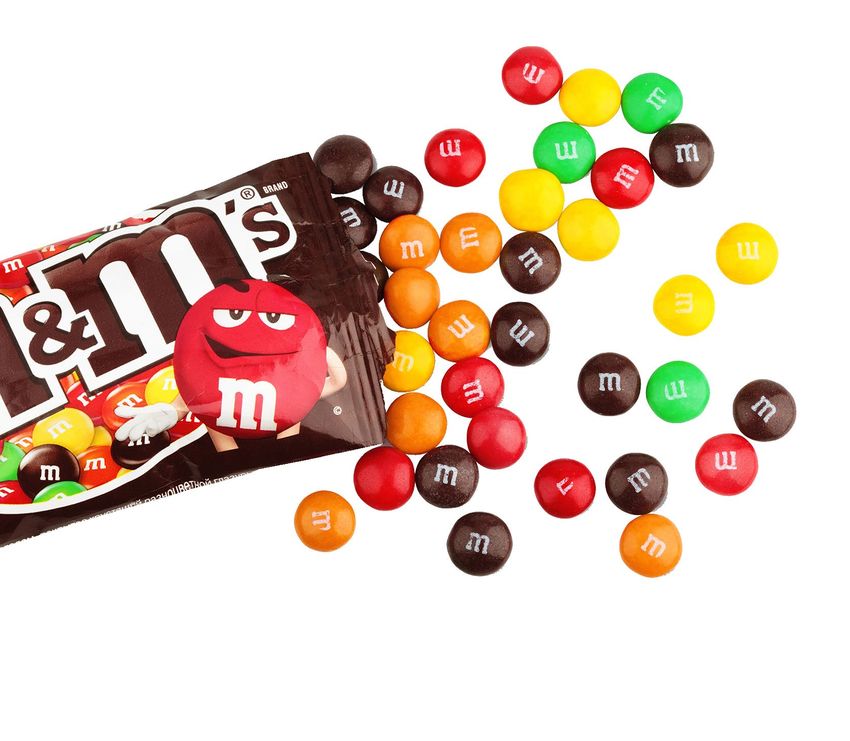
Get to Know                                    Classify
                                                  Animals
                                                    Description
                                                    Learn how to identify and classify
                                                    animals. We’ll focus on learning the
                                                    classes of vertebrates in this matching
                                                    activity.

                                                    Activity Steps
                                                    1. Read information about the classes of

Sophia,                                               vertebrates at 4-H.org/WildAnimals
                                                    2. Complete the table by writing the

Georgia 4-H                                            vertebrate classes for the pictures shown.
                                                    3. Visit your local zoo, nature trail or park to see
                                                       if you can spot them up close and share the
Sophia developed the program
                                                       facts your learned.
“ Tie-Dye for Troops” with her 4
                                 -H
 agent to help kids understand
 mental health issues and how to                                       Supplies
 deal with challenges.
                                                                          Paper &
 Visit 4-H.org/Sophia                                                     Pencil/Pen

 Pillows
                                                                                                       30 minutes | Grades: 3–5, 6–8, 9–12

                                                                      Description
                                                                      This is a simple, inexpensive, lightweight and helpful item

 for the
                                                                      to make that teaches kids that we can all help someone in
                                                                      need in small but meaningful ways.

                                                                      Activity Steps

 Homeless
                                                                      1. Cut the shopping bags up into pieces and crumple them
                                                                         into small balls for stuffing.
                                                                      2. Sew 3 sides of the towel together and stuff with bags.
                                                                      3. Hand sew the last side.
                                                                      4. Contact a local shelter to donate your finished pillows, or
                                                                         carry some in your car with various other hygiene supplies
                           Supplies                                      and non-perishable food items to give to community
                                                                         members in need.

                      +    Shopping
                             Bags       +
      Towelsn
      Kitche

                                              Sewing Machine
                                                                                                                        Thanks to Analynn,
                                                                                                                        Tennessee 4-H

                              +
       +         Pair of
                Scissors
                                       Needle & Thread

                                                                                                                                         4
60 minutes | Grades: 3–5, 6–8, 9–12
Building
an Art Bot
Description
The Art Bot is an activity that allows students to build
a robot that can draw by itself. This activity teaches
students how a basic electrical circuit is built. Bonus:
Most of the supplies can be recycled from other materials.
Supplies
Battery 14 Strips of
Direct Current (DC) Motor Electrical Tape
Connector with positive and negative
wires connected
Plastic +
9-volt
+ + Pair of
Battery + Cup
+
+-
16 oz + 3 Tongue Scissors
Compressors
Hot Glue Gun Decorations
& Sticks
2 Sheets
+ + +
+ + Card + Googly eyes,
Stock
Cork Paper
fuzzy pipe cleaners
Wire Stripper 3 Washable Markers or cotton balls
Dark works best
Activity Steps
1. Use electrical tape and tape the 3 7. In a triangular shape, tape one If you melt the cup, place a strip of electrical tape
across the top of the cup and cut another hole
tongue compressors to the cork. marker to each side of the cup.
through the tape. This will allow you another base
Use two strips of electrical tape per marker. Do not to glue the motor onto the cup.
2. Take the cork and gently place the tape on the sides of the cup where you made the
cork on top of the direct current (DC) slits in Step 4. The markers can fit in front or behind 13. Decorate the Art Bot with googly
motor with positive and negative wires the slits.
eyes, pipe cleaners for arms and a
connected, using the prong on top cotton ball for the nose.
8. Twist the DC motor wires and
of the motor to make a hole on the
battery connector wires together. 14. Place a sheet of card stock paper
cork to connect the cork and motor
together. Remove the cork and it will The red wires must twist together from the motor under the Art Bot.
to the battery connector and, depending on the
be placed back on top of the motor at
a later step.
color of your second wire (either black or blue), 15. Connect the battery connector
must be twisted with the appropriate color from
the motor to the battery connector. to the battery, matching the
3. Cut a hole on the top of the cup for the positive and negative on the
wires of your DC motor to fit through. 9. Once wires are twisted, tape them connector and battery. Then,
together with electrical tape. place the Art Bot onto the card
Use the DC motor to measure and it should sit flush
on top of the cup. Do not attach the motor at this
stock paper.
time.
10. Feed the battery connector through
OPTIONAL STEP: Add more weight to the sides
the cup gently, with the DC motor of the cup with magnets to steady its drawing,
4. Cut two 1/2-inch slits on cup’s side. sitting on top. as well as make it draw in different directions.
5. Tape the 9-volt battery to the inside 11. Test your connection.
of the cup with 2 strips of tape on the Make sure you are connecting the positive side to Enjoy watching
opposite side of the two slits on the the positive side of the battery and the negative to
cup. the negative on the battery. If the motor turns, you’ve your Art Bot draw
done it! If the motor does not turn, check the wire
Place the battery with positive and negative connections and repeat until the motor turns when by itself. Watch the
connecting the battery connector to the battery.
connectors facing downward on the cup.
Video Tutorial at
12. Place hot glue on the cup or the
6. Using the wire stripper on the DC
motor to glue the motor to the top
4-H.org/ArtBot
motor and the battery connector,
crimp each wire to remove the plastic of the cup.
Thanks to Emilee, Oklahoma 4-H
covering, leaving only the copper wires.
5
20 minutes | Grades: Pre-K–2

                                                                     Homemade
                                                                     Bath Fizzies
                                                                      Description
                                                                      Learn how to make homemade bath bombs. They make
                                                                      great gifts!

                                                                      Activity Steps
                                                                      1. Mix olive oil and essential oil together in bowl.
                                                                      2. Mix baking soda, cornstarch and citric acid together in
                                                                         separate bowl.
                            Supplies
                                                                      3. Make indentation in center of mixture and drizzle olive oil
                                                                         mixture into indentation; mix well.
                                                                      4. Add water, a little at a time, and blend - adding water
             Olive oil       +             +    Citric                   causes fizzing. Absorb water in cornstarch as much as
             1 tablespoon
                                                acid                     possible so the fizzie does not fizz while you are mixing
                                                                         ingredients.
                            Essential oil
                             scent of choice           Plastic        5. Once blended, scoop out 1 tablespoon of mixture. Shape
                               4-10 drops               bag              into a ball, squeezing tightly. You can also use a mold, like a
                    +                                                    decorative cookie mold.
                                       +         +
           Baking                                                     6. Allow to dry overnight before packaging.
                         Corn
            Soda                           Water                      7. Place in cellophane bags and tie off with ribbon.
                        starch          1 tablespoon

                                                                        Check it out at 4-H.org/BathBomb

All Ages

  How to Be
  a Record
  Breaker
   Description
   Have you got what it takes to earn a genuine Guinness
   World Record certificate? Learn how to apply!

                                                                 Activity Steps                        Make
                                                                 1. Apply Online.
                                                                    (guinnessworldrecords.com)         Someone
                                                                                                       Happy
                                                                 2. Get the guidelines.
                                                                 3. Attempt your record.
                                                                 4. Have fun with it and get
                                                                    creative with your ideas.
                                                                                                       Make and deliver cheerful
                                                                 5. Send your evidence.
                                                                                                       cards to local senior citizen
                                                                 Brought to you by Guinness            homes.
                                                                 World Records

     Get the full details here: 4-H.org/RecordBreaker

                                                                                                                                           6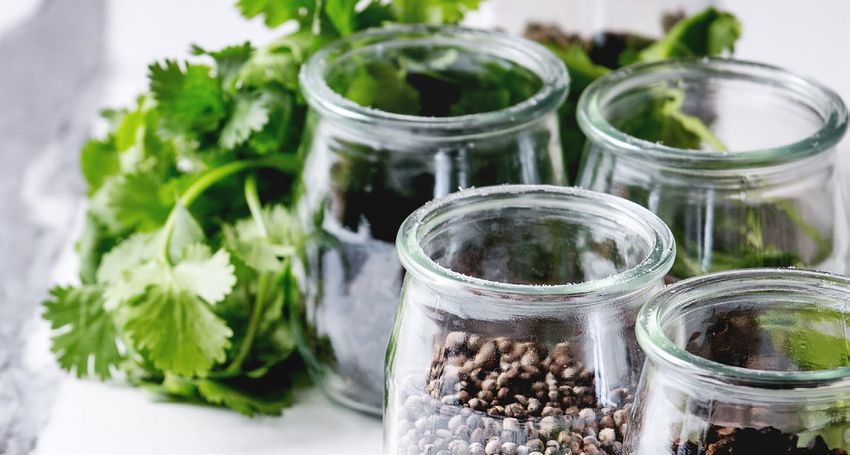
60 minutes | Grades: Pre-K–2, 3–5, 6–8

 Tie-Dye
 for Troops
 Description
 Tie-Dye for Troops is a mental health awareness activity           By tie-dyeing pillowcases and discussing the mix of
 for kids that uses colors, creativity and comic books to           emotions, every child is assured that, although feelings
 ensure an open conversation about feelings.                        can be messy and confusing, it is okay to feel different.

                                                        Supplies

                                                                                                      Pillow Cases
                                                                                  +
                                                            +                         Shopping
                     +               +      Rubber                                      Bags     +                    +
                          Bucket
                                            Bands               Mixture:
      Tie-dye Kit                                           Soda Ash & Water                                              Crayons
                                                                1 cup soda ash
                                                                 1 gallon water

                                                                    Activity Steps
                                                                    1. Give each child a pillowcase and write their name on it.
                                                                    2. Pass out rubber bands and show them some tie-dye
                                                                       folding techniques.
                                                                    3. Allow them to twist and fold their cases; wrap them in
                                                                       rubber bands.
                                                                    4. Allow them to freely dye their pillowcases for 5–7 minutes.
                    Discussion Guide                                5. After, have them put their pillowcases in a bag and write
                                                                       their name on the bag.
   Start a discussion to connect the activity to                    6. Let the pillowcases sit for 24 hours.
   emotions. Start with colors:                                     7. Rinse them until the water runs clear (this step is very
   • Ask what your child (or group of kids) thinks about               important) and leave to dry.
     a certain color, and whatever the consensus is,
     disagree with it.
   • Question the group whether it is okay or not okay
     to not agree with the majority.
   • Question them about other colors and hobbies
     (pass around the super pillow to give each kid an
     opportunity to speak).

   Explain how feelings are like tie-dye—they can be
   mixed up and confusing—and how tie-dye still ends
   up being beautiful.

   Introduce the pillow’s purpose: to be a friend, secret
   keeper, punching bag, etc. A way to privately to let
   out your feelings until they’re ready to share them
   with a trusted friend, parent or confidant.
                                                                                                     Thanks to Sophia, Georgia 4-H

                                                                                                                                     7
30 minutes | Grades: 3–5, 6–8, 9–12
Be-YOU-tiful
Mirror Craft Supplies
Description
Create a Be-YOU-tiful
Mirror Craft to give kids Glue Sticks
(especially tween girls)
Hand- + +
a tool to encourage a held
positive self-image. Mirror
Glue Gun
Activity Steps
1. Cover the table/surface to Paint
protect it. + +
2. Set out mirrors and supplies.
Markers
3. Print quotes to write on mirrors. +
4. Have fun decorating your mirrors! Decorations
Faux flowers, glitter, pom-poms, stickers, list of empowering quotes
5. Start a discussion about the emotions or
negative feelings that this mirror may help
you and your kids overcome to encourage
an open dialogue.
Thanks to Molly, Ohio 4-H
Brought to you by JOANN 60 minutes | Grades: 3–5, 6–8
Yoga Painted Fabric Wall Art
Description
Learn how to transform painted cotton fabric into bold, abstract wall décor. You’ll learn how
to paint on fabric, then “frame” your fabric into embroidery hoops. The finished pieces are
lightweight and easy to hang.
Supplies
Acrylic
Fabric Paint
+
+
Spray
2 yards light-
weight cotton Bottle
& Paint
Palette
Activity Steps + Jar of +
Water Pair of
1. Spray fabric with water. Scissors
2. Brush paint on fabric in desired pattern.
3. Let fabric/paint dry. +
Brushes + Embroidery
4. Lay out embroidery hoops in desired area. • Foam Hoops
• 2-3” wide,
Set a time for a family yoga 5. Cut fabric around hoops. coarse-
bristled
NOTE: Leave 1 inch on outside of hoop as extra.
session to release stress + Utility Knife
6. Place fabric over inside ring and place outer
and introduce the concept
ring on top. Pull fabric to be snug and tighten
of mindfulness. hardware of embroidery hoop. For the full tutorial, check out
7. Hang on wall. 4-H.org/WallArt
8
20 minutes | Grades: Pre-K–2, 3–5

                                               Garden of
                                               Greatness
Description
This activity will help young kids think about and recognize positive traits within themselves
and others in a fun and creative way, while creating a classroom or home “flower” display.

                                                     Supplies
                                                                                     Construction
                                                                                     paper, cut into
                                                                                     circles (1 circle
                             +                      +                                per child) and
                                                                         +
                                                                                     strips wide
                                                                                     enough to write
    Bulletin Board or             Stapler and                                        on (4–8 strips
      Display Area                  Staples             Masking Tape                 per child)

Activity Steps
1. Give each kid a circle with their name on it, and four to eight
   strips of colored paper.
2. Instruct them to write down things they love about themselves,
   or something they enjoy doing, on the strips. If they’re having
   trouble thinking of things, ask their friends or siblings to list
   their great qualities.
                                                                             Molly
3. Once they have their petals completed, help them tape each
   strip onto their circle.
4. Staple or tape each flower to the bulletin board or display area
   (the refrigerator works great too) while calling out at least one
   great thing about each kid.
5. Discuss how they are all unique with different qualities and
   interests, and how all their individual strengths and traits create
   a Garden of Greatness.

                                                                                Thanks to Molly, Ohio 4-H

                                                                                                             9
60 minutes | Grades: 3–5, 6–8, 9–12
Bread
in a Bag
Description
Learn food science in a fun and yummy way
with this easy recipe for making bread in a bag.
Supplies Ingredients
Kitchen Towel - 2 cups all-purpose flour
- 1 package quick-rising yeast
Gallon Size +
Rolling - 3 tablespoons sugar
Ziplock Bag + Pin
- 1 tablespoon nonfat dry milk
- 1 teaspoon salt
- 1 cup hot water (125 to 130 degrees F)
+
- 3 tablespoons vegetable oil
Oven 8x10
+ - 1 cup whole wheat flour
Mitts Baking
Pan
Activity Steps
1. Combine 1 cup all-purpose flour, undissolved yeast, sugar, dry milk and salt in a 1-gallon heavy-duty freezer bag with
zipper lock.
2. Squeeze upper part of bag to force air out. Seal bag. Shake and work bag with fingers to blend ingredients.
3. Add hot water and oil to dry ingredients. Reseal bag. Mix by working bag with fingers.
4. Add whole wheat flour; reseal bag and mix thoroughly.
5. Gradually add enough remaining all-purpose flour to make stiff dough that pulls away from bag.
6. Remove dough from bag. On floured surface, knead dough 2 to 4 minutes until smooth and elastic.
Cover dough; let it rest 10 minutes.
7. Makes 16 slices
Baking
1. Using a rolling pin, roll dough to a 12 x 7-inch rectangle. Roll up from narrow end.
Pinch edges and ends to seal.
2. Place in oiled 8 1/2 x 4 x 2 1/4-inch loaf pan; cover with plastic wrap and a kitchen
towel. Place in shallow pan on counter; half fill with boiling water. Place baking sheet
over shallow pan.
3. Let dough rise 20 minutes or until double in size.
4. Bake in preheated oven at 375 degrees F for 25 minutes or until done.
5. Remove from pan and cool on wire rack.
6. Slice with serrated knife to serve.
Learn more at 4-H.org/Bread Thanks to Casey, Arkansas 4-H
1025 minutes | Grades: Pre-K–2
Fruit Batteries
Forget about making lemonade—generate home-made electricity instead!
This activity teaches kids about the parts that make a battery work and the
chemical reaction that makes it possible.
Activity Steps
1. Give your lemon a quick roll to make sure the insides are 5. Once you’ve joined up the lemon battery, you should be
extra juicy. left with two free clips at either end—one coming from
2. Carefully use a knife or scissors to cut two slots/holes in the nail and the other coming from the coin.
opposite ends of the lemon. 6. To complete the circuit, attach the clips to the LED.
3. Insert the copper penny and the zinc nail into the pre- 7. If you’re doing the Bonus Fun, now connect the
made holes. (If you’re doing this to attempt a Guinness voltmeter, take a reading of the output and photograph
World Records title, you’ll start the time at the beginning the display to send as evidence for the Guinness World
of this step). Records title attempt.
4. Connect the nail and the coin (your electrodes) with the
alligator clips. Make sure that one end is attached to the See the full activity at 4-H.org/Battery
nail and the other to the coin.
Brought to you by Guinness World Records
60 minutes | Grades: 6–8, 9–12
Inspire Kids
Cooking Over to Do
Campfire Coals
Learn to code your names and see who
has the best design.
Code Your World is a four-part challenge
that teaches kids ages 8–14 to apply
Description computer science to the world around
Learn how to organize an outdoor cooking experience with this free them through hands-on activities.
activity guide from Iowa State University. It includes planning the
Start planning at 4-H.org/CampCooking Learn more: 4-H.org/NYSD18
Brought to you by Iowa 4-H Youth Development
1120 minutes | All Ages Brought to you by HughesNet and Nebraska Extension 20 minutes | Grades: 3–5
Build a Force and
Bird Feeder
Friction
Description
Pine Cone
Newton’s First Law of Motion states that an
object will remain at rest or in motion until an
outside force acts upon it. This activity uses Hot
Wheels cars to explore the concepts of force and friction described by
+ Peanut Newton. Youth will manipulate how hard a car is pushed and explore how
Butter to maximize the pull of gravity. Full tutorial at 4-H.org/NewtonsForce
Supplies
Monitor your bird feeder for
a week and log the types of Tape Measure Stop Watch Masking Tape 4 Books, Movie
Cases, or Boxes
birds. the Same Size
+ + +
Why is this important? Just
like people, the birds in your
backyard also need nutritious Hot Wheels Car
foods. Hot Wheels
Launcher
+ + Hot Wheels
Get started: 4-H.org/BirdFeeder Track
30 minutes | Grades: Pre-K–2, 3–5
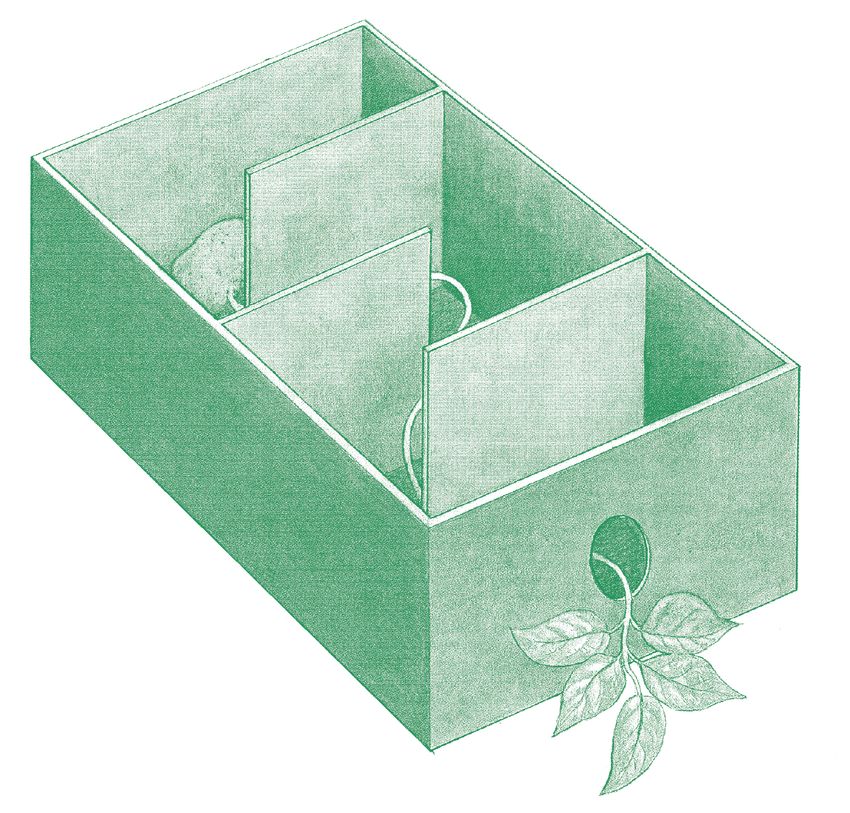
Build a Potato Maze
Description
Using just a cardboard box and a sprouting potato, do this
fun activity to show kids the obstacles plants will overcome
to find the light they need to grow.
Activity Steps
1. Make a small hole in a short side of a long cardboard box.
2. With an adult’s help, cut out several pieces of cardboard
and stick them inside the box to make a maze like the one
in the picture.
3. Put a sprouting potato at the end of the box opposite the
hole and place the lid on the box.
4. Leave the box in a light place so that light can easily get
into the box through the hole in the end.
5. After a few days, take the lid off the box. Has your potato
found the pathway through the “maze” to reach the light?
Get started at 4-H.org/PotatoMaze
123 hours | Grades: 6–8, 9–12
Stuff a Truck for
Service Members
Description
Create a “stuff a truck” event
or collection to send care
packages overseas to service
members (or others in need
like hurricane victims). You
can start by asking shoppers
to buy something extra to
say thank you to members of
our Armed Forces. It teaches
kids public speaking skills,
fundraising, community
support, and teamwork.
+ + + +
Research Create Signs/Posters Find a Store Create a Send Donations
Donation Jar
Activity Steps
1. Research which organizations are 4. Have kids stand by the main entrance 7. Teach the kids to thank the person,
providing care packages for service of a popular store with posters whether they participate or not.
members, what kind of contributions describing their cause, preprinted
8. Send the donated items to the
they need, and where/how you can notes with items for the public to
organization you chose, following
send supplies. purchase and bags to put them in.
their guidelines of where, how and
2. Select your organization and create 5. Have a donation jar out and prime what.
signs or posters to inform people it with a few dollars.
about the cause and organization
you’re supporting. 6. Help the kids develop their pitches.
For example:
3. Pick a local store with a lot of foot
• Would you like to say ‘thank you’
traffic (or a handful if you’ll do this with
to our Armed Forces by buying
a big group or multiple times) and
just a few items to put in a care
dates for your activity. Visit the store
package?
to speak with a manager to get
approval for your plans. . • Would you like to add another
item to your basket to help
families affected by the
hurricane? Thanks to Cathy, Massachusetts 4-H
135 minutes | All Ages
Paper Crafting
Description
Check out this project idea guide that contains a list of
activities and tips related to paper crafting. Paper crafting
comes in many forms, but the main supply, as the name
implies, is paper. Many of the other supplies can be found
around the house, making this an inexpensive hobby.
Pick One or More
The project guide at 4-H.org/PaperCraft lists many
different paper craft techniques and ideas like card making,
decoupage, origami, paper embroidery, embossing and
more. Read starter ideas for each topic and select one or
more to try your hand at. Brought to you by Ohio 4-H Youth Development
30 minutes | Grades: Pre-K–2
Fun and
60 minutes | Grades: 3–5
Grow a Bean
Tempting in a Bottle
M&M Math
Description
Practice early math
skills with this tasty and Learn about the life cycle of a
tempting activity to help plant from Serena, an Oklahoma
4-H’er, and discover what their
even the littlest of kids
plant needs to survive. They
count and categorize will also learn about innovative
their M&Ms—if they can gardens that don’t require going
resist the temptation! outside. This activity showcases
how agriculture and science go
Start practicing at hand-in-hand.
4-H.org/Math
Learn more: 4-H.org/Bean
1460 minutes | Grades: 3–5, 6–8, 9–12
Building Bridges
Description
Try this fun challenge from Indiana 4-H’er, Arianna, to teach kids the concepts of engineering. Using toothpicks and
gumballs, students will build a small bridge. First, we do the design phase, where students discuss characteristics
of real bridges, and how it helps with common challenges. Then students build their bridges and go through testing
stages before they present their final project.
For a group of 10 kids: Two 100-packs of wooden toothpicks (overestimate, you’ll use a lot of
them!) + Four packs of gumballs + A variety of materials to test the students’ bridge strength +
Small prizes for the winners
Toothpicks Thanks to Arianna, Indiana 4-H
Activity Steps
1. Define “engineering” or, for older kids, confirm their 6. Once designs are complete, set out materials. Students
understanding of what “engineering” is. should have unlimited access to materials, but tell them
2. Explain the project, as well as how it relates to to be reasonable—they shouldn’t use an entire box of
engineering—mention the specific concepts it teaches: toothpicks on one bridge.
design process, critical thinking, etc. 7. Using pre-selected materials, begin running students’
3. Discuss what common problems need to be addressed prototype bridges through strength challenges. Each
when building a bridge—start by discussing what new challenge should be heavier than the last. These
a bridge’s function is, and what might impede that challenges will reveal structural flaws in the students’
function. bridges.
4. Pull up pictures of real bridges, and discuss what 8. Send students back to the drawing table, and have
design features they have in common. Then discuss them re-work their bridges to fix the flaws. Consider
how these features contribute to the bridge’s having them start the entire process again—write out
successful function. what issue they’re facing, then draw/list how they’ll fix
it in their new design.
5. Have students list the steps they’ll use to make the
bridge, or draw the bridge. Push them to be as detailed 9. Bring all students’ completed bridges together and
as possible—when they start building, they’ll be glad run them through a single final challenge. This should
they were. be the heaviest challenge you present. Any student
whose bridge supports the weights for at least 10
seconds wins the challenge!
1530 minutes | Grades: Pre-K–2
Wind Energy Inspire
Description
Learn how wind can be converted into energy.
In this activity, youth will build a simple windmill
to Do
and use it to power a pulley system to lift a bucket.
Get started at 4-H.org/UsingWind
Brought to you by Hughesnet and Illinois 4-H Foundation
Supplies
Construction Paper String Paper Clips Small & Large
Disposable Cups
+ +
+
Volunteer
+
Tape Rubber Bands
Scissors
Large Volunteer as a dog walker
+ + & Small once a week at a local
+
Straws
shelter.
Origami
30 minutes | Grades: 3–5, 6–8, 9–12
Cube
Description
Don’t be square—have a go at the record for
the fastest time to make a modular origami
cube! The challenge here is that it’s made from
not one sheet of paper but six, inspired by
traditional Japanese design.
Supplies
- Six Pieces of Square Origami
Paper or Rectangular Paper Get started at 4-H.org/Origami
Cut into Squares
- Stop Watch
Brought to you by Guinness World Records
1615 minutes | Grades: Pre-K–2, 3–5
Intelligent
Eggs {experiment}
Teach your kids about the principles of buoyancy with this fun
“magic trick” using only simple household items!
Start your experiment at 4-H.org/Eggs
1
•
SETUP
Two 8-ounce glasses
2 THE ACT
Announce you have two intelligent
3 TIPS
This trick uses an old standby
• Water eggs that obey written commands. of magicians called
• 4 tablespoons sugar Give them to a member of your “misdirection.”
• Two uncooked eggs audience with a marking pencil
• Laundry marking pencil and give him or her the choice...
60 minutes | Grades: 3–5, 6–8, 9–12
Marshmallow
Catapult
You’ll need good aim and a faithful lab assistant (or at least a willing buddy)
to take on this sweet experiment. Perhaps don’t mention that their role will
mainly involve having marshmallows fired at them!
Supplies You will also need:
• Bulldog Clip • Glue Gun
Create a
• Bottle Caps • Scissors
• Craft Sticks
(Two Sizes)
Gratitude
• Marshmallows
Journal
Help your kid learn to notice
and appreciate the little Visit 4-H.org/Catapult
things.
Brought to you by Guinness World Records
1720 minutes | Grades: Pre-K–2, 3–5, 6–8
Simple Healthy
Lunch
How to Make a Simple Healthy Lunch with a Friend
To encourage kids to eat healthier, show them how simple it is to make a healthy snack that tastes good. This activity
encourages independence and thoughtfulness about what they’re putting in their bodies.
Supplies
2 Apples 1/2 Cup 1/3 Cup 1/4 Cup
Strawberries Peaches Grapes
1 Tablespoon Juice of 1/2 Measuring Cup Hand
3/4 Cup Knife Serving
Orange Juice Lemon Juice Grapefruit & Spoons Juicer
Bowls
Activity Steps
1. Chop and measure apples.
2. Chop and measure strawberries.
3. Chop and measure peaches.
4. Chop and measure grapes.
5. Place fruit in a medium-sized bowl.
6. Juice 1 lemon, measure and pour onto fruit.
7. Juice 1 grapefruit, measure and pour onto the fruit.
8. Measure out the orange juice and pour onto fruit.
9. Stir well and serve. Get creative...add raspberries, kiwi, blackberries and more.
Thanks to Adarra, Oklahoma 4-H
1815 minutes | Grades: 3–5
Learn the
Right Way
to Wash
Your Hands
Description
Learn how to wash your hands correctly to keep your kids and
family better protected from germs.
Supplies
Liquid Hand Soap Paper Towels or Sink/Water for 8 oz. Bottle of
a Hand Towel(s) Demonstration and Practice Glo Germ and UV light
Activity Steps
1. Apply Glo Germ to hands and hold hands under the
UV light to show coverage.
2. Wash your hands:
• Wet your hands with clean, running water (warm or
cold), turn off the tap and apply soap.
• Lather your hands by rubbing them together with the
soap. Be sure to lather the backs of your hands,
between your fingers and under your nails.
• Scrub your hands for at least 20 seconds. Need a
timer? Hum the “Happy Birthday” song from
beginning to end twice.
• Rinse your hands well under clean, running water.
• Dry your hands using a clean towel or air dry them.
3. Check hands under UV light to show areas that are
not washed properly.
Thanks to Sofia, California 4-H
1930 minutes | Grades: 3–5, 6–8 25 minutes | Grades: 6–8, 9–12
Egg Drop
Herbs in a Jar Challenge
Description
Plant your favorite herbs in a mason jar—look for recipes to use them
as they grow.
Hold an egg drop challenge—
build containers to keep the
egg from cracking.
The object of the game is
for each team to determine
how to drop an egg without
breaking it.
Get started: 4-H.org/EggDrop
60 minutes | Grades: Pre-K–2, 3–5, 6–8
“Stained Glass”
Butterflies
Description
Beautiful and delicate butterflies are a favorite for many kids. Their wings are covered with tiny overlapping scales
that give them their lovely colors. Try this fun craft to enjoy this beauty every day from your window.
Supplies
+ +
Marker
or Crayon
Sheet of Paper Waxed Paper
+ + +
Tissue Paper Pipe Tape
(Many Colors) Liquid Starch Cleaners
Check it out at 4-H.org/GlassButterfly
2030 minutes | Grades: Pre-K–2, 3–5
Sew a
Burlap
Bag
Description
Using yarn and a plastic needle, teach youth
how to sew a burlap bag from a rectangle of
burlap fabric. Using simple tools, you can teach
kids basic sewing techniques.
Supplies
Plastic Craft Needle and Yarn
in Your Favorite Color
Rectangle of Burlap the Size
You Want Your Bag (9”x 14”
is a good size)
Activity Steps
1. Before beginning, serge around the burlap pieces to
prevent fraying.
2. Fold the burlap rectangle in half to make a 9 x 7-inch
rectangle (if using the 9 x 14-inch measurement).
3. Stitch each side and tie off the ends of the thread.
4. You can then embellish with a button closure or
decorative items!
Thanks to Beth, Oklahoma 4-H
2120 minutes | Grades: Pre-K–2, 3–5
Science
String
Supplies
Printer Paper LEDs Bug
Description
+ +
Learn from one of our 4-H Youth in Action Winners,
Cassandra, how to make a light-up “Science Bug”
necklace. Kids will learn about circuits and electricity
as they practice lighting up LEDs.
Watch Electric Colored Pencils
1
Battery Tape or Markers
(Optional) See the full activity at 4-H.org/Bug
+
+
Brought to you by HughesNet
Go on a Hike Have
Description
Go on a hike or go to the neighborhood park and draw the view. a Car
Wash
While there, walk around and write down what you see others
doing. Discuss with your group or family what you saw. Was there
trash or other damage people left behind?
Learn to Leave
No Trace at
4-H.org/Hiking
Hold a neighborhood car wash in
support of a local shelter.
2235 minutes | Grades: 6–8, 9–12
Test Drive
Your Trust
Description
“Test drive” is an activity from Georgia 4-H’er, Oakley, used to build and teach the importance of trust. Through
youth “driving” each other around, they will be able to see how hard it is to build and maintain trust and
how easy it is to lose it. This activity works well in the social/emotional concept of healthy living, specifically
for relationship and bullying prevention.
Activity
Before the activity, set up a room with items, or use any room or area to make an obstacle course to go
through. This activity is about trust and how important it is. Have the youth pair up into groups of two and
instruct the groups to choose which of them will be the “driver” and which will be the “car.” The driver will
stand behind the “car” and provide driving instructions without speaking to the car.
Instructions: Have the “car” close their eyes and then have the “driver” start their
1. Start walking engines. Allow the driving teams to drive around a bit; if volunteers
are available, it is suggested to place some around to keep them safe
2. Double tap on both shoulders from falling or bumping into objects. Have the driving teams switch
3. Stop walking places and drive around a bit.
4. Tap once on both shoulders
5. Turn left When finished, ask the group questions like:
6. Tap left shoulder 1. Who picked who would be the driver?
7. Turn right 2. Was it difficult to be led around without seeing?
8. Tap right shoulder 3. Did anyone lose trust in their partner?
9. Honk horn
10. Tap the top of the head Why?
1. How did it feel to switch positions?
2. If you lost trust in each other, were you able to build it back?
Thanks to Oakley, Georgia 4-H
23Inspire Healthy Meals:
To Do Plan, Shop & Prepare
Description
Teach your kid how to plan, shop
for and prepare healthy meals on a
budget once a week.
A healthy meal starts with more
vegetables and fruits and smaller
portions of proteins and grains.
Think about how you can adjust
the portions on your plate to get
more of what you need without too
many calories. And don’t forget
Volunteer to help
the dairy! Make it the beverage
senior citizens in you drink with your meal or add
your neighborhood fat-free or low-fat dairy products
to your plate.
with technology and
household chores. Learn more at 4-H.org/HealthyMeals
60 minutes | Grades: Pre-K–2, 3–5
Make a
Wind Vane
Description
Make your very own wind vane to teach kids how
wind is “made” and check the wind’s direction
with this super simple and fun craft.
Fun Fact
Did you know that the sun is responsible for creating
winds? As the air is warmed by the sun, it rises, and colder,
denser air moves in to replace it. This is wind! Geographical
features, such as mountains, bodies of water and deserts
help determine the nature of wind—its speed and direction.
Learn how to build your wind vane at 4-H.org/WindVane
2430 minutes | Grades: Pre-K–2, 3–5, 6–8
Sweet,
Savory and
Tennessee
Description
This activity developed by Tennessee 4-H’er Justin, will enable
youth to make sweet and savory snacks from dairy products,
while learning more about agriculture and healthy living. You will
learn to make your own homemade butter and whipped cream.
Supplies (Butter) Supplies (Whipped Cream)
2 oz. Plastic Heavy Whipping Measuring Cup Vanilla
Cups with Lids Cream Extract
+
+ Sugar
+ +
+
Your Choice of
1
Salt Whisk and
Fruit (strawberries
(if desired) Crackers Mixing
and blueberries are
Bowl
recommended)
+ + + +
For making butter: For making whipped cream:
1. Fill the 2 oz. plastic cup about 2/3 full of heavy 1. Add 2 cups of whipping cream, 1 tsp. vanilla extract,
whipping cream. and 1–2 tbsp. of sugar into a metal mixing bowl.
2. Seal the cup and shake the heavy whipping cream for 2. Whip the mixture in the mixing bowl until it
5–10 minutes, until solid butter is formed. becomes thick.
3. Drain the remaining liquid (buttermilk) and add salt 3. Once it has reached your desired texture, add to
(if desired). fruit and enjoy!
4. Spread the butter on crackers and eat.
Thanks to Justin, Tennessee 4-H
258 hours | Grades: 3–5, 6–8, 9–12
Luau Bash for
Healthy Living Thanks to Bryanne,
California 4-H
Description
To encourage exercise in a fun environment, the “Luau Bash” concept,
created by California 4-H’er Bryanne, consists of several fun and active
games that promote healthy lifestyles.
Activities Include:
• Pineapple Bowling encourages guests to get moving.
• Aloha Limbo allows everyone to practice and strengthen
their flexibility.
• Musical Towels encourages everyone to dance.
• Kebab Relay will nourish guests while getting in some
exercise for this healthy treat.
Supplies & Instructions
Pineapple Bowling Aloha Limbo
- 6 pineapples - 5 flower leis
- 1 coconut - 2 helpers
Set up six pineapples in a triangle Cut one snip in each of the five flower leis.
pattern. Walk 10 feet away from the Tape leis together to form one long chain.
pineapples and give the first contestant Assign two “holders” to stretch the lei chain.
a coconut to knock over the pineapples. Have players line up perpendicular to the chain.
Set up pineapples after each player’s Start by holding the chain high. Each player must
turn. Each player gets one turn that bend backwards slightly (if necessary). Lower the
consists of two chances to knock down chain for the next round. If anyone touches the
as many pineapples as possible. The chain, they are out. The person who can limbo
player who knocks over the most the lowest wins!
pineapples wins!
Musical Towels Kebab Relay
- 10 towels (based on number of - 6 skewers (3 per team)
guests) - 60 pieces of chopped fruit (30 in each bowl)
- Hawaiian music - 2 tables
Arrange X towels in a circle on the Place two bowls of fruit on one side of the yard
grass (X=1 less than number of players). on a table. Place second table 20 feet away and
Have guests stand in a circle outside set skewers on the table. Split guests into two teams.
of the towels. Begin music. Stop music Have guests line up behind the fruit table. On “go”
after at least seven seconds (vary the guests will grab one piece of fruit, run to the next
time elapsed each round). The person table and carefully place on skewer (10 pieces of fruit
not sitting on a towel is out! Repeat until per skewer). First team to assemble all three
one player is left. fruit kebabs wins!
265 minutes | All Ages
The 4-H Pledge Inspire
& Yoga Sequence To Do
Description
Learn eight yoga poses that
you can do along with the
4-H pledge.
Watch the video demonstration
at 4-H.org/Yoga to learn the
4-H pledge and the poses!
Help your kid organize a
neighborhood food drive
Brought to you by Arkansas 4-H
for a local shelter or food
Youth Development pantry.
45 minutes | Grades: 3–5, 6–8
Build a Rubber
Band Car
Description
In this activity, kids will build a four-wheeled car
from items found in your home and learn about
the engineering design process and physics!
Many of the items in this
activity can be swapped
out for other similarly
shaped household items.
Start building at 4-H.org/Cars
Brought to you by Guinness World Records
2720 minutes | Grades: Pre-K–2, 3–5, 6–8
Calm Jars
Description
Calm jars are a tool used to lead kids
through developing positive “self-talk”
practices which can help boost confidence,
optimism and motivation while decreasing
negative thoughts and emotions.
Supplies
Glass Jars
Decorations for the jars such as: Glitter,
stickers, markers, etc. Activity Steps
1. Set out your supplies.
2. Have each youth decorate a glass jar in any way
they wish.
3. Fold the calm cards and put them inside of the jar.
4. Talk kids through how to use the tool and ask
them about the situations and emotions they’re
feeling when they think this exercise could be
Print “calm cards” on colorful paper. useful:
You’ll see a few examples below, but get
creative with your own ideas! • Sit in a calm safe space (like your bedroom
or outside).
• Begin by taking several deep breathes.
• Take each slip out, one at a time, and read
aloud while taking a deep breath.
I accept myself I am learning
as a unique what I need to
and worthwhile do to take care • Use the cards to calm your stress, nerves
person of my body
or anger.
I am calm and I am in control
confident of my choices • Cards can also be used daily by selecting a
new one each day.
p
©G oo
Visit 4-H.org/CalmCards
Cut calm cards so everyone has one copy
of each sheet.
Thanks to Molly, Ohio 4-H
2845 minutes | Grades: 3–5
Take a
Tour Sunfold
Printed
Scarf
In this video tutorial from CreativeBug.com, you’ll learn how to create vibrant,
textural prints on textiles and home décor.
To make these prints, you’ll use Inkodye—a special light-sensitive fabric dye
that comes out of the bottle translucent and develops in the sunlight, resulting
Take a tour of a farm or
in beautifully dyed fabric.
nursery in your area.
Ask three questions Watch the video tutorial to learn the technique for applying Inkodye, and several
about the plants ways to fold fabric to create organic printed designs as well as intricate stripes
and animals. and swooshes. You’ll also learn ideas for moving beyond the scarf, printing on
throw pillows, curtains and pashminas.
Check it out: 4-H.org/Scarf Brought to you by JOANN
All Ages
Signs of
Wildlife
Description
Start a neighborhood nature club and teach kids
about nature right in their backyard.
Supplies
Binoculars
Field
Guide/ +
Internet +
Notebook Activity Steps
1. Hike around the neighborhood looking for signs of wildlife
(home/park/nature preserve as possible locations).
+ + Pen or Pencil 2. Walk quietly try to observe all wildlife.
3. Listen to wildlife sounds.
Camera 4. Record what you see and hear in a journal.
5. Use identification guides to determine what animals you
Get started at 4-H.org/NatureClub saw and heard.
2960 minutes | Grades: 9–12
Healthy
Recipes on
a Budget
Description
Indiana 4-H’er, Madison, had the opportunity to visit a ranch
to learn more about global hunger and how to address hunger in
her local community. With her fellow 4-H’ers, Madison developed
an action plan for their community built around teaching people how
to make healthy, simple and affordable meals in a hands-on workshop.
She’s sharing two recipes you can make with your family tonight!
Overnight Oats: Greek Spinach Pasta Salad:
Recipe: Recipe:
- 32 oz. plain Greek yogurt - 1 package of whole wheat penne pasta
- 2 cups of old fashioned oats - 1 package (6 oz.) fresh baby spinach
- 2 2/3 cups of milk or almond milk - 1 pint of grape tomatoes, cut in half
- 6 tsp. chia seeds - 6 oz. crumbled feta cheese
- 1/4 cup honey - 1/2 cup sliced Greek olives
Preparation: For the salad vinaigrette:
- 1/2 cup olive oil
These can be eaten at any meal or as
- 1/2 cup white wine vinegar
a snack; they are both filling and
- 1/3 cup grated Parmesan cheese
refreshing. We will make a batch in
- 1 tbsp. Dijon mustard
a large bowl and then fill in single-
- 2 garlic cloves, minced
serving jars.
- 1 tsp. dried oregano
• Combine all ingredients and fill - 1/4 tbsp. salt
individual containers a little over 1/2 - 1/4 tsp. pepper
full (like mason jars or any other
single-serving container you have Preparation:
in the house), seal and refrigerate This recipe makes 10 servings and stays fresh in the fridge for a
overnight. week, making healthy eating easy to fit into our busy schedules.
• For breakfast or snacks throughout • Cook the pasta according to the package and set aside to
the week, simply take out of the fridge cool (with a little olive oil so it doesn’t stick).
and add any fresh fruit or toppings
you like and enjoy! • Prepare the vinaigrette while the pasta is cooking: mix all
ingredients in a resealable container and shake/stir (kids love
to help here) until well blended.
• Combine the salad ingredients in a large bowl with the pasta.
• Add the vinaigrette and mix. Store sealed in a large bowl or
individual containers for on-the-go for up to a week!
Thanks to Madison, Indiana 4-H
3030 minutes | Grades: 3–5, 6–8
Farm Animal
Finger Puppets Brought to you by JOANN
Description
Learn how to make a whole gang of farm
animal finger puppets. Templates are
included to make a dog, cat, pig, chick
and bunny, and each finger puppet is
made the same way—with two pieces
of felt and a few simple stitches. But
the cute hand-stitched faces and little
details are what give each farm animal
their distinctive traits. Watch the video
on CreativeBug.com for step-by-step
instructions, tips for free-hand stitching
the features and a demonstration on how
to sew the front to the back with a blanket
stitch.
Learn more at 4-H.org/FingerPuppets
All Ages
Get to Know
Write a Letter
Description
Write a thank you letter to someone who has impacted your community.
Thaddeus,
Illinois 4-H
Thaddeus has been a mentor for
FIRST Lego League and the Illinois
h
T !a n k State Robotics Competition teams for
four years. Over the course of his work
in 4‑H, he has helped to introduce
You
STEM and robotics to more than
6,000 youth across Illinois.
Watch now at 4-H.org/Thaddeus
3120 minutes | Grades: Pre-K–2, 3–5
The Beautiful
and the Bruised
Apple
Description
Aimed at anti-bullying,
this activity shows kids how
unkind words affect others
with a simple yet impactful
apple demonstration.
Supplies
• 2 Red Apples
• Knife
• Cutting Board
Activity Steps
1. Before the activity, take one of the apples and 6. Place the “Beautiful” apple on the cutting board
hit it against a table to cause bruising on the and slice it in half. Say something like “The apple
inside of the apple (but don’t let the kids see we were kind to is so fresh and clear on
you do this, and try not to damage the outside the inside!”
of the apple). 7. Then cut the “Bruised” apple open and say
2. Have kids sit in a circle on the floor and hold up something like “The apple we were bullying and
both apples. Ask them to describe the similarities unkind to is all bruised and mushy inside!”
between both apples. 8. Ask the kids why they think it’s bruised? How do
3. Next, take the “Bruised” apple and begin to call they feel when others say unkind things to them?
it names or tell it how “horrible” it looks. Tell the 9. Use it as a conversation starter to have the kids
kids that because you don’t like it, you don’t discuss how they feel and situations they’ve
want them to like it either. experienced. Make a point to ensure they
4. Pass the apple around the circle and have understand that when kids are bulled, they feel
everyone make fun of it and call it names. When bruised on the inside, but may not show it on the
everyone has had a turn, put it to the side. outside, and how they can help when they see
5. Now take the “Beautiful” apple and give it praise others being bullied.
and compliments. Pass it around the circle so the
kids can do it too.
Thanks to Karee, North Carolina 4-H
32You can also read