APRIL 2019 - Synchrony Toolbox
←
→
Page content transcription
If your browser does not render page correctly, please read the page content below
GEN-16-9485
202-389-00 (4/19)   APRIL 2019

                                 1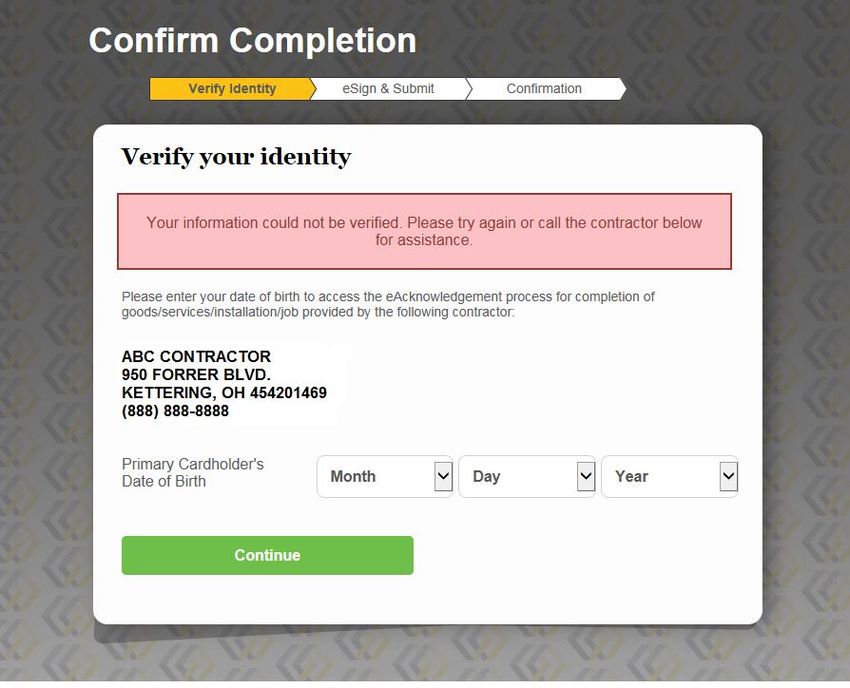
CONTENTS

                                                                     Keep an eye out.
I. Introduction                                                      Throughout this guide, key
     • What it Does……………………………………..……………                         3   tasks, notes, and tips are
     • Why it Matters (contractor and consumer benefits)……………    4   highlighted by these symbols:
     • How it Works………………………………………………….                          5
     • System Requirements……………………………………….                       7          Information to note
II. Getting Started (set up devices and users)……………………..         8
     • Authorize and Activate Devices……...………...…………..           9          Actions to take
     • View Profile…………………………………………………..                        12
III: Using the Platform.…………….……..………….................         13
     • Estimate Payments……………………..…………………..                     14          Tips for success
     • Apply for Credit….…………………………………………..                     17
     • Generate a Sales Slip.……………………………………..                   25
     • Submit for Funding (Business Center only)..……….……….      36
     • View Transactions ..……..…………………………………                    46
IV. Appendix………................………………………………….                   50
     • Business Center: Transaction Status……………………              51
     • Business Center: Headquarters/Rollup………………….             52
     • Business Center: Register……………………………….                   53
     • Business Center: Add Users…………………………….                   54
     • Business Center: Assign Permissions………………….              55
     • Learn More…………………………….…………………..                          56
     • FAQ…………………………….…………………………..                              57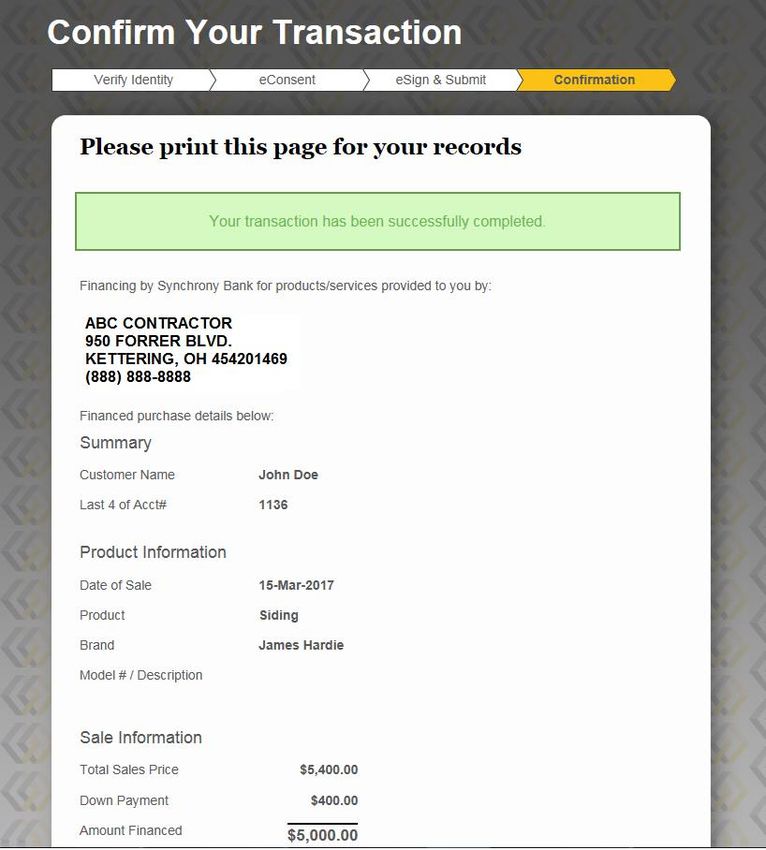
INTRODUCTION: WHAT IT DOES

      Synchrony Transact is an online platform that makes the financing
      process faster and easier for both the contractor and the consumer.

 With Synchrony Transact, you can:
 • Review estimated monthly payments with
   consumers, and view promotional financing options
 • Help consumers apply for a credit card
 • Complete transaction details
 • Manage your sales pipeline, and more

         You can access Synchrony Transact at:
         https://bcpos.mysynchrony.com

                                                                            3
INTRODUCTION: WHY IT MATTERS

    Synchrony Transact accelerates the financing process so you and your
    team can focus on your projects rather than paperwork—and deliver
    a better customer experience.

    Synchrony Transact                  TM

    Simple, Smart Financing
                                                                        Quick
                                                    A streamlined process of digital forms and online
    By providing the process online—fast, easy,
                                                   records accelerates every aspect of your financing
    and convenient— Synchrony Transact lets        program, so you can complete transactions faster.
    you help more homeowners make the home
    improvements they want and need with the
    spending power that they’re looking for—
    while helping you close more sales, increase
    project sizes, and grow your business.
                                                                       Simple
                                                       Intuitive tools, a user-friendly interface, and a
                                                   straightforward, step-by-step process make it easier
                                                       than ever to offer financing and manage your
                                                   program, so you can stay focused on sales, service,
                                                                    and business success.

                                                                                                           4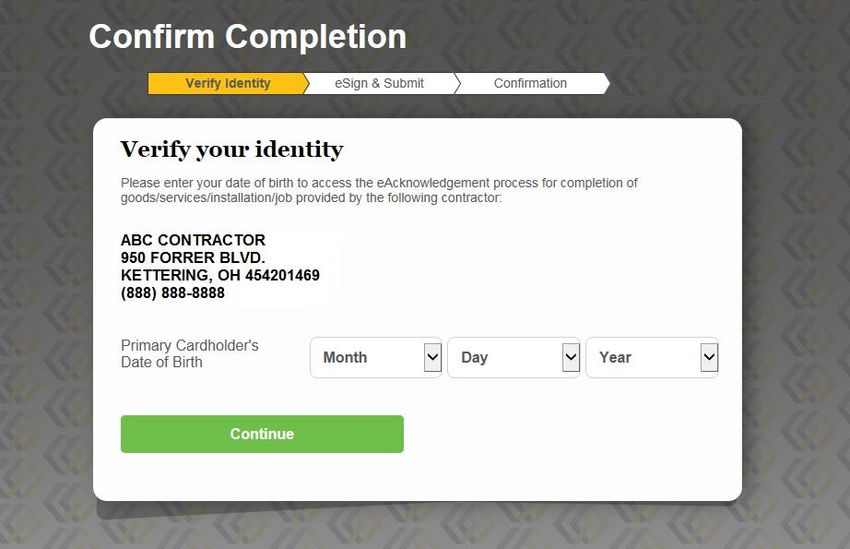
INTRODUCTION: HOW IT WORKS—OVERVIEW

    Synchrony Transact provides access to tools and resources to support financing
    transactions end to end—from application to contractor payment. These three
    steps summarize the activities that occur by device or platform.

                                                                                          Submit for Funding
                                                                                          Completion Consent
                                                                                           NOT REQUIRED

             STEP 1                           STEP 2                 STEP 3                     OR

       Apply for Credit                  Create Sales Slip                                Submit for Funding
    (on Contractor Device)                                                                Completion Consent
                                     • Generate Sales Slip                                   REQUIRED
  • Estimate monthly                   (on Contractor Device)
    consumer payments                • Confirm Transaction
  • Help consumers apply for           (on Cardholder Device)
    credit

             Based on your program structure (i.e., whether or not completion consent is required),
             you will follow one of two possible paths to submit for funding.

                                                                                                               5
INTRODUCTION: HOW IT WORKS—ADDITIONAL CAPABILITIES

      Before using Synchrony Transact, you must authorize and activate the devices you
      and your team will use. Once you have begun using Synchrony Transact, you can
      also access tools to help manage your transactions.

   Authorize and Activate Devices                               Use “My Transactions”

  • Authorize (in Business Center)                       •   Review or Re-Submit (on
  • Activate (on Contractor Device)                          Contractor Device)

                                                                                           Submit for Funding
                                                                                           Completion Consent
                                                                                            NOT REQUIRED
              STEP 1                           STEP 2                 STEP 3                      OR
                                                                                           Submit for Funding
        Apply for Credit                  Create Sales Slip                                Completion Consent
     (on Contractor Device)                                                                   REQUIRED
                                      • Generate Sales Slip
  • Estimate monthly                    (on Contractor Device)
     consumer payments                • Confirm Transaction
  • Help consumers apply for            (on Cardholder Device)
     credit

              Admin-level activity (set up users, assign permissions) takes place in Business Center:
              businesscenter.mysynchrony.com
              User-level activity (help consumers apply and complete Sales Slip) takes place in Synchrony Transact
              (on authorized contractor devices): https://bcpos.mysynchrony.com
                                                                                                                     6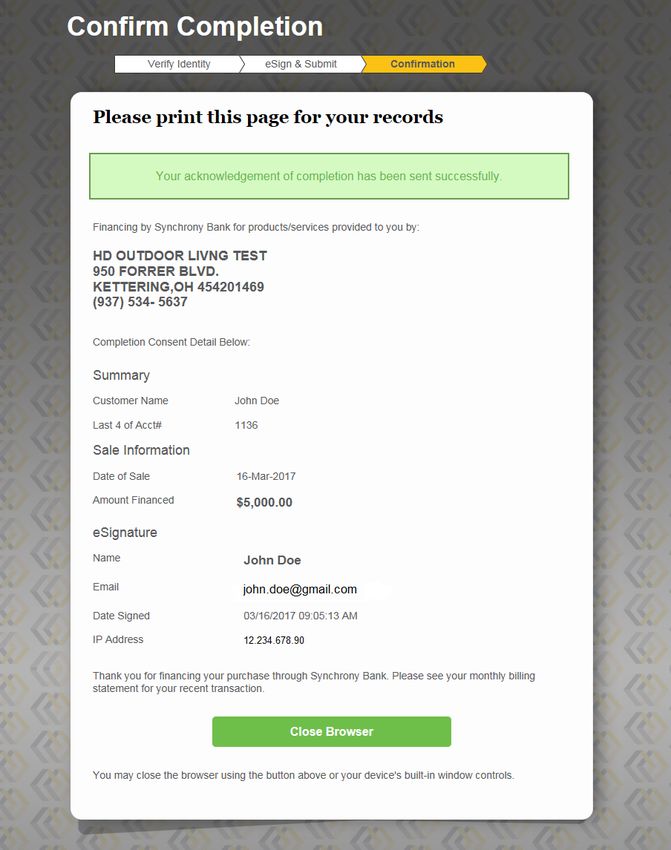
INTRODUCTION: SYSTEM REQUIREMENTS

Synchrony Transact can be accessed on a desktop computer, laptop, or tablet.
It works on both Windows PC and Mac IOS.

Access Synchrony Transact at:
https://bcpos.mysynchrony.com

For optimal performance, use the following web browsers:
•   Internet Explorer
    •   IE 8.0 minimum
    •   IE 11 build versions – excluding version
        KB3175443
•   Chrome
•   Firefox
•   Safari

             Synchrony Transact uses cookies, so it is important to use the same browser for registration and all
             future access. Be sure that cookies are enabled, and do not clear your cookies or switch to private
             mode. This will delete your data and require re-registration of the device.
                                                                                                                    7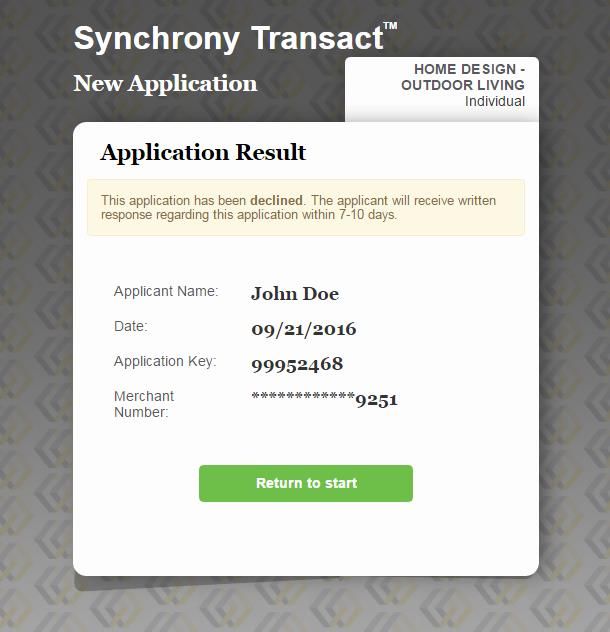
GETTING STARTED
  •   Authorize and Activate Devices
  •   View Profile

                                       8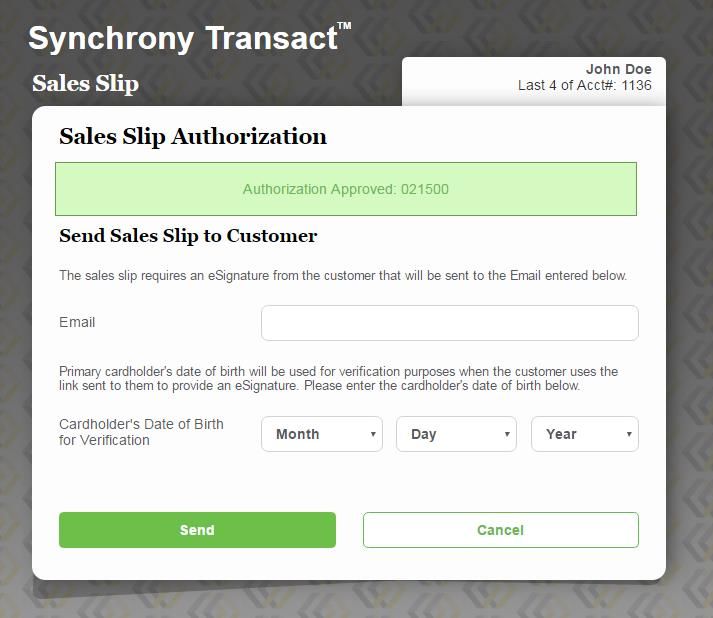
GETTING STARTED: AUTHORIZE DEVICES

For security reasons, only authorized devices may use Synchrony Transact. A user
with administrator permissions in Business Center will need to authorize each
device that you or your team plan to use with Synchrony Transact. Next, users will
activate their devices (see page 11).

1. Log into Business Center. If you do NOT already have a Business Center account, see the
   Appendix (page 53) for guidance on how to register your company.
2. Under Administration, select Manage Devices.
3. Once the Manage Devices screen loads, click the “ADD a DEVICE” button.
4. Enter a unique name for this device.

                                                                                      Give each device a
                                                                                         unique, clear,
                                                                                      memorable name,
                                                                                     especially if you plan
                                                                                       to authorize many
                                                                                         devices (e.g.,
                                                                                        JohnContractor).
                                                                                     Device names can be
                                                                                    up to 25 characters and
                                                                                    can only include letters
                                                                                         and numbers.

                                                                                                        9
GETTING STARTED: AUTHORIZE DEVICES CONTINUED

5. Select a Device Type from the dropdown menu
6. Click the “SAVE DEVICE” button. The system will generate the registration URL, Device Display
   Name, Location ID, and a unique Passcode for the added device.
7. Share the information above with the device user(s) via printout or email (to be used for activation).

The device is now authorized.

                                                                                    Passcodes are valid for
                                                                                     48 hours and must be
                                                                                      regenerated if they
                                                                                    expire before the device
                                                                                          is activated.

                                                                                   Be sure to provide access
                                                                                   information to the user via
                                                                                        printout or email.

                                                                                                                 10
GETTING STARTED: ACTIVATE DEVICES
After you authorize a device, the owner(s) / user(s) of that device must
activate it within 48 hours.
1. On the authorized device, use your preferred web browser to visit the unique Registration URL
generated by Business Center.
2. Enter the unique Device Name, Location ID, and Passcode for the device.
3. Click the “Continue” button.
The device is now activated.
Synchrony Transact uses cookies, so it is important to use the same
If device is not activated
browser for registration and all future access. Be sure that cookies are within 48 hours, a user with
enabled, and do not clear your cookies or switch to private mode. This administrator permissions
will delete your data and require re-registration of the device. must create a new device
Authorization in Business
Bookmark Synchrony Transact in the device browser, and / or add a shortcut Center.
to the device’s desktop or home screen for convenient access in the future. 11GETTING STARTED: VIEW PROFILE
Users may view their profiles in Synchrony Transact.
1. On the Synchrony Transact home screen, click the button for “My Profile.”
2. View profile. If your profile needs to be updated, please contact your Synchrony Sales
Representative by calling 1-877-891-9803.
HOME DESIGN – OUTDOOR LIVING
XXXX
600
604
602
605
12USING THE PLATFORM
• Estimate Payments
• Apply for Credit
• Generate a Sales Slip
• Submit for Funding (with or without Completion Consent)
• Use “My Transactions”
13USING THE PLATFORM: ESTIMATE PAYMENTS
For many consumers, the first questions regarding financing are what promotional offers
are available, and what their estimated payments will be. You can use the Payment
Estimator in Synchrony Transact to quickly answer these questions.
1. On the Synchrony Transact homepage, select the “Payment Estimator” button.
2. In the window that opens, select Program from the drop-down menu (if applicable).
3. Enter dollar amount to be financed.
4. Click “Calculate.”
It is best to begin the process with the Payment Estimator. If you use the Payment
Estimator in between receiving an application approval and preparing a Sales Slip, or
at any time while a Sales Slip is in progress, any data entered will be lost and the
process will have to be restarted from the home page.
(continued on next page) 14USING THE PLATFORM: ESTIMATE PAYMENTS (CONTINUED)
5. The available Promotional Menu options will now be displayed, including promotion details and
estimated payment information.
Making the Minimum Monthly Payment will not pay off the purchase within the promotional period.
HOME DESIGN – OUTDOOR LIVING
With the “No Monthly Interest if Paid in Full” options, two payment options will be shown. The first option
details the Equal Monthly Payments, Payoff Period, and Total Payments if paid off within promotional period
(18 Months is example shown above). The second option details the estimated Fixed Monthly Payments
(minimum payment), Payoff Period, and Total Payments, with interest (104 Months is example shown above).
15USING THE PLATFORM: APPLY FOR CREDIT: FAIR LENDING PRINCIPLES
Credit applications must be offered to all consumers fairly and consistently. Failure to do so
may result in allegations of discrimination, potential violations of federal or state fair lending
laws, litigation, or reputational risk.
All consumers should be encouraged to apply for credit without regard to race, color, religion,
national origin, sex, marital status, familial status, age, disability, receipt of income (in whole or
in part) from public assistance programs, or an applicant's good faith exercise of a right under
the Consumer Credit Protection Act.
Credit related activities must be conducted in a way that is not considered unfair, deceptive, or
abusive from the consumer’s perspective. Unfair activities are those that may cause
unavoidable "substantial injury" (typically financial harm) to consumers. Deceptive activities
could include statements or omissions that mislead consumers or influence their decision to
buy or use a product or service. Abusive practices interfere with the consumer's ability to
understand the terms and conditions of a product or service; or which take advantage of the
consumer’s lack of understanding or inability to protect their interests.
16USING THE PLATFORM: APPLY FOR CREDIT: START THE APPLICATION
Be sure to hand the consumer the paper version of the Terms & Conditions (T&C).
1. On the Synchrony Transact homepage, select the “Apply for Credit” button.
2. In the window that opens, select the relevant program from the dropdown menu (if applicable).
3. Ask the consumer if this will be an Individual or Joint application, and select the appropriate button.
You must give the
consumer a paper
version of the T&C.
Many contractors
only have one
program / merchant
number. For those
with multiple
programs, choosing
the correct one is
important to ensure
relevant promotions
are displayed and
available to offer the
consumer.
17USING THE PLATFORM: APPLY FOR CREDIT: START THE APPLICATION (CONTINUED)
4. Enter the Estimated Sales Amount (whole dollar amount) the consumer intends to finance.
5. If applicable, enter your Employee ID.
6. Remember, be sure to hand out a paper copy of the Terms and Conditions.
7. Click the “Continue” button to proceed.
Many contractors
track sales activity
by each associate
for rewards,
recognition, or
record-keeping.
18USING THE PLATFORM: APPLY FOR CREDIT: ENTER ID INFORMATION
The next step is to verify the consumer’s identity by reviewing two pieces of identification.
1. Verify primary and secondary ID with all applicants. Common primary and secondary ID types
are pre-selected as default options. Other options are also available.
2. If necessary, use the dropdown menu to change the primary or secondary ID type.
3. Enter the expiration date (month and year) and issuer for the ID.
4. Click the “Continue” button to proceed.
• If necessary, reassure the
consumer that you will be
noting the type of ID and
issuer / expiration details,
but NOT capturing personally
identifiable information, such
as a credit card or license
numbers.
• Ensure Primary Identification
is a valid, non-expired
government-issued ID.
19USING THE PLATFORM: APPLY FOR CREDIT: ENTER CONTACT INFORMATION
Next, you will enter personal information for the applicant.
1. Enter the First Name, Last Name, Mailing Address (no P.O. boxes), and Zip Code. City and State will
automatically populate the form once the Zip Code is entered.
2. If necessary, click “Add Apt. #" to enter an apartment number.
3. Select the type of housing from the dropdown menu. Rental and non-owner occupied homes are not
eligible.
Note that the applicant
must provide a physical
mailing address for
their primary residence.
He or she can change
their mailing address to
a P.O. box once the
account has been open
for two business days.
20USING THE PLATFORM: APPLY FOR CREDIT: ENTER CONTACT INFO (CONTINUED)
4. Enter the applicant’s Primary Phone (including area code), and Select Type of phone (e.g., home,
cell) from the dropdown menu. Ask the applicant if they care to add an Additional Phone. If so, click
the link and enter the relevant information.
5. Enter Email and Confirm Email.
6. Enter the applicant’s Social Security Number, Date Of Birth, and Monthly Net Income.
7. Click the “Continue” button to proceed.
It is helpful to have
more ways to contact If the applicant
the applicant, especially decides to change
if a problem ever arises from an individual to a
with the primary phone joint application (or
number. vice versa), there is
no need to cancel and
restart the process.
Simply click the text
link below the buttons
to add or remove a
If necessary, explain to joint applicant.
the applicant that this
information is required
in order to apply for
financing, and reassure
him / her that the
information is secure.
21USING THE PLATFORM: APPLY FOR CREDIT: REVIEW APPLICATION
The applicant now must review and verify (or modify as needed) the information
entered so far.
1. Give or show the device to the applicant, and ask him or her to review the application information.
2. If anything is incorrect, the contractor should click the relevant link (green pencil icon) to “Make
Changes.”
3. Click the “Continue” button to proceed.
Note that the applicant’s
SSN is shown partially
masked. If helpful, point
out this fact, and the
limited detail associated
with the forms of ID, as
further reassurance that
the applicant’s personal
data will not be stored
on the contractor’s
device.
22USING THE PLATFORM: APPLY FOR CREDIT: REVIEW TERMS AND CONDITIONS (T&C)
The consumer must now acknowledge receiving, reviewing, and accepting the T&C.
1. Give or show the device to the consumer, and ask him or her to Review Terms and Conditions.
2. Explain that this is the final step before their application will be submitted for review. If the applicant
has any questions or concerns, do your best to address them.
3. Have the consumer click the “Accept & Submit” button to proceed.
Tell the consumer that the same
information is found in the printed T&C you
provided, which they should keep for their
records and reference.
23USING THE PLATFORM: APPLY FOR CREDIT: RECEIVE APPLICATION RESULTS
Within a few minutes, you will receive an Application Result. While waiting, explain that
three responses are possible: yes (approved), pending, or no (declined).
1. If the application is approved, show the applicant the Credit Limit and Account Number.
2. If the application is delayed (pending), call 888-222-2176 for immediate assistance.
3. If the application is declined, explain that there are numerous reasons why this could be the case, and continue the sales
process as appropriate. You can ask for another form of payment, or individuals could apply again with a joint applicant.
4. If the application was approved and the cardholder wishes to use financing immediately, click the “Process a Sale” button
to proceed. If the cardholder is not ready or able to make a purchase now, click the “Return to Start” button to conclude the
process and reload the Synchrony Transact homepage.
6034-6226-1414-1136
24USING THE PLATFORM: GENERATE A SALES SLIP: INITIATE TRANSACTION (OPTION A)
Once a consumer is approved for financing, you may immediately initiate a Sales Slip
by selecting the Process a Sale button on the Application Result (approved) screen.
The Customer Information fields in the Sales Slip will pre-populate from the data you
entered in the application.
1. On the Application Result screen, select the “Process a Sale” button.
2. In the window that opens, the Program selection will already be filled in on the form.
3. Customer Name and Account Number will also already be filled in.
4. If applicable, enter your employee ID.
5. Click the “Continue” button to proceed.
Many contractors
track sales activity by
each associate for
6034-6226-1414-1136
rewards, recognition,
or record-keeping.
If an account was previously generated (or generated outside of Synchrony Transact), a new
Sales Slip may be initiated by selecting the Sales Slip button on the Synchrony Transact
homepage (see next page). 25USING THE PLATFORM: GENERATE A SALES SLIP: INITIATE TRANSACTION (OPTION B)
If an account was generated outside of Synchrony Transact (or was opened at an
earlier time), a new Sales Slip may be initiated by selecting the Sales Slip button on
the Synchrony Transact homepage.
1. From the Home Screen, select the “Sales Slip” button.
2. In the window that opens, select the relevant program from the dropdown menu (if applicable).
3. Enter the Customer Name and Account Number.
4. If applicable, enter your Employee ID.
5. Click the “Continue” button to proceed.
Be sure the customer
name matches that of
the cardholder.
Many contractors track
sales activity by each
associate for rewards,
recognition, or record-
keeping.
26USING THE PLATFORM: GENERATE A SALES SLIP: SELECT PRODUCTS
The next step is to specify the
product(s) or service(s) the
cardholder will be financing.
1. Use the Product dropdown menu to select
the appropriate product or service.
2. Use the Brand dropdown menu to select
the brand of the selected product or
service.
3. Enter the Model # / Description of the
product or service, if applicable (always
required for HVAC and generators).
4. If the cardholder is financing more than
one product or service, click “Add
Additional Product” and repeat steps 1-3
above. Up to two products can be entered.
5. Click the “Continue” button to proceed.
If the appropriate Product or Brand is not
included in the dropdown menu, select
“Other” and type in the relevant details.
27USING THE PLATFORM: GENERATE A SALES SLIP: ENTER SALES INFORMATION
Next, enter the sales information.
1. The Date of Sale will auto-populate (current date).
2. Enter the Total Sales Price of the selected product(s) or service(s).
3. If the cardholder is paying a portion of the sale price directly (and financing only a portion of the
cost), enter the amount of the Down Payment he or she is providing.
4. Click the “Continue” button to proceed.
The amount financed will
update automatically
based on the sales price
and down payment
information entered.
28USING THE PLATFORM: GENERATE A SALES SLIP: SELECT PROMOTION
Cardholders will qualify for one or more special promotions.
1. Review all of the available promotions with the cardholder under “Promotion Selection.”
2. If the cardholder wants additional detail, click “View Promotional Details” for full documentation.
3. Click the large gray button for the promotion the cardholder prefers. Once selected, the button turns green.
4. Click the “Continue” button to proceed.
$5,000.00
29USING THE PLATFORM: GENERATE A SALES SLIP: REVIEW SALES SLIP
Now, the cardholder will review and verify (or modify as needed) the Sales Slip details .
1. Give or show the device to the cardholder, and ask him or her to Review Sales Slip information.
2. If anything is incorrect, the contractor should click the relevant link (green pencil icon) to “Make Changes.”
3. Click the “Submit for Authorization” button to proceed.
30USING THE PLATFORM: GENERATE A SALES SLIP: SEND FOR CUSTOMER SIGNATURE
The Sales Slip must be sent to the cardholder to verify identity, consent to receive
information electronically, provide an eSignature, and submit approval.
1. Enter the Email where the Sales Slip should be sent.
2. Enter the primary cardholder’s date of birth, which will be used as verification for signing
digital documents.
3. Click the “Send” button to proceed.
An email address
is required to complete a
transaction via Synchrony Transact.
If the cardholder does not have an
email address, the traditional paper
process must be used.
The DOB is important, as
it will be used to verify
identity at several points
in the process.
31USING THE PLATFORM: GENERATE A SALES SLIP: CONFIRM TRANSACTION
(CARDHOLDER DEVICE)
The cardholder will receive an email with a link to complete the Sales Slip process.
After clicking on the link, the cardholder will arrive at the “Verify your Identity” screen.
If the cardholder has an Internet-enabled device (e.g., smartphone) with him or her,
the steps to complete the Sales Slip can take place at that time.
The CARDHOLDER will:
The cardholder has five tries
1. Enter the Primary Cardholder’s Date Of Birth. on DOB before being locked
2. Click “Continue” to proceed. out. After this, the Sales Slip
must be re-sent from My
Transactions (within
Synchrony Transact) or
Business Center.
If verification
does not occur (e.g., DOB
does not match SYF
records), the cardholder
will be prompted to re-
enter the information or
contact the contractor.
32USING THE PLATFORM: GENERATE A SALES SLIP: CONFIRM TRANSACTION
(CARDHOLDER DEVICE)
The CARDHOLDER will:
3. Review the information on the “Consent to Receive Information Electronically” screen.
4. Click the “X” in the box to indicate consent. The box will fill in, and the “Accept” button will turn
green.
5. Click the “Accept” button to proceed.
33USING THE PLATFORM: GENERATE A SALES SLIP: CONFIRM TRANSACTION
(CARDHOLDER DEVICE)
The CARDHOLDER will:
6. Review the transaction details, including Product Information, Sale Information, Date of Sale, Total
Sales Price, Amount Financed, Promotion Details, etc. on the “Review and provide your eSignature”
screen.
7. Click the “eSign & Submit” button to submit to Synchrony Bank.
34USING THE PLATFORM: GENERATE A SALES SLIP: CONFIRM TRANSACTION
(CARDHOLDER DEVICE)
The CARDHOLDER will:
8. Print (or save a screenshot or PDF of) the transaction details, if he/she chooses.
9. Click the “Close Browser” button to conclude confirmation.
35USING THE PLATFORM: SUBMIT FOR FUNDING
Once a Sales Slip has been eSigned and the work has been completed, the final
step is to submit the transaction to Synchrony Financial, so it can be funded using
the cardholder’s credit account.
1. A user with administrative permissions will log into Business Center.
2. Under Management Tools, select "Transaction Status."
36USING THE PLATFORM: SUBMIT FOR FUNDING
3. In the dashboard that opens, select the relevant Program (if more than one is available) from the
dropdown. Note that the system defaults to showing “All” programs.
4. If necessary, use the search options to find the relevant transaction(s). You can set parameters
by Date, Customer Name, Account Number, Employee ID, and Sales Slip Status, and then click
the “Search” button or “Refresh Transactions” link to update results.
The Transaction Status
dashboard is a useful tool
to monitor your financing
pipeline. You can use the
search options to quickly
check activity by
program, time period,
customer, or employee.
37USING THE PLATFORM: SUBMIT FOR FUNDING: TWO PATHS
Once you have located the correct transaction, submitting to Synchrony for funding
can occur in one of two ways, based on whether or not a Completion Consent
document is required.
If Completion Consent is NOT REQUIRED:
• You can submit directly to Synchrony for funding.
• See page 39 for details
If Completion Consent is REQUIRED:
• You must send a Completion Consent document to the cardholder
to review and approve before funding can occur. Three outcomes
are possible:
• If the cardholder APPROVES, funding submission will occur
automatically
• If the cardholder DOES NOTHING, approval will occur
automatically within two weekdays, and submission will also
occur automatically afterward
• If the cardholder DECLINES approval, the contractor must
contact the cardholder to resolve any issues, and then re-
send the Completion Consent document
• See page 40 for details
38USING THE PLATFORM: SUBMIT FOR FUNDING: NO COMPLETION CONSENT
1. When the cardholder has eSigned the Sales Slip and the work is complete, click the
blue “Send to SYF” button, located in the “Finalize” column.
2. The status of the transaction will update, and the “Finalize” column will now show a
green “Sent to SYF” button. Funding will occur within 1-2 business days. Note that
status will not update when funding occurs.
Sales Slips that are ready to
submit will have a green “Signed”
button in the “Sales Slip” column
and a blue “Send to SYF” button
in the “Finalize” column.
After sending a transaction to
Synchrony, you can check its status at
any time. Simply log into Business
Center, use the left navigation to
choose Reporting > Funding Report,
and search for the relevant transaction.
To receive funding the following
business day, submit prior to
12:00 Eastern Time.
39USING THE PLATFORM: SUBMIT FOR FUNDING: COMPLETION CONSENT REQUIRED
1. Transactions that are eligible and ready for Completion Consent will have a blue “Send to
Customer” button in the “Completion Document” column. Click this button to proceed.
2. In the Completion window that opens, review the transaction information to make sure everything
is correct.
3. Click “Send” to send the completion consent for cardholder approval.
The cardholder information will
pre-populate, but you can edit
the delivery email if necessary.
40USING THE PLATFORM: SUBMIT FOR FUNDING: COMPLETION CONSENT REQUIRED
4. A confirmation message will appear with details regarding the completion consent process.
Click “Close” to proceed.
The cardholder will
have two weekdays to
approve the completion
consent.
41USING THE PLATFORM: CONFIRM COMPLETION (CARDHOLDER DEVICE)
The cardholder will receive a message requesting electronic confirmation that the
work is complete.
ABC CONTRACTOR
The CARDHOLDER will:
1. Receive an email with a button link to
confirm project completion.
1. Click “Submit Response” to proceed.
ABC CONTRACTOR.
42USING THE PLATFORM: CONFIRM COMPLETION (CARDHOLDER DEVICE)
The CARDHOLDER will:
3. In the “Confirm Completion” window that appears, the customer will enter
the primary cardholder’s Date of Birth to verify identity.
4. Click “Continue” to proceed.
If verification
does not occur (e.g., DOB
does not match SYF
records), the cardholder
will be prompted to re-
enter the information or
contact the contractor.
The cardholder has five
tries on DOB before being
locked out. After this, the
Completion Consent must
be re-sent to the
cardholder from Business
Center.
43USING THE PLATFORM: CONFIRM COMPLETION (CARDHOLDER DEVICE)
The CARDHOLDER will:
5. Review the transaction details, including Date of Sale and Amount Financed.
6. Click the “eSign & Submit” button to submit to Synchrony Bank.
44USING THE PLATFORM: CONFIRM COMPLETION (CARDHOLDER DEVICE)
The CARDHOLDER will:
7. Print (or save a screenshot or PDF of) the completion consent, if he/she chooses.
8. Click the “Close Browser” button to proceed.
Once completion consent occurs,
the transaction will automatically
submit to Synchrony for funding.
If the cardholder does not take action
within two weekdays, completion
consent will confirm automatically
(auto-consent), and the transaction
will submit for funding.
If the cardholder rejects
completion consent, contact
him/her to resolve any
concerns, and then re-
submit completion consent.
45USING THE PLATFORM: VIEW TRANSACTIONS
Synchrony provides many useful ways to view transaction information and manage
your financing program. The two main ways to do so online are through “My
Transactions” (on Synchrony Transact, for all users) and “Transaction Status” (in
Business Center, for users with administrative privileges).
In My Transactions In Transaction Status
(within Synchrony Transact): (within Business Center):
A Synchrony Transact user can review A user with administrative permissions can review
transactions initiated on his or her all transactions initiated on all authorized
device, and send / re-send sales slips for devices, send and re-send sales slips and
confirmation completion consent documents, submit for funding,
access reporting, and more (See Appendix, p. 51)
46USING THE PLATFORM: VIEW TRANSACTIONS
The following status options can be displayed in My Transactions (in Synchrony Transact) or
Transaction Status (in Business Center):
Send to Customer: Sales slip or Completion Consent is ready to be sent to the Cardholder.
Sent to Customer: Sales slip or Completion Consent has been sent to the Cardholder and is
awaiting a response.
Signed: Sales slip or Completion Consent has been signed by the Cardholder.
Re-Send: Sales Slip—Cardholder has not approved the Sales Slip in time or has failed the identity
verification. Access the Sales Slip in My Transactions or Business Center to re-send.
Completion Consent—Cardholder has indicated the job is not complete/not ready for funding. After
resolving any issues, access the Completion Consent in Business Center to re-send.
Auto-funded: Completion Consent has been auto funded due to no response from the Cardholder.
Not Required: Completion Consent step is not required. After work is complete, access sale in
Business Center to submit for funding.
Sent to SYF: Sale has been sent to Synchrony for funding.
Canceled: Cardholder has canceled the transaction. You must create a new Sales Slip to proceed.
You may only send the same Sales Slip to a cardholder twice within a 24-hour
period. After the second time you will need to wait a day to re-send.
47USING THE PLATFORM: VIEW TRANSACTIONS: MY TRANSACTIONS
The My Transactions page allows you to view transactions initiated on the device,
as well as managing sales slips.
1. On the Synchrony Transact homepage, select the “My Transactions” button.
48USING THE PLATFORM: VIEW TRANSACTIONS: MY TRANSACTIONS
2. In the window that opens, you can view transactions initiated on the device, including customer
name, account number (partial), auth code, and auth amount.
3. You can also send or re-send sales slips to cardholders.
You can refresh at any time to see
updated information in the dashboard.
• Only transactions initiated on the
device will appear in the dashboard.
To see all transactions, an authorized
admin for your company must log into
Business Center. If you unregister or
re-register the device, the dashboard
will reset, and prior information will not
be displayed.
3210
• Within the dashboard, you can send
or re-send sales slips and change the
recipient’s email address. You cannot
submit for funding (a user with
administrative permissions must log
into Business Center to do so).
49APPENDIX
50APPENDIX: BUSINESS CENTER: TRANSACTION STATUS
In addition to the “My Transactions” dashboard within Synchrony Transact, users
with administrator permissions in Business Center can access the “Transaction
Status” dashboard in Business Center.
1. A user with administrative permissions will log into Business Center.
2. In the left navigation, under Reporting, select "Transaction Status."
(continued on next page) 51APPENDIX: BUSINESS CENTER: HEADQUARTERS / ROLLUP
For businesses with multiple locations and a corporate headquarters, the Transaction Status
dashboard can also provide a “rollup” view of aggregate activity (transactions completed by various
users on their respective devices) at multiple company locations.
1. To view activity by all locations, choose the “Headquarters / Rollup” View.
2. To see activity for a single location, choose the “By Store” View, and select a location in the Store
dropdown.
3. You can also use the search options to find transaction(s). You can set parameters by Date,
Customer Name, Account Number, Employee ID, and Sales Slip Status, and then click the
“Search” button or “Refresh Transactions” link to update results.
52APPENDIX: BUSINESS CENTER: REGISTER
Before you can use Synchrony Transact, you need to register your company on Business Center.
1. Go to www.synchronybusiness.com and click on BUSINESS CENTER in the top navigation bar.
2. On the Business Center login page, click on the “Register” button.
3. On the Merchant Validation screen, enter your 16-digit (beginning with 534812) Synchrony Financial
Merchant Number and your Bank Account Number.
4. Click on the blue “Continue” button (should the “dealer agreement” screen pop up, check the appropriate box
and click “Continue”).
Note: Use the same
bank account number
you used when opening
your account with
Synchrony Financial.
53APPENDIX: BUSINESS CENTER: ADD USERS
In addition to adding and authorizing devices, you can add and authorize individual users to access
Synchrony Transact if you want to have additional users with access to Business Center. The process
here is similar and also consists of two steps: creating and configuring users.
1. Under Administration, select “Manage Users.”
2. On the Administration “Create a User” screen, fill in the appropriate fields (or select from “Existing
User List”).
Note: Only users with administrative permissions can add other users and
manage permissions.
54APPENDIX: BUSINESS CENTER: ASSIGN PERMISSIONS
Once a user ID is created, a user with administrative permissions can configure the ID or user. This
allows you to define specific user roles and permissions. For example, owners, managers, store
associates, bookkeepers, etc., may all need to access different information in distinct ways.
1. On the Administration “Edit a User” screen,
select a User Access Role from the
dropdown menu.
2. If appropriate, select a Permission
Template from the dropdown menu. This
will specify a default set of permissions,
which you can use as-is or modify.
3. If needed, check or uncheck individual
boxes to define specific permissions for
the user in key areas: Applications,
Reporting, Marketing Resources,
Administration, and Help.
4. Click the “UPDATE USER” button
to save your changes.
The user is now ready to begin using Business Center.
Note: Only users with administrative permissions can add other users and manage permissions.
Check the box for “Transaction Status” under “Reporting” for anyone who supports sales
(e.g., Dealer Managers and some Dealer Associates) 55APPENDIX: LEARN MORE
Additional resources to help you use, promote, and make the most of Synchrony
Transact are available online.
1. On the Synchrony Transact home screen, select “Learn More.”
2. In the window that opens, select the link(s) for the resource(s) you would like to access.
56APPENDIX: FAQS
Devices and System Requirements
1. What are the system requirements for Synchrony Transact? Synchrony Transact works on both Windows PC and Mac
IOS. It can be accessed on these internet browsers: Chrome, Safari, Firefox, Internet Explorer (IE 8.0 minimum, IE 11 build
versions - excluding version KB3175443)
2. What devices can I use for Synchrony Transact transactions? Synchrony Transact can be accessed on a desktop
computer, laptop, or tablet. Many smartphones are capable of using Synchrony Transact as well, but these devices are not
officially supported or recommended.
2. Do I need to have an active WiFi connection or can I run Synchrony Transact from my computer’s hard drive? An
INTERNET connection is required to use Transact. If no connection is available, use the paper process.
3. Do I need to download program software to access Synchrony Transact? No. Access the URL:
https://bcpos.mysynchrony.com
4. Can anyone on my team authorize and activate their own devices? No. Only the Administrator listed on Business Center
can authorize a device. Once a passcode is generated, the team member has 48 hours to activate their device using the code.
5. Can I authorize one or two devices and share them between my sales team? Yes.
6. Are devices activated permanently? Devices remain activated as long as you continue to use them to access Synchrony
Transact and do not clear cookies, enter private mode, or perform a system or software update. If you do not use the device to
access Synchrony Transact for 90 days, access will be terminated for security reasons. Access can only be restored by re-
authorizing and re-activating the device, which will delete all previous transaction data.
7. If a user loses the device activation information, can it be looked up? Yes. In Business Center, the Device Name and
Passcode can be found by going to Administration > Manage Devices.
8. Does Synchrony Transact ever time out? Yes. After 30 minutes of inactivity, a popup message will ask the user to click/tap
to stay on the page, or the window will close and the Synchrony Transact home screen will reload.
9. Can I use multiple browsers on a single device? No. Synchrony Transact credentials are based on both the individual
device and the Internet browser.
10. How do I de-authorize a device? In Business Center, select Manage Devices, then select Edit or Delete Device.
11. If a user needs to work in multiple store locations, can his/her device be registered for both? Yes. The user will need to
use different web browsers for each of the registrations (e.g., authorize one location using Safari, and another using Chrome ).
57APPENDIX: FAQS
Processing Applications and Transactions
1. Whom do I call if I am having trouble completing a transaction? The Business Center Help Desk at 1-888-222-
2176 (option 3 and then option 1).
2. Where do I locate my Location ID and Device Code when registering a device? These will be provided to you
by your Business Center Location Administrator so that you can register your device.
3. Can I still process an application with a joint applicant on Synchrony Transact? Yes. You can process single
and joint applications.
4. I have multiple programs with Synchrony, can I access all of them from Synchrony Transact? Yes, you will
be presented with a dropdown bar when entering an application or starting a Sales Slip. Once you choose your
program, the correct dealer number will appear.
5. Where can I review a list of my transactions and their current status? Users can see transactions initiated on
their device within the My Transactions dashboard. Users with administrative permissions can view transactions
initiated on all devices in the Transaction Status page on Business Center.
6. Why can't I see all of my available promotions when creating a Sales Slip? Be sure to select the right
program at the beginning of the application process to ensure you have access to the relevant promotions
when you get to the Sales Slip. Some promotional options may not be available for the sale amount that you are
processing.
7. What if I do not have a paper copy of the Terms and Conditions during the application process? You are
required to hand out a copy of the Terms and Conditions prior to completing the application digitally. If you do not
have a paper copy, you may order them on Business Center. Alternatively, you may complete a traditional paper
application, which includes printed Terms and Conditions.
58APPENDIX: FAQS
Processing Applications and Transactions (cont’d)
8. Can I print an application created in Synchrony Transact? Yes, but only from Business Center. In the left
menu, choose Applications > Application Status. Click on “Key Number” and chose “Print Application.”
9. Can I process credits using Synchrony Transact? No, but you can process credits electronically (for paper or
electronic sales slips) in Business Center. Go to Process Sale, and for transaction type choose “Refund.” Enter
the account number, choose “Card not present,” and then enter the credit amount, customer name, and promo
code.
10. Can I start with Synchrony Transact and finish with paper forms, or vice-versa? In some cases. It’s fine to
switch between the application and sales slip stages (i.e., apply digitally and transact on paper, or vice-versa).
However, if completion consent is required, it must be the same format as the sales slip (i.e., both digital, or both
paper).
11. What happens if a cardholder does not respond to the e-mail containing the Sales Slip? The process
comes to a halt until the customer responds to this e-mail. If necessary, you can re-send the Sales Slip from your
device.
12. Where can I look up the cardholder’s DOB entered in the Sales Slip or Completion Consent? The DOB can
be found by locating that transaction in My Transactions (in Synchrony Transact) or Transaction Status (in
Business Center) and selecting the “Sent to Customer” button.
13. Can I download an electronic version of the Sales Slip or Completion Consent for my records? Yes. Select
the green “Signed” button (or the “Auto-funded” button, if applicable) in the Transact reporting area of Business
Center. You can now print / save the screen for your records.
59APPENDIX: FAQS
Consumer Interactions
1. Whom do I contact if I cannot answer all of the consumer's questions or concerns? Call Merchant
Services at 1-888.222.2176.
2. What if the applicant's credit limit is not enough to cover the sale? Application entry errors may lead to
declines or lower than expected credit lines. Review the application with the consumer to determine that all of
the data is correct. Review any inaccurate or additional information with Synchrony. You may also re-apply with
a co-applicant for an increased line of credit.
3. What if the product the cardholder wishes to finance is not listed in the dropdown menu when
generating a Sales Slip? First check the Synchrony approved product list. If the product is listed, use the
"other" option in the dropdown menu and enter in the product. If the product is not listed in the Synchrony
approved products list, then the product cannot be financed.
4. How long does the cardholder have to verify their identity from their confirmation email before the
Sales Slip expires? 30 days.
5. What do I do if a customer cancels the transaction? A new Sales Slip must be generated [you are not able
to edit the original Sales Slip] and submitted for cardholder approval. In addition, the Authorization Code for the
previous Sales Slip must be cancelled with Merchant Services prior to initiating the new Sales Slip.
6. For Joint Applications, will both applicants receive the Sales Slip and/or Completion Consent for
review and approval? No. The Document(s) will be sent to whichever e-mail address was provided during the
Sales Slip process.
60You can also read