Benefits Participant Guide
←
→
Page content transcription
If your browser does not render page correctly, please read the page content below

Benefits Participant Guide
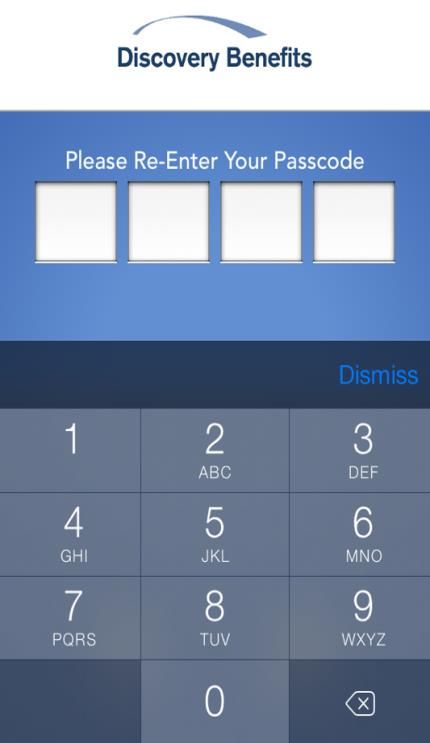
Table of Contents
Refer to the Table of Contents for a full summary of the information contained within this guide. Click
the section headings to be brought directly to that section of the guide. If you click a link in this
document and would like to return to the section you were at previously, push Alt + Left Arrow. Please
note, certain sections of this guide may not apply to your plan type or chosen plan design.

1. GENERAL INFORMATION ............................................................................................................... 3
   1.1 Contact Information ...................................................................................................................... 3
   1.2 Logging In To Your Account ......................................................................................................... 3
   1.3 Setting up a Bank Account (Direct Deposits, Repayments, Contributions)................................... 4
   1.4 Ordering Debit Cards.................................................................................................................... 6
   1.5 Eligible Expenses ......................................................................................................................... 6
   1.6 Mobile App ................................................................................................................................... 6
2. FLEXIBLE SPENDING ACCOUNTS (FSAs) .................................................................................... 8
   2.1 Documentation Requirements ...................................................................................................... 8
   2.2 Debit Card .................................................................................................................................... 8
     2.2.1 Receipt Reminders ................................................................................................................. 8
     2.2.2 When/Why Documentation is Required .................................................................................. 8
     2.2.3 Submitting Documentation ..................................................................................................... 9
     2.2.4 Card on Hold ........................................................................................................................ 10
     2.2.5 Offsetting Debit Card Transactions....................................................................................... 10
     2.2.6 Repaying Debit Card Transactions ....................................................................................... 12
   2.3 Filing Claims ............................................................................................................................... 13
   2.4 Expense Tracker ........................................................................................................................ 15
3. HEALTH SAVINGS ACCOUNTS (HSAs) ....................................................................................... 20
   3.1 Debit Card .................................................................................................................................. 20
   3.2 Distributions (Withdrawals) ......................................................................................................... 20
   3.3 Contributions (Deposits) ............................................................................................................. 21
   3.4 Investments ................................................................................................................................ 22
   3.5 Tax Documents .......................................................................................................................... 25
   3.6 Expense Tracker ........................................................................................................................ 26
4. TRANSPORTATION........................................................................................................................ 30
   4.1 Mass Transit/Parking/Bicycle ..................................................................................................... 30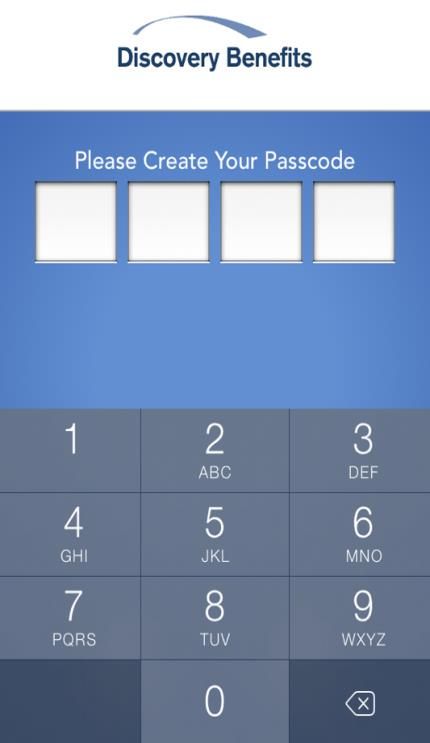
1. GENERAL INFORMATION
The information in this guide is general and does not apply to all plans depending on specific plan
rules. Please see your Summary Plan Description (SPD) for specific rules related to your plan. A copy
of your SPD can be obtained through your Human Resource department.

1.1 Contact Information
Participant Services is available to assist Monday through Friday from 6am to 9pm Central.

      Phone:     1-866-451-3399
      Fax:       1-866-451-3245
      Email:     customerservice@discoverybenefits.com
      Website:   www.discoverybenefits.com
      Mail:      Discovery Benefits
                 P.O. Box 2926
                 Fargo, ND 58108-2926

1.2 Logging In To Your Account
To create your account online go to www.discoverybenefits.com. Click the Login button and then
select Reimbursement Account.

                                                  3
TABLE OF CONTENTS
1. GENERAL INFORMATION                  3. HEALTH SAVING ACCOUNTS (HSAs)
2. FLEXIBLE SPENDING ACCOUNTS (FSAs)    4. TRANSPORTATION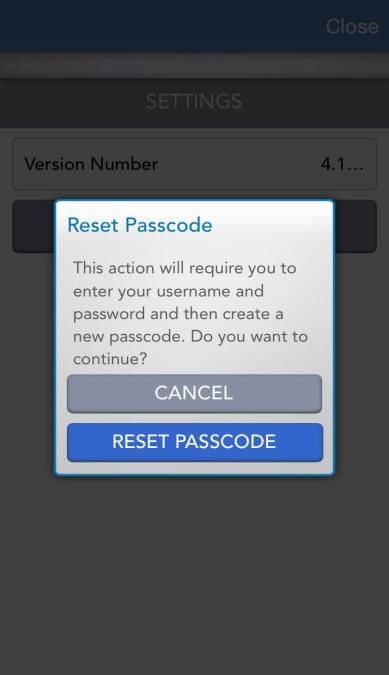
Select Create your new username and password and then complete the three steps.

      Step 1: Complete the required fields. Note: You can provide either your SSN OR Employee ID
      Number. Select Next.
      Step 2: Pick the security questions you would like to answer. Note: You will be prompted to
      answer security questions when completing certain functions within the portal.    Select Next.
      Step 3: A temporary username will auto-populate, double click on the auto-populated username
      to personalize it. Note: Keep record of your personalized username and password as we do
      not store this information. Select Submit.

1.3 Setting up a Bank Account (Direct Deposits, Repayments, Contributions)
By setting up a bank account (checking or savings) you can be reimbursed for claims via direct
deposit, repay claims and contribute to a Health Savings Account. Note: No reimbursement limit
applies to direct deposit. There is a $25.00 reimbursement requirement for paper checks that are not
issued directly to the provider. For check reimbursement not issued to the provider, claims will be held
until they reach $25.00 or until the end of the month.

       Step 1: Log In.

       Step 2: Select the Profile tab and then select Bank Accounts.

                                                   4
TABLE OF CONTENTS
1. GENERAL INFORMATION                    3. HEALTH SAVING ACCOUNTS (HSAs)
2. FLEXIBLE SPENDING ACCOUNTS (FSAs)      4. TRANSPORTATION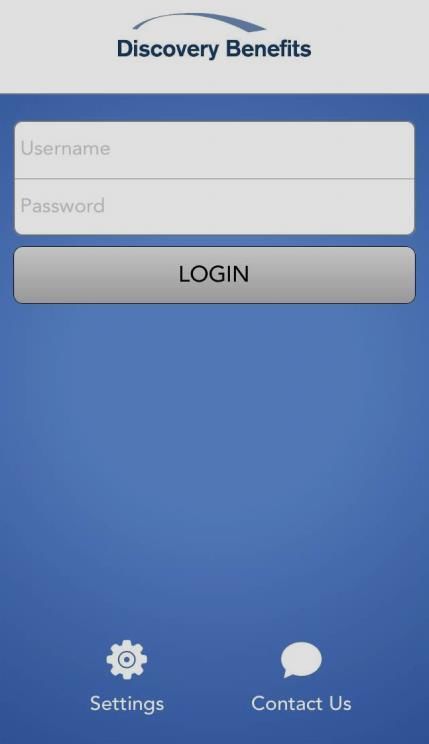
Step 3: Select Add Bank Account.
Step 4: Enter bank account (checking or savings) information into the required fields. The
Routing Number will auto-populate the Bank Information when you tab to the next field.
Select Submit.
Step 5: Answer the security question.
Step 6: Check mark the box for what plan years you would like set up with direct deposit. Then
click the Continue button.
Step 7: Validate the bank account. The direct deposit process will be in a hold status until
the bank account is validated.
A deposit between ($0.01 and $0.99) followed by an immediate withdrawal will be made to
the designated bank account within 1-3 business days of direct deposit submission.
Once you see the deposit in your bank account, log into your Discovery Benefits account at
www.discoverybenefits.com, and click on the activation link in the Message Center section
on the Home tab and enter the deposit amount. (Format example: $0.XX)
By completing the online steps for establishing direct deposit, you are certifying the information provided is accurate.
Further, the completion and submission of this information authorizes Discovery Benefits to issue payment directly to the
specified account unless notified to do otherwise. You understand and agree that Discovery Benefits reserves the right to
reverse any ACH deposit where an error occurs, in accordance with banking regulations.
5
TABLE OF CONTENTS
1. GENERAL INFORMATION 3. HEALTH SAVING ACCOUNTS (HSAs)
2. FLEXIBLE SPENDING ACCOUNTS (FSAs) 4. TRANSPORTATION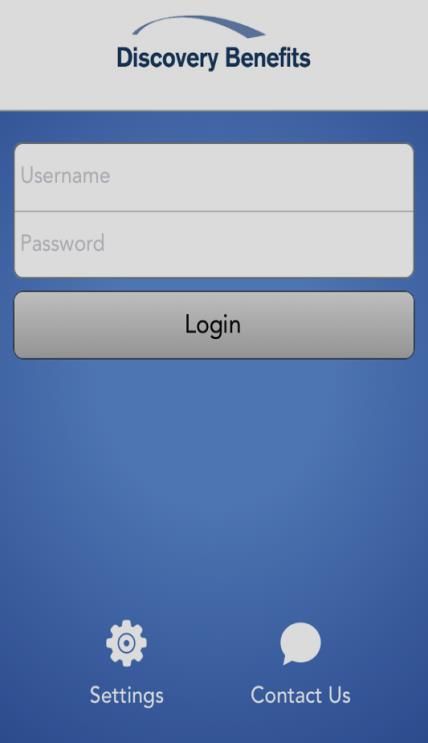
1.4 Ordering Debit Cards
If your plan offers the debit card as a reimbursement option, you may be able to order debit cards via
your online account.

      Step 1: Log In.

      Step 2: Select the Profile tab and then select Debit Cards and you will have the option to order
      additional or replacement cards.

The debit card(s) will arrive to your designated shipping address within 10-14 days of placing the
request. Note: You can set up a PIN for your debit card by calling 1-866-451-3399, Option 1, Option 1,
then Option 3.

1.5 Eligible Expenses
A searchable list of eligible expenses can be found on our website at
www.discoverybenefits.com/searcheligibleexpenses. Due to frequent updates to regulations governing
FSAs, DCAs and HSAs, this list does not guarantee reimbursement, but instead is to be utilized as a
guide. Additional resources can be found at www.discoverybenefits.com/extras.

1.6 Mobile App
A FREE mobile app is available for iOS (Apple) and Android markets for Medical FSAs, HSAs, HRAs
and Mass Transit/Parking. The app can be used to view account balances, upload receipts, review
plan details, and view account activity. Medical FSA claims can be filed and HSA investment detail
can also be viewed through the mobile app. For more information or to download the app please visit
http://www.discoverybenefits.com/participants/participants-benefits-programs/participants-mobile-app.

      Step 1: Download the Discovery Benefits app on your mobile device.

      Step 2: Enter your username and password (same as online account).

                                                  6
TABLE OF CONTENTS
1. GENERAL INFORMATION                   3. HEALTH SAVING ACCOUNTS (HSAs)
2. FLEXIBLE SPENDING ACCOUNTS (FSAs)     4. TRANSPORTATION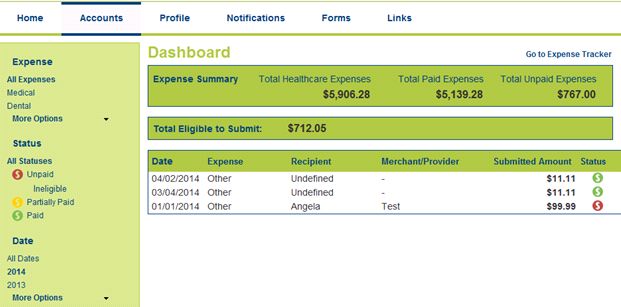
*NOTE: The above example, as well as the other examples in this guide, are from an iOS (Apple) device; Android devices will look slightly different

          Step 3: Create a four digit passcode, then confirm the passcode (the passcode will be how you
          will log in from this point forward with the app). NOTE: Discovery Benefits does not have the
          ability to reset your four digit passcode once created. To do so, you will need to choose the
          ‘Settings’ option on the home screen. After this has been selected you will see a page where
          you can select the ‘Change Passcode’ option. When selected you will be prompted to confirm
          this is what you would like to do.

                                                                           7
TABLE OF CONTENTS
1. GENERAL INFORMATION                                       3. HEALTH SAVING ACCOUNTS (HSAs)
2. FLEXIBLE SPENDING ACCOUNTS (FSAs)                         4. TRANSPORTATION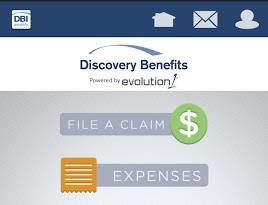
2. FLEXIBLE SPENDING ACCOUNTS (FSAs)
A Flexible Spending Account (FSA) falls under one of the following categories: Medical FSA,
Dependent Care FSA, Combination FSA, Limited FSA or Health Reimbursement Arrangement (HRA).
Note: A Health Reimbursement Arrangement (HRA) is an employer-funded account that covers
designated medical expenses. Please see your Summary Plan Description (SPD) for specific rules
related to your plan. A copy of your SPD can be obtained through your Human Resource department.
2.1 Documentation Requirements
Approvable documentation for medical expenses, which is required by the IRS, is a receipt/statement
containing, all of the following: name of provider, date(s) of service within the plan year, an eligible
type of service or product (see Eligible Expenses) and dollar amount (after insurance, if applicable).
Tip: An Explanation of Benefits (EOB) from your insurance provider is ideal for substantiating claims.
Approvable documentation for dependent care expenses, which is required by the IRS, is a
receipt/statement containing, all of the following: name of eligible provider, date(s) of service within the
plan year, eligible types of service, and dollar amount. Note: To be reimbursed, services must already
have been rendered. Tip: For Dependent Care Accounts (DCAs), a signature on the Reimbursement
Request Form by the daycare provider will take the place of needing to submit supporting
documentation for manual claims.
2.2 Debit Card
Advantages:
Less out-of-pocket expenses at the time of service
No waiting for a reimbursement
Merchant is paid directly at the point of sale
2.2.1 Receipt Reminders
If documentation is required for a debit card transaction you will receive an email notification to log in
to your account to view a Receipt Reminder. The Receipt Reminder will display the documentation
required and next steps. If you do not have an email address on file, a Receipt Reminder will be
mailed. Note: Debit card use will be put on temporary hold if documentation is not received within the
designated time period.
2.2.2 When/Why Documentation is Required
Due to IRS regulations, certain debit card transactions need to be substantiated. Substantiating
means validating a transaction to ensure the debit card was used for IRS approved items/services
within the allowed time frame.
When documentation is not needed:
When co-payments are tied to the account holders health plan.
When purchases are made at merchants using the Inventory Information Approval System
(IIAS). These merchants will approve eligible expenses at the point of purchase. When
8
TABLE OF CONTENTS
1. GENERAL INFORMATION 3. HEALTH SAVING ACCOUNTS (HSAs)
2. FLEXIBLE SPENDING ACCOUNTS (FSAs) 4. TRANSPORTATION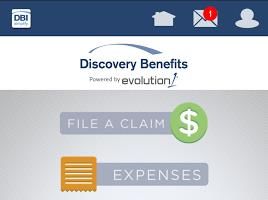
using your debit card at these merchants, swipe your debit card for the entire purchase. The
items that are eligible expenses will be approved, and the merchant will ask for a secondary
form of payment for ineligible items. To find a full list of merchants utilizing IIAS, visit our
website at www.discoverybenefits.com/extras or click the link Visit Our Website below.
When recurring expenses match the same provider and dollar amount for previously
substantiated transactions. Example: Jane goes to the doctor to get her allergy shot. Her
treatment requires that she continue to receive these shots every two weeks. Because
Jane’s allergy shots are not provided at an IIAS merchant and it is not a standard co-pay
amount, the first visit will need to be substantiated with an itemized receipt/statement or
Explanation of Benefits (EOB). Any recurring visits to the same provider, for the same dollar
amount, will be recognized as a recurring expense and will be processed without additional
substantiation.
2.2.3 Submitting Documentation
There are several ways to submit documentation.
Online
Ste
Step 2: A Message Center will appear in the middle of your Home tab.
Step 3: Click on the receipt(s) needed option.
Step 4: Click on Upload Receipt beside the claim to which you would like to upload your
documentation.
Step 5: You will be prompted to upload supporting documentation. Browse your documents
and select the correct attachment. Once documentation is attached, select Upload.
Step 6: Once uploaded, you will receive confirmation and you will see a receipt status of
Uploaded for that claim. This means your documentation has been submitted and will be
9
TABLE OF CONTENTS
1. GENERAL INFORMATION 3. HEALTH SAVING ACCOUNTS (HSAs)
2. FLEXIBLE SPENDING ACCOUNTS (FSAs) 4. TRANSPORTATION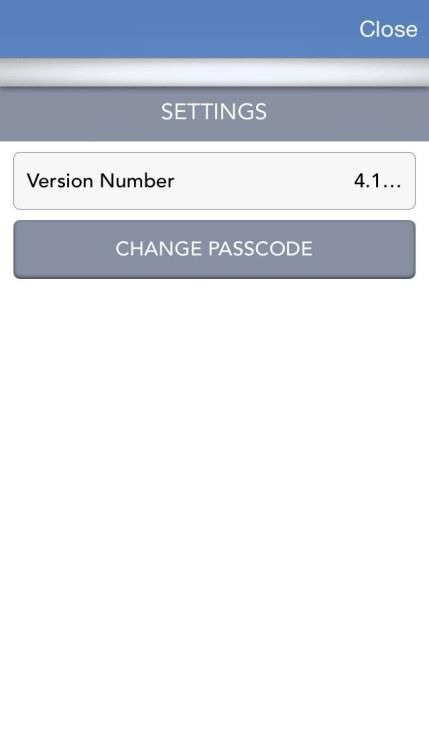
processed within two business days. If further documentation is needed, you will be notified via
      email. If an email address is not on file you will be notified via mail.

Mobile App

      Step 1: Log In.

      Step 2: Access the Message Center by selecting the envelope icon on the top of the mobile
      application.

      Step 3: Click on the Claim.

      Step 4: On the Claim screen, scroll to the bottom and select New Receipt. Your mobile device
      will then prompt you to take a picture with your camera.

      Step 5: Take a picture of your receipt. Make sure you can clearly read the name of the
      provider, date(s) of service, the type of service or product, and dollar amount (after insurance, if
      applicable). Once you have a clear picture save your image to submit the new receipt.

Fax or Mail

Submit the Receipt Reminder with documentation to Discovery Benefits via fax or mail.
      Fax: 1-866-451-3245
      Mail: Discovery Benefits, PO Box 2926, Fargo ND 58108-2926
2.2.4 Card on Hold
If documentation is not received and processed within the timeframe allowed, the debit card will be
placed on a temporary hold. When approved documentation or repayment is received, debit card use
will be resumed. Note: Only the debit card is on a temporary hold. Claims can still be filed for out-of-
pocket expenses.
2.2.5 Offsetting Debit Card Transactions
Offsetting is using eligible out-of-pocket expenses to clear up a denied debit card transaction.
Offsetting can be done on your online account or by fax or mail. To communicate your intent, simply
write ‘offset’ on the documentation you are submitting and include the Receipt Reminder or Denial
Notification.

                                                   10
TABLE OF CONTENTS
1. GENERAL INFORMATION                    3. HEALTH SAVING ACCOUNTS (HSAs)
2. FLEXIBLE SPENDING ACCOUNTS (FSAs)      4. TRANSPORTATION
Online
Step 1: Log In.
Step 2: Click on Receipt(s) Needed under the Home tab.
Step 3: Click on the receipt(s) needed option.
Step 4: Click on Upload Receipt beside the claim to which you would like to upload your
documentation.
Step 5: You will be prompted to upload supporting documentation. Browse your documents
and select the correct attachment. Once documentation is attached, select Upload.
Step 6: Once uploaded, you will receive confirmation and you will see a receipt status of
Uploaded for that claim. This means your documentation has been submitted and will be
processed within two business days. If further documentation is needed, you will be notified via
email. If an email address is not on file you will be notified via mail.
Mobile App
Step 1: Log In.
Step 2: Access the Message Center by selecting the envelope icon on the top of the mobile
application.
Step 3: Click on the Claim you would like to offset.
11
TABLE OF CONTENTS
1. GENERAL INFORMATION 3. HEALTH SAVING ACCOUNTS (HSAs)
2. FLEXIBLE SPENDING ACCOUNTS (FSAs) 4. TRANSPORTATIONStep 4: On the Claim screen, scroll to the bottom and select New Receipt. Your mobile device
will then prompt you to take a picture with your camera.
Step 5: Take a picture of your receipt. Make sure you can clearly read the name of the
provider, date(s) of service, the type of service or product, and dollar amount (after insurance, if
applicable). Once you have a clear picture save your image to submit the new offset receipt.
Fax or Mail
Submit the offsetting documentation with the Receipt Reminder or Denial Notification via fax or mail.
Fax: 1-866-451-3245
Mail: Discovery Benefits, PO Box 2926, Fargo ND 58108-2926
2.2.6 Repaying Debit Card Transactions
Repayments for denied debit card claims can be made on your online account or by mailing in a check
or money order to Discovery Benefits. To ensure efficient processing, include the Denial Notification.
Online
To repay the portion of your claim that was not approved by using the direct deposit account you have
on file, you can visit https://dbi.navigatorsuite.com. Once you have logged in to your account, select
the repayment link in the Message Center on your homepage. Click the Repay link next to the claim
you wish to repay and follow the remaining steps.
NOTE: You need to have a validated bank account on file in order to repay the claim using this method.
If you do not have a bank account on file or you have not yet validated your bank account, you must log
in to your online account and complete the necessary steps for setting up and validating your bank
account information. Please see the Setting up a Bank Account section 1.3 of this guide if you do not
have a bank account set up.
12
TABLE OF CONTENTS
1. GENERAL INFORMATION 3. HEALTH SAVING ACCOUNTS (HSAs)
2. FLEXIBLE SPENDING ACCOUNTS (FSAs) 4. TRANSPORTATIONMail
Repayments can be made by sending a check or money order via mail. To ensure efficient
processing, include the Denial Notification or Receipt Reminder with the check or money order. If this
is not available, simply write the claim number in the memo line of your check. Send repayments to:
Discovery Benefits, PO Box 2926, Fargo ND 58108-2926
2.3 Filing Claims
Claims for out-of-pocket expenses can be filed via mail, fax, online, or by using the mobile app. Note:
Don’t file a claim if you have already used your Flexible Spending Account debit card. This could result
in duplicate claims.
Online
Step 1: Log In.
Step 2: Select File Claims in the Accounts tab and select the plan for which you would like
to file a claim.
Step 3: Select the File Claim button from the plan you would like to be reimbursed from.
Step 4: Enter the claim information.
13
TABLE OF CONTENTS
1. GENERAL INFORMATION 3. HEALTH SAVING ACCOUNTS (HSAs)
2. FLEXIBLE SPENDING ACCOUNTS (FSAs) 4. TRANSPORTATIONNote: A receipt must be
uploaded to file a claim.
Samp
le
You have the option to send payment to yourself or
someone else. If you choose ‘Someone Else’ a paper
check will be mailed to the designated payee. Please
allow 10-14 days mailing time in addition to the two
business day claim processing time.
Step 5: Select Add Claim, agree to the Terms and Conditions, and select Submit.
Step 6: You will receive a confirmation that your claim was submitted. It will be processed
within two business days. If further documentation is needed, you will be notified via email if
you have an email address on file or via mail if you do not.
14
TABLE OF CONTENTS
1. GENERAL INFORMATION 3. HEALTH SAVING ACCOUNTS (HSAs)
2. FLEXIBLE SPENDING ACCOUNTS (FSAs) 4. TRANSPORTATIONMobile App
Step 1: Log In.
Step 2: Select File A Claim on the home screen.
Step 3: Select the plan you would like to file a claim for.
Step 4: Input your claim information on the New Claim screen. Scroll to the bottom of the
screen and select Upload Receipt. Your mobile device should then prompt you to take a picture
with your camera.
Step 5: Take a picture of your receipt. Make sure you can clearly read the name of the
provider, date(s) of service within the plan year, the type of service or product, and dollar
amount (after insurance, if applicable). Once you have a clear picture save your image and
select Add Claim to submit your claim.
Fax or Mail
Submit the Out-of-Pocket Reimbursement Request Form with documentation via fax or mail.
Fax: 1-866-451-3245
Mail: Discovery Benefits, PO Box 2926, Fargo ND 58108-2926
2.4 Expense Tracker
The Expense Tracker feature serves as an organizational tool to keep track of all expenses and
documentation relating to those expenses. It can also tie to the process of filing an online claim to be
reimbursed for out-of-pocket expenses.
15
TABLE OF CONTENTS
1. GENERAL INFORMATION 3. HEALTH SAVING ACCOUNTS (HSAs)
2. FLEXIBLE SPENDING ACCOUNTS (FSAs) 4. TRANSPORTATIONAdding an Expense
Mobile App
Step 1: Log In.
Step 2: Select Expenses on the home screen.
Step 3: Select create new expense at the top of the Expense tracker screen.
Step 4: Input your claim information under the Details section. Scroll to the bottom of the
screen and select Upload Receipt. Your mobile device will then prompt you to take a picture
with your camera.
Step 5: Take a picture of your receipt. Make sure you can clearly read the name of the
provider, date(s) of service, the type of service or product, and dollar amount (after insurance, if
applicable). Once you have a clear picture save your image and select Add Expense to store
your information. NOTE: You will be unable to submit your expense as a claim from the Mobile
App Expense Tracker. You will need to submit your expense through the online Expense
Tracker if you wish to be reimbursed.
Online
Step 1: From your homepage, select the Accounts tab, then Expense Tracker.
16
TABLE OF CONTENTS
1. GENERAL INFORMATION 3. HEALTH SAVING ACCOUNTS (HSAs)
2. FLEXIBLE SPENDING ACCOUNTS (FSAs) 4. TRANSPORTATIONStep 2: Select Add New Expense.
Step 3: Complete the fields and select Add Expense.
Submitting a Claim from the Expense Tracker
Step 1: Locate the filed expense in the Expense Tracker and select the Pay option.
Step 2: Next, choose the plan to pay from and select Pay Expense.
17
TABLE OF CONTENTS
1. GENERAL INFORMATION 3. HEALTH SAVING ACCOUNTS (HSAs)
2. FLEXIBLE SPENDING ACCOUNTS (FSAs) 4. TRANSPORTATIONStep 3: The system will populate the claim information based off the information entered from
the Expense Tracker feature (in addition to attaching the documentation), complete any
additional required fields and select Add Claim.
2.5 Dashboard
The Dashboard feature will provide a cumulative view of all claims, debit card transactions,
distributions and submitted healthcare expenses. You can access this from the Home page under the
Accounts tab.
Once you have selected the Dashboard option, the following page will appear. You will be able to
hover over each one of the dollar amounts to see the explanation of each field or item as listed in the
below image. You can also click on each individual claim too see the detail of each expense.
18
TABLE OF CONTENTS
1. GENERAL INFORMATION 3. HEALTH SAVING ACCOUNTS (HSAs)
2. FLEXIBLE SPENDING ACCOUNTS (FSAs) 4. TRANSPORTATIONIncludes paid claims, paid
Includes all claims, debit card debit card transactions, etc.
transactions, expenses, etc.
Includes unpaid Includes pending claims,
expenses denied claims, denied
debit card transactions,
etc.
You may also click on each individual expense to view more detail in regards to that specific claim or
charge.
19
TABLE OF CONTENTS
1. GENERAL INFORMATION 3. HEALTH SAVING ACCOUNTS (HSAs)
2. FLEXIBLE SPENDING ACCOUNTS (FSAs) 4. TRANSPORTATION3. HEALTH SAVINGS ACCOUNTS (HSAs)
3.1 Debit Card
Advantages:
Less out-of-pocket expenses at the time of service
No waiting for a distribution
Merchant is paid directly at the point of sale
Keep receipts for your own records. You aren’t required to submit documentation of HSA
transactions to Discovery Benefits.
3.2 Distributions (Withdrawals)
A distribution is requesting funds from your HSA. You can request a distribution via your online
account. If you need to request a distribution due to an excess contribution removal, prohibited
transactions, rollover, transfer, divorce or disability please use the HSA Distribution Form. If you need
to request a distribution due to death of the HSA account holder, please use the HSA Death
Distribution Form. Both of these forms are located on our website at:
http://www.discoverybenefits.com/participants/participants-forms.
Online
Step 1: Log In.
Step 2: Select Request HSA Distribution in the Accounts tab.
20
TABLE OF CONTENTS
1. GENERAL INFORMATION 3. HEALTH SAVING ACCOUNTS (HSAs)
2. FLEXIBLE SPENDING ACCOUNTS (FSAs) 4. TRANSPORTATIONStep 3: Complete the required (*) fields under Distribution Details.
You have the option to send payment to yourself or
someone else. If you choose ‘Someone Else’ a paper
check will be mailed to the designated payee. Please
allow 10-14 days for the payee to receive the check.
Step 4: Read the terms and information then check the box in front of ‘I have read, understand
and agree to the information and terms above.’
Fax or Mail
Submit the applicable HSA distribution form via fax or mail.
Fax: 1-866-451-3245
Mail: Discovery Benefits, PO Box 2926, Fargo ND 58108-2926
3.3 Contributions (Deposits)
You can contribute funds into your HSA electronically through your online account or via mailing the
HSA Contribution Form with a paper check or money order. Electronic contributions processing is
quickest way to deposit funds. Use the IRS Maximum Contribution Detail to determine how much you
can contribute for the applicable tax year. Note: Any contributions received will be deposited in a cash
account. To have funds transfer from the cash account to investments you must log in to your online
account and ‘opt in’ to establish a specified threshold amount. See the Investment section on how to
‘opt in’.
Online
Step 1: Log In.
Step 2: Select Contribute to HSA in the Accounts tab.
21
TABLE OF CONTENTS
1. GENERAL INFORMATION 3. HEALTH SAVING ACCOUNTS (HSAs)
2. FLEXIBLE SPENDING ACCOUNTS (FSAs) 4. TRANSPORTATIONStep 3: Complete the fields under Contribution Details.
You will need to have a bank
account established in order to
make an electronic contribution.
Step 4: Read the terms and information then check the box in front of ‘I have read, understand
and agree to the information and terms above.’
Step 5: Select Add Contribution. You will receive a confirmation alert that your contribution is
being processed.
Mail
Submit the Health Savings Account (HSA) Contribution Form with a check or money order to:
Discovery Benefits, PO Box 2926, Fargo ND 58108-2926
3.4 Investments
You have the ability to invest your HSA funds once you hit a minimum threshold. To set your
threshold you must opt into Manage Investment Transfers.
Step 1: Log in.
Step 2: Choose Account Summary under the Accounts tab.
22
TABLE OF CONTENTS
1. GENERAL INFORMATION 3. HEALTH SAVING ACCOUNTS (HSAs)
2. FLEXIBLE SPENDING ACCOUNTS (FSAs) 4. TRANSPORTATIONStep 3: Select View HSA Summary.
Step 4: Select Manage Investment Transfers.
23
TABLE OF CONTENTS
1. GENERAL INFORMATION 3. HEALTH SAVING ACCOUNTS (HSAs)
2. FLEXIBLE SPENDING ACCOUNTS (FSAs) 4. TRANSPORTATIONStep 5: Check the box next to ‘Define Investment Sweep Amount’. Set your threshold
amount, then select the Save button.
Your fund balances will be automatically reallocated, consistent with your investment
elections, at the frequency you select. Even as market conditions change, your overall
investment mix will stay on target with your diversification strategy. The investment sweeps
will automatically replenish your cash account when it goes below your investment threshold.
Step 1: Log In.
Step 2: Choose Account Summary under the Accounts tab.
24
TABLE OF CONTENTS
1. GENERAL INFORMATION 3. HEALTH SAVING ACCOUNTS (HSAs)
2. FLEXIBLE SPENDING ACCOUNTS (FSAs) 4. TRANSPORTATIONStep 3: Select View HSA Summary.
Step 4: Select View Investment Detail.
Step 5: You will be prompted to answer a security question, input the applicable answer
and select Submit. Once you have answered the security question, you will be in the
investment site. The toolbar on the left side of the investment site includes a FAQ section
that will assist you through navigation.
Note: Trades initiated after 1:30 p.m. Central will be processed the next business day. Trades can
take 3-6 business days to process.
3.5 Tax Documents
You will be provided with two HSA tax documents, the 1099-SA and 5498-SA. The 1099-SA is
provided in January and reports distributions. The 5498-SA is provided in May and reports
contributions. Note: You will only receive these documents if you had a distribution or contribution
within the applicable tax year. These documents can be found in your online account.
25
TABLE OF CONTENTS
1. GENERAL INFORMATION 3. HEALTH SAVING ACCOUNTS (HSAs)
2. FLEXIBLE SPENDING ACCOUNTS (FSAs) 4. TRANSPORTATIONStep 1: Log In.
Step 2: Select HSA Tax Documents in the Notifications tab.
Step 3: Choose View Document next to the document you need.
3.6 Expense Tracker
The Expense Tracker feature serves as an electronic storage feature. It can also tie to the process of
requesting a distribution.
Storing Documentation
Step 1: From your homepage, select the Accounts tab, then Expense Tracker.
Step 2: Select Add New Expense.
26
TABLE OF CONTENTS
1. GENERAL INFORMATION 3. HEALTH SAVING ACCOUNTS (HSAs)
2. FLEXIBLE SPENDING ACCOUNTS (FSAs) 4. TRANSPORTATIONStep 3: Complete the fields and select Add Expense.
Requesting a distribution from documentation already saved in the Expense Tracker
Step 1: Locate the desired documentation in the the Expense Tracker claim and select the Pay
button.
27
TABLE OF CONTENTS
1. GENERAL INFORMATION 3. HEALTH SAVING ACCOUNTS (HSAs)
2. FLEXIBLE SPENDING ACCOUNTS (FSAs) 4. TRANSPORTATIONStep 2: Next, choose the plan to pay from and select Pay Expense.
Step 3: Check the box in front of “I have read, understand and agree to the information and
terms above.”
Step 4: Select Request Distribution.
3.7 Dashboard
The Dashboard feature will provide a cumulative view of all claims, debit card transactions,
distributions and submitted healthcare expenses. You can access this from the Home page under the
Accounts tab.
28
TABLE OF CONTENTS
1. GENERAL INFORMATION 3. HEALTH SAVING ACCOUNTS (HSAs)
2. FLEXIBLE SPENDING ACCOUNTS (FSAs) 4. TRANSPORTATIONOnce you have selected the ‘Dashboard’ option, the following page will appear. You will be able to
hover over each one of the dollar amounts to see the explanation of each field or item as listed in the
below image. You can also click on each individual claim too see the detail of each expense.
Includes all claims, debit card Includes paid claims, paid
transactions, expenses, etc. debit card transactions, etc.
Includes unpaid Includes pending claims,
expenses denied claims, denied
debit card transactions,
etc.
You may also click on each individual expense to view more detail in regards to that specific
distribution or charge.
29
TABLE OF CONTENTS
1. GENERAL INFORMATION 3. HEALTH SAVING ACCOUNTS (HSAs)
2. FLEXIBLE SPENDING ACCOUNTS (FSAs) 4. TRANSPORTATION4. TRANSPORTATION
4.1 Mass Transit/Parking/Bicycle
You can file online for parking, vanpooling and bicycle. Mass transit products should only be
purchased with your Discovery Benefits debit card. If you tried your debit card and it was unable to be
utilized, an online claim can be filed. NOTE: You cannot file mass transit or parking expenses by fax,
mail, or with the mobile app.
Online
Step 1: Log In.
Step 2: Select the Accounts tab, then File Claims.
Step 3: Select File Claim next to the account you would like to be reimbursed from.
30
TABLE OF CONTENTS
1. GENERAL INFORMATION 3. HEALTH SAVING ACCOUNTS (HSAs)
2. FLEXIBLE SPENDING ACCOUNTS (FSAs) 4. TRANSPORTATIONStep 4: Complete the required (*) information. NOTE: You have the ability to reimburse
yourself or the provider directly.
Add a New Payee
To add a new payee, select the ‘Add a New
Payee’ option and fill in the displayed fields. To
save this payee for future use, check the ‘Save a
new payee’ checkbox at the bottom. After you
submit the distribution request, the newly added
payee will be available in the saved payees list. If
you don't want to save this payee, uncheck the
‘Save a new payee’ checkbox.
Select a Saved Payee
To use a previously saved payee, choose the
‘Select a Saved Payee’ option. Select a payee
from the list under ‘Payee Name’. The system will
automatically populate the payee information with
the saved payee information.
Step 5 (if applicable): Upload an itemized receipt if you are requesting reimbursement for
bicycle expenses.
Step 6: Once completed, select Add Claim. You will be able to add additional claims if needed.
Step 7: Once all claims have been added, agree to the Terms and Conditions and click Submit
Claim(s).
31
TABLE OF CONTENTS
1. GENERAL INFORMATION 3. HEALTH SAVING ACCOUNTS (HSAs)
2. FLEXIBLE SPENDING ACCOUNTS (FSAs) 4. TRANSPORTATIONYou can also read