COOKER 8L MULTI FUNCTION GUIDE & RECIPE BOOK - Cook4Life
←
→
Page content transcription
If your browser does not render page correctly, please read the page content below

8L MULTI FUNCTION
COOKER
                    GUIDE & RECIPE BOOK

                                   EASY TO USE
                                       PRE
                                   PROGRAMMED
                                    FUNCTIONS

                                   NON STICK
                                     INNER
                                      POT

                                    INCLUDES
                                    FREE
                                     RECIPE
                                     BOOK
Head Office:
  PO Box 4433, Tzaneen, 0850
     Block E, Medentia Park,
 15 Peace street, Tzaneen, 0850
Limpopo Province, South Africa

      Call Centre:
     +27 (0) 87 980 0345
   Fax: +27 (0) 87 980 1717
 E-mail: info@cook4life.co.za
  Web: www.cook4life.co.za
CONTENTS
WELCOME TO COOK4LIFE.........................................PAGE 4
COOK4LIFE WARRANTY ...........................................PAGE 4 - 5
INSTRUCTION MANUAL...........................................PAGE 6 - 16
Cooking Guidelines.............................................PAGE 17 - 18
RECIPES
  Samp & Beans...................................................Page 19
   BEEF STEW.........................................................Page 20
   CHICKEN STEW...................................................Page 21
   RICE..................................................................Page 22
   TRIPE & ONIONS.................................................Page 23
   OXTAIL...............................................................Page 24
   BRAISED LAMB SHANKS......................................Page 25
   WHOLE CHICKEN................................................Page 26
   CHEESECAKE......................................................Page 27

COOK4LIFE
                                                 WARRANTY
                                                 Electrical appliances & non electrical
                                                 products

                                                 Cook4Life warrants to the original purchaser of

     Welcome                                     this product (“the client”) that this products will be
                                                 free of defects in quality and workmanship under
                                                 normal personal, family or household use for a
      to the                                     period of 1 (one) year from the date of purchase
                                                 (“warranty period”).

     Cook4life                                   Where the client has purchased the product and
                                                 it breaks, is defective or does not work properly or

      Family!                                    for the intended purpose, the client must notify
                                                 Cook4Life thereof with the warranty period. Any
                                                 claim in terms of this warranty must be supported
                                                 by a proof of purchase. If proof of purchase in
     Congratulations on your purchase from       not available, then repair, and/or service charges
    Cook4life. At Cook4Life we care about        maybe be payable by the client to Cook4Life. All
                                                 repair, and/or service charges are payable up front
  you. We inform, educate and empower our        upon receipt of a Proforma Invoice from Cook4Life.
   customers to live a happy, nutritional and
 healthy lifestyle that lets you spend so much   The faulty product must be taken to Cook4Life’s
                                                 nearest regional office to exercise the warranty.
    more time with your friends and family       The product must be in good working condition,
                                                 with your original proof of purchase, name,
                                                 address, telephone number, and a description
   By purchasing your Cook4Life product,         of the claimed defect. Returned goods must be
 you automatically became part of the most       complete with all the accessories included in the
 trusted network marketing brand in South        original purchase. You will be required to offer
                                                 us an explanation for the return and offer us the
   Africa. Cook4life customers all over the      opportunity to address any problems. Cook4Life
 country have experienced the benefits of a      will provide the client with a charge for transport
                                                 and handling.
healthier lifestyle using Cook4Life products.
 Your Cook4Life product will not only Save       Cook4Life will repair or exchange the product
  you time and money but also allow you to       in terms of this warranty subject to legislative
                                                 requirements. This warranty shall be valid only
 prepare healthier and more delicious meals      where the client has not broken the product
            for you and your family.             himself, or used the product for something that it
                                                 is not supposed to be used for. The warranty does
                                                 not include and will not be construed to cover
 To get the most value out of your Cook4life     products damaged as a result of disaster, misuse,
   product, please read through this guide       tamper, abuse or any unauthorised modification or
                                                 repair of the product. Every possible precautionary
  which will tell you more about how to use      measure to prevent damage to the product has
         and care for your investment.           been taken.
4
If the client requests that Cook4Life repairs the product
and the product breaks or fails to work properly within 3
(three) months of the repair and not as a result of misuse,
tampering or modification by or on behalf of the client,
then Cook4Life may replace the product.

The client may be responsible for certain costs where
products returned are not in the original packaging,
or if the packaging is damaged or if all the accessories
included in the original purchase, are not included.

What if the goods are defective?

If within 6 months from date of purchase the goods are
found to be defective due to a manufacturing or material
defect, and not due to abuse, misuse or tampering, then
Cook4life will repair or replace the goods.

If after the initial 6 months from date of purchase, the
goods are found to be defective due to a manufacturing
or material defect, and not due to abuse, misuse or
tampering, then Cook4life will send the goods to the
manufacturer for assessment and the manufacturer will
decide whether you have a valid claim, and if so repair or
replace the goods.

If the goods become defective after the 12 months from
date of purchase Cook4life can arrange to have the
goods repaired at a cost. No repairs will be done without
the approval of a quotation first, as well as payment
received from the client.

When will the warranty from Cook4Life not
apply?

The 1 year warranty from Cook4life will only apply to
manufacturing defects of goods, and will not apply in
the following instances:

•    Damage caused by accident to the goods
•    Damage caused by tampering, abuse or misuse of
     the goods
•    If the goods are used for any other purpose other
     than which they were manufactured for
•    If the goods are not cared for or used according to
     their instruction manuals
                                                              5
INSTRUCTION MANUAL

Before operating your new appliance, please read all
instructions carefully and keep for future reference.

IMPORTANT SAFEGUARD                                           18.   DO NOT damage the Rubber Seal Ring and DO
                                                                    NOT replace it with anything other than the
When using pressure cookers, basic safety precautions
                                                                    replacement Ring designated for this unit.
should always be followed:
                                                              19.   DO NOT tamper with the Steel Ring in the Lid (2)
1.    Read all instructions before operation.                       with any tools or external forces. If the Steel Ring
2.    Do not operate while unattended.                              is damaged (2), please stop using immediately
3.    Do not touch hot surfaces. Use handles or knobs.              and replace the Lid.
4.    Close supervision is necessary when the pressure        20.   Clean the Filter (20) regularly to keep the cooker
      cooker is used near children.                                 clean.
5.    DO NOT allow children to operate under any              21.   NEVER use additional weight on the Pressure
      circumstance.                                                 Limiting Valve (3) or replace the Pressure
6.    Do not place the pressure cooker in a heated                  Limiting Valve (3) with anything not intended for
      oven or on a stove top.                                       use with this unit.
7.    Extreme caution must be used when moving a              22.   The surface of contact between the Inner
      pressure cooker containing hot liquids.                       Pot (8) and the Electronic Heater (18) should
8.    Do not use pressure cooker for other than                     always be clean. DO NOT use the Inner Pot with
      intended use.                                                 other heating sources. DO NOT replace the
9.    Never immerse product in water or other liquids.              Inner Pot with a container other than what is
10.   This appliance cooks under pressure. Improper                 recommended by the manufacturer.
      use may result in serious injury.                       23.   The Inner Pot consists of a non-stick surface. To
11.   Make certain unit is properly closed before                   avoid scratching the non-stick surface, please
      operating. See “Operating Instructions.”                      use wooden or plastic utensils.
12.   Do not fill the unit over 3/4 full. When cooking        24.   Food should not be kept warm for more than
      foods that expand during cooking such as rice or              8-10 hours in order to maintain the freshness of
      dried vegetables, do not fill the unit over 1/2 full.         the food.
      Over filling may cause a risk of clogging the vent      25.   The pressure cooker should not be used
      pipe and developing excess pressure. Failure                  for pressure cooking for more than 6 hours
      to follow this procedure can result in injury to              continuously.
      person(s) and/or damage to the unit.                    26.   Serious Injury and/or damage may occur if any
13.   Be aware that certain foods, such as apple sauce,             safeguards are ignored.
      cranberries, pearl barley, oatmeal or other             27.   If steam escapes around the Lid (2) during the
      cereals, split peas, noodles, macaroni, rhubarb, or           cooking process, please unplug from the power
      spaghetti can foam, froth, sputter, and clog the              supply immediately, let cool, remove contents
      pressure release device (steam vent). These foods             and return the product to the manufacturer for
      should not be cooked in a pressure cooker.                    exchange or repair. The Pressure Discharging
14.   Always check the pressure release devices for                 Device has activated. This is a safeguard to alert
      clogging before use.                                          the user that the Pressure Limiting Device is
15.   Do not open the pressure cooker until the unit                malfunctioning.
      has cooled and all internal pressure has been           28.   If there is any malfunction of the cooker during
      released. If it is difficult to turn, this indicates          the cooking process, please stop using the
      that the cooker is still pressurized – do not force           device and return to the manufacturer for repair
      it open. Any pressure in the cooker can result in             or exchange.
      serious injury. See “Operating Instructions.”           29.   DO NOT disassemble the product, or replace
16.   Do not use this pressure cooker for pressure                  parts with parts not intended for this unit.
      frying with oil.
17.   DO NOT place the product near flammable
      materials or use in a humid environment.                SAVE THESE INSTRUCTIONS
6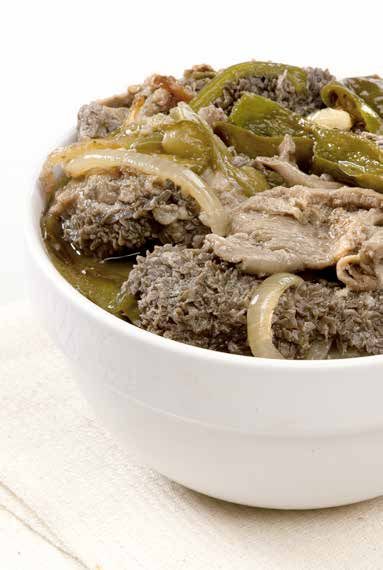
FOR HOUSEHOLD USE ONLY                                        PRESSURE COOKER WITH MULTIPLE FUNCTIONS:

SAFETY WARNING:                                               Multiple functions for cooking, stewing, braising,
                                                              simmering, and roasting.
There is a potential risk of fire, electric shock or injury
to persons if the product is not used as instructed.          •    Cooking will be done automatically by selecting
Protection against electric shock is assured only if the           the different menu choices on the unit. When
main power cord is connected to a properly grounded                the food has completed its cooking cycle, there
220-240V ~ 50/60Hz power receptacle.                               will be a beep indicator, followed by the unit
                                                                   automatically switching to the Keep Warm mode.
•        This product is to be used in an indoor              •    This unit allows the user to choose the period
         environment only and is not intended for                  of Pressurized Cooking Time (0-99 minutes)
         commercial use.                                           according to one’s taste and needs in addition to
•        All parts and accessories for this appliance must         the Pre-Set menu.
         be used properly according to the instructions.      •    A Delay Timer allows the user to delay the
         All parts and accessories must be the original            cooking time up to 24-hours. When the timer is
         provided from manufacturer. All parts or                  set, the count-down will start. By the end of the
         accessories not intended for use with this                countdown, the cooker will start to heat up.
         appliance is strictly prohibited.                    •    The pressure cooker also has its own memory.
•        The use of an extension cord, power adapter or            Interruptions such as a power failure,
         other electric devices is not recommended.                automatically renew the cooking cycle where
                                                                   the unit left off when the power resumes.
LED ERROR INDICATOR
                                                              RAPID COOKING; TIME & POWER SAVING:

    Indicator         Problems/Causes                         •    By using high pressure (high temperature),
    Code                                                           food will be cooked much more rapidly. This
    E1                Open Circuit of the Sensor                   will reduce the cooking time and consumption
                                                                   of power. For example: when cooking rice,
    E2                Short Circuit of the Sensor                  this pressure cooker will save up to 20% of the
    E3                Overheating                                  electricity and up to 15% of the time when
                                                                   compared to a conventional rice cooker. When
    E4                Signal Switch Malfunction                    cooking stew, soups or braising meats, this
                                                                   cooker will save more than 40% of time and
ABOUT YOUR PRESSURE COOKER                                         more than 45% of power as compared to a
                                                                   conventional slow cooker. Cooking can also be
This digitally controlled and automatic pressure                   done at high altitudes.
cooker uses advanced technology so you and your
family can enjoy the benefits of better, faster and           PRESERVE NUTRIENTS & PROMOTES HEALTHY
healthier cooking. Your Pressure Cooker seals in              EATING:
steam to cook hotter and faster while maintaining
important nutrients for healthier meals. Cook fast and        •    Airtight cooking methods preserve nutrients and
with less water to save vital natural resources and                original flavour of food.
energy. Features include easy touch-button settings,
a countdown timer, and a very large cooking pot big
enough for family gatherings! It’s the easiest pressure
cooker to use on the market. It may seem like a
complicated unit but rest assure, this pressure cooker
is simple to use, makes meals quick and easy, and
overall it saves you money! Please accept our thanks
for purchasing an Pressure Cooker and Enjoy!

                                                                                                                     7
INSTRUCTION MANUAL
PARTS & FEATURES

1.   Handle                        8.    Inner Pot              15.   Spoon/Ladle Holder
2.   Lid                           9.    Outer Pot              16.   Lower Body Base
3.   Pressure Limiting Valve       10.   Upper Body             17.   Bottom
4.   Float Valve (external view)   11.   Control Panel          18.   Electronic Heater
5.   Float Valve (internal view)   12.   Power Cord             19.   Seal Ring for Float Valve
6.   Lid Lock-Slider               13.   Condensation Cup       20.   Filter
7.   Sliding Latch for Lid         14.   Body Cover/Structure   21.   Rubber Seal Ring

8
BEFORE FIRST USE
                                                                                   Keep Warm
     Working Pressure               PSI              Maximum Pressure                                        Delay Timer
                                                                                  Temperature
                                                                                                               1~24 Hours
                                                                                                         0.5 Hour Increments up to
          0~70kPa                  12 PSI                    90kPa                 140ºF ~ 175 ºF
                                                                                                         10 hours thereafter 1-hour
                                                                                                                increments

1.      Remove packaging materials such as cardboard, plastics or Styrofoam and discard appropriately.
2.      Clean all the parts by wiping with a soft damp cloth or sponge and dry thoroughly.

LID ASSEMBLY:

1.      How to open the lid: When the lid (2) of the cooker is at the Closed position (Figure 1), hold the Handle (1)
        and turn it clockwise until you reach the Opened-Lid position (Figure 2). Lift up and the lid will swing open
        vertically. Note: For new units, the seal of the lid may be slightly stronger than normal and may be slightly
        difficult to unlock. Once the lid has been opened and closed several times, it will loosen up.

2.      How to close the lid: When the Lid (2) of the cooker is in vertical position (Figure 4), hold the Handle (1)
        and close it downwards at the Opened Lid position (Figure 5). Turn counter-clockwise until you reach the
        Closed Lid position. (Figure 6).
3.      How to dismantle the lid: When the lid (2) of the cooker is in the upright vertical position (Figure 7), hold
        the lid with both hands, and adjust the height between the Lid and the upper edge of the cooker to
        approximately 10cm (Figure 8). Then turn it counter-clockwise until you reach the Closed Lid position
        (Figure 9). In order to remove the lid, you will need to move in an upward direction (Figure 10).

* In the process of turning the Lid, please ensure that the height between the Lid (2) and the upper edge of the cooker is always
10cm. This is to smoothen turning and removing process.

                                                                                                                                      9
INSTRUCTION MANUAL
4.   How to install the lid: Hold the Lid (2) with both hands at the Closed Lid position and pull it upwards in a
     slanted position to a height of 10cm between the Lid and the upper edge of the cooker (Figure 11). Align
     the Lid’s Sliding Latch (7) to the pressure cooker’s Lock-Slider (6) and turn it in a clockwise direction until
     you reach the Opened Lid position (Figure 12). The lid will be installed when the lid is seated and in the
     horizontal position (Figure 13).

•    During the process of installing the lid, please ensure that the height between the Lid and the upper edge
     of the cooker is approximately 10cm. This is to ensure smooth movement when turning and installing the
     lid.

PREPARING YOUR PRESSURE COOKER
1.   To open the lid, hold the Handle (1) and turn it in a clockwise direction until you reach the Opened Lid
     position. Then pull upwards to vertical position (Figure 14 & 15).

2.   Remove the inner pot (8) and place desired food and liquids into the pot. The amount of water and food
     should not exceed 3/4 of the height of the inner Pot (Figure 17.) For food that will expand in water, the
     level should not exceed 3/5 of the Inner Pot (Figure 17). The minimum level for cooking would be 1/5 of the
     Inner Pot (Figure 18).

•    When cooking rice, the maximum amount of rice allowed for this 8 quart pressure cooker is 16 cups of
     uncooked rice.
•    Normally one cup of rice requires one cup of water. This may vary according to taste.

3.   Be certain the inner receptacle, where the Electronic Heater is located, is
     clean before inserting the inner pot. Place the inner pot into the pressure
     cooker and adjust the pot left and right to ensure optimal contact
     between the Inner Pot and the Electronic Heater. (Figure 19)

10
4. Closing the lid.
a) Make sure the Rubber Seal Ring (21) is fitted properly onto the inner part of the lid (2).
b) Observe the Rubber Seal Ring (21) inside the Lid (2) and ensure that it is evenly fitted onto the track.
(Caution: If the rubber seal ring is damaged, do not use the pressure cooker. Contact Customer
Service to repair or replace.)
c) Close the lid.
d) Hold the Handle (1) and turn it to the “Closed” position or Counter -clockwise. (A clamping sound can
be heard) (Figure 20 & 21).
5. Adjust the Pressure Limiting Valve (3) to the “Airtight” position, and ensure that the Float Valve (5) sinks.
(Figure 22a & 22b)
NOTES & TIPS #1:
• Please note that the Pressure Limiting Valve (3) will be loose when you are not using the unit for cooking. It
will rock slightly and will turn 360° manually. Once the pressure cooker is in operation and the pressure has
built up to its capacity, the Pressure Limiting Valve (3) will tighten securely, only allowing itself to be turned
to the Left or Right to “Exhaust”. Once all the pressure has released, it will become loose again.
NOTES & TIPS #2:
• During the Pressure Building process, you may notice steam or pressure escaping from the Pressure
Limiting Valve (3). Carefully adjust the valve by moving it gently or turning it side to side gently using
tongs or similar utensil until it seals properly.
• If any steam is escaping around the lid, it means that the Rubber Seal Ring (21) may not have completed
a tight seal when the lid was locked. Cancel the cooking process, release pressure manually or naturally,
remove the lid and check the Rubber Seal Ring (21). Reposition the lid and ensure that it is secure. Start
the cooking process again.
11INSTRUCTION MANUAL
OPERATING INSTRUCTIONS
HOW TO USE THE MENU SELECT BUTTONS:
There are Thirteen Menu Buttons programmed for your pressure cooker. These are preset for quick and easy
cooking for small portions of food in addition to manual programming. (When cooking food that is more than
3lbs. or more than 6-cups, please use the Timed Cooking function.) Each of these choices is programmed to
detect the weight of food being cooked and how much liquid is inside the pot during the cooking cycle. The unit
will automatically build up the pressure, cook the food and go to Keep Warm when cooking is complete.
MENU BUTTON SELECTIONS & APPROXIMATE COOK TIMES:
MENU DEFAULT MENU DEFAULT ADJUSTABLE
RICE 12-mins TRIPE 50-mins
SAMP 50-mins BROWN 00
SOUP 30-mins STEAM 01-mins 01-99mins
CHICKEN STEW 15-mins HIGH PRESSURE 01-mins 01-99mins
BEEF STEW 35-mins LOW PRESSURE 01-mins 01-99mins
PAP 20-mins SLOW COOK 0.5-hours 0.5-9.5hours
PORK 20-mins
1) Prepare desired food and place into cooking pot.
2) Secure the lid onto the unit, turn it Counter-clockwise to lock it properly in place.
3) Make sure the Pressure Limiting Valve (3) is set to the “Airtight” position. (Except when using the Reheat,
Steam, Slow cook, Brown function).
4) Plug the power cord into a 220-240V power outlet.
5) The LED screen will display 00 00.
6) Press the Menu Select Button to scroll through the Menu Selections. The Cook-Time will display for each
selection. Press START once you have selected the desired Menu Function.
7) Once you press START, the LED screen will display Г Г P
8) When proper pressure is achieved, the LED screen will display P0 30 for cooking Beans as an example and
the cook-time will begin to count down.
9) When the unit has pressurized, it will begin to pressure-cook the food. You may hear quiet hissing or
sizzling sounds coming from inside of the unit during this time.
10) When cooking has completed, the pressure cooker will beep 6-times and automatically go to Keep Warm.
The LED Screen will display END.
11) The Keep Warm indicator light will light. This means the Pressure Cooker is naturally releasing the pressure.
This will take approximately 10-15 minutes.
12) If you wish to Quick Release the pressure, move the Pressure Limiting Valve (3) to “Exhaust” position to
release the pressure until the Float Valve (5) sinks. (Figure 23a & 23b).
CAUTION: Keep hands and face away from Pressure Limiting Valve while in the Exhaust position.
Failure to comply may cause serious injury.
1213) Always be certain the pressure is released completely before unlocking the lid and opening it.
14) Remove food to serve immediately or press the Keep Warm button to keep food warm.
(It is not recommended to keep food warm for over 4-hours).
NOTES & TIPS #3:
• When cooking soups or stews with other hearty ingredients such as potatoes or meat, as much as 5 or 6
cups of liquid must be used to prevent ingredients from over-cooking or burning.
NOTES & TIPS #4:
• NATURAL RELEASE is recommended when cooking foods that will not have the tendency to overcook such
as Potatoes, Beans, Soups & Stews. During the Natural Release time period (may take 10-15 minutes), the
pressure cooker may still be heated and cooking the food slightly.
• QUICK RELEASE is recommended when cooking foods that you wish to be Medium or Medium-Rare such
as Beef Roasts or Lamb. This will release the pressure quickly and prevent the food from over-cooking.
HOW TO USE THE “PRESSURE COOK TIME
Setting your own cook time is ideal for cooking food according your own mouth feel and food weight light or
heavy. The programmed cook time can be adjust pressure cooking time as your favor.
1) Prepare desired food and place into cooking pot.
2) Secure the lid onto the unit, turn it Counter-clockwise to lock it in place properly.
3) Make sure the Pressure Limiting Valve (3) is set to the “Airtight” position.
4) Plug the power cord into a 220-240V power outlet.
5) The LED screen will display 00 00.
6) Press the Menu Select Button to scroll through the Menu Selections, press “Pressure cook time” to entre the
pressure cook time program, then you can press MIN button to desired time frame. (EX: If you want to set
RICE function to 15 minutes, press Menu button to select RICE function, the LED screen will display 00 12,
press “Pressure cook time” button one time, go on press MIN button three times the LED screen will display
00 15).
7) Once the time has been selected, press the START button.
NOTE: The LED screen will not immediately display a “P” until the proper pressure has been achieved. This
may sometimes take up to approximately 5-10 minutes.
8) When optimum pressure is achieved, the LED screen will display P0 15
9) When the unit has pressurized, it will begin to pressure-cook the food. The programmed time will begin to
count down until it reaches zero.
10) When cooking is complete, the pressure cooker will beep 6-times and automatically go to Keep Warm. The
LED Screen will display END.
11) The Keep Warm indicator light will light. This indicates the Pressure Cooker is Naturally Releasing the
pressure. (See Notes & Tips #4)
13INSTRUCTION MANUAL
HOW TO USE THE PRE-SET DELAY TIMER:
If you wish to program your pressure cooker to automatically cook prepared food, you can Pre-Set the pressure
cooker for up to 24-hours. (*See Tip #5 *Caution)
1) Prepare desired food and place into cooking pot.
2) Secure the lid onto the unit, turn it Counter-clockwise to lock it in place properly.
3) Make sure the Pressure Limiting Valve (3) is set to the “Airtight” position.
4) Plug the power cord into a 220-240V power outlet.
5) The LED screen will display 00 00.
6) Press the DELAY TIMER button, then the HOUR button to increase the timer by 0.5-hour increments up
to 10-hours, thereafter 1-hour increments (indicated on the LED screen). The maximum Preset period is
24-hours in half-hour increments. After 24-hours, the timer will start a new cycle. (The time that displays on
the LED screen shows how long the user wants the unit to wait before the cooking process begins.
EX: If you wish to program the pressure cooker to automatically turn on in 3-hours, press the DELAY TIMER
button, then the HOUR button until the LED screen displays 3.0 00).
7) After choosing the desired pre-set time, choose your pre-set function or cooking time.
MENU SELECT BUTTONS:
- Select one of the thirteen pre-programmed MENU SELECT BUTTONS and press START. Your pre-set timer
has been programmed.
- After the pressure cooker counts down to automatically turn on, it will follow the cooking sequence for
Menu Button Operation.
- When cooking is complete, the pressure cooker will beep 6-times and automatically go to Keep Warm.
(See Notes & Tips #5)
NOTES & TIPS #5:
• It is recommended to release the pressurized steam when the “Keep Warm” LED stops flickering as the
pressure cooker will have lower pressure. This will require a little more time. (Approximately 5-10 minutes).
• During the cooking process, when the pressure cooker enters into the Pressurized Sequence, the first digit
on the LED screen will display the letter “P”. At the same time, the power supply to the Heater (18) will shut
off.
• For foods with a high volume of liquid (Stews, soups, porridges, etc.) IT IS NOT RECOMMEND TO USE QUICK
RELEASE. This is to avoid liquid splatter from the ventilation in the Pressure Limiting Valve (3).
• Use the NATURAL RELEASE: User should wait for the temperature to drop and the Float Valve to sink on its
own prior to opening the lid.
*CAUTION: It is not recommended to use the Pre-Set Timer function to cook foods that may spoil.
Leaving raw foods inside the pressure cooker for long periods of time prior to cooking may result in
the food spoiling. Cook food that can be left out such as rice, beans, grains or other foods that will not
spoil.
14HOW TO BROWN/SAUTÉ INSIDE THE PRESSURE COOKER:
Certain recipes suggest that you brown meat or sauté vegetables to ensure juices are retained during cooking. It
also provides nice coloring when meat or vegetables are cooked and ready to serve.
To brown or sauté:
1. Open and/or remove the lid depending on your preference.
2. Select the BROWN menu setting and press START to manually begin the heating process.
3. Put food into the Inner Pot (8) and cook to brown or sauté to desired consistency.
NOTES & TIPS #6:
• During Browning/Sautéing, the pressure cooker will automatically set itself to Keep Warm when it reaches
a high temperature. (Approximately 5-minutes). If you are browning/sautéing a large quantity of food, you
may need to allow the unit to cool slightly for 1-2 minutes before pressing START again. It is possible that
the internal sensor will prevent any other buttons from activating to avoid over-heating.
4. W
hen ready to start the pressurized cooking cycle: Press the CANCEL button to cancel the browning/
sautéing process.
5. Close the lid and secure properly.
6. Follow the instructions on cooking to your preference.
HOW TO USE THE KEEP WARM FUNCTION:
Food can be prepared at an earlier time and kept warm inside the pressure cooker using the Keep Warm
function. It is not recommended to keep food warm for over 4-hours. Additional time may cause a change in
flavor, appearance and cause food to spoil.
1) Prepare desired food and place into inner pot.
2) Secure the lid onto the unit and turn it Counter-clockwise to lock it in place properly.
3) It is recommended to set the Pressure Limiting Valve (3) to “Exhaust” at this time since you are only keeping
food warm and not pressurizing.
4) Press the Keep Warm button. The indicator light will illuminate solid. The pressure cooker will start
maintaining a lower temperature to keep warm.
5) To cancel, simply press the Cancel button until indicator light is no longer illuminated.
6) Remove food and serve.
7) Unplug power cord and allow to cool completely before dismantling and cleaning.
HOW TO COOK WITH FROZEN FOODS:
Cooking frozen food inside a pressure cooker is quick and easy but has certain restrictions. Only cook individual
cuts of frozen meats that are up to 1 inch thick, the cooking time does not need to be altered. Pressure will not
be achieved until the internal temperature has reached a preset level. If the recipe states the meat be cooked for
10 minutes after pressure has been achieved, it will still be the same, but will take longer to come to the pressure
point.
It is not recommended to pressure cook larger cuts of frozen meats such as a whole roast, a block of frozen
ground meat or a whole chicken. Larger cuts will require increased cooking times of up to one third more, and
the results may not be the same when compared to meats that were thawed (or at least partially thawed) and
browned before cooking.
15INSTRUCTION MANUAL
HOW TO USE THE PRESSURE COOKER FOR STEAM:
1. Place a small, heat-resistant basket on wire rack (not included) in cooker pot.
2. Add water to a level just below bottom of rack.
3. Place food on rack. Do not fill pot more than 4/5 full with food.
4. Close lid on cooker and lock into place. Turn pressure regulator knob to EXHAUST.
5. Select the STEAM menu setting, the LED screen will display 00 01,
6. Set the desired cooking time by pressing MIN button once for each additional minute or hold for rapid
increase.
7. Press the START button to begin cooking. Once enough steam pressure has been reached the first two
digits of the display will show ”-- “, at this point the steam timer will count down. Once the timer reads “END
“ the cooker will switch to WARM mode. When finished press CANCEL to end operation. CAUTION! Never
put your face or hands directly over the cooker when removing lid, escaping steam can cause serious burn
injury.
HOW TO USE THE PRESSURE COOKER FOR SLOW COOK:
1. Close lid on cooker and lock into place.
2. Turn pressure regulator knob to EXHAUSE.
3. Press SLOW COOK button, the LED screen will display 00 0.5 (this means 30 minutes cooking time).
4. Set the desired slow cook time by pressing the HOUR button once for each additional 30 minutes. The
longest slow cook time is 9.5 hours.
5. Press START button to begin cooking.
6. The cooker will begin to count down in half hour (30 minute) 0.5 increments after the water temperature
reached 90-95°C. When display shows “END “ the appliance will switch to WARM mode. Press CANCEL to
end operation.
16Cooking Guidelines
Below is a list of suggested cooking times
for certain food items
Cooking Time
Meat (in Minutes)
Beef, stewing meat 15 – 20
Beef, pot roast, steak, rump, chuck, blade
35 – 40
or brisket, ribs, shanks
Oxtail 40 – 50
Chicken breasts 8 – 10
Whole chicken 20 – 25
Chicken pieces 10 – 15
Dried Beans Cooking Time
& Legume (in Minutes)
Split peas 10 – 15
Chickpeas 20 – 25
Red and white kidney beans 20 – 25
Samp 45 - 50
Soy beans 20 – 25
*All times are soaked cooking times
Please only use wooden or plastic utensils in the MFC!
17Rice
Rice Liquid/Butter Yield (when
Amount or Oil fluffed)
1 cup 1½ cups + 1 tbsp
3 cups
Serves 2 - 3 people butter or oil
1½ cups 2¼ cups + 1 tbsp
4 to 4½ cups
Serves 3 -4 people butter or oil
2 cups 3 cups + 2 tbsp
5½ to 6 cups
Serves 4 - 5 people butter or oil
3 cups 4¼ cups + 2 tbsp
7½ to 8 cups
Serves 5 - 6 people butter or oil
4 cups 5 cups + 2 tbsp
11 to 12 cups
Serves 6 - 7 people butter or oil
The oil or butter is to prevent the rice from
foaming while cooking in the MFC
18Samp &
Beans Cooking Instructions
1. rain samp, add the soaked/cooked samp with
D
600ml of water to the MFC
Ingredients
(Serves 3 - 4) 2. Seal the lid
3. Ensure pressure valve is in airtight position
1. 250g samp and bean
4. Select the “Samp” function and press start
mix
2. 600ml of water 5. I t will build up pressure and start counting down,
3. Rinse samp and bean once it is done it will beep
mix until water is clear 6. Leave it for about 10 to 15 minutes
4. You may leave it to 7. Open the valve to release excess pressure
soak overnight, or add
8. Serve with any main meal
it to a pot of water
bring it to a boil,
cook it for 5 minutes,
NB!!!
remove it from the
heat and soak it for 1
hour in the pot it was Be careful when opening valve as
boiled in steam can burn
19Beef
Stew
Ingredients
(Serves 4)
1. 400ml water
2. 1 tbsp of oil
3. 1 medium onion
chopped
4. 2 carrots cut into
medium sized cubes
5. 2 potatoes cut into
medium sized cubes Cooking Instructions
6. ½ tsp of garlic
7. 500g of stewing beef 1. Select the “Beef Stew” function on the MFC
cut into medium sized 2. dd the oil, onion and garlic and fry it for 2 – 4
A
cubes minutes
8. 1 packet of Knorr
3. Add the beef and fry until brown
country hot pot cook
in sauce 4. ix the Knorr cook in sauce with 400ml water,
M
pour into the pot
Optional 5. Add all the other ingredients to the pot
Vegetables 6. Seal the lid
7. Ensure pressure valve is in airtight position
1. 1 sweet potato cut
into medium sized 8. I t will build up pressure and start counting
cubes down, once it is done it will beep
2. 1 butternut peeled
9. Open the valve to release excess pressure
and cut into medium
sized cubes 10. Serve with rice or pap
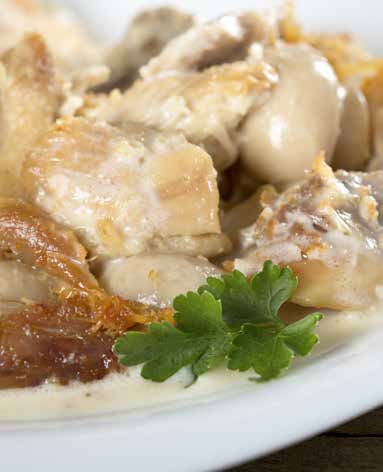
20Chicken
Stew
Ingredients
(Serves 4)
1. 1½ tbsp spoon of oil Cooking Instructions
2. 500g chicken pieces
1. Select the “Beef Stew” function. Add oil, onion,
3. 125g mushrooms
mushrooms and fry for 3 – 4 minutes
chopped
4. 1 onion chopped 2. Add chicken and fry until light brown
5. 125g cauliflower 3. ix water, milk and cream with the cook in
M
6. 1 cup green beans sauce. Add all the other ingredients to the pot
chopped 4. Seal the lid
7. 200 ml water 5. Ensure pressure valve is in airtight position
8. 300 ml milk
6. I t will build up pressure and start counting
9. 100 ml fresh cream
down, once it is done it will beep
10. 1 Knorr chicken &
mushroom cook in 7. Open the valve to release excess pressure
sauce 8. Stew ready to serve with pap or rice
21RICE
Ingredients Cooking Instructions
(See cooking guidelines
for additional portion 1. Select the “Rice” function on the MFC
information) 2. Add the oil / butter
1. 2 cups of rice 3. Add the water
2. 3 cups of water 4. Add the rice
5. Seal the lid
3. 2 tbsp butter or oil
6. Ensure pressure valve is in airtight position
7. It will build up pressure and start counting
down, once it is done it will beep
8. Leave the pot for about 5 minutes
9. Open the valve to release excess pressure
10. Rice ready to serve
22Tripe &
Onions
Ingredients
(serves 6 - 8)
1. 2 kg cleaned ox tripe
2. 10ml oil
3. 3 chopped onions
4. 2 garlic clove crushed
and chopped
Cooking Instructions
5. 2 tbsp coarse salt 1. Set the MFC to “BROWN” function. Once it is
6. 2 tbsp coarse black warm fry the onions in oil for 2-3 minutes
pepper 2. Add all the ingredients to the MFC and stir briefly
7. 50ml of vinegar
3. Manually set the MFC to cook for 60 minutes
8. 125ml of red wine
9. 100ml water 4. Serve with rice or pap
10. 3 Green chillies 5. This is a delectable tripe recipe, that’s very quick
coarsely chopped to prepare and cook!
23Oxtail
Ingredients
(serves 6)
1. 1.2kg oxtail
2. 1 onion finely
chopped
3. 3 leeks chopped
4. 2 carrots chopped Cooking Instructions
5. 3 cloves garlic
chopped 1. rown the oxtail for 2-3 minutes, then take them
B
6. 2 chillies finely out of the pot and keep aside whilst you prepare
chopped the other ingredients
7. 3 sprigs of fresh 2. Finely chop the onions, and chillies
rosemary
8. 3 sprigs of fresh Thyme 3. Chop the leeks, carrots and cloves
9. 3 sprigs of fresh 4. dd all the above ingredients including the
A
Parsley oxtail into the MFC pot
10. 2 tins of chopped and
5. Stir the ingredients briefly
peeled tomatoes
11. 2 beef stock pots 6. lose the lid and ensure the release valve is set
C
12. 500ml red wine to airtight
13. Salt and black pepper
7. anually set the cooking time to 60 minutes
M
to taste
and press start
14. 6 baby potatoes
peeled 8. Serve with pap, rice or mash potato
24Braised
Lamb
Cooking Instructions
Shanks 1. Put the flour and the 4 shanks into a plastic bag
and toss the shanks around to coat them in the
Ingredients flour. The excess flour can be used to thicken the
(serves 4) gravy should you prefer
2. Set the MFC to BROWN, add the olive oil, and
1. 4 lamb shanks
brown the shanks
2. 2 peeled tomatoes, cut
(2 at a time if necessary), then take them out and
in half
set them aside
3. ¼ cup plain flour
3. Fry onion, carrots and garlic for 5 minutes stirring
4. 40ml olive oil
occasionally
5. 1 onion chopped
4. Then add the tomatoes, wine, rosemary, salt and
6. 3 carrots, peeled and
pepper and beef and chicken stock pots
thickly sliced
5. Bring the ingredients to the boil, stirring
7. 1 garlic clove crushed
regularly
8. ¾ cup red wine
6. Add the lamb shanks to the pot, season with salt
9. 1 beef stock pot
and pepper and spoon some of the sauce onto
10. 1 chicken stock pot
the lamb shanks
11. 1 tbsp Robertsons
7. Seal the lid and set the MFC to cook for 40
barbecue spice
minutes
12. 1 tblsp coarse salt
8. Serve with rice or mash potato
13. 1 tblsp coarse black
9. A traditional family favourite recipe, perfect for a
pepper
Sunday lunch or anytime meal!
14. 3 sprigs of rosemary
25Whole
Chicken Cooking Instructions
1. I n a small bowl, combine paprika, thyme, salt,
Ingredients and pepper. Rub the seasoning over the outside
(serves 6-8) of the chicken
2. S tuff the chicken with a garlic clove, fresh
1. 1 whole chicken (1.5kg rosemary and onion quarters
– 1.8kg)
3. Heat oil in the MFC
2. 1 tbsp olive oil
4. dd the chicken, breast side down and cook for
A
3. 1 tsp paprika
6-7 minutes, turning 2 or times to brown the
4. 1 chicken stock pot whole outside of the chicken
5. 250ml water
5. F lip the chicken and add chicken stock pot with
6. 1 tsp thyme 250ml of water, lemon juice and garlic cloves
7. Ground black pepper
6. S eal the MFC lid and set the MFC to cook for 35
8. ½ tsp salt minutes
9. Fresh rosemary
7. elease the pressure and let the chicken stay in
R
10. 2 tbsp lemon juice the MFC for another 5 minutes before carving
11. 6 garlic cloves and serving
26Cheese
cake
Ingredients
(Serves 8)
1. 200g digestive biscuits
(crushed)
2. 80g butter, melted
3. 500g thick plain cream Cheesecake Filling
cheese
4. 125ml castor sugar 1. eat the cream cheese and sugar until smooth
B
5. Grated rind and juice 2. Add the lemon rind and juice, eggs and mix well
of 1 lemon 3. Pour this mixture into the baking pan
6. 3 eggs, beaten 4. Wrap the base and sides of the baking pan in a
7. Raspberries for double layer
decorating of foil
5. Place a trivet into the MFC
6. Add 500ml water and lower the baking pan onto
Cheesecake the trivet
7. Seal the MFC lid and set it to cook on high
Base pressure for 25 minutes
8. Release the pressure after the time is up and
1. ix the biscuits and
M
remove the baking pan from the MFC
melted butter
9. Remove the foil from the baking pan
2. Press biscuit and 10. Use a paper towel to soak any liquid or moisture
butter mixture into an that may have formed on top of the cheesecake
18cm baking pan 11. Refrigerate for a few hours until well chilled
3. Put it into the freezer 12. Remove from the pan and place on a serving
while you prepare the plate
filling 13. Decorate with raspberries
27Cares about you
Head Office:
PO Box 4433, Tzaneen, 0850
Block E, Medentia Park,
15 Peace street, Tzaneen, 0850
Limpopo Province, South Africa
Call Centre:
+27 (0) 87 980 0345
Fax: +27 (0) 87 980 1717
E-mail: info@cook4life.co.za
Web: www.cook4life.co.zaYou can also read