Create High-Quality Light Fixtures in Unity - Expert Guide Pierre Yves Donzallaz - Manual
←
→
Page content transcription
If your browser does not render page correctly, please read the page content below
Expert Guide
 Create High-Quality
Light Fixtures in Unity

       Pierre Yves Donzallaz
         Unity Technologies

          18 January 2019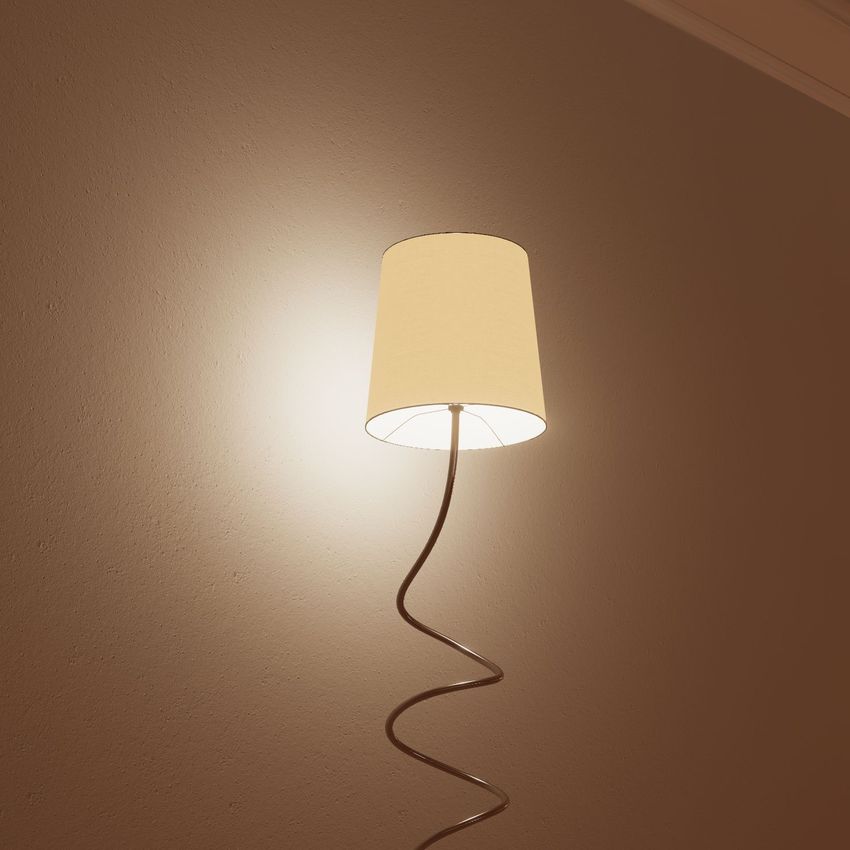
Introduction
A light c
ookie is a mask used to block parts of a light source in order to control the shape of the emitted light.
They can also be called “gobos”, “cucoloris” or “flags”, depending on the industry and their use case.
This expert guide presents several advanced techniques to create high-quality light fixtures in Unity, using
2D and cubemap light cookies, and taking advantage of the advanced shaders available in Unity’s High
Definition Render Pipeline. You can use these workflows in projects such as games, architectural
visualizations, films, and simulations.
Today’s real-time rendering engines cannot render all the intricate shadow details produced by a light
fixture: they are unable to produce ray-traced soft shadows efficiently for lower-end platforms, let alone
sharp refractive caustics. User-generated cookies can allow for better artistic control of the shadows and
the addition of creative details in the lighting.
Furthermore, real-time Point Light shadows are still a performance dilemma for modern hardware, so
creating environments with a large number of shadow-casting Point lights remains a challenge. This is why
baked light cookies are crucial to generate high-quality lighting for real-time applications.
Pierre Yves Donzallaz Unity Technologies 2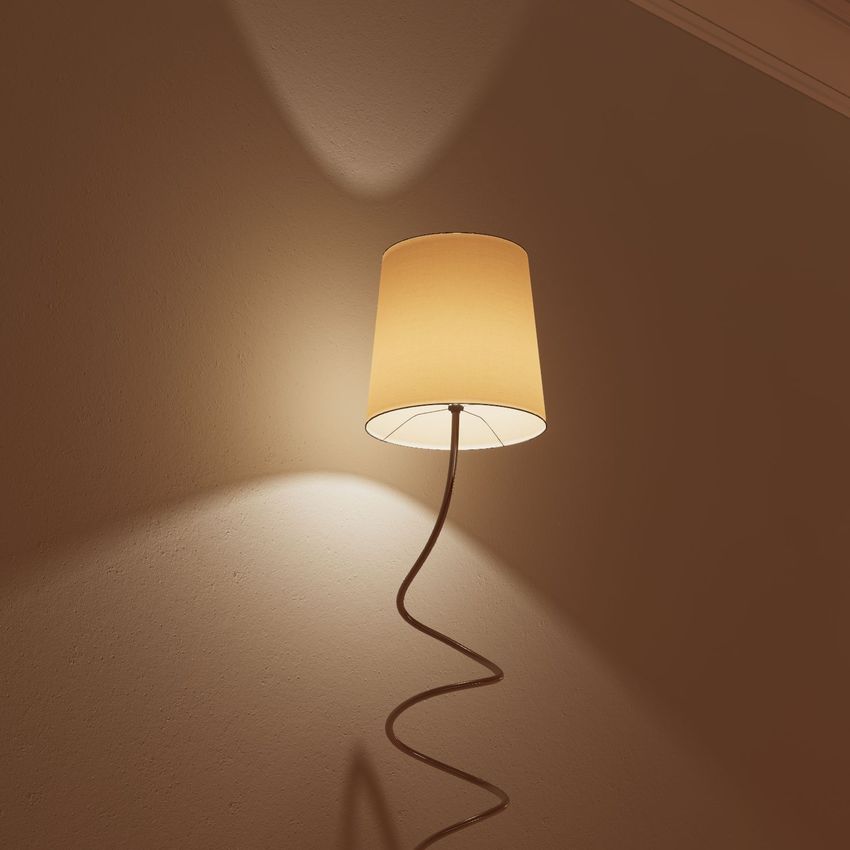
Pierre Yves Donzallaz Unity Technologies 3
Pierre Yves Donzallaz Unity Technologies 4
Pierre Yves Donzallaz Unity Technologies 5
Common lighting issues
In real-time applications, light sources often rely on glowing, detail-less “blobs” to simulate their emissive
parts. When created carefully, it is an acceptable way to create performance-efficient lighting, especially
when dealing with lower-end platforms. However, many projects on PC and consoles, including AAA games,
often fail to create convincing light sources.
First of all, when you tune the lighting and materials in Unity, ensure the colors of the
emissive surface and the light match properly, because experienced eyes will immediately
notice color discrepancies between the emitter and the resulting lighting. You can use the
swatches in the Unity color picker to store predefined color temperatures, to prevent too much color
diversity. You can also save color swatches as Assets and share them between team members. In addition,
the value or brightness of the color should be 100%, because you should only affect the intensity of the light
via the dedicated Intensity property, rather than the light color.
Another common problem is the lack of consistency between emissive intensity and the resulting lighting.
This results in very obvious light leaking (especially specular leaking) that immediately breaks the
photorealism of the Scene. This problem is even more obvious if there is a lack of realistic shadows (or
light cookies).
Discrepancies between emissivity and lighting Believable emissive source and resulting lighting
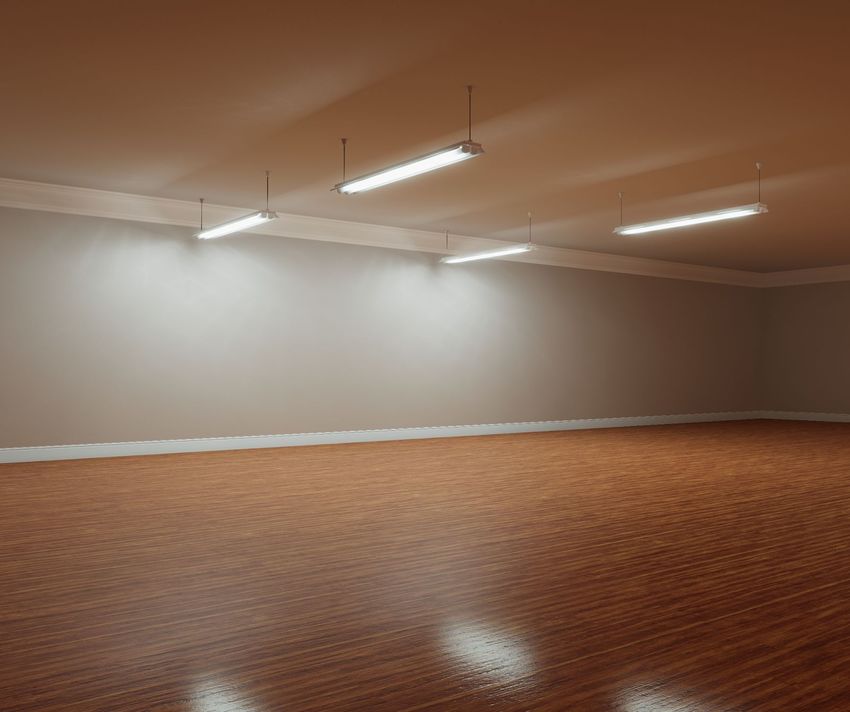
Fluorescent tube lights are also a great challenge in real-time graphics, because they require several
lighting features to look truly convincing, such as soft shadows, line (or capsule) light, and specular
roughness override.
Lack of self-shadowing for the fluorescent lamp Believable light occlusion from the lamp’s reflector
Pierre Yves Donzallaz Unity Technologies 6
Unity’s High Definition Render Pipeline can tackle most of these challenges, and allows you to simulate
tube lights with minimal burden.
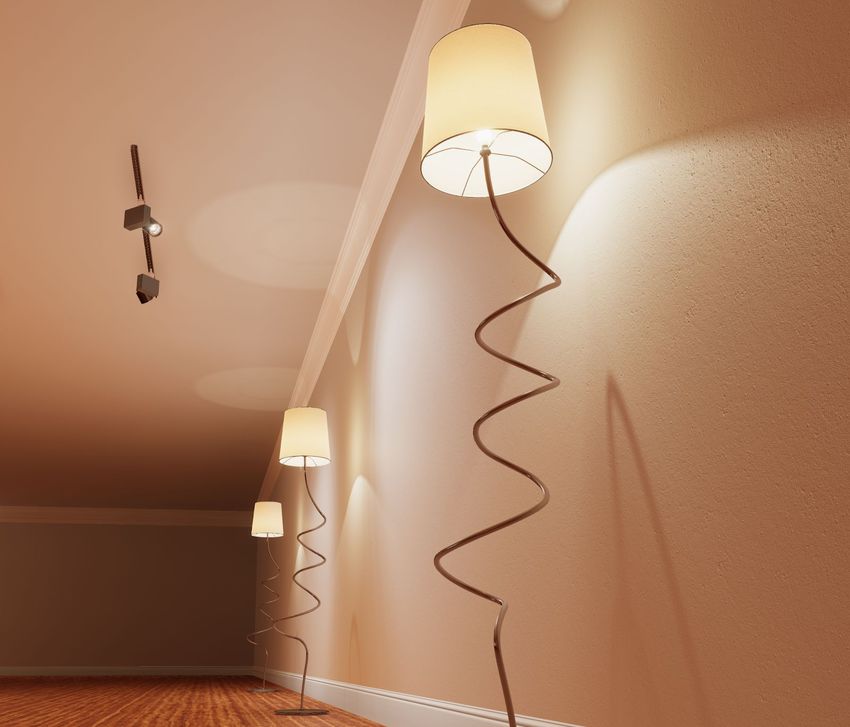
Finally, the emissive parts are often not convincing. Adding fine geometry and texture details can
dramatically raise the realism: a soft lighting falloff on the shade and the hint of a bulb goes a long way! For
that matter, HDRP offers great physically-based shaders with transparency, translucency, transmission,
refraction and distortion to simulate light on different surfaces (for example, translucent light shades,
metallic reflectors, and frosted glass).
Lack of emissive details and self-shadowing Believable self-occlusion and soft translucency
Pierre Yves Donzallaz Unity Technologies 7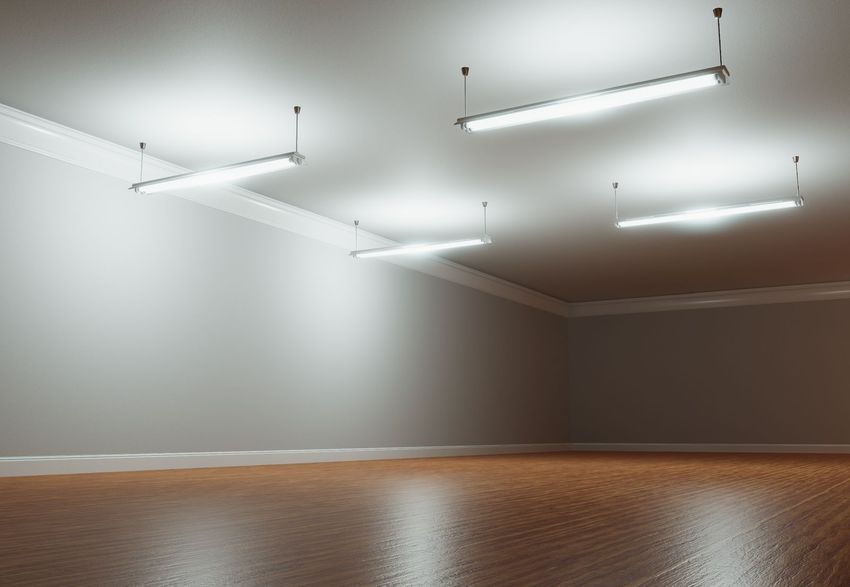
Creating cookies
This section explains how to capture lighting and shadows in 2D Textures and cubemaps, using offline
rendering techniques. The tools used in these examples are Photoshop, 3ds Max (with the included Arnold
renderer), and Unity itself. You can use other image manipulation programs and 3D packages to generate
these textures; the only major requirement is that the renderer you use to bake the cubemaps must support
a form of texture baking. For example, Nvidia’s Iray and Autodesk’s Quicksilver renderers do not support the
“Render to Texture” functionality to bake the cubemaps easily with 3ds Max. Arnold, V-Ray, Corona, and the
deprecated Mental Ray do support it.

2D textures cookies
Generating 2D cookies for Spot Lights is a relatively simple task, and can radically improve the look of the
default Spot Light in Unity. The High Definition Pipeline accepts colored cookies. The Built-In Render
Pipeline only accepts grayscale ones. Therefore, you can take advantage of HDRP’s abilities by adding
subtle color fringing and refraction effects to your cookies.

               Default Unity Spot Light                               User-created 2D cookie

You can experiment with blur filters, adjustment filters, gradients, and texture effects, to create unique
cookies with elaborate details. One particularly effective workflow for home spot lamps is to use radial blur
to create circular and asymmetrical shapes, and use a color gradient filter to generate the radial falloff and
sharper colored details. Finally, a key factor is to ensure that the borders of the texture are 100% black, to
prevent any obvious clipping at the edge of the light volume when using physically-based light intensities.

     Random pattern                Radial blur            Radial color gradient       Radial attenuation

Pierre Yves Donzallaz                            Unity Technologies                                         8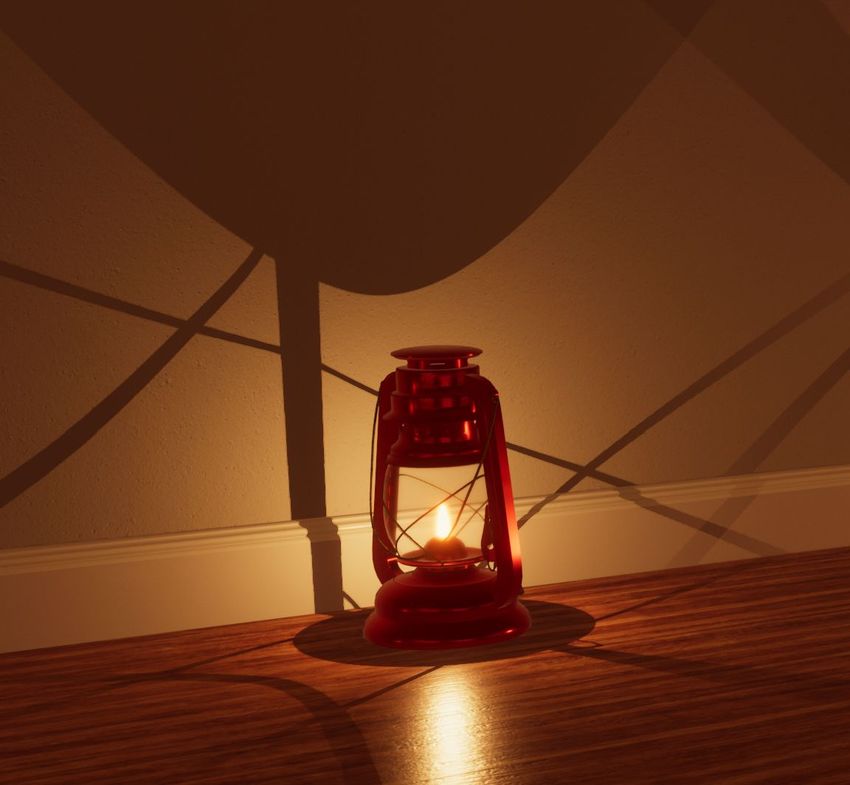
Cubemap cookies (3ds Max and Arnold)
Unit setup
First of all, specify the correct units in your DCC (Digital Content Creation) package. For example, in 3ds
Max, under Customize > Unit Setup… > System Unit Setup, make sure 1 unit = 1.0 Meter. This way, your
object will have the correct size when you import it into Unity. This is extremely important when dealing
with physically-based renderers like Unity’s High Definition Render Pipeline, which expects 1 unit to equal 1
meter. This has a tremendous impact on the lighting propagation and the look of your Scene!
Baking sphere
For this section, we’ve prepared a fully set-up MAX file for the baking sphere with a light fixture. Download
this file: W
allLamp.max. You can use this file as a starting point to experiment with Arnold.
If you want to manually create the sphere, follow these steps (based on 3ds Max workflow):
1. Create a cube and convert it to an Editable Poly.
2. Apply a Normal modifier to ensure the normals are facing inwards. Disable backface culling in the
object’s properties to see the interior of the box.
3. Apply a TurboSmooth modifier (3+ iterations) or a Quadify Mesh modifier to ensure the box is
subdivided sufficiently for the next step.
4. Apply a “Spherify” modifier to constrain the mesh into a perfect sphere. This way the cubemap won't
have any (minor) deformation.
5. Separate each face, rename them top, bottom, left, right, back and front.
6. Because you started from a box, the UV unwrap should already be perfect, but you can double check
each face covers the entire UV space, [0,0] to [1,1].
Pierre Yves Donzallaz Unity Technologies 9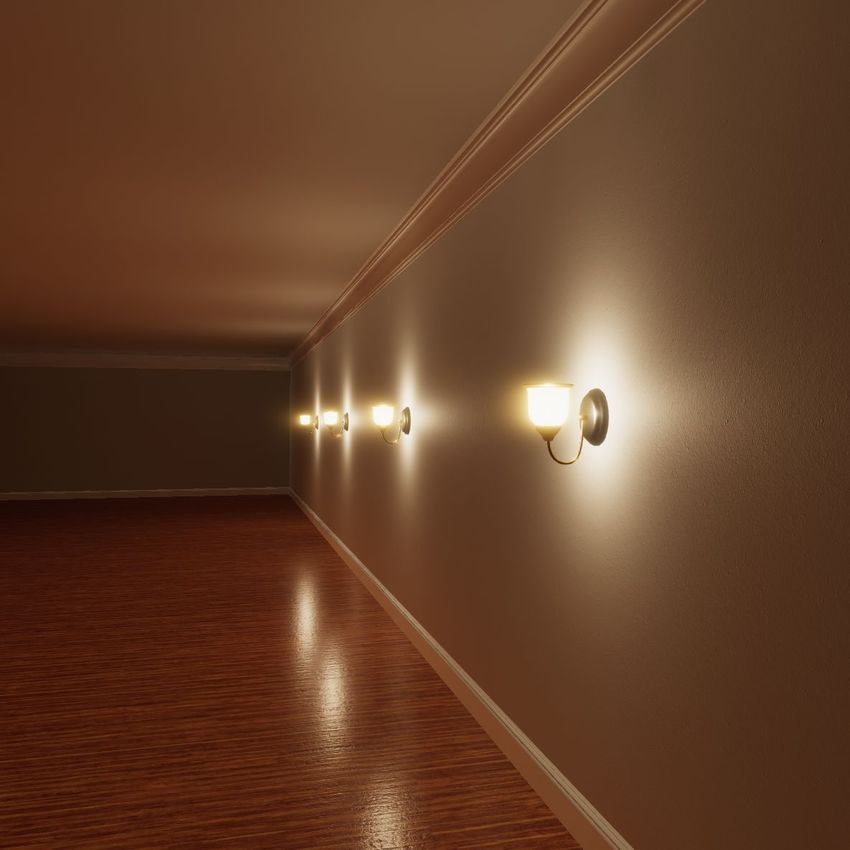
Arnold Materials
To achieve maximum rendering quality for the cookie, assign Arnold’s physical materials (Standard
Surface) to the light fixture.

The critical parameters for this scenario are:

   ●    Base color

           ○   This defines the color of the material,
               including metals. You can also use the
               specular color to produce edge tinting for
               metals or complex surfaces. You’re
               mainly capturing diffuse lighting and
               shadows here, so this parameter is only
               critical when dealing with indirect lighting
               that slightly tints the color of the
               shadows.

   ●   Roughness (under Specular)

           ○   This controls how smooth the material
               will appear. When this value is set to “1”
               the effect is a perfect mirror.

   ●   Transmission

           ○   This defines how much light is
               transmitted through the material. The
               higher the value, the more transparent
               and clear the material becomes. You can
               use this to simulate translucent
               lampshades and glass.

   ●   Emission

           ○   This controls the amount of self-emitting
               light for a surface. Usually, assigning a
               light to a mesh is more efficient, provides
               shorter rendering times, and produces
               renders with less visual noise.

Pierre Yves Donzallaz                            Unity Technologies                           10
Arnold Light
Arnold ignores standard 3ds Max lights
during the rendering of the sphere. You
must use an Arnold Light to generate light.
You cannot export Arnold Lights via FBX,
so you should still attach standard 3ds
Max lights to the lamps. You can export
3ds Max lights via FBX, and Unity can
interpret them correctly. This has the
benefit of providing a Light GameObject
with the correct Transform, so you
shouldn’t need to adjust the orientation of
your light cookie in Unity.
The key parameters of an Arnold Light are:
● Type, such as “Point” and “Mesh”
● Color
● Intensity and E
xposure
● Samples
White pixels should appear in unoccluded
parts of the cookie. If these appear grey,
you need to slightly increase the Arnold
light’s Intensity or Exposure values. Do
this carefully so that you don’t overexpose
the cookie; if the Arnold light intensity is
too high, soft shadows might be clamped and details will be lost. If you want to fully adjust the color of the
light in Unity, use a pure white light color.
The Samples value controls the noise in the direct light, and the corresponding soft shadows that the light
produces. Samples with higher values have less noise, but a longer rendering time. High sample count (4
and above) combined good filtering in the Arnold settings can produce almost noise-free results.
The Contribution panel contains parameters to help you achieve faster
bakes and correctly balanced cookies.
First of all, you should disable the “Specular” contribution, because the
baking sphere is only intended to capture direct (or diffuse) lighting.
In addition, if you rely on Global Illumination in your Unity Scene, you can
lower or entirely disable the Indirect value. This results in deeper, darker,
shadows in the baked cookie, and it greatly reduces the rendering time
when set to 0.
Pierre Yves Donzallaz Unity Technologies 11Shadow and penumbra softness
Like many offline renderers, Arnold offers the ability to assign a light to a mesh, thanks to the “Mesh” light
type. This produces a physically-based shadow blur and penumbra. Typically, this mesh would be the
glowing part of a light bulb or a flame.
In reality, shadows produced by light sources are often a lot more diffused (or blurrier) than expected. To
artistically retain shadow details, you can use a Point or Cylinder light instead of a Mesh light. To control
the softness of the penumbra, change the Radius of the Point light: the smaller the radius, the sharper the
shadows.
Arnold Point Light, 0 cm Arnold Point Light, 1 cm Arnold Mesh Light (~ 2.5 cm)
No penumbra with unrealistic Artistic penumbra with soft shadows Physically-based penumbra with
stencil-like, “video-gamey”, shadows and retained shadow details many “lost” shadow details
You need to apply some trial and error to find a good balance between shadow sharpness and physical
correctness, because unnaturally sharp shadows are uncanny. Mesh lights might produce slightly weaker
lighting compared to their analytical counterparts (such as Point & Cylinder).
The distance between the light source and the sphere also impacts the softness of the shadows: the closer
the sphere, the sharper the shadows. For this reason, scale the sphere so that it is representative of the
usual distance the light source is placed away from other shadow receivers.
Sphere diameter 1m Sphere diameter 5m
When you resize the sphere, you also need to adjust the Arnold light’s intensity (or exposure), to
accommodate for the physical inverse-square fall off of the lighting. Simply put, a larger sphere requires a
higher light intensity to ensure unoccluded parts of the cookie are white.
Pierre Yves Donzallaz Unity Technologies 12Self-shadowing
An important factor to consider is the self-shadowing of the fixture during the baking process. You should
hide very large occluding elements of the lamp that are irrelevant and negatively impact the lighting of the
prop itself.
Unnecessary self-shadowing Better self-shadowing
The light cookie casts unnatural shadows on the The light cookie doesn’t cast unnecessary shadows on
supporting arm and base of the lamp. the supporting arm and base of the lamp.
In this example, the circular support element and the light bulb are hidden during the rendering via Tools >
Layer Explorer… in 3ds Max. In the Layer Explorer, click the teapot icon for the corresponding object to
remain hidden during the baking.
Pierre Yves Donzallaz Unity Technologies 13Render to Texture setup
1. Select the group of 6 faces and then click 0
to open the Render to Texture dialogue.
The objects appear in the list in the center of the dialog box:
If you’re using Unity’s example MAX file (WallLamp.max), the sphere is ready to be rendered. The
images are output in a predefined local output path. You should change the rendering path for every
face to suit your project’s folder structure.
Switch to Individual mode and change the output
(and file type if needed).
2. To quickly set up the renderer with Arnold, load one of
Unity’s presets, available here: R
ender Presets.
You can load these presets via the drop-down list in the
Render Settings panel. They offer a different amount of
noise based on the chosen preset.
To learn more about the different types of noises and
how to mitigate them, have a look at Arnold’s
documentation.
For most renders showcased in this article, the Camera (AA) samples are especially important. If
the lamp uses transmission (for transparency and translucency), further samples are required for
both the indirect and the transmission properties.
ArnoldRenderToCookie ArnoldRenderToCookieDraft
Production quality render (~2 min) Very fast preview (less than 20 sec).
Pierre Yves Donzallaz Unity Technologies 143. If you do not use the provided rendering presets, a major parameter to consider is the image
filtering, under S
etup > Arnold Renderer > F
iltering.
You might be tempted to use the default Gaussian filtering with a higher radius to reduce the noise
in your rendered images. However, very high width values can introduce slight edge artifacts, which
produce visible seams on the cubemap.
Gaussian 4 Gaussian 10
Zoom 3x Zoom 3x
The following cubemap is rendered with the maximum Gaussian filtering width (10) to emphasize
the seam:
Pierre Yves Donzallaz Unity Technologies 15Unity can reduce or entirely fix the artifact, if
you open the Texture’s import settings and
tick Fixup Edge Seams.
4. Navigate to the bottom of the Render to Texture window and click Render. The frames are saved in
the output folder.
Pierre Yves Donzallaz Unity Technologies 16IES lights
Arnold lights do support photometric IES
lights, so you can render them into a 2D
texture or a cubemap cookie.
Select the Photometric light type and
locate the IES file on your machine.
IES lights that can be represented by a simple Spot Light can be baked into a
plane. IES shooting light in all directions (omnidirectional) will need to be
baked with a sphere to generate a cubemap.
Note, however, that a vast majority of IES profiles do not store a large
amount of angular information. The amount of data for every angle is
generally limited, and this produces blurry cookies in practice. Therefore,
you can either decide to create your own cookies from scratch, or import the
baked IES texture into Photoshop or Substance Painter to add sharper
details and colors.
Model export
Once the 3D model of the lamp is complete in your DCC package, export it as an FBX. Ensure Smoothing
Groups and Lights are exported, and untick TurboSmooth in case you want the mesh to tessellate based on
your TurboSmooth modifier settings. A ticked TurboSmooth means that, in practice, Unity does not display
the highly tessellated mesh, because it does not recognize the TurboSmooth modifier and cannot
re-tessellate the mesh on Asset import.
Notice that 3ds Max uses a different axis system than Unity. In 3ds Max, the up-axis is Z, and in Unity it is Y.
This introduces a rotation -90 degrees for the X-axis for the parent GameObject.
Photoshop setup
If you were to combine the faces in a 6 by 1 cubemap, import it directly in
Unity and apply it to a Light object, the faces of the cubemap would appear
incorrect; for example, they might be rotated or flipped. This is because Unity
expects the faces to be mapped in a specific orientation.
An elegant way to solve this issue is to use Photoshop and Smart Objects with
file linking to automatically handle the face orientation and the cubemap
creation. This means you don’t have to handle it with a UV unwrap that might
be resource-intensive because of the inverted normals on the sphere.
Pierre Yves Donzallaz Unity Technologies 17Here’s a Photoshop Document (PSD) file already set up properly for Unity: W
allLampCookie1024.psd.
Each face is orientated in the right direction so that you don’t have to handle this part yourself.
If the faces do not exist on disk in the location Photoshop expects them, the layer thumbnails display a red
icon. To restore the link to the image, right-click on each image and select Relink to File…:
Whenever you re-render the sphere, Photoshop automatically updates the cubemap. Photoshop does store
the current faces in the PSD, so you can undo the auto-update if the newly rendered faces are not
satisfactory.
Do not rotate, move or flip the faces. Doing so breaks the cubemap when Unity handles it.
Pierre Yves Donzallaz Unity Technologies 18Cubemap cookies (Unity Progressive Lightmapper)
Unity’s Progressive Lightmapper can also be used to generate cubemap cookies. The setup relies on
baking a sphere and using a Reflection Probe to generate an HDR cubemap. Once edited, this cubemap can
be used as a light cookie.
Baking setup
1. Place the lamp inside a sphere that has inward-facing normals. Tag all the shadow-casting and
light-receiving geometries Lightmap Static, so that the lightmapper considers them during the bake.
Assign all the necessary Unity Materials to the sphere and the prop.
2. Enable Baked Global Illumination (menu: Window > Rendering > Lighting Settings).w
3. Set the mode of the Light GameObject
inside the lamp to Baked. You can set
the Indirect Multiplier of the Light to 0 to
only capture the direct lighting. Tune the
Baked Shadow Radius as well, to
simulate a larger source of light and
create soft shadows.
4. Tune the Lightmapping Settings based
on your requirements. The settings in
the Lightmapping Settings screenshot
(right) can generate the lighting for one
single sphere in less than 30 seconds on
a high-end laptop. Consider increasing
the Lightmap Resolution to 1024 for
production rendering, to capture as
many details as possible. Note that this
does have the downside of increased
bake times.
5. Select Generate Lighting. Unity bakes
the lighting into the sphere.
Pierre Yves Donzallaz Unity Technologies 196. Add a Reflection Probe inside the sphere, and ensure its Near Clip remains within the sphere.
Create a Layer mask for the lamp so that it remains invisible to the Probe. This way, you don’t need
to constantly toggle the visibility of the lamp in the Scene while you iterate.
Assign the lamp to this new layer mask, then in the Probe’s Inspector, in the Culling Mask
drop-down, disable the Layer the prop belongs to.
Light fixture layer settings Reflection Probe culling settings
7. Generate the lighting again, so that the Probe captures the lighting information. The resolution of
the probe is set globally inside the HDRP Asset.
8. Open the EXR reflection file in Photoshop, and apply an
Exposure adjustment layer to tone the Texture appropriately.
Unity only requires 8-bit cookies, so reduce the color mode
from 32-bit to 8-bit to reduce the size of the file.
Pierre Yves Donzallaz Unity Technologies 20Limitations of the Progressive Lightmapper
The cookie baking workflow with Unity’s Progressive Lightmapper has several drawbacks compared to a
fully offline workflow with a 3D package and an offline renderer. At the moment, we only recommend using
the Progressive Lightmapper for uncomplicated light fittings with a majority of opaque materials. It isn’t
suited for production work with elaborate light fixtures that have advanced material properties. For now, the
advantages of rendering the cubemaps in a DCC package are:
1. The model is already created within the package, and it can be rendered with its own set of
materials, without impacting Unity’s model or Materials.
2. The geometry can use advanced modifiers (such as TurboSmooth) for the offline rendering, in order
to create extremely smooth shadows without the need to import very dense meshes inside Unity.
3. DCC applications usually have specific tools to render objects into textures and automate the
baking process.
4. Offline renderers can create noise-free textures in very little time.
Lights and Materials
In Unity, certain types of light cannot cast shadows, such as the Line light. This means baking cookies for
tube lamps requires more work, because it requires a row of shadow-casting Point lights instead, as a
workaround.
The Progressive Lightmapper does not support most of HDRP’s advanced shaders, such as colored
translucency and refraction. This means you need to create a separate set of materials for the baking
process, and potentially baking-specific prefabs. To simulate the translucency of a lampshade, convert its
material from an opaque to a transparent shader. This allows the Progressive Lightmapper’s light rays to
travel across the lampshade.
Progressive Lightmapper render with an Opaque Progressive Lightmapper render with a
Translucent material Transparent Standard material
Pierre Yves Donzallaz Unity Technologies 21The color of the transparency in Unity’s material does not affect the color of the shadows. You can simulate
colored transmission via a colored light, but this tints the color of the unoccluded lighting. You can also
generate two cubemaps (one with tinted light and one without) and compose them in Photoshop, but this is
a long and impractical process.
As a workaround, you can use emission. It does require a very large amount of indirect samples to look
acceptable (several thousand), and you need to set the Bounce value (in the Lightmapping Settings) to 1.
The baking time increases and might take several hours on a powerful CPU. Arnold can simulate the same
effect with a Mesh light within seconds.
Emissive flame, 20’000 indirect samples, 512 texels per meter, ~20 minutes
Without filtering With Gauss filtering
Seams
Seams often become visible when you increase the Shadow Baking Radius and use indirect light bounces.
Pierre Yves Donzallaz Unity Technologies 22Banding
Because Unity captures the cookie via a Reflection Probe, banding can happen, especially when dealing
with very low-intensity light props. For this reason, we recommend you use higher light intensity multipliers
to prevent precision errors where possible. By comparison, Arnold can produce near-perfect cookies,
without any noticeable artifact.
Reflection Probe EXR source Progressive Lightmapper Arnold in-engine result
(Greatly increased Gamma) in-engine result Perfect result
Visible banding
If banding remains an issue, you can also extract the faces from the lightmap itself and recombine them
into a cubemap.
Pierre Yves Donzallaz Unity Technologies 23Unity setup
Cookie import
Export the cubemap in your Asset folder. If disk space, transfer speed, asset size and processing time are
important parameters, then try not to store very large source PSDs in your Asset folder.
If you use the default Built-in Render Pipeline, use the following Texture settings. Set the Light Type to
either S
pot if the Texture is a 2D map, or Point if the Texture is a cubemap.
If you use the High Definition Render Pipeline, use the following Texture settings. Set the Texture Shape to
2D if the Texture is a 2D map, or Cube if the Texture is a cubemap.
You can manually adjust the resolution of each Texture. Try
to minimize the size of the Texture to reduce its memory
footprint, especially for cubemaps, which are six times larger
than regular 2D cookies. 128 to 512 cookies usually provide
enough detail. This parameter is less critical for projects that
only run on powerful desktop computers.
To set the global maximum resolution for all the cookies, select
the High Definition Render Pipeline Asset, navigate to the
Inspector menu and adjust the settings under C ookies.
Finally, select the Light GameObject in your Scene and assign
the Texture to its Cookie field.
Pierre Yves Donzallaz Unity Technologies 24Lighting setup
The Light GameObject in HDRP offers several new features. For our light fixtures, the following parameters
are critical. Have a look at the P
ost Processing Stack documentation to learn how to set up your Scene.
Exposure
Before lighting a Scene, it’s helpful to understand the concept of exposure value. Exposure is expressed
using the EV system, EV100 to
be exact, which corresponds to the Exposure Value at ISO 100. For example, a
typical sun-lit scene on a bright day returns an exposure value around EV 15, while a moonlit one returns an
exposure value of around EV -5. When it comes to interior lighting (the main use case presented in this
document), the exposure value ordinarily ranges between EV 4 and EV 7.
You can simulate these exposure values in Unity. Select
the Post-Processing Asset, navigate to the Inspector
window, and in the Auto Exposure settings, adjust the
Minimum (EV) property. Set the Minimum (EV) to 5 if you
want to ensure that the Scene is never overexposed (or
“brightened”) beyond the set level, so that the interior
remains as dark as you expect.
Unity only supports EV -9 (very dark star-lit night) to EV +9 (very dark overcast day), which mean that using
a physically-based sun intensity of 80,000 lux (EV 15) results in overbright Scenes. To accommodate for
bright sunlight, a common workaround in video game development is to use a sun intensity of only 5,000 to
10,000 lux, with Exposure Compensation set to 1.0, and a less extreme Minimum (EV). However, this is
obviously not an optimal technique to reach physical correctness.
The new post-processing features currently developed specifically for HDRP tackle this issue and offer
practically an infinite range of exposure values (EV 100). All the examples presented in this document focus
on interior lighting, so the limited exposure value range in the Post Processing Stack V2 should not cause
any problem.
Tone mapping
In computer graphics, tone mapping is the process of
adapting a computer-generated image with a High
Dynamic Range (HDR) for a display with a low(er)
dynamic range (LDR), such as a TV, a PC monitor or a
phone screen. Non or neutrally tone mapped images
displayed on a monitor usually exhibit clamped highlights
artifacts.
The current industry standard for tone mapping is based on the Academy Color Encoding
System (ACES). From a visual perspective, this technique allows you to simulate the
lighting response of film, with very bright pixels converging toward desaturated whites,
rather than pure saturated colors which produce a displeasing “linear” look often found in
older generations of games. This desaturation is important to maintain optimal shading for
Pierre Yves Donzallaz Unity Technologies 25brightly lit materials, and is therefore especially important when you work with strong emissive materials
and high contrast lighting.
On the other hand, ACES tone mapping can introduce a stronger contrast, especially if you initially adjusted
the lighting with the Neutral tone mapper which produces flatter visuals by default. With ACES, you can
naturally still reduce contrast and lift midtones, with parameters such as the Contrast or Gamma slider.
Neutral tone mapping ACES tone mapping
Highlights are too saturated and the overall image is flat Highlights converge towards white and the lighting
(i.e. it lacks contrast) response is more photorealistic (i.e. filmic)
Screen-Space Ambient Occlusion (SSAO)
Post-processing Ambient Occlusion is a
common effect in video games. It simulates
the occlusion of the ambient light between
surfaces with different depths, using only
information available on screen. It is effective
in organic and noisy environments. However, in high-quality rendering scenarios with clean materials and
Pierre Yves Donzallaz Unity Technologies 26flat, hard surfaces, it produces unwanted artifacts, such as dark corners and haloing around small objects.
In reality, corners are not dark (although many players and developers have become used to this
appearance in video games!).
SSAO Intensity 0.0 SSAO Intensity 0.5 SSAO Intensity 1.0
Emissivity
For the light-generating surfaces of a lamp, use a dedicated emissive texture instead of a flat emissive HDR
color. In reality, the healthy human eye can distinguish fine brightness detail when looking at bulbs and
lamps, so a solid emissive with no brightness variation does not give realistic results, especially for large
surfaces.
Flat emissive HDR color Emissive map (8 bit)
Use Photoshop to paint the texture in 16 or 32-bit mode with a very high F-stop intensity. This allows you to
create extremely bright highlights without needing to drastically raise the HDR color intensity in the
material. This also prevents common compression artifacts that can occur when you use 8-bit textures as a
source for emissivity.
Flat emissive HDR color Emissive map (32 bit)
Pierre Yves Donzallaz Unity Technologies 27Light intensity units
In the real world, intensities for bulbs and lighting systems are expressed with many different units,
depending on the industry and the manufacturer. Unity offers a wide range of units, based on your
workflows. In HDRP, the punctual light intensity is defined with “Lumen”, “Candela”, “Lux at x Meter” and
“EV”.
Lumen (lm) defines the luminous flux generated by a source of light. Simply put, it indicates the total
amount of light able to escape the light source. If the light was a liquid, lumen would correspond to the rate
of flow. See Wikipedia: Lumen for more information.
To measure the total output of a bulb or lamp, it is placed inside an integrating sphere, which has an inner
surface with a reflective white coating. A detector measures the diffused lighting in the sphere. For this
reason, lumens do not give any directional information about the light fixture. Lumens are particularly
useful when you need to simulate a spherical light that gives off the same amount of light in all directions,
rather than a focused one.
For example, if you simulate a typical light bulb of 800 lm, you could set the Light GameObject’s Intensity to
800. However, if you place a lampshade around the bulb, presuming that the shade does not cast shadows
in Unity, the received lighting on the nearby surfaces will be too strong, because the lampshade in your
scene does not occlude the lighting in real-time.
800 lm (bulb specifications) 400 lm to simulate lampshade occlusion
The nearby wall is too brightly lit. The light throw on the wall is more believable.
You also need to carefully consider
lumens when dealing with focused
lighting, such as Spot Lights. By definition,
lumens do not specify the direction of the
lighting. For this reason, if you simulate a
spotlight with a specification of 1200 lm
and a maximum angle of 110 degrees,
you need to enable the Reflector mode (previously called A
ngle affect intensity) in the Light inspector to
receive the correct amount of focused lighting.
Pierre Yves Donzallaz Unity Technologies 28Spot Lights with Reflector disabled Spot Lights with Reflector enabled
The given amount of light isn’t focused. The lighting is correctly focused.
When Reflector is enabled, the amount of light hitting a surface increases if the beam becomes narrower,
and decreases if the beam becomes wider (just like in reality).
Spot Light angle at 135 degrees Spot Light angle at 20 degrees
Reflector On Reflector On
Candela (cd) is potentially a more intuitive unit of measurement: it defines the luminous intensity observed
from a particular angle. 1 cd roughly equals 1 “candlepower”, which is the brightness of a standard candle.
See W
ikipedia: Candela for more information.
For example, if you stand in the total shadow of a light fixture, you might observe nearly 0 cd. If you stand in
its brightest area, you might measure several hundred candelas. It is important to note that the distance to
the light fixture has no influence. IES light profiles use candelas to define the intensity of the lighting from
many angles around the light. Unity does not support the IES file format; however, you can bake them into a
2d or cubemap cookie.
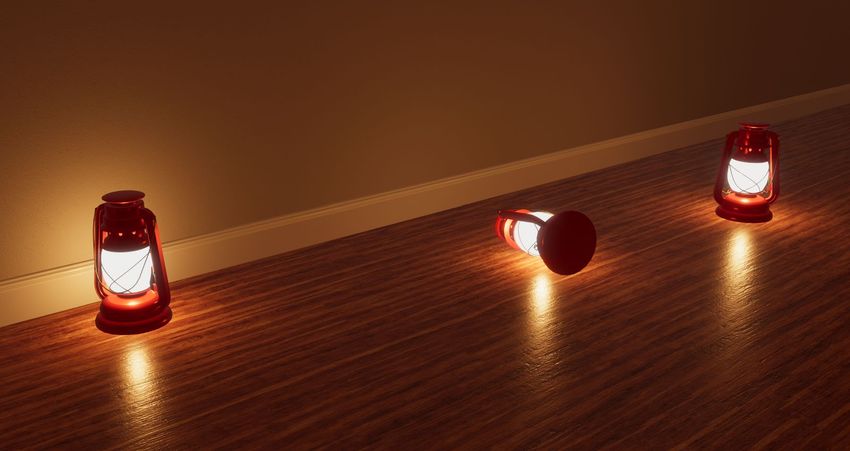
When light manufacturers state the number of candelas generated by their products, they usually only
provide the maximum intensity measured from the best possible angle. For a home spotlight (~ 3000 cd), it
will be in the central part of the light throw, whereas for an old gas lantern (~ 8 cd), it will be on its sides.
Lux at x meters defines how much light a surface receives at a given distance from the light source. This
type of measurement is especially useful when simulating professional movie lighting. Specifications for
Pierre Yves Donzallaz Unity Technologies 29professional spotlights and floodlights often include the lux measurements at arbitrary distances.
Architects, designers, and engineers rely on recommended light levels in lux when designing the lighting for
interiors and outdoor environments. For example, a road tunnel typically requires at least 20 lux, and a
domestic kitchen 150 lux, while 2000 lux can be considered the minimum when working on complex
machinery in an engineering laboratory. See Wikipedia: Lux for more information.
Color temperature
Unity offers 2 color models for maximum
flexibility. Enable Color temperature to
follow the incandescent model (Kelvin). You
can use an additional color Filter to
simulate lighting effects such as tinted
glass, reflectors, and colored gels. Due to the lack of automatic white balance in Unity, sticking to a
physically-based color temperature model can sometimes produce unnaturally warm and saturated lighting
in certain situations. This means incandescent lighting (typically between 2600 and 3200 Kelvin) generally
looks unrealistic before color correction.
In reality, the following halogen spotlights have
a color temperature of 3200 Kelvin. To simulate
the color adaptation of the human eye, or the
automatic or manual white balance of a
camera, you can either manually set a colder color or filter for the light, or use post-processing color
grading to adjust the temperature and tint to produce a more realistic and balanced look.
3200K 3200K Arbitrary color
No white balance. White balance via color grading. No white balance.
The resulting image is too warm. The resulting image is believable. The resulting image is believable.
Like with a real photo or video camera, if you apply the wrong auto-white balance preset (such as
incandescent instead of fluorescent), the colors are poorly altered. The following image shows the tube
lamps already using a correct, colder, 5000 Kelvin temperature, being white-balanced with a tungsten-style
correction in Unity, either via LUTs (LookUp Tables) or Unity’s color grading tools.
Pierre Yves Donzallaz Unity Technologies 305000K 5000K
No white balance. Tungsten white balance incorrectly applied via color
The resulting color is believable. grading. The resulting image is too cold.
Using volume-based or per-camera color grading can mitigate these practical issues. In any case, you can
always rely on hand-picked colors if these problems are too complex to solve in your environment,
especially if it contains a wide range of light types.
For most lamps showcased in this document, we’ve used carefully hand-picked colors, instead of Kelvin
temperatures. This showcases the recurrent conflicts between physical correctness and artistic freedom,
and how a supposedly reality-based workflow might introduce complications when certain parts of the
pipeline aren’t available (such as automatic white balance).
Pierre Yves Donzallaz Unity Technologies 31Indirect Multiplier
Unity does not support cookies when baking light via its Baked or Realtime Global Illumination solution. As
a result, there is often too much indirect lighting generated in the Unity scene when you use cubemap
cookies that contain a large amount of occlusion.
The following tube lamp cookie has a strong occlusion at the top (6th face of the cubemap):
To fix this issue, you need to reduce the Indirect Multiplier in
the Light GameObject. An approximate method to find a
satisfactory Indirect Multiplier is to look for the average
brightness of the cookie. In Photoshop, open the Histogram
tool and find the Mean value. Then use the following formula
to convert the Mean from Gamma space into Linear space:
I ndirect M ultiplier = (M ean/255)2.2
This gives you a good starting point for the average Indirect
Multiplier of the light. For example, a mean of 121 results in
an Indirect Multiplier of 0.2. It offers more believable
indirect lighting compared to the default value of 1.0.
Indirect Multiplier 1.0 Indirect Multiplier 0.2
Nevertheless, this approach does not take the lighting directionality of the light fixture into account.
Therefore, the multiplier might require further adjustments, based on the structure of the fixture.
Pierre Yves Donzallaz Unity Technologies 32Max Smoothness
In real-time graphics, Spot and Point
light are usually infinitely small; they
emit the light from one single point in
space. It is very efficient in terms of
performance; however, it is not realistic, and it often produces unnaturally sharp specular highlights on
glossy surfaces.
To make this problem less severe, HDRP lights have a Max Smoothness setting for the simulation of a
larger light source. Materials affected by a light that has a lower Max Smoothness appear rougher, and thus
give the illusion that the light source is larger.
Max Smoothness 1.0 (Default) Max Smoothness 0.65
The specular highlights are too sharp. The specular highlights better match the light fixtures.
Pierre Yves Donzallaz Unity Technologies 33Shadows You can activate both real-time and baked cookie shadows at the same time, so that your dynamic GameObjects can cast real-time shadows, while the baked cookie also allows for soft static shadows. Real-time shadows for Point lights are much more resource-intensive than Spot Light shadows, whereas baked cookies are extremely efficient. When using real-time shadows, view the Light’s Inspector and adjust the Shadow Near Plane to prevent shadow clipping with the lamp geometry. Push the plane outside the lamp to entirely encompass it, otherwise double shadowing can occur, as well as other unwanted artifacts caused by the overlap of the baked cookie shadows and the real-time shadows. The following image exhibits some of the artifacts visible when the Near Plane clips with the lamp geometry. The default shadow filtering can also produce unrealistically sharp real-time shadows, especially when using high-resolution shadows. Pierre Yves Donzallaz Unity Technologies 34
For comparison, baked cookies offer more realistic shadows, and are much less resource-intensive.

HDRP does offer a high-quality filtering mode for the real-time shadows, but it is resource-intensive, so you
should only use it for high-end machines.

     Real-time shadows only               Real-time shadows only                 Light cookies only
        Filtering quality: Low           Filtering quality: High (PCSS)    Cookie resolution: 512 (per face)
      Shadow resolution: 1024              Shadow resolution: 4096

Pierre Yves Donzallaz                          Unity Technologies                                              35
To enable the high-quality filtering mode, select
your HDRP Asset, switch the Rendering Mode to
Forward, and in the Shadow section set the
filtering quality to High. This exposes additional
sampling parameters in the Light Inspector to let
you adjust the softness and quality of the shadows.
Light layers
In certain scenarios, the light cookie has a
negative visual effect on the lamp, such as
unwanted self-shadowing or transmission
contribution.
With HDRP in Unity, you can decide which
GameObjects receive light from specific lights.
This system is called Light Layers. To enable it,
select the HDRP Asset, and in the Render
Pipeline Supported Features section, enable
LightLayers. You can use this to ensure that the light cookie does not affect certain parts of the light
fixture.
In the following example, the bulb is assigned to a separate light layer, so that it does not receive lighting
contribution from the main light cookie.
To restore the transmission on the bulb, a tiny
Point light is placed inside the bulb and assigned
to the same light layer as the bulb.
Default Bulb in “Light Layer 1” New light in “Light Layer 1”
The light cookie incorrectly affects When you assign the bulb to a When you assign the new point light
the transmission on the bulb specific light layer, the light cookie to the same light layer as the bulb,
geometry. does not affect the bulb anymore. the bulb is lit correctly.
Pierre Yves Donzallaz Unity Technologies 36Finally, controlling the bulb’s lighting with a dedicated Point light is particularly useful in scenarios where
light fixtures can be dynamically turned off or destroyed.
Both lamp prefabs are identical, except the right one’s lights are disabled.
They both react to the lights correctly, thanks to the translucent materials used on the bulb and the shade.
This real-world-based approach is elegant because it relies on the actual Light GameObjects to simulate the
transmission of the light, rather than on an arbitrary emissivity set in the bulb and lampshade materials.
Typically, in a video game scenario, the Meshes of the lamp or its Materials would have to be swapped at
run time for non-emissive ones. This process isn’t particularly efficient, and can result in visual glitches
while the swapping occurs. Therefore, only relying on Light GameObjects is much more efficient, both in
terms of performance and practicality.
Pierre Yves Donzallaz Unity Technologies 37Material setup Let’s have a look at the potential Material setups for the lampshades on the red chandelier. There are different techniques to reproduce this Material, depending on the surface type, the look, and the performance you want to achieve. All the following examples use HDRP’s highly flexible Lit shader. Pierre Yves Donzallaz Unity Technologies 38
Emissivity The cheapest and easiest way to simulate the transmission of light through the lampshade relies on using an Opaque surface type with an emissive Texture. This allows for more artistic control, because you can paint specific details into the emissive Texture in order to emphasize certain characteristics of the shade. We especially recommend this technique for lower-end hardware that cannot or should not execute shaders with complex instructions, and should avoid transparency. Pierre Yves Donzallaz Unity Technologies 39
Transparent surface A common way to simulate clear glass is to use a Transparent surface type, with a Standard Material type. You can control the transparency via the alpha value in the Base Color, or with a custom Texture. However, this doesn’t always reproduce a realistic glass effect, because the refraction and the resulting deformations are missing. You should separate the transparent parts into unique GameObjects to ensure their correct sorting. This means every glass lampshade needs to be a separate GameObject. Otherwise, multiple layers of glass belonging to the same GameObject can create potential visual problems, such as surfaces that are behind others appearing on top of them. HDRP’s Transparent surface type provides rendering tricks to fix those artifacts, such as Enable back then front to render background transparent GameObjects first, and Transparent Sort Priority to control the sorting manually. This latter option is especially useful when you work with fixed or pre-defined camera positions. A single-sided Mesh for the shade elements and the Double Sided property on the Material can also sometimes prevent sorting troubles. Pierre Yves Donzallaz Unity Technologies 40
Translucency An elegant way to reproduce a very thick frosted glass or translucent material is to rely on a simpler Opaque surface type, with a Translucent Material type. Create a Diffusion profile to adjust the translucency. If the general translucency appears flat, a Thickness map can produce a more realistic gradient for the translucent shades. For the translucency to behave properly, each shade requires its own Point light. These lights should be small enough that they don’t influence the rest of the environment unnecessarily, because the central cookie light is already in charge of the general lighting. One benefit of these five additional lights is the creation of extra self-reflections, because they provide more specular highlights originating from each bulb on the fixture. Note that this technique increases the number of draw calls and the shading becomes more resource-intensive. Pierre Yves Donzallaz Unity Technologies 41
Transparent surface with refraction
One of the more advanced solutions relies on transparency, refraction and transmission to create a
believable frosted glass effect. These are relatively resource-heavy effects, and therefore you should only
use this Material setup in applications intended to run on higher-end platforms.

The previously mentioned limitation due to the transparency remains, so you still need to separate the
lampshades into individual GameObjects to mitigate most sorting issues.

Pierre Yves Donzallaz                        Unity Technologies                                         42
Geometric specular anti-aliasing
One issue that can be hard to tackle with traditional anti-aliasing methods, including temporal anti-aliasing,
is the specular aliasing resulting from high-frequency glossy surfaces, such as the supporting golden pole
for the chandelier in the example below.
HDRP does provide a per-material specular anti-aliasing technique that is designed to tackle this problem
for high detail geometries.
The Screen space variance allows you to reduce the aliasing on screen. You need to find a visual
compromise between aliasing and blurriness.
Screen space variance (zoom 3x)
0.0 0.05 0.1 0.2
High Screen space variance values can also greatly alter the perception of certain materials. In this
example, the golden pole loses its metallic aspect when the variance increases beyond a reasonable value.
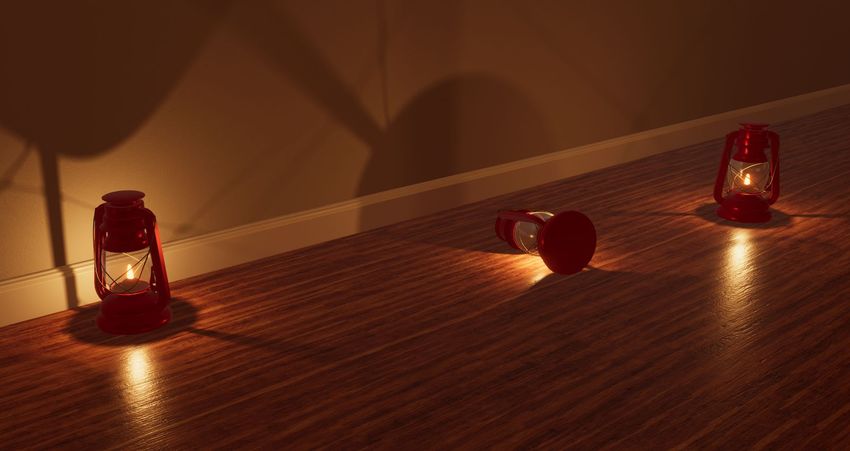
Pierre Yves Donzallaz Unity Technologies 43Caustics
Caustics bring the final touch to the cookies. They can greatly improve the realism of the lighting, and break
up very flat and clean surfaces such as walls and ceilings.
Arnold is not efficient at rendering sharp caustics (path tracing), and Unity’s Progressive Lightmapper is
unable to generate them at all. For this reason, use another renderer such as V-Ray or Corona. V-Ray is
particularly fast, and can produce “caustics only” renders very efficiently.
Through experimentation, we concluded that none of these renderers were able to produce great results
when we placed the light within a geometry, or when a bulb was used as a Mesh light. They only provided
acceptable results when we placed small yet intense lights at a distance from the object. For this reason,
we aimed V-Ray Plane lights towards randomly-shaped translucent objects with different indexes of
refractions, to create a large library of generic caustics cubemaps.
Experimentation is key, as results can be unexpected: very minor subdivision differences and subtle light
placement alterations can create very different caustics, which is very convenient when building a large
library of caustics.
Examples of shapes
You can blend these caustics cubemaps on top of the light cookie Textures, or assign them to a separate
light. Relying on a dedicated “caustics light” increases the resource-intensiveness of the lighting. However,
Pierre Yves Donzallaz Unity Technologies 44it offers greater flexibility when it comes to the intensity of the caustics, because you can greatly increase
their corresponding light’s intensity without having to recalibrate the cookie of the fixture itself.
When blending the caustics on top of the fixture’s cookie, you can test different blending modes, such as
Overlay and Soft Light. This ensures the overall brightness of the cookie does not change radically.
+ =
Alternatively, you can extract caustics from real photographs and stamp them manually on the faces of the
cubemap, with Photoshop or Substance Painter. You can also add simpler caustics to 2D cookies and
project them into the Scene with Spot Lights.
Example 1: Chandelier
You can use caustics in the chandelier’s cubemap to simulate the light bouncing off the golden central
structure. This example uses a dedicated caustics Point light, due to the very high intensity required for the
caustics.
No caustics Dedicated caustics light
+
Pierre Yves Donzallaz Unity Technologies 45Example 2: Wall lamp
You can use a wavy and noisier caustics cubemap to simulate the inner reflections that the golden rim of
the lampshade creates, as well as the glass imperfections and potential sub-pixel scratches.
No caustics Blended caustics
Pierre Yves Donzallaz Unity Technologies 46Example 3: Fluorescent tubes You can replicate the inner reflections between both glass tubes, and the sharp highlights from the glossy reflector, to reduce the flat look associated with fluorescent tubes. A generic caustics cubemap with long streaks is the perfect candidate. No caustics Blended caustics Pierre Yves Donzallaz Unity Technologies 47
Final words
The High Definition Render Pipeline, with its physically-based lighting model and shaders, can deliver a near
CG-quality lighting in real time. As we’ve seen, you can simulate refractive and translucent surfaces with
photorealistic results. The older Built-In Render Pipeline can also take advantages of the light cookies to
create light props with ray-traced quality shadows, for a fraction of the resource requirements of real-time
shadows. This means you can also produce high-quality shadows on older mobile hardware that would be
unable to run HDRP.

Ultimately, you still require an artistic approach to emphasize certain elements of the lighting, such as
shadows, caustics and color temperatures. Lighting remains an art form that is difficult to master,
especially when dealing with complex systems requiring both technical knowledge and artistic sensibility.
You can apply all of these techniques to any art style, from high-end photorealistic simulations to stylized
role-playing games on mobile platforms.

Hopefully, thanks to this article, you now have many ingredients in hand to cook convincing light cookies,
and raise the visual bar of your Unity Scenes!

Pierre Yves Donzallaz                         Unity Technologies                                          48
You can also read